Blog

  • The Best Anti-Chafe Products Every Curvy Traveler Needs in Her Bag

    The Best Anti-Chafe Products Every Curvy Traveler Needs in Her Bag

    The Chafing Conversation We Need to Have

    The Chafing Conversation We Need to Have

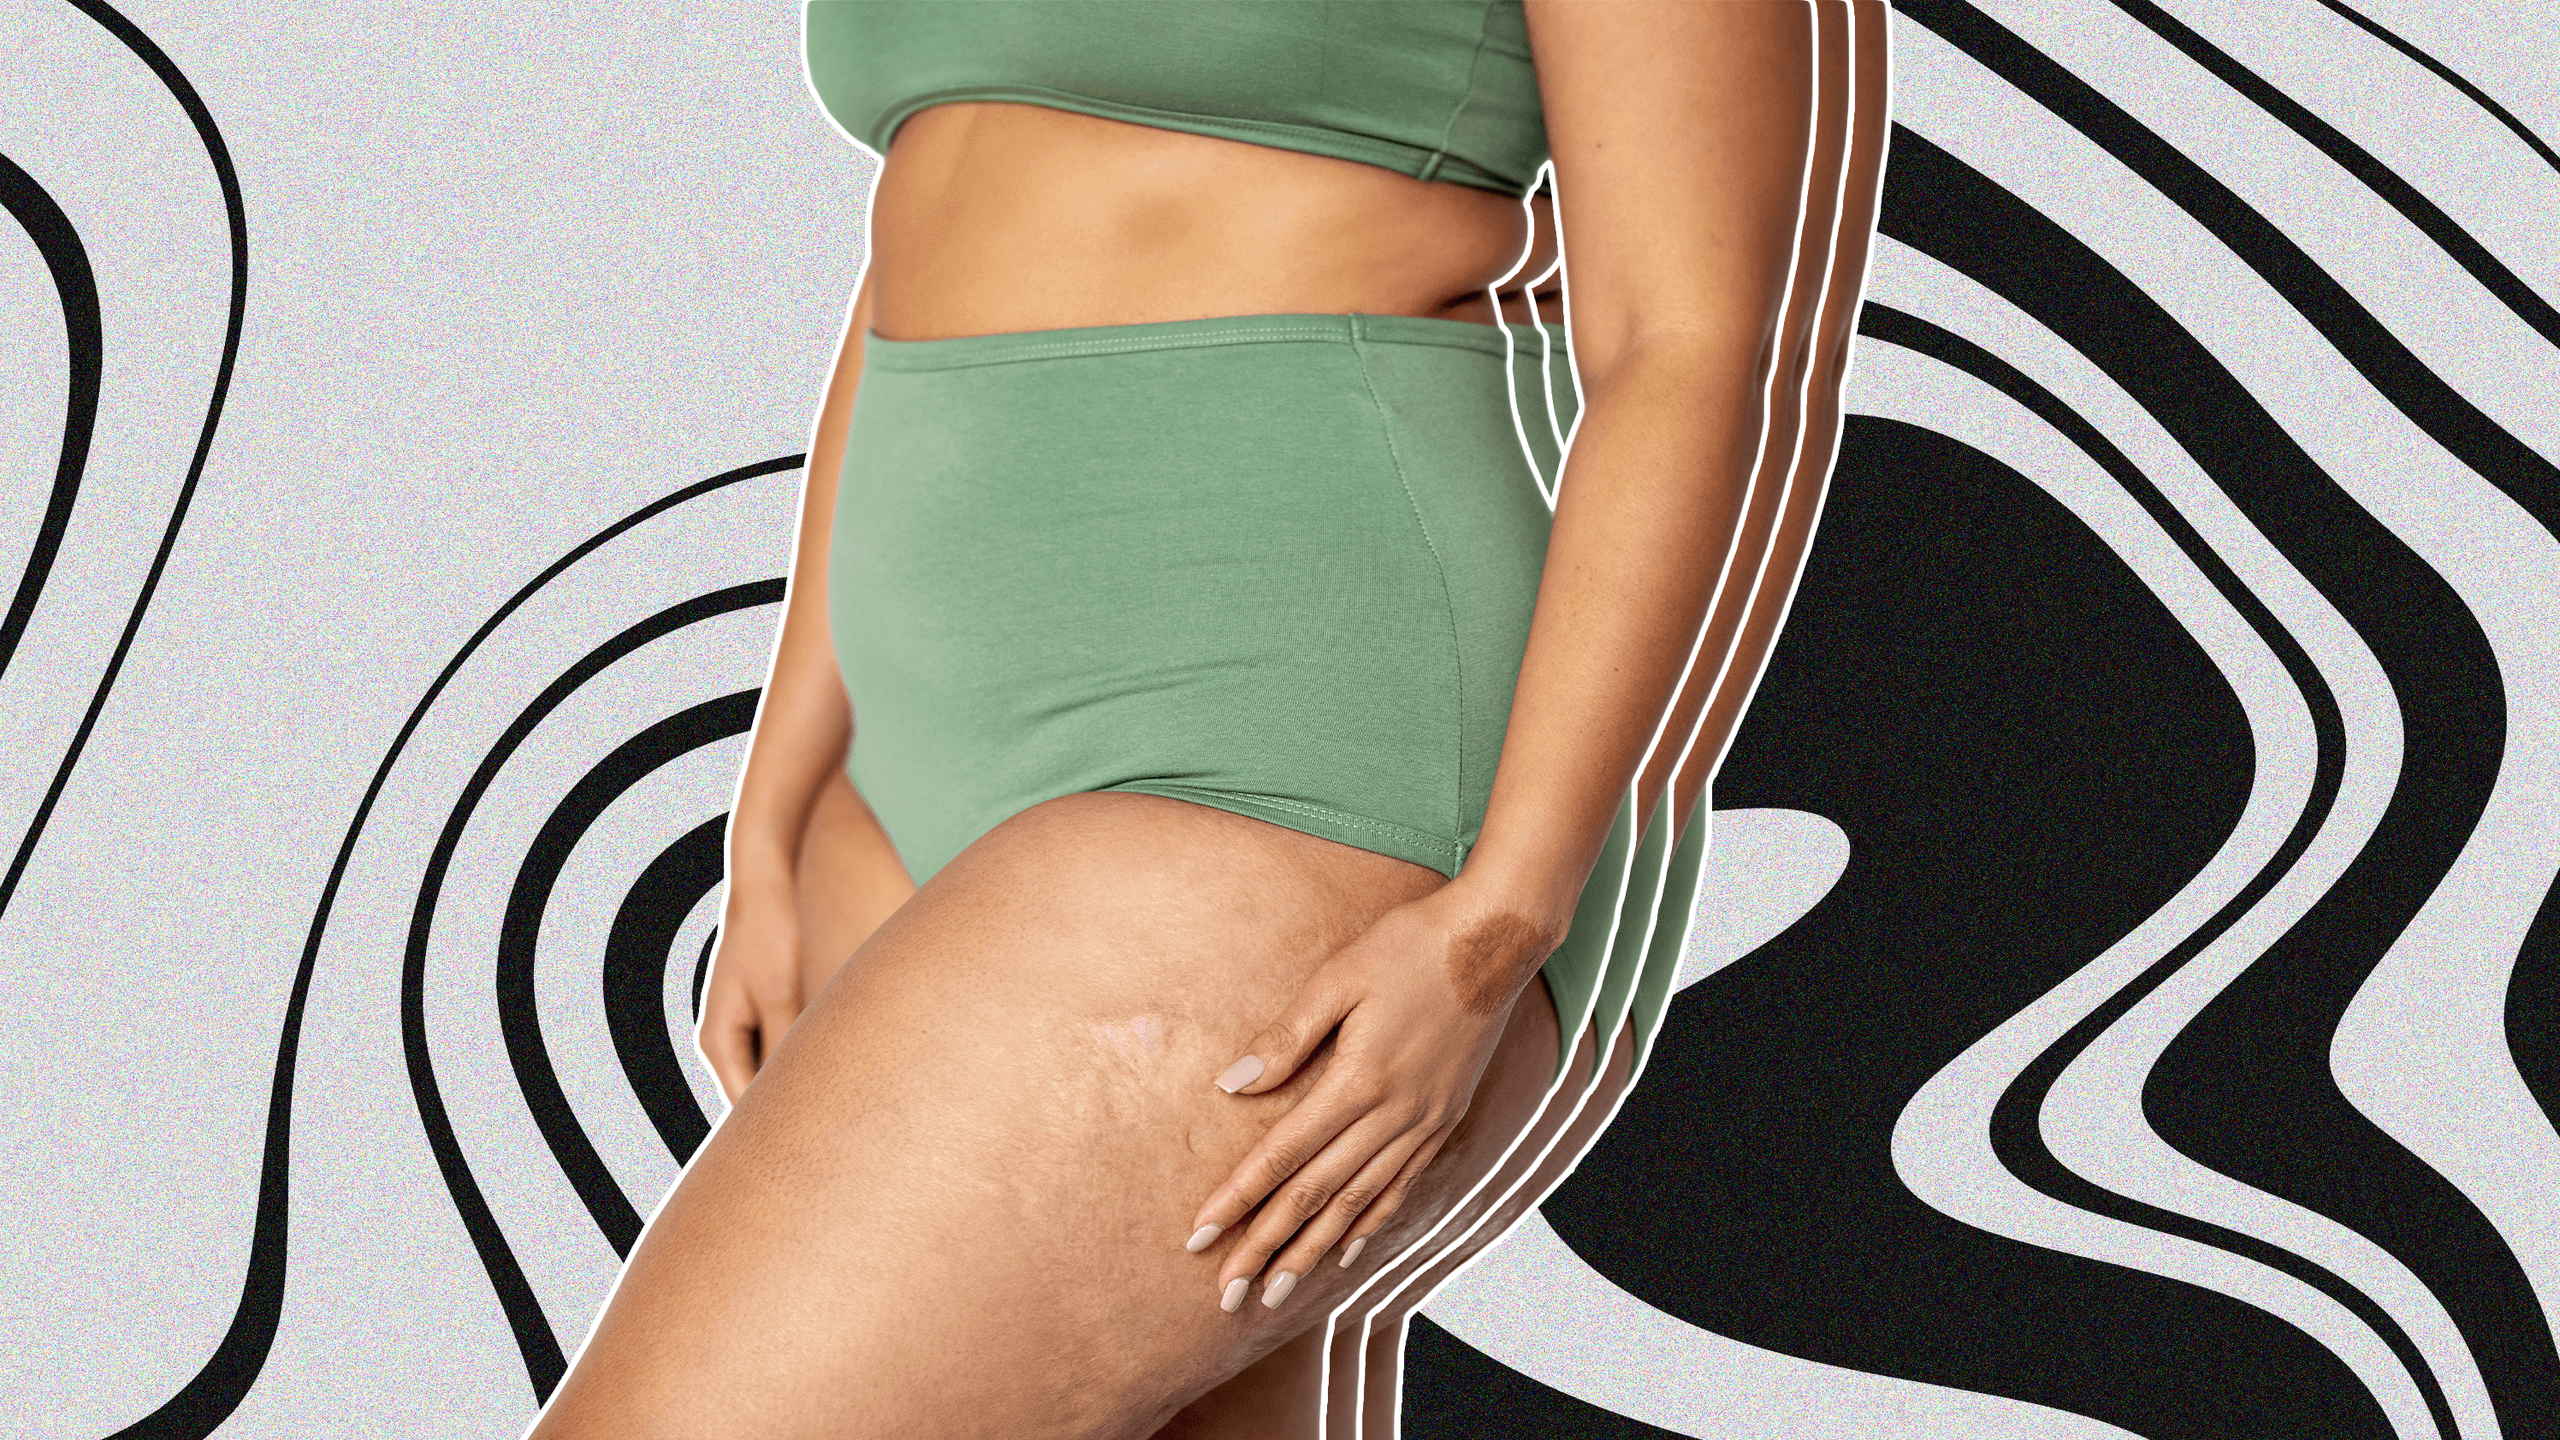
    Let us talk about something that affects millions of curvy women and yet rarely gets discussed honestly: chafing. Inner thigh chafing, underarm chafing, under-bust chafing, and the general friction-based misery that comes from skin meeting skin in warm, humid conditions. It is not a weight problem. It is a skin-contact problem. People of all sizes experience chafing, and anyone who tells you otherwise has simply never walked ten thousand steps in a tropical climate.

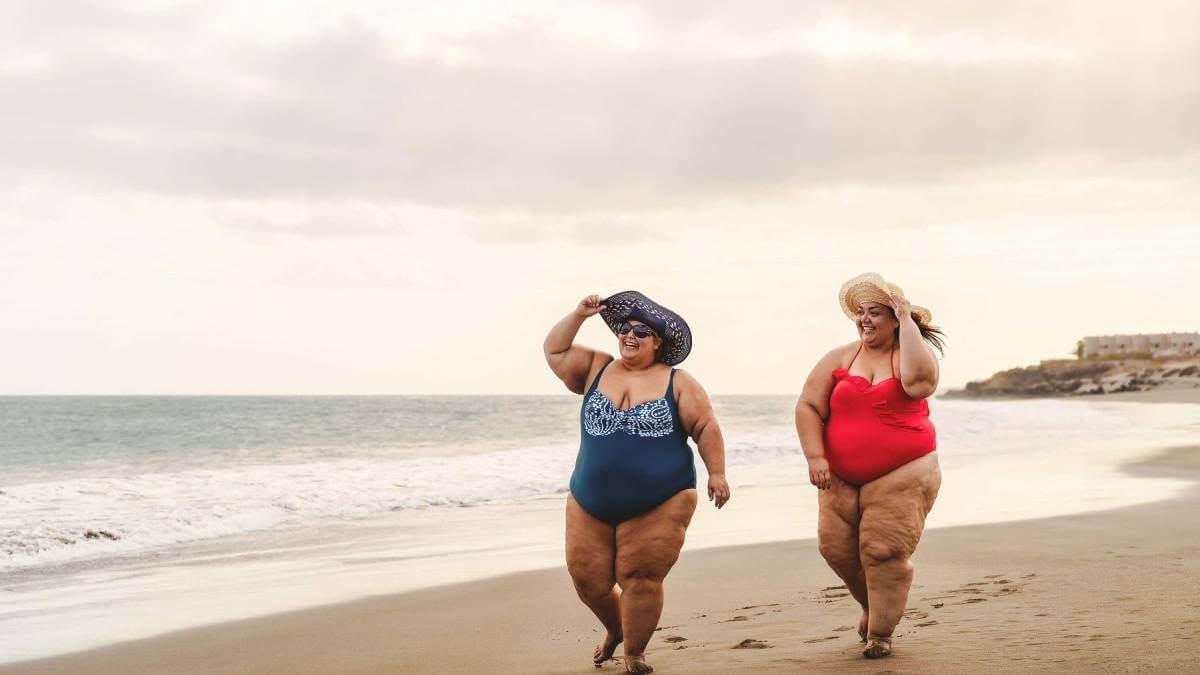
    For curvy travelers, chafing is not just an inconvenience, it is a vacation-threatening reality. A full day of sightseeing in Rome can go from magical to miserable if your inner thighs start burning by lunchtime. A beach walk in Cancun loses its romance when every step feels like sandpaper. And nothing ruins a cute vacation dress faster than the knowledge that wearing it means raw, painful skin by the end of the evening.

    The good news is that anti-chafe products have evolved enormously in recent years, and the options available in 2026 are more effective, longer-lasting, and travel-friendlier than ever. We have tested dozens of products during actual travel, subjecting them to the real-world conditions that matter: twelve-hour sightseeing days in European summers, humid Caribbean beach days, and everything in between. This guide covers the products that actually work, the ones that do not, and the prevention strategies that keep you comfortable from takeoff to touchdown.

    There is absolutely nothing embarrassing about taking care of your comfort. Professional athletes use anti-chafe products. Marathon runners use anti-chafe products. And every curvy traveler should have a tested, trusted anti-chafe product in her bag at all times. Let us find yours.

    Why Travel Makes Chafing Worse

    Why Travel Makes Chafing Worse

    Travel creates the perfect storm of chafing conditions, which is why a product that works fine during your normal daily routine might fail completely during a vacation day.

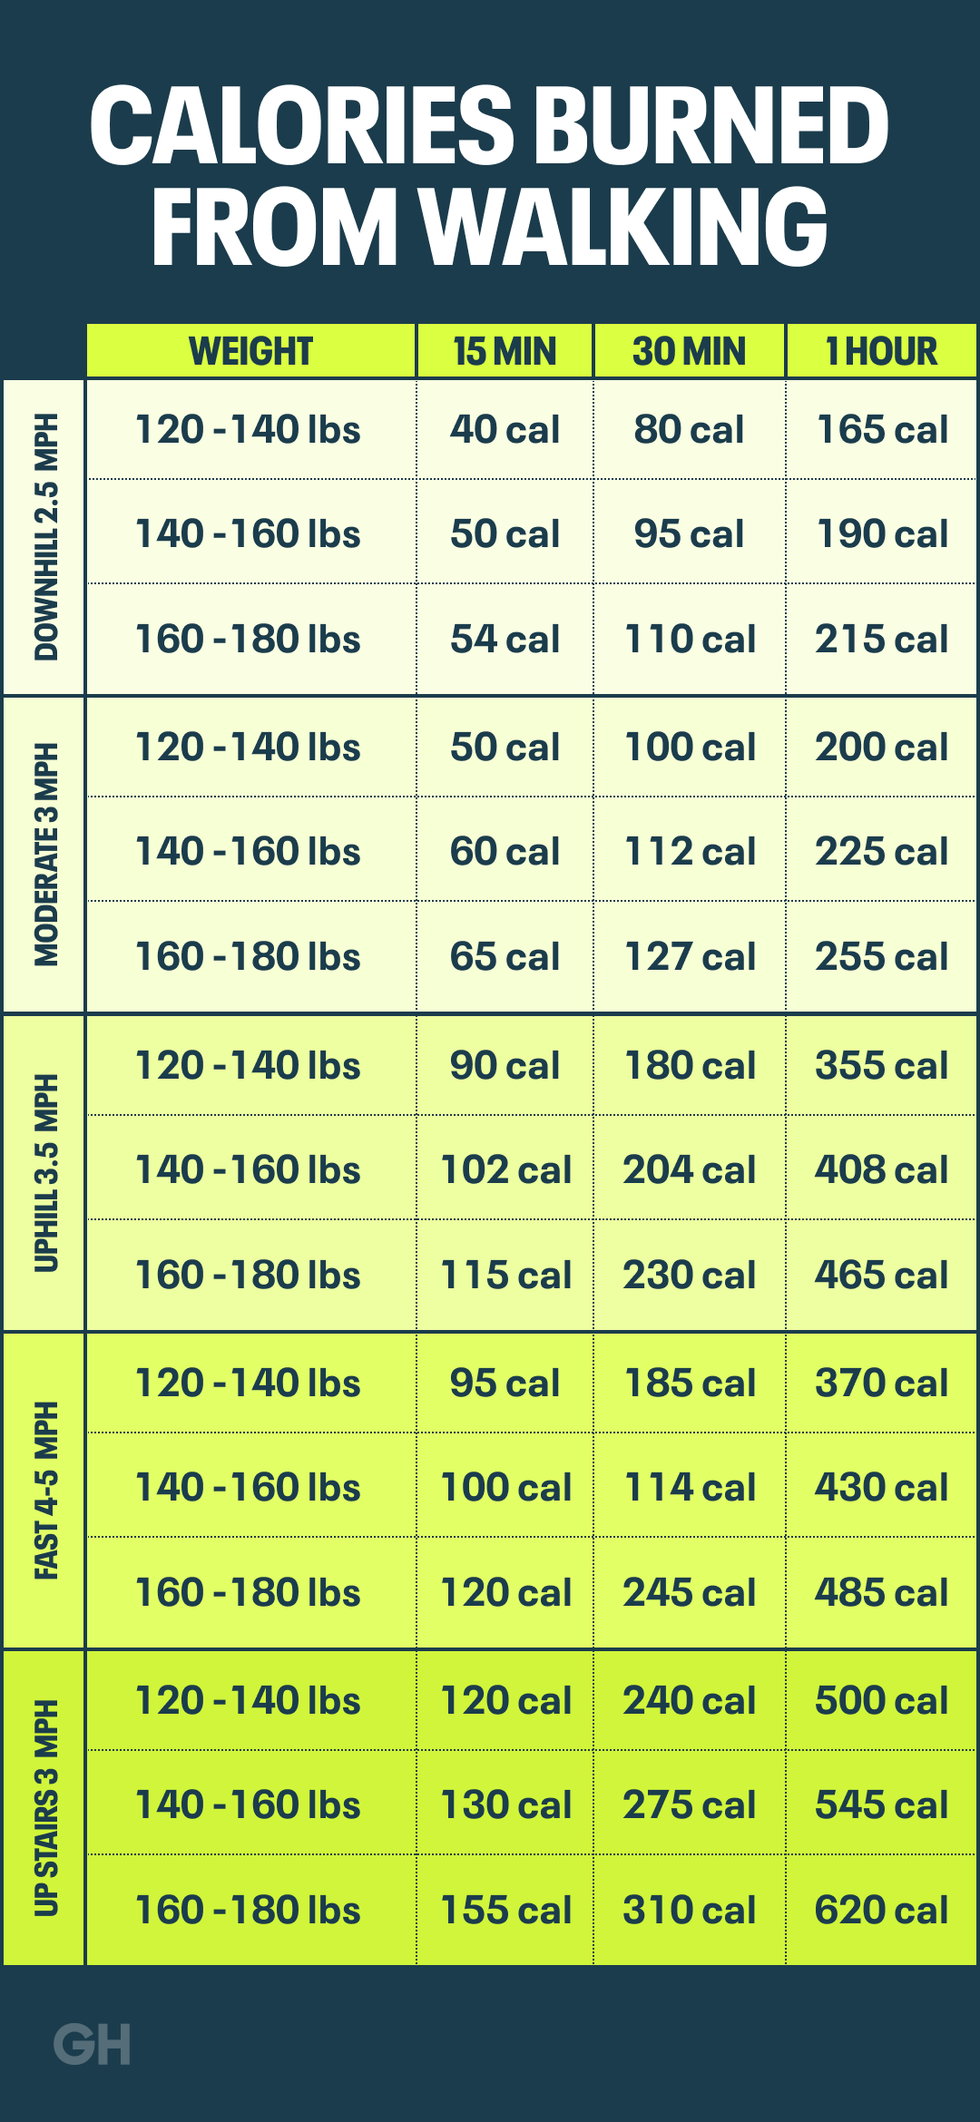
    Increased Walking. Most people walk significantly more during travel than in daily life. A typical sightseeing day can easily reach fifteen to twenty thousand steps, compared to the five to eight thousand steps of a normal day. More steps mean more skin-on-skin friction, and the cumulative effect over hours of walking produces chafing that your everyday routine never triggers.

    Heat and Humidity. Warm, humid conditions increase sweating, which breaks down the protective barrier of anti-chafe products faster and adds moisture to friction zones. Tropical destinations, summer European cities, and even the humid interiors of airports and planes create conditions that accelerate chafing.

    Unfamiliar Clothing. New vacation clothes, particularly dresses and shorts that you might not wear in daily life, can create friction patterns your body is not accustomed to. Fabric types, seam placement, and fit differences all contribute to chafing in unexpected areas.

    Salt Water and Pool Chemicals. Swimming in the ocean or pool, then walking in salt-or-chlorine-dried skin, dramatically increases friction. Salt crystals on skin act like tiny abrasives, and the drying effects of chlorine strip away natural moisture that normally protects against friction.

    Sitting for Extended Periods. Long flights and car rides create pressure-based chafing in areas where skin folds press together for hours. This is different from friction-based chafing but equally uncomfortable, and it often hits in areas like the underside of your belly, under your bust, or in the crease where your thighs meet your torso.

    Types of Anti-Chafe Products Explained

    Types of Anti-Chafe Products Explained

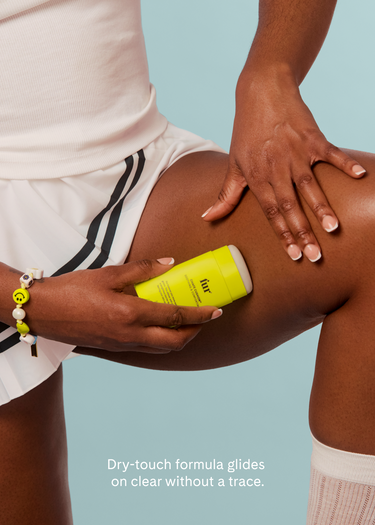
    Sticks and Balms. These solid, deodorant-style products glide on skin and create a smooth barrier that reduces friction. They are the most popular and convenient anti-chafe format for travel because they are mess-free, TSA-friendly in standard sizes, and easy to apply and reapply. Most sticks last two to four hours before needing reapplication, depending on activity level and humidity.

    Creams and Lotions. Cream-based anti-chafe products are thicker and often more moisturizing than sticks. They tend to last longer per application but can feel greasy on skin and are less convenient for on-the-go reapplication. Creams are best applied in the morning before getting dressed and supplemented with a stick for midday touch-ups.

    Powders. Anti-chafe powders absorb moisture and reduce friction through dryness rather than lubrication. They are excellent for areas where moisture is the primary chafing trigger, like the underside of the bust and skin folds. However, powders can cake in very humid conditions and may not be sufficient for high-friction areas like inner thighs during heavy walking.

    Physical Barriers. Anti-chafe shorts, bands, and thigh wraps create a physical barrier between skin surfaces, eliminating friction entirely. These are the most reliable anti-chafe solution because they do not wear off with sweat or activity. The tradeoff is an additional layer of clothing, which adds warmth and may be visible under certain outfits.

    Best Anti-Chafe Sticks for Travel

    Best Anti-Chafe Sticks for Travel

    Megababe Thigh Rescue Anti-Chafe Stick. This is our number one pick for travel, and it is not close. Megababe Thigh Rescue goes on smooth, creates an effective friction barrier, and keeps inner thighs comfortable even on long, hot sightseeing days. The formula includes grapeseed oil for hydration, vitamin E for skin protection, and aloe for soothing. It has won multiple beauty awards including the Allure Best of Beauty and New Beauty Best Chafe Stick, and the cult following among plus-size women is well-earned. The full-size stick is TSA-friendly, and we recommend keeping one in your purse and one in your hotel bathroom.

    Check Megababe Thigh Rescue at Target

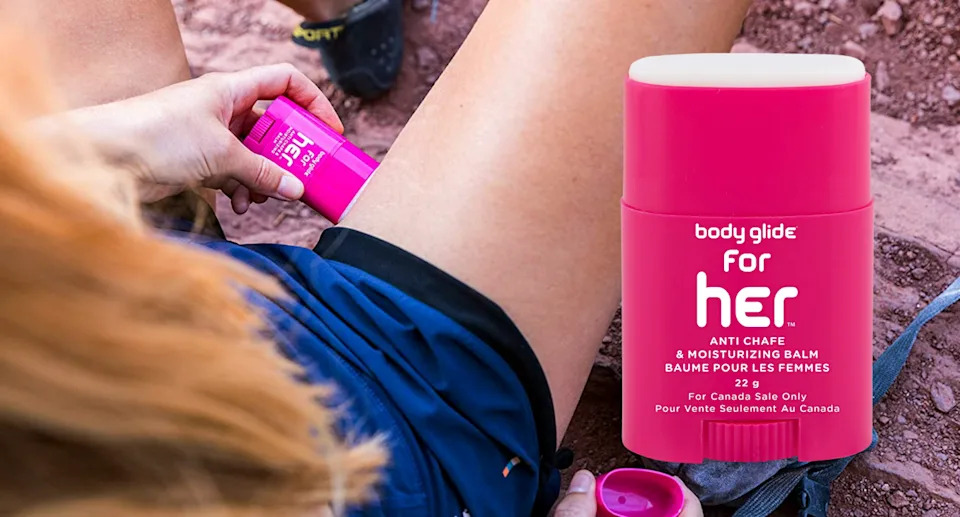
    Body Glide Original Anti-Chafe Balm. Body Glide is the original anti-chafe product, born in the running and athletic world. It goes on smoothly, does not clog pores, and creates a slick barrier that effectively prevents friction. The formula is vegan, allergen-free, and suitable for sensitive skin. Body Glide’s athletic heritage means it is formulated to withstand serious sweating and extended activity, which translates well to active travel days. It is widely available at big-box stores and pharmacies, making it easy to purchase or replace during travel if needed.

    Check Body Glide on Amazon

    Monistat Chafing Relief Powder Gel. This pharmacy classic is a budget-friendly anti-chafe option that doubles as a makeup primer, which makes it the ultimate multi-tasking travel product. The silicone-based formula creates a smooth, protective barrier on skin and dries to a powdery finish that is comfortable under clothing. It is less thick than Megababe or Body Glide, which some women prefer, and it is available at virtually every pharmacy and drugstore, making it the easiest anti-chafe product to find while traveling.

    Check Monistat Chafing Relief at Walmart

    Squirrel’s Nut Butter All Natural Anti-Chafe. For travelers who prefer natural, clean ingredients, Squirrel’s Nut Butter uses a blend of coconut oil, cocoa butter, beeswax, and vitamin E to create a natural friction barrier. It glides on easily, smells subtly pleasant, and performs surprisingly well for a natural product. The longevity is slightly less than synthetic options, so plan for more frequent reapplication, but the ingredient list is impressively clean for an effective anti-chafe product.

    Best Anti-Chafe Creams and Balms

    Best Anti-Chafe Creams and Balms

    Gold Bond Friction Defense Stick. Despite the stick format, Gold Bond’s formula acts more like a cream, providing a thicker, more cushioning barrier than lighter stick products. It is particularly effective for areas that experience heavy friction, and the formula includes seven moisturizers that help protect and soothe skin. It lasts longer per application than most sticks, making it a good choice for days when you know you will not have convenient opportunities to reapply.

    CeraVe Healing Ointment. While not marketed specifically as an anti-chafe product, CeraVe’s Healing Ointment is an excellent overnight treatment for skin that has already experienced mild chafing, and it works as a preventive barrier when applied to problem areas before activity. The ceramide-rich formula helps repair the skin barrier, and the petroleum base creates an effective occlusive layer that prevents friction. Keep a tube in your hotel bathroom for nightly repair and morning prevention.

    Check CeraVe Healing Ointment at Ulta

    Best Anti-Chafe Powders

    Best Anti-Chafe Powders

    Megababe Body Dust. From the same brand that makes our favorite anti-chafe stick, Megababe Body Dust is a talc-free powder infused with lavender and green tea extracts. It absorbs moisture effectively without the health concerns associated with talc-based powders, and the subtle lavender scent is pleasant without being overpowering. Use it in conjunction with a stick product for maximum protection: apply the powder to areas where moisture is the primary concern and the stick to high-friction zones.

    Check Megababe Body Dust at Target

    Lush Silky Underwear Dusting Powder. Lush’s cocoa butter-based dusting powder absorbs moisture while leaving a silky, smooth feel on skin. The cocoa butter provides a layer of lubrication in addition to moisture absorption, making it more effective at preventing friction than powder alone. It smells like vanilla and chocolate, which is a delightful bonus. The solid format makes it extremely travel-friendly, with no risk of powder spills in your suitcase.

    Best Anti-Chafe Shorts and Bands

    Best Anti-Chafe Shorts and Bands

    Undersummers Classic Shortlette. Undersummers makes the best anti-chafe shorts on the market, period. These lightweight, breathable shorts are specifically designed to be worn under dresses and skirts to prevent inner thigh chafing. The moisture-wicking fabric keeps you cool, the stay-put waistband does not roll, and the mid-thigh length covers the most common chafe zone without being visible under most dress lengths. They are available in sizes up to 5X and come in multiple colors. For dress-wearing travel days, Undersummers are absolutely essential.

    Check Undersummers Classic Shortlette on Amazon

    Bandelettes Elastic Thigh Bands. If full shorts feel like too much coverage, Bandelettes offer a minimal alternative: elastic lace bands that sit on your upper thighs and prevent skin-on-skin contact at the most common chafe point. They stay in place remarkably well considering how simple the design is, and the lace material looks attractive rather than utilitarian, which is a bonus if they peek beneath a shorter dress. Available in a range of sizes including plus options.

    Jockey Skimmies Slip Shorts. Jockey’s Skimmies are a lightweight, seamless short that provides anti-chafe protection without adding bulk. They are thinner and less structured than Undersummers, which some women prefer in hot weather. The seamless construction means no visible lines under fitted dresses, and the microfiber fabric wicks moisture effectively.

    How to Treat Chafing When It Happens

    How to Treat Chafing When It Happens

    Despite your best prevention efforts, chafing can still happen during travel. When it does, quick treatment prevents it from getting worse and helps you recover faster for the next day’s adventures.

    Clean the area gently. Wash chafed skin with lukewarm water and a gentle, fragrance-free cleanser. Avoid hot water, which can sting and further irritate raw skin. Pat dry gently, never rub.

    Apply a healing barrier. CeraVe Healing Ointment, Aquaphor, or a similar occlusive healing product creates a protective barrier over chafed skin and promotes healing. Apply a generous layer and allow it to absorb before dressing. For overnight healing, apply a thick layer before bed.

    Let it breathe when possible. If you can, give chafed skin time without clothing friction. Hotel evenings are ideal for this: change into loose, breathable pajamas or loungewear that does not rub against the affected area.

    Choose your next-day outfit carefully. After experiencing chafing, choose outfits that protect the affected area. Anti-chafe shorts under dresses, looser pants instead of shorts, or leggings that cover chafed thighs all help prevent re-aggravation while you heal.

    Seek medical attention if needed. If chafed skin becomes infected, showing signs like increasing redness, warmth, swelling, or discharge, seek medical attention. Minor chafing is a normal skin irritation, but broken skin in warm, humid conditions can occasionally develop infection.

    Prevention Strategies Beyond Products

    Prevention Strategies Beyond Products

    Stay dry. Moisture accelerates chafing, so dry off thoroughly after swimming before putting on clothes, change out of sweaty clothes as soon as practical, and consider carrying a small travel towel for midday freshen-ups in restrooms.

    Choose the right fabrics. Moisture-wicking, smooth-textured fabrics create less friction than cotton or rough-weave materials. Synthetic athletic fabrics, silk, and bamboo are all excellent choices for garments that touch common chafe zones.

    Wear well-fitting clothes. Both too-tight and too-loose clothing can cause chafing. Too-tight clothes press skin together more forcefully, while too-loose clothes shift and rub with movement. Aim for clothes that fit close to the body without constriction, with smooth seams and soft waistbands.

    Pre-apply before you need it. Apply anti-chafe products before activity, not after chafing starts. Once friction has already irritated your skin, products provide less protection and may sting on contact. Make anti-chafe application part of your morning getting-dressed routine and reapply midday as a preventive measure.

    Building Your Anti-Chafe Travel Kit

    Building Your Anti-Chafe Travel Kit

    Here is our recommended anti-chafe travel kit that covers every scenario you might encounter during travel.

    In your purse or day bag: One travel-size Megababe Thigh Rescue or Body Glide stick for midday reapplication. This is your first line of defense and should be accessible at all times.

    In your hotel bathroom: One full-size anti-chafe stick for morning application. One tube of CeraVe Healing Ointment or Aquaphor for overnight treatment and healing. One talc-free body powder for under-bust and skin-fold areas.

    In your suitcase: Two to three pairs of Undersummers or similar anti-chafe shorts for dress-wearing days. One pair of Bandelettes for nights out in shorter dresses.

    This comprehensive kit adds minimal weight and suitcase space to your travel packing but provides complete protection and treatment for any chafing situation. The peace of mind alone is worth the small investment in products and packing space.

    Key Takeaways

    • Megababe Thigh Rescue is our top anti-chafe stick pick for travel, offering effective, long-lasting protection in a travel-friendly format.
    • Travel increases chafing risk due to increased walking, heat, humidity, and unfamiliar clothing, making anti-chafe products essential packing items.
    • Undersummers anti-chafe shorts are the most reliable physical chafing prevention for dress-wearing travel days.
    • Apply anti-chafe products preventively before activity, not after chafing has already started, for the most effective protection.
    • A complete anti-chafe travel kit includes a portable stick for reapplication, a healing ointment for treatment, and anti-chafe shorts for dress days.
    • Body Glide and Monistat Chafing Relief are widely available alternatives that can be purchased at pharmacies during travel if your primary product runs out.
    • Chafing is a skin-contact issue, not a weight issue, and treating it as a normal part of travel comfort planning removes unnecessary shame from the conversation.

    Frequently Asked Questions

    How often do I need to reapply anti-chafe stick during travel?

    Most anti-chafe sticks last two to four hours during normal activity in moderate conditions. On hot, humid, or heavily active days, plan to reapply every two hours. After swimming, reapply immediately after drying off. Carrying a travel-size stick in your purse or day bag makes midday reapplication easy and discreet.

    Can I use anti-chafe products on sensitive skin?

    Most anti-chafe products are formulated for sensitive skin, but if you have known sensitivities, test any new product on a small skin patch before travel. Body Glide is allergen-free and fragrance-free, making it one of the safest options for sensitive skin. Natural options like Squirrel’s Nut Butter use minimal, recognizable ingredients. Avoid products with fragrance if you have sensitive or reactive skin.

    Are anti-chafe products TSA-approved for carry-on luggage?

    Are anti-chafe products TSA-approved for carry-on luggage?

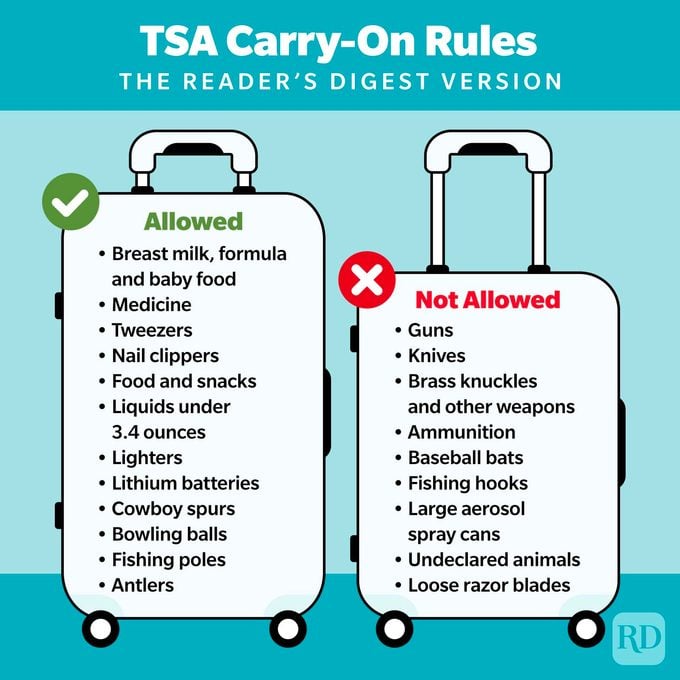
    Solid sticks and balms like Megababe Thigh Rescue and Body Glide are not subject to TSA liquid restrictions and can be packed in carry-on luggage in any size. Cream and gel products in containers over 3.4 ounces must go in checked luggage or be decanted into smaller containers for carry-on. Powders in containers over 12 ounces may require additional screening but are permitted in carry-on bags.

    What should I do if I forgot to pack anti-chafe products?

    In a pinch, deodorant can provide temporary anti-chafe protection, though it is less effective than dedicated products. Monistat Chafing Relief is available at virtually every pharmacy worldwide, making it the easiest product to find while traveling. Petroleum jelly, available at any drugstore, also provides temporary friction reduction. For the long term, order a proper anti-chafe product to your hotel via Amazon or purchase from a local store.

  • Which Amusement Park Rides Fit Plus-Size Guests – A Practical Guide

    Which Amusement Park Rides Fit Plus-Size Guests – A Practical Guide

    The Honest Truth About Amusement Parks and Plus-Size Bodies

    The Honest Truth About Amusement Parks and Plus-Size Bodies

    Let us address this directly: visiting an amusement park as a plus-size person can be stressful, embarrassing, and disappointing. The anxiety of approaching a ride and not knowing whether you will fit. The humiliation of the walk of shame when a restraint will not close. The frustration of watching your friends and family enjoy rides you cannot join. These experiences are painful, and if you have been through them, your feelings are completely valid.

    The amusement park industry has been slow to acknowledge that their guests come in all sizes, and ride design has historically prioritized a narrow range of body types. But things are changing – slowly but measurably. More parks are adding test seats outside rides, designing new attractions with larger restraint options, and training staff to handle size-related situations with discretion and sensitivity. We are not where we need to be yet, but progress is happening.

    This guide exists to give you the practical information you need to plan an amusement park visit with confidence. We will cover which types of rides tend to be most and least accommodating, what to expect at major parks, and strategies for maximizing your enjoyment while minimizing the chances of an uncomfortable experience. Because you deserve to have fun at amusement parks too – and with the right information, you absolutely can.

    A note on language: ride fit depends on many factors including body shape, weight distribution, height, and where you carry your weight. Two people who wear the same clothing size can have very different experiences on the same ride. The information in this guide is general, and your individual experience may vary.

    How Ride Restraints Work and Why Size Matters

    How Ride Restraints Work and Why Size Matters

    Understanding why some rides are harder to fit is the first step toward navigating the situation. Ride restraints are safety mechanisms designed to keep you securely in your seat during the ride. They must lock into a specific position to pass the safety check. The two main types you will encounter are lap bars and over-the-shoulder harnesses, and each interacts differently with larger bodies.

    Lap Bars

    Lap Bars

    Lap bars press down across your thighs and hips. For plus-size guests, the challenge is usually with people who carry weight in their midsection, hips, and thighs. If the lap bar cannot push down far enough to engage the locking mechanism, the ride cannot operate. Some newer rides have individual lap bars (one per person) rather than shared lap bars (one bar for two or three people in a row), and individual bars are significantly more accommodating for larger bodies because they are not affected by the person sitting next to you.

    Over-the-Shoulder Harnesses (OTSR)

    Over-the-Shoulder Harnesses (OTSR)

    These restraints come down over your head and lock in front of your chest. They are the most challenging for plus-size guests, particularly those with broad shoulders, large chests, or significant upper body size. The shoulder harness must click down to a specific point to clear the safety check, and there is less flexibility in how they accommodate different body shapes compared to lap bars. Many of the highest-profile ride rejections happen on OTSR rides.

    Seatbelts

    Seatbelts

    Some rides use seatbelts in addition to bars or harnesses. These secondary restraints have a fixed length and must buckle for the ride to operate. Seatbelt length varies widely between rides and parks, and they are often the limiting factor for plus-size guests even when the bar or harness closes successfully. Some parks offer seatbelt extenders on certain rides – it is worth asking.

    Park by Park – What Plus-Size Guests Can Expect

    Park by Park - What Plus-Size Guests Can Expect

    Walt Disney World and Disneyland

    Walt Disney World and Disneyland

    Disney parks are generally among the most accommodating for plus-size guests. Many Disney rides use vehicle designs with bench seating, lap bars, or simple seatbelts that accommodate a wide range of body sizes. Rides like Pirates of the Caribbean, Haunted Mansion, Small World, Jungle Cruise, and most dark rides are comfortable for nearly all body types. The newer rides, including Rise of the Resistance and Remy’s Ratatouille Adventure, have been designed with accessibility in mind. The rides that can be challenging include some roller coasters like Space Mountain and Rock ‘n’ Roller Coaster, which have tighter restraints.

    Universal Studios (Orlando and Hollywood)

    Universal Studios (Orlando and Hollywood)

    Universal has made significant improvements in ride accessibility but still has some of the most notoriously restrictive rides in the industry. Many Universal rides use OTSR harnesses that can be difficult for larger guests. However, Universal has added test seats outside most rides so you can check your fit before waiting in line. The Hogwarts rides (Forbidden Journey and Hagrid’s) have been particularly challenging for plus-size guests, though Hagrid’s is more accommodating than Forbidden Journey. Newer attractions are being designed with greater size inclusivity.

    Six Flags Parks

    Six Flags Parks

    Six Flags parks vary significantly by location, as they operate independently and have different ride lineups. Generally, Six Flags roller coasters tend to have tighter restraints than Disney rides. Many coasters use OTSR harnesses with secondary seatbelts that can be restrictive. Test seats are available at most major rides. The flat rides, water rides, and family attractions are usually more accommodating than the thrill coasters.

    Cedar Fair Parks (Cedar Point, Kings Island, Knott’s)

    Cedar Fair Parks (Cedar Point, Kings Island, Knott's)

    Cedar Point, known as the “Roller Coaster Capital of the World,” has rides that range from very accommodating to very restrictive. Some coasters, particularly newer B&M models, have been designed with modified seats on specific rows that offer extra room for larger riders. Ask ride operators about “big boy seats” or modified rows – they exist on several coasters and can make the difference between fitting and not fitting. Cedar Fair parks also generally have test seats available.

    Comfortable walking shoes are essential for any park visit. A pair of Nike Air Max sneakers in wide widths provide cushioning and support for the 15,000+ steps you will likely walk in a day at a major theme park.

    Rides That Are Generally Plus-Size Friendly

    Rides That Are Generally Plus-Size Friendly

    While individual experiences vary, these types of rides tend to be the most accommodating for plus-size guests across most parks.

    Dark rides and trackless rides (like Haunted Mansion, Pirates of the Caribbean, Rise of the Resistance) typically use open vehicles with bench seating and simple lap bars that accommodate most body types comfortably. Water rides (like log flumes and rapids rides) generally have larger seats and more flexible restraint systems. Ferris wheels and observation rides have spacious gondolas designed for multiple passengers. Carousels, train rides, and gentle spinning rides are almost universally accessible. Shows, parades, fireworks, and character experiences have no size restrictions whatsoever.

    Many flat rides like bumper cars, spinning rides, and swing rides are also generally accommodating, though individual rides vary. When in doubt, ask the ride operator or look for a test seat before getting in line.

    Rides That Tend to Be More Restrictive

    Rides That Tend to Be More Restrictive

    Understanding which ride categories are most likely to present challenges helps you plan your day and manage expectations.

    Inverted coasters (where your feet dangle below the track) typically have the tightest OTSR harnesses and are among the most restrictive rides for plus-size guests. Launch coasters and high-speed coasters often have tight restraints designed for extreme forces, leaving less room for larger bodies. Screen-based motion rides (like Universal’s simulator attractions) sometimes use restraint systems that are restrictive for guests with wider torsos or larger midsections. Some floorless coasters have modified seats available on specific rows – always ask before waiting in line.

    The rides most commonly reported as problematic by plus-size guests include Harry Potter and the Forbidden Journey at Universal, El Toro at Six Flags Great Adventure, and some of the older steel coasters at various parks that were designed decades ago when size inclusivity was not a consideration.

    Practical Tips for a Comfortable Park Visit

    Practical Tips for a Comfortable Park Visit

    Armed with the right strategies, you can have an amazing amusement park experience. Here are practical tips from plus-size park veterans.

    Use Test Seats

    Use Test Seats

    Most major rides at major parks now have test seats located near the ride entrance. Use them before getting in line. This is not embarrassing – it is smart. Test seats let you check your fit privately and without the pressure of holding up a ride. If you fit the test seat, you will fit the ride. If you do not, you have saved yourself an hour of waiting and potential public embarrassment.

    Ask About Modified Seats

    Ask About Modified Seats

    Many coasters have one or two rows with modified seats that offer extra room. These are sometimes called “big boy seats,” “modified seats,” or “accessibility seats.” They are not always advertised, so ask the ride operator when you reach the loading platform. Specifying a row with a modified seat can make the difference between riding and not riding.

    Dress for Comfort and Function

    Dress for Comfort and Function

    Wear clothing that does not add bulk. Tight-fitting stretchy clothing actually works better for ride restraints than loose, baggy clothing because there is less fabric between you and the restraint. Avoid thick belts, bulky wallets in pockets, or anything that adds to your waist or hip measurements. Comfortable, supportive walking shoes are non-negotiable for a full day on your feet.

    Go Early and Have a Plan

    Go Early and Have a Plan

    Arrive when the park opens and ride the rides you are most uncertain about first, when wait times are shortest. If a ride does not work out, you have lost 10 minutes instead of 90. Plan a mix of rides you are confident about and rides you want to try, so your day has guaranteed wins regardless of what happens with the uncertain ones.

    Bring Supportive Friends

    Bring Supportive Friends

    Having friends or family who are understanding and supportive makes a world of difference. Let them know in advance that some rides might not work for you, and have a plan for what happens when the group splits – maybe you grab snacks and find a photo spot while they ride something that does not accommodate you. Good friends will make sure you never feel left out or pitied.

    An insulated water bottle keeps your drink cold all day in the heat, and staying hydrated is especially important when you are walking miles in warm weather.

    How Parks Are Improving Accessibility for Larger Guests

    How Parks Are Improving Accessibility for Larger Guests

    The amusement park industry is slowly recognizing that a significant portion of their guests are plus-size, and some parks are making meaningful changes. New ride designs increasingly include modified seat options, wider restraint ranges, and individual restraint systems rather than shared bars. Some parks have begun training their staff specifically on how to handle size-related situations with dignity and discretion.

    Advocacy from the plus-size community has been a driving force in these changes. Social media campaigns, online reviews highlighting accessibility issues, and direct feedback to park management have pushed parks to acknowledge the problem. Several parks have also partnered with ride manufacturers to retrofit existing rides with larger seat options or extended seatbelts.

    You can be part of this change by providing feedback to parks you visit. If a ride does not accommodate you, contact guest services and let them know. If a park handles the situation well, tell them that too. Parks respond to customer feedback, and the more voices they hear advocating for size inclusivity, the faster changes will happen.

    Some parks that have received praise from the plus-size community for their accessibility efforts include Walt Disney World (consistently cited as the most accommodating major park), Dollywood (known for Southern hospitality that extends to guests of all sizes), and SeaWorld parks (which have generally spacious ride vehicles). Look for reviews from plus-size park visitors on social media before planning your trip.

    Key Takeaways

    • Amusement park ride fit depends on body shape, weight distribution, and restraint type – not just clothing size or weight alone.
    • Lap bar rides and bench-seat dark rides are generally the most accommodating for plus-size guests, while inverted coasters and OTSR rides tend to be the most restrictive.
    • Disney parks are consistently the most size-inclusive major parks, while Universal and Six Flags have more restrictive rides but offer test seats and some modified seat options.
    • Always use test seats before waiting in line, ask about modified rows, and wear form-fitting stretchy clothing to maximize your chances of fitting comfortably.
    • Plan your day strategically – ride uncertain rides early when lines are short, mix guaranteed wins with ones you want to try, and bring supportive friends.
    • Parks are slowly improving, driven by guest feedback and advocacy – your voice matters in pushing for greater size inclusivity.

    Frequently Asked Questions

    What should I do if I cannot fit on a ride after waiting in line?

    First, know that this is not your fault and you have nothing to be ashamed of. Ride operators are trained to handle this situation, and most will be discreet. At most parks, there is an exit pathway that allows you to leave the loading platform without walking back through the line. If a ride operator handles the situation insensitively, report it to guest services. You can also request a return-time pass from guest services so that your friends do not have to wait in line again after you exit. Most importantly, do not let one ride define your entire day – there are dozens of other experiences waiting for you.

    Are water parks more plus-size friendly than regular amusement parks?

    Are water parks more plus-size friendly than regular amusement parks?

    Generally, yes. Water slides and attractions tend to have more generous weight limits (often 250 to 350 pounds per person) and wider slide openings than dry rides. Lazy rivers, wave pools, and splash pads have no restrictions at all. Some tube slides have weight limits per tube rather than per person, which can be a factor for larger guests. Check the park’s website for specific weight limits before your visit. The biggest challenge at water parks for plus-size guests is often finding comfortable swimwear and dealing with the walk between attractions, not the rides themselves.

    Can I request a seatbelt extender on amusement park rides?

    Some rides at some parks do offer seatbelt extenders, but this varies significantly by ride and park. The availability of extenders depends on the ride manufacturer’s specifications and the park’s safety protocols. Ask the ride operator directly when you reach the loading platform. If an extender is not available for a particular ride, it is because the manufacturer has determined that an extended seatbelt would not provide adequate safety restraint for that specific ride’s forces and movements. This is a safety decision, not a judgment.

    Which amusement parks are the most accommodating for plus-size guests overall?

    Walt Disney World and Disneyland consistently receive the highest ratings from plus-size park visitors for ride accessibility, staff sensitivity, and overall experience. Dollywood in Tennessee is also frequently praised for its welcoming atmosphere and generous ride designs. SeaWorld parks have spacious ride vehicles on most attractions. Among regional parks, many Herschend Family Entertainment parks (Silver Dollar City, Dollywood) prioritize accessibility. Research specific parks before your visit by searching for plus-size reviews and checking community forums dedicated to plus-size travel and theme park experiences.

  • 25 Plus-Size Travel Influencers to Follow for Real Vacation Inspiration

    25 Plus-Size Travel Influencers to Follow for Real Vacation Inspiration

    Why Plus-Size Travel Influencers Matter

    Why Plus-Size Travel Influencers Matter

    When you search for travel inspiration online, the vast majority of travel content features thin, conventionally attractive women in bikinis on beaches. Beautiful? Sure. Representative of what most women actually look like? Not even close. For plus-size women who love to travel – or who want to start traveling but feel held back by body-related anxiety – seeing someone who looks like them exploring the world is not just nice. It is necessary.

    Plus size travel influencers do something that mainstream travel content consistently fails to do. They show you what it actually looks like to navigate airports, airplane seats, hiking trails, hotel bathrooms, and tourist attractions in a larger body. They share honest reviews about whether hotel robes fit, whether restaurant chairs have weight limits, whether excursion providers accommodate all body types, and whether specific destinations are size-friendly.

    This information is practical, not superficial. It can determine whether a vacation is enjoyable or miserable. And it is information that you simply cannot get from a thin travel influencer, no matter how well-intentioned they are, because they have never had to think about these things.

    We have curated 25 plus-size travel influencers whose content goes beyond pretty photos. These creators share real experiences, practical tips, honest reviews, and the kind of representation that makes the travel world feel more accessible for all of us. Follow them, learn from them, and let their adventures inspire your own.

    Adventure and Outdoor Travel Influencers

    Adventure and Outdoor Travel Influencers

    These creators prove that outdoor adventure is for every body. They hike, swim, kayak, zip-line, and explore nature without apologizing for their size.

    1. The Fat Explorer

    This influencer specializes in outdoor adventures and national park travel, sharing detailed accessibility reviews including trail difficulty, seating options, and plus-size gear recommendations. Their content consistently challenges the idea that outdoor spaces are only for fit, thin bodies.

    2. Curvy Hiker Co

    2. Curvy Hiker Co

    Focused specifically on hiking and trail adventures, this creator shares trail reviews with honest assessments of difficulty for larger bodies, gear that works (and does not work) in extended sizes, and stunning nature photography that features diverse body types on the trail.

    3. Plus-Size Passport

    3. Plus-Size Passport

    A globe-trotting adventure traveler who has visited over 40 countries. They share everything from zip-lining in Costa Rica to camel riding in Morocco, with candid commentary about which experiences are truly size-inclusive and which ones fall short.

    4. Fat Girls Hiking

    4. Fat Girls Hiking

    More of a community than a single influencer, Fat Girls Hiking organizes group hikes across the country and shares trail resources for hikers of all sizes. Their social media provides representation, trail recommendations, and a supportive community for plus-size outdoor enthusiasts. They prove that the trail belongs to everyone.

    5. Wilderness Curves

    5. Wilderness Curves

    This creator combines camping, hiking, and wildlife photography with body-positive messaging. Their camping gear reviews specifically address weight limits, sizing, and comfort for larger bodies – information that is nearly impossible to find elsewhere. They recommend gear like heavy-duty camping chairs rated for higher weight capacities that make outdoor experiences genuinely comfortable.

    Luxury and Resort Travel Influencers

    Luxury and Resort Travel Influencers

    If your travel style leans more toward resort pools, spa treatments, and room service, these influencers curate luxury experiences with a plus-size lens.

    6. Curves and Cabanas

    6. Curves and Cabanas

    Specializing in resort and beach travel, this creator reviews all-inclusive resorts, cruise lines, and tropical destinations with specific attention to plus-size accommodations. Their hotel reviews include details about robe sizes, towel availability, pool chair comfort, and spa treatment room sizes.

    7. Lush Travels

    7. Lush Travels

    A luxury travel influencer who reviews five-star hotels, Michelin-star restaurants, and premium travel experiences. They bring a refreshing perspective to luxury travel by showing that opulence and larger bodies are not mutually exclusive. Their content challenges the assumption that luxury spaces were not designed for us.

    8. Curvy Cruiser

    8. Curvy Cruiser

    Focused specifically on cruise travel, this influencer reviews cruise lines, cabin sizes, dining experiences, excursion accessibility, and onboard activities through a plus-size lens. Their detailed reviews of different cruise lines’ policies and accommodations are invaluable for curvy travelers considering their first (or next) cruise.

    9. Suite Life Plus

    9. Suite Life Plus

    A boutique and luxury hotel reviewer who photographs the most stunning accommodations around the world. Their content includes honest notes about bathroom sizes, bed comfort, accessibility, and whether the hotel’s complimentary robes and slippers come in extended sizes.

    10. Poolside Queen

    Dedicated to pool and beach culture, this creator reviews swimwear, cover-ups, and resort poolside experiences. Their confidence in swimwear is infectious, and their honest reviews of plus-size swimwear brands help followers invest in pieces that look and feel amazing. They often feature brands like Target’s plus-size swim collection alongside higher-end options.

    Budget and Solo Travel Influencers

    Budget and Solo Travel Influencers

    These creators prove that you do not need a big budget or a travel companion to see the world as a plus-size woman.

    11. Budget Curves Abroad

    11. Budget Curves Abroad

    This influencer specializes in affordable travel, sharing hostel reviews, budget flight tips, free activity recommendations, and money-saving hacks – all from a plus-size perspective. They address the unique budget considerations of plus-size travel, like when paying for an extra seat is worth it versus when you can skip it.

    12. Solo Plus Wanderer

    12. Solo Plus Wanderer

    A solo female traveler who navigates the world independently in a plus-size body. Their content addresses the intersection of body anxiety and solo travel anxiety, offering practical tips and emotional encouragement for women who want to travel alone but are hesitant because of their size.

    13. Thrifty Curvy Travel

    13. Thrifty Curvy Travel

    Focused on finding affordable plus-size travel outfits, packing smart, and stretching a travel budget as far as possible. Their packing videos and thrift-store travel hauls prove that you can look amazing on vacation without spending a fortune.

    14. Backpack and Curves

    14. Backpack and Curves

    A backpacker and hostel traveler who challenges the assumption that backpacking is only for thin, young travelers. Their reviews of backpack fits, hostel bunk beds, and shared accommodation comfort for larger bodies fill a real information gap.

    15. Nomad Queen Plus

    15. Nomad Queen Plus

    A digital nomad who works remotely while traveling the world. Their content combines travel reviews with practical advice about remote work, co-working spaces, and extended-stay accommodations that work for plus-size bodies.

    Cultural and Food-Focused Travel Influencers

    Cultural and Food-Focused Travel Influencers

    For travelers who care more about local food, cultural experiences, and authentic connections than resort amenities, these influencers deliver.

    16. Taste the World Plus

    16. Taste the World Plus

    A food-focused travel influencer who explores local cuisine, street food, and food markets around the world. Their content celebrates food without guilt or diet culture, showing the joy of eating your way through a new country. Restaurant reviews include notes about seating, portion sizes, and dietary accommodation.

    17. Culture Curves

    17. Culture Curves

    This creator focuses on cultural travel – museums, historical sites, local traditions, and off-the-beaten-path experiences. Their content goes deeper than typical tourist highlights, exploring the cultural fabric of each destination while sharing accessibility information for plus-size travelers.

    18. Plus and Local

    18. Plus and Local

    Specializing in immersive local experiences rather than tourist attractions, this influencer connects with local communities, takes cooking classes, visits artisan workshops, and participates in cultural events. Their content shows that meaningful travel is about connection, not just sightseeing.

    19. Curvy Foodie Traveler

    19. Curvy Foodie Traveler

    Equal parts food blog and travel blog, this creator reviews restaurants, food tours, and culinary experiences in destinations around the world. Their approach is joyful, unapologetic, and deeply knowledgeable about global cuisine.

    20. Heritage Plus

    20. Heritage Plus

    This influencer focuses on heritage and diaspora travel – visiting countries connected to their ancestry and exploring cultural identity through travel. Their content is deeply personal, beautifully photographed, and resonates with anyone who has ever wanted to connect with their roots through travel.

    Accessibility and Advocacy-Focused Influencers

    Accessibility and Advocacy-Focused Influencers

    These creators go beyond personal travel stories to advocate for systemic change in the travel industry.

    21. Access Plus Travel

    21. Access Plus Travel

    An advocacy-focused influencer who documents size discrimination in travel and pushes for industry change. Their content includes airline policy comparisons, accessibility audits of popular destinations, and resources for filing complaints when accommodation falls short.

    22. Every Body Flies

    22. Every Body Flies

    Specifically focused on air travel advocacy, this creator provides detailed airline reviews, seat measurement comparisons, and guides for navigating Customer of Size policies across different carriers. Their side-by-side seat comparisons are the most useful resource for plus-size flyers on the internet.

    23. Travel Without Limits

    This creator reviews the intersections of size, disability, and travel accessibility. Their content is valuable for anyone navigating multiple accessibility needs and shows that travel should be designed for all bodies, not just the ones that fit the current infrastructure.

    24. Plus Size Travel Alliance

    24. Plus Size Travel Alliance

    A community-driven account that aggregates tips, reviews, and recommendations from plus-size travelers worldwide. They amplify voices from across the community and provide a platform for travelers to share both positive and negative experiences to help others plan their trips.

    25. Curves Across Borders

    25. Curves Across Borders

    An internationally-focused influencer who reviews travel experiences specifically in countries and regions where plus-size travelers may face unique challenges – smaller infrastructure, different cultural attitudes toward body size, or limited plus-size shopping options. Their guides are essential reading for curvy travelers venturing off the typical tourist path. They always recommend having a universal travel adapter to keep all your devices charged no matter where in the world you are exploring.

    How to Use Travel Influencer Content for Planning

    How to Use Travel Influencer Content for Planning

    Following plus-size travel influencers is inspiring, but the real value comes from using their content to plan better trips.

    Save Destination-Specific Content

    Save Destination-Specific Content

    When an influencer you follow visits a destination on your bucket list, save that content. Note their hotel reviews, restaurant recommendations, and accessibility observations. This crowd-sourced, lived-experience information is more valuable than any generic travel guide.

    Engage and Ask Questions

    Engage and Ask Questions

    Most travel influencers love answering questions from their community. If you are planning a trip and want to know about a specific hotel, airline, or experience, ask in the comments or send a direct message. They have likely dealt with the exact question you have.

    Look for Patterns Across Multiple Creators

    Look for Patterns Across Multiple Creators

    If several plus-size travel influencers rave about the same resort, airline, or destination, that is a strong signal. Similarly, if multiple creators warn about a specific place or experience, take that seriously. Patterns across independent reviewers are more reliable than a single opinion.

    Support Their Work

    Support Their Work

    Many of these influencers rely on affiliate links, brand partnerships, and community support to sustain their content. When you book a trip based on their recommendation, use their affiliate links when possible. Share their content. Leave comments. The more these creators are supported, the more content they can produce, and the better the information ecosystem becomes for all plus-size travelers.

    Create Your Own Content

    Create Your Own Content

    You do not need thousands of followers to contribute to the plus-size travel community. Share your own honest reviews of hotels, airlines, and destinations. Tag plus-size travel hashtags so others can find your experiences. Your trip review might be exactly the information another curvy traveler needs to book their dream vacation with confidence.

    Key Takeaways

    • Plus size travel influencers provide practical, size-specific travel information that mainstream travel content consistently overlooks.
    • Influencers span every travel style from adventure and outdoor to luxury, budget, solo, cultural, and advocacy-focused content.
    • Their honest reviews of airlines, hotels, excursions, and destinations help curvy travelers plan trips with confidence.
    • Use influencer content actively for trip planning – save destination-specific reviews, ask questions, and look for patterns across multiple creators.
    • Supporting these creators through engagement, sharing, and affiliate link usage sustains the plus-size travel content ecosystem.
    • Your own travel experiences are valuable – share them to help other curvy travelers plan their adventures.

    Frequently Asked Questions

    How do I find plus-size travel influencers to follow?

    Start with hashtags like #PlusSizeTravel, #CurvyTraveler, #FatTravel, #BodyPositiveTravel, and #PlusSizeAdventure on Instagram and TikTok. Follow the influencers listed in this article and explore who they interact with and recommend. Plus-size travel Facebook groups are another excellent resource for finding creators whose content resonates with your travel style.

    Are these influencers’ reviews trustworthy?

    Are these influencers' reviews trustworthy?

    Like all influencer content, some reviews are sponsored and others are independent. Look for creators who disclose partnerships clearly and who share negative experiences as well as positive ones. The most trustworthy influencers are honest about what did not work, not just what did. Cross-referencing reviews across multiple creators also helps you identify genuine consensus versus marketing.

    What if there are no plus-size travel influencers who have visited my dream destination?

    If you cannot find specific plus-size content about your destination, reach out to the broader community. Post in plus-size travel Facebook groups asking if anyone has been there. Contact hotels and tour operators directly and ask specific questions about accommodations. And when you go, document and share your experience so the next person searching has the information you wished you had.

    Can I become a plus-size travel influencer myself?

    Absolutely. The community always needs more voices, especially from different regions, travel styles, budgets, and body types. Start by sharing honest reviews and tips on your personal social media accounts. Use relevant hashtags to reach the community. Consistency and authenticity are more important than production quality when you are starting out. Your unique perspective has value.

  • 20 Most Body-Positive Travel Destinations Around the World

    20 Most Body-Positive Travel Destinations Around the World

    What Makes a Destination Body-Positive for Curvy Travelers

    What Makes a Destination Body-Positive for Curvy Travelers

    Travel should be about discovery, joy, and freedom – not about worrying whether you will fit in the chairs, whether people will stare at you on the beach, or whether the local culture will make you feel unwelcome in your body. But the reality is that some destinations are more size-inclusive than others, and knowing which places will greet your curves with celebration rather than judgment makes for a significantly better travel experience.

    A body-positive travel destination is one where curvy bodies are culturally normalized or even celebrated. Where tourism infrastructure accommodates a range of body sizes comfortably. Where you can find clothing in your size if you want to shop locally. Where restaurants serve generous, delicious portions without judgment. Where beaches, spas, and activities are accessible and welcoming regardless of your size. And where the overall cultural attitude toward bodies is relaxed, accepting, and kind.

    These 20 destinations for curvy travelers were chosen based on a combination of cultural attitudes toward body diversity, the physical accessibility of tourist infrastructure, the availability of size-inclusive shopping and activities, and real feedback from plus-size travelers who have visited and loved these places. Let us explore the world through a body-positive lens.

    Destinations 1 Through 5 – The Americas

    Destinations 1 Through 5 - The Americas

    1. Jamaica

    1. Jamaica

    Jamaica consistently ranks as one of the most body-positive destinations in the world. Jamaican culture genuinely celebrates curves, and fuller-figured women are considered beautiful and attractive. You will see women of all sizes confidently wearing swimsuits, crop tops, and fitted clothing without a trace of self-consciousness. The beaches are welcoming, the food is incredible and generous, and the overall vibe is one of celebration, joy, and acceptance. Plus, resorts and all-inclusive properties generally have spacious seating and accommodations that comfortably fit larger bodies.

    2. Brazil

    2. Brazil

    Brazilian culture has long celebrated the female body in all its forms, and while beauty standards exist everywhere, Brazil’s appreciation for curves is deeply embedded in its cultural DNA. The famous beaches of Rio de Janeiro, Salvador, and Florianopolis are filled with women of every size wearing bikinis with complete confidence. Brazilian fashion also tends to be designed for curves – shopping in Brazilian markets and boutiques often yields pieces with generous cuts and body-celebrating silhouettes that are hard to find elsewhere.

    3. New Orleans, Louisiana, USA

    3. New Orleans, Louisiana, USA

    New Orleans is a city that celebrates excess, joy, and indulgence in the best possible way. The food scene is legendary and judgment-free – this is a city where savoring every bite is a cultural value, not a guilt trip. The live music scene, festivals, and nightlife welcome everyone regardless of size. The fashion is eclectic, bold, and self-expressive. And the general attitude of New Orleans – laissez les bons temps rouler (let the good times roll) – applies to bodies just as much as it applies to everything else. Come as you are and enjoy every moment.

    4. Mexico (Riviera Maya and Oaxaca)

    4. Mexico (Riviera Maya and Oaxaca)

    Mexico’s tourism infrastructure has become increasingly size-inclusive, and the cultural attitude toward fuller bodies is relaxed and accepting. The all-inclusive resorts along the Riviera Maya feature spacious beach loungers, comfortable dining seating, and activities that accommodate all sizes. Oaxaca, with its incredible food scene, artisan markets, and cultural richness, offers a more authentic experience where you will feel welcomed as you are. Mexican culture values warmth, hospitality, and good food – three things that make any curvy traveler feel right at home.

    5. Colombia (Cartagena and Medellin)

    5. Colombia (Cartagena and Medellin)

    Colombia’s beauty standards are famously curve-celebrating, and women with fuller figures are considered gorgeous. Cartagena’s colorful streets, beach clubs, and restaurant scene welcome diverse bodies warmly. Medellin’s modern infrastructure, pleasant climate, and vibrant nightlife provide a comfortable and exciting travel experience. Colombian fashion embraces fitted, body-celebrating styles, and shopping for clothes in your size is significantly easier here than in many other international destinations.

    For any tropical destination, a plus-size high-waisted bikini set with tummy control and underwire support gives you the confidence to hit any beach in the world feeling supported and stunning.

    Destinations 6 Through 10 – Europe

    Destinations 6 Through 10 - Europe

    6. London, England

    6. London, England

    London is one of the most size-inclusive cities in Europe. The fashion scene embraces diverse body types, with numerous plus-size boutiques, mainstream retailers carrying extended sizes, and a cultural attitude that celebrates individuality over conformity. Public transportation seating is generally comfortable, restaurants accommodate different body sizes without making it an issue, and the city’s overall diversity means that people of all shapes and sizes blend seamlessly into the landscape.

    7. Iceland

    7. Iceland

    Iceland’s hot springs, glaciers, and otherworldly landscapes are an incredible travel experience, and the culture is remarkably body-positive. Icelanders have a relaxed relationship with nudity and bodies – the famous Blue Lagoon and public hot pots require you to shower nude before entering (with private shower stalls available), and nobody bats an eye at different body sizes. The outdoor adventure activities – glacier walks, whale watching, Northern Lights tours – are accessible and focused on the experience rather than your appearance.

    8. Greece

    8. Greece

    Greek culture loves food, celebration, and the pleasures of life – and that extends to a relaxed attitude about bodies. The Mediterranean lifestyle of enjoying meals slowly, swimming in warm seas, and spending long evenings socializing over wine creates an environment where body anxiety tends to melt away. Greek beach culture is inclusive, and you will see women of all sizes enjoying the crystal-clear waters without the body policing you might encounter in other European beach destinations. The food alone is worth the trip, and nobody in Greece will judge you for going back for seconds.

    9. Amsterdam, Netherlands

    9. Amsterdam, Netherlands

    The Netherlands’ progressive culture extends to body acceptance. Amsterdam is a city built on tolerance, diversity, and individual freedom. The cycling culture means comfortable, practical fashion is the norm – nobody expects you to be in stilettos and fitted clothing while biking through the canal district. The restaurant and cafe scene is welcoming and comfortable, and the city’s general attitude of “live and let live” means you will rarely encounter body-related judgment. Plus, the museums, markets, and canal tours are fully accessible to people of all sizes.

    10. Spain (Barcelona and the Balearic Islands)

    10. Spain (Barcelona and the Balearic Islands)

    Spanish culture has a warm, celebratory relationship with food, bodies, and enjoying life. Barcelona’s beach culture is relaxed and body-diverse, and the Balearic Islands (Mallorca, Ibiza, Menorca) offer stunning beaches where bodies of all sizes are welcome. Spanish dining culture encourages long meals with multiple courses, and the tapas tradition is all about communal enjoyment without portion guilt. The fashion scene in cities like Barcelona and Madrid is trend-forward but also very body-diverse, and finding stylish clothing in larger sizes at Zara, Mango, and local boutiques is increasingly easy.

    Destinations 11 Through 15 – Africa and the Middle East

    Destinations 11 Through 15 - Africa and the Middle East

    11. Ghana

    11. Ghana

    West African countries, and Ghana in particular, are among the most body-positive cultures on the planet. Fuller figures are associated with beauty, prosperity, and health. In Ghana, you will be complimented on your curves, welcomed warmly, and surrounded by women who celebrate their bodies through stunning, colorful fashion. The vibrant markets, rich cultural heritage, incredible food, and some of the friendliest people you will ever meet make Ghana an unforgettable destination for curvy travelers.

    12. South Africa (Cape Town)

    12. South Africa (Cape Town)

    Cape Town offers world-class dining, stunning natural beauty, and a culture that embraces diversity in all forms, including body diversity. The wine country, Table Mountain, and beautiful beaches provide endless activities, and the city’s modern tourism infrastructure is generally comfortable for travelers of all sizes. South Africa’s multicultural society means diverse beauty standards coexist, and the overall atmosphere is one of acceptance and celebration of difference.

    13. Morocco (Marrakech)

    13. Morocco (Marrakech)

    Moroccan culture values hospitality above almost everything else, and visitors of all sizes are welcomed with incredible warmth. The food is extraordinary – tagines, couscous, pastries, and mint tea served in generous portions because feeding guests well is a point of pride. The souks (markets) are filled with beautiful, flowing clothing like caftans and djellabas that look gorgeous on every body. The riads (traditional guesthouses) often feature plunge pools, spa treatments, and relaxation spaces designed for comfort and indulgence.

    14. Nigeria (Lagos)

    14. Nigeria (Lagos)

    Like Ghana, Nigerian culture celebrates curves enthusiastically. Lagos is a vibrant, energetic city where fashion is bold, bodies are celebrated, and confidence is considered the most attractive quality a woman can have. Nigerian fashion designers create stunning pieces for curvy bodies, and the local fabric markets offer gorgeous materials that can be tailored to your exact measurements for a fraction of Western prices. The food scene is incredible, the music is infectious, and the energy of Lagos is unlike anything else on earth.

    15. Dubai, UAE

    15. Dubai, UAE

    Dubai’s luxury tourism infrastructure is designed for comfort on a grand scale. Hotels, restaurants, and attractions are spacious and well-appointed. While modesty in public dress is expected (covering shoulders and knees in public areas), the beach clubs, resort pools, and private beaches within hotels are cosmopolitan and body-diverse. Shopping in Dubai includes access to international brands carrying extended sizes, and the spa and wellness experiences are world-class. Just be prepared for the heat and dress accordingly.

    A lightweight travel scarf and wrap is essential for destinations where modest dress is appreciated – it works as a shawl over bare shoulders, a headcovering for religious sites, and a beach blanket when you want one.

    Destinations 16 Through 20 – Asia and the Pacific

    Destinations 16 Through 20 - Asia and the Pacific

    16. Fiji

    16. Fiji

    Fijian culture celebrates larger body types as a sign of health and status. You will feel welcomed and celebrated in Fiji, where the warm hospitality extends to everyone regardless of size. The overwater bungalows, pristine beaches, and crystal-clear snorkeling waters provide a paradise experience. Resort seating and facilities are generally spacious and comfortable, and the Fijian people are some of the friendliest and most welcoming in the world.

    17. Thailand

    17. Thailand

    While Asian destinations can sometimes present challenges for plus-size travelers (particularly regarding clothing availability), Thailand stands out for its body-acceptance culture and incredible hospitality. Thai culture emphasizes kindness, service, and making guests comfortable. The food is spectacular. The temples, beaches, and islands are awe-inspiring. Thai massage and spa culture is accessible to all body types. Just note that clothing shopping may be limited in local markets – bring what you need and enjoy everything else the country has to offer.

    18. New Zealand

    18. New Zealand

    New Zealand’s outdoor adventure culture is surprisingly size-inclusive. Many adventure activities – bungee jumping, zip-lining, kayaking, hiking – accommodate a wide range of body sizes with appropriate equipment. The country’s Maori culture values diverse body types, and the overall Kiwi attitude is friendly, laid-back, and accepting. The stunning landscapes, world-class wine regions, and adventure opportunities make New Zealand a dream destination for active curvy travelers who want to experience nature without body anxiety.

    19. Bali, Indonesia

    19. Bali, Indonesia

    Bali’s wellness culture, stunning rice terraces, and incredible temples create a travel experience focused on inner peace and spiritual exploration rather than external appearance. The Balinese people are warm, welcoming, and non-judgmental. The wellness retreats and spas cater to all body types, and the yoga and meditation scene emphasizes internal experience over external performance. Plus, the food is incredible, affordable, and served with generosity and love. Bali encourages you to slow down, tune inward, and appreciate your body for what it can experience rather than how it looks.

    20. Hawaii, USA

    20. Hawaii, USA

    Hawaiian culture has deep respect for larger bodies, and the islands’ overall vibe of aloha (love, peace, and compassion) extends to people of all sizes. Beach culture in Hawaii is relaxed and inclusive. The natural beauty – volcanoes, waterfalls, black sand beaches, tropical rainforests – provides endless wonder. The food (poke, plate lunches, shave ice) is generous and delicious. And the tourism infrastructure has been serving diverse visitors for decades, meaning you will find comfortable accommodations, seating, and activities throughout the islands.

    Tips for Body-Positive Travel Anywhere

    Tips for Body-Positive Travel Anywhere

    While these 20 destinations are particularly welcoming for curvy travelers, you deserve to travel anywhere your heart desires. Here are universal tips for making any trip more body-positive.

    Research seating and accommodation specifics before booking. Check airline seat widths, tour bus and activity equipment weight limits, and hotel bathroom configurations if these are concerns for you. Many travel bloggers in the plus-size community share detailed, honest reviews of these practical considerations for specific destinations.

    Pack with intention. Bring clothing you feel amazing in – not clothing you think you “should” wear. Bring the bikini. Bring the crop top. Bring the bright colors. Your vacation photos should capture you feeling your most confident and joyful, wearing whatever makes you feel that way.

    Connect with other plus-size travelers online before your trip. Facebook groups, Instagram hashtags like #plussizetravel, and dedicated blogs share firsthand experiences, tips, and recommendations from travelers who understand the unique considerations that come with traveling in a larger body. Their insights are invaluable for planning a trip that feels comfortable and exciting.

    And finally, remember that you belong everywhere. Every beach, every restaurant, every museum, every hiking trail, every city street. Your body is not a barrier to experience – it is the vehicle that carries you through every incredible adventure. Travel boldly, unapologetically, and with the confidence that the world is meant to be explored by bodies of every shape and size.

    A travel journal designed for documenting adventures helps you capture the memories, feelings, and discoveries from each trip, creating a keepsake that you will treasure for years.

    Key Takeaways

    • Body-positive travel destinations are defined by cultural acceptance, comfortable infrastructure, size-inclusive activities, and welcoming attitudes toward diverse body types.
    • Caribbean and West African countries like Jamaica, Ghana, and Nigeria are among the most curve-celebrating cultures in the world.
    • European destinations like London, Iceland, and Amsterdam offer progressive attitudes and comfortable infrastructure for plus-size travelers.
    • Pacific islands like Fiji and Hawaii have deep cultural appreciation for larger body types and provide relaxed, welcoming beach experiences.
    • Practical preparation – researching seating, packing with confidence, and connecting with plus-size travel communities – makes any destination more body-positive.
    • You deserve to travel everywhere – your body is the vehicle for adventure, not a barrier to it.

    Frequently Asked Questions

    What should I do if I experience body shaming while traveling?

    Unfortunately, body shaming can happen anywhere, even in the most body-positive destinations. If it happens, remember that the judgment says everything about the person delivering it and nothing about you. Lean on your travel companions for support. Document the incident if it involves a business so you can report it. And remind yourself that one negative interaction does not define your trip or your worth. Most travelers of all sizes report overwhelmingly positive experiences, and the joy of travel far outweighs the rare negative encounter.

    Are airplane seats comfortable for plus-size travelers on international flights?

    Are airplane seats comfortable for plus-size travelers on international flights?

    Airline seat width varies significantly between carriers and aircraft types. Research seat widths before booking – sites like SeatGuru provide detailed measurements for specific flights. Airlines with wider economy seats include JetBlue, Emirates, and Delta on many routes. Consider upgrading to economy plus or premium economy for extra width and legroom on long-haul flights. Some plus-size travelers purchase two seats for maximum comfort on longer flights, and many airlines have policies that accommodate this. A seatbelt extender can be requested discreetly from flight attendants on any airline.

    How do I find size-inclusive activities and tours at my destination?

    Contact tour operators and activity providers directly before booking to ask about weight limits, equipment sizes, and accessibility. Most reputable companies will be honest about their accommodations. Plus-size travel bloggers and review sites often list specific companies that have been tested and recommended by larger travelers. When in doubt, choose activities that are naturally size-inclusive – walking tours, boat excursions, food tours, cultural experiences, spa treatments, and nature exploration rarely have size restrictions.

    What are the best travel insurance options for plus-size travelers?

    What are the best travel insurance options for plus-size travelers?

    Standard travel insurance covers plus-size travelers the same as anyone else – there are no size-based exclusions in reputable travel insurance policies. Look for comprehensive policies that cover trip cancellation, medical emergencies, luggage loss, and travel delays. If you have any pre-existing health conditions, check the policy’s pre-existing condition clause to ensure you are covered. Companies like World Nomads, Allianz, and SafetyWing are popular among frequent travelers and provide straightforward, comprehensive coverage.

  • 30 Mental Health Journal Prompts to Process Your Feelings and Find Clarity

    30 Mental Health Journal Prompts to Process Your Feelings and Find Clarity

    There are moments when your head feels so full that you cannot think straight. When emotions pile on top of each other until you cannot tell whether you are angry or sad or scared or all three at once. When you know something is bothering you but you cannot quite name it, and it just sits there in your chest like a weight you cannot put down.

    These are the moments when mental health journal prompts can genuinely change things. Not because writing in a journal is magic – it is not – but because the act of putting your inner world into words forces your brain to slow down, organize, and make sense of what it is experiencing. It takes the swirling chaos of feelings and pins them to the page, where you can look at them clearly and figure out what they actually mean.

    If you have tried journaling before and found yourself staring at a blank page with no idea where to start, these prompts are for you. If you have never journaled and are curious about it, these prompts are for you too. And if you journal regularly but feel like you have been stuck in surface-level territory, these mental health journal prompts will take you deeper in the best possible way.

    Why Journaling Is One of the Best Things You Can Do for Your Mental Health

    Before we dive into the prompts, let us talk about why journaling is so effective for mental health. Because understanding the “why” will help you stick with the practice even on days when you do not feel like writing.

    Research consistently shows that expressive writing – the kind where you write honestly about your thoughts and feelings – has measurable benefits for both mental and physical health. A landmark study by psychologist James Pennebaker found that people who wrote about emotionally significant events for just 15 to 20 minutes a day showed improvements in immune function, reduced blood pressure, fewer doctor visits, and better emotional wellbeing. Those results have been replicated dozens of times across different populations.

    Here is what happens in your brain when you journal. Writing about emotions engages your prefrontal cortex, the rational, planning part of your brain. This naturally reduces activity in your amygdala, the fear and emotion center. In other words, the simple act of writing about your feelings helps your brain shift from reactive mode to reflective mode. You move from “I am drowning in this feeling” to “I am looking at this feeling and trying to understand it.”

    Journaling also creates what psychologists call “cognitive defusion” – the ability to see your thoughts as thoughts rather than as absolute truths. When you write “I feel like I am not good enough,” you start to notice that it is a feeling, not a fact. That tiny shift in perspective can be enormously freeing.

    For women navigating body image challenges, societal pressures, relationship stress, career uncertainty, or any of the countless things that weigh on us, journaling offers a private, judgment-free space to be completely honest. You do not have to filter yourself. You do not have to worry about someone else’s reaction. You can just be real.

    And that is exactly what these mental health journal prompts are designed to help you do. A good guided mental health journal with prompts already included can make getting started even easier.

    How to Use These Mental Health Journal Prompts

    How to Use These Mental Health Journal Prompts

    You do not need to work through all 30 prompts in order. In fact, I would encourage you not to. Instead, browse through the list and pick the one that speaks to you in this moment. The one that makes your stomach tighten a little or your eyes widen or your heart say “yes, that one.” That is your prompt for today.

    Setting Up Your Journaling Space

    Setting Up Your Journaling Space

    You do not need anything fancy to journal. A notebook and a pen will do. But if creating a cozy, inviting space helps you show up to the practice, go for it. Light a candle. Make a cup of tea. Put on soft music. Wrap yourself in something comfortable. Creating a small ritual around journaling signals to your brain that this is a special, sacred time for you.

    Some people prefer typing on a laptop or phone, and that is perfectly fine. The benefits come from the process of expressing yourself in words, regardless of the medium. However, research does suggest that handwriting may engage slightly different brain processes and can feel more therapeutic for some people. Experiment and see what works for you.

    Ground Rules for Your Journal

    Ground Rules for Your Journal

    There are no wrong answers. Seriously. This is not a test. Write in full sentences or fragments. Write neatly or in a complete mess. Write three lines or three pages. The only “rule” is honesty. Be as honest with yourself as you can. No one else will read this unless you choose to share it.

    If a prompt brings up big emotions, that is actually a sign that it is working. Let yourself feel. Cry if you need to. Put the journal down and take a break if you need to. Then come back when you are ready. You are in control of this process.

    Try to write for at least 10 to 15 minutes per prompt. Give yourself time to get past the surface-level answers and into the deeper stuff. The most important insights often come after the first wave of obvious responses, when you push yourself to keep going and see what else is there.

    Prompts for Processing Difficult Emotions (1 through 10)

    Prompts for Processing Difficult Emotions (1 through 10)

    These mental health journal prompts are designed to help you sit with and process the emotions that are hardest to face. They are not about fixing anything – they are about understanding and being with what is.

    Prompt 1 – What emotion have I been avoiding lately, and what might happen if I let myself feel it fully?

    We all have emotions we try to push away – anger, grief, jealousy, fear. This prompt invites you to name the one you have been sidestepping and explore what it might be trying to tell you. Often, the emotions we avoid the most carry the most important messages. Anger might be telling you that a boundary has been crossed. Grief might be telling you that something mattered deeply. Give yourself permission to go there.

    Prompt 2 – Write about a time recently when you felt truly hurt. What happened, and what did you need in that moment that you did not get?

    This prompt helps you identify unmet needs – one of the most important skills for emotional health. When we are hurt, we often focus on what the other person did wrong. But underneath the hurt is always a need that was not met – a need for respect, for safety, for understanding, for love. Naming that need is the first step toward being able to ask for it or give it to yourself.

    Prompt 3 – If my body could talk right now, what would it say to me?

    Our bodies hold emotions that our minds have not processed yet. Tension in your shoulders, a knot in your stomach, heaviness in your chest – these are all your body’s way of communicating. This prompt invites you to listen. And for those of us with complicated body relationships, it can be a powerful way to start seeing your body as an ally rather than an adversary.

    Prompt 4 – What am I most ashamed of right now, and what would I say to a friend who was carrying this same shame?

    Shame thrives in secrecy and silence. Writing about it – even just for your own eyes – breaks that cycle. And the second part of this prompt, where you imagine offering compassion to a friend with the same shame, helps you access kindness for yourself that might otherwise feel out of reach.

    Prompt 5 – Write a letter to the version of yourself who was going through the hardest time in your life. What does she need to hear?

    This prompt can be deeply emotional, so approach it with care. Writing to your past self from the safety of the present allows you to process old pain with the wisdom and compassion you have now. You can acknowledge what was hard, validate the feelings, and offer the comfort that nobody else provided at the time.

    Prompt 6 – What is one thing I am angry about that I have not allowed myself to express?

    Women are often socialized to suppress anger, to be “nice” and “agreeable.” But unexpressed anger does not disappear – it turns inward and becomes depression, anxiety, or physical symptoms. Give your anger a voice on the page. You do not have to act on it. You just need to let it exist.

    Prompt 7 – What story am I telling myself about my current situation, and is it the whole truth?

    We all construct narratives about our lives, and those narratives shape how we feel. “I am stuck.” “Nothing ever works out for me.” “I always mess things up.” This prompt invites you to examine your current narrative and ask whether it is a fact or a story. What evidence supports it? What evidence contradicts it? Is there a more complete, more compassionate story available?

    Prompt 8 – What loss am I still grieving, even if it happened a long time ago?

    Grief does not follow a timeline. You might still be mourning a relationship, a dream, a version of yourself, or a life you thought you would have. This prompt gives you permission to grieve on your own schedule, without judgment. There is no expiration date on loss.

    Prompt 9 – Write about something you feel guilty about. Then write about what you would need to forgive yourself.

    Guilt can be useful when it motivates us to repair harm. But chronic guilt – the kind that just loops and loops without resolution – is corrosive. This prompt helps you distinguish between guilt that has served its purpose and guilt that has overstayed its welcome. And it begins the process of self-forgiveness, which is one of the most healing things you can do.

    Prompt 10 – How am I really doing right now? Not the version I tell other people, but the real answer.

    Sometimes the most powerful journal prompt is the simplest one. Most of us have a rehearsed answer for “how are you?” This prompt asks you to drop the script and tell the truth, even if the truth is messy or contradictory or hard to put into words. Let yourself be seen, even if you are the only one watching.

    Prompts for Reducing Anxiety and Finding Calm (11 through 20)

    Prompts for Reducing Anxiety and Finding Calm (11 through 20)

    These mental health journal prompts specifically target anxiety – the racing thoughts, the what-ifs, the constant feeling that something bad is about to happen. Writing is one of the most effective tools for anxiety because it forces your spinning mind to slow down and deal with one thought at a time.

    Prompt 11 – List everything that is currently worrying you, no matter how small or irrational it seems.

    A brain dump. Get it all out. Every worry, every concern, every nagging thought. When anxious thoughts are swirling in your head, they feel infinite and unmanageable. When they are on paper, you can actually see that there are a finite number of them – and some of them are probably not as big as they felt when they were competing for space in your mind.

    Prompt 12 – For each worry on your list, write down whether it is something you can control, something you can influence, or something that is completely outside your control.

    This follow-up to Prompt 11 is incredibly clarifying. When you sort your worries into these three categories, you quickly see where your energy is best spent – and where you are burning energy on things you cannot change. For the things outside your control, practice the mantra: “I release what I cannot control.”

    Prompt 13 – What is the worst case scenario I am afraid of, and what would I actually do if it happened?

    Anxiety often keeps us stuck in vague, formless dread. This prompt forces you to get specific. And here is what usually happens: when you actually think through the worst case scenario, you realize that you would survive it. You would cope. It would be hard, but you would find a way. That realization is incredibly calming.

    Prompt 14 – Write about a time when you were anxious about something that turned out fine.

    Your brain has a negativity bias – it remembers the times things went wrong and forgets the countless times your anxiety was unfounded. This prompt pushes back against that bias. Remind yourself of your track record. How many times has the thing you worried about never actually happened? Probably more times than you can count.

    Prompt 15 – What would today look like if I were not anxious? Describe it in detail.

    This prompt is a gentle visualization exercise. Imagine your day without the weight of anxiety. What would you do differently? How would you move through the world? What would you try? What would you enjoy? This is not about wishing your anxiety away – it is about connecting with the life that exists underneath it, the life that is still possible and waiting for you.

    Prompt 16 – What am I really afraid of underneath this anxiety?

    Anxiety is often a surface emotion that is masking something deeper – fear of rejection, fear of failure, fear of not being enough, fear of being seen. This prompt asks you to dig beneath the anxiety and see what is really driving it. When you name the core fear, it loses some of its power.

    Prompt 17 – List five things I can see, four things I can touch, three things I can hear, two things I can smell, and one thing I can taste right now.

    This is the classic 5-4-3-2-1 grounding technique, adapted for journaling. Writing it down instead of just thinking it adds an extra layer of grounding because you are engaging your motor system and your visual processing. Use this prompt when anxiety is spiking and you need to come back to the present moment quickly.

    Prompt 18 – What is one kind thing I can do for myself in the next hour?

    When anxiety feels overwhelming, the idea of feeling better eventually can seem impossible. But the next hour? You can do something about the next hour. Maybe it is making a cup of tea, stepping outside for five minutes, putting on your favorite playlist, or changing into comfortable clothes. This prompt brings your focus from the terrifying future to the manageable present. Changing into something cozy like a super soft lounge jogger set can genuinely help shift your nervous system.

    Prompt 19 – Write about someone who makes you feel safe. What is it about them that creates that feeling?

    Thinking about safety when you are anxious might seem counterintuitive, but it actually activates your attachment system, which is the body’s natural antidote to the threat system. Write in detail about this person – how they look at you, how they speak to you, what they do that makes you feel held. You can carry this image with you as an internal resource for anxious moments.

    Prompt 20 – What would I tell my anxious thoughts if they were a scared child?

    This reframe is beautiful and effective. Your anxious thoughts are not your enemy – they are a part of you that is trying to protect you, just doing it in a way that is not helpful anymore. If those thoughts were a scared child, you would not yell at them or try to silence them. You would get down on their level, acknowledge their fear, and gently reassure them. Try that approach in your journal.

    Prompts for Building Self-Awareness and Clarity (21 through 30)

    Prompts for Building Self-Awareness and Clarity (21 through 30)

    These mental health journal prompts are about understanding yourself better – your patterns, your values, your dreams, and your needs. They are less about processing pain and more about building a clear, honest relationship with who you are.

    Prompt 21 – What does my ideal ordinary day look like, from morning to night?

    Not your dream vacation or your fantasy life – your ideal regular Tuesday. What time do you wake up? What do you eat? How do you spend your time? Who are you with? This prompt reveals what you actually value, not what you think you should value. And it can show you which parts of your current routine are aligned with your true self and which parts are not.

    Prompt 22 – What am I tolerating in my life that I should not be?

    We all have things we put up with – the friend who drains our energy, the cluttered space we walk past every day, the job that does not value us, the clothes that do not fit right. This prompt asks you to get honest about what you are tolerating and consider what it would take to change it. Sometimes just naming a toleration is the first step to eliminating it.

    Prompt 23 – When do I feel most like myself? What am I doing, and who am I with?

    This prompt helps you identify the conditions under which you thrive. When you know what makes you feel most alive and authentic, you can deliberately create more of those conditions in your life. It is like reverse-engineering happiness.

    Prompt 24 – What is a belief I held five years ago that I no longer believe? What changed?

    This prompt is a powerful reminder that you are always growing and evolving. The beliefs that feel so solid and permanent right now may shift dramatically in the next few years. This awareness can make you hold your current beliefs a little more lightly and be more open to change.

    Prompt 25 – What boundary do I need to set that I have been avoiding?

    Boundaries are one of the most important tools for mental health, and they are also one of the hardest things to implement. This prompt gives you space to identify a needed boundary and explore what is stopping you from setting it. Is it fear of conflict? Fear of rejection? People-pleasing? Understanding the obstacle is the first step to overcoming it.

    Prompt 26 – Write about a compliment you received that you had trouble accepting. Why was it hard to believe?

    The compliments we deflect often reveal our deepest insecurities. If someone said you were beautiful and you immediately thought “they are just being nice,” that tells you something about what you believe about your appearance. This prompt invites you to explore why certain positive messages do not land and what it would take to let them in.

    Prompt 27 – What would change in my life if I truly believed I was enough, exactly as I am right now?

    This is a big one. Really sit with it. If the voice that says “not good enough, not thin enough, not smart enough, not successful enough” went completely quiet – what would be different? What would you stop doing? What would you start doing? How would you walk through the world? This prompt gives you a glimpse of the freedom that is possible when you release the need for external validation.

    Prompt 28 – List three things you are proud of that have nothing to do with how you look or what you have accomplished.

    We are so conditioned to measure our worth by appearance and achievement that we forget all the other things that make us valuable. Your kindness. Your ability to make people laugh. Your resilience. Your curiosity. The way you love. This prompt reconnects you with the parts of yourself that have nothing to do with productivity or beauty standards.

    Prompt 29 – What does my inner critic sound like, and whose voice is it really?

    Your inner critic did not come out of nowhere. It is usually a composite of critical voices from your past – a parent, a teacher, a bully, a culture. When you identify whose voice your inner critic is actually using, you realize that it is not your truth. It is someone else’s judgment that you internalized. And that means you have the power to give it back.

    Prompt 30 – Write a letter to your future self, one year from now. What do you hope she knows, feels, and believes?

    This final prompt is about hope and intention. It is a way to set a compass heading for your inner life. What emotional growth do you hope for? What beliefs do you hope to have released? What relationship do you hope to have with yourself? Write it as a love letter to the woman you are becoming. And then put it somewhere safe and read it in a year.

    Tips for Making Journaling a Sustainable Habit

    Tips for Making Journaling a Sustainable Habit

    Having 30 beautiful mental health journal prompts is wonderful, but they only work if you actually use them. Here are some tips for making journaling a lasting part of your self-care routine.

    Choose a Consistent Time

    Choose a Consistent Time

    Journaling works best when it becomes a habit, and habits need consistency. Pick a time that works for your life – first thing in the morning, during your lunch break, or before bed are all popular choices. Morning journaling can set a positive tone for the day. Evening journaling can help you process what happened and release the day before sleep. There is no best time – just the time that you will actually do it.

    Lower the Bar

    Lower the Bar

    If writing for 15 minutes feels like too much, write for five. If five minutes feels like too much, write for two. If opening your journal feels like too much, just set it on the table and look at it. Seriously. The hardest part is starting. Once you begin, you will usually write more than you planned. But even on the days when you write one sentence, you showed up. That counts.

    Invest in Tools You Love

    You are more likely to journal if you enjoy the physical experience of it. A beautiful leather journal that feels good in your hands, a pen that writes smoothly, a cozy spot that feels like yours – these things matter more than you might think. They transform journaling from a chore into a ritual.

    Do Not Reread Right Away

    Do Not Reread Right Away

    Some journal entries are for processing, not for rereading. If you wrote something raw and emotional, let it sit. You can come back to it in a week or a month with fresh eyes and new perspective. Or you can never read it again. The healing happened in the writing itself.

    Mix It Up

    Mix It Up

    You do not have to answer a deep mental health journal prompt every single day. Some days, a simple gratitude list is perfect. Some days, doodling is what you need. Some days, writing an angry rant is the right medicine. Let your journal be a flexible, living thing that adapts to what you need in the moment.

    Consider a Digital Option Too

    Consider a Digital Option Too

    If you travel a lot or want your journal always accessible, consider keeping a digital journal on your phone or tablet alongside a physical one. Apps designed for therapeutic journaling can offer additional features like mood tracking and pattern recognition that add another layer to your practice. A tablet with a stylus can give you the handwriting experience digitally.

    There is also something powerful about looking back at old journal entries months or years later. You see patterns you could not see in the moment. You see growth you did not realize was happening. You see that the things that felt like the end of the world were actually the beginning of something new. Your journal becomes a record of your resilience, and that is an incredibly valuable thing to have.

    Whatever prompt you choose today, remember this: there is no wrong way to journal. Messy is fine. Repetitive is fine. Contradictory is fine. Your journal is a mirror of your inner world, and inner worlds are complex, beautiful, and always changing. Give yourself permission to put it all on the page – the light stuff and the heavy stuff, the clarity and the confusion, the hope and the fear. It all belongs there. And so do you.

    Key Takeaways

    • Journaling activates your prefrontal cortex and reduces amygdala activity, helping your brain shift from reactive to reflective mode – making it one of the most effective tools for mental health.
    • You do not need to answer all 30 prompts in order – pick the one that resonates with you right now and write for at least 10 to 15 minutes to get past surface-level answers.
    • The prompts are organized into three categories: processing difficult emotions, reducing anxiety, and building self-awareness – so you can choose based on what you need most.
    • Making journaling sustainable is about lowering the bar, choosing a consistent time, and investing in tools you actually enjoy using.
    • There is no wrong way to journal – messy, repetitive, and contradictory entries are all part of the process and equally valuable for your mental health.

    Frequently Asked Questions

    How often should I use mental health journal prompts?

    There is no strict rule, but research suggests that journaling three to four times per week provides significant mental health benefits. Daily journaling can be wonderful if it works for your schedule, but even once or twice a week is valuable. The most important thing is consistency over time rather than frequency. A shorter, regular practice is more beneficial than long, sporadic sessions. Listen to your needs and adjust accordingly.

    What if journaling brings up really intense emotions that feel overwhelming?

    It is completely normal for deep journal prompts to bring up strong emotions. If you feel overwhelmed, put down the pen and use a grounding technique – focus on your senses, take slow deep breaths, or step outside for fresh air. You can always come back to the prompt later. If journaling consistently triggers intense distress, consider working with a therapist who can help you process these emotions in a supported environment. Journaling can complement therapy beautifully but is not a replacement for professional support when needed.

    Should I keep my journal private or share it with someone?

    Your journal should be private by default. The power of journaling comes from the freedom to be completely honest without filtering yourself for an audience. When you know no one else will read it, you give yourself permission to write things you might not say out loud. That said, you might occasionally choose to share a specific entry with a therapist, partner, or trusted friend if it helps you communicate something important. The key is that sharing should always be your choice, never an obligation.

    Can journaling replace therapy for mental health?

    Can journaling replace therapy for mental health?

    Journaling is a wonderful self-care tool, but it is not a substitute for professional mental health treatment when that is needed. Think of journaling as one tool in your mental health toolkit – it works beautifully alongside therapy, medication, social support, and other interventions. If you are experiencing persistent anxiety, depression, trauma symptoms, or any mental health concern that is interfering with your daily life, please reach out to a mental health professional. Journaling can enhance your therapeutic work, but it should not be your only resource during serious mental health challenges.

  • The 30-Day Walking for Weight Loss Plan That Actually Gets Results

    The 30-Day Walking for Weight Loss Plan That Actually Gets Results

    Why Walking Is the Most Underrated Weight Loss Tool

    Why Walking Is the Most Underrated Weight Loss Tool

    The 30-day walking for weight loss plan you are about to follow is not a flashy fitness trend or an extreme challenge designed for people who already work out five days a week. This is a progressive, realistic plan built specifically for plus-size women who want to start moving more, feel stronger, and see real changes in their bodies and energy levels. Walking is the exercise that actually sticks, and this plan is designed to prove it.

    Here is why walking deserves more respect than it gets. Research published in the Journal of Exercise Nutrition and Biochemistry found that women who walked 50 to 70 minutes three times per week for 12 weeks reduced their body fat, waist circumference, and BMI significantly. Another study in the British Journal of Sports Medicine showed that brisk walking produces comparable fat loss results to running when the energy expenditure is matched. You do not need to run to lose weight. You need to walk consistently and progressively.

    Walking has several advantages over more intense forms of exercise, especially for plus-size women. It is low impact, meaning less stress on your joints, knees, and back. It does not require gym equipment or a membership. It can be done anywhere – your neighborhood, a park, a shopping mall, a treadmill at home. And perhaps most importantly, it does not leave you so exhausted and sore that you dread doing it again tomorrow. Sustainability is the secret ingredient in any weight loss plan, and walking is the most sustainable exercise on the planet.

    The plan ahead gradually increases your walking time, pace, and intensity over four weeks. You will start where you are – not where someone else thinks you should be – and build from there. Every day has a specific goal, but every day also has built-in flexibility because real life does not pause for a fitness plan. If you miss a day, you pick up where you left off. No guilt, no starting over, no quitting.

    Before You Start – Setting Yourself Up for Success

    Check in With Your Body

    Check in With Your Body

    If you have been mostly sedentary, have joint issues, or have any health conditions that might be affected by increased physical activity, talk to your doctor before starting. This is not about getting permission to move your body – your body is yours and you are allowed to move it. It is about making sure you have any information you need to move safely and comfortably. If you have knee issues, your doctor might suggest a knee brace. If you have plantar fasciitis, you might need specific shoes. This information helps, not hinders.

    Get Your Baseline

    Get Your Baseline

    Before day one, go for a walk at your normal comfortable pace and time how long you can walk before you feel like you need to stop or slow down significantly. This is your baseline. Maybe it is 10 minutes. Maybe it is 25 minutes. Maybe it is 5 minutes. Whatever it is, that number is your starting point and there is absolutely nothing wrong with it. Write it down. You are going to be amazed by how much that number changes over 30 days.

    Choose Your Walking Route

    Choose Your Walking Route

    Pick two to three routes near your home or workplace. Having options prevents boredom and gives you choices based on weather, time, and energy levels. A flat neighborhood loop is perfect for easy days. A route with some gentle hills adds natural intensity for harder days. An indoor option – a mall, a big box store, a treadmill – gives you a backup for bad weather days. Knowing your routes in advance removes one more decision from your daily routine, which makes it easier to just go.

    Schedule Your Walks

    Schedule Your Walks

    Put your walks on your calendar like appointments. Research consistently shows that people who schedule their workouts are significantly more likely to complete them than people who try to fit them in when they have time. Morning walkers tend to be the most consistent because they get it done before the day’s demands pile up, but the best time to walk is whatever time you will actually do it. If that is your lunch break, after dinner, or during your kid’s soccer practice, that is perfect.

    Track Your Progress

    Track Your Progress

    You need a way to track your walks. A simple notebook works. A step counter on your phone works. A fitness tracker works. The method does not matter as much as the habit of recording what you did. Tracking creates accountability, shows your progress over time, and gives you concrete evidence that you are changing even on days when the scale does not move.

    Week 1 – Building Your Foundation (Days 1 through 7)

    Week 1 - Building Your Foundation (Days 1 through 7)

    The goal of week one is simple – build the habit. You are not trying to break records or push limits. You are teaching your body and brain that walking is now a regular part of your routine. Consistency matters more than intensity this week.

    Day 1 – Your Starting Walk

    Day 1 - Your Starting Walk

    Walk for 15 minutes at a comfortable, conversational pace. This means you could hold a full conversation with someone without getting winded. If 15 minutes feels like too much, walk for whatever your baseline time was and work up from there. If 15 minutes feels easy, resist the urge to do more. You are building a habit, not proving anything.

    Day 2 – Same Pace, Same Time

    Day 2 - Same Pace, Same Time

    Walk for 15 minutes again at the same comfortable pace. Same route or a different one. Notice how your body feels compared to yesterday. Some people feel a little stiff after day one. That is completely normal and typically resolves within the first few minutes of walking.

    Day 3 – Add Five Minutes

    Day 3 - Add Five Minutes

    Walk for 20 minutes at a comfortable pace. This small increase is enough to challenge you slightly without feeling overwhelming. If you need to slow down during the last five minutes, slow down. Finishing the walk matters more than maintaining a specific speed.

    Day 4 – Rest or Light Movement

    Day 4 - Rest or Light Movement

    Rest days are part of the plan, not a break from the plan. Your muscles repair and strengthen during rest. Today, you can take a complete rest day or do some gentle stretching, a slow stroll around your neighborhood, or some light housework. Listen to your body.

    Day 5 – 20 Minutes With Purpose

    Walk for 20 minutes, but this time, focus on your posture. Stand tall with your shoulders back and down, engage your core by gently pulling your belly button toward your spine, and swing your arms naturally. Good posture while walking increases calorie burn, reduces back pain, and strengthens your core without any extra effort.

    Day 6 – 20 Minutes Exploring

    Day 6 - 20 Minutes Exploring

    Walk for 20 minutes on a different route than you have been using. A new route keeps your brain engaged, makes the walk feel shorter, and prevents the boredom that kills walking plans. If possible, find a route with some natural beauty – a park, a tree-lined street, a path near water.

    Day 7 – Your First Longer Walk

    Day 7 - Your First Longer Walk

    Walk for 25 minutes at your comfortable pace. This is ten minutes more than day one, which is a meaningful increase. Pay attention to how you feel at minute 25 compared to how you felt at minute 15 on day one. You are already building endurance.

    Week 1 Summary

    Week 1 Summary

    Total walking days: 6 (with 1 rest day). Total walking time: approximately 115 minutes. Average daily walk: about 19 minutes. You have established the habit, built a small amount of endurance, and proven to yourself that you can do this consistently. That is a massive win.

    Week 2 – Increasing Duration and Pace (Days 8 through 14)

    Week two builds on your foundation by gradually increasing both how long and how fast you walk. You are ready for more, and your body is adapting. This week introduces the concept of pace variation, which is one of the most effective tools for increasing calorie burn during walks.

    Day 8 – 25 Minutes With a Speed Check

    Walk for 25 minutes. During the middle ten minutes, pick up your pace slightly. You should still be able to talk, but you might need to pause between sentences to breathe. This slightly faster pace is often called a brisk walk, and it is where the real calorie burning happens. Slow back down for the last five minutes as a cool-down.

    Day 9 – 25 Minutes Steady

    Walk for 25 minutes at a steady, moderate pace. Not your slowest, not your fastest, just a consistent moderate effort. Focus on keeping your stride even and your breathing rhythmic. Consistency of effort teaches your cardiovascular system to work more efficiently.

    Day 10 – 30 Minutes With Intervals

    Day 10 - 30 Minutes With Intervals

    Walk for 30 minutes. After a five-minute warm-up at an easy pace, alternate between two minutes of brisk walking and two minutes of comfortable walking. Repeat this pattern until you reach the 25-minute mark, then cool down with five minutes of easy walking. These intervals boost your heart rate and increase calorie burn without requiring sustained high-intensity effort.

    Day 11 – Rest or Gentle Movement

    Day 11 - Rest or Gentle Movement

    Your second rest day of the plan. Use it wisely. Gentle stretching, foam rolling, or a slow walk of 10 minutes or less is fine. Your body needs this recovery time especially as you start increasing intensity.

    Day 12 – 30 Minutes Steady Brisk

    Day 12 - 30 Minutes Steady Brisk

    Walk for 30 minutes at a brisk pace for the entire walk (after a brief warm-up). Brisk walking typically means 3 to 3.5 miles per hour, but do not worry about exact speed. The talk test is your best guide – you can talk but you would rather not sing. This is the pace that research links most strongly to weight loss and cardiovascular improvement.

    Day 13 – 30 Minutes With Hills

    Day 13 - 30 Minutes With Hills

    Walk for 30 minutes on a route that includes some incline. Hills naturally increase your effort level, engage your glutes and hamstrings more than flat walking, and boost calorie burn significantly. If you do not have hills nearby, use a treadmill with a 2 to 4 percent incline, or find a parking garage and walk the ramps. Slow your pace on the uphills as needed. The incline is doing the work.

    Day 14 – 35 Minutes at Your Choice

    Day 14 - 35 Minutes at Your Choice

    Walk for 35 minutes. You choose the pace and the route. This is about building your longest walk yet while also giving you ownership of the process. Some people prefer a steady moderate pace. Others prefer intervals. Some want hills. Choose what felt best this week and do more of it.

    Week 2 Summary

    Week 2 Summary

    Total walking days: 6 (with 1 rest day). Total walking time: approximately 175 minutes. Average daily walk: about 29 minutes. You have increased your walking time by over 50 percent from week one and introduced pace variation and incline. Your cardiovascular fitness is noticeably improving.

    Week 3 – Adding Intensity and Variety (Days 15 through 21)

    By week three, you are a walker. The habit is forming, your endurance has grown, and your body is ready for more challenge. This week introduces longer walks, more structured intervals, and some strength elements that amplify your results.

    Day 15 – 35 Minutes With Power Intervals

    Day 15 - 35 Minutes With Power Intervals

    Walk for 35 minutes. After a five-minute warm-up, do one minute of your fastest sustainable walking pace followed by two minutes of moderate recovery pace. Repeat this pattern for 25 minutes, then cool down for five minutes. These power intervals are where significant calorie burn happens because your heart rate spikes during the fast portions and stays elevated during recovery.

    Day 16 – 35 Minutes Steady With Arm Movement

    Day 16 - 35 Minutes Steady With Arm Movement

    Walk for 35 minutes at a brisk, steady pace. Add intentional arm movement – pump your arms in a controlled, 90-degree angle motion as you walk. This turns your walk into a full-body exercise by engaging your upper body, core, and increasing your overall calorie burn by 5 to 10 percent. It also naturally increases your walking speed without feeling like you are pushing harder with your legs.

    Day 17 – 40 Minutes Easy Pace

    Walk for 40 minutes at a comfortable, easy pace. This is a recovery-paced walk with a longer duration. The purpose is to build endurance and burn calories through duration rather than intensity. Put on a podcast, call a friend, or just enjoy being outside. Not every walk needs to be hard to be effective.

    Day 18 – Rest Day

    Day 18 - Rest Day

    Full rest or very gentle activity. At this point in the program, rest days are essential for preventing overuse injuries and allowing your muscles, joints, and connective tissue to adapt to the increased demands you are placing on them. Use this day to stretch, take a bath, or do some gentle yoga.

    Day 19 – 35 Minutes With Walking Lunges

    Day 19 - 35 Minutes With Walking Lunges

    Walk for 35 minutes at a brisk pace. At the 10-minute mark and again at the 20-minute mark, stop and do 10 walking lunges (5 per leg). If lunges are uncomfortable for your knees, substitute 30 seconds of marching in place with high knees. Adding these brief strength bursts to your walk increases muscle engagement and boosts your metabolic rate for hours after your walk ends.

    Day 20 – 40 Minutes With Hills

    Day 20 - 40 Minutes With Hills

    Walk for 40 minutes on your hilliest available route. By now, hills that felt challenging in week two should feel more manageable. Push yourself to maintain a brisker pace on the inclines than you did last week. Your legs are stronger, your heart is more efficient, and you can handle more.

    Day 21 – 45 Minutes at Your Pace

    Day 21 - 45 Minutes at Your Pace

    Walk for 45 minutes. This is your longest walk yet and a milestone worth celebrating. Choose your pace and route based on how your body feels. If you are energized, make it a brisk, challenging walk. If you are tired from the week, keep it moderate and steady. Either way, 45 minutes of walking is an incredible achievement and a major jump from where you started.

    Week 3 Summary

    Week 3 Summary

    Total walking days: 6 (with 1 rest day). Total walking time: approximately 230 minutes. Average daily walk: about 38 minutes. You are now walking nearly double your week-one average and incorporating intensity techniques that significantly boost calorie burn. Most people notice tangible changes in their energy levels, sleep quality, and how their clothes fit by this point.

    Week 4 – Pushing Your Limits (Days 22 through 30)

    Week 4 - Pushing Your Limits (Days 22 through 30)

    The final week is nine days instead of seven, giving you a full 30-day experience. This week challenges you with your longest walks, your most structured intervals, and culminates in a walk that would have seemed impossible on day one. You are ready for this.

    Day 22 – 40 Minutes Power Walk

    Day 22 - 40 Minutes Power Walk

    Walk for 40 minutes at the briskest pace you can sustain for the full duration. This is not a sprint. This is your fastest comfortable walking pace maintained consistently. Focus on posture, arm swing, and heel-to-toe foot placement. A sustained power walk at this duration burns significant calories and builds serious cardiovascular endurance.

    Day 23 – 40 Minutes Pyramid Intervals

    Day 23 - 40 Minutes Pyramid Intervals

    Walk for 40 minutes using pyramid intervals. After a five-minute warm-up, walk fast for one minute, recover for one minute, walk fast for two minutes, recover for one minute, walk fast for three minutes, recover for two minutes, then work back down – fast for two minutes, recover for one minute, fast for one minute, recover for one minute. Repeat the pyramid if time allows, then cool down. Pyramids prevent boredom and push your cardiovascular system in a progressive, manageable way.

    Day 24 – 45 Minutes Steady

    Day 24 - 45 Minutes Steady

    Walk for 45 minutes at a moderate to brisk pace. This is a workhorse walk – not your hardest, not your easiest, just solid consistent effort. These steady-state walks are the backbone of any walking program and are responsible for the majority of your cumulative calorie burn over 30 days.

    Day 25 – Rest Day

    Your final scheduled rest day. You have earned it. Stretch, foam roll, hydrate, and mentally prepare for the final push. Look back at your tracking log and appreciate how far you have come. Your day-one baseline probably feels laughable now, and that is exactly the point.

    Day 26 – 45 Minutes With Strength Stops

    Walk for 45 minutes at a brisk pace. At the 15 and 30-minute marks, stop and do a mini strength circuit: 10 squats, 10 calf raises, and a 20-second wall sit (use a bench, tree, or wall). These strength additions build the muscles that support your walking form and increase your resting metabolic rate, meaning you burn more calories even when you are not walking.

    Day 27 – 50 Minutes Easy Exploration

    Day 27 - 50 Minutes Easy Exploration

    Walk for 50 minutes at an easy, enjoyable pace on a route you have never tried before or rarely use. A new environment stimulates your brain, makes the time fly, and reminds you that walking is not just exercise – it is a way to explore and enjoy the world around you. This is your longest walk yet, and the easy pace makes it achievable and pleasant.

    Day 28 – 45 Minutes With Maximum Intervals

    Day 28 - 45 Minutes With Maximum Intervals

    Walk for 45 minutes. After a five-minute warm-up, alternate between 90 seconds of your absolute fastest walking pace and 90 seconds of recovery. This 1:1 interval ratio is demanding and incredibly effective for calorie burn and cardiovascular improvement. Continue this pattern for 35 minutes, then cool down for five minutes. Your fastest walking pace by day 28 is significantly faster than your fastest pace on day 10, which shows real fitness improvement.

    Day 29 – 50 Minutes Moderate Steady

    Day 29 - 50 Minutes Moderate Steady

    Walk for 50 minutes at a moderate, steady pace. This walk is about endurance and reflection. Think about how far you have come, how much stronger you feel, and what you want your walking practice to look like going forward. This is not the end of your walking journey – it is the foundation for everything that comes next.

    Day 30 – Your Celebration Walk (60 Minutes)

    Day 30 - Your Celebration Walk (60 Minutes)

    Walk for 60 minutes. One full hour. Choose your favorite route, your favorite pace, and your favorite playlist or podcast. This walk is a celebration of 30 days of commitment, consistency, and growth. Four weeks ago, you walked for 15 minutes. Today, you are walking for a full hour. That transformation is extraordinary, and it happened because you showed up day after day.

    Week 4 Summary

    Week 4 Summary

    Total walking days: 8 (with 1 rest day). Total walking time: approximately 410 minutes (6 hours and 50 minutes). Average daily walk: about 51 minutes. You are now a strong, consistent walker who can comfortably walk for an hour. Your cardiovascular fitness, endurance, and calorie-burning capacity have transformed.

    Essential Gear for Comfortable Walking

    Essential Gear for Comfortable Walking

    Walking Shoes

    Walking Shoes

    Your shoes are the single most important investment for a walking program. For plus-size walkers, proper footwear is even more critical because your feet support more weight with every step. Look for shoes with ample cushioning (especially in the heel and forefoot), a wide toe box that does not squeeze your toes, sturdy arch support, and a sole that provides good shock absorption.

    The Nike Air Monarch IV is a classic walking shoe that comes in wide and extra-wide widths with excellent cushioning. For women who need maximum support, the Brooks Addiction Walker 2 is a podiatrist-recommended walking shoe available in wide widths that provides exceptional stability and motion control.

    Replace your walking shoes every 300 to 500 miles, or roughly every three to six months of regular walking. Worn-out shoes lose their cushioning and support, which leads to foot, knee, and hip pain. If you notice aches that were not there before, your shoes might be the culprit.

    Moisture-Wicking Clothing

    Moisture-Wicking Clothing

    Cotton absorbs sweat and stays wet, which causes chafing, discomfort, and temperature regulation problems. Moisture-wicking fabrics pull sweat away from your skin and dry quickly, keeping you comfortable during longer walks. The plus-size moisture-wicking walking sets on Amazon are affordable and come in sizes up to 5X.

    Anti-Chafe Products

    Anti-Chafe Products

    Thigh chafing is real, it is painful, and it can derail your walking plan faster than anything else. Prevention is simple. Apply an anti-chafe balm or cream to your inner thighs, under your arms, and anywhere skin rubs together before every walk. Products like Body Glide or Megababe Thigh Rescue create a invisible barrier that prevents friction. Some walkers also wear bike shorts or slip shorts under their walking clothes for additional protection.

    A Supportive Sports Bra

    A Supportive Sports Bra

    Walking creates repetitive motion that can be uncomfortable without proper breast support, especially for larger cup sizes. A high-impact sports bra is not necessary for walking – a medium-support encapsulation bra that separates and supports each breast individually tends to be more comfortable than a compression style. The All in Motion sports bras at Target offer excellent support in extended sizes at an accessible price point.

    A Water Bottle

    A Water Bottle

    Hydration during walks longer than 20 minutes matters, especially in warm weather. A handheld water bottle or a waist-mounted hydration belt keeps water accessible without interrupting your stride. Aim for 8 ounces of water every 20 minutes during your walk, and more in heat or humidity.

    Nutrition Tips to Maximize Your Walking Results

    Fuel Before Your Walk

    Fuel Before Your Walk

    Walking on a completely empty stomach can leave you lightheaded and low-energy, while walking on a full stomach causes cramps and discomfort. The sweet spot is a small snack 30 to 60 minutes before your walk – something with simple carbohydrates and a little protein. A banana with a tablespoon of peanut butter, a small handful of trail mix, or a piece of toast with avocado gives you enough energy to power through your walk without weighing you down.

    Recover After Your Walk

    Recover After Your Walk

    Eat a balanced meal or snack within an hour of finishing your walk. This helps your muscles recover and prevents the ravenous hunger that leads to overeating later. Include protein (to repair muscles), complex carbohydrates (to replenish energy stores), and some healthy fat (to keep you satisfied). A Greek yogurt parfait with fruit and granola, a turkey and avocado wrap, or a smoothie with protein powder, banana, and spinach are all excellent post-walk options.

    Focus on Whole Foods

    Focus on Whole Foods

    You do not need to follow a strict diet to see results from your walking plan. Focus on eating more whole, minimally processed foods – vegetables, fruits, lean proteins, whole grains, and healthy fats – and less of the processed, high-sugar, high-sodium foods that make up the modern diet. Small, sustainable nutrition improvements paired with consistent walking produce better long-term results than any crash diet.

    Stay Hydrated All Day

    Stay Hydrated All Day

    Hydration affects everything from your energy levels to your appetite to your walking performance. Aim for half your body weight in ounces of water per day, plus additional water during and after your walks. If plain water bores you, add sliced fruit, cucumber, or a splash of lemon juice. Herbal teas count toward your water intake too.

    Do Not Eat Back All Your Calories

    One common mistake is using exercise as an excuse to eat significantly more. Walking burns real calories – a 200-pound woman walking briskly for 45 minutes burns approximately 300 to 350 calories. But that does not mean you should add 350 calories to your daily intake. A small post-walk snack is fine. Rewarding every walk with a large treat undermines your calorie deficit and stalls weight loss. This is not about deprivation – it is about awareness.

    Troubleshooting Common Walking Challenges

    Troubleshooting Common Walking Challenges

    Shin Splints

    Shin Splints

    Pain along the front of your lower leg during or after walking is usually shin splints, caused by doing too much too soon, worn-out shoes, or walking on hard surfaces. Treatment includes rest, ice for 15 minutes several times a day, and stretching your calves. Prevention means increasing your walking time gradually (this plan is designed with that in mind), wearing proper shoes, and walking on softer surfaces like tracks or trails when possible.

    Knee Pain

    Knee Pain

    If your knees hurt during or after walking, check your shoes first – worn-out or unsupportive shoes are the most common culprit. Second, check your walking form – taking too-long strides puts extra stress on your knees. Shorter, quicker steps are easier on your joints. Third, consider your route – constant downhill walking is harder on knees than flat or uphill walking. If knee pain persists, a knee support sleeve can provide compression and stability during walks.

    Boredom

    Boredom

    Walking the same route at the same time every day gets monotonous. Combat boredom by rotating routes, listening to podcasts, audiobooks, or music, walking with a friend or family member, joining a walking group, or using a walking app that gamifies your routes. Some walkers track their cumulative miles and plot them on a virtual journey – like walking the equivalent distance from one city to another.

    Weather

    Weather

    Bad weather is the most common excuse for skipping walks. Have an indoor backup plan ready at all times. A treadmill, a large store or mall, an indoor track, or even walking in place at home while watching TV are all valid alternatives. You do not lose progress because you walked indoors instead of outdoors. You lose progress by not walking at all.

    Time Constraints

    Time Constraints

    On days when you genuinely cannot fit in the full walk, do a shorter version rather than skipping entirely. Even a 10-minute walk maintains your habit and provides real health benefits. Research shows that three 10-minute walks throughout the day provide similar health benefits to one continuous 30-minute walk. Split your walk into morning, lunch, and evening segments if that is what fits your schedule.

    Lack of Motivation

    Lack of Motivation

    Motivation is unreliable. It comes and goes depending on your mood, energy, sleep, and stress levels. Do not depend on motivation – depend on routine. Set out your walking clothes the night before. Put your shoes by the door. Tell someone your walking plan so they can check in on you. On the days you least want to walk, commit to just five minutes. Most of the time, once you start, you will keep going.

    What Happens After Day 30

    What Happens After Day 30

    What You Can Expect to Have Achieved

    What You Can Expect to Have Achieved

    After 30 days of consistent walking, most people experience measurable changes. These typically include weight loss of 3 to 8 pounds (depending on starting weight and nutrition), reduced waist circumference, improved cardiovascular endurance, better sleep quality, higher daily energy levels, improved mood and reduced stress, and better blood pressure and blood sugar numbers. Your body has adapted to regular movement, and it now expects and craves it.

    Keep the Momentum Going

    Day 30 is not a finish line – it is a launching pad. You have built a walking habit, and now you get to decide what to do with it. You have several options for continuing your progress. You can repeat the plan with increased baseline times, starting at 25 minutes instead of 15 and scaling up from there. You can maintain your week-four walking schedule as your regular routine, walking 45 to 60 minutes most days. You can add other forms of exercise alongside your walking, like strength training, swimming, or yoga. Or you can train for a specific goal, like a 5K walk, a charity walk event, or hitting 10,000 steps daily.

    Beyond the Scale

    Weight loss may have been your initial motivation, and that is completely valid. But after 30 days, many women discover that the non-scale benefits of walking are even more valuable. The mental clarity, the stress relief, the quiet time with your own thoughts, the sense of accomplishment, the physical strength, the improved sleep – these benefits last long after you reach any number on the scale. Walking changes your body, but it also changes your relationship with movement. And that relationship is worth more than any number.

    The fitness trackers with plus-size bands on Amazon can help you track your continued progress beyond the 30-day plan, monitoring steps, distance, heart rate, and calories burned throughout the day.

    Key Takeaways

    • Walking is one of the most effective and sustainable forms of exercise for weight loss, especially for plus-size women, because it is low impact, free, accessible, and produces real results when done consistently.
    • This 30-day plan progressively builds from 15-minute walks to 60-minute walks, gradually increasing duration, pace, and intensity so your body adapts without injury or burnout.
    • Proper gear – especially supportive walking shoes and moisture-wicking clothing – prevents pain, chafing, and discomfort that can derail your progress.
    • Rest days are built into the plan because recovery is when your body gets stronger, and skipping rest leads to overuse injuries.
    • Small, sustainable nutrition changes paired with consistent walking produce better long-term results than any extreme diet.
    • After 30 days, most women experience 3 to 8 pounds of weight loss plus significant improvements in energy, sleep, mood, and cardiovascular fitness.
    • Day 30 is a launching pad, not a finish line – use the habit you have built to keep walking, add new exercises, or train for specific goals.

    Frequently Asked Questions

    How many calories does walking burn for a plus-size woman?

    How many calories does walking burn for a plus-size woman?

    Calorie burn depends on your weight, walking speed, terrain, and duration. As a general estimate, a 200-pound woman walking at a brisk pace (3.5 mph) burns approximately 350 to 400 calories per hour. A 250-pound woman burns approximately 430 to 480 calories per hour at the same pace. Heavier bodies burn more calories during the same activity because they are moving more mass. Walking on hills or at faster speeds increases these numbers further. Over the course of this 30-day plan, total calorie burn from walking alone is approximately 7,000 to 12,000 calories, which translates to 2 to 3.5 pounds of fat loss from walking alone before accounting for any nutritional changes.

    Can I walk every day or do I need rest days?

    You can walk every day if your body feels good, but scheduled rest days are included in this plan for important reasons. Rest allows your muscles, joints, and connective tissue to recover and adapt. Without rest, you risk overuse injuries like shin splints, plantar fasciitis, and joint inflammation that could sideline you for weeks. If you feel great on rest days and want to move, keep it light – a gentle 10-minute stroll, some stretching, or easy yoga. Save your full-effort walks for the scheduled walking days.

    Is walking enough for weight loss or do I need to diet too?

    Is walking enough for weight loss or do I need to diet too?

    Walking alone can produce weight loss, especially if you were previously sedentary, because it creates a calorie deficit through increased activity. However, combining walking with mindful eating produces significantly better results. You do not need to follow a strict diet. Focus on eating more whole foods, watching portion sizes, staying hydrated, and reducing highly processed snacks and sugary drinks. The combination of regular walking and moderate nutritional improvements is the most sustainable and effective approach to lasting weight loss.

    What if I miss a few days during the 30-day plan?

    Missing days does not mean you failed or need to start over. Life happens – illness, bad weather, family emergencies, exhausting work days. If you miss one day, simply do that day’s walk tomorrow and shift the plan by one day. If you miss several days, go back to the last day you completed and pick up from there. The plan is designed to be flexible. Completing it in 35 or 40 calendar days still gives you the same progressive benefit as completing it in exactly 30. Consistency over time matters far more than perfection.

    Should I walk on a treadmill or outside?

    Both are effective. Outdoor walking offers natural terrain variation, fresh air, sunlight (which helps vitamin D production and mood), and changing scenery that reduces boredom. Treadmill walking offers climate control, consistent surfaces, precise speed and incline control, and convenience. The best choice is whichever one you will do consistently. Many successful walkers use both – outdoor walks when the weather cooperates and treadmill walks when it does not. If you primarily use a treadmill, set the incline to at least 1 percent to simulate the natural resistance of outdoor walking.

  • The 30-Day Mirror Confidence Challenge – A Step-by-Step Plan for Body Acceptance

    The 30-Day Mirror Confidence Challenge – A Step-by-Step Plan for Body Acceptance

    Let us be honest for a moment. How do you feel when you catch your reflection? If your first instinct is to look away, to zero in on the parts of your body you have been taught to dislike, or to avoid mirrors altogether, you are not alone. So many of us have spent years absorbing messages that told us our bodies were problems to be solved. But what if you could rewire that response? What if, in just 30 days, you could build a mirror confidence challenge practice that helps you see yourself with kindness instead of criticism?

    This is not about forcing yourself to love every inch of your body overnight. That kind of pressure is just another form of perfectionism dressed up in self-help language. Instead, this 30-day mirror confidence challenge is about building a slow, steady, and sustainable path toward body acceptance. It is about replacing the automatic negativity with something gentler, something truer, and something that actually serves you.

    Whether you are a size 14 or a size 34, whether you have always struggled with your reflection or are just going through a rough patch, this challenge meets you exactly where you are. No toxic positivity. No before-and-after photos. Just you, your mirror, and a daily practice that thousands of women have used to shift their mindset in ways they never thought possible.

    Why a Mirror Confidence Challenge Can Transform Your Relationship With Your Body

    The mirror confidence challenge is not some trendy internet dare. It is rooted in actual psychological principles. Exposure therapy, one of the most well-researched techniques in cognitive behavioral therapy, works by gradually and repeatedly exposing someone to something they avoid or fear. For many plus-size women, mirrors have become a source of anxiety, and this challenge uses a similar principle to gently desensitize that response.

    Research published in the journal Body Image found that mirror exposure exercises – where participants spent structured time looking at their bodies with guided neutral or positive commentary – significantly reduced body dissatisfaction over time. Participants reported feeling less anxious around mirrors, less preoccupied with perceived flaws, and more able to appreciate their bodies as they are.

    But here is the part that research alone cannot capture: the feeling of looking at yourself and not flinching. The quiet power of being able to get dressed in the morning without a wave of self-criticism. The freedom of walking past a store window and not automatically sucking in your stomach. These shifts are subtle, but they change the texture of your entire day.

    This mirror confidence challenge works because it is progressive. You are not being asked to stand naked in front of a full-length mirror on Day 1 and recite affirmations. Instead, you are building up to it, layer by layer, at a pace that respects your emotional bandwidth.

    Before You Begin – Setting Yourself Up for Success

    Before you start your 30-day mirror confidence challenge, take a few minutes to set yourself up for the best possible experience. This is not about perfection – it is about intention.

    Choose Your Mirror

    Choose Your Mirror

    Pick a mirror that you will use consistently throughout the challenge. Ideally, this should be a full-length mirror in a private space where you feel safe and uninterrupted. If you do not own a full-length mirror, a bathroom mirror works perfectly fine for the first two weeks. You can always upgrade later.

    If you want to invest in a good mirror for this challenge, a full-length floor mirror with a sturdy frame is a great option. Look for one with good lighting – avoid mirrors in dim corners or ones that distort your image. You deserve to see yourself clearly.

    Set Your Time

    Set Your Time

    Each daily exercise takes between 3 and 10 minutes. Choose a consistent time – maybe after your morning shower, during your skincare routine, or right before bed. Consistency is more important than duration. Three minutes every day beats twenty minutes once a week.

    Get a Journal

    Get a Journal

    You will want somewhere to jot down your thoughts after each session. This does not need to be fancy. A simple notebook, the notes app on your phone, or a guided self-love journal all work beautifully. The act of writing helps solidify the shifts you are making internally.

    Tell Someone You Trust

    Tell Someone You Trust

    Accountability matters. Tell a friend, a partner, a therapist, or an online community that you are doing this. You do not have to share details – just the fact that you are working on something meaningful for yourself. Having someone check in on you can make the difference between finishing and fading out around Day 12.

    Week One – Days 1 Through 7 – The Foundation Phase

    The first week of the mirror confidence challenge is gentle by design. You are simply building the habit of spending intentional time with your reflection. No big emotional asks. Just showing up.

    Day 1 – The Neutral Gaze

    Day 1 - The Neutral Gaze

    Stand in front of your mirror for three minutes. You can be fully clothed – whatever makes you comfortable. Your only goal is to look at your face. Not to evaluate it, not to pick it apart, just to look. Notice your eye color, the shape of your brows, the curve of your lips. If critical thoughts come up, acknowledge them and let them pass. You are practicing neutral observation.

    Day 2 – Three Nice Things About Your Face

    Day 2 - Three Nice Things About Your Face

    Same position as yesterday, but today, name three things about your face that you appreciate. These do not have to be things you love – just things you can acknowledge. Maybe it is that your eyes crinkle when you smile. Maybe it is the freckles across your nose. Write them down afterward.

    Day 3 – Smile at Yourself

    Day 3 - Smile at Yourself

    This sounds silly, and that is exactly the point. Stand in front of your mirror and genuinely smile at yourself for one full minute. Not a forced grin – try to think of something that makes you happy and let it reach your face. Notice how your reflection changes. Most of us never see ourselves smiling naturally. It can be surprisingly emotional.

    Day 4 – Hands and Arms Appreciation

    Day 4 - Hands and Arms Appreciation

    Expand your gaze to include your hands and arms. Look at them in the mirror. Think about everything they do for you – the meals they prepare, the people they hug, the work they accomplish. Say out loud: “These hands carry me through my life.” Write down any feelings that come up.

    Day 5 – The Outfit Check

    Put on an outfit you feel good in. Stand in front of the mirror and take in the full picture – not just the parts you usually fixate on, but the whole image. Notice colors, textures, how the fabric moves. If you need outfit inspiration that makes you feel amazing, the Torrid Studio Knit collection is designed to drape beautifully on curves.

    Day 6 – Gratitude for Function

    Day 6 - Gratitude for Function

    Today, stand in front of the mirror and focus on what your body does rather than how it looks. Your legs carry you. Your lungs breathe without you asking. Your heart has been beating since before you were born. Spend three minutes thanking your body for its function. Write down five things your body did for you today.

    Day 7 – Weekly Check-In

    Take ten minutes to journal about your first week. What felt easy? What felt hard? Did any emotions surprise you? Rate your comfort level with the mirror from 1 to 10 – this is your baseline. You will check in again at the end of each week.

    Week Two – Days 8 Through 14 – The Observation Phase

    Now that you have built the habit, Week Two introduces deeper observation. You are learning to see your body as a whole rather than a collection of problem areas.

    Day 8 – Full Body Scan With Neutrality

    Day 8 - Full Body Scan With Neutrality

    Wearing something comfortable – leggings and a tank top, a soft robe, whatever feels right – stand in front of the mirror and slowly scan your body from head to toe. Your goal is neutral description, like a painter studying their subject. “I have round shoulders. My stomach is soft. My thighs are strong.” No judgment words – just observation.

    Day 9 – The Posture Experiment

    Day 9 - The Posture Experiment

    Stand in front of the mirror and try three different postures: shoulders hunched, neutral standing, and shoulders back with chin slightly lifted. Notice how each posture changes not just how you look but how you feel. Body confidence lives in your posture as much as in your thoughts. For extra support during the day, a plus-size posture corrector can be a helpful reminder to stand tall.

    Day 10 – Soft Belly Day

    This is often the hardest day of the challenge, and it is placed early in Week Two intentionally. Stand in front of the mirror, place your hands on your belly, and breathe. Do not suck in. Do not tense up. Let your belly be soft. Spend three minutes with your hands there, breathing normally. If tears come, let them. This is where so much of our body shame lives, and giving it gentleness instead of tension is a radical act.

    Day 11 – Movement in the Mirror

    Put on your favorite song and move in front of the mirror. Dance, sway, stretch – whatever feels natural. Watch your body in motion. Bodies in motion look different from bodies standing still, and there is something beautiful about seeing yourself move freely. Let it be fun. Let it be silly. Let it be whatever it wants to be.

    Day 12 – The Touch Exercise

    Day 12 - The Touch Exercise

    While looking in the mirror, gently touch different parts of your body with kindness. Run your hands down your arms, across your shoulders, over your hips. Touch your body the way you would comfort a friend. This exercise builds a connection between physical sensation and visual input, rewiring the way your brain processes your reflection.

    Day 13 – Wearing Something You Have Been Avoiding

    Pull out that piece of clothing you bought but never wore. The sleeveless top. The bodycon dress. The shorts. Put it on and stand in front of the mirror for five minutes. You do not have to love how it looks. You just have to see yourself in it and sit with whatever comes up. If the item does not fit comfortably, that is information about the clothing, not about your body.

    Day 14 – Weekly Check-In

    Journal again. Rate your comfort level from 1 to 10. Compare it to last week. Write about any shifts you have noticed – in front of the mirror and outside of it. Many women report that by this point, they are catching themselves being less critical throughout the day, not just during the challenge.

    Week Three – Days 15 Through 21 – The Affirmation Phase

    Week Three is where you start actively replacing critical self-talk with affirmations. By now, you have built enough comfort with the mirror that adding positive language will feel more natural than it would have on Day 1.

    Day 15 – Your First Mirror Affirmation

    Day 15 - Your First Mirror Affirmation

    Look into your own eyes in the mirror and say: “I am allowed to take up space.” Say it three times. The first time might feel awkward. The second time might feel forced. The third time, something might shift. Write about the experience afterward.

    Day 16 – Body Part Affirmations

    Day 16 - Body Part Affirmations

    Choose three body parts – including one you struggle with – and give each one a compliment out loud. “My arms are strong and capable.” “My thighs carry me through every adventure.” “My belly is soft, and that is perfectly fine.” Specificity matters here. Generic affirmations slide off. Specific ones stick.

    Day 17 – The Letter to Your Body

    Day 17 - The Letter to Your Body

    Write a short letter to your body as if it were a friend you had been neglecting. Apologize for the harsh words. Acknowledge what it has been through. Promise to try harder. Then read the letter out loud to your reflection. This exercise is borrowed from therapeutic practice and is one of the most powerful days of the entire challenge.

    Day 18 – Affirmations in Your Skincare Routine

    Today, combine your mirror time with your skincare routine. As you apply each product, say something kind to the skin you are caring for. When you apply moisturizer to your face, say “I am taking care of you.” When you apply body lotion, say “You deserve softness.” A nourishing body cream like Sol de Janeiro Brazilian Bum Bum Cream turns this into a sensory experience that reinforces the positive message.

    Day 19 – The Power Pose

    Social psychologist Amy Cuddy popularized the idea of power posing – standing in an expansive, confident posture to shift your internal state. Today, try three power poses in front of the mirror: hands on hips (the Wonder Woman), arms raised in a V (the victory pose), and hands clasped behind your head with elbows wide. Hold each for two minutes. Notice how your reflection looks powerful and commanding. That is you. That has always been you.

    Day 20 – Affirmations for Your Younger Self

    Day 20 - Affirmations for Your Younger Self

    Look at your reflection and imagine your younger self standing beside you – the little girl who first learned to feel bad about her body. What would you say to her? Speak those words out loud to the mirror. Many women find this exercise deeply healing because it connects the dots between old wounds and current self-perception.

    Day 21 – Weekly Check-In

    Day 21 - Weekly Check-In

    Rate your comfort level again. By Week Three, most women report a 3 to 5 point increase from their baseline. Journal about the affirmation exercises. Which ones felt powerful? Which felt difficult? What surprised you about hearing your own voice say kind things about your body?

    Week Four – Days 22 Through 30 – The Celebration Phase

    The final phase is about anchoring everything you have built. These exercises are designed to be joyful, celebratory, and deeply affirming. You have done the hard work. Now it is time to enjoy the results.

    Day 22 – The Photo Shoot

    Set up your phone on a timer or prop it against the mirror and take photos of yourself. Not for social media – for you. Try different poses, different angles, different expressions. Look at the photos afterward and pick three that make you smile. Save them somewhere you can easily access them on hard days.

    Day 23 – Dress Up Day

    Day 23 - Dress Up Day

    Put together your most confident outfit. Do your hair. Do your makeup if that is your thing. Put on jewelry. Go all out. Then stand in front of the mirror and take yourself in. This is you at your most put-together, and the goal is to see the full picture with appreciation. A statement accessory like a chunky gold chain necklace can add that extra boost of confidence to your look.

    Day 24 – Bare Skin Day

    If you are ready – and only if you are ready – spend time in front of the mirror in minimal clothing. Underwear, a bralette, whatever your comfort level allows. This is not about being brave or pushing past your limits. It is about meeting your body without the armor of clothing and offering it the same kindness you have been practicing all month.

    Day 25 – The Compliment Collection

    Day 25 - The Compliment Collection

    Write down every compliment you can remember receiving about your appearance, your energy, your presence – anything. Then read them to your reflection. Sometimes we dismiss compliments the moment we hear them. Today, you are going to let them land.

    Day 26 – Mirror Dancing – The Full Version

    Remember Day 11? Today, you are doing it again, but bigger. Create a playlist of songs that make you feel unstoppable. Dance in front of the mirror for at least three songs. Watch yourself move. Let yourself be mesmerized by your own body in motion. This is freedom.

    Day 27 – Share Your Journey

    Day 27 - Share Your Journey

    If it feels right, share something about your experience. Post on social media, tell a friend, write a blog post, or simply text someone you love and tell them about this challenge. Vulnerability shared becomes strength multiplied.

    Day 28 – Create Your Personal Affirmation

    Day 28 - Create Your Personal Affirmation

    Using everything you have learned about yourself over the past 27 days, write one personal affirmation that resonates deeply with you. Not something generic from the internet – something that speaks directly to your journey. Write it on a sticky note and put it on your mirror. This is your anchor.

    Day 29 – The Forgiveness Exercise

    Day 29 - The Forgiveness Exercise

    Look in the mirror and say: “I forgive myself for every unkind thing I have ever thought about you.” Say it as many times as you need to. Some women say it once and feel complete. Others need to repeat it for five minutes before it starts to sink in. There is no right way. There is only your way.

    Day 30 – The Celebration

    Day 30 - The Celebration

    You did it. Stand in front of your mirror one final time – for now – and simply say “Thank you.” Thank your body for carrying you through this challenge. Thank yourself for showing up every day. Thank the mirror for being a tool for healing instead of harm. Then do something wonderful for yourself. Take a bath, buy yourself flowers, order that gorgeous satin robe set from Savage X Fenty you have been eyeing, or simply sit with the quiet pride of having completed something meaningful.

    How to Handle Difficult Days During the Challenge

    How to Handle Difficult Days During the Challenge

    Let us be real – not every day of this mirror confidence challenge will feel good. Some days you will stand in front of the mirror and the old critical voice will be louder than anything else. Some days you will cry. Some days you will want to skip. Here is what to do when that happens.

    Lower the Bar, Do Not Drop It

    If a day’s exercise feels too intense, scale it back. Instead of a full body scan, just look at your hands. Instead of saying affirmations out loud, whisper them. Instead of five minutes, do one. The goal is not to complete each exercise perfectly – it is to maintain the habit of showing up. A scaled-back practice still counts.

    Name the Voice

    When critical thoughts come up, it helps to externalize them. Some women name their inner critic – “Oh, there goes Karen again, telling me my thighs are too big.” This creates distance between you and the thought. You are not your inner critic. You are the person who is brave enough to challenge it.

    Write It Out

    Write It Out

    If a session brings up big emotions, write them down immediately. Do not try to analyze or fix them. Just get them out of your body and onto paper. This is one reason the journal component of this challenge is so important. It gives your feelings somewhere to go besides back into your body as tension and shame.

    Reach Out

    Reach Out

    If a day feels particularly heavy, text the person you told about this challenge. You do not have to explain everything – just say “Today was hard” and let someone hold that with you. Body acceptance work can surface deep stuff, and you do not have to carry it alone.

    Remember Why You Started

    Remember Why You Started

    On the hardest days, come back to your why. Maybe you started because you are tired of dreading getting dressed. Maybe you started because you want your daughter to see a woman who likes her reflection. Maybe you started because you deserve peace with your body after decades of war. Whatever your reason, it is enough. It is more than enough.

    What Happens After the 30 Days Are Over

    What Happens After the 30 Days Are Over

    The mirror confidence challenge does not end on Day 30. It simply shifts from a structured program to a sustainable practice. Here is how to maintain the gains you have made.

    Keep the Mirror Time

    Continue spending at least one minute per day in intentional mirror time. This can be during your skincare routine, while getting dressed, or as a standalone practice. The key word is intentional – you are choosing to look at yourself with presence rather than rushing past your reflection on autopilot.

    Update Your Affirmation

    Update Your Affirmation

    Every few weeks, check in with your personal affirmation. Does it still resonate? Does it need updating? As you grow, your affirmation should grow with you. Some women keep a running list and rotate through them.

    Build a Body-Positive Environment

    Build a Body-Positive Environment

    Your mirror work is most effective when supported by a body-positive environment. Curate your social media feeds to include diverse body types. Follow plus-size creators who celebrate their bodies without apology. Read books like “The Body Is Not an Apology” by Sonya Renee Taylor or body-positive book collections available on Amazon . Surround yourself with images and messages that reinforce what you are building in front of the mirror.

    Dress for Joy, Not Hiding

    Dress for Joy, Not Hiding

    One of the most practical outcomes of this challenge is a shift in how you get dressed. Many women report that after 30 days, they start reaching for clothes that make them feel good rather than clothes that hide their bodies. If your wardrobe needs a refresh to match your new mindset, brands like Universal Standard and Eloquii offer beautiful, well-made pieces designed for curvy bodies.

    Consider Professional Support

    Consider Professional Support

    If this challenge surfaced deep-seated body image issues, trauma around your appearance, or symptoms of disordered eating, please consider working with a therapist who specializes in body image. This challenge is a wonderful starting point, but it is not a substitute for professional support when you need it. Organizations like the National Eating Disorders Association (NEDA) offer free resources and referrals.

    The 30-day mirror confidence challenge is not magic. It will not erase years of internalized fatphobia overnight. But it will crack the door open. It will show you that another way of seeing yourself is possible. And once that door is open, even just a crack, the light that comes through can change everything.

    You deserve to look at your reflection and feel peace. Not perfection. Not forced positivity. Just peace. And that starts with 30 days, a mirror, and the willingness to try.

    Key Takeaways

    • The 30-day mirror confidence challenge uses principles from exposure therapy to gradually build a healthier relationship with your reflection, moving through foundation, observation, affirmation, and celebration phases.
    • Starting with neutral observation rather than forced positivity makes the practice sustainable and prevents the challenge from feeling overwhelming or fake.
    • Difficult days are normal and expected – scaling back the exercise is always better than skipping it entirely.
    • Combining mirror work with journaling, supportive community, and a body-positive environment amplifies the results beyond what mirror time alone can achieve.
    • The real goal is not to love every part of your body but to reach a place of peace and acceptance where your reflection no longer triggers shame or avoidance.

    Frequently Asked Questions

    Do I have to do the mirror confidence challenge every single day without missing one?

    No. Life happens, and missing a day does not erase your progress. If you miss a day, simply pick up where you left off the next day. What matters most is the overall pattern of showing up, not achieving a perfect streak. Some women take 35 or 40 days to complete the 30 exercises, and the results are just as meaningful.

    What if I start crying during one of the exercises?

    What if I start crying during one of the exercises?

    Tears are a completely normal and healthy response during this challenge, especially during exercises like the soft belly day or the letter to your body. Crying means something is moving through you. Let it happen, write about it afterward, and be extra gentle with yourself for the rest of the day. If the emotions feel overwhelming or unmanageable, consider reaching out to a therapist for additional support.

    Can I do this challenge with a friend or partner?

    Absolutely. Many women find it helpful to do the challenge alongside a friend, checking in daily or weekly to share their experiences. However, the actual mirror exercises should be done privately. Body image work is deeply personal, and you need the freedom to be vulnerable without an audience. Share your reflections afterward, but keep the mirror time just for you.

    I have a history of eating disorders. Is this challenge safe for me?

    Mirror exposure can be powerful, and for individuals with a history of eating disorders, it should ideally be done under the guidance of a therapist who specializes in body image and eating disorders. This challenge is designed for general body acceptance work, not clinical treatment. If you have an active eating disorder or are in early recovery, please consult with your treatment team before starting.

    Will this challenge help me lose weight?

    This challenge is not about weight loss. It is about changing your relationship with your body as it is right now. Many women find that when they stop fighting their bodies and start caring for them, their overall health behaviors naturally improve – but weight loss is not the goal, the metric, or the measure of success here. The measure of success is how you feel when you look in the mirror on Day 30 compared to Day 1.

  • 20 Stress Relief Activities You Can Do in Under 10 Minutes

    20 Stress Relief Activities You Can Do in Under 10 Minutes

    Why Quick Stress Relief Matters

    Why Quick Stress Relief Matters

    Stress does not wait for a convenient time to show up. It hits you in the middle of a workday, during your commute, before an important meeting, after a tough conversation, or at 2 AM when your brain decides to replay every embarrassing moment from the last decade. You cannot always take an hour-long yoga class or schedule a spa day when stress strikes. What you can do is have a collection of stress relief activities that work in 10 minutes or less.

    Quick stress relief is not a substitute for long-term stress management strategies – those matter too. But having tools that work in the moment can prevent a stressful situation from spiraling into a full-blown anxiety attack, an emotional meltdown, or a physical stress response that affects your entire day.

    The science behind these techniques is solid. When you are stressed, your sympathetic nervous system activates your fight-or-flight response, flooding your body with cortisol and adrenaline. Quick stress relief activities work by activating your parasympathetic nervous system – the “rest and digest” system – which counteracts the stress response and brings your body back to baseline.

    Here are 20 proven stress relief activities, each designed to take 10 minutes or less, organized by category so you can find what works best for your situation.

    Breathing-Based Stress Relief Activities

    Breathing-Based Stress Relief Activities

    Breathing techniques are the fastest way to activate your parasympathetic nervous system. They work anywhere, require no equipment, and can produce noticeable results in as little as 60 seconds.

    1. Box Breathing (4 Minutes)

    1. Box Breathing (4 Minutes)

    Breathe in for 4 counts. Hold for 4 counts. Breathe out for 4 counts. Hold for 4 counts. Repeat for 4 minutes. This technique is used by Navy SEALs to manage stress in high-pressure situations. If it works in combat, it can work during your meeting with your manager.

    2. The 4-7-8 Technique (5 Minutes)

    2. The 4-7-8 Technique (5 Minutes)

    Breathe in through your nose for 4 counts. Hold your breath for 7 counts. Exhale through your mouth for 8 counts. The extended exhale is the key – it directly stimulates your vagus nerve, which is the main highway of your parasympathetic nervous system. Do 4 to 8 cycles.

    3. Physiological Sigh (1 Minute)

    This is the fastest breathing technique backed by neuroscience. Take a quick double inhale through your nose – one normal breath immediately followed by a shorter sharp breath that fully inflates your lungs. Then do one long, slow exhale through your mouth. Repeat 2-3 times. Stanford researchers found this technique reduces stress more effectively than traditional meditation in just one minute.

    4. Belly Breathing (5 Minutes)

    4. Belly Breathing (5 Minutes)

    Place one hand on your chest and one on your belly. Breathe in slowly through your nose, directing the air into your belly so your lower hand rises while your upper hand stays still. Exhale slowly through your mouth. This type of diaphragmatic breathing is one of the most natural stress relief activities because it mimics the way you breathe when you are fully relaxed.

    Physical Movement Stress Relievers

    Physical Movement Stress Relievers

    Movement burns off stress hormones and releases endorphins. You do not need a gym membership or workout clothes – these activities work in whatever you are wearing, wherever you are.

    5. Power Walk (10 Minutes)

    5. Power Walk (10 Minutes)

    Walk briskly for 10 minutes – around the block, up and down stairs, through a parking lot. Moving your body at a pace slightly faster than comfortable increases blood flow, oxygenates your brain, and shifts your focus from internal worries to your physical environment. If you can get outside, the combination of movement plus fresh air doubles the benefit.

    6. Progressive Muscle Relaxation (7 Minutes)

    6. Progressive Muscle Relaxation (7 Minutes)

    Starting from your toes and working up, tense each muscle group for 5 seconds, then release for 10 seconds. Feet, calves, thighs, glutes, stomach, chest, hands, arms, shoulders, neck, face. By the time you reach your face, your entire body will feel noticeably more relaxed. This technique works because physical tension and mental stress are deeply connected – releasing one releases the other.

    7. Shake It Off (3 Minutes)

    Stand up and literally shake your body. Start with your hands, then arms, then shoulders, then hips, then legs. Shake vigorously for 2-3 minutes. This might feel silly, but it is based on how animals release stress after a threatening encounter. Your body stores stress as tension, and shaking releases it physically.

    8. Desk Stretching (5 Minutes)

    8. Desk Stretching (5 Minutes)

    Roll your neck in slow circles. Stretch your arms overhead. Twist gently at the waist. Roll your shoulders backward. Stretch your wrists and fingers. These simple stretches release the tension that accumulates in your body during long periods of sitting, especially if you carry stress in your neck, shoulders, or back.

    9. Dance Break (5 Minutes)

    9. Dance Break (5 Minutes)

    Put on your favorite upbeat song and dance like nobody is watching. Close your office door, put in your earbuds, or wait until you are alone – then move. Dancing combines physical movement with music and joy, making it one of the most effective and enjoyable stress relief activities available. You will feel ridiculous and you will feel better. Both things can be true.

    Sensory Grounding Techniques

    Sensory Grounding Techniques

    When stress pulls you into your head – into worries about the future or regrets about the past – sensory grounding brings you back to the present moment. These techniques use your five senses to anchor you in the here and now.

    10. The 5-4-3-2-1 Technique (5 Minutes)

    10. The 5-4-3-2-1 Technique (5 Minutes)

    Name 5 things you can see. 4 things you can touch. 3 things you can hear. 2 things you can smell. 1 thing you can taste. This technique interrupts anxious thought spirals by forcing your brain to focus on sensory input rather than mental chatter. It works remarkably well for acute anxiety and panic.

    11. Cold Water Splash (2 Minutes)

    11. Cold Water Splash (2 Minutes)

    Splash cold water on your face and wrists, or hold an ice cube in your hands. The cold activates your dive reflex, which is a built-in stress-reduction mechanism that slows your heart rate and lowers your blood pressure. This is one of the fastest ways to interrupt a stress response in your body.

    12. Aromatherapy (5 Minutes)

    12. Aromatherapy (5 Minutes)

    Certain scents have been scientifically shown to reduce stress and anxiety. Lavender, chamomile, bergamot, and peppermint are among the most effective. Keep an essential oil roller or a scented hand cream at your desk for quick access. A lavender essential oil roller is portable enough to carry in your bag for on-the-go stress relief.

    13. Warm Beverage Ritual (5 Minutes)

    13. Warm Beverage Ritual (5 Minutes)

    Make a cup of tea or warm water with lemon. Hold the warm mug in both hands. Focus on the warmth, the aroma, and the taste as you sip slowly. This simple ritual combines warmth (which relaxes muscles), hydration (which supports brain function), and mindfulness (which interrupts stress patterns). Chamomile tea has the added benefit of containing compounds that genuinely reduce anxiety.

    Creative and Mindful Activities

    Creative and Mindful Activities

    Engaging your brain in a creative or focused activity can redirect mental energy away from stress and toward something productive or soothing.

    14. Journaling Brain Dump (10 Minutes)

    14. Journaling Brain Dump (10 Minutes)

    Set a timer for 10 minutes and write everything that is on your mind without filtering, editing, or censoring. Get every worry, frustration, and anxious thought out of your head and onto paper. You are not trying to solve anything – you are trying to externalize the mental clutter so it stops circling inside your head. Many people find that once the thoughts are on paper, they feel significantly lighter. A stress relief journal with guided prompts makes this even easier.

    15. Coloring (10 Minutes)

    15. Coloring (10 Minutes)

    Adult coloring books exist for a reason – the repetitive, focused activity of coloring engages the parts of your brain that manage motor function and creativity while quieting the parts that generate worry and anxiety. Keep a small coloring book and a few colored pencils in your desk drawer for stressful moments.

    16. Guided Meditation (5-10 Minutes)

    16. Guided Meditation (5-10 Minutes)

    You do not need to be a meditation expert to benefit from a quick guided session. Apps like Calm, Headspace, and Insight Timer have thousands of short meditations designed specifically for stress relief. Put in your earbuds, close your eyes, and let someone else guide your brain to a calmer place.

    17. Visualization (5 Minutes)

    17. Visualization (5 Minutes)

    Close your eyes and mentally transport yourself to a place that feels safe and peaceful. Maybe it is a beach, a forest, your grandmother’s kitchen, or your favorite cozy spot at home. Engage all your senses – what do you see, hear, smell, and feel in this place? Your nervous system does not fully distinguish between real and imagined experiences, so vivid visualization can genuinely calm your stress response.

    Social and Connection-Based Relief

    Social and Connection-Based Relief

    Human connection is one of the most powerful stress relievers we have access to. Even brief moments of genuine connection can significantly lower cortisol levels.

    18. Call or Text a Friend (5-10 Minutes)

    Reach out to someone who makes you feel good. You do not have to talk about what is stressing you – sometimes just hearing a friendly voice or having a lighthearted exchange is enough to shift your mood. The key is connecting with someone who energizes you, not someone who adds to your stress.

    19. Hug Someone (1 Minute)

    19. Hug Someone (1 Minute)

    Research shows that a 20-second hug releases oxytocin, which directly counteracts cortisol. Hug your partner, your child, your friend, or your pet. If nobody is available, give yourself a hug – cross your arms, squeeze gently, and hold for 20 seconds. Self-hugs have been shown to reduce physical pain and emotional distress.

    20. Pet an Animal (5-10 Minutes)

    20. Pet an Animal (5-10 Minutes)

    If you have a pet, spend a few minutes focused entirely on them. Pet them, talk to them, play with them. Interacting with animals has been repeatedly shown to lower blood pressure, reduce cortisol, and increase serotonin and dopamine. If you do not have a pet, watching animal videos has been shown to produce a milder but still measurable stress-reduction effect. Science says cute animal content is good for you.

    Building a Personal Stress Relief Toolkit

    Building a Personal Stress Relief Toolkit

    The most effective stress management approach is having a variety of tools ready for different situations. Not every technique works in every context, so building a personal toolkit ensures you always have an option available.

    For the Office

    For the Office

    Keep these at your desk: a stress ball or fidget toy, an essential oil roller, a small journal, headphones for guided meditations, and a coloring book. When stress hits during the workday, you have immediate access to multiple coping tools without leaving your desk.

    For On-the-Go

    For On-the-Go

    The breathing techniques and the 5-4-3-2-1 grounding exercise require nothing but your body and can be done anywhere – on a bus, in a waiting room, in a bathroom stall. A discreet anxiety fidget ring is another portable option that looks like regular jewelry but gives you something to channel nervous energy into.

    For Home

    For Home

    At home, you have more options. Dance, take a warm shower, do a full progressive muscle relaxation session, journal, call a friend, or hug your pet. Having a designated “reset spot” in your home – a comfortable chair, a corner with a blanket and candle – can create a Pavlovian association that helps your body start relaxing the moment you sit down.

    Know Your Patterns

    Know Your Patterns

    Pay attention to when stress tends to hit hardest for you. Is it in the morning before work? During afternoon energy dips? Late at night? Knowing your patterns lets you proactively deploy stress relief techniques before the stress becomes overwhelming. Prevention is always easier than reaction.

    Practice When You Are Calm

    Practice When You Are Calm

    Stress relief techniques work better when you have practiced them in a non-stressful state. Try each technique during a calm moment so your body learns the process. Then when stress hits, the technique is familiar and your body knows how to respond. Think of it like a fire drill – you practice so that when the real thing happens, your response is automatic.

    Key Takeaways

    • Quick stress relief activities work by activating your parasympathetic nervous system, counteracting the fight-or-flight stress response.
    • Breathing techniques like box breathing, the 4-7-8 method, and the physiological sigh are the fastest tools, producing results in as little as 60 seconds.
    • Physical movement – walking, dancing, shaking, stretching – burns off stress hormones and releases endorphins.
    • Sensory grounding techniques like the 5-4-3-2-1 method and cold water splash bring you back to the present moment during anxiety spirals.
    • Creative activities like journaling, coloring, and guided meditation redirect mental energy away from stress.
    • Building a personal stress relief toolkit with multiple techniques for different situations ensures you always have a tool available when stress hits.

    Frequently Asked Questions

    Which stress relief activity works the fastest?

    Which stress relief activity works the fastest?

    The physiological sigh – a double inhale followed by an extended exhale – has been shown by Stanford researchers to reduce stress faster than any other single technique, often within just one to three breaths. For a slightly longer intervention, the cold water splash on the face and wrists produces near-immediate results by activating your mammalian dive reflex.

    Can quick stress relief replace therapy or medication?

    Can quick stress relief replace therapy or medication?

    No. These techniques are excellent for managing everyday stress and acute stress moments, but they are not a substitute for professional help if you are dealing with chronic anxiety, clinical depression, PTSD, or other mental health conditions. Think of these as tools in a larger toolkit that might also include therapy, medication, lifestyle changes, and professional support.

    What if none of these techniques seem to work for me?

    Not every technique resonates with every person. Experiment with all of them and pay attention to which ones produce the most noticeable shift in how you feel. Also consider that if stress feels unmanageable despite using these tools, you may benefit from speaking with a mental health professional who can help you develop a more personalized coping strategy.

    How often should I practice stress relief techniques?

    Ideally, incorporate at least one technique into your daily routine as a preventive measure, not just a reactive one. A morning breathing practice, a lunchtime walk, or an evening journaling session can lower your baseline stress level so that when acute stress hits, you are starting from a calmer place and have more capacity to cope.

  • 20 Healthy Dinner Recipes for Weight Loss That the Whole Family Will Love

    20 Healthy Dinner Recipes for Weight Loss That the Whole Family Will Love

    Finding healthy dinner recipes that support your wellness goals AND get a thumbs up from the whole family can feel like searching for a unicorn. Your kids want chicken nuggets. Your partner wants something filling. You want something that does not require an hour of prep after a long day and does not make you feel like you are on a diet. Is it possible to make everyone happy?

    Yes. These 20 healthy dinner recipes for weight loss are proof. Every single one is packed with lean protein, fiber-rich vegetables, and satisfying flavors that make the whole family forget they are eating “healthy food.” Because here is the secret – the best healthy dinners do not taste healthy. They just taste good.

    We have organized these recipes by cooking method so you can choose based on your energy level and schedule. Quick meals for busy weeknights. Sheet pan dinners for minimal cleanup. Slow cooker meals for the days when you need dinner to make itself. And plant-based options for meatless nights. Let us make dinner the easiest part of your day.

    What Makes a Dinner Recipe Good for Weight Management

    What Makes a Dinner Recipe Good for Weight Management

    Before we get to the recipes, let us talk about what makes a dinner genuinely supportive of weight management – because it is not about eating as little as possible.

    A good dinner for weight management has three qualities. First, it is satisfying. If you finish dinner feeling hungry, you will snack all evening and undo any caloric benefit. Satisfaction comes from adequate protein (at least 25 to 30 grams per serving), fiber from vegetables and whole grains, and enough healthy fat to trigger satiety hormones.

    Second, it is nutritionally dense. You want to get maximum nutrition from every calorie. This means choosing whole foods over processed ones, loading up on colorful vegetables, and using herbs and spices for flavor instead of relying on heavy sauces and excessive oil.

    Third, it is sustainable. A healthy dinner recipe only works if you actually make it repeatedly. If it takes 90 minutes and 25 ingredients, it is not sustainable for a weeknight. These recipes prioritize simplicity, accessibility, and realistic prep times because the best healthy dinner is the one you actually cook.

    A well-stocked pantry makes healthy cooking infinitely easier. Having staples like olive oil, garlic, onions, canned tomatoes, broth, whole grains, and basic spices means you are always halfway to a healthy dinner. A spice rack organizer set keeps everything accessible and reminds you to use variety in your cooking.

    Quick and Easy Healthy Dinners – Under 30 Minutes

    Quick and Easy Healthy Dinners - Under 30 Minutes

    1. Lemon Garlic Salmon with Roasted Asparagus

    1. Lemon Garlic Salmon with Roasted Asparagus

    Season salmon fillets with lemon juice, minced garlic, olive oil, salt, and pepper. Place on a baking sheet alongside asparagus spears drizzled with olive oil. Bake at 400 degrees for 12 to 15 minutes. Serve with a side of quinoa or brown rice. Total time: 20 minutes. Per serving: approximately 400 calories, 35g protein.

    2. Turkey Taco Lettuce Wraps

    2. Turkey Taco Lettuce Wraps

    Brown one pound of ground turkey with taco seasoning. Serve in large butter lettuce leaves topped with diced tomatoes, shredded cheese, avocado slices, salsa, and a dollop of Greek yogurt. Total time: 15 minutes. Per serving: approximately 350 calories, 30g protein.

    3. Shrimp Stir-Fry with Vegetables

    3. Shrimp Stir-Fry with Vegetables

    Stir-fry shrimp with broccoli, snap peas, bell peppers, and carrots in a sauce of soy sauce, ginger, garlic, and a touch of honey. Serve over brown rice or cauliflower rice. Total time: 20 minutes. Per serving: approximately 380 calories, 28g protein.

    4. Greek Chicken Bowls

    4. Greek Chicken Bowls

    Season chicken breast with oregano, garlic, lemon, and olive oil. Grill or pan-sear for six to seven minutes per side. Slice and serve over a bowl of brown rice or farro with cucumber, tomatoes, red onion, Kalamata olives, feta cheese, and a drizzle of tzatziki made from Greek yogurt. Total time: 25 minutes. Per serving: approximately 420 calories, 38g protein.

    5. Black Bean Quesadillas with Side Salad

    5. Black Bean Quesadillas with Side Salad

    Fill whole wheat tortillas with mashed seasoned black beans, corn, diced bell pepper, and shredded cheese. Cook in a dry skillet until crispy on both sides. Serve with a big side salad dressed with lime vinaigrette and topped with avocado. Total time: 15 minutes. Per serving: approximately 400 calories, 22g protein.

    One-Pan and Sheet Pan Healthy Dinners

    One-Pan and Sheet Pan Healthy Dinners

    6. Sheet Pan Chicken Sausage with Roasted Vegetables

    6. Sheet Pan Chicken Sausage with Roasted Vegetables

    Slice pre-cooked chicken sausage and toss on a sheet pan with cubed sweet potatoes, Brussels sprouts, and red onion. Drizzle with olive oil and season with garlic powder, smoked paprika, and Italian seasoning. Roast at 425 degrees for 25 minutes. Total time: 30 minutes plus mostly hands-off oven time. Per serving: approximately 380 calories, 25g protein.

    7. One-Pan Tuscan Chicken

    7. One-Pan Tuscan Chicken

    Sear seasoned chicken breasts in a skillet. Remove and add garlic, sun-dried tomatoes, and spinach to the same pan. Pour in a mixture of chicken broth and a splash of cream (or coconut cream for dairy-free). Return the chicken to the pan and simmer for 15 minutes until chicken is cooked through. Serve with crusty whole grain bread or over pasta. Total time: 30 minutes. Per serving: approximately 390 calories, 35g protein.

    8. Sheet Pan Salmon Teriyaki with Broccoli

    8. Sheet Pan Salmon Teriyaki with Broccoli

    Place salmon fillets and broccoli florets on a sheet pan. Brush the salmon with a homemade teriyaki sauce of soy sauce, honey, ginger, and garlic. Roast at 400 degrees for 15 minutes. Serve over brown rice with sesame seeds. Total time: 25 minutes. Per serving: approximately 420 calories, 33g protein.

    9. One-Pan Chicken and Vegetable Skillet

    9. One-Pan Chicken and Vegetable Skillet

    Dice chicken thighs and cook in a skillet with olive oil. Add diced zucchini, bell peppers, cherry tomatoes, and corn. Season with Italian seasoning, garlic, and a squeeze of lemon. Cook until vegetables are tender and chicken is done. Top with fresh basil and Parmesan. Total time: 25 minutes. Per serving: approximately 370 calories, 30g protein.

    10. Sheet Pan Pork Tenderloin with Root Vegetables

    10. Sheet Pan Pork Tenderloin with Root Vegetables

    Season pork tenderloin with Dijon mustard, garlic, rosemary, and thyme. Place on a sheet pan surrounded by cubed butternut squash, parsnips, and carrots. Roast at 400 degrees for 25 to 30 minutes until pork reaches 145 degrees internally. Rest five minutes before slicing. Total time: 35 minutes. Per serving: approximately 380 calories, 32g protein. A reliable instant-read meat thermometer ensures perfect results every time.

    Slow Cooker and Instant Pot Healthy Dinners

    Slow Cooker and Instant Pot Healthy Dinners

    11. Slow Cooker Chicken Tikka Masala

    11. Slow Cooker Chicken Tikka Masala

    Place chicken thighs in the slow cooker with a sauce of canned tomatoes, coconut cream, garam masala, turmeric, cumin, ginger, garlic, and a pinch of cayenne. Cook on low for six hours. Shred the chicken and stir back into the sauce. Serve over brown basmati rice with a side of naan and fresh cilantro. Prep time: 10 minutes. Per serving: approximately 410 calories, 32g protein.

    12. Instant Pot White Chicken Chili

    12. Instant Pot White Chicken Chili

    Combine chicken breasts, white beans, green chilies, chicken broth, corn, onion, garlic, cumin, and oregano in the Instant Pot. Pressure cook for 15 minutes. Shred the chicken and stir in a splash of cream cheese for richness. Top with avocado, cilantro, and a squeeze of lime. Total time: 30 minutes including pressurization. Per serving: approximately 360 calories, 34g protein.

    13. Slow Cooker Beef and Broccoli

    13. Slow Cooker Beef and Broccoli

    Place sliced flank steak in the slow cooker with soy sauce, beef broth, brown sugar (just a tablespoon), garlic, and ginger. Cook on low for five to six hours. Add steamed broccoli florets in the last 30 minutes. Thicken the sauce with a cornstarch slurry. Serve over brown rice. Prep time: 10 minutes. Per serving: approximately 400 calories, 35g protein.

    14. Instant Pot Lentil Soup

    14. Instant Pot Lentil Soup

    Saute onion, carrot, and celery in the Instant Pot on saute mode. Add dried lentils, diced tomatoes, vegetable broth, cumin, turmeric, and smoked paprika. Pressure cook for 12 minutes. Season with lemon juice and serve with crusty bread. Total time: 25 minutes. Per serving: approximately 300 calories, 18g protein.

    15. Slow Cooker Stuffed Pepper Soup

    15. Slow Cooker Stuffed Pepper Soup

    Combine lean ground turkey (browned), diced bell peppers, canned diced tomatoes, tomato sauce, cooked brown rice, chicken broth, Italian seasoning, and garlic in the slow cooker. Cook on low for six hours. Top with a sprinkle of mozzarella. All the flavors of stuffed peppers with none of the assembly work. Prep time: 15 minutes. Per serving: approximately 340 calories, 28g protein.

    Vegetarian and Plant-Based Healthy Dinners

    Vegetarian and Plant-Based Healthy Dinners

    16. Chickpea and Sweet Potato Curry

    16. Chickpea and Sweet Potato Curry

    Saute onion, garlic, and ginger in a pot. Add curry powder, turmeric, and cumin. Add cubed sweet potato, canned chickpeas, canned coconut milk, and vegetable broth. Simmer for 20 minutes until sweet potatoes are tender. Stir in spinach until wilted. Serve over brown rice or with naan. Total time: 30 minutes. Per serving: approximately 380 calories, 14g protein.

    17. Vegetable and Bean Burrito Bowls

    17. Vegetable and Bean Burrito Bowls

    Layer brown rice or cauliflower rice with seasoned black beans, roasted corn, sauteed fajita vegetables, diced tomatoes, shredded lettuce, guacamole, and a drizzle of lime crema (Greek yogurt mixed with lime juice). Total time: 20 minutes. Per serving: approximately 400 calories, 16g protein.

    18. Mushroom and Spinach Stuffed Shells

    18. Mushroom and Spinach Stuffed Shells

    Cook jumbo pasta shells. Mix sauteed mushrooms and spinach with part-skim ricotta, garlic, Parmesan, and Italian seasoning. Stuff the shells, place in a baking dish, cover with marinara sauce and mozzarella. Bake at 375 degrees for 25 minutes. Total time: 40 minutes. Per serving: approximately 370 calories, 20g protein.

    19. Thai Peanut Noodle Stir-Fry

    19. Thai Peanut Noodle Stir-Fry

    Cook whole wheat spaghetti. Stir-fry edamame, shredded cabbage, carrots, and bell peppers. Toss everything with a sauce of peanut butter, soy sauce, lime juice, ginger, garlic, and a splash of sriracha. Top with crushed peanuts and cilantro. Total time: 20 minutes. Per serving: approximately 420 calories, 18g protein.

    20. Mediterranean Baked Falafel Bowls

    20. Mediterranean Baked Falafel Bowls

    Make baked falafel from canned chickpeas blended with parsley, cilantro, garlic, cumin, and flour, formed into patties and baked at 400 degrees for 25 minutes. Serve over a bed of greens with hummus, diced cucumber and tomato, pickled red onion, feta cheese, and a drizzle of tahini dressing. Total time: 35 minutes. Per serving: approximately 390 calories, 16g protein. A compact food processor makes blending the falafel mixture quick and effortless.

    Tips for Making Healthy Dinners a Family Habit

    Tips for Making Healthy Dinners a Family Habit

    Involve Everyone in the Process

    Involve Everyone in the Process

    Kids and partners who help cook are more likely to eat and enjoy the food. Assign age-appropriate tasks – younger kids can wash vegetables and stir, older kids can chop and measure, and partners can handle grilling or prep. Cooking together also creates family bonding time that makes healthy eating feel like a shared value rather than a mandate.

    Start with Familiar Flavors

    If your family is used to takeout and processed food, do not start with quinoa bowls and unfamiliar ingredients. Start with healthier versions of their favorites – homemade chicken tenders, better tacos, lighter mac and cheese. Once the family is on board with the concept, you can gradually introduce new recipes.

    Meal Plan on the Weekend

    Meal Plan on the Weekend

    Spending 15 minutes on Sunday planning the week’s dinners and creating a shopping list eliminates the dreaded 5 PM “what are we eating” panic that leads to takeout orders. Choose three to four recipes for the week, shop once, and know exactly what you are making each night.

    Make Double Batches

    Most of these recipes scale up easily. Making a double batch and freezing half gives you a ready-made healthy dinner for a future busy night. Soups, chilis, stir-fry sauces, and casseroles all freeze beautifully.

    Let Go of Perfection

    Let Go of Perfection

    Not every dinner needs to be Instagram-worthy or nutritionally perfect. Some nights, scrambled eggs with toast and a side of fruit is a perfectly good dinner. The goal is progress, not perfection. Consistently making slightly better food choices over time adds up to significant health benefits – without the stress of trying to be perfect every single night.

    Key Takeaways

    • The best healthy dinner recipes for weight loss are satisfying (at least 25g protein), nutritionally dense (whole foods and vegetables), and sustainable (realistic prep times).
    • These 20 recipes are organized by cooking method – quick meals, sheet pan, slow cooker, and plant-based – so you can choose based on your energy level and schedule.
    • Sheet pan and slow cooker meals are ideal for busy families because they require minimal prep and cleanup while delivering maximum flavor.
    • Making healthy dinners a family habit starts with involving everyone in cooking, starting with familiar flavors, and meal planning on the weekend.
    • Consistency matters more than perfection – making slightly better food choices most nights adds up to significant health improvements over time.

    Frequently Asked Questions

    How many calories should a healthy dinner be for weight management?

    There is no universal answer because calorie needs vary widely based on age, activity level, height, and metabolism. However, for most women pursuing moderate weight management, dinner typically falls in the 350 to 500 calorie range. The recipes in this article range from about 300 to 420 calories per serving, which fits comfortably in most daily calorie targets. Rather than obsessing over exact calorie counts, focus on filling half your plate with vegetables, a quarter with lean protein, and a quarter with whole grains. This naturally creates a balanced, moderate-calorie meal.

    What is the best protein for healthy dinner recipes?

    What is the best protein for healthy dinner recipes?

    The best protein is the one you enjoy and will eat consistently. Chicken breast, turkey, fish (especially salmon and white fish), shrimp, lean pork tenderloin, and eggs are all excellent animal protein choices. For plant-based options, beans, lentils, chickpeas, tofu, tempeh, and edamame provide substantial protein with added fiber. Variety is key – rotating through different proteins throughout the week ensures a diverse nutrient intake and keeps meals interesting.

    Can I eat carbs at dinner and still manage my weight?

    Yes. Carbohydrates are not the enemy of weight management. The type and amount of carbs matter more than their mere presence. Whole grains (brown rice, quinoa, whole wheat pasta), sweet potatoes, and legumes are excellent dinner carbs that provide sustained energy, fiber, and important nutrients. They also make meals more satisfying, which can actually prevent overeating later. The recipes in this article include balanced portions of whole-food carbohydrates alongside protein and vegetables.

    How do I get my kids to eat healthy dinners?

    The biggest mistake parents make is making a separate “kid meal.” Research shows that kids eat better when they eat the same food as the rest of the family. Start with healthier versions of foods they already like – chicken tenders, tacos, pasta, stir-fries. Involve them in cooking. Let them choose between two healthy options rather than giving no choice. Serve new foods alongside familiar ones without pressure. And model the behavior you want – kids who see their parents enjoying vegetables are more likely to try them. Patience is key – it can take 10 to 15 exposures before a child accepts a new food.

  • 15 Red Flags in Dating in 2026 – From a Plus-Size Therapist’s Notebook

    15 Red Flags in Dating in 2026 – From a Plus-Size Therapist’s Notebook


    15 Red Flags in Dating in 2026 – From a Plus-Size Therapist’s Notebook – Curvy Girl Journal

    15 Red Flags in Dating in 2026 – From a Plus-Size Therapist’s Notebook

    By Kira Morales, Lifestyle & Wellness Writer

    In the spring of 2021, I was still working as a middle school counselor in Decatur when a colleague I’ll call Asha sat down across from me in the staff lounge with her tuna sandwich and started telling me about a man she had been seeing for six weeks. She was a size 18, brilliant, sharper than anyone on our team. He had told her, on date three, that he had “never been with a bigger girl before” but that he had always found her “type” more interesting. He said she was lucky to have found someone like him, because “most guys wouldn’t see past it.” He said it like a compliment. She heard it like a compliment. I was holding my coffee and feeling my counselor face do what counselor faces do when they are trying not to broadcast alarm.

    That staff lounge sentence is most of what I want to talk about. In the five years since, working with plus-size friends and clients, I have heard a version of that opener so many times it sounds like a script. The dating advice industry almost never names it. The “red flag” lists online cover the basics. They do not cover what it looks like to date in a body the culture has decided is conditional.

    So this is the list I wish I had handed Asha six weeks earlier. Fifteen patterns, sorted by category, leaning on Gottman, Ramani Durvasula, Esther Perel, and Logan Ury where the research holds. The framing is mine, from eight years sitting across from people whose nervous systems had been telling them what their heads were not ready to admit.

    The body flags, the part the standard lists miss

    1. “I usually date skinny girls but you’re different.” This sentence, or any cousin of it, is not a compliment. It is a negotiation. He is telling you, in the first five dates, that your body is the thing he is making peace with. He has placed himself above you on a hierarchy you did not agree to. The thing he wants you to feel grateful for is the act of him choosing you in spite of. Choice in spite of is not love. It is a tab he is going to come back and cash.

    2. Frequent body comments framed as love language. “I just want you to be healthy.” “Have you thought about trying that gym with me.” “I’m saying this because I care.” Care does not audit your plate. Real care notices that you are tired and asks about your day. The line between concern and control is whether the comment is about your wellbeing or about his comfort with how you look next to him. If you have ever felt the need to stop apologizing for everything in your own relationship, including for eating in front of the person who claims to love you, that is the data.

    3. Fetishization presented as preference. There is attraction that finds your specific body beautiful, and there is attraction that finds the category of your body a kink. The tell is whether he can describe what he loves about you as a person without circling back to your size within two sentences. The fetish version is “I love how soft you are” on loop, with no curiosity about your work, your family, or your week. Logan Ury, the Hinge Director of Relationship Science and author of How to Not Die Alone, talks about the difference between “spark” and “slow burn.” Fetishization mimics spark. Six weeks in, if his interest still sits entirely at the surface of your body, that is a structural problem, not a phase.

    4. Comments about your eating in front of others. The waiter is at the table. He says, with a smile, “she’ll have the salad, she’s being good tonight.” Or his sister asks if you want dessert and he answers for you. Public comments about your food are not jokes. They are him performing oversight of your body for an audience. It tells you what he thinks the relationship looks like to outside eyes. It also tells you what your next family dinner is going to feel like.

    5. The compliment ladder that only activates when you are losing weight. Pay attention to when he tells you that you look beautiful. If the compliments concentrate on the weeks you skip dinner, the months you start a new workout routine, the morning after a stomach bug, you are not in a relationship. You are in a conditioning loop. Beauty that is contingent on shrinking is a wage he pays you for compliance.

    The character flags, who he is when he forgets you’re watching

    6. The way he talks about his mother, his sister, his ex. Not the content. The texture. Contempt is the giveaway. Dr. John Gottman’s decades of research at The Gottman Institute named contempt the single strongest predictor of divorce in his Four Horsemen framework, alongside criticism, defensiveness, and stonewalling. He wrote about it most clearly in The Seven Principles for Making Marriage Work in 1999. The way a man talks about the women who came before you is the way he will talk about you in eighteen months. If his ex is “crazy” and his mother is “exhausting” and his sister is “too much,” you are next in line for one of those nouns.

    7. The friend group reveal that never happens. Three months in, you have not met a single friend of his. Not at a bar, not at a birthday, not even on a video call. He has met yours. The standard explanations are “I don’t really have a close group” or “I keep work and personal separate.” Maybe. Or maybe he is keeping you in a compartment because a healthy friend group would tell him exactly what they see, and he does not want that mirror held up. The friend group test is not a vanity check. It is a basic indicator of whether you exist in the documented part of his life.

    8. The job, credit, family black box. Six weeks in, you still cannot answer simple factual questions about him. What does he actually do for work day to day. Has he ever filed for bankruptcy. Does he have a kid you do not know about. Is he in contact with his parents and if not, why not. Privacy is fine. Opacity is a strategy. The man with nothing to hide will not feel interrogated by the question “tell me about your last serious relationship.”

    9. The waiter test. Watch him with people who cannot do anything for him. If he is courteous to you and rude to the woman at the gate desk, you are watching a performance, not a personality. Esther Perel, in her practice and in Where Should We Begin, talks about the gap between who a person is in courtship and who they become inside the relationship. The courtship version is the marketing campaign. The waiter version is the product.

    The communication flags Gottman and Ramani spent careers naming

    10. Stonewalling. Gottman’s fourth horseman. You raise a concern, he goes silent, picks up his phone, refuses to engage for hours or days. He calls it “needing space.” Space is a forty-five-minute walk and a return to the conversation. Stonewalling is punishment dressed up as self-regulation. It teaches you, week by week, not to bring up the thing that is bothering you, because the silence is worse than the swallow.

    11. Love-bombing followed by withdrawal. Dr. Ramani Durvasula, the clinical psychologist whose 2024 book It’s Not You: Identifying and Healing from Narcissistic People is the most useful single text on the subject, calls this the “idealize, devalue, discard” cycle. Week one to three he is showing up with flowers and planning a trip in March. Week four to six he is distant, criticizing the way you load the dishwasher. Week seven he is back with flowers. The intermittent reinforcement is the hook. The unpredictability is not a personality quirk. It is the mechanism.

    12. The clarifying question that becomes an interrogation. You ask where he was on Friday because something did not add up. He answers, briefly. Two days later he brings it up unprompted, walks you through a forensic explanation, then flips the conversation to challenge how you could have doubted him. By the end you are apologizing for asking. That maneuver has a name. DARVO, deny, attack, reverse victim and offender. Once you see it once, you cannot unsee it.

    13. The cold reception when you say no. No to sex on a tired night. No to a weekend with his family you cannot afford. Watch what happens in the forty-eight hours after the no. If the temperature drops, if texts go unanswered, if the next time you see him he is “just in a mood,” you have your answer about whose comfort the relationship is built around. A grown man can hear no without retaliating. The ones who cannot are telling you what the next ten years would look like.

    The context flags, the world he places you in

    14. Won’t introduce you publicly. No photo of you on his phone home screen, none on his socials, no Saturday brunch with his work friends. He calls it “keeping the relationship private.” Privacy is a choice two people make together. Concealment is a choice one person makes alone. Hinge’s 2024 Annual Dating Report found that visibility consistency in the first six months is one of the strongest correlates of relationships that make it past a year. And in the dating economy, plus-size women are hedged on at a disproportionate rate. The 2024 OkCupid match-rate data showed that women categorized as plus-size receive roughly 30 percent fewer initial responses than the platform average. Christian Rudder’s work on the original OkCupid dataset documented similar patterns over a decade ago. The numbers have not improved.

    15. Future-faking that never materializes. Month two he is talking about the apartment you two will get. Month four he is talking about how his mom will love you when she meets you in June. June comes. No plan, no flight, no date on the calendar. He rolls the timeline forward. Logan Ury calls this one of the most reliable warning signs in the six-week window. The honest version of a future plan has a date and a price tag. The dishonest version has a vibe. If six weeks in you cannot point to a single concrete commitment he has made and kept, you are dating his marketing deck, not his roadmap.

    The week-six body change test

    Here is the question I tell women in my DMs to ask themselves in week six. Not week one. Week six, when the brain has cooled off enough to see the data. If my body changed tomorrow, would the way he speaks to me change. If I gained fifteen pounds in three months because of medication or stress, would the compliments thin out. If I lost twenty pounds, would the volume turn up. Would his hand stay on the small of my back, or would it migrate. Would the photos he does not post start getting posted.

    The honest answer is almost always available in week six, if you let it be. It is in the texture of his attention, not the content of his words. Men who love women love the woman, not the silhouette she is currently rendering. The terms of a probationary contract are usually written in the body comments first, then the public comments, then the silences.

    Dr. Sue Johnson, the founder of Emotionally Focused Therapy and author of Hold Me Tight, has written for decades that the central question of every romantic attachment is “are you there for me.” Not are you attracted to me, are you there for me. The plus-size lens sharpens that question. Are you there for me, or are you there for the version of me you are negotiating toward. Being in your feminine era, in the way that phrase actually means something, is refusing to be in a relationship that requires you to negotiate the question.

    If you are reading this and recognizing your relationship, you do not have to leave on a Tuesday. You do have to start writing things down. Dates, sentences, how you felt in your body after the conversation. Dr. Ramani’s clinical recommendation, which I echo because it works, is to keep a private note on your phone to keep your own memory honest. Memory is the first thing the dynamic erodes. A book that has helped my clients is Why Does He Do That? by Lundy Bancroft, the most direct text I have found on the patterns of controlling men. For the boundary work that has to come before the leaving, Set Boundaries, Find Peace by Nedra Glover Tawwab is the clearest book I know.

    And then ask the question. If my body changed tomorrow, would the way he speaks to me change. Sit with whatever answer arrives. That answer, not the man, is the relationship.

    Asha left him in the fall of 2021. She told me later that what ended it was not the worst thing he had said. It was a Tuesday night, nothing dramatic. He made a face when she ordered the pasta. She watched the face. She paid the bill. She did not go home with him. Sometimes that is what the leaving looks like. Quiet, on a Tuesday, over pasta, after the body finally believed what the head had been hearing.