Blog

  • How Much Do Hair Extensions Cost in 2026?

    How Much Do Hair Extensions Cost in 2026?

    Hair extension types laid out by price tier for a cost comparison overview

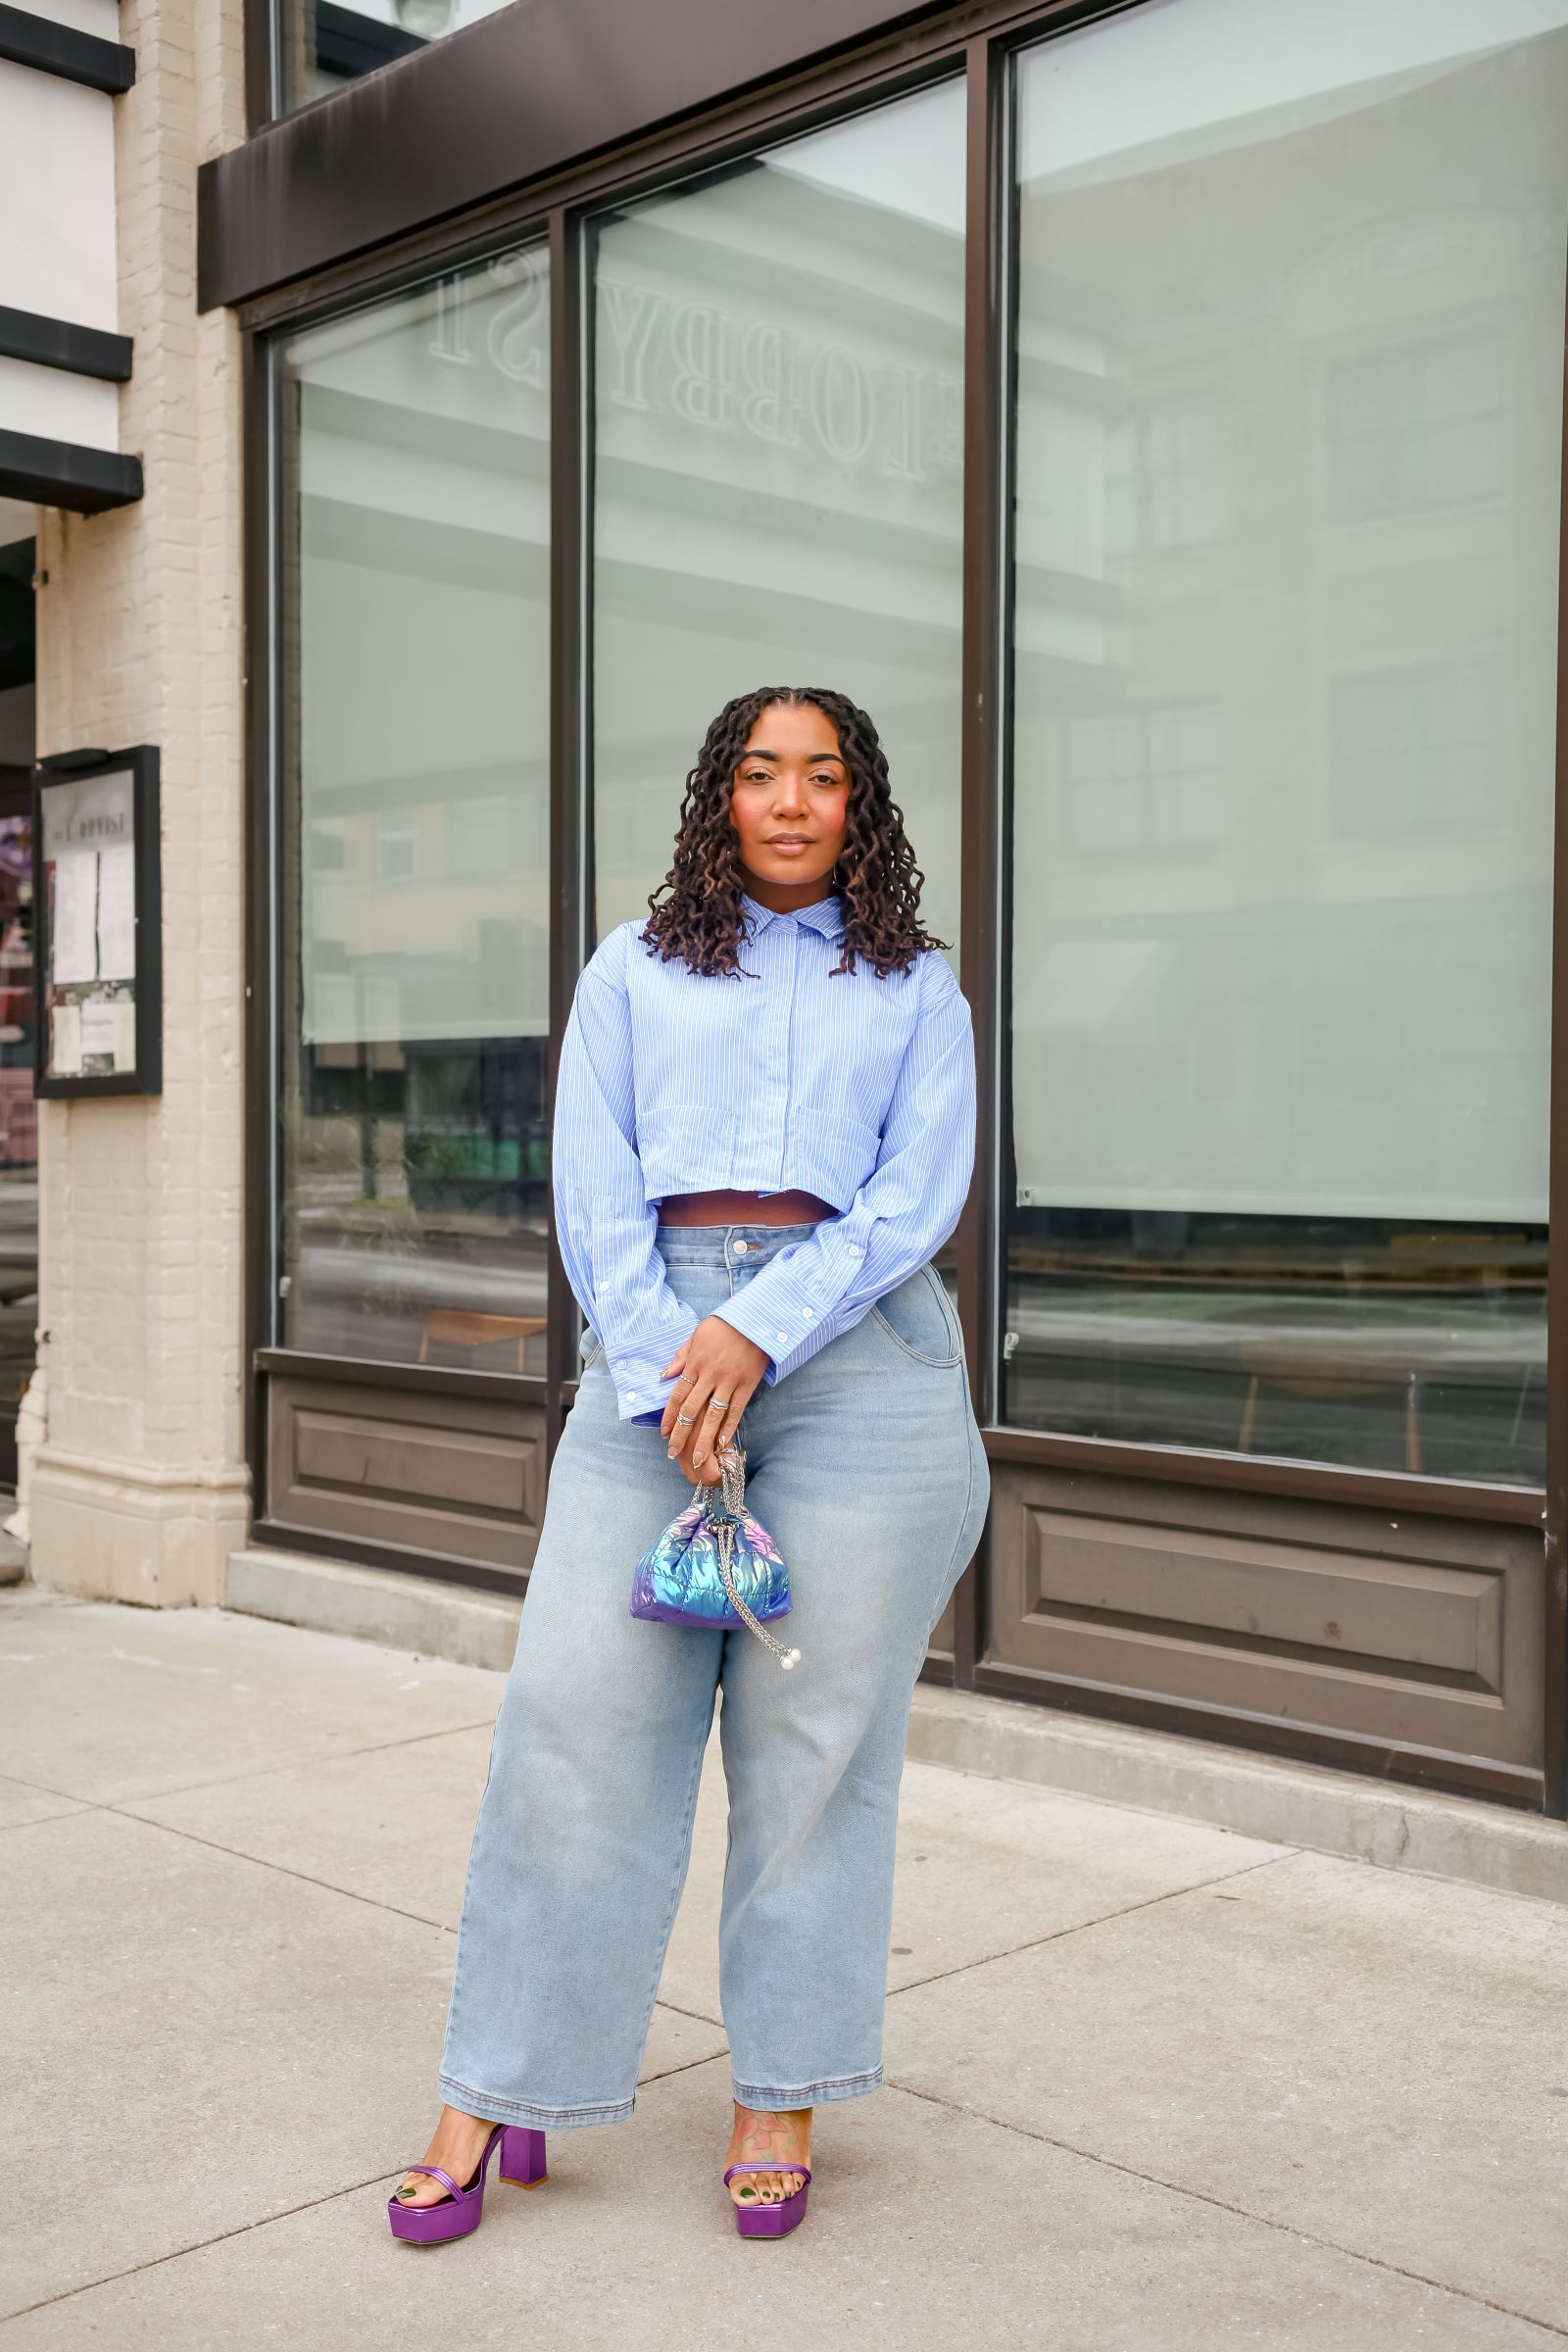
    After three years of covering this category, sitting in on consultations with stylists across Atlanta, and pricing out installs for friends with hair types from 2A to 4C, I can tell you the number on a salon menu almost never matches the number on the final invoice. Extensions are sold as one price (the hair) and quoted as a second price (the install) and rarely include a third (the maintenance every 6-10 weeks). Most of the sticker shock people share with me on Instagram comes from missing one of those three layers, not from any one salon overcharging. This is the breakdown I wish someone had handed me when I was still wearing my first set of clip-ins in 2019.

    The fast answer

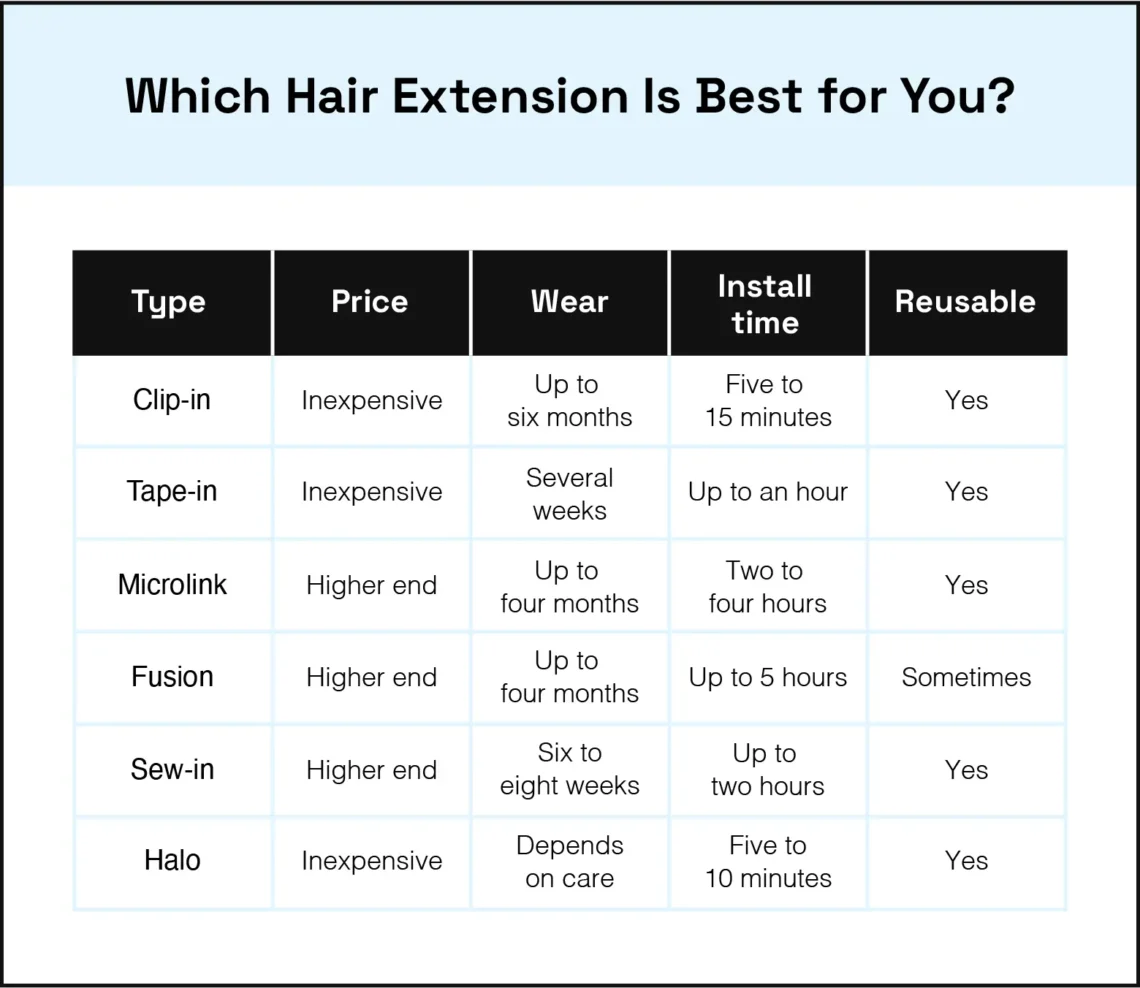
    Hair extensions in 2026 range from about $40 for a synthetic clip-in set off Amazon to $3,500 for a full raw-hair sew-in install at a luxury salon. The median spend among the women I have helped shop is around $850 all-in for a quality human-hair install that lasts 3-6 months with maintenance. Clip-ins run $40 to $400 for the hair itself with zero install cost. Tape-ins run $200 to $700 for the hair plus $200 to $500 for the install. Sew-ins and hand-tied wefts run $300 to $1,500 for the hair plus $300 to $800 for the install. Maintenance every 6-10 weeks adds $100 to $300 per appointment. The realistic budget for someone who wants their extensions to look like real hair and last is $700 to $1,200 for the first install.

    Hair quality – synthetic vs human vs raw

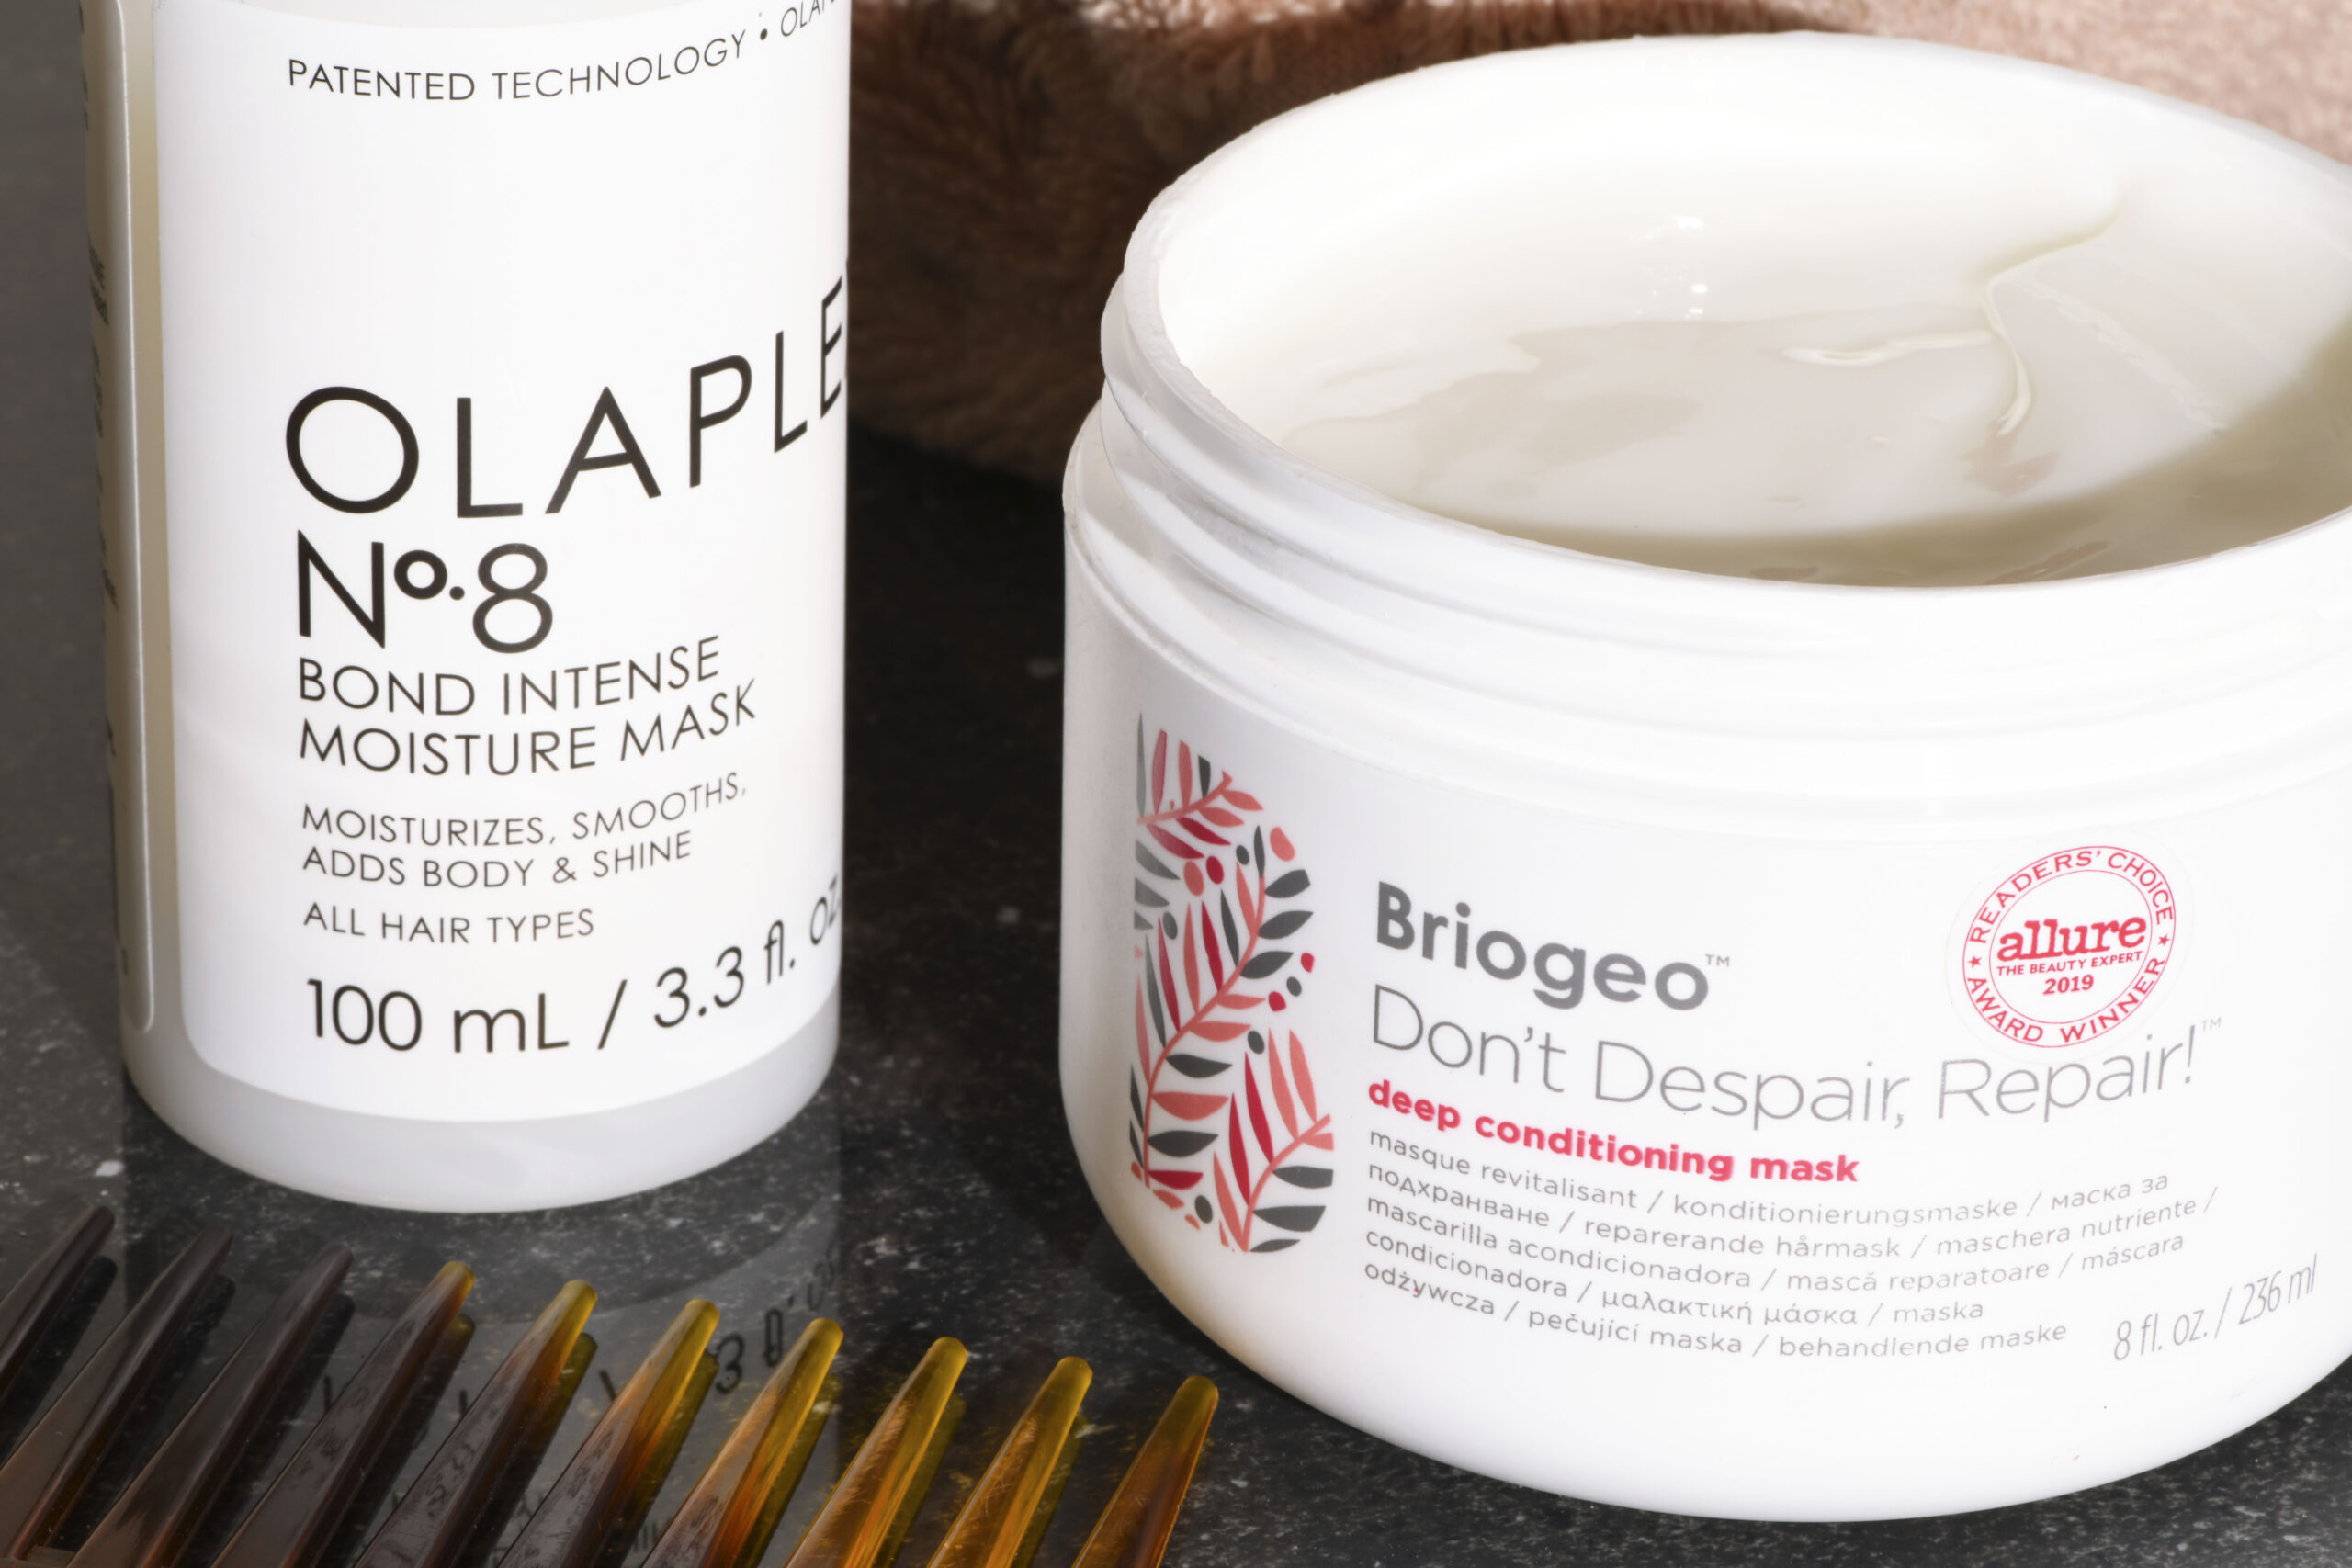
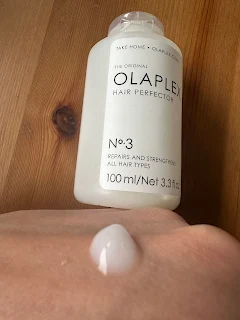
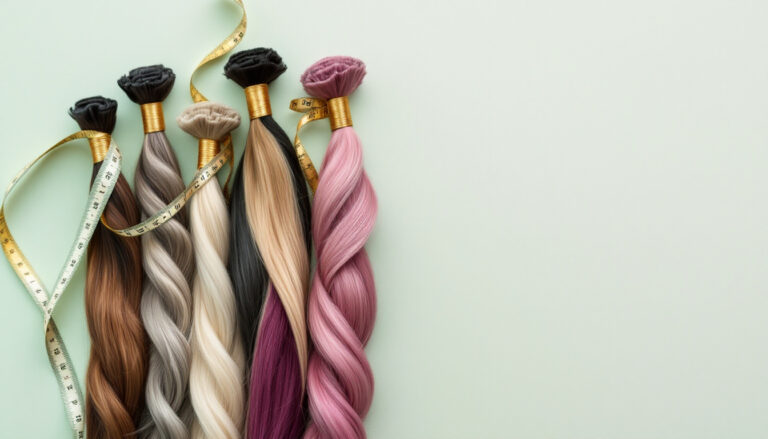
    This is the line item that swings the price more than any other, and the one most first-time buyers underestimate. Synthetic hair runs $30 to $80 for a clip-in set and cannot be heat-styled past 250F or color-treated at all. It tangles fast, the fiber gets that plastic shine after a few wears, and you will replace the set within 3 months if you wear it weekly. Human hair (often labeled Remy) runs $150 to $400 for a clip-in set and can be heat-styled, colored within a couple of shades, and worn for 9-18 months with reasonable care. Raw hair – which means single-donor, no acid bath, cuticles intact and aligned – runs $600 to $1,500 for a bundle set and can last 2-4 years with proper care. The price gap between Remy and raw is real, and so is the difference. If you have low-porosity 4A hair like mine and you want texture-matched extensions that take a wash day without matting, you are realistically in the Remy-or-better range. Skip synthetic unless you specifically want a costume-level wear.

    Install method

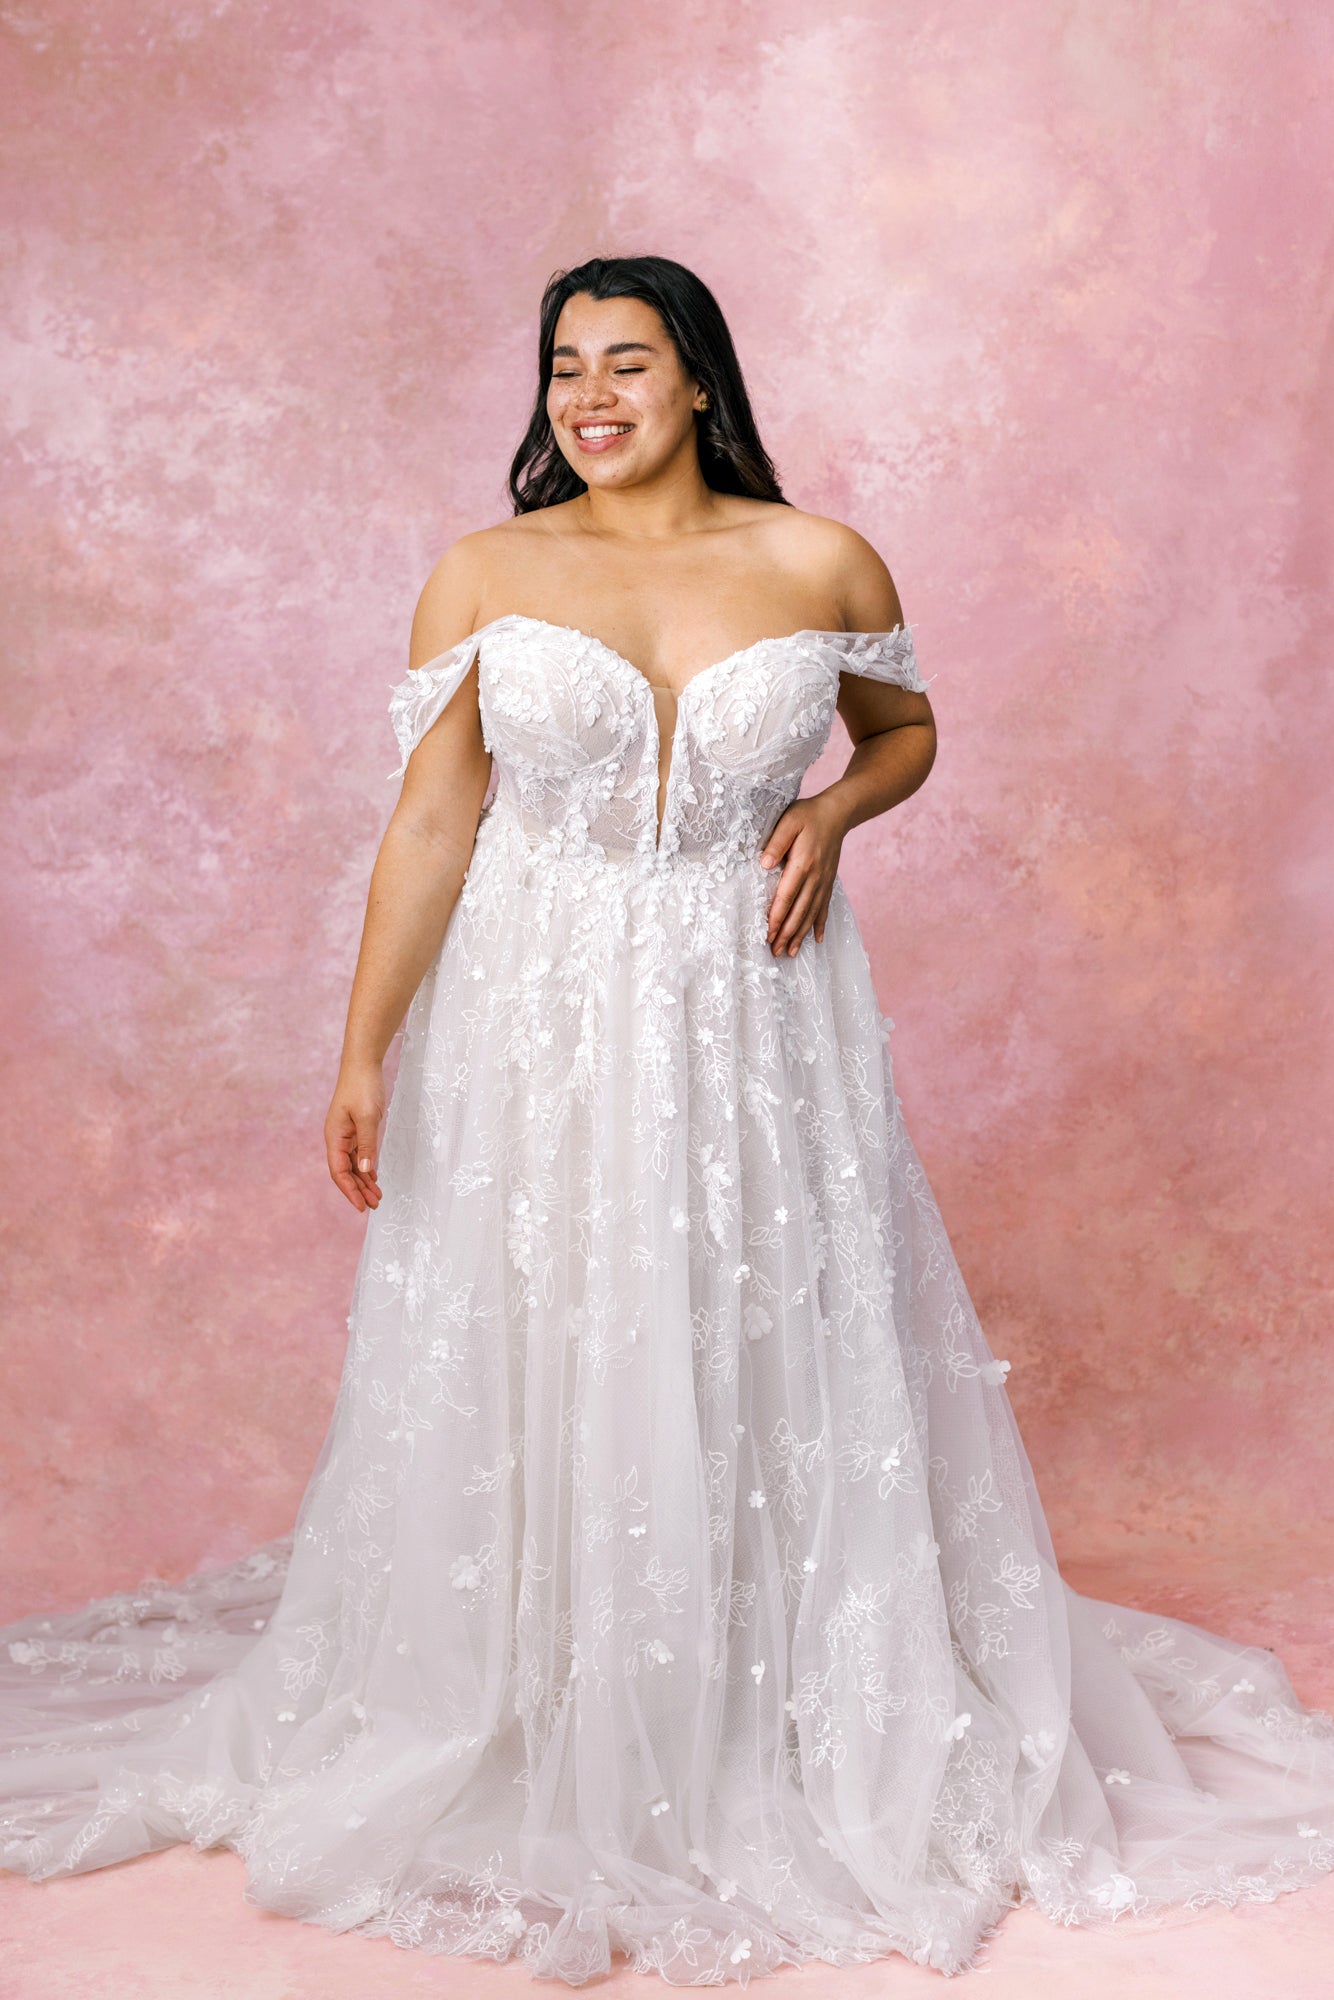
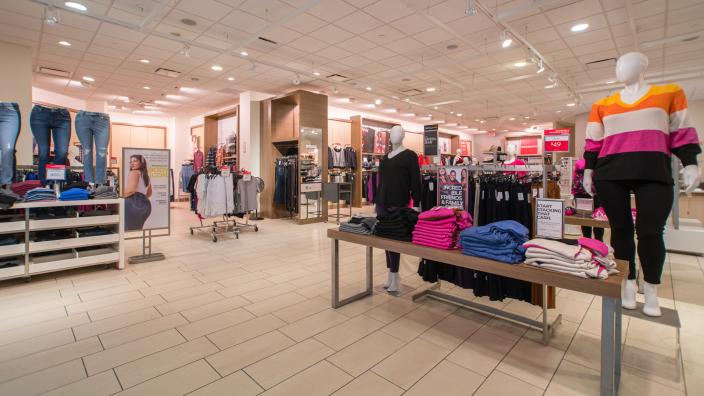
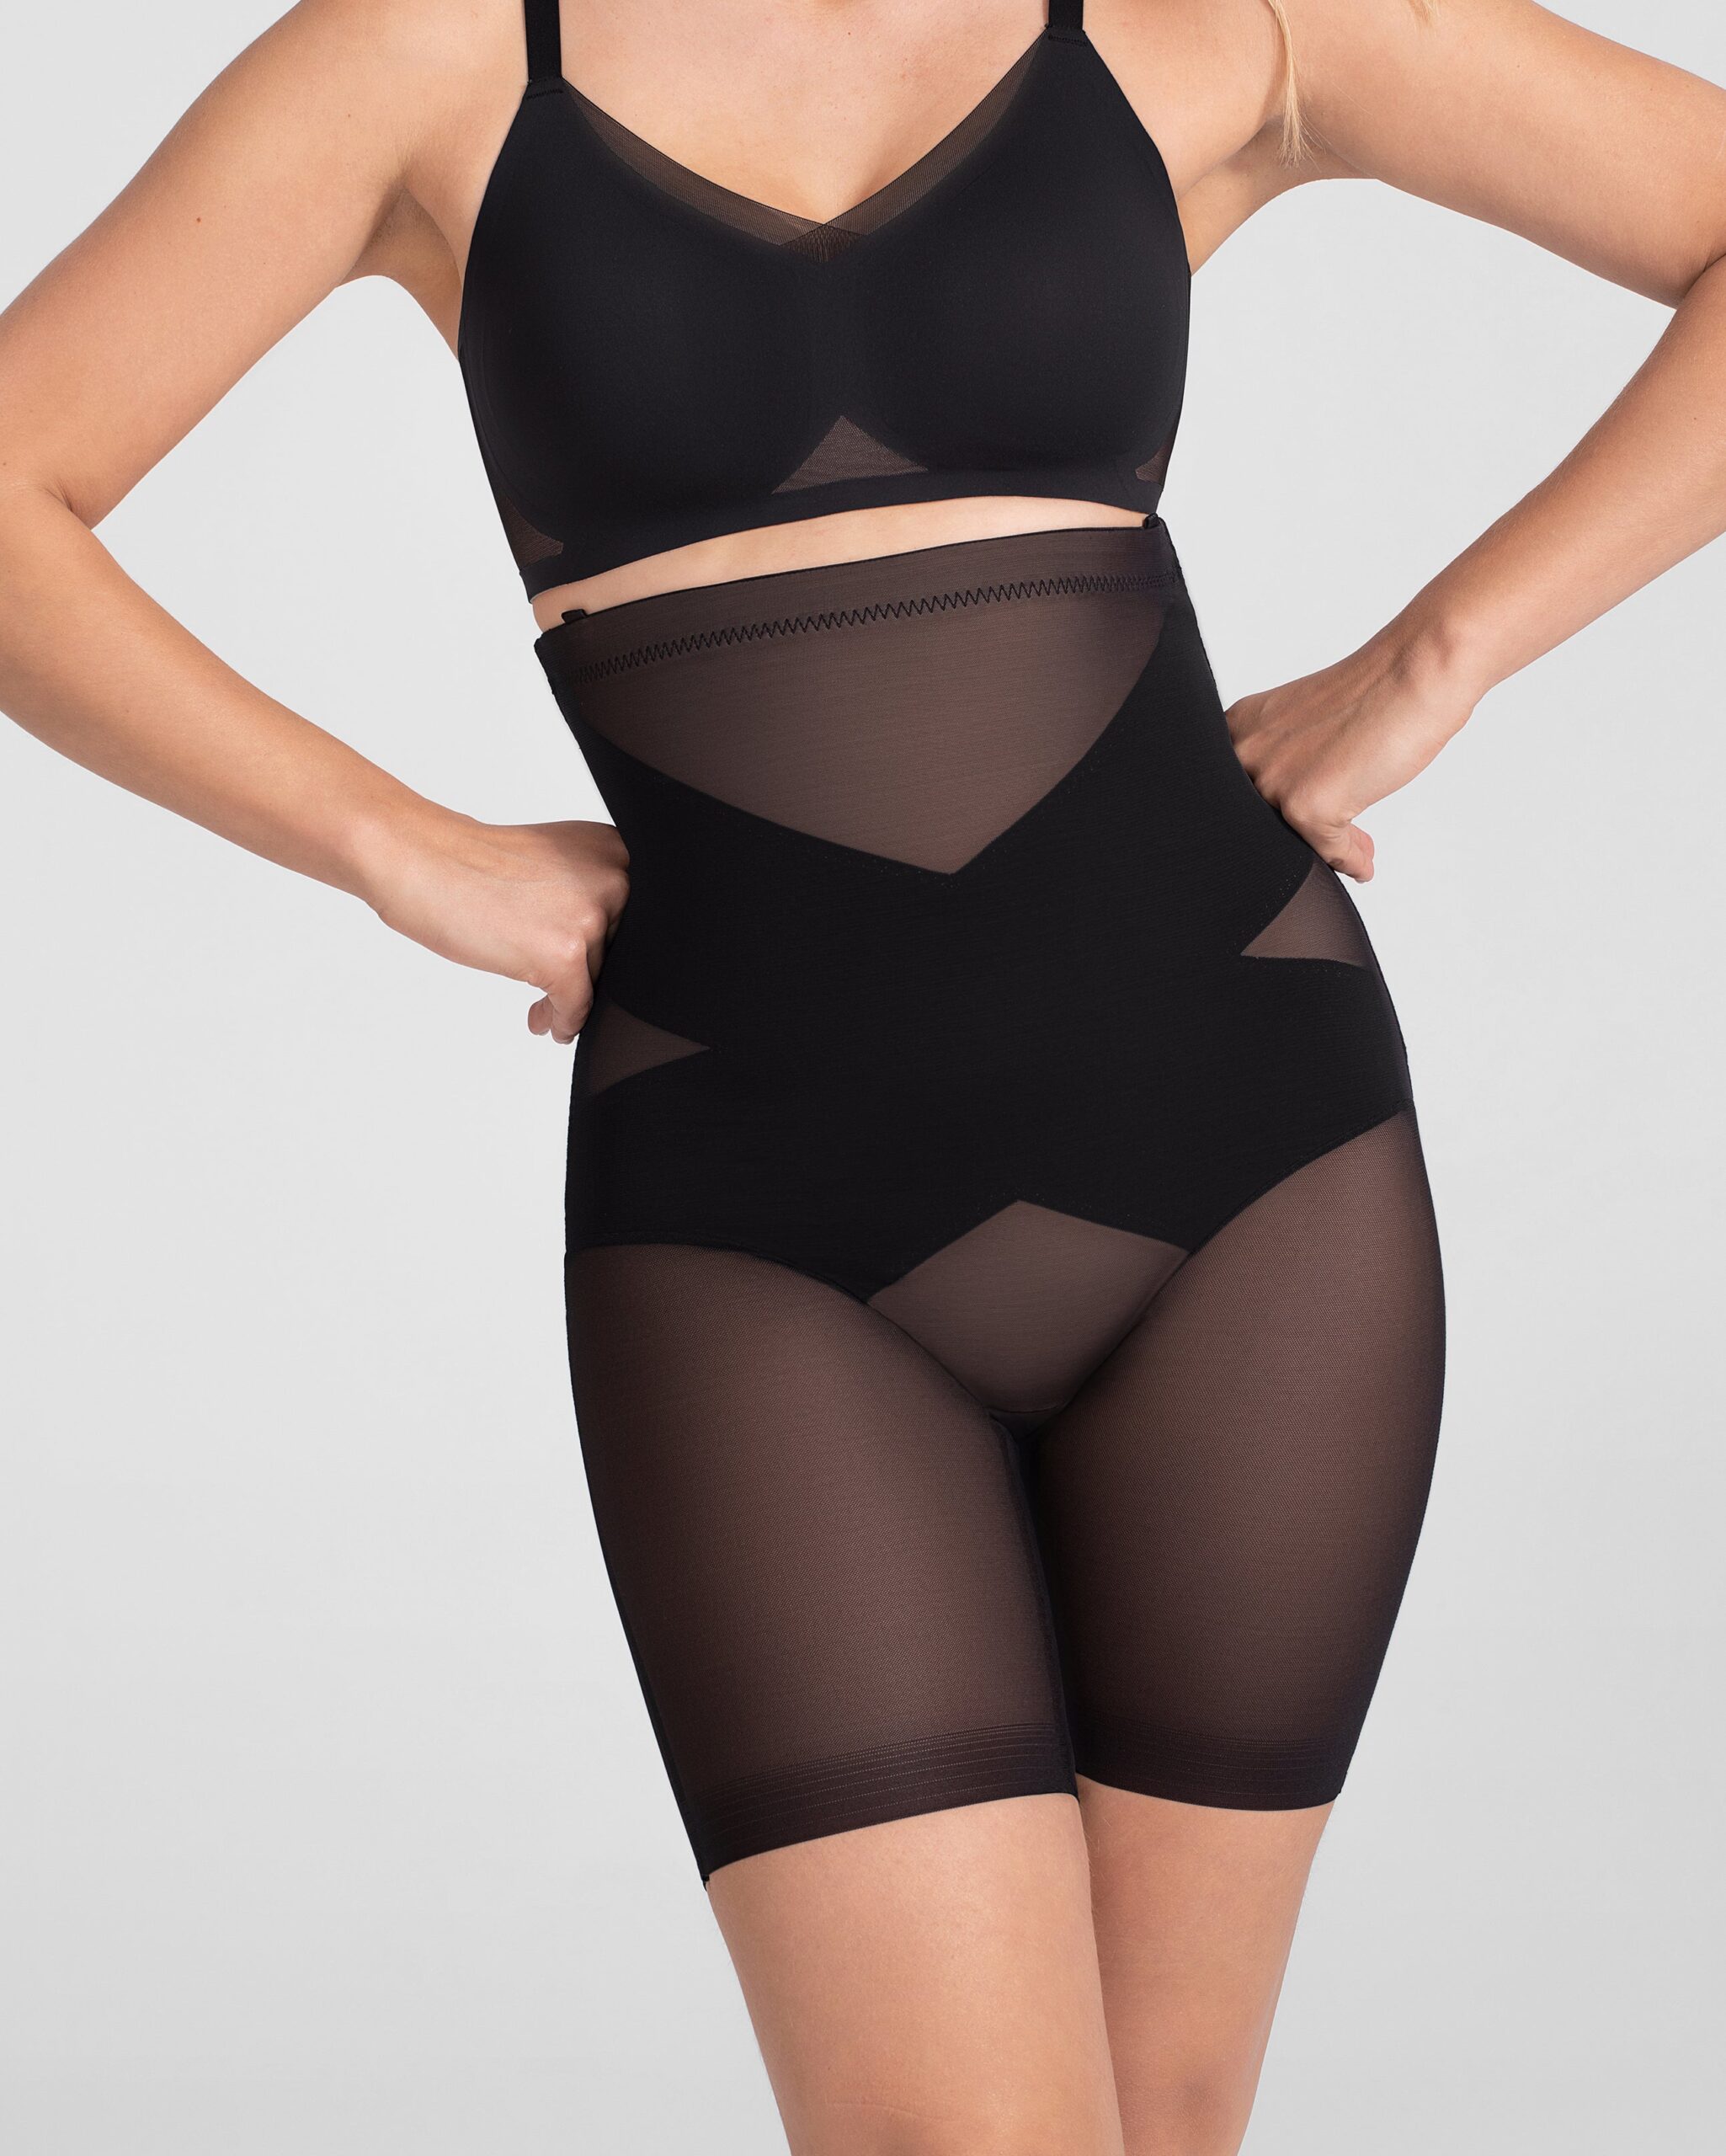
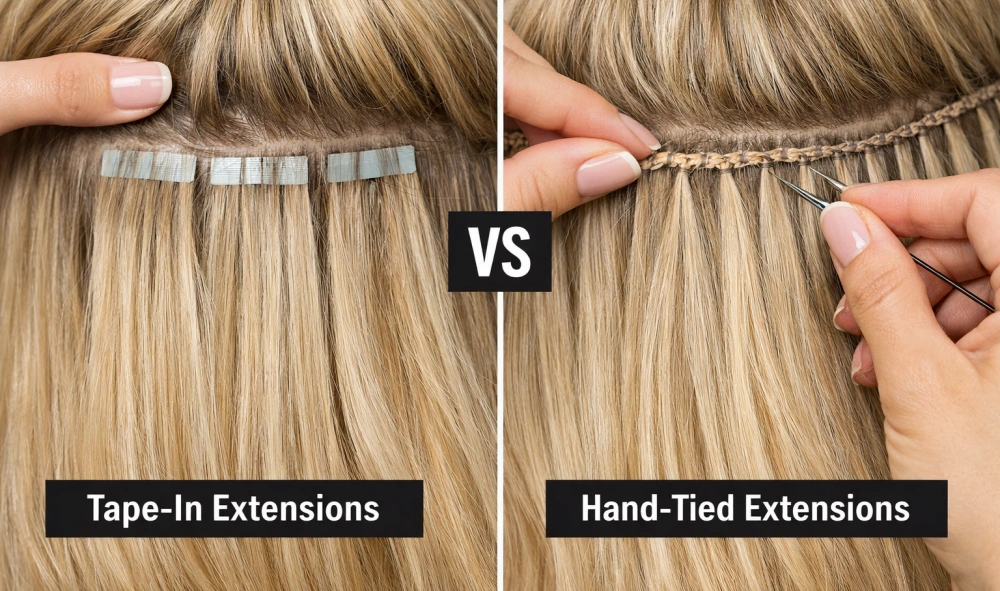
    Clip-ins have zero install cost and zero salon time. You buy the set, you snap them in at home in 10 minutes. Tape-ins are installed in 60-90 minutes with adhesive tape strips and run $200-$500 for the install depending on your market – Atlanta sits in the middle of that range, NYC and LA sit at the top. Sew-ins (also called weaves) braid your natural hair into cornrows and stitch wefts onto the braids; the install runs 2-4 hours and $300-$800. Hand-tied wefts (the I-tip and K-tip family, plus newer beaded-weft methods) are the salon-favorite right now because they sit flatter and damage less than traditional sew-ins; install runs 3-5 hours and $400-$900. Fusion bonds (keratin tips melted onto small hair sections) run $500-$1,200 for the install and are the most damaging long-term because removal involves a solvent that breaks down cuticle. The install method matters less for the price than the stylist’s experience with your specific hair texture – a stylist who routinely installs on Type 4 hair is worth the premium over a generalist.

    Stylist experience and market

    A licensed cosmetologist with 5-plus years of extension-specific experience charges 30-50% more than a newer stylist, and it shows in the placement, the blend, and how long the install holds. The market matters too. Atlanta install pricing sits around $400-$700 for a sew-in at a mid-tier salon. NYC and LA push that to $600-$1,000 for the same service at a comparable salon. Smaller markets (Charlotte, Birmingham, Memphis) can land at $250-$500. The premium for celebrity-adjacent stylists – the people whose names show up on red carpets – runs $1,500-$3,500 for a single install. For most women, the sweet spot is a stylist with 3-7 years of texture-specific extension experience charging $400-$700, not the cheapest option and not the magazine-credit one.

    Maintenance and longevity

    The cost most people forget. Tape-ins need to be moved up every 6-8 weeks as your natural hair grows – that is $150-$300 per appointment, and the tape gets replaced each time at $30-$80. Sew-ins need to be taken down and reinstalled every 8-10 weeks – that runs $200-$400 per refresh if you reuse the hair. Hand-tied wefts move up every 6-10 weeks at $150-$300. Fusion bonds need removal and reinstallation every 3-4 months at $400-$700. Over a year, factor in 5-8 maintenance appointments. For a tape-in wearer that is $750-$2,400 a year on maintenance alone, on top of the original install. The hair itself, if it is quality Remy or raw, can be reused across multiple installs – which is where the long-term math starts working out compared to buying cheap hair every few months.

    Color matching and customization

    If your shade is standard (black, dark brown, basic blonde) you can buy off the rack and the cost is whatever the bundle price is. If your hair is colored, highlighted, balayaged, or in any way customized, you are either paying for custom-colored extensions ($100-$400 surcharge on top of the hair) or paying your stylist to color the extensions to match ($150-$350 in coloring service). Custom-colored extensions ordered through your stylist often come out cheaper than buying off-the-rack and recoloring at the salon, because the extension house already has the right base tone. Get the color consultation done before you buy the hair. The number of women who buy a $400 bundle online and then need a $300 color match because the tone is off is high enough that I now warn every friend before they click purchase.

    Price tiers with examples

    Budget tier clip-in human hair extensions worn casually

    Budget tier: $40-$400 total. This is clip-in territory, and the right place to start if you have never worn extensions before. Synthetic sets from Amazon at $40-$80 are fine for one event – a wedding, a photo shoot, a Halloween look – but they will not survive weekly wear. Human-hair clip-in sets from mid-market brands run $150-$400 and can be worn 1-3 times a week for 9-12 months if you cowash them every few wears and store them flat. Sensationnel and Outre both make Remy clip-in sets in this range that I have personally tested on Type 4A hair with good results – the wefts are thick enough to blend without showing tracks, and the clips hold without slipping. Sensationnel Remy clip-in sets on Amazon are the strongest budget-tier human-hair option I have hands-on history with. Zero install cost, zero salon time, low commitment.

    Mid-range tape-in or hand-tied weft extensions freshly installed

    Mid-range tier: $500-$1,200 total install. This is where most women who wear extensions consistently land. Tape-ins or hand-tied wefts in Remy human hair, professionally installed at a mid-tier salon, with maintenance built into the budget. The hair runs $250-$600 for a full set; the install runs $300-$600; the first maintenance appointment 6-8 weeks later runs $150-$300. Outre and Sensationnel both make Remy weft and tape-in collections in this range that hold up across multiple installs. Bellami sits at the higher end of this tier and is the brand I see most often on stylists’ tables in Atlanta – the hair is consistently graded, the wefts are double-drawn so they do not shed at the ends, and the color range is wide enough that most clients can buy off the rack. Outre Mytresses Remy bundles on Amazon are the strongest entry point at this tier if you are buying the hair separately and bringing it to your stylist. Plan for the hair to last 18-24 months across 3-4 reinstalls.

    Premium tier: $1,500-$3,500 total install. Raw hair – single-donor, cuticle-aligned, unprocessed – installed by an experienced stylist with celebrity-adjacent pricing. The hair runs $800-$1,800 for a full set; the install runs $600-$1,200; the first color customization runs $200-$400. Indique is the brand most often cited in this tier, with raw bundles that can be reused across 4-8 installs over 2-4 years. The math at this tier only works if you wear extensions year-round and reinstall the same hair multiple times – the per-wear cost drops below the mid-range tier if you actually get the full life out of the bundles. If you wear extensions for one event a year, this tier is the wrong call. Indique Pure raw bundles on Amazon represent the accessible end of this premium tier. Expect to bring this hair to a stylist; the install is not a DIY job at this level.

    Where to save and where to spend

    Save on the install method, not the hair. A tape-in install at $300 with quality Remy hair will look and last better than a hand-tied weft install at $700 with cheap synthetic. The hair is the part the camera sees. The install method is the part the stylist troubleshoots.

    Save on maintenance frequency if your hair grows slowly. The 6-week cycle on the salon menu is a default, not a rule. If your natural hair grows half an inch a month instead of an inch, you can stretch tape-in moveups to 8-9 weeks without compromising the install. Ask your stylist to assess your specific growth pattern at the 6-week mark instead of automatically rebooking.

    Spend on the stylist with proven experience in your specific hair texture. The difference between a generalist and a Type 4 specialist is not the install time, it is whether your edges are still intact 6 months later. Pay the premium. The hair grows back from a bad install slower than the credit-card statement comes due.

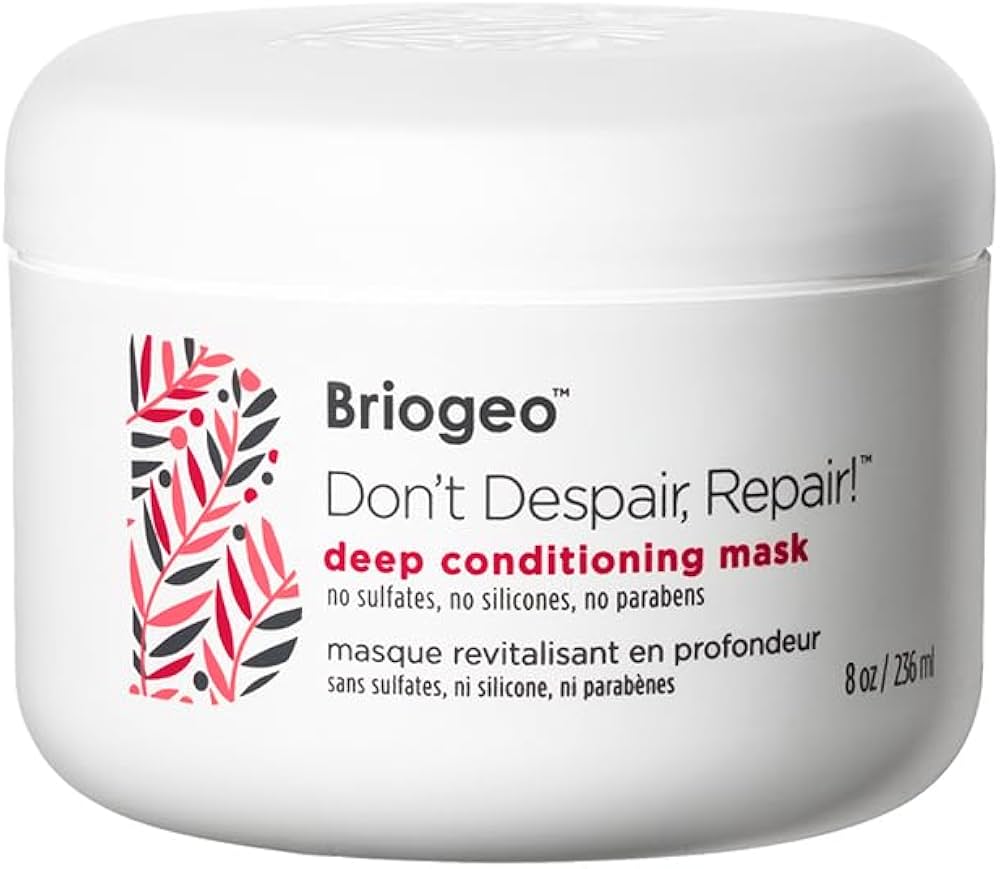
    Spend on a quality leave-in and a satin pillowcase for the maintenance routine. Mielle Organics Pomegranate & Honey leave-in conditioner and Camille Rose Honey Hydrate leave-in are both gentle enough for extension wear and prevent the dryness that kills bundle longevity. A $30 satin pillowcase extends the life of a $500 install by months. This is the cheapest math in the entire extension category.

    Frequently asked questions

    Are extensions cheaper if I buy the hair myself and bring it to a stylist?

    Sometimes, sometimes not. Salons that sell the hair often mark it up 30-60% over what you can find online from the same brand, so bringing your own bundle saves real money on that line. But some stylists charge a higher install fee for client-supplied hair, and some refuse to install hair they cannot verify the source of. Ask before you buy. The savings only land if your stylist is on board.

    How long do extensions actually last?

    Synthetic clip-ins last 2-4 months of regular wear. Remy human-hair clip-ins last 9-18 months with cowashing every 8-10 wears. Tape-ins and sew-ins in Remy hair last 3-6 months per install with the hair itself reusable for 18-24 months across multiple installs. Raw hair lasts 2-4 years across 4-8 installs. The published numbers from extension brands are optimistic; cut their estimate by 25-30% for realistic planning.

    Why does the same install cost so much more in NYC than in Atlanta?

    Rent, labor cost, and demand. A licensed cosmetologist in Manhattan pays substantially more for chair rent or salon space than the same stylist in Atlanta or Charlotte. That gets passed through. The skill level is not necessarily different – I have had installs in Atlanta and NYC and the Atlanta one held longer. The market premium is real but does not always correlate with quality.

    Can I install tape-ins or sew-ins myself to save the install cost?

    You can. Most stylists, including the ones I know personally, will tell you not to. Tape-ins require precise placement to avoid traction damage at the root. Sew-ins require cornrow braids tight enough to hold but not so tight they pull the edge. The first DIY install I tried in 2020 cost me 4 weeks of edge breakage that took 6 months of protective styling to recover from. Save the install money for the second appointment, not the first.

    The number to actually budget

    For a first-time extension wearer who wants a quality install that lasts and does not damage your natural hair, budget $700-$1,200 all-in for the first appointment – hair plus install plus the first maintenance visit. That covers Remy tape-ins or a hand-tied weft set installed by an experienced stylist in a mid-market city. Below $400 means clip-ins, a fine starting point but a different product. Above $2,500 means raw hair, worth it only if you wear extensions year-round and reinstall the same hair multiple times. The $850 middle is where most of my friends landed and stayed. Save your money on the cheapest synthetic option and spend it on the stylist who knows your texture. That is the layering order that pays off.

  • How Much Do Plus-Size Wedding Dresses Cost in 2026?

    How Much Do Plus-Size Wedding Dresses Cost in 2026?

    Plus-size bride viewing wedding dress options at multiple price tiers in a bridal boutique

    The bridal industry quotes plus-size wedding dress prices the way airlines quote base fares: the number on the tag is almost never the number on the credit card receipt. Across the major designer houses that publish their plus-size price lists, the sticker average for a size 20+ gown in 2026 sits between $1,400 and $2,200, but the all-in spend – the number you actually pay after alterations, sizing surcharges, rush fees, and the accessories most brides forget to budget for – lands closer to $2,400 on the median. The gap between sticker and total is roughly 60% for plus-size brides, compared to about 35% for straight-size, because the line items that get added on top scale harder above size 18. This is a category-wide pricing pattern that nobody at the bridal salon volunteers up front, and it is the single biggest reason brides get blindsided by the final bill.

    I have been tracking apparel pricing since 2019, and bridal is the category where the gap between marketing price and real price is the widest of anything I cover. Below is the breakdown. Real ranges, real brands, real line items.

    The fast answer

    A plus-size wedding dress in 2026 runs $400 to $5,000 for the dress alone, with a median of about $1,500. Add $250-$700 for alterations, $50-$200 for plus-size sizing surcharges where they still exist, $100-$400 for accessories, and a 4-week to 6-month timeline. Realistic all-in for the average bride wanting a dress that fits and photographs well: $1,800-$2,600. Budget route: $700-$1,200 all-in. Premium designer route: $4,000-$7,000 all-in. Rental route, if you are size 14-22: $300-$900. Anyone quoting you just the dress price is leaving out 40-60% of the actual cost.

    Sizing surcharge – the hidden line

    This is the line item I see catch brides off guard most often, and it is the one to ask about before you fall in love with a dress on the rack. Roughly 70% of major bridal designers still add a surcharge for sizes above 18, typically $50-$200 per dress depending on brand and size. The justification offered is fabric volume and pattern grading complexity. The reality is that this is a margin tradition the industry has been walking back since 2020, but slowly. As of 2026, the designers that price uniformly across sizes include Christian Siriano Bridal, Hayley Paige Occasions, Stella York Curve, Eddy K Bridal, and Allure Bridals Plus. The ones that still surcharge include Maggie Sottero, Mori Lee, and David’s Bridal on certain designer collaboration styles. Always ask the bridal consultant for the size-specific price before you try the dress on, not after. I have watched two brides find out about a $175 surcharge at the contract signing.

    Fabric and construction – what you are actually paying for

    The difference between a $700 dress and a $2,500 dress is usually construction, not just fabric. The cheaper end of the market is polyester satin and machine lace, which photograph well in good light but wrinkle quickly, breathe poorly, and feel different against skin. The mid-range moves into polyester-silk blends, better lining, and internal boning. The premium tier is silk dupioni, hand-beaded lace, and structured corseted bodices with proper bust support. For plus-size shoppers, construction matters more than fabric brand. A polyester dress with real internal boning and sewn-in bra cups will fit better and photograph better than a silk dress without that infrastructure. When I evaluate any bridal piece, the first thing I check is whether the bodice has actual structure or whether it is relying on the bride’s own shapewear to hold the silhouette. The marketing language is rarely useful here. Ask the consultant directly if the dress has boning and built-in cups.

    Designer cachet and brand markup

    This is the most variable cost line and the easiest place to consciously save money without compromising how the dress looks. A $4,000 Vera Wang White gown and a $1,400 Stella York Curve dress can use comparable fabric and comparable construction. The $2,600 gap is the label. Some brides care about the label, which is a legitimate part of the experience for them, and some don’t. Knowing it is a line item lets you decide on purpose instead of by accident. The plus-size-specific design houses – Stella York Curve, Hayley Paige Occasions, Eddy K Bridal, Wtoo by Watters Curve – consistently deliver dresses that are structurally comparable to the major designer pieces at 40-60% less because they skip the runway-name premium and route the budget into pattern engineering instead.

    Alterations – non-optional and frequently underestimated

    Every wedding dress, regardless of price tier, needs alterations. The standard plus-size dress alterations and their typical ranges in 2026: hem ($50-$150), bodice take-in or let-out ($75-$200), bra cup addition if not built in ($75-$150), bustle for the train ($100-$200), strap or sleeve adjustment ($30-$80). Total for a well-fitting plus-size dress: $250-$700. For a dress purchased a size or two too small and let out, alterations can pass $1,000 and approach the cost of the dress itself. The save-money move here is buying in your actual size from a plus-size-friendly designer, which keeps alterations in the $300-$500 band. The expensive mistake is falling for a sample dress that is two sizes off and assuming the alterations specialist will fix it – they can, but the bill will be a second dress purchase.

    Timeline expedite and accessories

    Standard plus-size wedding dress production is 4-6 months, longer than straight-size because most plus-size dresses are made to order. Under 12 weeks adds a $150-$400 rush fee. Under 6 weeks adds $400-$800. Buying off the rack at a sample sale skips this entirely. Accessories are the other commonly underbudgeted line: veil ($75-$300), shoes ($80-$300), shapewear ($60-$200), jewelry ($50-$500), small accessories ($30-$100). Realistic accessory total: $300-$1,200. Honest assessment: accessories are the easiest line to compress without affecting how the dress looks.

    Price tiers with examples

    Plus-size bride in a budget tier wedding dress in the 400 to 900 dollar range

    Budget tier: $400-$900 for the dress. The strongest brands here are Azazie Bridal Plus, David’s Bridal lower-tier plus-size, Lulus Bridal Plus, Adrianna Papell off-the-rack, and ASOS Curve formalwear. Azazie Bridal Plus is the one I send brides to first. Made-to-measure options start under $500, the sizing runs through 30, and the 14-day sample return policy is more generous than most competitors. The catch is online-only fitting, so order a sample first if you can. ASOS Curve carries simpler formal pieces in the $200-$600 range that work as backup or non-traditional ceremony dresses. Browse Azazie Bridal Plus made-to-measure options on Amazon for the most consistent quality at this tier. Verdict at this tier: worth it if you do your alterations homework. The $700 dress with $400 of professional alterations beats the $1,800 dress with $150 of bad alterations every time.

    Plus-size bride in a mid-range wedding dress in the 1000 to 2200 dollar tier

    Mid-range tier: $1,000-$2,200 for the dress. Where most plus-size brides end up. The reliable brands: Stella York Curve, Hayley Paige Occasions, Eddy K Bridal, Wtoo by Watters Curve, Allure Bridals Plus, and Mori Lee Plus. These designers produce made-to-order through sizes 30-32 with the construction that holds up in photography and feels appropriate to the day. Stella York Curve is the brand I have seen recommended most consistently across actual plus-size weddings – the corseted bodices fit through the bust without gapping, the patterns are graded properly instead of scaled up, and the styles are modern without being trend-cycle dated. Hayley Paige Occasions does not charge a plus-size surcharge and runs slightly more fashion-forward for brides who want something less traditional. Stella York Curve dresses are listed at Nordstrom for the styles available through partner retailers, though most pieces order through independent bridal salons. Verdict at this tier: worth it. This is the sweet spot.

    Plus-size bride in a premium designer wedding dress in the 2500 to 5000 dollar tier

    Premium tier: $2,500-$5,000 for the dress. The brands: Christian Siriano Bridal (sizes through 32), Vera Wang White (limited extended sizes), Carolina Herrera (some pieces extended), Marchesa Notte Plus, and made-to-measure independent houses. At this tier you are paying for label, advanced construction, and higher-grade fabric. Christian Siriano is the plus-size luxury name to know in 2026 – the bridal pieces are engineered for plus-size bodies instead of being graded up from straight-size patterns, which is the actual difference between a couture-feeling dress and a couture-priced one. Christian Siriano Bridal at Nordstrom stocks the most accessible portion of the line. Verdict at this tier: worth it if the label matters to you. Worth it at $2,500, harder to justify at $5,000 unless you specifically want the silk fabric or the runway provenance.

    Where to save and where to splurge

    Save on accessories. The cost-per-wear math on a $300 veil worn for four hours is dramatically worse than the math on a $1,800 dress that anchors the entire day’s photography. Compress accessories ruthlessly. A $80 veil from a small Etsy maker or a department store accessories counter photographs identically to a $300 designer veil in 90% of shots. Same logic for shoes if you are not changing into them mid-reception, and for shapewear, where the Spanx Suit Yourself bodysuit at around $98 does the same job as anything sold as a bridal-specific undergarment at double the price.

    Save on the timeline. Order 6 months out, skip the rush fees entirely. Almost every bride I have seen pay a $400 rush surcharge did so because the decision got delayed, not because the timeline was genuinely compressed.

    Splurge on construction and alterations. Internal boning, real bra cups, quality lining, and a tailor who specializes in plus-size bridal are what makes a dress photograph at twice its actual cost. Cheap alterations are why a $2,000 dress can end up looking like a $700 one in the gallery. Find an alterations specialist with plus-size bridal experience specifically – not a general tailor – and pay them their full rate.

    Frequently asked questions

    Why does plus-size bridal often cost more than straight-size?

    It does not always. Many designers now price uniformly across sizes – Christian Siriano, Hayley Paige Occasions, Stella York Curve, Eddy K, Allure Bridals Plus. Where the surcharge persists, the stated reason is fabric volume and pattern grading complexity. The actual reason is partly historical margin tradition. The progressive designer list above is your filter if avoiding the surcharge matters to you, and at this point it should.

    How early should I start shopping?

    9-12 months out is the safe window. 6-9 months works but tightens the alterations schedule. Under 6 months means rush fees or off-the-rack only. Plus-size production runs 4-6 weeks longer than straight-size on average, so add that buffer to whatever timeline a straight-size friend tells you worked for her.

    Is rental a real option at plus-size?

    Rent the Runway and Nuuly carry some plus-size formal options at around $300-$900 for a 4-day rental window. Honest read: rental is competitive on price if your dream dress retails under $1,200 and you wear sizes 14-22. Above size 22, the rental inventory thins out hard, and the styles available skew toward simpler silhouettes. If you want a specific designer or you are above size 22, ownership is still the better route.

    Can I buy off the rack and skip the made-to-order wait?

    Yes, and it is increasingly common. Most plus-size-friendly bridal boutiques carry samples in sizes 18-26 that sell off the rack with alterations. Skipping the production timeline alone saves the rush fees and shortens the total spend by $400+. The trade-off is you are choosing from what the shop already stocks, not the full designer catalog.

    The realistic budget number

    For a polished plus-size wedding look with a dress that fits, alterations done right, and reasonable accessories, budget $1,800-$2,600 all-in. That number works for the average bride at a Stella York Curve or Eddy K level. Below $1,500 all-in is doable through sample sales or rental but tightens the selection. Above $4,000 buys premium designer cachet and luxury fabric, which is real but optional. The $2,200 all-in number is the line where the spend stops affecting how the dress photographs – paying past it is preference, not quality. Worth it at $2,200, harder to justify at $5,000.

  • How to Style Plus-Size Baggy Jeans Without Losing the Shape

    How to Style Plus-Size Baggy Jeans Without Losing the Shape

    Plus-size woman styled in dark indigo baggy jeans with a fitted tucked tank and loafers, editorial street style

    After three years of covering plus-size denim almost weekly, I have watched the baggy jean cycle through three distinct iterations – the carpenter-tinged 2022 version, the slouchier 2023 dad-jean wave, and the cleaner column cut brands are building around for FW25. Every time the silhouette comes back, the same complaint shows up in my inbox: a plus-size reader bought the jean she saw on a size-6 Pinterest model, put it on, and the whole outfit collapsed into a shapeless shape. The jean was fine. The styling was wrong, because nobody told her the rules change above size 14.

    Baggy denim on a plus-size frame is a real silhouette, not a compromise version of the trend. Done right it reads as deliberate and runway-aware. Done wrong it reads as borrowed-from-the-boyfriend with no architecture. The difference is four decisions: where the waistband sits, how you handle the tuck, what shoe goes under it, and what proportion the top half is doing. The principles hold across Universal Standard, Eloquii, Good American, Madewell Curvy, and the Old Navy plus extension – the four brands currently making the cleanest baggy cuts above size 18.

    What “baggy” actually means on a plus-size body

    The word baggy is doing a lot of work right now and it covers at least four distinct cuts. The straight-leg dad jean is column-shaped from hip to ankle with maybe a quarter-inch of taper, sits high on the natural waist, and reads as the cleanest baggy option for plus-size shoppers. The wide-leg, which gets called baggy interchangeably, flares from the knee down. The carpenter or workwear baggy is straight but cut roomier through the seat and thigh with utility detailing. The true slouch baggy has a dropped crotch and exaggerated volume from the hip down.

    On a plus-size body those four cuts are not interchangeable, and retail marketing copy will not tell you which one you’re looking at. A straight-leg dad jean in a size 20 from Universal Standard‘s plus line skims the hip and columns down with maybe two inches of ease through the thigh. A true slouch baggy in the same size adds four to six inches of fabric across the seat, which on a size-20 hip is a meaningful amount of additional visual volume. Both are called baggy. Only one is doing the column thing.

    The cut to start with, if you have not been wearing baggy denim and want to ease in, is the high-rise straight-leg dad jean. It works across plus-size shapes – hourglass, pear, inverted triangle, rectangle – with minor styling tweaks, and produces a column line that lengthens rather than spreading. Universal Standard‘s Donna and Eloquii’s Wide Leg Trouser Jean are the two I keep coming back to. Build up to the truer slouch once the proportion math is working for you in the cleaner cut first.

    Four baggy jean cuts arranged flat-lay style on linen background with labels

    The volume rule: anchor the top, let the bottom breathe

    The single most useful principle for styling plus-size baggy jeans is volume balance. The jean is doing the volume work for the outfit, so the top half needs to contain itself. That does not mean tight or compressive. It means fitted at the waist with a clean line through the torso. The pin-saved Pinterest tutorial – cropped baby tee, no tuck, chunky sneaker – is designed for a 24-inch waist where volume contrast creates the look. On a plus-size body that same formula produces one undifferentiated mass from shoulder to floor.

    The default formulas that work across shapes: a ribbed tank tucked into the waistband with a slim belt and an unbuttoned shirt or blazer worn open over it – the editor-uniform version, photographs cleanly at any size. A fitted long-sleeve knit, half-tucked at the front waistband so the back hangs naturally and the front signals waist – most forgiving for days you do not want a full tuck. A cropped knit cardigan ending right at the waistband seam, worn over a fitted tank, which lets you skip the tuck entirely. A fitted turtleneck tucked in for cold weather, which extends the column line and reads polished with minimal effort.

    What does not work: oversized graphic tees worn untucked over baggy jeans, billowy peasant blouses, drapey cardigans hanging to mid-thigh, hoodies pulled down over the waistband. Each layers volume on volume and erases the waist. You can wear an oversized top with a baggy jean – I do it – but you have to French-tuck the front and accept you are styling for a specific look rather than throwing things on.

    Three plus-size styling options for baggy jeans showing tucked tank, half-tucked knit, and cropped cardigan

    Tucks, belts, and the architecture of the waistband

    The tuck is the technical move that separates a baggy-jean outfit that works from one that does not. On a plus-size body in a high-rise baggy jean, the waistband sits at the natural waist – the smallest point of the torso. That is the line you want to define. Hiding it under an untucked top throws away the entire shape advantage the jean is built around.

    The full tuck works best with thin or medium-weight fabrics. A cotton ribbed tank, a silk camisole, a fine merino sweater. Heavy fabrics like a chunky knit or a structured button-up bunch awkwardly when fully tucked and create bulk at the waistband. For those, use a French tuck or front tuck – tuck only the front center, three to four inches wide, and let the sides and back drape. Waist signal without the bulk.

    The belt is the other architectural tool. A slim belt, half an inch to one inch wide, in brown, cognac, or black leather, threaded through the loops of a high-rise baggy jean, does three things at once: defines the waist, adds a horizontal line that balances the proportion, and pulls the outfit out of casual into intentional. Madewell, Universal Standard, and Eloquii all make slim belts in extended sizes. Skip the wide statement belts on a baggy jean – they fight the volume. If your jean does not have functional belt loops, the cropped layer becomes your waist signal instead: a boxy cropped sweater, a leather jacket cut at the natural waist, a structured cardigan with a deliberate hem at the waist.

    Shoes that make a baggy jean read intentional

    Shoes are where most plus-size baggy-jean outfits go wrong, and the mistake is almost always going too chunky. The instinct is reasonable: if the jean is voluminous, a substantial shoe should balance it. The reality on a plus-size frame is that a chunky sneaker or platform boot under a wide-leg jean reads as one unbroken mass from knee to floor and adds visual weight at exactly the ankle, which is where you want the line to taper.

    The shoes that work, ranked by how reliably they look intentional: a slim loafer in brown or black leather, which lets the hem break cleanly over the top of the shoe. A pointed-toe flat or low pump, which extends the line of the leg through the foot. A clean low sneaker – a leather Vionic, a Naturalizer, an Allbirds Tree Runner – casual without ankle bulk. A western ankle boot with a slim shaft, which slides under the hem of a wide-leg jean and disappears.

    Hem length matters more than most people realize. A baggy jean should hit either right at the top of your shoe with a slight break, or be cropped at the ankle bone. Hems pooling three or four inches of fabric on top of the shoe read as ill-fitting regardless of how good the jean is. If your jean is too long, get it hemmed at a local tailor – twelve to fifteen dollars and the outfit upgrades.

    Four shoe options paired with plus-size baggy jeans in flat-lay editorial layout

    Layering jackets and outerwear over the volume

    Outerwear with a baggy jean is the place to introduce structure back into the outfit. The baggy half is below the waist; everything above can be more architectural. The jackets that work hardest with this silhouette are the ones with a defined shoulder and a hem at or just below the natural waist. A cropped leather moto jacket, a boxy cropped denim jacket worn over a tucked tank, a tailored blazer in wool or linen, a fitted bomber with a banded waist.

    Longer coats also work, but the rules change. A long wool coat or trench in a clean line – knee-length or longer, single-breasted, with a defined shoulder – looks polished over baggy jeans because it creates a vertical column that contains the volume. A long puffer or oversized parka adds bulk to bulk and turns the outfit into a marshmallow situation. If you want a puffer, get a cropped one that ends at the natural waist and lets the jean continue the line.

    For the in-between weather most of us live in eight months a year, the combination I default to is a fitted long-sleeve knit, baggy jean, slim belt, loafer, and an unbuttoned button-up worn open as a layer. The unbuttoned shirt acts like a lightweight cardigan, adds a third color or pattern, and keeps the shoulders defined without committing to a jacket. J.Crew’s plus extension and Madewell Curvy both make this kind of layering shirt in size-inclusive runs.

    Troubleshooting the most common baggy-jean fails

    If the outfit feels off in the mirror and you cannot name why, run through these diagnostics in order. They are the failure modes I see most often, and most are fixable in under sixty seconds.

    First, the lost waist. If the outfit reads as a single shape from shoulder to ankle, you are missing the waist signal. Fix: tuck the top, add a slim belt, swap to a cropped layer that ends at the waistband, or front-tuck if a full tuck looks bulky. Pick one and the outfit reorganizes. Second, the swallowed shoe. If your hem is pooling over the top of your shoe in three inches of stacked fabric, the jean is too long. Get it hemmed, or roll the hem once for a structured cuff that lets the shoe become visible again.

    Third, the top-heavy collapse. If your shoulders or bust feel like they are dominating the outfit and the jean is reading as an afterthought, your top has too much volume relative to the bottom. Switch to a fitted top, or add a slim belt to reintroduce waist definition. The baggy jean should be the loudest piece in the outfit, not the quietest. Fourth, the saggy seat. If the jean is bagging out behind you within an hour of wearing it, the fabric has too much elastane and is overstretching without recovering, or you sized down. Look for 92-98 percent cotton with 2-6 percent elastane – Universal Standard and Madewell Curvy consistently land there.

    The pieces worth investing in

    The minimum kit for styling baggy jeans well across a season is smaller than you would think. One pair of high-rise straight-leg dad jeans in a dark wash from a curve-engineered brand – Universal Standard’s Donna wide-leg is my pick because the rise actually hits at the natural waist on a plus-size body and the fabric weight holds shape. Two or three ribbed tanks in white, black, and cream from Old Navy’s plus extension or Madewell Curvy. A slim leather belt in cognac or brown – a Madewell belt in extended sizes runs around $40 and lasts. A pair of loafers in brown or black leather; Naturalizer and Cole Haan both carry wide widths in styles that hold up.

    To extend the formula across a season, add a cropped denim jacket, a cropped cardigan in cream or oatmeal, and a fitted black turtleneck. Eloquii’s Wide Leg Trouser Jean in dark indigo is the polished variation if you want a second pair that dresses up easier than a dad jean.

    Frequently asked questions

    Can I wear baggy jeans if I am short (under 5’4″)?

    Yes, with adjustments. Look for a cropped wide-leg or cropped straight-leg version, which most brands now carry at 24-26 inch inseams. If you can only find regular length, get it hemmed to the ankle bone – twelve to fifteen dollars at any tailor and the volume stops overwhelming your frame. Pair with a pointed-toe shoe rather than a flat round-toe to add visual length to the leg. The fitted top half is non-negotiable at shorter heights because volume contrast matters more.

    Are baggy jeans flattering on plus-size pear shapes specifically?

    They can be, and they are one of the better cuts for pear shapes when styled correctly. The volume in the leg balances the volume in the hip, creating a column line that reads proportional rather than bottom-heavy. The rule for pears specifically is to keep the volume even from hip to ankle (straight-leg dad jean) rather than flaring from the knee, because the flare can amplify hip width. Pair with a fitted top and a belt to define the waist.

    How baggy is too baggy for a plus-size body?

    If you cannot pinch and find a defined waistband at the natural waist, the jean is too baggy for flattering plus-size styling. The waistband is the architectural anchor of the entire outfit, and a true slouch jean with a dropped or loose waist removes that anchor. Stick with cuts that sit firmly at the natural waist (high-rise, 11 inches or more in the front rise) and have a defined waistband seam. The volume below the waist can be substantial; the waistband itself should not be.

    What about wearing baggy jeans to work?

    Depends on the dress code, but a tailored take on the silhouette works in most business-casual environments. Swap the dad jean for a wide-leg trouser jean in dark indigo or black, tuck a fitted silk shell or fine merino knit in, add a slim belt, finish with a pointed loafer or low pump. A blazer worn open over the top reads as office-appropriate. The Eloquii Wide Leg Trouser Jean is the version I recommend most often for work because the fabric is heavier.

    Final word

    Styling plus-size baggy jeans well is mostly about respecting the architecture: anchor the waist, contain the top, pick a shoe that does not double the ankle, and let the jean be the loudest piece. The one I keep reaching for is Universal Standard‘s Donna wide-leg in dark indigo, size 18, around $98 on the Universal Standard site – it has held shape through twenty wears and a half-dozen washes, and it works under a tucked tank, a cropped cardigan, or a blazer with equal ease. Buy that one, hem it if you need to, and the rest of the outfits build themselves around it.

  • How to Style Plus-Size Barrel Jeans Without Drowning in the Cut

    How to Style Plus-Size Barrel Jeans Without Drowning in the Cut

    Plus-size woman wearing dark wash barrel jeans, fitted white tank, and pointed boots in editorial street-style shot

    I have a friend who texted me a fitting-room photo last spring and asked, point blank, whether barrel jeans were a trap. She’d pulled on a size 20, taken one look at the curved leg ballooning around her thigh, and decided the trend was a conspiracy against anyone above a 14. I sent back a three-paragraph voice note. The trend is not a trap. The styling defaults that work for a wide-leg or straight-leg jean do not transfer to a barrel, and most plus-size content has not caught up.

    Barrel jeans landed in 2023 as a runway niche and went fully mainstream by FW25, when the curved-leg silhouette showed up in every plus-size extension from Universal Standard to Eloquii to Old Navy. The cut is now a real menu option through size 32. What follows is the framework I use with friends and readers – the jeans have to read intentional, not costumey, by 9 a.m. on a Tuesday. It covers what the cut is, how to read it in your size, and the top, shoe, and outerwear pairings that hold the silhouette together rather than letting it eat you.

    What a barrel jean actually is

    The barrel jean is defined by a curved leg that flares slightly through the thigh, peaks in volume around the knee, and tapers back in at the ankle. The silhouette traces a soft barrel shape rather than the flat column of a wide-leg or the straight tube of a relaxed straight. The defining detail is the taper at the ankle, usually landing somewhere between the ankle bone and mid-calf depending on the brand’s drop. That taper is what separates a barrel from a balloon jean, which keeps the full volume all the way to the hem and reads much more theatrical.

    Most plus-size barrels cut the curve in the back panel rather than relying entirely on the side seam. That detail matters because it means the silhouette holds its shape standing still. A barrel curved only through the side seam collapses against the leg by hour two and you end up looking like you’re wearing a stretched-out wide-leg with a weird hem. Pinch the inseam between thumb and forefinger in the fitting room. If you feel a true three-dimensional curve, the pattern is engineered. If it feels flat, the cut is decorative.

    The rise on a well-cut plus-size barrel is high – eleven inches or more through the front – and the waistband is contour-cut, not straight. This is non-negotiable because the leg volume needs to anchor above your natural waist or the jean reads bottom-heavy. Universal Standard, Good American, and Eloquii cut their barrel options at a true high rise. Old Navy’s plus barrel runs a half-inch lower. Knowing the rise number before you order saves a return cycle.

    Dark indigo plus-size barrel jeans laid flat showing curved leg shape and high-rise waistband

    Why this matters for plus-size bodies

    Most plus-size styling guides go wrong on this cut because they treat barrel jeans as just another wide silhouette and recommend the same oversized-top pairings that work with a wide-leg. The math is different. A wide-leg reads as a column. A barrel creates volume in the middle of the leg, which means a long oversized top doubles down on that midsection volume and compresses your visible height by three or four inches.

    Plus-size bodies with any meaningful hip-to-thigh measurement difference – which is most of us – are particularly sensitive to this. The barrel’s peak volume hits where the eye is already drawn on a pear or hourglass shape, so styling has to actively redirect visual weight up the body. That means a tucked or partial-tuck top, a defined shoulder line, and a shoe that elongates the leg below the hem. Skip any one of those and the jean wears you.

    There’s also a length issue. Most plus-size barrels are graded on a 27 to 28 inch regular inseam, shorter than the 28 to 30 inches standard on wide-leg cuts because the taper is meant to crop slightly above the ankle. If you’re 5’7″ or taller, you want the tall inseam (29 to 31 inches). If you’re 5’4″ or shorter, the regular cut often lands closer to mid-calf, which is a different silhouette entirely and rarely flattering.

    The tops that hold the silhouette

    The single most important rule for plus-size barrel jeans is that the top has to define your waist or your shoulder line, ideally both. The barrel’s volume needs a structural counterweight up top. The four categories that consistently work are fitted knits, partial-tuck button-ups, structured blazers, and cropped-but-not-bralette tops that hit at the high hip.

    A fitted ribbed tank or a tucked-front bodysuit is the cleanest starting point. The ribbed texture adds visual interest without bulk, and tucking the front into the waistband (while leaving the back loose, the French tuck you’ve heard about for fifteen years) creates the waist anchor the jean needs. I wear a size 18 in the Universal Standard Soft Rib tank tucked into their barrel cut at least once a week. The combination reads polished even with sneakers, which is the actual test of a working outfit.

    Structured blazers are the secret weapon for this cut. A blazer with a built-up shoulder and a nipped waist pulls the eye up and gives the silhouette the inverted-triangle line that balances the barrel’s volume below. Look for a denser fabric – tropical wool, structured cotton twill, or a polyester wool blend at 70/30 minimum. Anything floppy undoes the work. Eloquii’s structured single-breasted blazer in their workwear line does this job well, and Old Navy’s plus blazer collection has improved meaningfully since 2024 if you want a lower price tier.

    Now the tops that swallow the silhouette: oversized sweatshirts, long flowy tunics, anything cropped above the navel, drop-shoulder oversized button-ups, and graphic tees in a relaxed cut. All of these create either too much volume in the upper body to balance the barrel, or too little structure to anchor it. The exception is a deliberately cropped boxy tee tucked at the front, which works because the high-hip break still defines a waistline. Rule of thumb: if your top would look correct with cargo pants, it will overwhelm a barrel jean.

    Three top styles laid flat next to plus-size barrel jeans showing tucked tank, structured blazer, and cropped boxy tee

    Shoes that finish the leg line

    The shoe choice on a barrel jean is doing more work than people realize. Because the leg tapers above the ankle, whatever sits below that taper becomes part of the silhouette. The wrong shoe creates a horizontal break that visually chops your leg in half. The right shoe extends the line and lets the jean’s tapered hem work as a frame.

    Pointed-toe ankle boots in a color that approximates your skin tone, or in black, are the most reliable choice. The point extends the visual line of the leg past the actual hem, which is exactly what you want with a tapered cut. A block heel between one and two inches adds height without making the proportion read like you’re trying. I have worn the Naturalizer pointed bootie in black for two years through three pairs of barrel jeans and the proportion is correct every time. Cole Haan has similar shaping at a slightly higher price.

    Sneakers work, but the silhouette matters. A low-profile sneaker in clean white or off-white extends the leg line and reads modern. Chunky platform sneakers fight the cut because they add volume right where the jean is trying to taper. If you want a chunkier sole, go with clean cream or white rather than a multi-color pattern – the visual quiet keeps the proportion clean.

    What to skip: round-toe loafers that sit flat against the foot, mid-calf boots that compete with the ankle taper, anything with a wide ankle strap that creates a horizontal line right at the visual break point, and slides or flip-flops if you’re going for an actual look. Heeled mules with a pointed toe are a possible exception but require a tall enough heel (2 inches minimum) to create the leg-line extension. Anything in between just looks like you didn’t decide.

    Close-up of plus-size barrel jeans tapered hem ending above pointed-toe black ankle boots

    Outerwear without doubling the volume

    Outerwear is where the most expensive mistakes happen because the wrong coat undoes every other correct choice. The cardinal rule: your coat should not add visible volume below the hip line. The barrel jean is already doing volume work in the leg. A puffer that hits mid-thigh or a long oversized cocoon coat layered over a barrel creates a Michelin-tire silhouette that even Karla Welch could not save.

    The outerwear that holds up: a structured trench at hip or just-below-hip length, a tailored topcoat in a wool blend that grazes the hip, a cropped moto jacket in leather or a leather alternative, and a fitted denim trucker in a different wash from your jeans (a contrast wash or true black). All four cut the silhouette at a structural point that emphasizes your waist rather than compounding the lower-body volume. A single-breasted topcoat at 70 percent wool minimum is the most useful piece here and outlasts trend cycles by years. Universal Standard, Eloquii, and J.Crew extended all carry this shape through size 28.

    If the weather requires a longer coat, the coat itself has to be slim through the body. A floor-length wool with a defined waist and minimal volume in the skirt – the kind you see in Theory or Vince extended – sits cleanly over a barrel. Tie the belt at your natural waist. Skip any coat marketed as voluminous or cocoon. The volume math always loses. For layering underneath, a thin merino crewneck tucked into the jeans and topped with a structured blazer works through fall and most temperate winters. Avoid bulky chunky sweaters under outerwear with this jean.

    Fitting-room signals this pair is wrong

    Some barrel jeans are not going to work no matter what you do in styling, and you can tell within sixty seconds in the fitting room. The five signals to watch for:

    1. The taper hits the wrong place on your leg. A correctly-graded barrel taper should land just above your ankle bone. If it lands at mid-calf or below the bone on your foot, the inseam is wrong for your height and you need a different length, not a different size.
    2. The volume collapses against your thigh when you stand still. Walk around the fitting room. Sit down and stand up. If the curve flattens against your leg within a minute, the pattern is decorative rather than engineered and the jean reads sad by hour two.
    3. The waistband gap is wider than a finger. A small gap is fixable with a $15 to $25 tailor take-in. A two-finger gap means the brand’s hip-to-waist ratio is too far off your body for the jean to work without major reconstruction.
    4. The fabric refuses to drape. Barrel jeans depend on the fabric having enough weight and drape to hold the curve. Stiff denim with no movement reads as costume. You want eleven to thirteen ounce weight with around 2 percent elastane for recovery without sagging.
    5. The front-pocket bag is visible from the side. If you can see the pocket lining poking out, the pocket placement is wrong for your hip and you’ll be tugging at it all day. Pinch and check before you buy.
    Back view of plus-size barrel jeans showing waistband fit and curved leg shape

    What to keep on hand

    You don’t need much. A soft cloth measuring tape from any basic sewing tape on Amazon for under $5 covers the waist, hip, and inseam measurements you need to size confidently across brands. A notebook page or Notes app entry tracking the actual inseam landing point and waistband gap on each barrel pair you’ve tried gives you a reference set so you stop re-learning the same lesson with every order.

    The brand starting points worth knowing: Universal Standard’s barrel cut runs through size 40 with a true high rise and a contour waistband. Eloquii’s barrel runs through size 28 and has a slightly looser hip grade that works well on a pear shape. Old Navy’s plus barrel is the budget pick. Good American extended sizes do barrel with the heaviest fabric weight of the four and the silhouette holds the longest. For tailoring, a neighborhood specialist who works on denim is worth more than a cheaper general alterations shop. The hem alteration on this cut has to preserve the taper curve, which not every tailor will take on.

    Frequently asked questions

    Are barrel jeans only for tall women?

    No, but the proportion math changes by height. Under 5’4″, look for the petite or short inseam in barrel cuts so the taper still lands above your ankle bone rather than at mid-calf. Most plus-size brands now offer petite cuts in their barrel options, but you have to filter for them. If the brand doesn’t make a petite, plan on a $20 to $30 hem alteration as part of the purchase cost.

    Can I wear barrel jeans to work?

    In most workplaces, yes, if you style them correctly. A dark indigo or black barrel paired with a structured blazer, a tucked silk-blend top, and a pointed bootie reads as deliberate workwear. Skip light washes, distressing, or any styling that leans casual. The cut itself is no longer fashion-forward enough to read as risky in most offices, but the proportion still needs to be intentional rather than weekend-pulled-together.

    What’s the difference between a barrel jean and a balloon jean?

    A barrel tapers back in at the ankle. A balloon keeps the full volume to the hem. The barrel is the more wearable of the two for most plus-size bodies because the taper creates a defined ankle break that lets the shoe finish the silhouette. The balloon requires a much more specific styling vocabulary and reads more costumey if you get the top or shoe wrong. Start with barrel; advance to balloon if you genuinely love the shape.

    Will barrel jeans look dated in two years?

    The most extreme cuts (very high curve, very dramatic taper) will likely read 2024-2026 within a couple of seasons, the way ultra-skinny jeans now read 2014. A moderate barrel in a dark wash with a clean high-rise waistband will outlast the trend cycle because the silhouette is fundamentally a softened version of a wide-leg, which is a perennial. Buy the moderate version first and let the trendier cuts come and go.

    Final word

    Plus-size barrel jeans are not the trend that’s going to humiliate you. They’re a silhouette that responds well to specific styling rules and badly to defaults. Pick a true high rise, anchor the waist with a tucked or partial-tuck top, finish the leg with a pointed or low-profile shoe, and keep the outerwear above the hip. Get the hem tailored if it lands wrong. Skip the cuts where the curve collapses against your leg. The pair I reach for is the Universal Standard barrel in dark indigo, size 18, $108. The hem got a $25 alteration to hit just above my ankle bone. The link’s below.

  • The 120-Year History of Lane Bryant, the Brand That Built American Plus-Size Retail

    The 120-Year History of Lane Bryant, the Brand That Built American Plus-Size Retail

    Lane Bryant archival maternity dress and a modern Lane Bryant denim look side by side as a 120-year brand timeline

    In 1904, a nineteen-year-old Lithuanian immigrant named Lena Himmelstein took her single-needle sewing machine into a small Manhattan storefront on Fifth Avenue and started sewing tea gowns and lingerie for women in her neighborhood. She had been widowed at twenty-three, raising her infant son David, and the sewing machine had been a wedding gift from her late husband. One of her clients, pregnant and trying to navigate Edwardian society without admitting it, asked Lena to make her something she could leave the house in. Lena pleated an elastic waistband into a wool tea gown. That dress is the founding artifact of American plus-size retail, even though “plus-size” as a category did not exist yet and would not exist as a clean retail concept for another three decades.

    This is the long version of the Lane Bryant story. 121 years, four ownership eras, two near-death restructurings, and one quiet truth the brand has not fully resolved: Lane Bryant invented the plus-size department store and then spent the back half of its history figuring out what to do with the thing it invented after the rest of the industry caught up. Every other plus brand on the racks today is either standing on Lane Bryant’s shoulders or actively arguing with the playbook Lane Bryant wrote.

    The founder story you only half know

    Lena arrived at Ellis Island from Lithuania in 1895 at age sixteen with $1 in her pocket and a sister already in New York. She took a job as a seamstress earning $1 a week, then moved to a higher-paying corset house at $15 a week. In 1899 she married a jeweler named David Bryant, had a son, and was widowed within two years. She fell back on the sewing skills and opened the Fifth Avenue shop in 1904 on custom commissions for women in her immediate neighborhood.

    The maternity-dress innovation – a pleated elastic waistband let into a tea gown so it could expand with the pregnancy – was so unusual in 1904 that newspapers refused to advertise the garment for years. Maternity was something a woman was supposed to hide. Lena’s first newspaper ad did not run until 1911, when the New York Herald finally agreed. The ad sold out the entire stock the next day. By 1915 she had remarried, to engineer Albert Malsin, who built the merchandising side around her design instincts. The name itself is the detail most people know: a bank teller misspelled “Lena” as “Lane” on her business account paperwork and she kept the typo because it was already on the checks. Pragmatic.

    The pivot from maternity to plus-size happened in the late 1910s, and Albert Malsin saw it first. He noticed that many of Lane Bryant’s maternity customers were not actually pregnant – they were plus-size women who could not buy dresses anywhere else and were ordering the maternity line because it was the only ready-to-wear in the country cut for fuller figures. Albert commissioned a statistical study of 4,500 women’s measurements, one of the first applied anthropometric studies in American retail, and used the data to draft a standardized plus-size grading system. In 1923 the company launched the “Stout Women’s” line, the first ready-to-wear plus-size collection sold at retail in the United States. By 1923 Lane Bryant was doing roughly $5 million in annual sales.

    What the brand actually does, then and now

    Lane Bryant in its current form sells women’s apparel in US sizes 10 through 40, with the deepest assortment concentrated in sizes 14 through 28. The categories: denim, dress pants, tops, dresses, intimates through the Cacique sub-brand, activewear, outerwear, and a small accessory and shoe assortment. The Cacique intimates business was launched as an in-house Lane Bryant brand in 1996 and has been the most consistent profit engine inside the company for the last two decades. The brand operates around 540 stores in the US today, down from a peak of roughly 800 in the early 2010s, plus the lanebryant.com direct channel which has grown into the larger of the two.

    The price tier is mid-market. Signature denim runs roughly $70 to $90 at full price and frequently lands in the $40s on promotion. Dress pants are in the $60 to $90 range. The Cacique full-coverage bras start around $42 and run to about $65, with sister sizes through 40H and beyond in select fits. The bra-fitting program has been one of the brand’s quiet competitive advantages for decades – the in-store associates are genuinely trained on the bra fits, and the assortment includes back sizes (40, 42, 44, 46) and cup sizes (G, H, I) that most mainstream lingerie brands still do not stock.

    Distribution is direct – the brand’s own stores plus lanebryant.com. Lane Bryant does not wholesale into department stores in any meaningful way, which distinguishes it from newer plus-size labels that route through Nordstrom or Macy’s. The trade-off: it controls the shopping experience end to end but bears the full cost of the physical footprint, which is the variable that has driven most of its restructuring drama over the last fifteen years.

    A modern Lane Bryant store interior showing the denim assortment and Cacique bra wall

    Where the brand gets it right

    Start with the bras. Cacique remains the deepest plus-size bra assortment under one roof in American retail. The brand fits up through a 44H in several core styles and stocks the bandeaus, the racerback convertibles, and the no-wire balconettes that women in the 38-46 band range cannot easily find at Victoria’s Secret or ThirdLove. The fitting service is free, the associates are trained, and the return policy is generous. It is the part of the business hardest for any newer entrant to replicate, because the back-and-cup-size assortment requires an inventory commitment DTC brands struggle to fund.

    The denim fit grading is the second strength. The block has been refined over decades and the result is one of the few mid-market plus-size denims that grades proportionally through size 28 without losing the waist-to-hip ratio. The Skinny, Boyfriend, and Wide Leg blocks all sit on a real waistband rather than the rolled-elastic compromise a lot of brands at this price point default to. Not as flattering as Universal Standard‘s higher-priced denim, but at half the price it is doing real work.

    The third strength is store accessibility. 540 physical locations means a plus-size woman in a mid-sized American city can walk into a store, try on jeans in size 22, try a bra in 42DD, and walk out with both. Eloquii is largely DTC. Universal Standard has a small store footprint. Torrid has stores but at a different price point and aesthetic. For the woman who wants to physically try things on in her size, Lane Bryant is still the largest game in the country.

    The fourth: the brand has stayed honest about who it dresses. Lane Bryant’s marketing for the past decade has used plus-size models from the actual size range it serves. The “I’m No Angel” campaign in 2015, the Plus is Equal industry push in 2016, the ongoing campaign work with models like Ashley Graham and Precious Lee – all of it has kept the brand visually anchored to its customer in a way the major department stores have never managed.

    Where there is room

    The product design has been cautious. For most of the 2010s, the assortment leaned on workwear staples, classic dresses, and bootcut denim – safe pieces for a customer the brand assumed wanted to blend in. The result is that Lane Bryant ceded the editorial, trend-forward plus-size space to Eloquii and the higher-fashion designer capsules. The brand is now playing catch-up on the silhouettes that have defined plus-size fashion over the past five years: the wide-leg trouser, the architectural blazer, the corseted bodice dress, the slip skirt. The 2024 and 2025 collections have pushed into this territory, but the brand is still working against a reputation for being the place your aunt bought her dress pants.

    The store experience varies wildly by location. Some stores are well-merchandised, well-staffed, properly lit. Others, more common in secondary mall locations, feel underfunded, with stale visual merchandising and limited size depth on the floor. The brand has been closing the weakest locations for several years, but a shopper’s first impression still depends heavily on which mall she walks into.

    Pricing on certain core categories has crept higher than it should be for the quality tier. A non-denim dress pant at $90 sits in the same range as Universal Standard‘s wide-leg trouser, which is cut and constructed at a noticeably higher quality level. The brand has not always justified the mid-market pricing with mid-market product, and the gap shows up most clearly in the woven tops and lighter-weight knits.

    The ownership eras that shaped what the brand is now

    The 121-year ownership chart is essential context. Lena Himmelstein Bryant Malsin and her family ran the company until 1982, when the Malsins sold Lane Bryant to The Limited, Inc., the Leslie Wexner conglomerate that also owned Victoria’s Secret and Express at various points. The Limited held Lane Bryant for nineteen years and grew the store footprint substantially but is widely viewed as having under-invested in the plus-size product itself, treating it as a steady cash generator rather than a brand to develop.

    In 2001 The Limited sold Lane Bryant to Charming Shoppes, the Pennsylvania-based plus-size conglomerate that also owned Fashion Bug and Catherines. The Charming Shoppes era built Cacique into a real franchise and pushed the store count to its peak. It is also the era that turned Lane Bryant into a meaningful piece of the plus-size retail establishment.

    In 2012 Ascena Retail Group, the publicly traded specialty conglomerate that already owned Ann Taylor, Loft, and Justice, acquired Charming Shoppes for about $890 million and folded Lane Bryant into the portfolio. The Ascena era is the troubled stretch most plus-size shoppers remember. Ascena over-leveraged itself across too many brands, mismanaged the merchandising disciplines that had made Charming effective, and entered bankruptcy in 2020.

    Lane Bryant came out of the Ascena bankruptcy in late 2020 when private equity firm Sycamore Partners acquired it along with Catherines and a couple of other Ascena assets. In 2024 Sycamore restructured the business again, closing additional underperforming stores and re-investing in digital. The brand operates today as part of Premium Apparel LLC, the Sycamore holding entity that also owns Loft and Ann Taylor. The ownership history explains why the brand has had stretches of brilliance and stretches of drift – it has been pulled between strategies by ownership groups with different priorities for over four decades.

    A flat-lay of Lane Bryant signature pieces: skinny denim, Cacique no-wire bra, and wide-leg trouser

    What to buy from them

    If you are walking into Lane Bryant for the first time or coming back after a few years away, the assortment to actually engage with is narrower than the catalog suggests. Five categories where the brand is still doing its best work:

    The Cacique No-Wire Bra at around $52 is the bra I recommend to anyone in a 38-46 band size who has given up on wire bras after years of underwire poking. The fit through the 42 and 44 bands is the best I have tried in this category, and the back closure has three hook columns rather than the two most brands stop at. Worth the trip into a physical store for a fitting.

    The Signature Fit Skinny Jean at around $80 is the denim that earns its place. The waistband is real, the rise is high enough to actually stay up, and the grading through 18, 20, 22 is proportional rather than tapered-to-cylinder. I size down a half-size in this style because the waistband stretches over the first three wears.

    The Wide Leg Trouser at around $90 is the dress pant the brand has finally gotten right after years of bootcut-only assortments. The drape is closer to a proper trouser than to a stretch pant, the back darts grade through size 28, and the inseam options include a true Petite at 28 inches. Order one length up from your usual and have it hemmed if you wear flats.

    The Cacique Cotton Fit Panty 5-Pack at around $40 is the underwear most plus-size women I know rotate through. The leg openings sit flat without rolling and the cotton-modal blend washes consistently through hundreds of cycles. Buy three packs, throw out the rest of your drawer.

    The Cacique T-Shirt Bra Balconette at around $58 is the wired option for the days when you want lift and structure under a fitted top. The cup grading through the H range is the part most other brands skip, and Cacique’s fit through 40H specifically is one of the few options at this price point.

    Why this 120-year history actually matters

    It is tempting to read this story as nostalgic – 121 years, the immigrant founder, the family origin. The more useful read is that Lane Bryant is the case study for what happens to a category-defining brand when the rest of the industry catches up. The Malsins built the plus-size department store in 1923 because no one else would. For the next sixty years, Lane Bryant had the category to itself. From the 1980s onward the rest of the industry started entering – first the mass chains, then Torrid and Eloquii, then the DTC entrants like Universal Standard, then the designer capsules.

    The answer the brand keeps arriving at – bras, denim, store accessibility, real plus-size casting – is defensible. None of those four things is easy to replicate. The bra assortment is an inventory commitment most brands cannot fund. The denim grading is decades of fit-block work. The store footprint is a real-estate position newer brands have not built. The casting is editorial discipline earned by serving this customer for a century. Where the brand has lost ground is trend-forward product design and the editorial energy newer labels have brought to plus fashion. That is fixable. Whether the Sycamore-era turnaround sticks is the question worth watching over the next three to five years.

    I bought the Wide Leg Trouser in a size 18 in the longer inseam at $90 from lanebryant.com last month. First Lane Bryant pant I have owned in roughly six years. Not the equal of my Universal Standard wide-leg, but closer than I expected, and at this price tier that is the more relevant comparison. The link is below.

  • Madewell Curvy vs Regular: The Denim Fit Test That Settled It

    Madewell Curvy vs Regular: The Denim Fit Test That Settled It

    Two pairs of Madewell jeans arranged side by side - Curvy fit and Regular fit

    After pulling forty-two return-window reviews off the Madewell site, tracking rise and inseam specs across six denim styles, and ordering both the Curvy and Regular versions of the same washes in my own size, the picture got clearer than the brand’s own marketing makes it. Madewell sells two different jeans under one brand name and the difference is not cosmetic. The Curvy line is built around a different waist-to-hip ratio, a different back-rise number, and a different stretch percentage in some washes. The Regular line is the brand’s original fit and was cut for a closer-to-straight torso. If you have a real hip-to-waist difference and you have been buying Madewell Regular because that is what the store carried in your size, you are almost certainly wearing the wrong pair. After six months of wearing both, here is what the test actually showed.

    Madewell launched the Curvy fit in 2018 because the brand’s denim was failing a meaningful percentage of customers at the back-waist gap. Universal Standard, Good American, and Eloquii were already building plus-size denim with a curvier block. Madewell added Curvy as a parallel fit inside the same denim styles – same washes, same inseams, same names (the Perfect Vintage, the Slim Demi-Boot, the Wide-Leg). I bought both in the same washes and the same nominal size and wore each through three contexts: work week under sweaters, weekend errands with a tucked tee, and one wedding-guest moment with heels.

    Quick verdict if you only have 30 seconds

    Madewell Curvy wins for any body with a four-inch or greater waist-to-hip difference. The back-waist sits flat, the hip room is real, and the rise stays put through a full day of sitting. Madewell Regular is the right pick only if you have a straighter torso, a smaller hip-to-waist gap, or you specifically want a looser fit through the seat. For plus-size readers in the size 18 to 24 range, Curvy is the answer most of the time. The Regular fit is not bad, it is just cut for a different shape. Full reasoning below.

    What they are and how Madewell positions them

    Madewell Regular is the original Madewell denim block, cut for what the brand calls a “more even ratio through the waist and hip.” In practice that means the back-waist is straighter, the hip room is moderate, and the rise (front and back) is the published number with no extra ease added at the back. The Regular line covers sizes 23 through 35 and includes Madewell’s flagship styles: the Perfect Vintage Jean, the Slim Demi-Boot, the Wide-Leg, and seasonal updates.

    Madewell Curvy is a different block built on a higher back-rise, a more contoured waistband, and approximately two inches more room through the hip relative to the waist in the same nominal size. The Curvy line covers most of the same Perfect Vintage styles, the Slim Demi-Boot, the Wide-Leg, and several of the high-rise options. Not every Madewell style comes in Curvy, which is one of the line’s real limitations. The Curvy fit goes from size 23 through 35 in core washes and from 14W through 28 in some plus-extended pieces. The brand uses both numeric and W-numeric sizing across the same line, which is part of why buyers end up with the wrong pair.

    The brand does not heavily market the Curvy line on its homepage. You have to filter for it. The product page for a Perfect Vintage in Regular will not surface the Curvy version unless you click through, which means a plus-size buyer who lands on the site via a Pinterest pin is likely to add the Regular to cart by default. This is a recurring complaint in the Madewell subreddit.

    Side-by-side comparison

    Feature Madewell Curvy (Perfect Vintage) Madewell Regular (Perfect Vintage)
    Price (full retail) Around $138 Around $128
    Size range 23 to 35 plus 14W to 28 23 to 35
    Back rise Higher, contoured Standard, straight
    Hip room vs waist Approximately 2″ extra through hip Even ratio waist to hip
    Fabric (core washes) Cotton blend with 2-3% elastane in most washes Cotton blend with 1-2% elastane in most washes
    Inseam options Petite, standard, tall in core styles Petite, standard, tall in core styles
    Return window 30 days unworn, tags attached 30 days unworn, tags attached

    The retail prices are close. The fit math is not. That two-inch hip-to-waist offset is the entire reason the Curvy line exists, and on a body with a measured hip-to-waist difference of nine inches or more, you can feel it within the first thirty seconds of trying both on.

    Madewell Curvy: the line built for the gap

    I bought the Perfect Vintage Jean in Curvy in the Bellevue wash, size 33, standard inseam. The first thing that registered when I pulled them on was the back-waist behavior. No gap. The waistband sat flat against my lower back when I sat down, when I bent over, when I stood back up. The Regular pair in the same size and wash had a roughly inch-and-a-half gap at the back when I sat, which is the exact problem the Curvy line is supposed to solve. It solves it.

    The hip room is real but not exaggerated. The Curvy is not a stretchy compromise that adds elastane to fake the fit – the cotton content is still high and the structure of a real denim jean is preserved. I washed them cold and hung them dry and they came back to original size after each wash with no stretching out at the knee or seat through twelve wears.

    The rise is the second thing the Curvy gets right for a plus-size body. The back is cut taller, which means the waistband does not slide down when I sit. On the Regular, sitting at my desk for two hours produced the familiar slow descent toward the lower hip, then a discreet pull-up before standing. The Curvy did not do that. Over a full workday this matters more than any single feature.

    The fit through the thigh is the trade-off. The Curvy adds room through the hip and seat but the thigh in some washes runs slightly fitted by comparison, which on my size 18 lower body felt close but not tight. On a fuller thigh (size 22 plus), some Madewell subreddit reviews report the Curvy thigh still pulling.

    Buy the Curvy from Nordstrom for the more generous return window than the 30-day Madewell direct policy. Nordstrom takes back denim case-by-case without a hard cutoff, which on a $138 jean matters when the fit issue does not surface until wear three.

    Plus-size woman wearing Madewell Curvy Perfect Vintage jeans showing the flat back-waist fit

    Madewell Regular: the original block that fits a narrower shape

    The Regular Perfect Vintage in the same Bellevue wash, same size 33, same standard inseam. The fit story is the inverse of the Curvy. The waist sat on me with about an inch and a half of gap at the lower back. The hip room felt tighter through the seat and looser through the upper thigh, which is the signature of a block cut for a more even waist-to-hip ratio. On a body with a smaller hip-to-waist gap (the four-to-six-inch range), the Regular would fit cleanly. On my nine-inch gap, it did not.

    The Regular is not poorly made. The fabric is the same denim base, the stitching is the same Madewell quality, the wash holds up the same way. The construction is identical to the Curvy. The pattern is what differs. If you have been wearing Madewell Regular for years and you fit a straighter body type, there is no reason to switch. If the fit has always been “almost right but the waist gaps,” the Curvy block is what you actually want.

    One real strength of the Regular line: more washes and more styles. Madewell releases seasonal washes faster on the Regular block than on the Curvy. If you want a specific wash for a wedding-guest outfit and the Curvy is not yet cut in that wash, you may need to go to a competitor brand or wait. The second real strength: the Regular holds up well to alteration. A tailor can work with the Regular block more easily than the contoured Curvy waistband. For size 18 to 20 buyers who would rather pay $25 for a tailor than swap, the Regular plus alteration is a viable path.

    Buy the Regular from Nordstrom over Madewell direct for the same return-flexibility reason. The Madewell direct site offers 30 days from delivery and requires tags attached. Nordstrom is more forgiving on fit-based returns past day thirty.

    Where they overlap and where they differ

    Both lines use the same denim mills, the same Perfect Vintage name, the same five-pocket construction, and the same nominal sizing range from 23 to 35 in core styles. Both come in petite, standard, and tall inseams. Both are washed and finished the same way, which is why side-by-side they read as the same jean from across the room. The differences are structural and live in three places: the back rise (Curvy is taller and contoured), the hip-to-waist ratio (Curvy adds approximately two inches of hip room relative to the waist in the same size), and the stretch percentage (Curvy core washes carry slightly more elastane to accommodate the contoured fit without binding).

    Price-wise the Curvy runs around $10 higher per style than the equivalent Regular, which feels reasonable for the additional pattern work and the more contoured waistband. The size range overlaps from 23 to 35 in numeric sizes but the Curvy extends into the 14W to 28 W-numeric range in some plus-extended pieces. For sizes above 35 (roughly above a 24), Curvy is the only Madewell option in many styles. For sizes 23 to 28, both are available and the choice comes down to body shape alone.

    Which one for which person

    If your hip measurement is eight inches or more above your waist measurement and you have been frustrated by gap-at-the-back-waist on Madewell Regular, get the Madewell Curvy Perfect Vintage . This is the fit the line was built for. Order your usual Madewell number and the back-rise problem disappears. The hip-to-waist contour is the whole point.

    If your hip-to-waist difference is closer to four to six inches and the Regular has been fitting you reasonably well, stay with the Madewell Regular Perfect Vintage . The Curvy will gap at the hip on a straighter shape, which is the opposite of the problem it solves. Body shape, not body size, determines which line is right.

    If you wear size 24 or above, the Curvy is the practical answer because the Regular size range tops out below where you need it in most styles. Look at the W-numeric range on the Curvy side of the site. The Universal Standard Seine jean and the Good American Always Fits line are the cross-shop options if Madewell Curvy still does not sit right – both brands cut a denim block specifically for plus-size buyers and both offer longer return windows than Madewell direct.

    If you live in a market without a Madewell physical store, Nordstrom carries both lines in many washes and offers a longer fit-based return window than Madewell direct. Order both, try both at home, return the loser within Nordstrom’s window. This is the fastest way to settle the fit question without burning the Madewell 30-day clock.

    Frequently asked questions

    Is Madewell Curvy actually plus-size or is it a curvy-cut for straight sizes?

    It is both. The Curvy line covers 23 through 35 in numeric sizes (roughly 0 to 24) and extends into the W-numeric range (14W through 28) in some plus-extended pieces. It is not a dedicated plus-size line in the way that Torrid or Eloquii are, but it does carry sizes above where the Regular caps and the fit is built around a curvy hip-to-waist ratio that applies across the size range. A size 6 with a curvy block fits the Curvy line as well as a size 22.

    How does Madewell Curvy compare to Universal Standard or Good American for plus-size denim?

    Universal Standard Seine jeans run about $100, cover sizes 00 through 40, and offer a 60-day return window. The fit is comparable to Madewell Curvy through the hip but slightly less contoured at the back rise. Good American Always Fits jeans run $159 to $189 and use a high-stretch denim that holds its shape across two adjacent sizes. For sizes above 24, Universal Standard is the better cross-shop.

    If I have always worn Madewell Regular, do I need to size down in Curvy?

    No. Order your usual Madewell numeric size in Curvy. The Curvy adds room through the hip relative to the waist in the same size – it does not run larger overall. If you typically wear a 33 in Regular, order a 33 in Curvy. If the waist feels too loose after that, then size down. Most buyers do not need to.

    Do Madewell jeans shrink after washing?

    Cold wash and hang dry, no meaningful shrinkage in either line through twelve wears. Dryer heat will shrink the elastane in both Curvy and Regular by approximately a half-size within two cycles and will visibly distress the fabric. Both lines are washed and finished the same way, so the shrinkage risk is identical. Air dry or low-heat tumble if you must.

    Final pick

    Madewell Curvy Perfect Vintage. Worth the extra $10 over Regular for any body with a real hip-to-waist gap, and the only practical option in many styles above size 24. If you have always defaulted to Madewell Regular because that is what the homepage surfaces, swap to the Curvy and the back-waist gap disappears. If your body sits closer to an even waist-to-hip ratio, the Regular is still the right Madewell jean and you do not need to switch. Choose by shape, not by size. Buy the Curvy Perfect Vintage at Nordstrom for the more flexible return window, or via Amazon if you have Prime and want it inside two days. Worth it at $138, worth it more at sale.

  • How Much Do Brazilian Waxes Cost Nearby? A Real Price Breakdown for 2026

    How Much Do Brazilian Waxes Cost Nearby? A Real Price Breakdown for 2026

    Close-up of a soft wax strip in a Brazilian wax service

    I have a friend who walked into a European Wax Center in suburban Chicago last spring expecting to pay around $45 for her first Brazilian, the number she remembered from a 2019 appointment in a different city. She walked out forty minutes later having spent $108 – the wax itself, the Strut Club membership the front-desk associate enrolled her in, the post-wax serum she did not ask for, and the tip. She called me from the parking lot. We have since done the math on Brazilian wax pricing across her zip code and three others, called eight studios for first-visit and returning-client quotes, and pulled the receipts from my own waxing log going back to 2022. The number you see on a salon’s website is almost never the number you pay. Here is what a Brazilian wax actually costs nearby in 2026, broken down by what you are really paying for.

    The fast answer

    A Brazilian wax in the United States in 2026 costs between $35 and $120 for the service itself, with the national average sitting right around $65 for a returning client at a mid-tier chain. First-visit promotional rates run $25 to $45 at chains. Boutique and independent salons charge $75 to $120. Add 18-22% for tip, $15-$40 if you are upsold any post-wax product, and $30-$80 a month if you sign a membership at the chains. Realistic all-in budget for a Brazilian wax appointment if you walk in unprepared: $80 to $110. If you know the script and decline the upsells: $50 to $75. Premium boutique route with tip: $90 to $145.

    What actually drives the price

    Brazilian wax pricing looks simple on a menu and gets complicated fast in the chair. There are six different cost levers most salons use, and only one or two are disclosed up front. Once you understand the full stack, you can read a quote and figure out which lever is moving the number.

    Location and metro tier

    This is the biggest single driver. A Brazilian in Manhattan, San Francisco, or West Hollywood runs $85 to $130 at a mid-tier chain. The same chain in Cleveland, Indianapolis, or Phoenix charges $50 to $70 for the identical service. Suburban locations of the same brand are typically 15-25% cheaper than their downtown sister studios. I have personally booked the exact same European Wax Center service in three different metros over the past two years – $52 in suburban Chicago, $68 in downtown Atlanta, $94 in Manhattan. Same wax, same protocol, same brand training. If you live near a metro line that crosses into a cheaper suburb, the drive is often worth the savings on a regular cadence.

    Chain versus boutique versus independent

    European Wax Center, Waxing the City, and LunchboxWax dominate the chain space and price within $5-$10 of each other in any given market. Independent studios and waxing-focused boutiques run 30-60% higher because the esthetician usually owns the chair, sets her own pricing, and is not splitting commission with a corporate parent. The trade-off is real – boutique waxers tend to have more experience on a single client, use higher-grade hard wax, and run longer appointment windows. Whether that is worth the markup depends on how reactive your skin is and how much time you want to spend in the chair. A Sephora-tier service environment costs Sephora-tier prices.

    Membership pricing and the chain trap

    The chains have built their entire pricing model around getting you into a monthly membership. European Wax Center’s Wax Pass and Strut Club programs drop the per-service price by 20-50% but require either prepaying for a 9 or 12-pack or committing to a recurring monthly auto-charge. The math: a non-member Brazilian at EWC averages $68 nationally; the same service for a Wax Pass member averages $42. If you wax every 4-5 weeks, the membership pays for itself in 3-4 visits. If you wax sporadically or you are testing a salon for the first time, the membership is a trap. The front-desk pitch always frames the membership as “today’s savings” but it locks you into the salon whether or not you actually like the work.

    Esthetician seniority and request fees

    Most studios let you book with whichever esthetician has availability. Some charge $10-$20 extra to request a specific senior waxer by name. This fee is almost never disclosed on the website. The reasoning is real – a senior waxer with 5+ years of experience is genuinely faster, gentler, and more thorough than a junior one – but the practice of charging for it on top of the base service is a recent trend that started showing up at boutiques in 2024 and has migrated to some chains in 2026. If your usual esthetician leaves the salon and you are reassigned, you should not pay a request fee to rebook with someone of equivalent seniority. You can ask, and most front desks will waive it the first time.

    Add-on services and the post-wax serum upsell

    The biggest hidden cost line is the post-wax product upsell. At nearly every chain, the front-desk associate will offer you a $24-$48 ingrown-hair serum, exfoliating gloves, or aftercare lotion at checkout, framed as “you really need this for your first appointment.” You do not. A drugstore PFB Vanish or Tend Skin product runs $15-$22 and does the same job. The Strut Club enrollment, if you fall for it, is a $30-$60 monthly auto-charge that auto-renews until you call to cancel during business hours. I have personally watched three friends get talked into Strut Club at their first visit. Two of them paid for 4+ months they never used before they remembered to cancel.

    Tipping and how it changes the real price

    Brazilian wax tipping convention in the US is 18-22% on the pre-tax service total. On a $65 Brazilian that is $12-$14 added. Most clients tip in cash at the chair, though card tipping has become standard at the chains since 2023. The tip is not optional in practice – the esthetician’s hourly base at most chains is below $18 and tips make up the meaningful portion of her take-home. A $50 service is really a $60-$62 service after tip. A $95 boutique service is really a $115-$118 service. Budget for it up front so the actual all-in cost matches what you planned.

    Price tiers with examples

    A budget tier waxing chain studio interior in the $35-$50 first-visit range

    Budget tier: $35-$55 per service. This tier is dominated by first-visit promotional pricing at the major chains – European Wax Center’s “first wax free” promo (you still pay tip), Waxing the City’s introductory rate, and LunchboxWax’s first-visit discount. Returning-client pricing in this tier exists mainly at independent strip-mall studios in lower-cost metros and at training-school clinics where licensed students perform the wax under supervision. The student-clinic route at an Aveda Institute or Paul Mitchell school runs $25-$40 for a Brazilian with a final-year student. The work is slower (60-75 minutes versus 25-35 at a chain) but is supervised and the price is genuinely cheap. If you stock the aftercare yourself, PFB Vanish at around $19 is the workhorse ingrown serum for this tier and outperforms most of the $35 salon-counter products.

    A mid-range waxing studio treatment room in the $55-$80 tier

    Mid-range tier: $55-$80 per service. This is where most regular Brazilian-wax clients land. European Wax Center, Waxing the City, and LunchboxWax all sit in this tier for returning clients at non-membership pricing in mid-cost metros. Independent studios in the same price band tend to offer slightly longer appointment windows (35-45 minutes versus the chain standard of 20-30) and the same quality of hard wax. The mid-range tier is the sweet spot for predictability – the chains have standardized protocols, consistent hard wax, and reliable booking systems. The trade-off is the upsell culture at checkout. To handle the ingrown management without the salon-counter markup, Tend Skin Care Solution at around $22 is the other workhorse, particularly for clients with sensitive skin that reacts to PFB Vanish. Both are sold at Ulta and at most drugstores.

    Premium boutique waxing studio

    Premium tier: $85-$120 per service. Boutique waxing studios in major metros, hotel-spa waxing services, and high-end independent estheticians charge in this band. At this tier you are paying for the chair (a senior esthetician with 7+ years in waxing, often a single-client specialty), the wax (Berodin and Cirepil Blue are the boutique standards versus the proprietary blends at the chains), and the room (longer appointment windows, pre-wax cleansing, post-wax soothing serum included rather than upsold). Premium-tier studios also tend to skip the membership pressure – your relationship is with the esthetician, not the front-desk script. For premium aftercare to match the service, the Fur Ingrown Concentrate at around $32 is the boutique-standard pick and is genuinely better-formulated than the drugstore options, particularly for the bikini-line skin texture. Worth it if you wax in this tier already and want the routine to match.

    Where to save and where to splurge

    Save on the studio environment. A $95 boutique Brazilian and a $58 chain Brazilian use functionally similar hard wax and follow similar removal protocols. The difference is the decor, the appointment length, and the upsell culture. If your skin is not reactive and you do not need the spa-day framing, the chains deliver the same hair-removal result at 60% of the cost.

    Save on aftercare products at the salon counter. The $38 ingrown serum the front desk recommends is almost always a markup on a drugstore-grade formulation. PFB Vanish, Tend Skin, and the Sephora-tier alternatives like Fur do the same job at a third of the salon price.

    Splurge on the esthetician once you find a good one. The difference between a junior waxer and a senior one is not subtle – the senior waxer is faster, gentler, and produces less irritation. If you find someone whose work you like, request her by name and tip well even if her base price is higher. The cost-per-visit goes down over time because your skin reacts less and you do not need to redo problem spots.

    Splurge on consistency. Booking every 4-5 weeks at the same studio with the same esthetician produces dramatically better results than rotating studios chasing the cheapest first-visit promo. The hair grows back finer and more sparsely with regular waxing on a consistent cycle. The first-visit-promo hop costs you the long-term thinning effect that makes Brazilian waxing actually worth doing.

    Frequently asked questions

    Why does the price vary so much from one studio to the next in the same city?

    Three reasons. Chains versus independents account for the biggest gap. Within chains, the same brand charges different prices by zip code based on local rent and local wages. And within any one studio, the seniority of the esthetician you book with can swing the price by $10-$20. Always check the per-esthetician pricing if the studio lists it, not just the base menu price.

    Is the chain membership actually worth it?

    Only if you wax on a consistent 4-5 week cycle and you have already tested the studio for at least two appointments before signing up. The Wax Pass and Strut Club programs at European Wax Center save real money for committed monthly clients – usually 30-40% over the 9 or 12-pack term. The trap is signing up at your first visit before you know whether you like the work or the location. Two appointments at full price is cheaper than one year of a membership you do not use.

    How much should I tip on a Brazilian wax?

    18-22% of the pre-tax service total is the convention. On a $65 service, $12-$14 is standard. Cash tipping was the norm through 2022 but card tipping at checkout is now accepted at almost every chain and most boutiques. If your esthetician was particularly fast, gentle, or accommodating with a request, 25% is appropriate. If you booked through a discounted membership rate, tip on the original service price, not the discounted price.

    Can I get a Brazilian wax cheaper at a beauty school?

    Yes. Aveda Institutes, Paul Mitchell schools, and most state-licensed cosmetology programs offer Brazilian services performed by final-year students under licensed-instructor supervision at $25-$40. The work is slower and the appointment runs 60-75 minutes versus 25-35 at a chain. The supervision is real, the price is genuinely the lowest in the legal market, and the students are typically more careful because they are being graded. The trade-off is scheduling – student clinics run limited hours and require booking 2-3 weeks ahead.

    The realistic number to budget

    For a routine Brazilian wax nearby in 2026, budget $75-$90 all-in including tip at a mid-tier chain in a mid-cost metro. Add $20-$30 if you are in a high-cost city. Subtract $25 if you commit to a membership at a studio you have already tested. Premium boutique route runs $110-$145 all-in. Beauty-school route runs $35-$50 all-in. The single most important move is declining the post-wax product upsell at checkout and buying your aftercare from a drugstore or Ulta for a third of the salon price. Worth it at $58 with a tested esthetician. Skip at $95 if you are paying for the decor and not the chair.

  • Olaplex vs Briogeo: A Bond-Repair Comparison for Textured Hair

    Olaplex vs Briogeo: A Bond-Repair Comparison for Textured Hair

    Olaplex No. 3 and Briogeo Don't Despair Repair side by side on a beige linen background

    Bond-repair hair care became a $1 billion category on the strength of one brand’s patent and one viral hashtag, but the textured-hair conversation has been quietly arguing the case for a different formulation philosophy for years. Olaplex spent the last decade selling a single proprietary molecule (bis-aminopropyl diglycol dimaleate) as the only real fix for damaged bonds, while Briogeo built a cabinet of plant-derived masks and proteins that promise the same surface-level result with a softer ingredient list. Both brands sit on a lot of curly-haired readers’ shelves at some point. Both get recommended by the same hairstylists. And both are routinely misused on the wrong hair type, which is how you end up with low-porosity 4A coils that feel coated, gummy, or weirdly stiff a week after the treatment that was supposed to save them. The category deserves a real comparison, not another five-star praise piece, so here is the side-by-side that addresses what these two brands actually do on natural, low-porosity hair.

    Quick verdict

    For most low-porosity Type 3-4 hair, Briogeo Don’t Despair Repair is the better weekly mask – softer slip, better moisture, no protein-overload risk when used twice a month. Olaplex No. 3 is the better targeted treatment after a color appointment, a flat iron session, or a heavy protective-style takedown, used once every two to three weeks. Most readers buying one of these for general maintenance should start with Briogeo. Most readers who color, heat-style, or chemically process should keep a small bottle of Olaplex No. 3 in the cabinet alongside it. Full reasoning below.

    What they are and where they came from

    Olaplex launched in 2014 around a single patented active. The original three-step system was sold to salons first (No. 1 and No. 2 are professional-only), with No. 3 Hair Perfector as the at-home version. The brand built itself on the bond-repair claim, meaning the molecule supposedly relinks broken disulfide bonds in the cortex of the hair shaft. Since 2014 the range has expanded into shampoos, conditioners, leave-ins, and the No. 8 mask and No. 9 serum, but the core pitch is still the same molecule doing the same job. Olaplex is sold direct, at Sephora, Ulta, and Amazon, and the No. 3 sits at around $30 for 3.3 oz.

    Briogeo launched the same year, founded by Nancy Twine, with a positioning closer to clean beauty than to lab science. The line built around plant proteins, B vitamins, biotin, rosehip oil, and algae extract rather than around one signature molecule. Don’t Despair Repair is the flagship mask in the strengthening range; Scalp Revival is the second pillar of the brand and a separate product category entirely. Briogeo sits at Sephora and Sephora-adjacent retailers, with Don’t Despair Repair at around $39 for 8 oz. The brand was acquired by Wella in 2022, which has not visibly changed the formulations as of this year.

    Side-by-side comparison

    Feature Olaplex No. 3 Hair Perfector Briogeo Don’t Despair Repair
    Price Around $30 for 3.3 oz Around $39 for 8 oz
    Format Pre-shampoo cream treatment Post-shampoo deep conditioning mask
    Core active Bis-aminopropyl diglycol dimaleate (patented bond builder) Rosehip oil, algae extract, biotin, vitamin B5, almond oil
    Recommended frequency Once a week max, sit 10-90 minutes Once a week, sit 10-30 minutes
    Protein load Bond-focused, low traditional protein Light protein from plant sources
    Best use case Post-color, post-heat, post-bleach repair Weekly moisture and slip for textured hair
    Return window 60 days at Sephora, 60 days at Ulta 60 days at Sephora, 60 days at Ulta

    Olaplex No. 3 on low-porosity 4A hair

    I have used Olaplex No. 3 across three different stretches of my hair journey – once during the year I was bleaching out brassiness, once after a flat-iron season where I was straightening monthly, and once as a general weekly add to my routine when I wanted to see what it did on otherwise undamaged hair. The verdict changes a lot depending on which version of my hair was using it.

    What works: when there is actual damage to address, this product earns its reputation. After the bleach year I would apply No. 3 on dry hair, in sections, sit with it for 45 minutes under a plastic cap, then shampoo and condition normally. The next-day curl pattern was visibly bouncier and the strand felt less like a dry rope. The post-flat-iron application gave me less heat-frizz on the next wash day and a curl pattern that snapped back faster than it had been. For a deep-conditioning step after real cuticle stress, the No. 3 does what it says.

    What does not work: on undamaged low-porosity 4A hair, I felt nothing for the first three uses, and after the fourth weekly application I felt my strands going stiff and stretched-out, the classic protein-overload feeling. Low-porosity hair already resists product penetration, so a strengthening treatment on a strand that does not need strengthening tips you toward stiffness fast. The smell is also clinical, almost chemistry-set, and the consistency is a thin cream that runs if you do not stay in sections. The bottle is also small for the price – 3.3 oz disappears in two applications if you have shoulder-length thick 4A hair.

    One real critique: the marketing pitches No. 3 as universally helpful, but the application instructions and the actual chemistry suggest it is meant as a targeted repair, not a maintenance step. If your hair is not chemically processed, heat-stressed, or otherwise structurally compromised, you are not the customer for this product even though the brand sells it like you are. Buy Olaplex No. 3 at Sephora if you want the easiest return path and the bundle pricing on the rest of the system.

    Olaplex No. 3 Hair Perfector bottle held in hand in bathroom setting

    Briogeo Don’t Despair Repair on low-porosity 4A hair

    Briogeo Don’t Despair Repair has been in my weekly rotation, on and off, for about three years. It is the mask I reach for when my hair feels dry and dull but is not actively damaged – the in-between stretch most natural hair lives in for months at a time. The texture is a thick, creamy mask with real slip, the kind that lets a wide-tooth comb glide through a tangle on the first pass instead of yanking.

    What works: the moisture delivery. I apply it after shampoo on damp hair, work it through in four sections from root to tip, sit with it under a plastic cap for 20 minutes (sometimes with low heat from a steamer if I am being thorough), then rinse. The next-day curls are softer, more defined, and less thirsty-looking than they are without it. The slip is what sold me originally – detangling 4A coils with this mask in is the closest I get to a relaxing wash day. The 8 oz jar lasts me about ten weekly uses, which puts it at a better per-use cost than the No. 3 despite the higher sticker price.

    What does not work: the protein content is light but real, and if you stack this with other protein-heavy products in the same week (a hard protein treatment, a heavy gelatin or rice-water rinse), you can still overdo it on low-porosity hair. The packaging is the second issue – the jar opening collects product around the rim and gets sticky after a few uses, which is a small but real annoyance. And the smell, which Briogeo describes as a clean herbal, reads as a bit medicinal to me. Not bad, just not the comforting almond-and-honey smell of a Camille Rose Algae Renew mask, which is the closest direct competitor I would point a reader to.

    The real critique: it is a maintenance mask, not a damage repair, and the brand is honest about that in the product copy. If you have just colored, bleached, or heat-trained your hair, this mask alone is not going to undo the structural stress. Buy Briogeo Don’t Despair Repair at Sephora for the Beauty Insider points and the 60-day return window if it does not work for your texture.

    Briogeo Don't Despair Repair jar open with creamy mask texture visible

    Where they overlap and where they differ

    Both brands sell a once-a-week deep treatment with a strengthening claim, both are widely stocked at Sephora and Ulta, both run in the $30 to $40 range, both are commonly recommended by stylists for textured hair, and both will leave most users with softer, more defined curls the day after use. That is the overlap, and it is enough to confuse a first-time buyer into thinking the choice does not matter.

    The differences are bigger than they look. Olaplex No. 3 is a pre-shampoo treatment, meaning you apply it to dry hair before you wash. Briogeo Don’t Despair Repair is a post-shampoo mask, applied on damp hair after cleansing. Olaplex is built around a single patented bond-repair molecule and is most useful after structural damage. Briogeo is built around plant proteins, oils, and vitamins and is most useful for ongoing moisture and slip. Olaplex is a small bottle that disappears fast. Briogeo is a larger jar with more cost-per-use efficiency. Olaplex smells like a chemistry product. Briogeo smells like a salon product. Both have generous 60-day return windows at Sephora and Ulta, which is the same window across the two retailers, but Ulta is faster to refund on a card and Sephora is more generous on partially-used product when you have Rouge status.

    The deciding question for most readers is whether your hair needs structural repair or weekly moisture, because these two products are aimed at different problems even though the marketing makes them sound like alternatives.

    Which one for which person

    If you have low-porosity Type 3-4 hair that is not chemically colored, not regularly heat-styled, and not coming out of a long protective-style takedown, buy Briogeo Don’t Despair Repair first. It addresses the dry, dull, hard-to-detangle problem that most natural hair runs into between wash days, and it does so without the protein-overload risk that low-porosity textures hit fast. Use it once a week, sit 20 to 30 minutes under a cap, rinse.

    If you color your hair regularly (highlights, full color, bleach), heat-style with a flat iron or blow dryer weekly, or have just taken down a four-week protective style that involved tension on the cuticle, buy Olaplex No. 3 . Use it every two to three weeks as a targeted treatment, not weekly. Apply on dry hair, sit 30 to 45 minutes, then shampoo and condition. Skip the weekly application schedule the bottle recommends if your hair is otherwise healthy.

    If you have high-porosity hair (color-treated, heat-damaged, or naturally porous), the calculus shifts slightly. Olaplex penetrates faster and gives more visible results on high-porosity hair than on low-porosity, so weekly use becomes more reasonable. Briogeo still earns the maintenance slot, but Olaplex earns more of the rotation.

    If you have the budget for both, the smart move is to rotate. Briogeo three weeks of the month for moisture and slip. Olaplex once a month, the week after a color appointment or after a heavy heat session. That is the pattern most textured-hair stylists I know quietly recommend when no one is filming.

    Frequently asked questions

    Can I use Olaplex and Briogeo in the same wash day?

    You can, but for most low-porosity 4A hair I would not. Stacking a pre-shampoo bond treatment with a post-shampoo deep conditioner in the same wash loads a lot of strengthening ingredients onto the strand at once, and low-porosity hair gets stiff fast with that combination. Pick one per wash day and alternate by week.

    Is Olaplex worth it if I do not color my hair?

    Mostly no. If your hair is virgin and you do not heat style, the No. 3 is a treatment your hair does not have a use for, and you will likely feel either nothing or the protein-stiff feeling after a few uses. The Briogeo mask is the better starting point for undamaged textured hair.

    Does Briogeo replace a protein treatment?

    No. Briogeo Don’t Despair Repair has plant proteins but is not a hard protein treatment. If your strands have lost elasticity and snap when stretched wet, you need a true protein treatment like Aphogee Two-Step or an at-home gelatin rinse, not the Briogeo mask. The mask is a moisture-and-slip product with a strengthening assist, not a structural fix.

    How long does each one last on the shelf?

    Both have a 12-month period-after-opening symbol. The Briogeo jar holds up well across that window if you scoop with a clean spatula instead of dipping fingers. The Olaplex bottle, because of the smaller size and the pump-cap design, usually empties within four to six months of regular use, so shelf life is rarely the deciding factor.

    Final pick

    For the average low-porosity Type 3-4 reader buying one product, Briogeo Don’t Despair Repair is the better starting point. Softer slip, better weekly moisture, larger jar, lower protein-overload risk. For readers with color-treated or heat-stressed hair, Olaplex No. 3 earns its spot in the cabinet alongside the Briogeo, used once every two to three weeks as a targeted repair instead of weekly maintenance. Save your money on the No. 3 if your hair is not damaged, and spend it on the Don’t Despair Repair plus a good leave-in like Pattern Beauty’s. Buy Briogeo Don’t Despair Repair at Sephora first, add the Olaplex No. 3 at Ulta later if your hair needs structural repair. Layering order on a Briogeo wash day: cleanse, mask 20 minutes, rinse, leave-in, curl cream, gel, air dry or diffuse.

  • Ozempic vs Mounjaro for Type 2 Diabetes: A Plain-English Comparison

    Ozempic vs Mounjaro for Type 2 Diabetes: A Plain-English Comparison

    Two injectable pen-style medications shown side by side on a cream background for comparison

    After three years of reading GLP-1 literature, talking to friends on these drugs, and watching the conversation around them turn into a marketing circus, the most useful thing I can do is set the comparison out plainly. Ozempic and Mounjaro are both FDA-approved injectable medications for type 2 diabetes, and that is the lane this piece stays in. I am not your doctor. I am not a doctor at all. I am a wellness writer who has watched four women in my life try to make this decision while their endocrinologists were running 15 minute appointments, and I have read enough prescribing information to lay the comparison out in a way that does not require a pharmacology degree. The goal is not to pick a winner for you. It is to help you walk into the appointment with the right questions.

    Both drugs sit inside a class of medications that has changed how type 2 diabetes is treated over the last decade. Ozempic, made by Novo Nordisk, contains semaglutide and was approved by the FDA in 2017. Mounjaro, made by Eli Lilly, contains tirzepatide and was approved in 2022. They are both weekly injections. They both lower blood sugar. They both tend to reduce appetite as a side effect, which is the part of the story that pulled them onto magazine covers. But they are not the same drug, they do not work through identical mechanisms, and the side effect profiles, the cost picture, and the long-term data are different enough that the choice between them actually matters.

    Quick verdict if you have 30 seconds

    For type 2 diabetes specifically, Mounjaro (tirzepatide) shows somewhat stronger A1C reduction and weight loss in the head-to-head trial that compared the two, but it is the newer drug with less long-term safety data. Ozempic (semaglutide) has more years of real-world use behind it, a broader prescribing history, and the cardiovascular outcomes data that made it a default in many endocrinology practices. The right pick depends on your A1C target, your insurance coverage, your tolerance for gastrointestinal side effects, and your doctor’s read on your full health picture. Talk to your endocrinologist. Do not order either of these from an internet pharmacy that is not legitimate.

    What these drugs are and how they actually work

    Ozempic is semaglutide, a GLP-1 receptor agonist. GLP-1 is a hormone your gut releases after a meal, and it does several things – it tells your pancreas to release insulin, it slows down how fast food moves out of your stomach, and it signals fullness to your brain. Semaglutide is a synthetic version of that hormone that lasts long enough to be injected once a week. For someone with type 2 diabetes, the net effect is lower blood sugar after meals, more stable fasting glucose, and often a reduction in appetite that leads to some weight loss as a secondary benefit.

    Mounjaro is tirzepatide, which targets the same GLP-1 receptor but also activates a second receptor called GIP. GIP is another gut hormone that plays a role in insulin secretion and fat metabolism. The dual-action design is the whole pitch behind Mounjaro – by hitting two receptors instead of one, it appears to produce a bigger drop in blood sugar and body weight in clinical trials than GLP-1-only drugs. Both drugs are administered through a pen injector, once a week, with dose escalation over several months to let the body adjust.

    Worth naming the obvious: both have also been pulled into the weight-loss conversation through their sister formulations – Wegovy is semaglutide marketed for weight loss, Zepbound is tirzepatide marketed for weight loss. This piece is about the diabetes versions specifically. If you are interested in either drug for weight management without type 2 diabetes, that is a separate conversation with a separate prescriber pathway.

    Side-by-side comparison

    Feature Ozempic (semaglutide) Mounjaro (tirzepatide)
    Manufacturer Novo Nordisk Eli Lilly
    FDA approval for type 2 diabetes 2017 2022
    Drug class GLP-1 receptor agonist Dual GIP/GLP-1 receptor agonist
    Administration Once-weekly subcutaneous injection Once-weekly subcutaneous injection
    Typical dose range 0.25 mg to 2 mg weekly 2.5 mg to 15 mg weekly
    Typical A1C reduction in trials Around 1.5 to 1.8 percentage points Around 1.9 to 2.4 percentage points
    Cardiovascular outcomes data Yes, established in SUSTAIN-6 trial Trial ongoing as of 2026
    List price without insurance Around $1,000 per month Around $1,000 to $1,100 per month

    Ozempic: the one with the longer track record

    Unbranded weekly injection pen on a wooden desk with a medication tracking card

    Ozempic has been in widespread use for type 2 diabetes since 2017, which means nearly a decade of real-world prescribing data, post-marketing safety surveillance, and outcomes research back it up. For an endocrinologist deciding what to start a newly diagnosed patient on, that history matters. It is the more conservative pick in the sense that fewer surprises tend to show up after a drug has been in the population at scale for years.

    The cardiovascular data is one of the strongest pieces of the Ozempic case. The SUSTAIN-6 trial showed that semaglutide reduced the risk of major cardiovascular events in adults with type 2 diabetes who had cardiovascular disease or were at high risk for it. That kind of outcomes data, not just blood sugar numbers but actual heart attack and stroke reduction, is part of why semaglutide became a default in many practices. If you have type 2 diabetes plus existing heart disease, this is a factor your doctor will weigh.

    A1C reduction in the trials sits in the range of 1.5 to 1.8 percentage points depending on dose. Weight loss as a secondary benefit averages somewhere in the 10 to 15 pound range over roughly a year of use, with wide individual variation. The most common side effects are gastrointestinal – nausea, occasional vomiting, constipation, diarrhea – and they are most pronounced during the dose escalation phase. Most people who tolerate the drug long-term find the GI side effects fade after the first two to three months.

    The real-world downside that does not show up in trial data: shortages. Because of off-label weight-loss demand, semaglutide supply has been intermittently constrained, which means even diabetic patients have sometimes had trouble filling prescriptions. Ask your pharmacy about current availability before you commit to a plan. For broader context on adjusting to a chronic diagnosis, Lori Gottlieb’s Maybe You Should Talk to Someone is the book I keep recommending to women navigating new medical news.

    Mounjaro: the newer drug with stronger trial numbers

    An injection pen beside an open notebook with handwritten dosing notes

    Mounjaro entered the market in 2022 with clinical trial data that turned heads. The SURPASS series of trials showed A1C reductions in the 1.9 to 2.4 percentage point range depending on dose, which is meaningfully larger than what GLP-1-only drugs had been delivering. The weight loss numbers were also larger, with patients on the higher doses losing 15 to 20 percent of starting body weight in some studies. For someone with high A1C numbers that have not come down with metformin and lifestyle changes alone, the bigger reduction can be the difference between staying on oral medications and adding insulin.

    The mechanism is the part that makes researchers cautiously optimistic. GIP activation, in combination with GLP-1 activation, appears to produce metabolic effects that GLP-1 alone does not. Research is underway looking at whether tirzepatide may have benefits for sleep apnea, fatty liver disease, and cardiovascular outcomes in non-diabetic populations, but as of 2026 the cardiovascular outcomes trial in diabetic patients is still ongoing. That is the asterisk – we do not yet have the same heart-attack-and-stroke reduction evidence for Mounjaro that we have for Ozempic.

    Side effects look broadly similar to Ozempic, with some patients reporting more pronounced GI symptoms during dose escalation. The dosing schedule starts at 2.5 mg and can be titrated up to 15 mg over months, with increases happening no more often than every four weeks to allow the body to adjust. The titration is not a small consideration – moving from 2.5 mg to 15 mg is a six-month-plus process for most people who reach the top dose. Cost runs roughly $1,000 a month at list price, with actual out-of-pocket depending on insurance, manufacturer savings card eligibility, and whether your plan has tirzepatide on its type 2 diabetes formulary. If you want a journal to track dosing, meals, blood sugar, and side effects week to week, a basic dot-grid notebook from a brand like Leuchtturm1917 is what my therapist friend recommends for this kind of self-tracking.

    Where they overlap and where they differ

    Both drugs are weekly pen injections, both work through gut-hormone signaling, both reduce blood sugar, both tend to reduce appetite, and both carry warnings about pancreatitis, gallbladder problems, and a boxed warning related to thyroid C-cell tumors based on rodent studies. Both require dose escalation over months. Both produce GI side effects, especially in the first weeks. Both are expensive without insurance. Both have been targets of supply shortages because of off-label weight-loss demand. The overlap is substantial.

    Where they differ comes down to four things. First, the magnitude of the effect – Mounjaro produces larger reductions in both A1C and body weight in head-to-head comparisons, with SURPASS-2 showing tirzepatide outperforming semaglutide on both measures. Second, years of safety data – Ozempic has more, full stop. Third, cardiovascular outcomes evidence – established for semaglutide, still being researched for tirzepatide. Fourth, the insurance and access landscape – which one your plan covers can be the deciding factor regardless of clinical merits, and that is worth checking before you and your doctor settle on a plan.

    Which one for which person

    If your A1C is moderately high (in the 7 to 8.5 range) and you have existing cardiovascular disease or risk factors, Ozempic is the option with the cardiovascular outcomes data behind it. For someone with a relatively simple type 2 diabetes picture and an endocrinologist who wants to start with the more conservatively-evidenced option, this is the path many practices default to.

    If your A1C is significantly high (above 8.5) and you have not gotten the reduction you need from metformin, lifestyle, or a previous GLP-1, Mounjaro’s larger A1C-lowering effect is the case for trying it. If your doctor’s read is that you need a bigger drop to get to target and avoid moving to insulin, the stronger trial data on tirzepatide is the argument for the newer drug.

    If insurance is the practical constraint – and for most people it is – check your formulary first. Some plans cover one and not the other, some require step therapy through metformin and a sulfonylurea first, some have prior authorization requirements that take weeks to clear. The Eli Lilly and Novo Nordisk savings programs each cover commercially-insured patients under specific conditions, and your endocrinologist’s office often has the most current information. For tracking appointments, glucose readings, and questions for your next visit, a dedicated medical journal like a health tracking notebook is genuinely useful, especially for the first six months when you are learning your body’s response.

    If you are weighing either drug primarily for weight loss without type 2 diabetes, the right conversation is about Wegovy or Zepbound with a doctor who specializes in obesity medicine, not Ozempic or Mounjaro off-label. The dosing, the insurance coverage, and the prescribing pathway are different.

    Frequently asked questions

    How long does it take to see results from either drug?

    Blood sugar improvements often start within the first two to four weeks at the starting dose, though full A1C reduction takes about three months to show up on a lab draw. Weight changes typically begin within the first month or two and continue gradually over a year, with most of the loss in the first six to nine months. These drugs work on a slow curve, not a dramatic week-over-week one.

    What happens if you stop taking them?

    Blood sugar typically rises back toward pre-treatment levels, and weight that was lost during treatment often comes back over the following year for many patients. These are treatments meant for long-term management of a chronic condition. Talk to your doctor before stopping for any reason other than a medical emergency.

    Are the side effects actually as bad as the headlines suggest?

    The most common side effects (nausea, occasional vomiting, constipation, diarrhea) affect a significant minority of users, are most pronounced during dose escalation, and tend to improve over the first two to three months. Serious side effects (pancreatitis, gallbladder issues, severe GI symptoms requiring hospitalization) are uncommon but real. Both drugs are contraindicated for people with a personal or family history of medullary thyroid carcinoma.

    Can you switch from Ozempic to Mounjaro or vice versa?

    Yes, with a doctor’s guidance. The transition is usually handled by stopping one drug and starting the other at the lowest dose, then titrating up over weeks or months. Some patients switch because of side effects, some because of insurance changes, some because A1C is not responding on the first drug. It is not a decision to make on your own based on a TikTok video.

    Final pick

    I am not picking a winner here in the way I would for shapewear or skincare, because this is a prescription medication for a chronic disease and the right pick depends on your specific picture in a way a single recommendation cannot capture. What I will say: if I were sitting with a friend asking me which one to ask her endocrinologist about first, my read of the evidence as of 2026 is that Ozempic is the safer default for someone with a longer time horizon and moderate A1C, and Mounjaro is the stronger option for someone with high A1C who needs a bigger reduction and whose insurance covers it. Either one is a real conversation worth having with a doctor who knows your full health picture. Bring the trial data, bring your A1C history, bring your insurance card, and bring the questions you actually have. This isn’t going to fix you, but it might help on a Tuesday. For the journal to take to the appointment, something simple and durable is all you need.

  • How Betsie Larkin Built Honeylove Into the Third Name in Shapewear

    How Betsie Larkin Built Honeylove Into the Third Name in Shapewear

    Honeylove SuperPower shorts and sculpting bodysuit in nude and black on a cream backdrop

    Walk into any Nordstrom intimates floor in 2026 and the shapewear wall used to be a two-name conversation. Spanx on one end, Skims on the other, and a scatter of smaller labels in between that nobody asked the associate about. That has shifted. The Honeylove section now sits at eye level between the two giants in most full-line stores, the packaging in the soft cream-and-black palette that the brand has held since launch, and the associates have actually been trained on the difference between a SuperPower short and a Skims Sculpting one. Eight years after Betsie Larkin started prototyping the first piece in her apartment, Honeylove has become the third name customers walk in asking for by brand.

    This piece is about how that happened. What Larkin built, what the brand executes better than its bigger competitors, where it still falls short, and why it is worth paying attention to as a plus-size customer specifically. The shapewear category had calcified around two brands with very different theories of compression – Spanx tight enough to redistribute, Skims smoother and softer with less hold – and Honeylove arrived with a third theory. Structural, engineering-led, designed not to roll. The proposition is narrow. The execution has been disciplined. The brand has held that focus across nearly every product launch since 2018.

    The founder who could not find a piece that stayed put

    Betsie Larkin is not a celebrity founder. She does not have a styling rolodex, did not come out of a Calabasas product-development pipeline, did not have her name on a fashion-house letterhead before she launched. She was a singer-songwriter in the electronic-dance space in the mid-2010s, performing in fitted stage outfits regularly, and her actual founding story is the one shapewear customers know in their bodies. The pieces rolled down. The waistbands cut. The bodysuits dug into the shoulders. The compression that promised to smooth was actually creating a different silhouette problem two inches above the original one. She tried everything in the category that existed at the time, and the gap she experienced was the gap a lot of women experienced and accepted as the cost of wearing shapewear at all.

    Larkin spent her own savings working with a patternmaker and a small contract factory to prototype a short that would not roll. The breakthrough was a bonded silicone-and-fabric waistband construction that the brand calls the Liftwear waistband – a wide, structured band that grips against the skin without the elastic memory that causes rollover. The first product launched on the Honeylove site in 2018 with no traditional retail partner, no PR push, and a marketing budget that consisted of Instagram ads and a single founder-led story. The product sold out within weeks of the early influencer pickup and the brand has been chasing its own production capacity for most of the years since.

    The reason the founding story matters for the brand identity is the same reason it matters for the product: Larkin was solving a problem she had personally lived inside, and the discipline of that problem-solving shows up in every product the brand has launched since. Honeylove does not chase trend-of-the-moment ingredients or fabrics. The brand has stayed inside a narrow product corpus – shaping shorts, bodysuits, briefs, leggings, bras – and refined that corpus across iterations rather than sprawling into adjacent categories. That is unusual restraint in a venture-backed direct-to-consumer brand, and the restraint is the founder’s fingerprint.

    Betsie Larkin, founder of Honeylove shapewear

    What the brand actually sells

    Honeylove sits squarely in the shaping category. The brand does not make outerwear, lounge, swim, or sleep. The product range is built around a core idea of structured shaping that does not roll, and every silhouette in the line is engineered around the same waistband and panel construction. The hero categories: shaping shorts and briefs, sculpting bodysuits, shaping leggings, shaping bras, and a small set of slip dresses and tank pieces.

    The sizing range goes from XS through 3XL across most of the core line, which lands at roughly a US size 22 to 24 depending on the cut. That is wider than where Skims started in 2019 but narrower than Universal Standard’s full range. For plus-size customers above a 24, the brand still has work to do, and I want to flag that upfront because the marketing language sometimes implies a broader range than the actual product grading delivers. The price tier sits between Spanx and Skims for direct comparison pieces – shaping shorts at roughly $70 to $80, bodysuits at $90 to $130, the leggings at $90, the bras at $60 to $80. Distribution today: honeylove.com direct, Nordstrom in-store and online, Amazon for a curated set of styles, and Macy’s at select doors.

    Where the brand gets it right

    The first thing Honeylove got right is the waistband problem they originally set out to solve. The Liftwear band on the SuperPower short and the Crossover short genuinely does not roll on most body shapes through most of a wearing day. I have worn the SuperPower in a size 2X under a fitted knit dress for a six-hour event and the band sat where I put it at the start of the night. Spanx Suit Yourself in the same wearing scenario migrates downward by about an inch over the same window, in my experience, and Skims Sculpting Shorts sit lower to begin with and ride up at the thigh. The waistband is the thing the brand built itself around, and it works.

    The second is the panel construction across the bodysuits. The brand uses what they call a Sculptlace or patterned-mesh panel through the torso of the sculpting bodysuits, which compresses without creating the smooth-but-stiff feeling of older-generation Spanx, and without the slipperier, softer compression of Skims that smooths more than it shapes. The panel is structured. It holds. For a plus-size body where the goal is genuine redistribution rather than just smoothing, the Honeylove construction does more actual work. The trade-off is breathability, which I will get to in the cons section.

    The third is the discipline around the product line. Honeylove launches roughly three to five new silhouettes per year, with each launch building on the existing engineering rather than chasing a new fabric trend. The 2022 leggings extension, the 2023 bra range, the 2024 slip dresses – all sit inside the same construction philosophy as the original shorts. The brand has not done a beauty extension, a swim extension, or an athleisure extension despite the obvious commercial pull to do so. That focus is rare for a venture-backed DTC label past year five.

    The fourth is the customer-experience layer that often gets overlooked. Honeylove offers a 100-day return window on most pieces – longer than Spanx, longer than Skims, comparable to Universal Standard’s 60-day window. The pieces are returnable worn, which matters in shapewear because the actual question is whether the silhouette works under your actual clothes, which you cannot test in the dressing room with the tags still on. The return policy is the kind of thing that signals real confidence in the product, and the brand has held it across all of its retail expansion.

    Where the brand has room

    Honest critique. The price ceiling is a real friction point. At $130 for the V-Neck Shaping Bodysuit, Honeylove is the most expensive of the three names in the standard shapewear conversation. Spanx Suit Yourself at $98 and Skims Sculpting at $78 both do related work for materially less money. The Honeylove construction is better-engineered, but “better-engineered at 30 to 60 percent more” is a math each customer has to do for herself. I think the bodysuits earn it for the right occasion. I am less convinced the basic shaping shorts earn it when the Spanx and Skims options are within a few percentage points of the same outcome.

    The breathability is the structural trade-off I mentioned earlier. The Sculptlace and patterned-mesh panels that deliver the structured compression also retain heat more than the lighter Skims fabrications. In a sit-down setting that is fine. For a long event in a warm room or any kind of summer wedding in the South, the bodysuit gets noticeable. This is the cost of the structured panel doing real work, but it is a cost worth naming.

    The sizing range above a 22 or 24 is the third gap. The brand markets itself as size-inclusive and the language sometimes implies a wider range than the grading delivers. Pieces in the 3XL grade do not always sit cleanly on bodies above a 24, and the bra range has a narrower band-and-cup matrix than specialty fit brands like Elomi or Cuup. For customers above a 26, the brand is not quite there yet, and that is worth knowing before you place an order.

    How it lines up against the rest of the category

    Honeylove does not exist in a vacuum. The shapewear category has three serious contenders in 2026, and the choice between them is not arbitrary.

    Spanx is the original. Founded by Sara Blakely in 2000, the brand still owns the institutional retail relationships and the broader product range that Honeylove does not have. Spanx Suit Yourself is the bodysuit most associates will hand you first. The fit is consistent. The compression is firm. The cut runs slightly small through the bust on most bodies, and the leg openings can leave a visible line under thinner fabrics. Spanx is the safe choice for the customer who wants the brand the rest of her wardrobe is already paired with. The trade-off is that the product engineering has not moved as far in the last five years as the newer brands have.

    Skims is the second name and the softer-feeling option. Founded by Kim Kardashian in 2019 and now sized through the broadest commercial color range in the category, Skims Sculpting and Skims Fits Everybody are the right choice for the customer whose priority is smoothing and a barely-there feel rather than structural redistribution. The pricing sits below Honeylove on most direct comparison pieces. The compression is genuinely softer. Plus-size customers above a 22 will find the Skims range more reliable than the Honeylove grading, which is the trade-off in the other direction.

    The honest read: if your priority is the bodysuit that will not roll and will actually hold under a fitted dress, Honeylove is the pick. If your priority is the smoother, softer, lower-compression smoothing layer for a casual lean, Skims wins on price and feel. If your priority is buying inside an institutional brand with the widest retail footprint, Spanx is still the default. Three different problems, three different right answers.

    Plus-size woman in fitted knit midi dress with smooth held silhouette in editorial lifestyle photography

    What to buy from them

    If you are buying Honeylove for the first time, do not buy the full system. The smart move is to test the brand on one piece that matches the silhouette problem you are actually trying to solve. The pieces I would put on a first order, in priority order:

    The Honeylove SuperPower Short at around $72 is the foundation piece and the one I would buy first. The Liftwear waistband holds through a wearing day in a 2X, the leg openings sit at mid-thigh without rolling up, and the compression is firm without bruising. This is the piece that earned the brand its reputation and it remains the strongest item in the lineup.

    The V-Neck Shaping Bodysuit at around $128 is the bodysuit I would recommend for a fitted-dress occasion specifically. Run it under a knit midi or a silk slip and the silhouette holds without the typical bodysuit migration at the shoulder seam. Worth the price point if you have a real wear occasion. Probably not worth it as a daily basic.

    The Crossover Short at around $68 is the lower-waist alternative to the SuperPower for outfits that need a piece sitting below the natural waist. The construction is the same Liftwear band in a different cut. This is the right pick for high-rise pants or skirts that sit at the hip rather than the waist.

    The Silhouette Bra at around $78 is the brand’s strongest bra and works as a layering piece under bodysuits or as a smoothing layer in its own right. The band runs true to size, the cup grading is consistent up through the larger sizes the line carries, and the construction is more structured than the Skims Fits Everybody bras at a similar price point.

    The Shaping Legging at around $90 is the piece I am most mixed on but the one I keep returning to in colder months. The compression sits through the leg without bunching at the knee, which is the failure most shaping leggings hit, and the waistband holds the way the brand’s shorts do. Buy this one if leggings are a real part of your rotation. Skip if not.

    Detail of Honeylove Liftwear silicone waistband and Sculptlace panel on a shaping short

    Why this brand matters in the broader shapewear conversation

    Honeylove is worth paying attention to because of what it proved about the shapewear category. The accepted wisdom in 2018 was that the category was mature, that Spanx owned the institutional buyer and Skims would take the next-generation customer, and that there was no room for a third name to mean anything. Larkin’s brand is the counter-evidence. By holding to a narrow product corpus, solving a specific engineering problem, and refusing to sprawl into adjacent categories, Honeylove built a third position in a category that was supposed to be a two-brand race.

    For the plus-size customer in particular, this matters because the rise of a third name with structural compression as its core proposition opens up a meaningful option that did not exist seven years ago. Plus-size bodies often need redistribution more than smoothing, and the brand that built its waistband around that distinction is doing real work the older two brands had not prioritized. Honeylove is not perfect, and the price ceiling and the sizing gap above 24 are both real. But the brand has earned its shelf space at Nordstrom. I am wearing the SuperPower short in a 2X under a Christopher John Rogers knit dress to a wedding in two weeks. The link is below.