Blog

  • 20 Stress Relief Activities You Can Do in Under 10 Minutes

    20 Stress Relief Activities You Can Do in Under 10 Minutes

    Why Quick Stress Relief Matters

    Why Quick Stress Relief Matters

    Stress does not wait for a convenient time to show up. It hits you in the middle of a workday, during your commute, before an important meeting, after a tough conversation, or at 2 AM when your brain decides to replay every embarrassing moment from the last decade. You cannot always take an hour-long yoga class or schedule a spa day when stress strikes. What you can do is have a collection of stress relief activities that work in 10 minutes or less.

    Quick stress relief is not a substitute for long-term stress management strategies – those matter too. But having tools that work in the moment can prevent a stressful situation from spiraling into a full-blown anxiety attack, an emotional meltdown, or a physical stress response that affects your entire day.

    The science behind these techniques is solid. When you are stressed, your sympathetic nervous system activates your fight-or-flight response, flooding your body with cortisol and adrenaline. Quick stress relief activities work by activating your parasympathetic nervous system – the “rest and digest” system – which counteracts the stress response and brings your body back to baseline.

    Woman practicing stress relief breathing in a calm, bright room

    Here are 20 proven stress relief activities, each designed to take 10 minutes or less, organized by category so you can find what works best for your situation.

    Breathing-Based Stress Relief Activities

    Breathing-Based Stress Relief Activities

    Breathing techniques are the fastest way to activate your parasympathetic nervous system. They work anywhere, require no equipment, and can produce noticeable results in as little as 60 seconds.

    1. Box Breathing (4 Minutes)
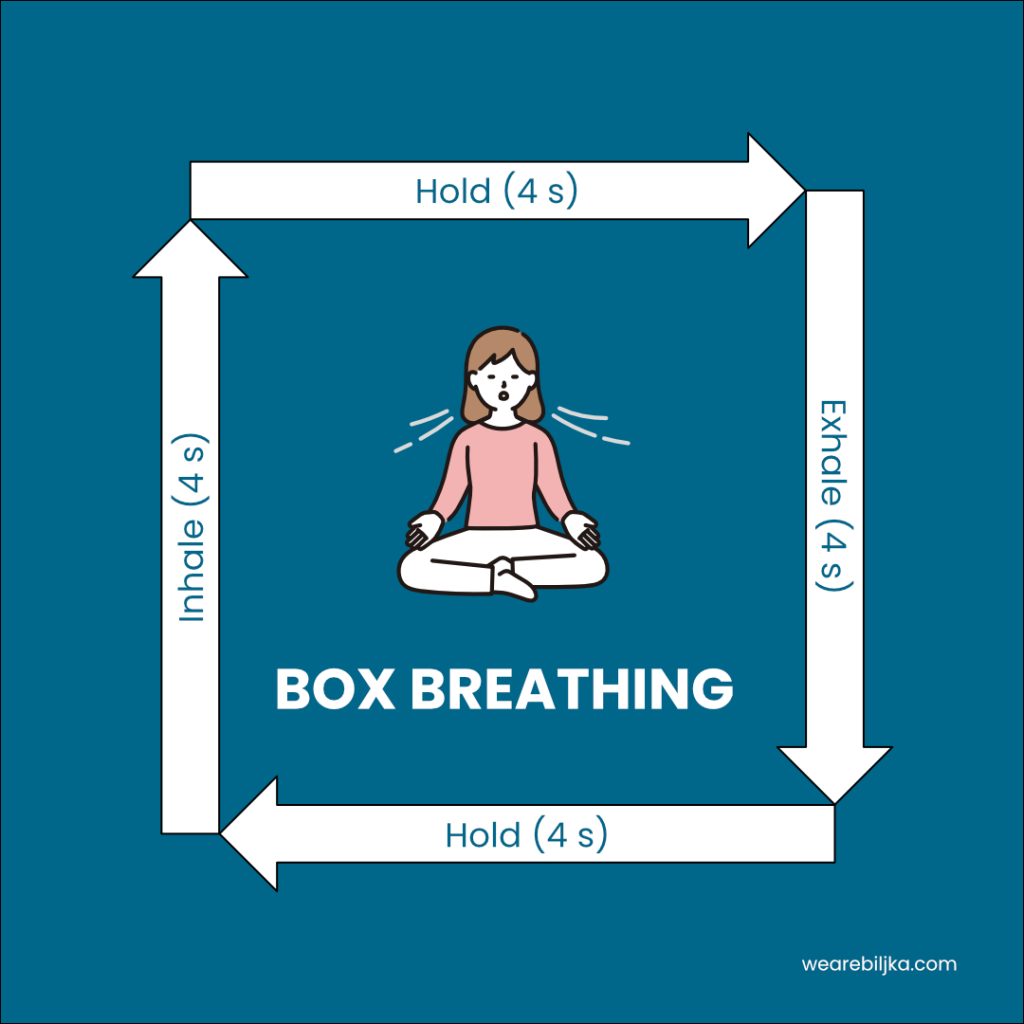
    1. Box Breathing (4 Minutes)

    Breathe in for 4 counts. Hold for 4 counts. Breathe out for 4 counts. Hold for 4 counts. Repeat for 4 minutes. This technique is used by Navy SEALs to manage stress in high-pressure situations. If it works in combat, it can work during your meeting with your manager.

    2. The 4-7-8 Technique (5 Minutes)

    2. The 4-7-8 Technique (5 Minutes)

    Breathe in through your nose for 4 counts. Hold your breath for 7 counts. Exhale through your mouth for 8 counts. The extended exhale is the key – it directly stimulates your vagus nerve, which is the main highway of your parasympathetic nervous system. Do 4 to 8 cycles.

    3. Physiological Sigh (1 Minute)

    This is the fastest breathing technique backed by neuroscience. Take a quick double inhale through your nose – one normal breath immediately followed by a shorter sharp breath that fully inflates your lungs. Then do one long, slow exhale through your mouth. Repeat 2-3 times. Stanford researchers found this technique reduces stress more effectively than traditional meditation in just one minute.

    4. Belly Breathing (5 Minutes)

    4. Belly Breathing (5 Minutes)

    Place one hand on your chest and one on your belly. Breathe in slowly through your nose, directing the air into your belly so your lower hand rises while your upper hand stays still. Exhale slowly through your mouth. This type of diaphragmatic breathing is one of the most natural stress relief activities because it mimics the way you breathe when you are fully relaxed.

    Physical Movement Stress Relievers

    Physical Movement Stress Relievers

    Movement burns off stress hormones and releases endorphins. You do not need a gym membership or workout clothes – these activities work in whatever you are wearing, wherever you are.

    5. Power Walk (10 Minutes)

    5. Power Walk (10 Minutes)

    Walk briskly for 10 minutes – around the block, up and down stairs, through a parking lot. Moving your body at a pace slightly faster than comfortable increases blood flow, oxygenates your brain, and shifts your focus from internal worries to your physical environment. If you can get outside, the combination of movement plus fresh air doubles the benefit.

    6. Progressive Muscle Relaxation (7 Minutes)

    6. Progressive Muscle Relaxation (7 Minutes)

    Starting from your toes and working up, tense each muscle group for 5 seconds, then release for 10 seconds. Feet, calves, thighs, glutes, stomach, chest, hands, arms, shoulders, neck, face. By the time you reach your face, your entire body will feel noticeably more relaxed. This technique works because physical tension and mental stress are deeply connected – releasing one releases the other.

    7. Shake It Off (3 Minutes)

    Stand up and literally shake your body. Start with your hands, then arms, then shoulders, then hips, then legs. Shake vigorously for 2-3 minutes. This might feel silly, but it is based on how animals release stress after a threatening encounter. Your body stores stress as tension, and shaking releases it physically.

    8. Desk Stretching (5 Minutes)

    8. Desk Stretching (5 Minutes)

    Roll your neck in slow circles. Stretch your arms overhead. Twist gently at the waist. Roll your shoulders backward. Stretch your wrists and fingers. These simple stretches release the tension that accumulates in your body during long periods of sitting, especially if you carry stress in your neck, shoulders, or back.

    9. Dance Break (5 Minutes)

    9. Dance Break (5 Minutes)

    Put on your favorite upbeat song and dance like nobody is watching. Close your office door, put in your earbuds, or wait until you are alone – then move. Dancing combines physical movement with music and joy, making it one of the most effective and enjoyable stress relief activities available. You will feel ridiculous and you will feel better. Both things can be true.

    Woman dancing joyfully in her living room for a quick stress relief break

    Sensory Grounding Techniques

    Sensory Grounding Techniques

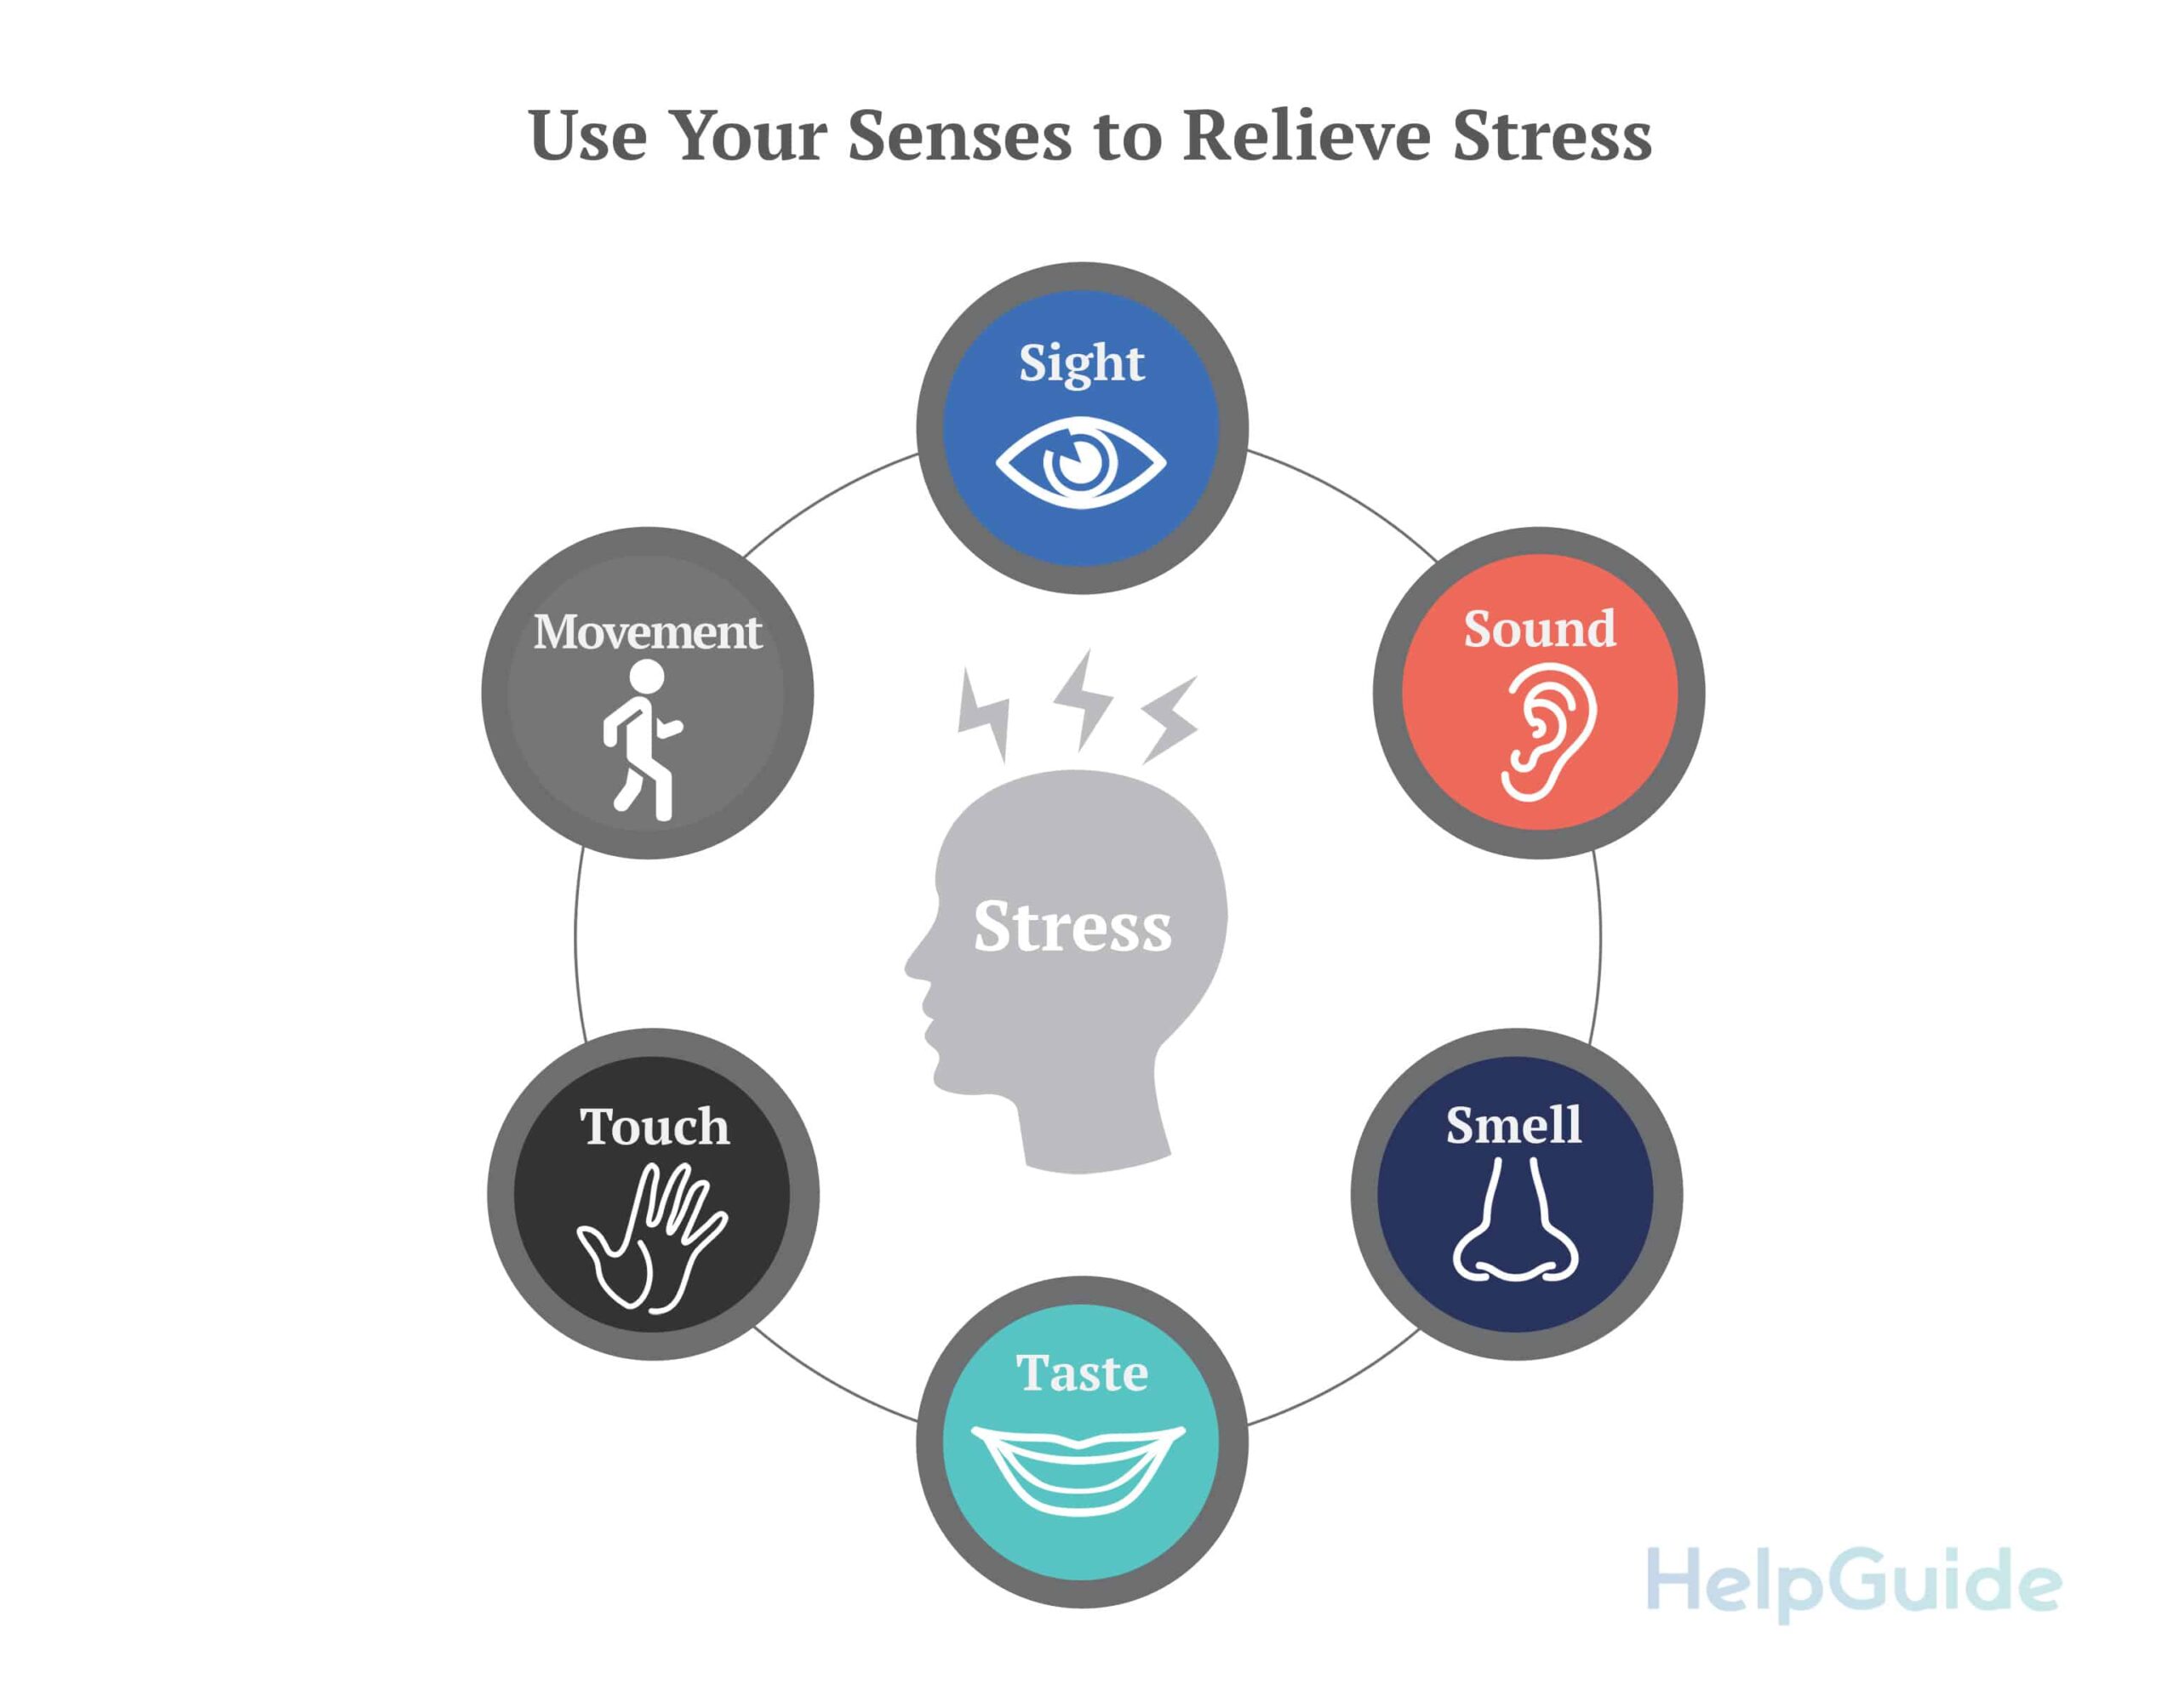
    When stress pulls you into your head – into worries about the future or regrets about the past – sensory grounding brings you back to the present moment. These techniques use your five senses to anchor you in the here and now.

    10. The 5-4-3-2-1 Technique (5 Minutes)
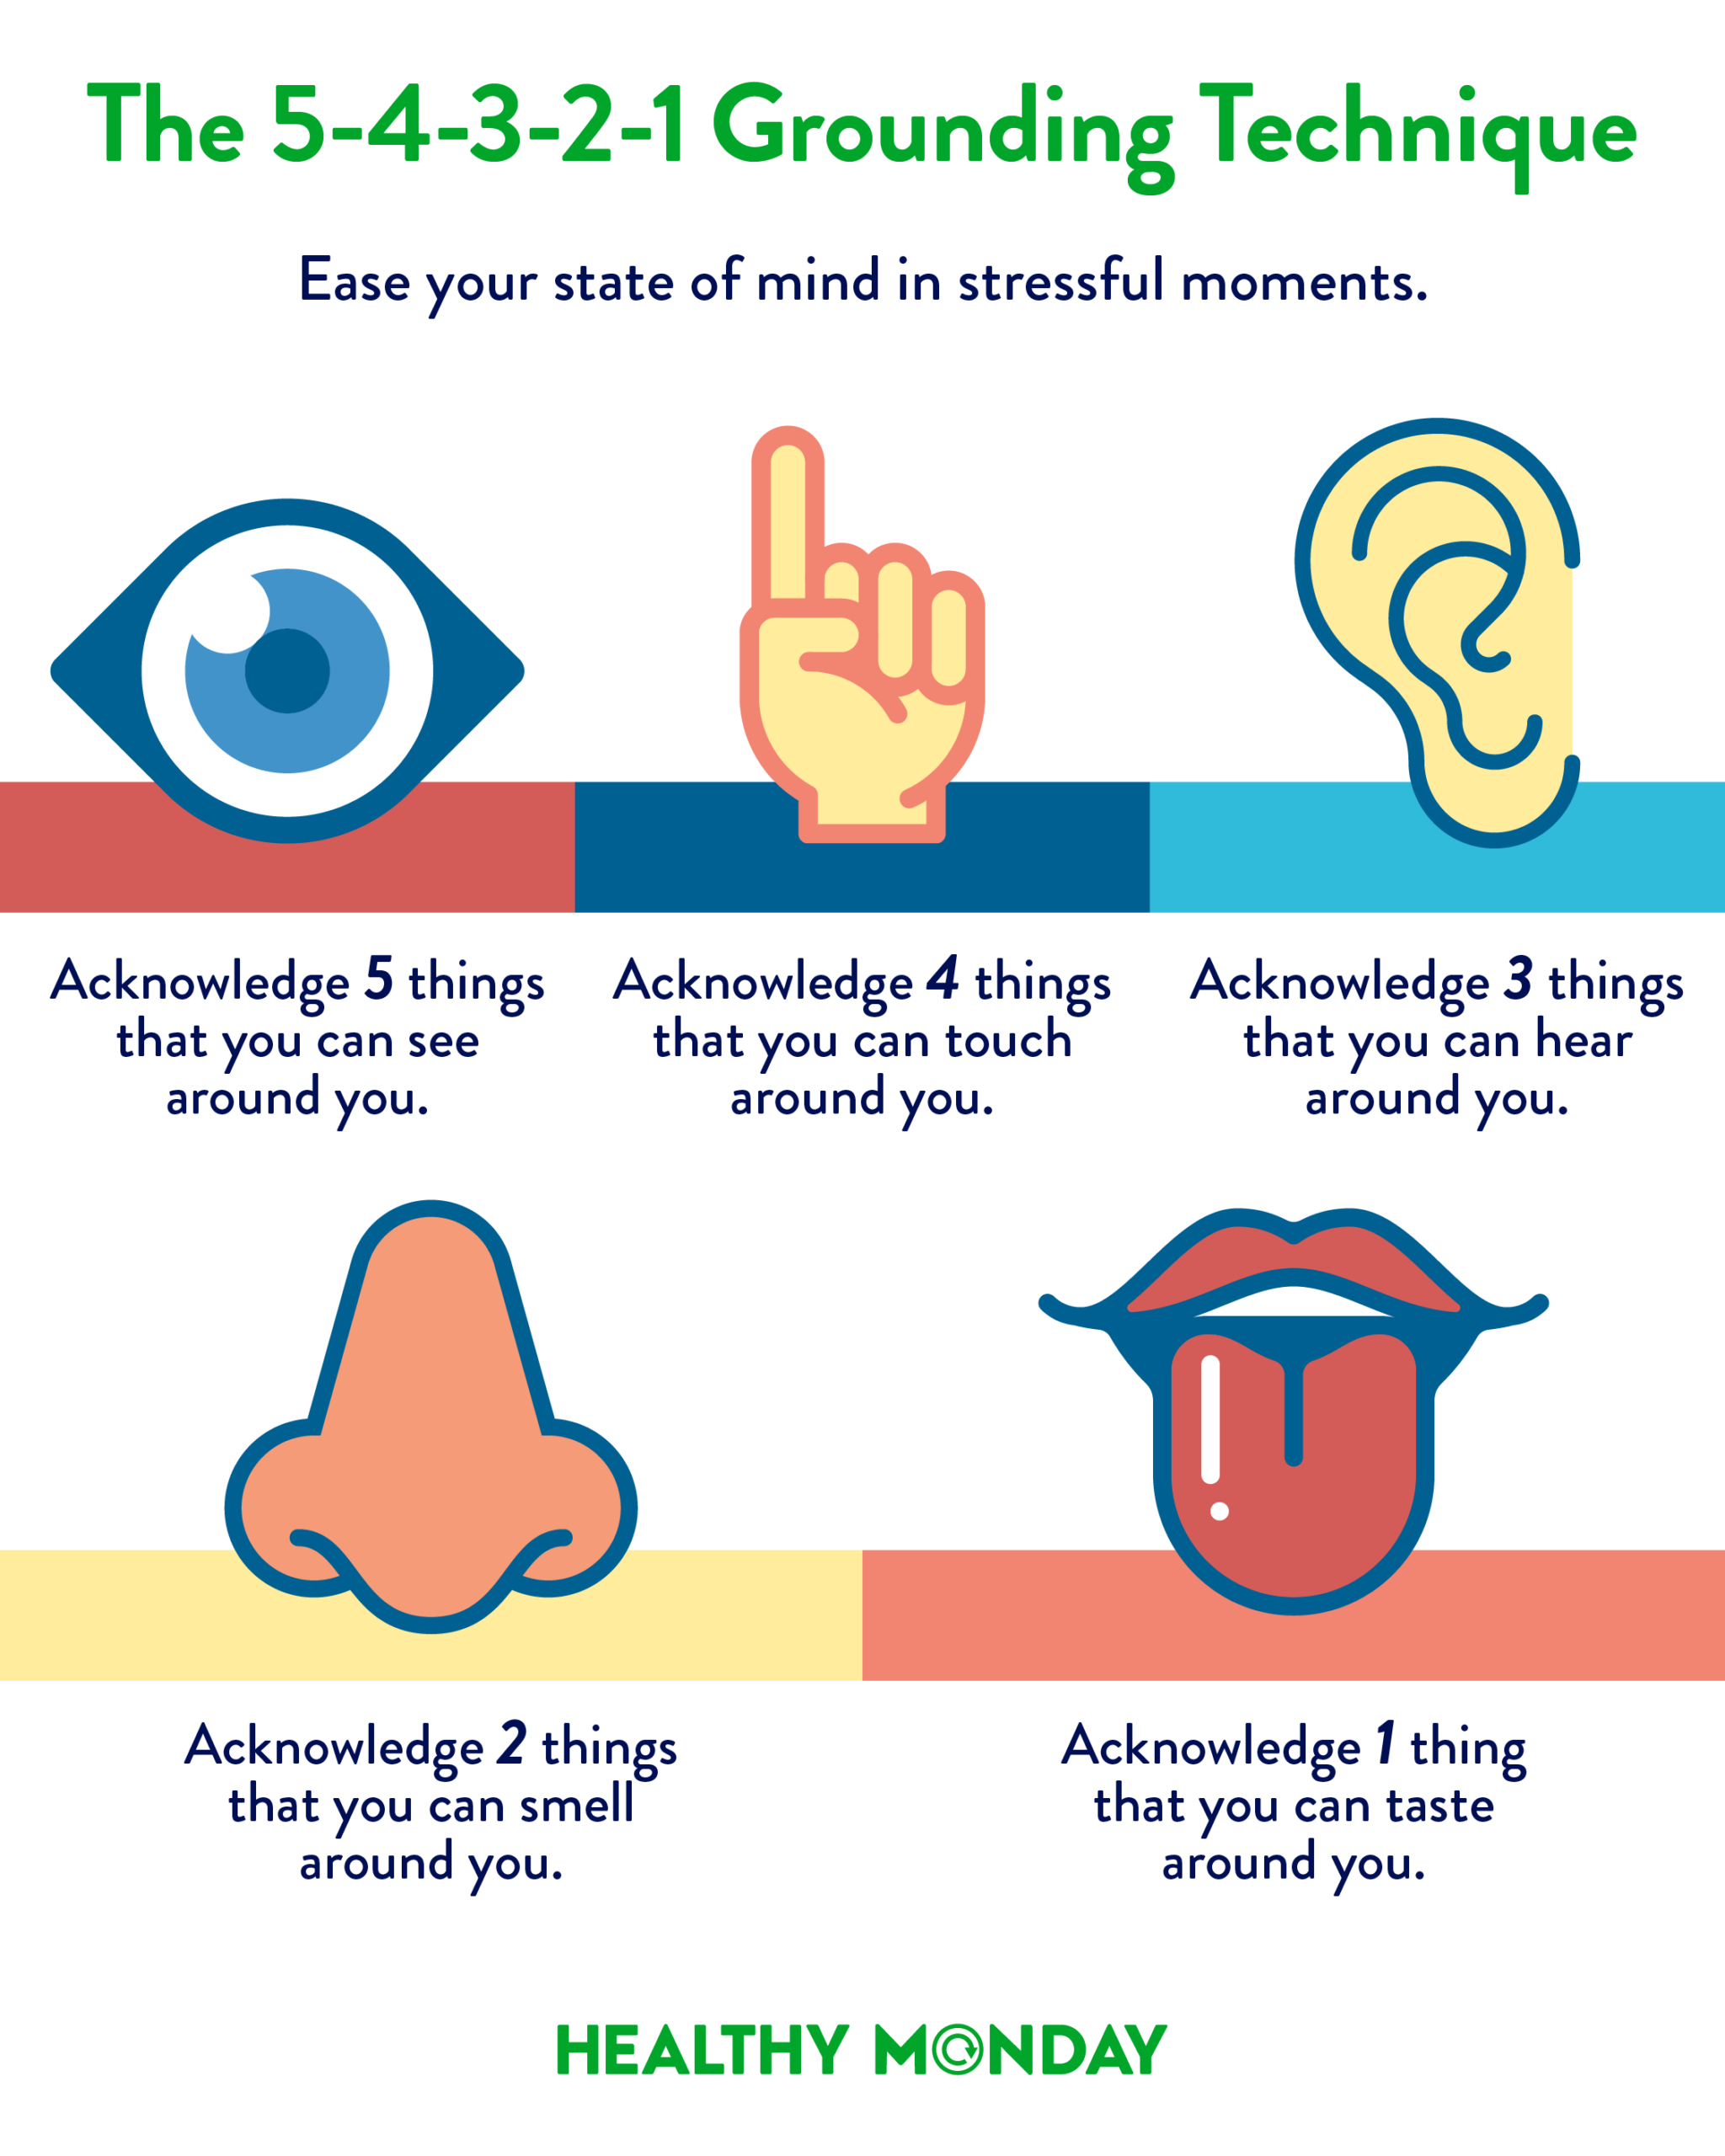
    10. The 5-4-3-2-1 Technique (5 Minutes)

    Name 5 things you can see. 4 things you can touch. 3 things you can hear. 2 things you can smell. 1 thing you can taste. This technique interrupts anxious thought spirals by forcing your brain to focus on sensory input rather than mental chatter. It works remarkably well for acute anxiety and panic.

    11. Cold Water Splash (2 Minutes)

    11. Cold Water Splash (2 Minutes)

    Splash cold water on your face and wrists, or hold an ice cube in your hands. The cold activates your dive reflex, which is a built-in stress-reduction mechanism that slows your heart rate and lowers your blood pressure. This is one of the fastest ways to interrupt a stress response in your body.

    12. Aromatherapy (5 Minutes)
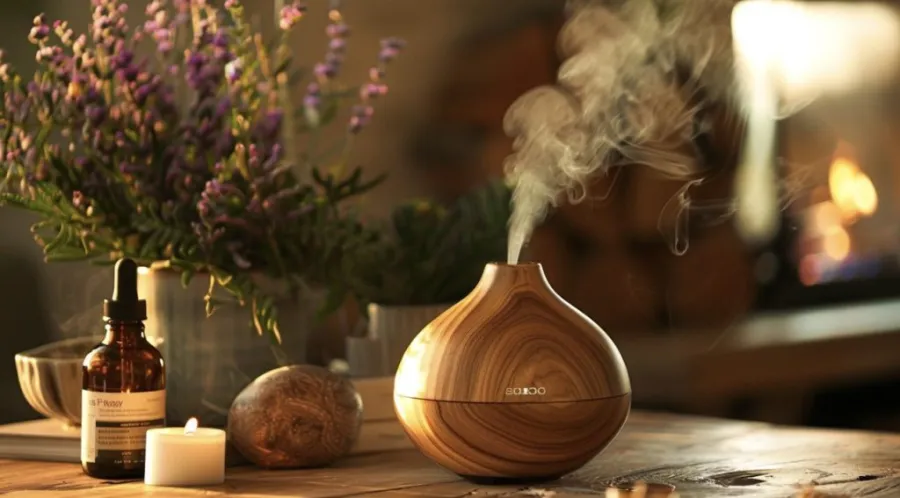
    12. Aromatherapy (5 Minutes)

    Certain scents have been scientifically shown to reduce stress and anxiety. Lavender, chamomile, bergamot, and peppermint are among the most effective. Keep an essential oil roller or a scented hand cream at your desk for quick access. A lavender essential oil roller is portable enough to carry in your bag for on-the-go stress relief.

    13. Warm Beverage Ritual (5 Minutes)
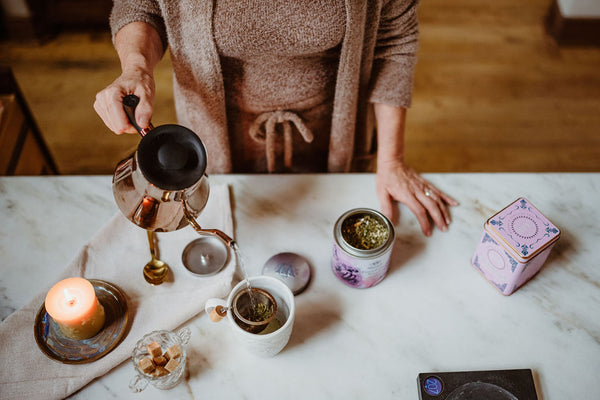
    13. Warm Beverage Ritual (5 Minutes)

    Make a cup of tea or warm water with lemon. Hold the warm mug in both hands. Focus on the warmth, the aroma, and the taste as you sip slowly. This simple ritual combines warmth (which relaxes muscles), hydration (which supports brain function), and mindfulness (which interrupts stress patterns). Chamomile tea has the added benefit of containing compounds that genuinely reduce anxiety.

    Creative and Mindful Activities

    Creative and Mindful Activities

    Engaging your brain in a creative or focused activity can redirect mental energy away from stress and toward something productive or soothing.

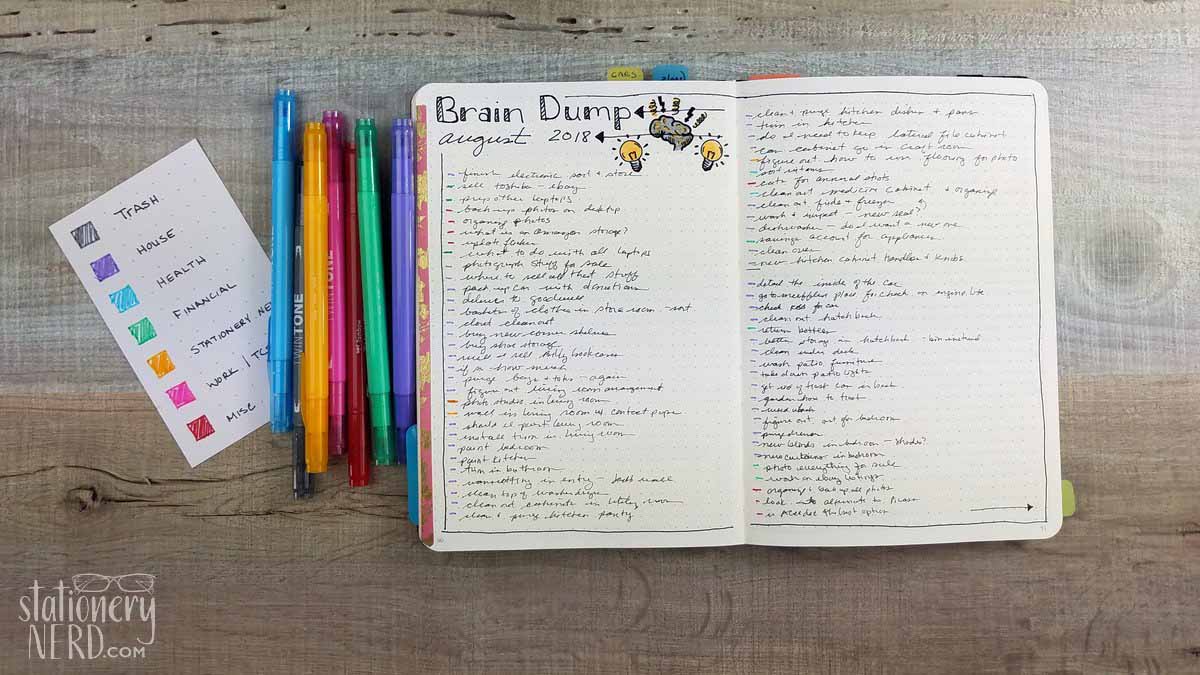
    14. Journaling Brain Dump (10 Minutes)
    14. Journaling Brain Dump (10 Minutes)

    Set a timer for 10 minutes and write everything that is on your mind without filtering, editing, or censoring. Get every worry, frustration, and anxious thought out of your head and onto paper. You are not trying to solve anything – you are trying to externalize the mental clutter so it stops circling inside your head. Many people find that once the thoughts are on paper, they feel significantly lighter. A stress relief journal with guided prompts makes this even easier.

    15. Coloring (10 Minutes)

    15. Coloring (10 Minutes)

    Adult coloring books exist for a reason – the repetitive, focused activity of coloring engages the parts of your brain that manage motor function and creativity while quieting the parts that generate worry and anxiety. Keep a small coloring book and a few colored pencils in your desk drawer for stressful moments.

    16. Guided Meditation (5-10 Minutes)

    16. Guided Meditation (5-10 Minutes)

    You do not need to be a meditation expert to benefit from a quick guided session. Apps like Calm, Headspace, and Insight Timer have thousands of short meditations designed specifically for stress relief. Put in your earbuds, close your eyes, and let someone else guide your brain to a calmer place.

    17. Visualization (5 Minutes)

    17. Visualization (5 Minutes)

    Close your eyes and mentally transport yourself to a place that feels safe and peaceful. Maybe it is a beach, a forest, your grandmother’s kitchen, or your favorite cozy spot at home. Engage all your senses – what do you see, hear, smell, and feel in this place? Your nervous system does not fully distinguish between real and imagined experiences, so vivid visualization can genuinely calm your stress response.
    Woman coloring in an adult coloring book for stress relief during a work break

    Social and Connection-Based Relief

    Social and Connection-Based Relief

    Human connection is one of the most powerful stress relievers we have access to. Even brief moments of genuine connection can significantly lower cortisol levels.

    18. Call or Text a Friend (5-10 Minutes)

    Reach out to someone who makes you feel good. You do not have to talk about what is stressing you – sometimes just hearing a friendly voice or having a lighthearted exchange is enough to shift your mood. The key is connecting with someone who energizes you, not someone who adds to your stress.

    19. Hug Someone (1 Minute)

    19. Hug Someone (1 Minute)

    Research shows that a 20-second hug releases oxytocin, which directly counteracts cortisol. Hug your partner, your child, your friend, or your pet. If nobody is available, give yourself a hug – cross your arms, squeeze gently, and hold for 20 seconds. Self-hugs have been shown to reduce physical pain and emotional distress.

    20. Pet an Animal (5-10 Minutes)

    20. Pet an Animal (5-10 Minutes)

    If you have a pet, spend a few minutes focused entirely on them. Pet them, talk to them, play with them. Interacting with animals has been repeatedly shown to lower blood pressure, reduce cortisol, and increase serotonin and dopamine. If you do not have a pet, watching animal videos has been shown to produce a milder but still measurable stress-reduction effect. Science says cute animal content is good for you.

    Building a Personal Stress Relief Toolkit
    Building a Personal Stress Relief Toolkit

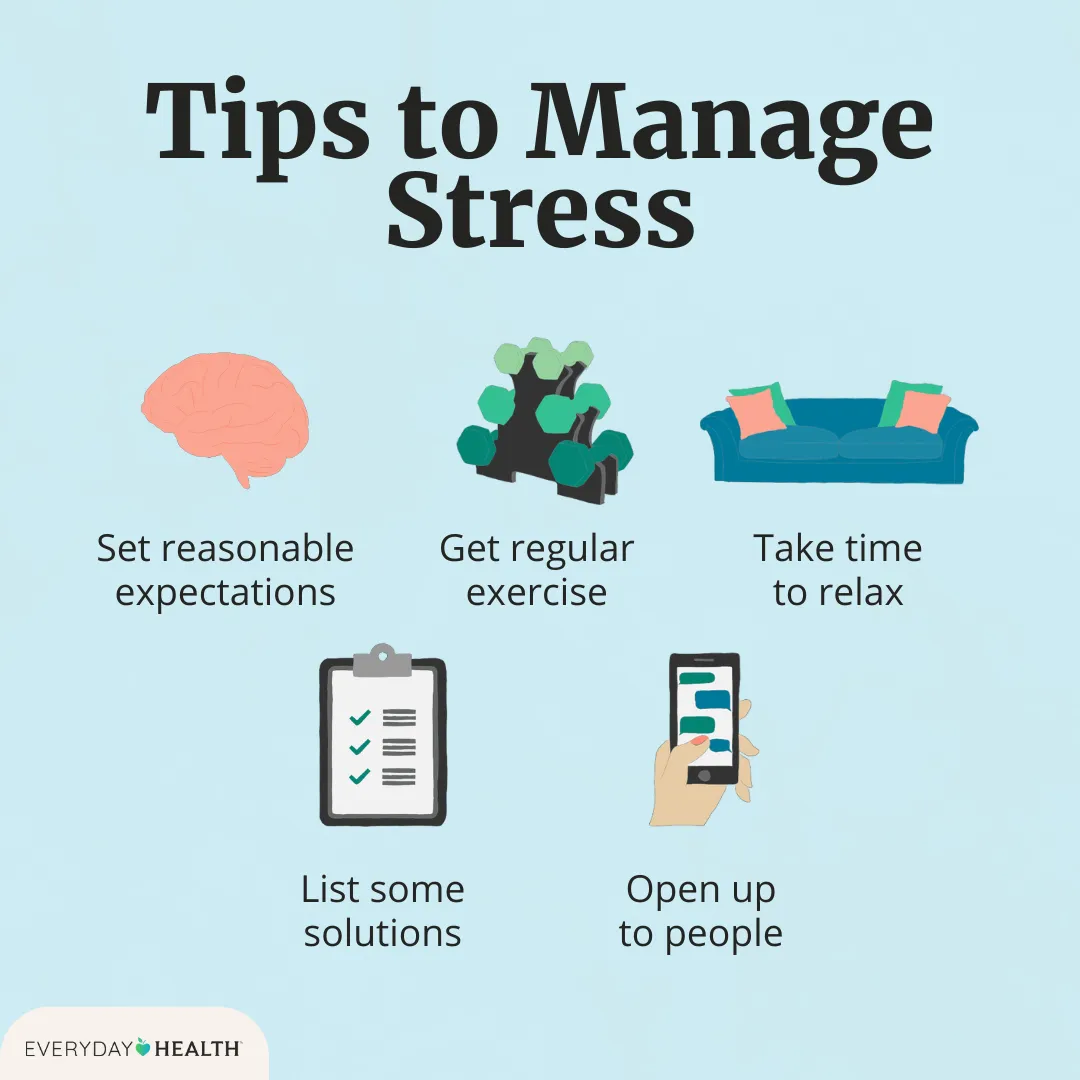
    The most effective stress management approach is having a variety of tools ready for different situations. Not every technique works in every context, so building a personal toolkit ensures you always have an option available.

    For the Office

    For the Office

    Keep these at your desk: a stress ball or fidget toy, an essential oil roller, a small journal, headphones for guided meditations, and a coloring book. When stress hits during the workday, you have immediate access to multiple coping tools without leaving your desk.

    For On-the-Go

    For On-the-Go

    The breathing techniques and the 5-4-3-2-1 grounding exercise require nothing but your body and can be done anywhere – on a bus, in a waiting room, in a bathroom stall. A discreet anxiety fidget ring is another portable option that looks like regular jewelry but gives you something to channel nervous energy into.

    For Home

    For Home

    At home, you have more options. Dance, take a warm shower, do a full progressive muscle relaxation session, journal, call a friend, or hug your pet. Having a designated “reset spot” in your home – a comfortable chair, a corner with a blanket and candle – can create a Pavlovian association that helps your body start relaxing the moment you sit down.

    Know Your Patterns

    Know Your Patterns

    Pay attention to when stress tends to hit hardest for you. Is it in the morning before work? During afternoon energy dips? Late at night? Knowing your patterns lets you proactively deploy stress relief techniques before the stress becomes overwhelming. Prevention is always easier than reaction.

    Practice When You Are Calm

    Practice When You Are Calm

    Stress relief techniques work better when you have practiced them in a non-stressful state. Try each technique during a calm moment so your body learns the process. Then when stress hits, the technique is familiar and your body knows how to respond. Think of it like a fire drill – you practice so that when the real thing happens, your response is automatic.

    Key Takeaways

    • Quick stress relief activities work by activating your parasympathetic nervous system, counteracting the fight-or-flight stress response.
    • Breathing techniques like box breathing, the 4-7-8 method, and the physiological sigh are the fastest tools, producing results in as little as 60 seconds.
    • Physical movement – walking, dancing, shaking, stretching – burns off stress hormones and releases endorphins.
    • Sensory grounding techniques like the 5-4-3-2-1 method and cold water splash bring you back to the present moment during anxiety spirals.
    • Creative activities like journaling, coloring, and guided meditation redirect mental energy away from stress.
    • Building a personal stress relief toolkit with multiple techniques for different situations ensures you always have a tool available when stress hits.

    Frequently Asked Questions

    Which stress relief activity works the fastest?

    Which stress relief activity works the fastest?

    The physiological sigh – a double inhale followed by an extended exhale – has been shown by Stanford researchers to reduce stress faster than any other single technique, often within just one to three breaths. For a slightly longer intervention, the cold water splash on the face and wrists produces near-immediate results by activating your mammalian dive reflex.

    Can quick stress relief replace therapy or medication?
    Can quick stress relief replace therapy or medication?

    No. These techniques are excellent for managing everyday stress and acute stress moments, but they are not a substitute for professional help if you are dealing with chronic anxiety, clinical depression, PTSD, or other mental health conditions. Think of these as tools in a larger toolkit that might also include therapy, medication, lifestyle changes, and professional support.

    What if none of these techniques seem to work for me?

    Not every technique resonates with every person. Experiment with all of them and pay attention to which ones produce the most noticeable shift in how you feel. Also consider that if stress feels unmanageable despite using these tools, you may benefit from speaking with a mental health professional who can help you develop a more personalized coping strategy.

    How often should I practice stress relief techniques?

    Ideally, incorporate at least one technique into your daily routine as a preventive measure, not just a reactive one. A morning breathing practice, a lunchtime walk, or an evening journaling session can lower your baseline stress level so that when acute stress hits, you are starting from a calmer place and have more capacity to cope.
  • 20 Healthy Dinner Recipes for Weight Loss That the Whole Family Will Love

    20 Healthy Dinner Recipes for Weight Loss That the Whole Family Will Love

    Finding healthy dinner recipes that support your wellness goals AND get a thumbs up from the whole family can feel like searching for a unicorn. Your kids want chicken nuggets. Your partner wants something filling. You want something that does not require an hour of prep after a long day and does not make you feel like you are on a diet. Is it possible to make everyone happy?

    Yes. These 20 healthy dinner recipes for weight loss are proof. Every single one is packed with lean protein, fiber-rich vegetables, and satisfying flavors that make the whole family forget they are eating “healthy food.” Because here is the secret – the best healthy dinners do not taste healthy. They just taste good.

    We have organized these recipes by cooking method so you can choose based on your energy level and schedule. Quick meals for busy weeknights. Sheet pan dinners for minimal cleanup. Slow cooker meals for the days when you need dinner to make itself. And plant-based options for meatless nights. Let us make dinner the easiest part of your day.

    Family-style dinner table with multiple healthy dishes everyone can enjoy

    What Makes a Dinner Recipe Good for Weight Management

    What Makes a Dinner Recipe Good for Weight Management

    Before we get to the recipes, let us talk about what makes a dinner genuinely supportive of weight management – because it is not about eating as little as possible.

    A good dinner for weight management has three qualities. First, it is satisfying. If you finish dinner feeling hungry, you will snack all evening and undo any caloric benefit. Satisfaction comes from adequate protein (at least 25 to 30 grams per serving), fiber from vegetables and whole grains, and enough healthy fat to trigger satiety hormones.

    Second, it is nutritionally dense. You want to get maximum nutrition from every calorie. This means choosing whole foods over processed ones, loading up on colorful vegetables, and using herbs and spices for flavor instead of relying on heavy sauces and excessive oil.

    Third, it is sustainable. A healthy dinner recipe only works if you actually make it repeatedly. If it takes 90 minutes and 25 ingredients, it is not sustainable for a weeknight. These recipes prioritize simplicity, accessibility, and realistic prep times because the best healthy dinner is the one you actually cook.

    A well-stocked pantry makes healthy cooking infinitely easier. Having staples like olive oil, garlic, onions, canned tomatoes, broth, whole grains, and basic spices means you are always halfway to a healthy dinner. A spice rack organizer set keeps everything accessible and reminds you to use variety in your cooking.

    Quick and Easy Healthy Dinners – Under 30 Minutes

    Quick and Easy Healthy Dinners - Under 30 Minutes

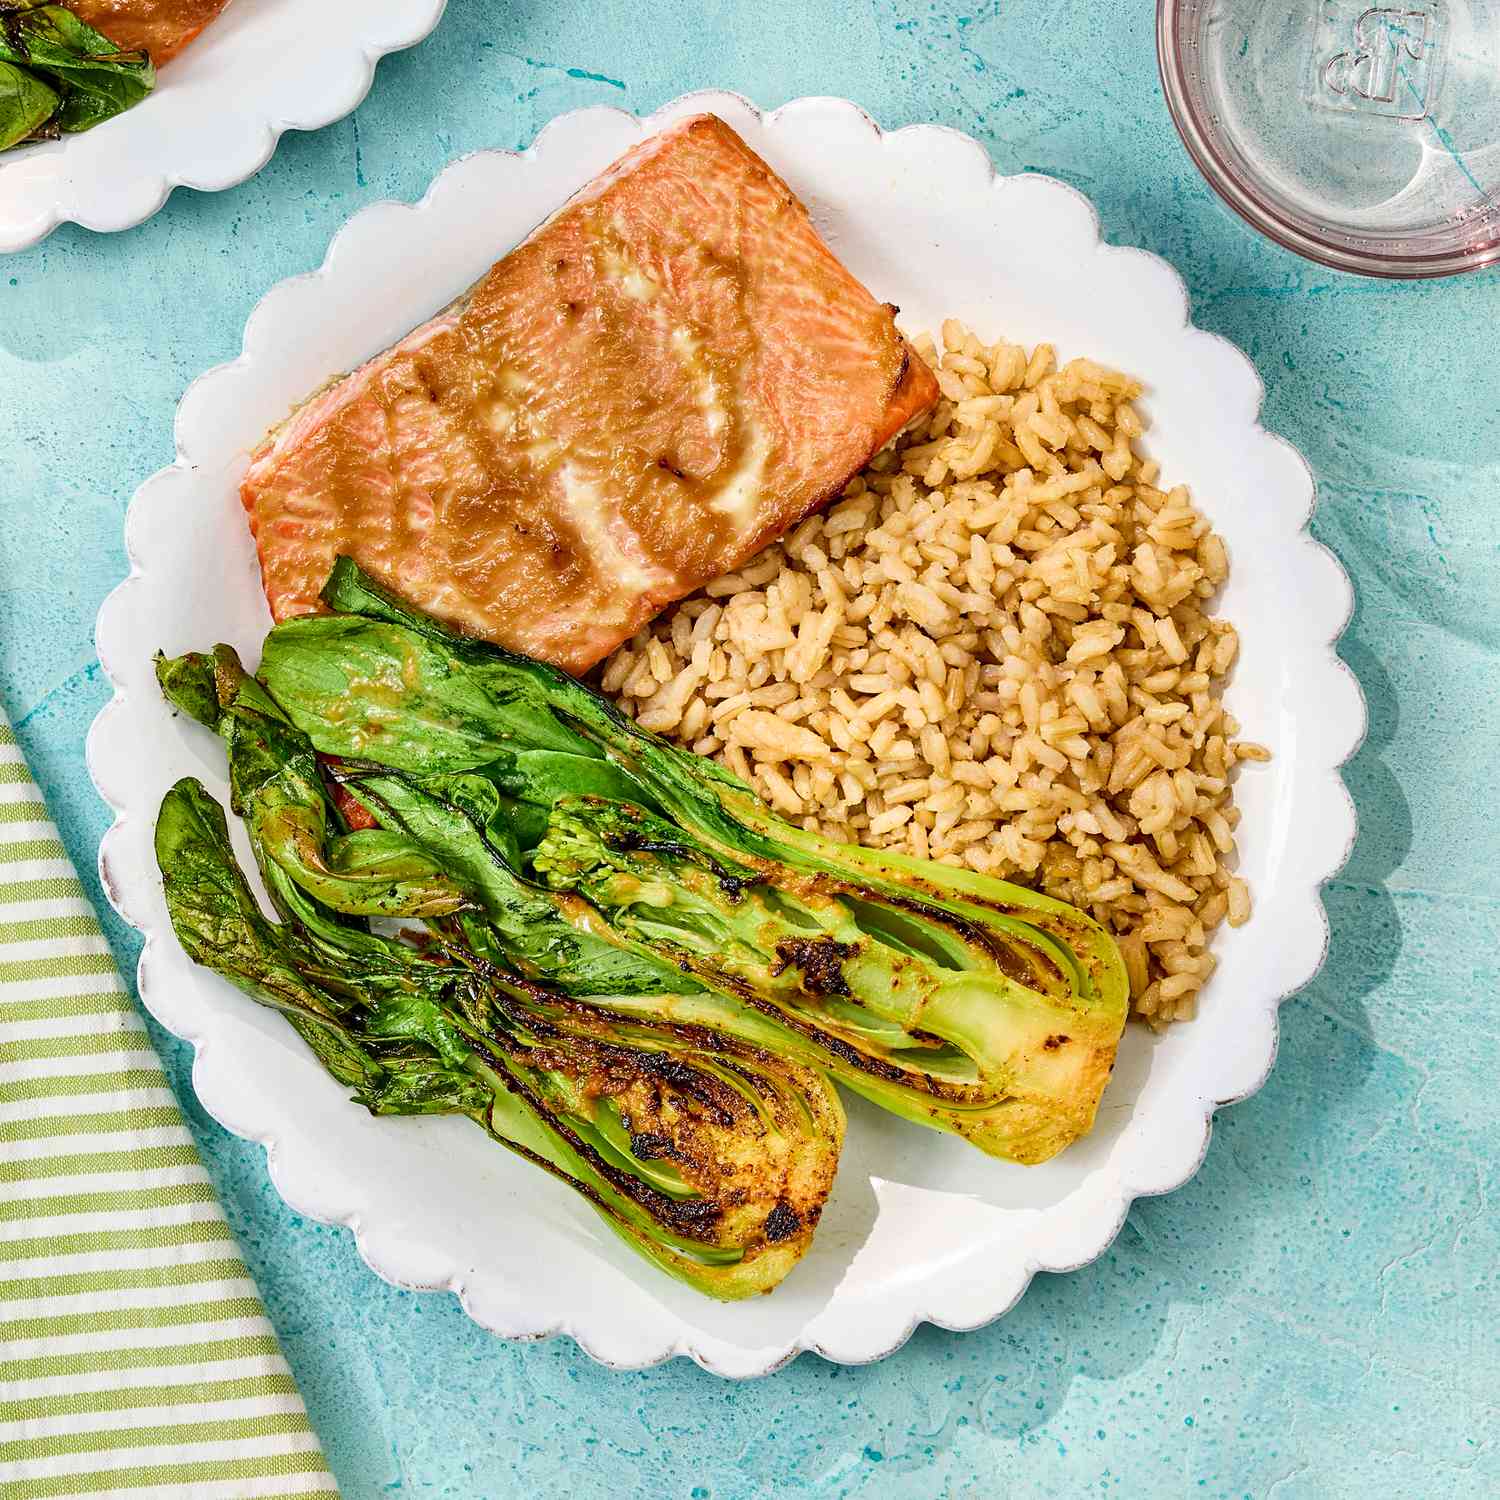
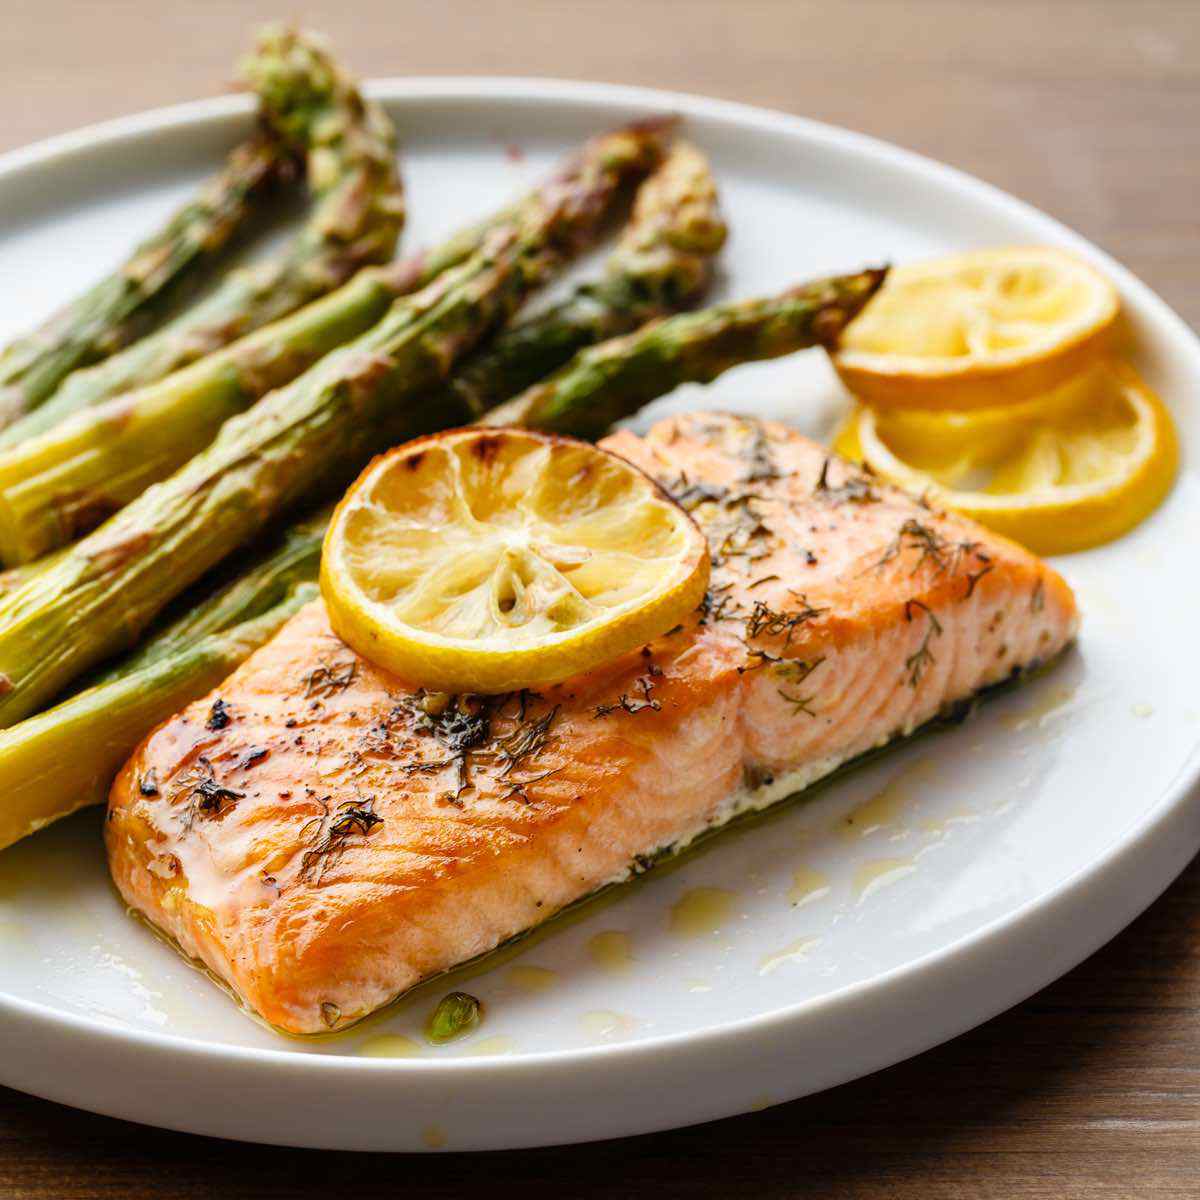
    1. Lemon Garlic Salmon with Roasted Asparagus

    1. Lemon Garlic Salmon with Roasted Asparagus

    Season salmon fillets with lemon juice, minced garlic, olive oil, salt, and pepper. Place on a baking sheet alongside asparagus spears drizzled with olive oil. Bake at 400 degrees for 12 to 15 minutes. Serve with a side of quinoa or brown rice. Total time: 20 minutes. Per serving: approximately 400 calories, 35g protein.

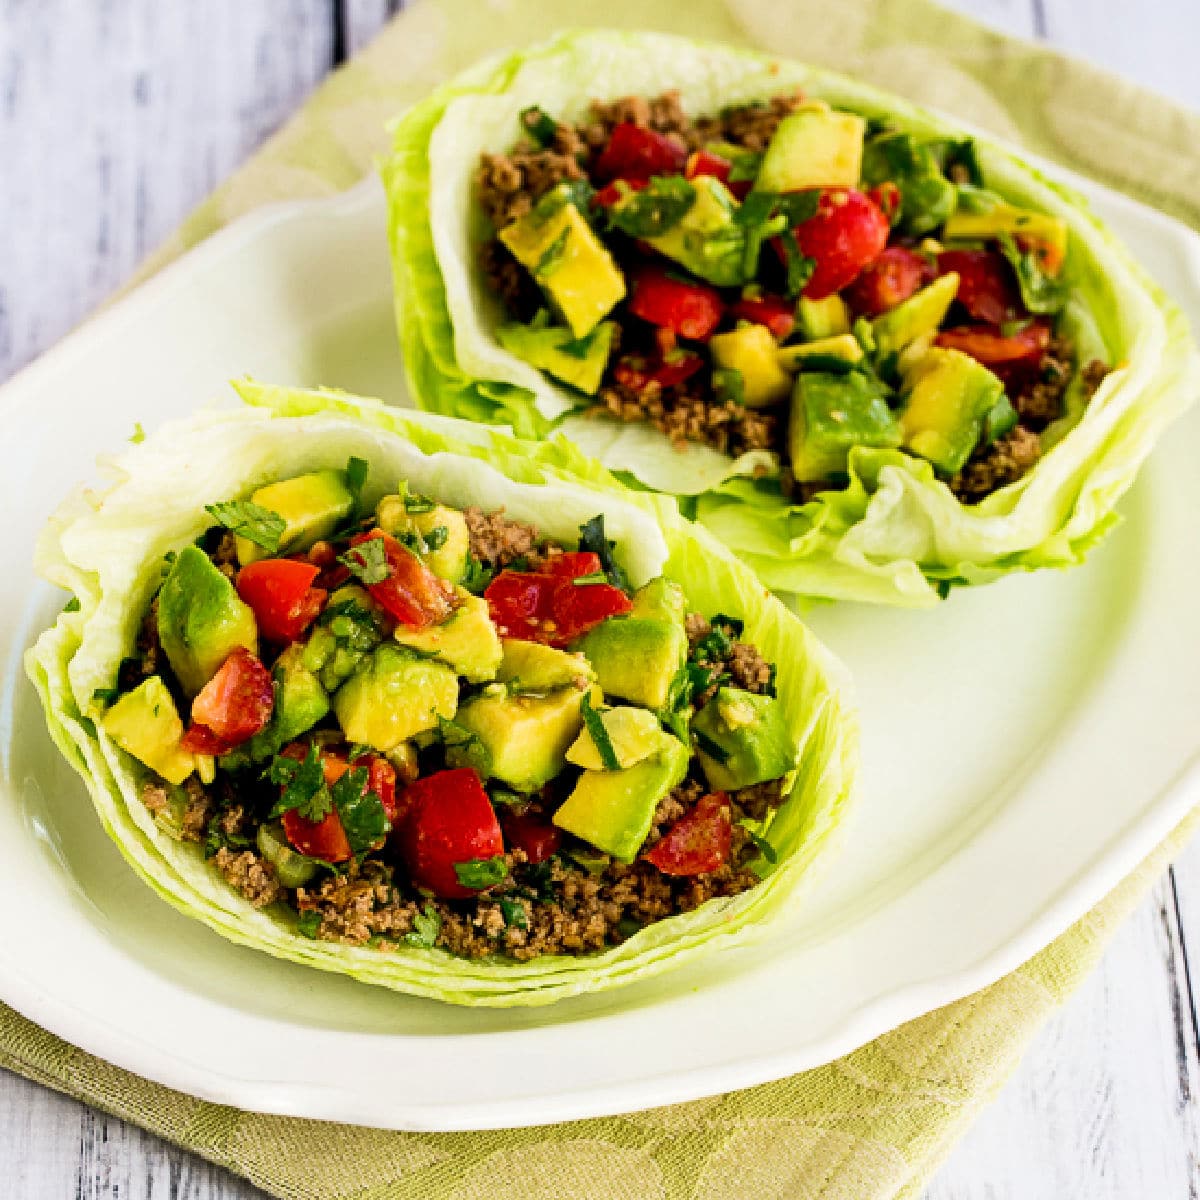
    2. Turkey Taco Lettuce Wraps

    2. Turkey Taco Lettuce Wraps

    Brown one pound of ground turkey with taco seasoning. Serve in large butter lettuce leaves topped with diced tomatoes, shredded cheese, avocado slices, salsa, and a dollop of Greek yogurt. Total time: 15 minutes. Per serving: approximately 350 calories, 30g protein.

    3. Shrimp Stir-Fry with Vegetables

    3. Shrimp Stir-Fry with Vegetables

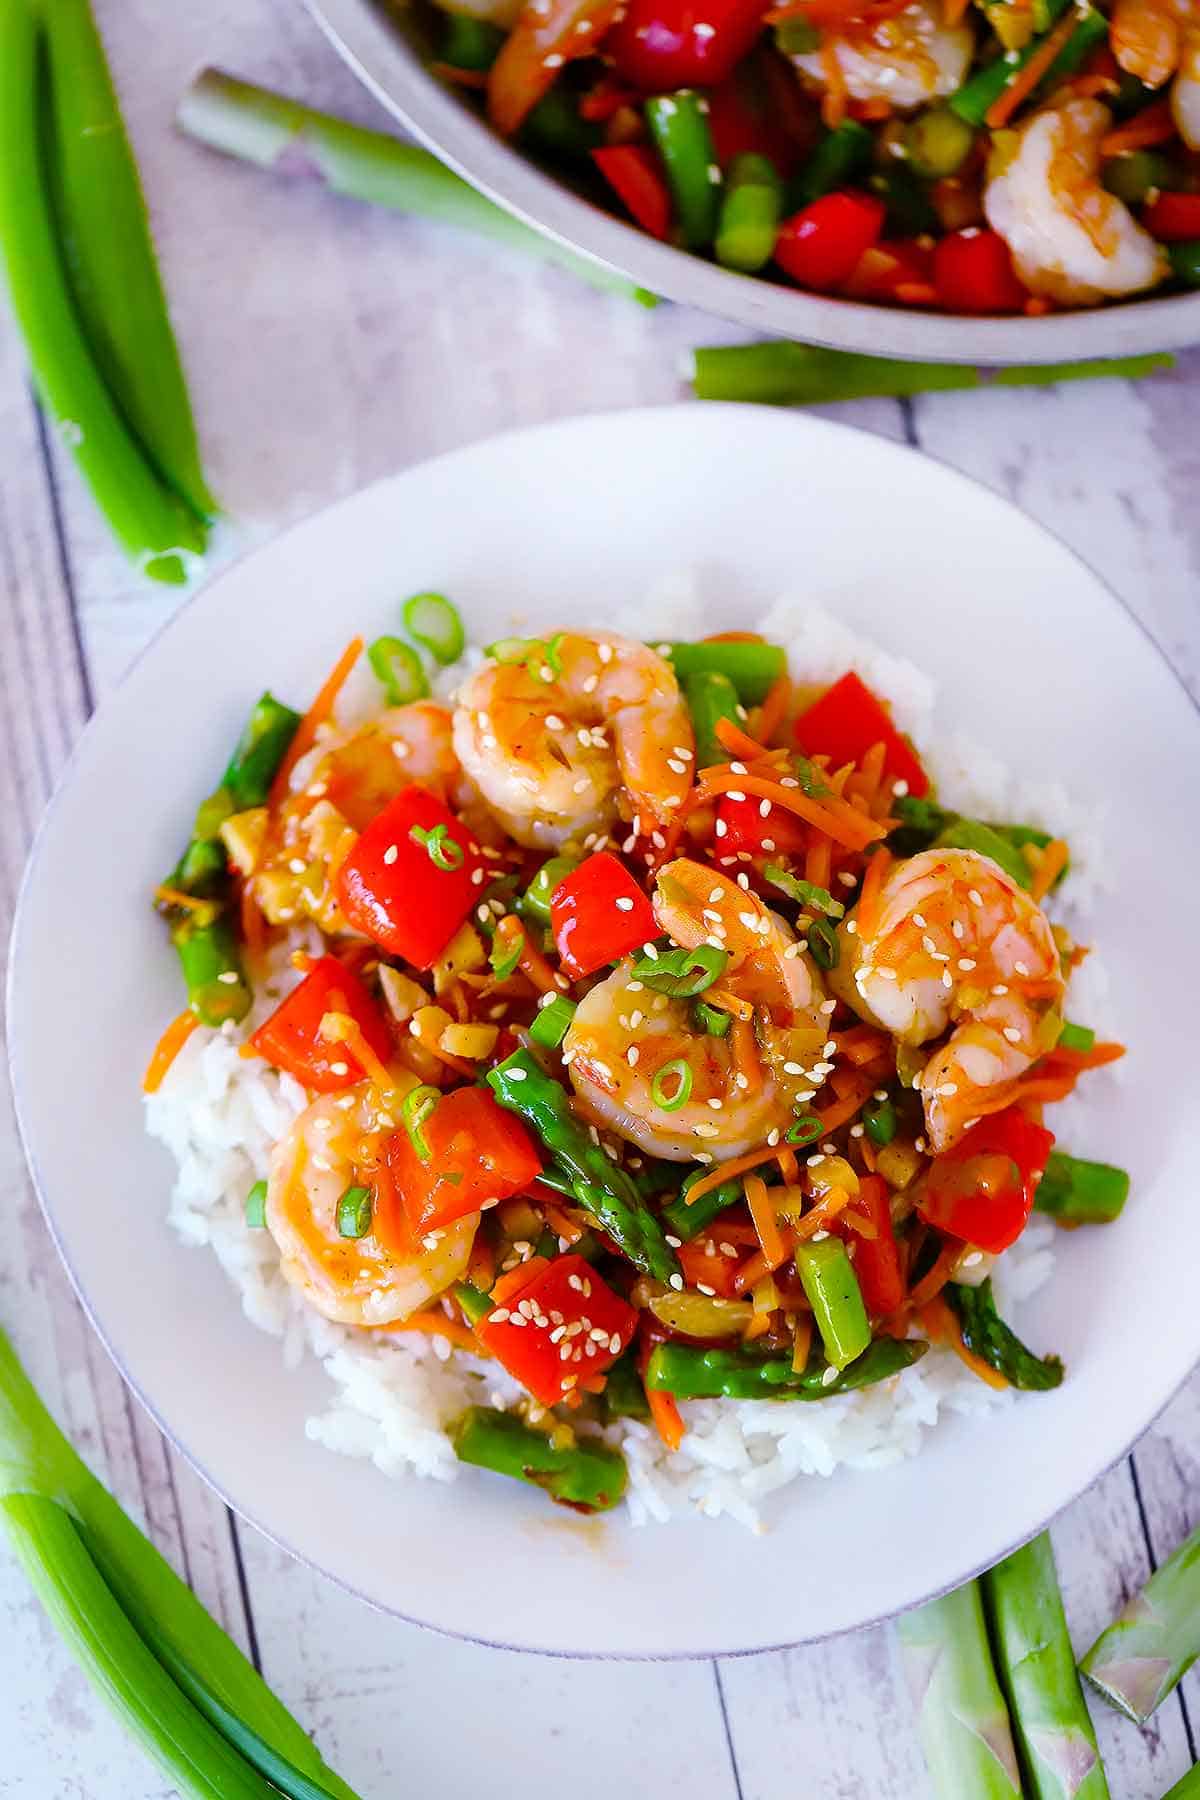
    Stir-fry shrimp with broccoli, snap peas, bell peppers, and carrots in a sauce of soy sauce, ginger, garlic, and a touch of honey. Serve over brown rice or cauliflower rice. Total time: 20 minutes. Per serving: approximately 380 calories, 28g protein.

    4. Greek Chicken Bowls

    4. Greek Chicken Bowls

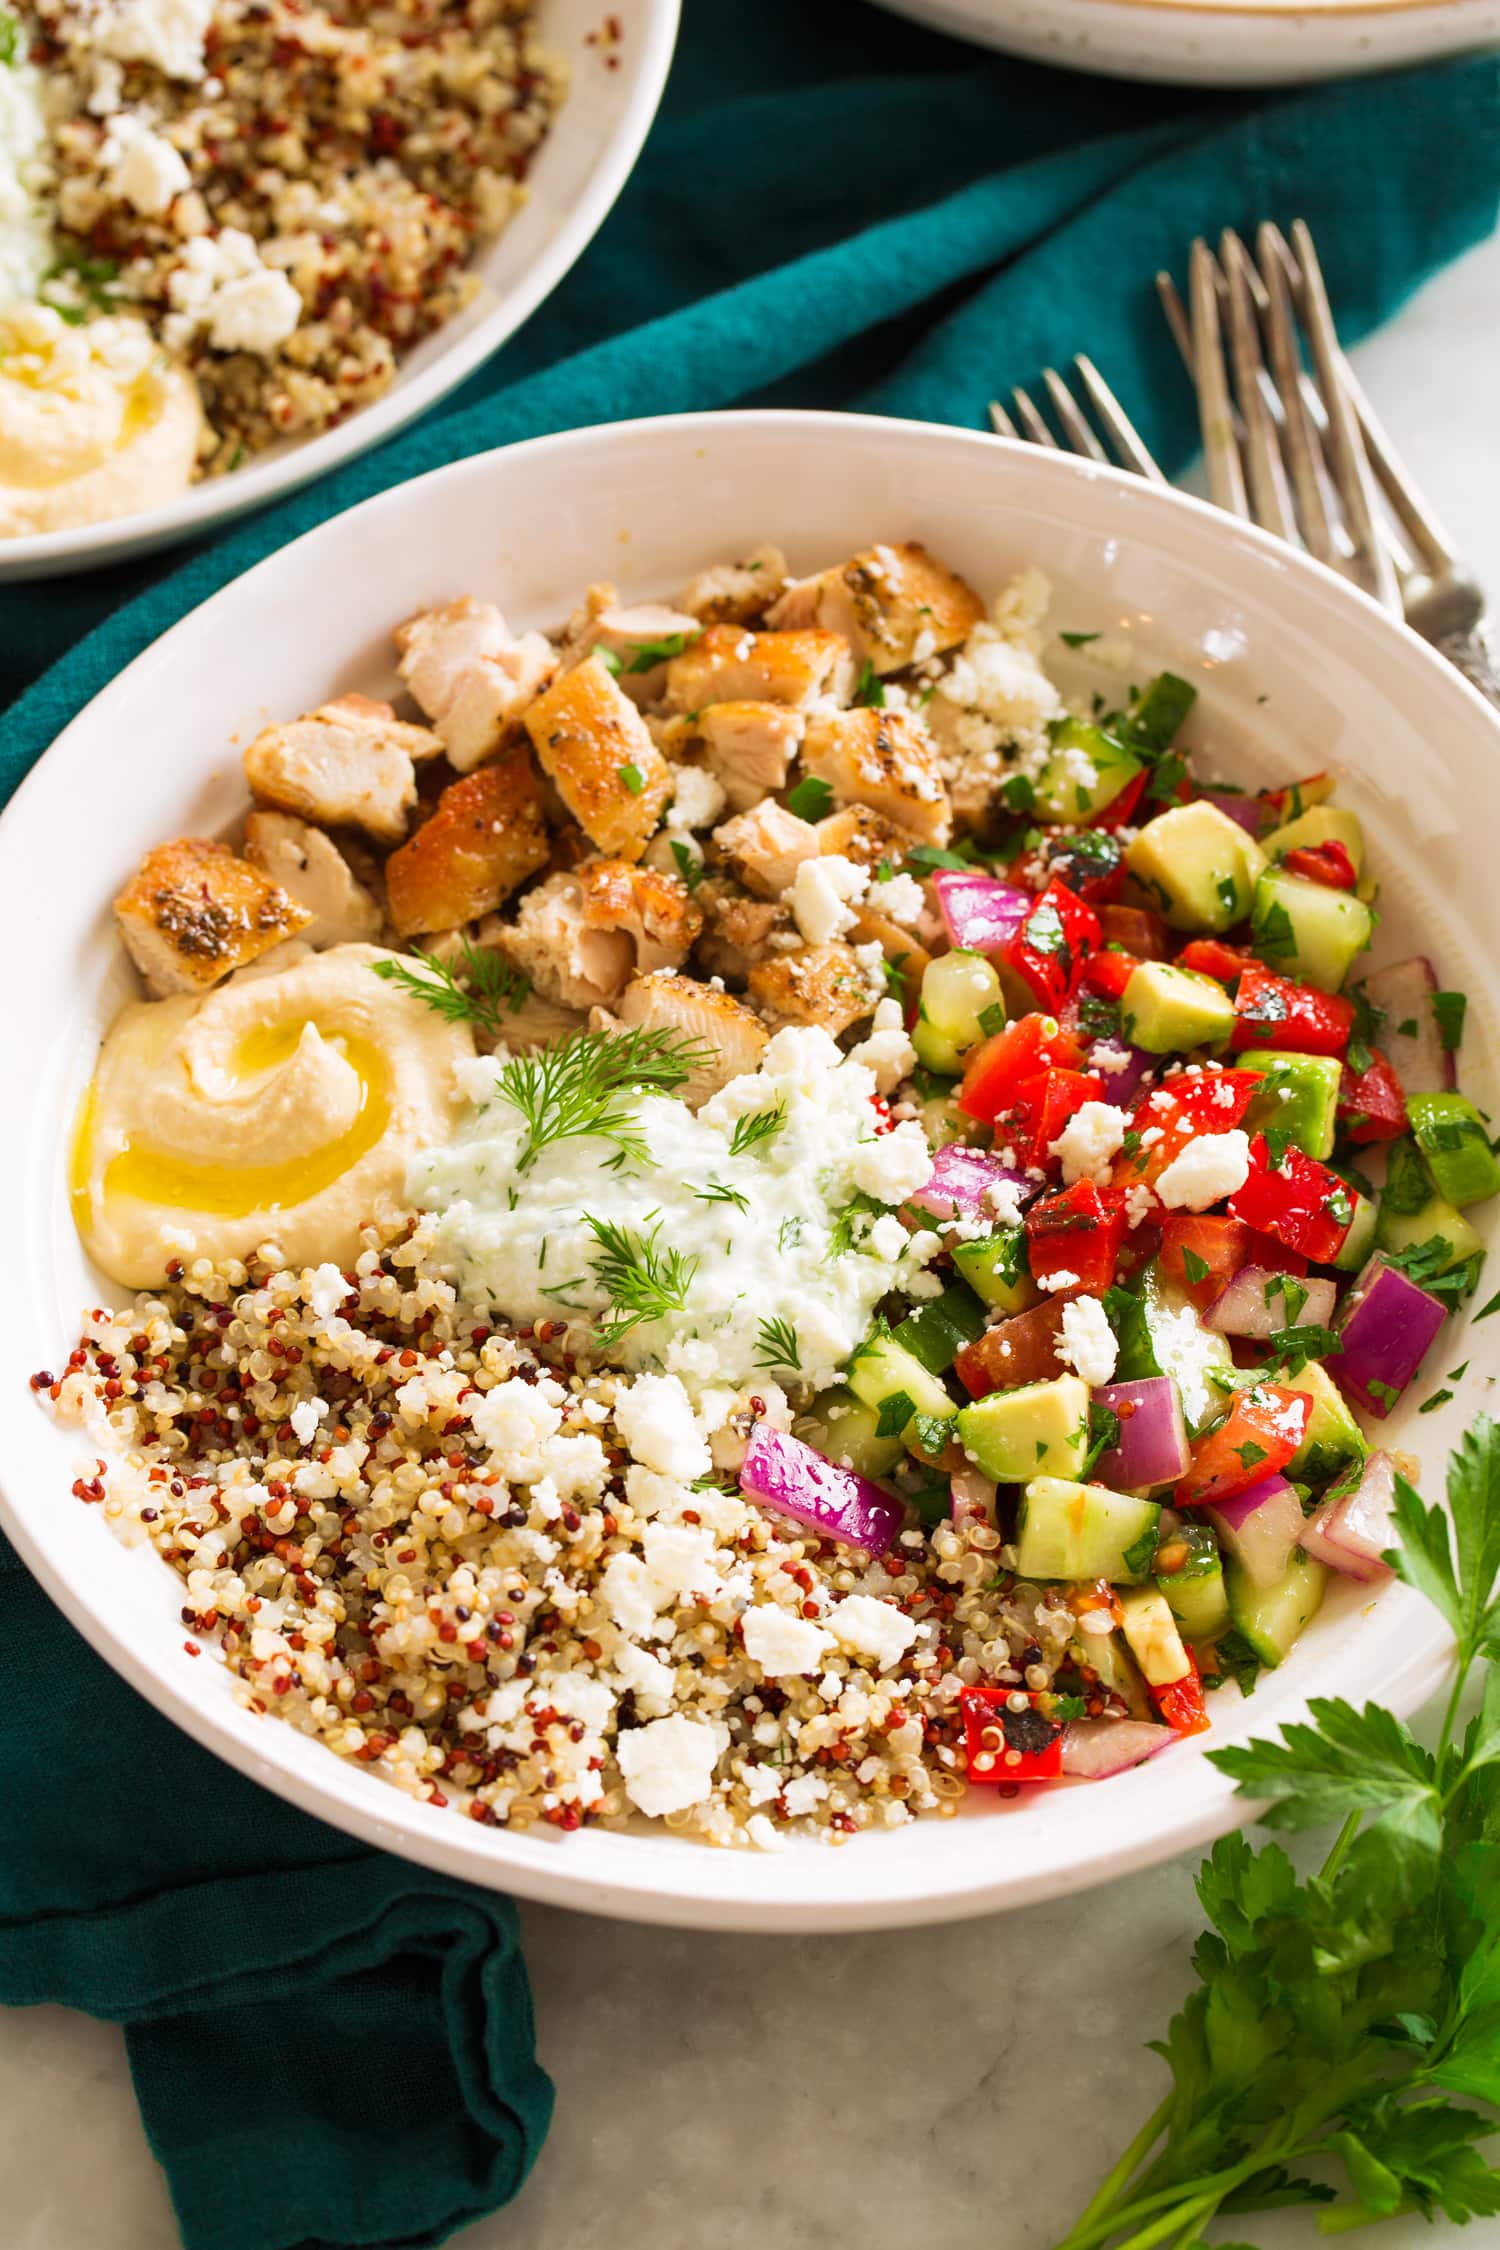
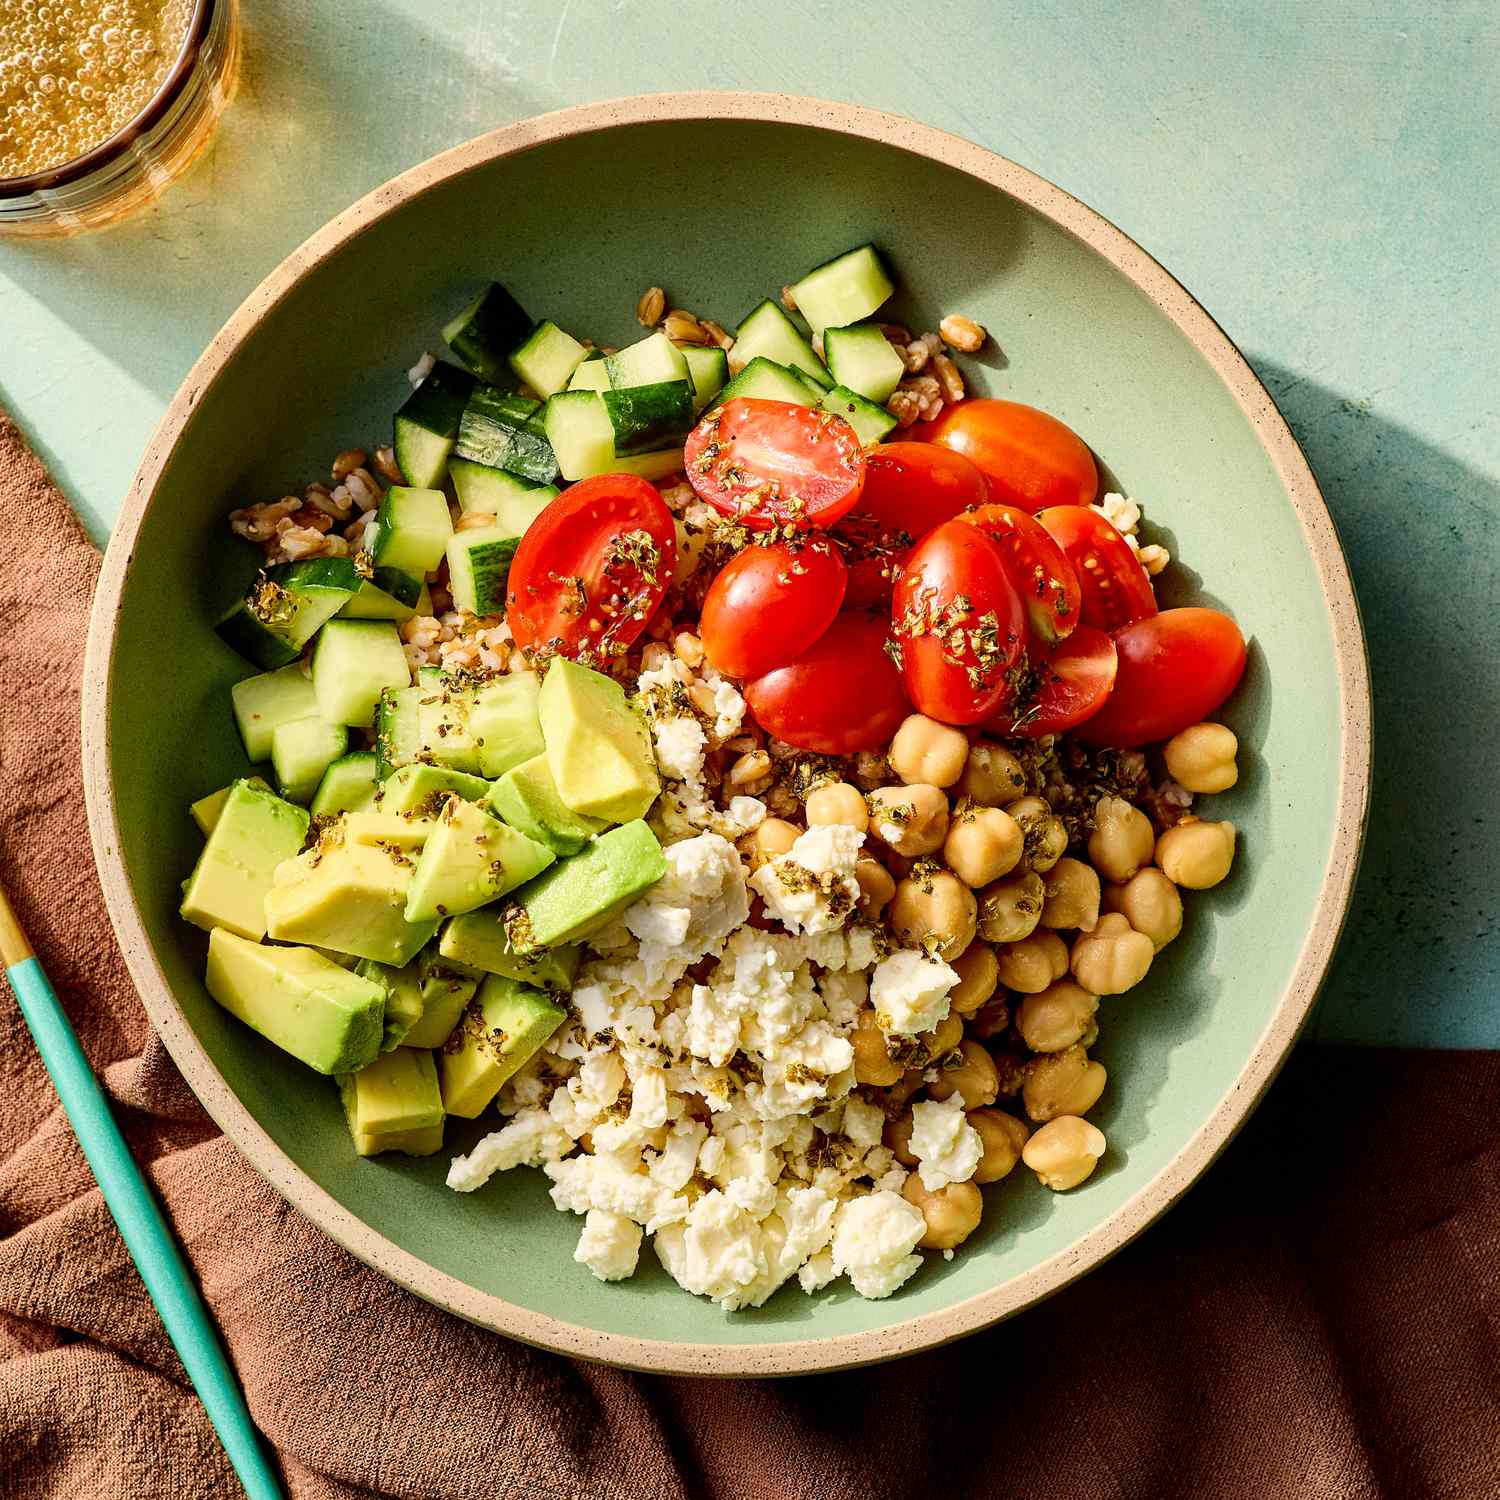
    Season chicken breast with oregano, garlic, lemon, and olive oil. Grill or pan-sear for six to seven minutes per side. Slice and serve over a bowl of brown rice or farro with cucumber, tomatoes, red onion, Kalamata olives, feta cheese, and a drizzle of tzatziki made from Greek yogurt. Total time: 25 minutes. Per serving: approximately 420 calories, 38g protein.

    5. Black Bean Quesadillas with Side Salad

    5. Black Bean Quesadillas with Side Salad

    Fill whole wheat tortillas with mashed seasoned black beans, corn, diced bell pepper, and shredded cheese. Cook in a dry skillet until crispy on both sides. Serve with a big side salad dressed with lime vinaigrette and topped with avocado. Total time: 15 minutes. Per serving: approximately 400 calories, 22g protein.

    One-Pan and Sheet Pan Healthy Dinners

    One-Pan and Sheet Pan Healthy Dinners

    6. Sheet Pan Chicken Sausage with Roasted Vegetables

    6. Sheet Pan Chicken Sausage with Roasted Vegetables

    Slice pre-cooked chicken sausage and toss on a sheet pan with cubed sweet potatoes, Brussels sprouts, and red onion. Drizzle with olive oil and season with garlic powder, smoked paprika, and Italian seasoning. Roast at 425 degrees for 25 minutes. Total time: 30 minutes plus mostly hands-off oven time. Per serving: approximately 380 calories, 25g protein.

    7. One-Pan Tuscan Chicken

    7. One-Pan Tuscan Chicken

    Sear seasoned chicken breasts in a skillet. Remove and add garlic, sun-dried tomatoes, and spinach to the same pan. Pour in a mixture of chicken broth and a splash of cream (or coconut cream for dairy-free). Return the chicken to the pan and simmer for 15 minutes until chicken is cooked through. Serve with crusty whole grain bread or over pasta. Total time: 30 minutes. Per serving: approximately 390 calories, 35g protein.

    8. Sheet Pan Salmon Teriyaki with Broccoli

    8. Sheet Pan Salmon Teriyaki with Broccoli

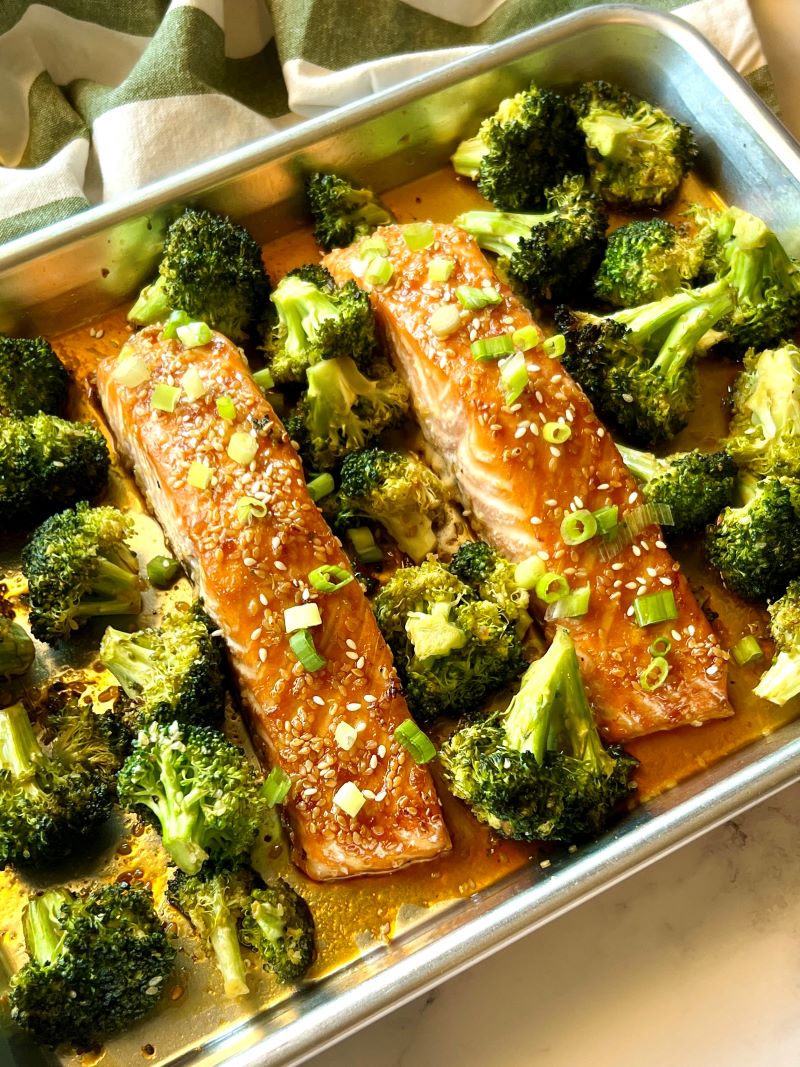
    Place salmon fillets and broccoli florets on a sheet pan. Brush the salmon with a homemade teriyaki sauce of soy sauce, honey, ginger, and garlic. Roast at 400 degrees for 15 minutes. Serve over brown rice with sesame seeds. Total time: 25 minutes. Per serving: approximately 420 calories, 33g protein.

    9. One-Pan Chicken and Vegetable Skillet

    9. One-Pan Chicken and Vegetable Skillet

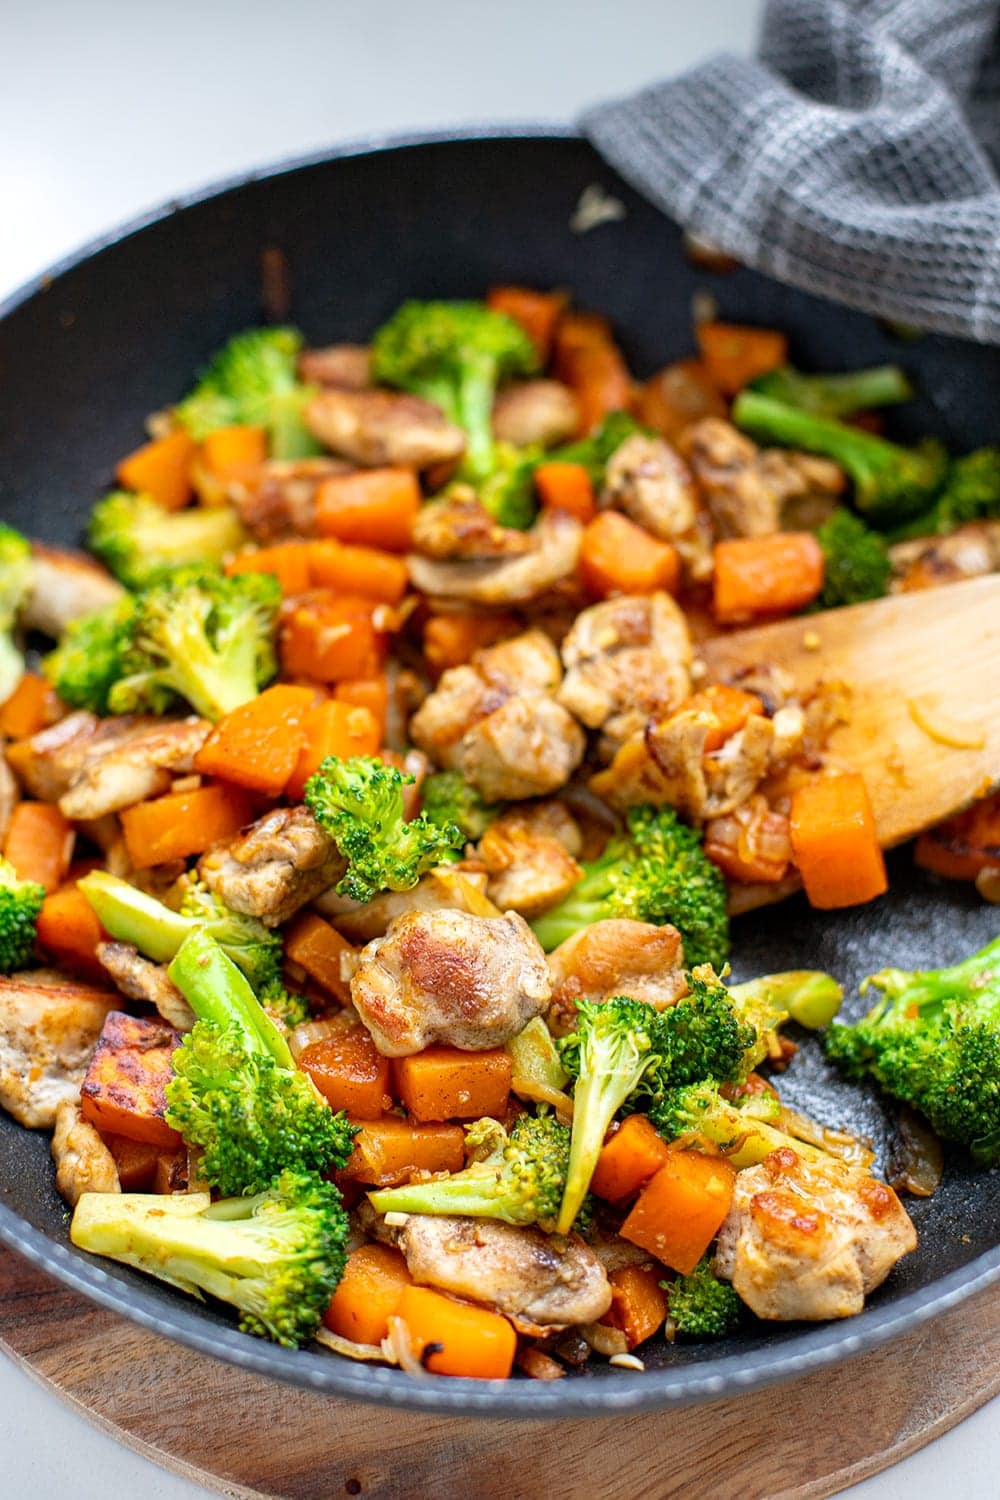
    Dice chicken thighs and cook in a skillet with olive oil. Add diced zucchini, bell peppers, cherry tomatoes, and corn. Season with Italian seasoning, garlic, and a squeeze of lemon. Cook until vegetables are tender and chicken is done. Top with fresh basil and Parmesan. Total time: 25 minutes. Per serving: approximately 370 calories, 30g protein.

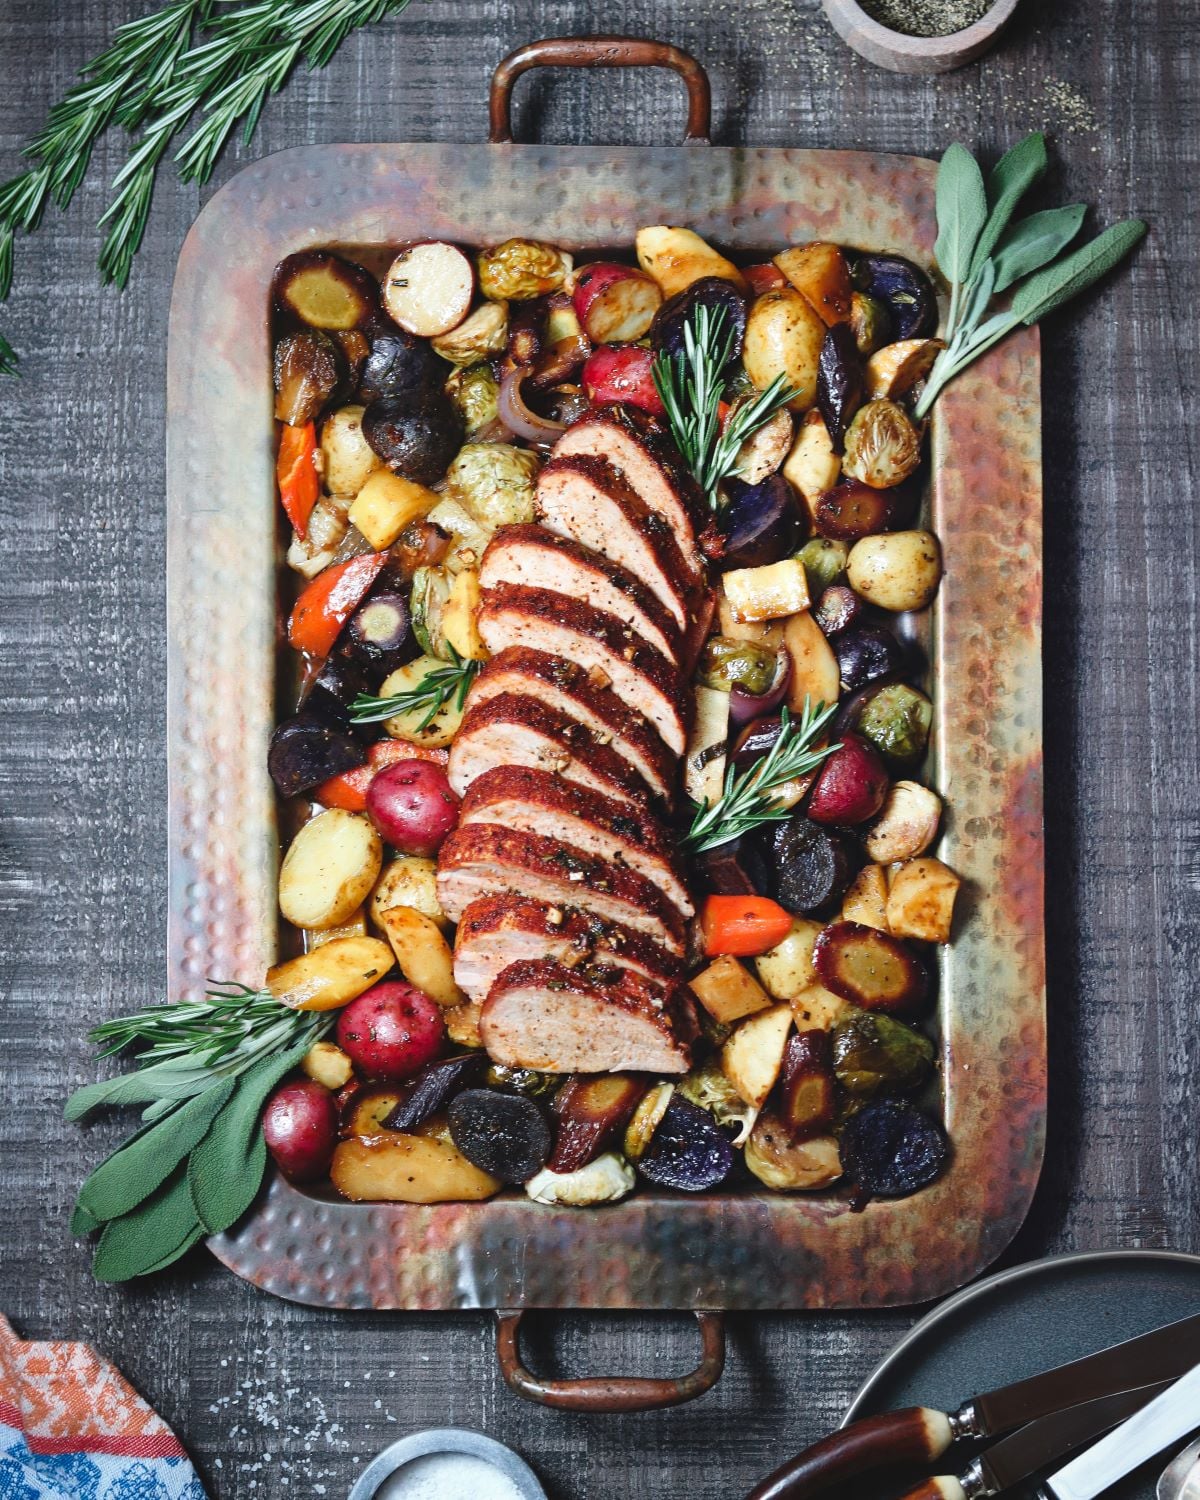
    10. Sheet Pan Pork Tenderloin with Root Vegetables

    10. Sheet Pan Pork Tenderloin with Root Vegetables

    Season pork tenderloin with Dijon mustard, garlic, rosemary, and thyme. Place on a sheet pan surrounded by cubed butternut squash, parsnips, and carrots. Roast at 400 degrees for 25 to 30 minutes until pork reaches 145 degrees internally. Rest five minutes before slicing. Total time: 35 minutes. Per serving: approximately 380 calories, 32g protein. A reliable instant-read meat thermometer ensures perfect results every time.

    Golden roasted sheet pan dinner with chicken and colorful vegetables

    Slow Cooker and Instant Pot Healthy Dinners

    Slow Cooker and Instant Pot Healthy Dinners

    11. Slow Cooker Chicken Tikka Masala

    11. Slow Cooker Chicken Tikka Masala

    Place chicken thighs in the slow cooker with a sauce of canned tomatoes, coconut cream, garam masala, turmeric, cumin, ginger, garlic, and a pinch of cayenne. Cook on low for six hours. Shred the chicken and stir back into the sauce. Serve over brown basmati rice with a side of naan and fresh cilantro. Prep time: 10 minutes. Per serving: approximately 410 calories, 32g protein.

    12. Instant Pot White Chicken Chili

    12. Instant Pot White Chicken Chili

    Combine chicken breasts, white beans, green chilies, chicken broth, corn, onion, garlic, cumin, and oregano in the Instant Pot. Pressure cook for 15 minutes. Shred the chicken and stir in a splash of cream cheese for richness. Top with avocado, cilantro, and a squeeze of lime. Total time: 30 minutes including pressurization. Per serving: approximately 360 calories, 34g protein.

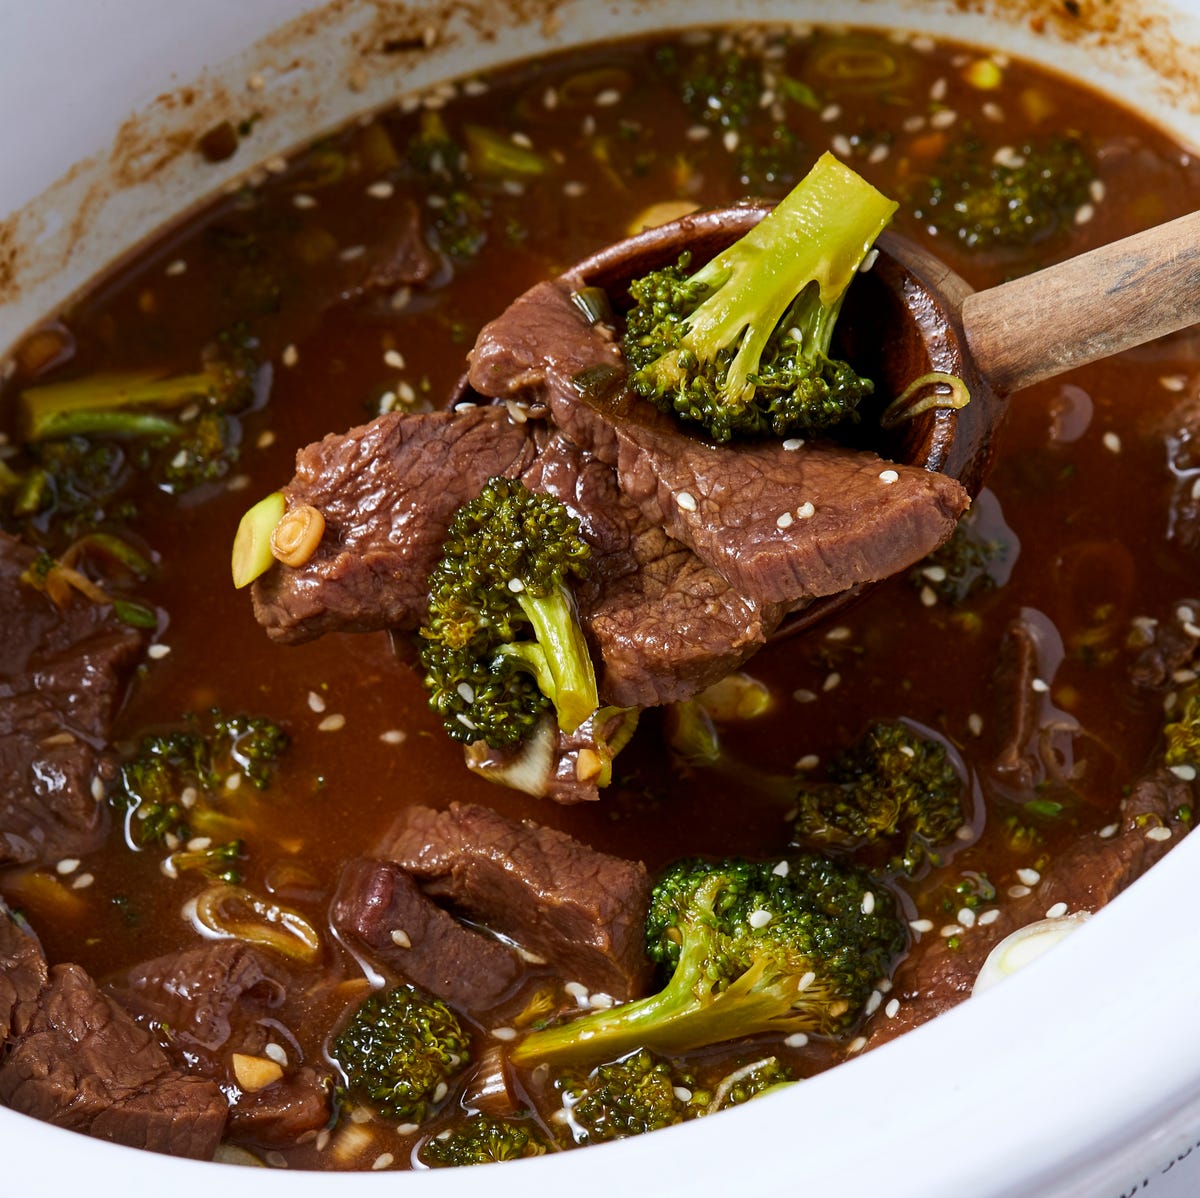
    13. Slow Cooker Beef and Broccoli

    13. Slow Cooker Beef and Broccoli

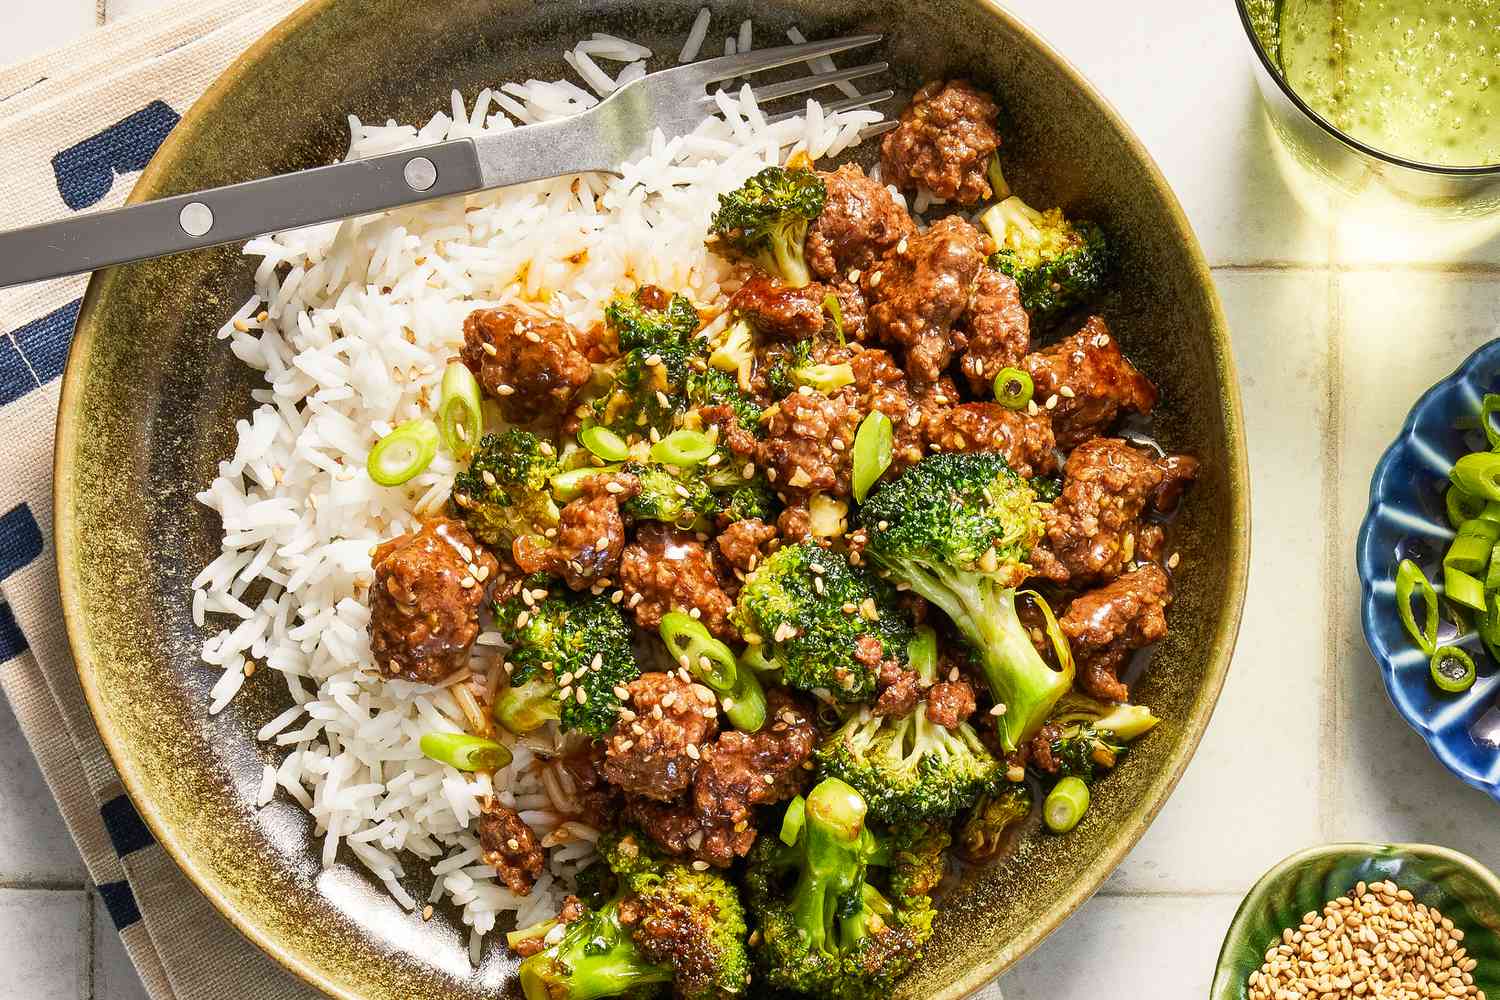
    Place sliced flank steak in the slow cooker with soy sauce, beef broth, brown sugar (just a tablespoon), garlic, and ginger. Cook on low for five to six hours. Add steamed broccoli florets in the last 30 minutes. Thicken the sauce with a cornstarch slurry. Serve over brown rice. Prep time: 10 minutes. Per serving: approximately 400 calories, 35g protein.

    14. Instant Pot Lentil Soup

    14. Instant Pot Lentil Soup

    Saute onion, carrot, and celery in the Instant Pot on saute mode. Add dried lentils, diced tomatoes, vegetable broth, cumin, turmeric, and smoked paprika. Pressure cook for 12 minutes. Season with lemon juice and serve with crusty bread. Total time: 25 minutes. Per serving: approximately 300 calories, 18g protein.

    15. Slow Cooker Stuffed Pepper Soup

    15. Slow Cooker Stuffed Pepper Soup

    Combine lean ground turkey (browned), diced bell peppers, canned diced tomatoes, tomato sauce, cooked brown rice, chicken broth, Italian seasoning, and garlic in the slow cooker. Cook on low for six hours. Top with a sprinkle of mozzarella. All the flavors of stuffed peppers with none of the assembly work. Prep time: 15 minutes. Per serving: approximately 340 calories, 28g protein.

    Vegetarian and Plant-Based Healthy Dinners

    Vegetarian and Plant-Based Healthy Dinners

    16. Chickpea and Sweet Potato Curry

    16. Chickpea and Sweet Potato Curry

    Saute onion, garlic, and ginger in a pot. Add curry powder, turmeric, and cumin. Add cubed sweet potato, canned chickpeas, canned coconut milk, and vegetable broth. Simmer for 20 minutes until sweet potatoes are tender. Stir in spinach until wilted. Serve over brown rice or with naan. Total time: 30 minutes. Per serving: approximately 380 calories, 14g protein.

    17. Vegetable and Bean Burrito Bowls

    17. Vegetable and Bean Burrito Bowls

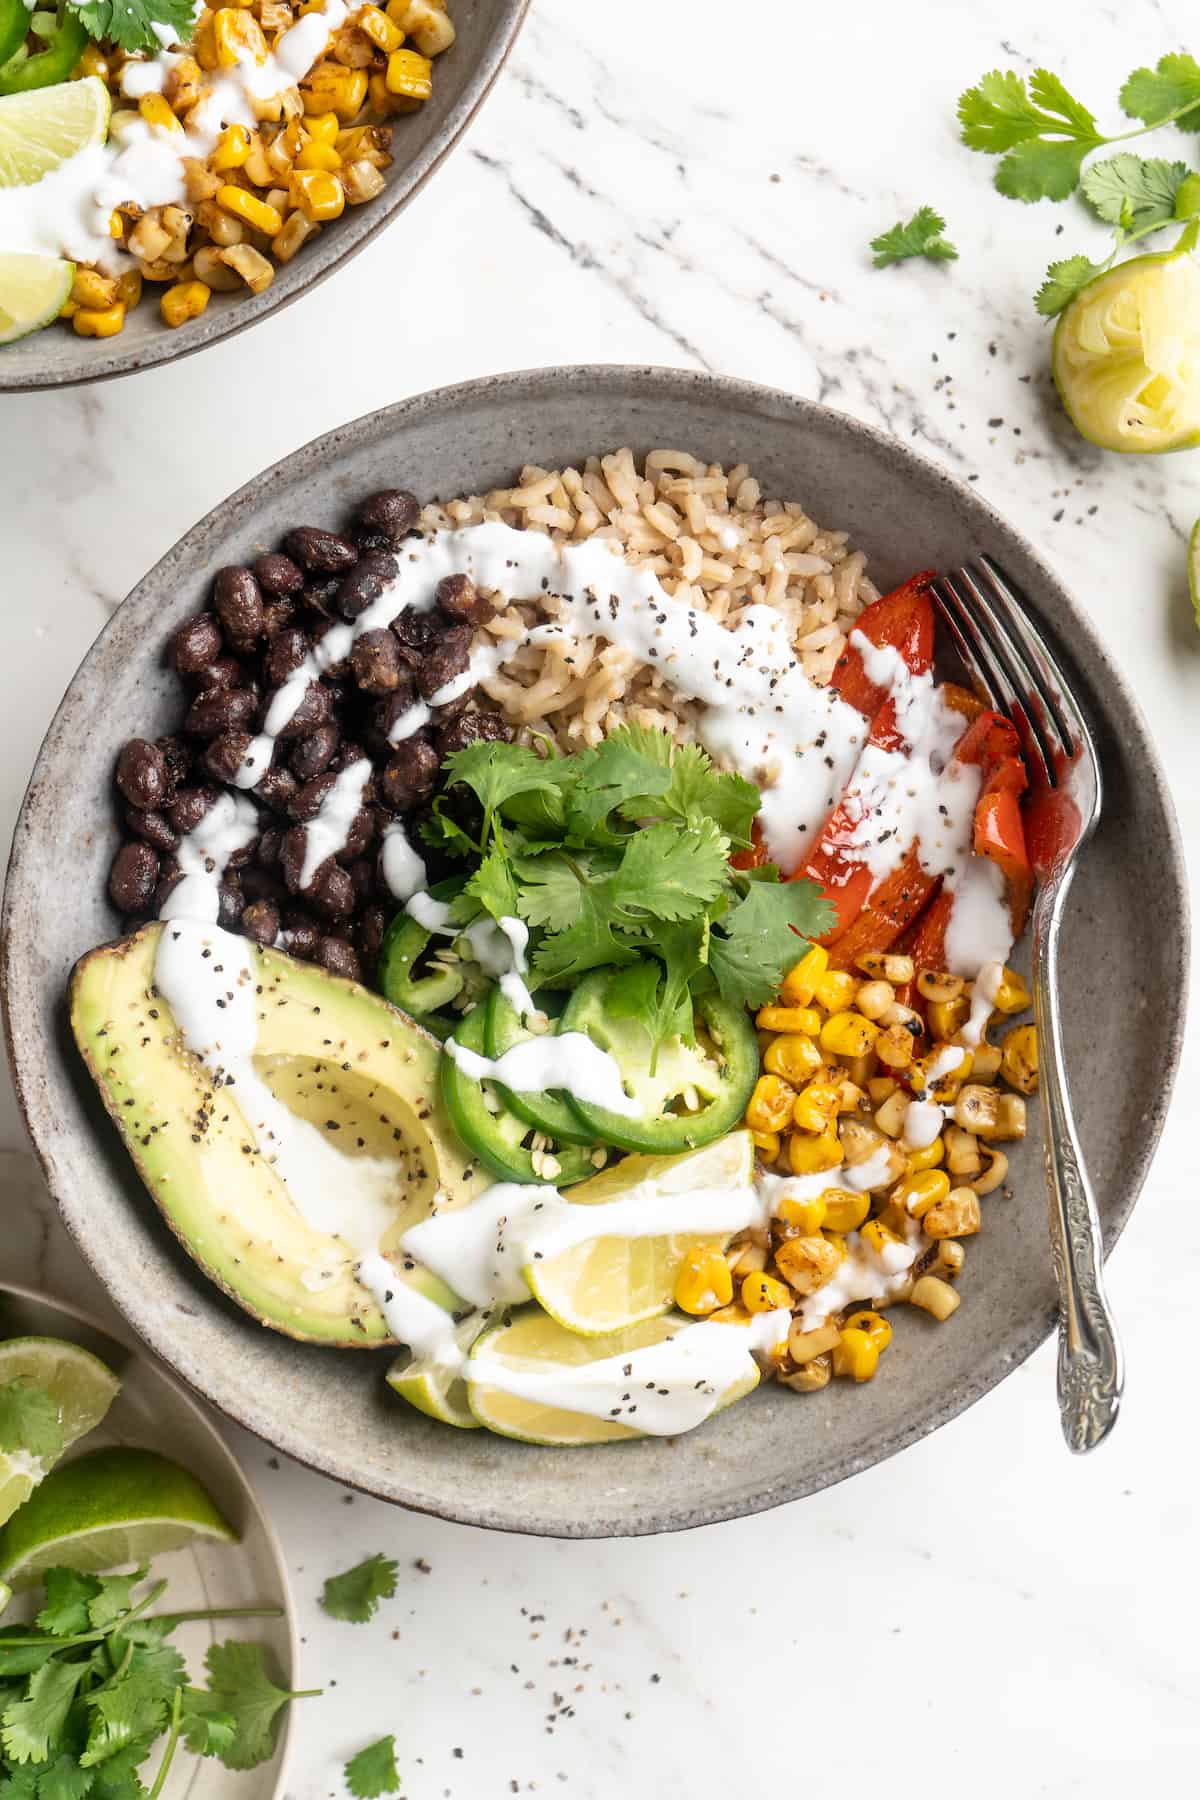
    Layer brown rice or cauliflower rice with seasoned black beans, roasted corn, sauteed fajita vegetables, diced tomatoes, shredded lettuce, guacamole, and a drizzle of lime crema (Greek yogurt mixed with lime juice). Total time: 20 minutes. Per serving: approximately 400 calories, 16g protein.

    18. Mushroom and Spinach Stuffed Shells

    18. Mushroom and Spinach Stuffed Shells

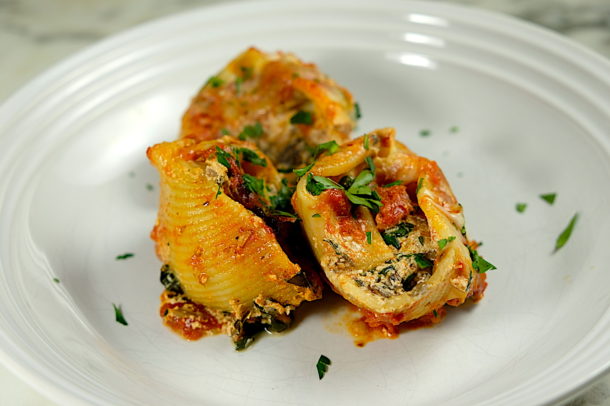
    Cook jumbo pasta shells. Mix sauteed mushrooms and spinach with part-skim ricotta, garlic, Parmesan, and Italian seasoning. Stuff the shells, place in a baking dish, cover with marinara sauce and mozzarella. Bake at 375 degrees for 25 minutes. Total time: 40 minutes. Per serving: approximately 370 calories, 20g protein.

    19. Thai Peanut Noodle Stir-Fry

    19. Thai Peanut Noodle Stir-Fry

    Cook whole wheat spaghetti. Stir-fry edamame, shredded cabbage, carrots, and bell peppers. Toss everything with a sauce of peanut butter, soy sauce, lime juice, ginger, garlic, and a splash of sriracha. Top with crushed peanuts and cilantro. Total time: 20 minutes. Per serving: approximately 420 calories, 18g protein.

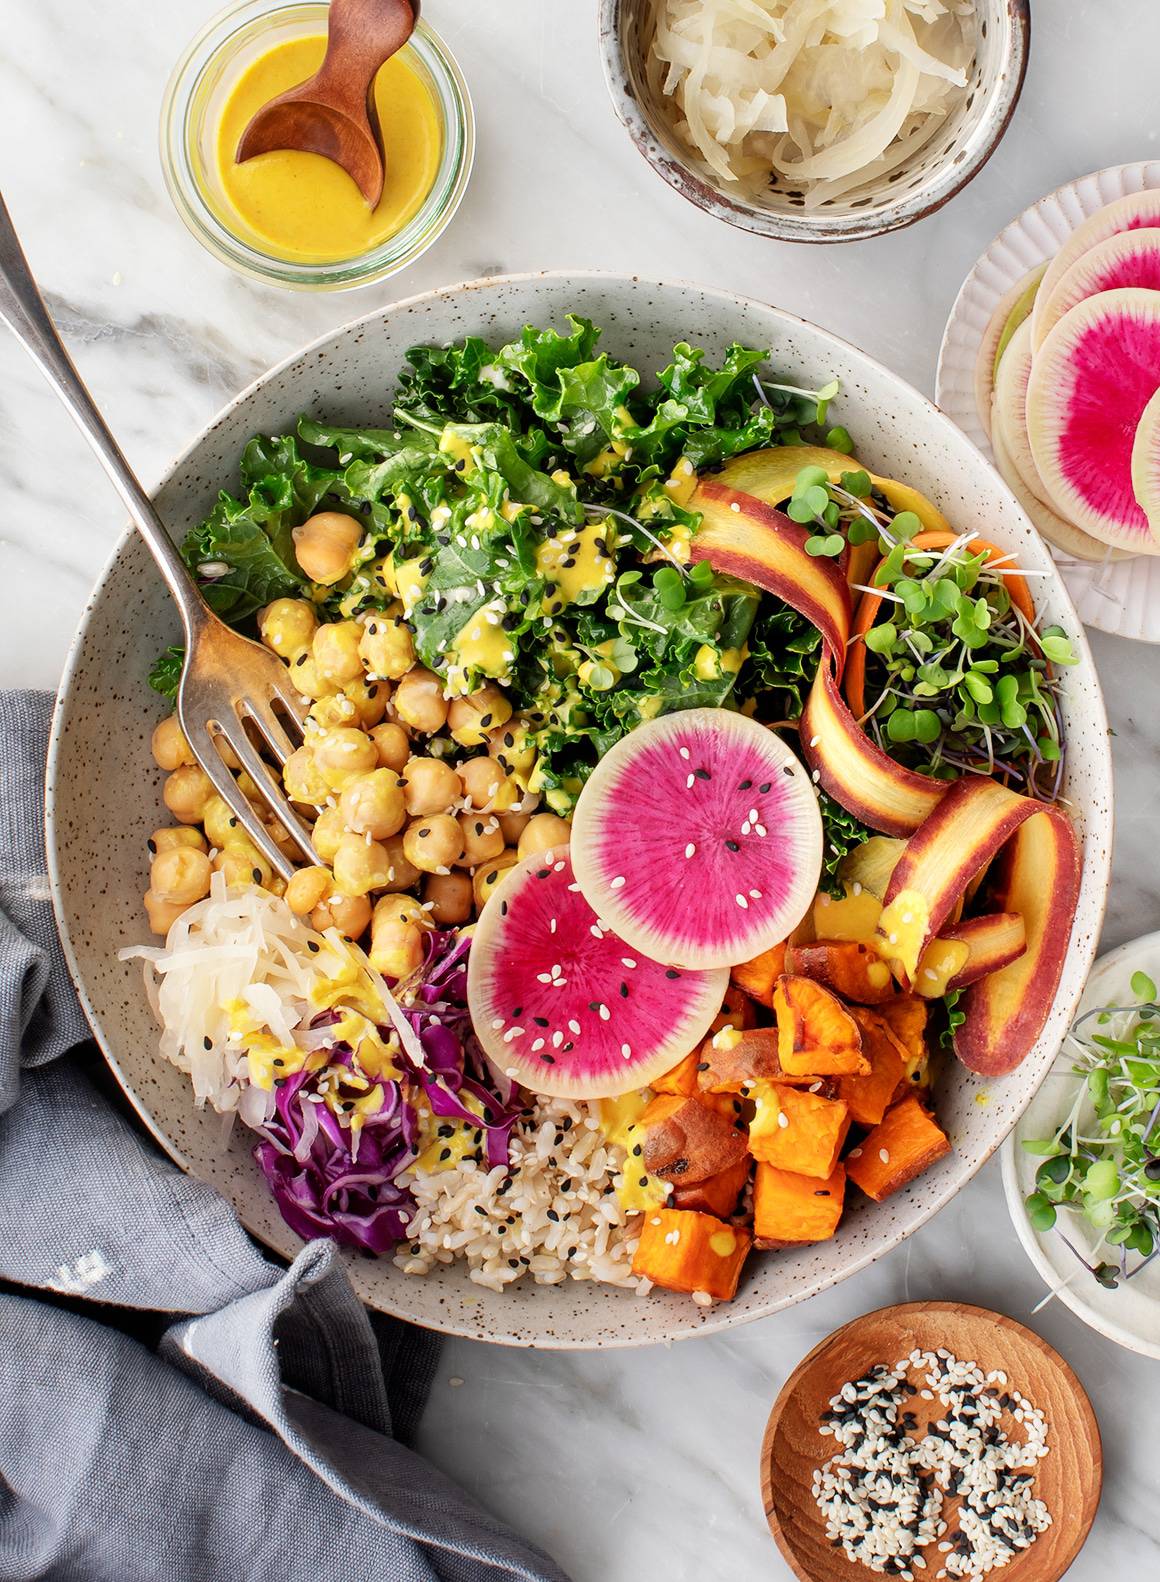
    20. Mediterranean Baked Falafel Bowls

    20. Mediterranean Baked Falafel Bowls

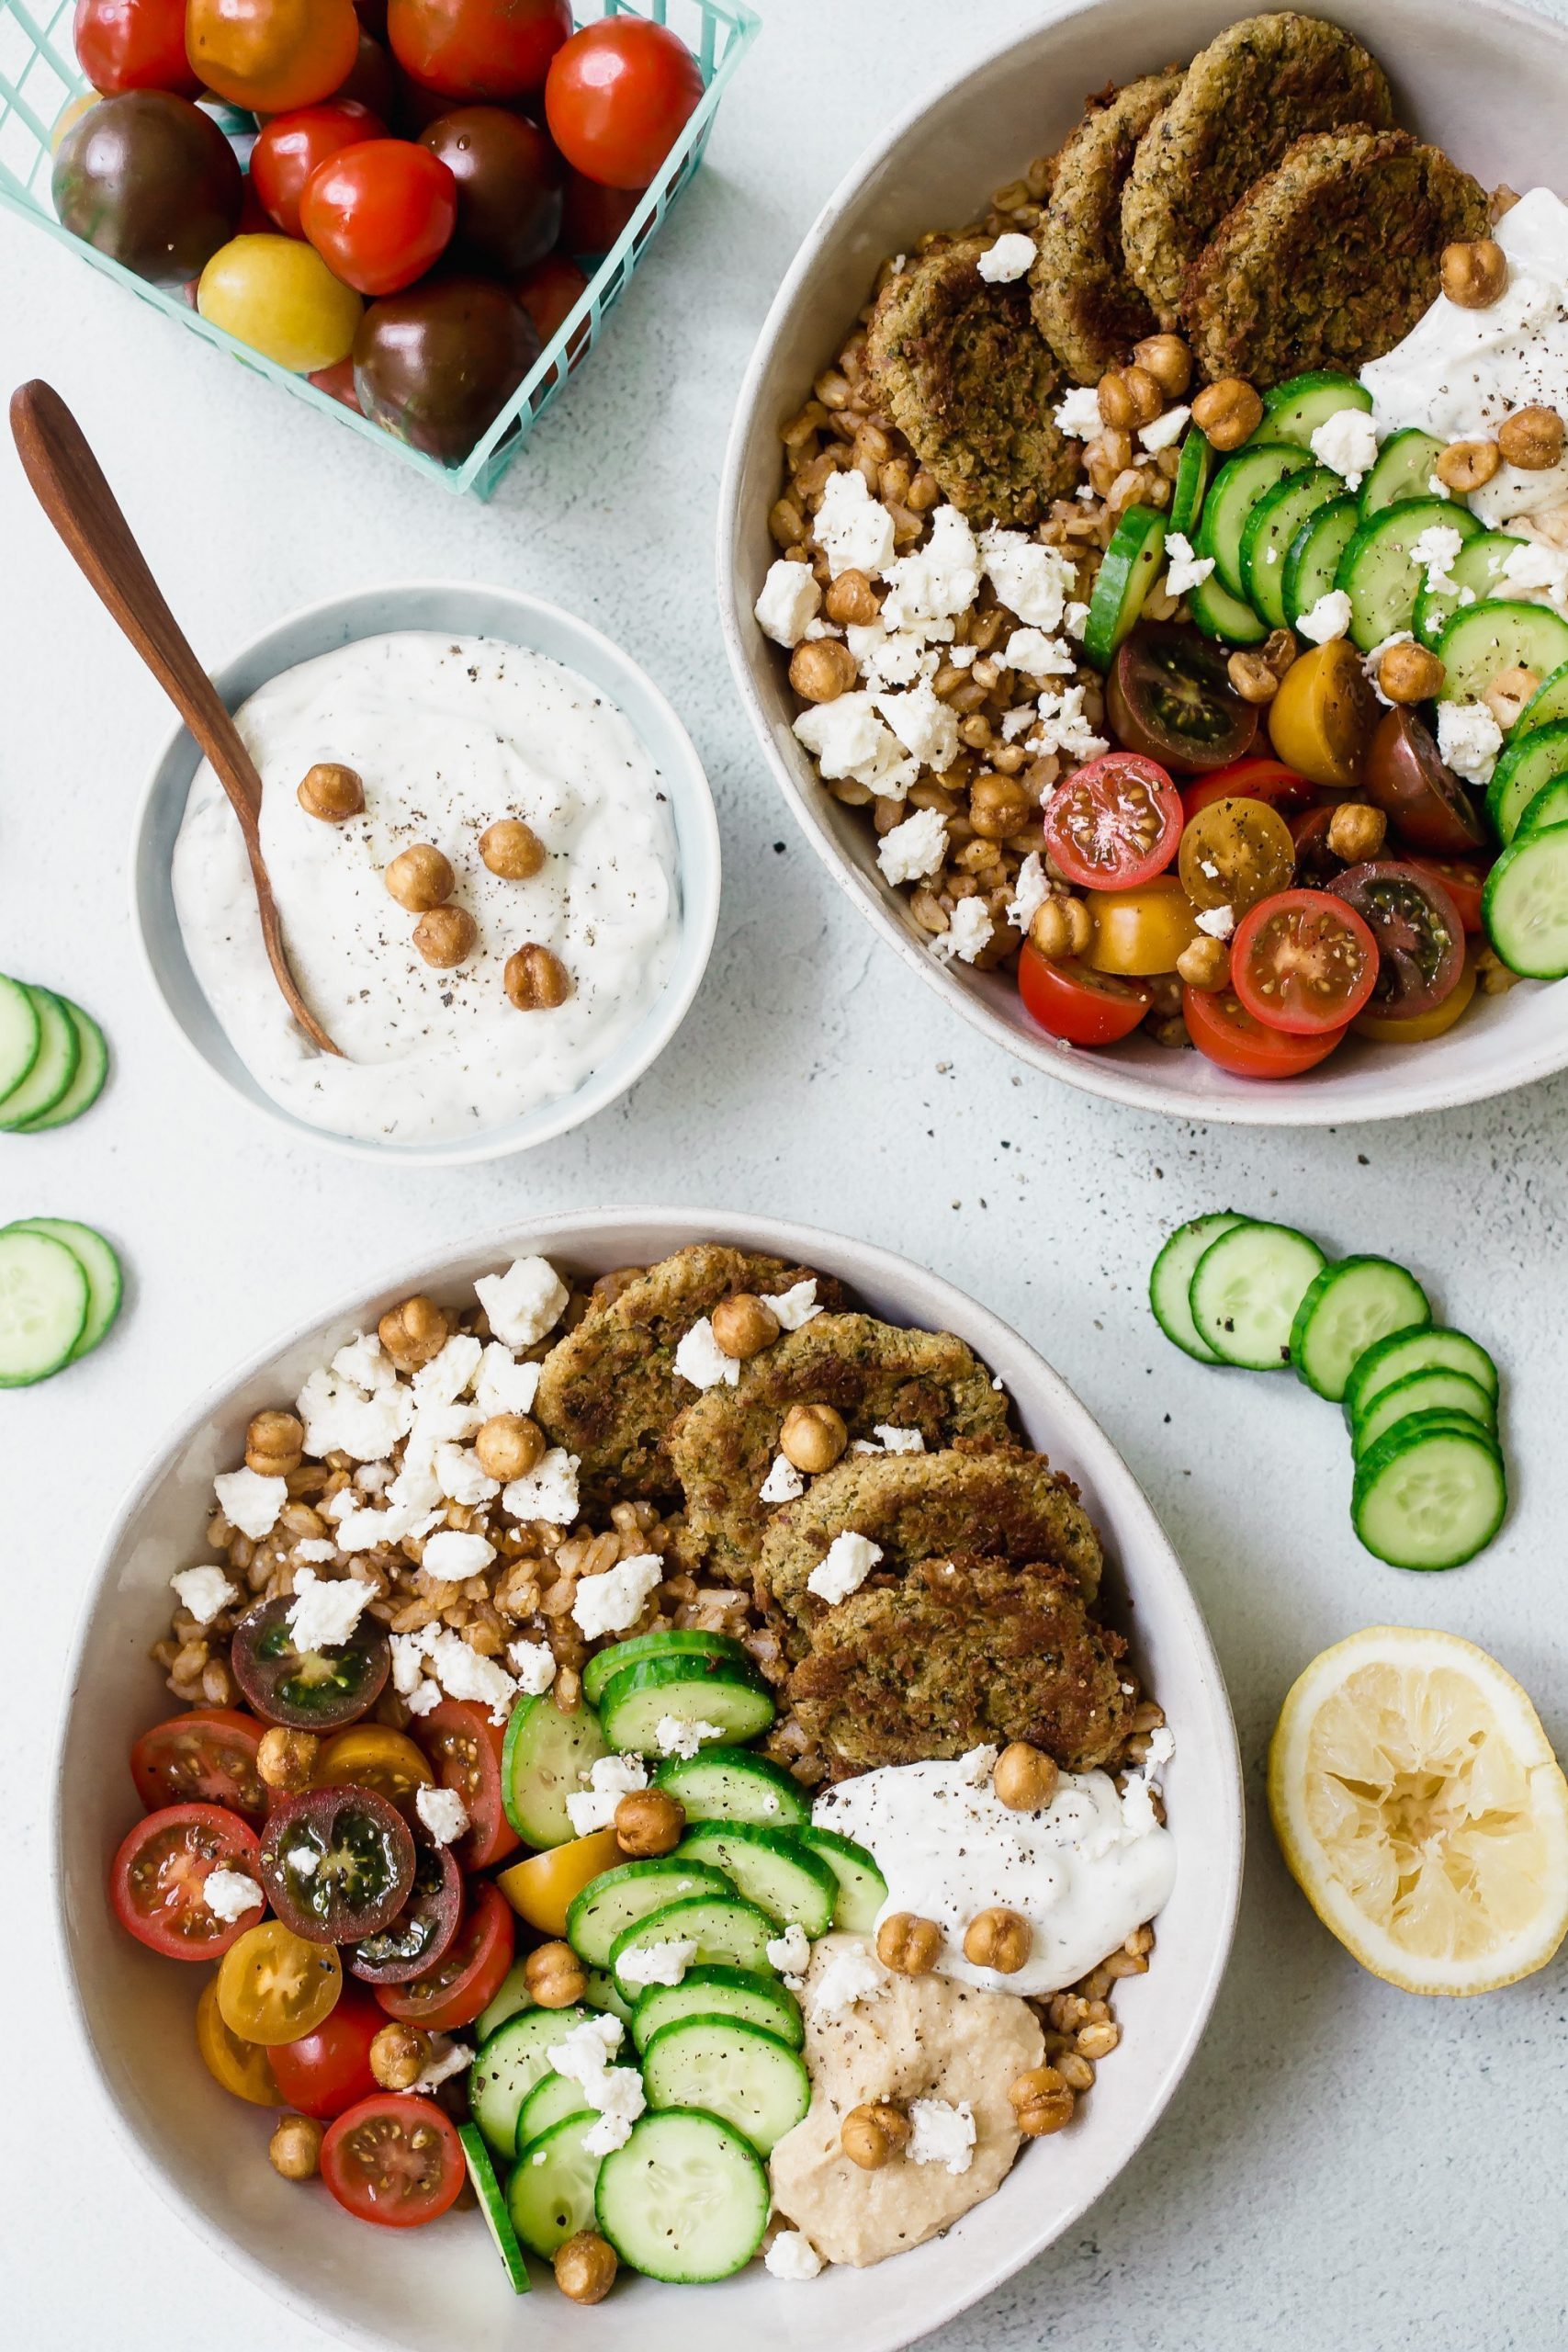
    Make baked falafel from canned chickpeas blended with parsley, cilantro, garlic, cumin, and flour, formed into patties and baked at 400 degrees for 25 minutes. Serve over a bed of greens with hummus, diced cucumber and tomato, pickled red onion, feta cheese, and a drizzle of tahini dressing. Total time: 35 minutes. Per serving: approximately 390 calories, 16g protein. A compact food processor makes blending the falafel mixture quick and effortless.

    Colorful Mediterranean baked falafel bowl with fresh toppings

    Tips for Making Healthy Dinners a Family Habit

    Tips for Making Healthy Dinners a Family Habit

    Involve Everyone in the Process

    Involve Everyone in the Process

    Kids and partners who help cook are more likely to eat and enjoy the food. Assign age-appropriate tasks – younger kids can wash vegetables and stir, older kids can chop and measure, and partners can handle grilling or prep. Cooking together also creates family bonding time that makes healthy eating feel like a shared value rather than a mandate.

    Start with Familiar Flavors

    If your family is used to takeout and processed food, do not start with quinoa bowls and unfamiliar ingredients. Start with healthier versions of their favorites – homemade chicken tenders, better tacos, lighter mac and cheese. Once the family is on board with the concept, you can gradually introduce new recipes.

    Meal Plan on the Weekend

    Meal Plan on the Weekend

    Spending 15 minutes on Sunday planning the week’s dinners and creating a shopping list eliminates the dreaded 5 PM “what are we eating” panic that leads to takeout orders. Choose three to four recipes for the week, shop once, and know exactly what you are making each night.

    Make Double Batches

    Most of these recipes scale up easily. Making a double batch and freezing half gives you a ready-made healthy dinner for a future busy night. Soups, chilis, stir-fry sauces, and casseroles all freeze beautifully.

    Let Go of Perfection

    Let Go of Perfection

    Not every dinner needs to be Instagram-worthy or nutritionally perfect. Some nights, scrambled eggs with toast and a side of fruit is a perfectly good dinner. The goal is progress, not perfection. Consistently making slightly better food choices over time adds up to significant health benefits – without the stress of trying to be perfect every single night.

    Key Takeaways

    • The best healthy dinner recipes for weight loss are satisfying (at least 25g protein), nutritionally dense (whole foods and vegetables), and sustainable (realistic prep times).
    • These 20 recipes are organized by cooking method – quick meals, sheet pan, slow cooker, and plant-based – so you can choose based on your energy level and schedule.
    • Sheet pan and slow cooker meals are ideal for busy families because they require minimal prep and cleanup while delivering maximum flavor.
    • Making healthy dinners a family habit starts with involving everyone in cooking, starting with familiar flavors, and meal planning on the weekend.
    • Consistency matters more than perfection – making slightly better food choices most nights adds up to significant health improvements over time.

    Frequently Asked Questions

    How many calories should a healthy dinner be for weight management?

    There is no universal answer because calorie needs vary widely based on age, activity level, height, and metabolism. However, for most women pursuing moderate weight management, dinner typically falls in the 350 to 500 calorie range. The recipes in this article range from about 300 to 420 calories per serving, which fits comfortably in most daily calorie targets. Rather than obsessing over exact calorie counts, focus on filling half your plate with vegetables, a quarter with lean protein, and a quarter with whole grains. This naturally creates a balanced, moderate-calorie meal.

    What is the best protein for healthy dinner recipes?

    What is the best protein for healthy dinner recipes?

    The best protein is the one you enjoy and will eat consistently. Chicken breast, turkey, fish (especially salmon and white fish), shrimp, lean pork tenderloin, and eggs are all excellent animal protein choices. For plant-based options, beans, lentils, chickpeas, tofu, tempeh, and edamame provide substantial protein with added fiber. Variety is key – rotating through different proteins throughout the week ensures a diverse nutrient intake and keeps meals interesting.

    Can I eat carbs at dinner and still manage my weight?

    Yes. Carbohydrates are not the enemy of weight management. The type and amount of carbs matter more than their mere presence. Whole grains (brown rice, quinoa, whole wheat pasta), sweet potatoes, and legumes are excellent dinner carbs that provide sustained energy, fiber, and important nutrients. They also make meals more satisfying, which can actually prevent overeating later. The recipes in this article include balanced portions of whole-food carbohydrates alongside protein and vegetables.

    How do I get my kids to eat healthy dinners?

    The biggest mistake parents make is making a separate “kid meal.” Research shows that kids eat better when they eat the same food as the rest of the family. Start with healthier versions of foods they already like – chicken tenders, tacos, pasta, stir-fries. Involve them in cooking. Let them choose between two healthy options rather than giving no choice. Serve new foods alongside familiar ones without pressure. And model the behavior you want – kids who see their parents enjoying vegetables are more likely to try them. Patience is key – it can take 10 to 15 exposures before a child accepts a new food.

  • 15 Red Flags in Dating in 2026 – From a Plus-Size Therapist’s Notebook

    15 Red Flags in Dating in 2026 – From a Plus-Size Therapist’s Notebook


    15 Red Flags in Dating in 2026 – From a Plus-Size Therapist’s Notebook – Curvy Girl Journal

    15 Red Flags in Dating in 2026 – From a Plus-Size Therapist’s Notebook

    By Kira Morales, Lifestyle & Wellness Writer

    In the spring of 2021, I was still working as a middle school counselor in Decatur when a colleague I’ll call Asha sat down across from me in the staff lounge with her tuna sandwich and started telling me about a man she had been seeing for six weeks. She was a size 18, brilliant, sharper than anyone on our team. He had told her, on date three, that he had “never been with a bigger girl before” but that he had always found her “type” more interesting. He said she was lucky to have found someone like him, because “most guys wouldn’t see past it.” He said it like a compliment. She heard it like a compliment. I was holding my coffee and feeling my counselor face do what counselor faces do when they are trying not to broadcast alarm.

    That staff lounge sentence is most of what I want to talk about. In the five years since, working with plus-size friends and clients, I have heard a version of that opener so many times it sounds like a script. The dating advice industry almost never names it. The “red flag” lists online cover the basics. They do not cover what it looks like to date in a body the culture has decided is conditional.

    So this is the list I wish I had handed Asha six weeks earlier. Fifteen patterns, sorted by category, leaning on Gottman, Ramani Durvasula, Esther Perel, and Logan Ury where the research holds. The framing is mine, from eight years sitting across from people whose nervous systems had been telling them what their heads were not ready to admit.

    The body flags, the part the standard lists miss

    1. “I usually date skinny girls but you’re different.” This sentence, or any cousin of it, is not a compliment. It is a negotiation. He is telling you, in the first five dates, that your body is the thing he is making peace with. He has placed himself above you on a hierarchy you did not agree to. The thing he wants you to feel grateful for is the act of him choosing you in spite of. Choice in spite of is not love. It is a tab he is going to come back and cash.

    2. Frequent body comments framed as love language. “I just want you to be healthy.” “Have you thought about trying that gym with me.” “I’m saying this because I care.” Care does not audit your plate. Real care notices that you are tired and asks about your day. The line between concern and control is whether the comment is about your wellbeing or about his comfort with how you look next to him. If you have ever felt the need to stop apologizing for everything in your own relationship, including for eating in front of the person who claims to love you, that is the data.

    3. Fetishization presented as preference. There is attraction that finds your specific body beautiful, and there is attraction that finds the category of your body a kink. The tell is whether he can describe what he loves about you as a person without circling back to your size within two sentences. The fetish version is “I love how soft you are” on loop, with no curiosity about your work, your family, or your week. Logan Ury, the Hinge Director of Relationship Science and author of How to Not Die Alone, talks about the difference between “spark” and “slow burn.” Fetishization mimics spark. Six weeks in, if his interest still sits entirely at the surface of your body, that is a structural problem, not a phase.

    4. Comments about your eating in front of others. The waiter is at the table. He says, with a smile, “she’ll have the salad, she’s being good tonight.” Or his sister asks if you want dessert and he answers for you. Public comments about your food are not jokes. They are him performing oversight of your body for an audience. It tells you what he thinks the relationship looks like to outside eyes. It also tells you what your next family dinner is going to feel like.

    5. The compliment ladder that only activates when you are losing weight. Pay attention to when he tells you that you look beautiful. If the compliments concentrate on the weeks you skip dinner, the months you start a new workout routine, the morning after a stomach bug, you are not in a relationship. You are in a conditioning loop. Beauty that is contingent on shrinking is a wage he pays you for compliance.

    The character flags, who he is when he forgets you’re watching

    6. The way he talks about his mother, his sister, his ex. Not the content. The texture. Contempt is the giveaway. Dr. John Gottman’s decades of research at The Gottman Institute named contempt the single strongest predictor of divorce in his Four Horsemen framework, alongside criticism, defensiveness, and stonewalling. He wrote about it most clearly in The Seven Principles for Making Marriage Work in 1999. The way a man talks about the women who came before you is the way he will talk about you in eighteen months. If his ex is “crazy” and his mother is “exhausting” and his sister is “too much,” you are next in line for one of those nouns.

    7. The friend group reveal that never happens. Three months in, you have not met a single friend of his. Not at a bar, not at a birthday, not even on a video call. He has met yours. The standard explanations are “I don’t really have a close group” or “I keep work and personal separate.” Maybe. Or maybe he is keeping you in a compartment because a healthy friend group would tell him exactly what they see, and he does not want that mirror held up. The friend group test is not a vanity check. It is a basic indicator of whether you exist in the documented part of his life.

    8. The job, credit, family black box. Six weeks in, you still cannot answer simple factual questions about him. What does he actually do for work day to day. Has he ever filed for bankruptcy. Does he have a kid you do not know about. Is he in contact with his parents and if not, why not. Privacy is fine. Opacity is a strategy. The man with nothing to hide will not feel interrogated by the question “tell me about your last serious relationship.”

    9. The waiter test. Watch him with people who cannot do anything for him. If he is courteous to you and rude to the woman at the gate desk, you are watching a performance, not a personality. Esther Perel, in her practice and in Where Should We Begin, talks about the gap between who a person is in courtship and who they become inside the relationship. The courtship version is the marketing campaign. The waiter version is the product.

    The communication flags Gottman and Ramani spent careers naming

    10. Stonewalling. Gottman’s fourth horseman. You raise a concern, he goes silent, picks up his phone, refuses to engage for hours or days. He calls it “needing space.” Space is a forty-five-minute walk and a return to the conversation. Stonewalling is punishment dressed up as self-regulation. It teaches you, week by week, not to bring up the thing that is bothering you, because the silence is worse than the swallow.

    11. Love-bombing followed by withdrawal. Dr. Ramani Durvasula, the clinical psychologist whose 2024 book It’s Not You: Identifying and Healing from Narcissistic People is the most useful single text on the subject, calls this the “idealize, devalue, discard” cycle. Week one to three he is showing up with flowers and planning a trip in March. Week four to six he is distant, criticizing the way you load the dishwasher. Week seven he is back with flowers. The intermittent reinforcement is the hook. The unpredictability is not a personality quirk. It is the mechanism.

    12. The clarifying question that becomes an interrogation. You ask where he was on Friday because something did not add up. He answers, briefly. Two days later he brings it up unprompted, walks you through a forensic explanation, then flips the conversation to challenge how you could have doubted him. By the end you are apologizing for asking. That maneuver has a name. DARVO, deny, attack, reverse victim and offender. Once you see it once, you cannot unsee it.

    13. The cold reception when you say no. No to sex on a tired night. No to a weekend with his family you cannot afford. Watch what happens in the forty-eight hours after the no. If the temperature drops, if texts go unanswered, if the next time you see him he is “just in a mood,” you have your answer about whose comfort the relationship is built around. A grown man can hear no without retaliating. The ones who cannot are telling you what the next ten years would look like.

    The context flags, the world he places you in

    14. Won’t introduce you publicly. No photo of you on his phone home screen, none on his socials, no Saturday brunch with his work friends. He calls it “keeping the relationship private.” Privacy is a choice two people make together. Concealment is a choice one person makes alone. Hinge’s 2024 Annual Dating Report found that visibility consistency in the first six months is one of the strongest correlates of relationships that make it past a year. And in the dating economy, plus-size women are hedged on at a disproportionate rate. The 2024 OkCupid match-rate data showed that women categorized as plus-size receive roughly 30 percent fewer initial responses than the platform average. Christian Rudder’s work on the original OkCupid dataset documented similar patterns over a decade ago. The numbers have not improved.

    15. Future-faking that never materializes. Month two he is talking about the apartment you two will get. Month four he is talking about how his mom will love you when she meets you in June. June comes. No plan, no flight, no date on the calendar. He rolls the timeline forward. Logan Ury calls this one of the most reliable warning signs in the six-week window. The honest version of a future plan has a date and a price tag. The dishonest version has a vibe. If six weeks in you cannot point to a single concrete commitment he has made and kept, you are dating his marketing deck, not his roadmap.

    The week-six body change test

    Here is the question I tell women in my DMs to ask themselves in week six. Not week one. Week six, when the brain has cooled off enough to see the data. If my body changed tomorrow, would the way he speaks to me change. If I gained fifteen pounds in three months because of medication or stress, would the compliments thin out. If I lost twenty pounds, would the volume turn up. Would his hand stay on the small of my back, or would it migrate. Would the photos he does not post start getting posted.

    The honest answer is almost always available in week six, if you let it be. It is in the texture of his attention, not the content of his words. Men who love women love the woman, not the silhouette she is currently rendering. The terms of a probationary contract are usually written in the body comments first, then the public comments, then the silences.

    Dr. Sue Johnson, the founder of Emotionally Focused Therapy and author of Hold Me Tight, has written for decades that the central question of every romantic attachment is “are you there for me.” Not are you attracted to me, are you there for me. The plus-size lens sharpens that question. Are you there for me, or are you there for the version of me you are negotiating toward. Being in your feminine era, in the way that phrase actually means something, is refusing to be in a relationship that requires you to negotiate the question.

    If you are reading this and recognizing your relationship, you do not have to leave on a Tuesday. You do have to start writing things down. Dates, sentences, how you felt in your body after the conversation. Dr. Ramani’s clinical recommendation, which I echo because it works, is to keep a private note on your phone to keep your own memory honest. Memory is the first thing the dynamic erodes. A book that has helped my clients is Why Does He Do That? by Lundy Bancroft, the most direct text I have found on the patterns of controlling men. For the boundary work that has to come before the leaving, Set Boundaries, Find Peace by Nedra Glover Tawwab is the clearest book I know.

    And then ask the question. If my body changed tomorrow, would the way he speaks to me change. Sit with whatever answer arrives. That answer, not the man, is the relationship.

    Asha left him in the fall of 2021. She told me later that what ended it was not the worst thing he had said. It was a Tuesday night, nothing dramatic. He made a face when she ordered the pasta. She watched the face. She paid the bill. She did not go home with him. Sometimes that is what the leaving looks like. Quiet, on a Tuesday, over pasta, after the body finally believed what the head had been hearing.


  • Best Edge Controls for Natural Hair in 2026 – Sleek Edges Without Flaking or Breakage

    Best Edge Controls for Natural Hair in 2026 – Sleek Edges Without Flaking or Breakage

    Close-up of beautifully laid edges on Black woman with elegant updo

    There are few things in the natural hair world as satisfying as perfectly laid edges. When your baby hairs are sleek, smooth, and holding their pattern without a single flake in sight, the entire look comes together in a way that feels polished, intentional, and absolutely gorgeous. But finding the right edge control to achieve that look without damaging your delicate hairline is a journey that many naturals know all too well.

    The wrong edge control can leave you with white flakes by midday, a crusty, stiff feel that looks unnatural, or worse, it can contribute to traction alopecia around your hairline from harsh chemicals and excessive pulling. The right edge control, on the other hand, gives you a smooth, flexible hold that lasts all day, conditions your edges while keeping them in place, and washes out easily without buildup.

    In 2026, the edge control market has expanded with formulas that are more sophisticated than ever. Brands are infusing their products with nourishing ingredients like biotin, castor oil, and shea butter that actively strengthen your hairline while providing hold. We have researched and compared the best options available right now to help you find the perfect edge control for your hair type, your hold preferences, and your budget.

    Edge Control Basics: What It Is and Why It Matters

    Edge Control Basics: What It Is and Why It Matters

    Edge control is a styling product specifically designed to smooth and lay down the shorter hairs around your hairline, often called baby hairs or edges. Unlike regular gel, edge control is typically thicker in consistency, with a wax-like or pomade-like texture that provides more targeted hold for small, delicate hairs.

    Your edges are some of the most fragile hairs on your head. They sit along the hairline where the skin is thinner and the hair follicles are more susceptible to damage from tension, manipulation, and harsh products. This is why choosing an edge control that provides hold without compromising hair health is so important. A product that grips too aggressively or contains drying alcohols can contribute to thinning around your hairline over time, which defeats the entire purpose of styling your edges in the first place.

    The best edge controls achieve a balance between hold and flexibility. They keep your baby hairs in place through humidity, sweat, and daily activity while still allowing the hairs to move naturally. They do not flake as the product dries, they do not leave a white or ashy residue, and they wash out completely with regular shampooing.

    What to Look for in a Quality Edge Control

    What to Look for in a Quality Edge Control

    Hold Level

    Hold Level

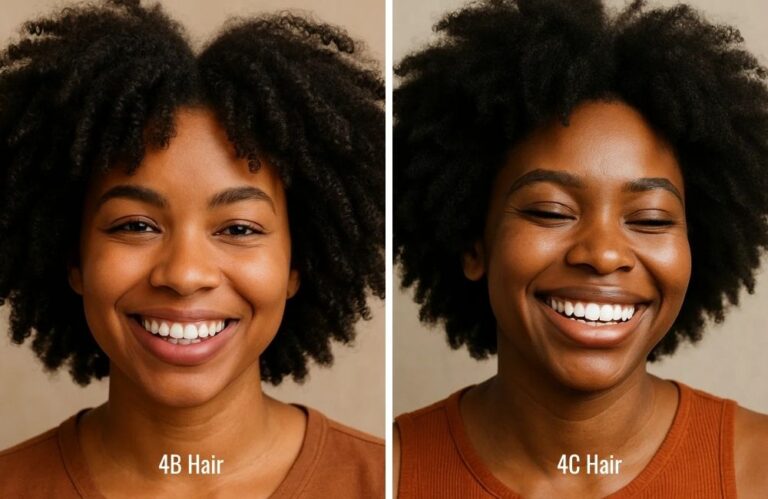
    Edge controls range from light to extreme hold. Your ideal hold level depends on your hair texture and how long you need your edges to last. Fine or loosely textured hair often does well with a light to medium hold. Coarser, kinkier textures like 4B and 4C typically need a firm to extreme hold to keep edges laid throughout the day. Consider your activity level too. If you are sweating through workouts or commuting through humid weather, you need a stronger hold than someone working in an air-conditioned office.

    Ingredients to Seek

    Ingredients to Seek

    Look for edge controls that contain nourishing ingredients alongside their hold agents. Castor oil promotes healthy hair growth and adds shine. Biotin strengthens the hair shaft. Shea butter and mango seed butter condition and moisturize. Aloe vera soothes the scalp and provides light hold without stiffness. Argan oil adds shine and helps prevent breakage. These ingredients transform your edge control from a purely cosmetic product into a hairline-strengthening treatment.

    Ingredients to Avoid

    Ingredients to Avoid

    Short-chain alcohols like alcohol denatured, isopropyl alcohol, and SD alcohol dry out your hair and contribute to breakage over time. Heavy mineral oils can clog follicles along your hairline, potentially contributing to thinning. Excessive fragrance can irritate the delicate skin at your hairline. While no single ingredient is necessarily harmful in small amounts, products heavy in these ingredients are best avoided for regular use on your fragile edges.

    Texture and Consistency

    Texture and Consistency

    Edge controls come in several textures: gel-like, wax-like, pomade-like, and cream-based. Gel-like formulas tend to dry harder and provide more defined, sleek styles. Wax-like and pomade-like formulas offer more flexibility and a softer, more natural finish. Cream-based formulas are the lightest and work well for everyday, more subtle edge styling. Your preference depends on the look you are going for and how your hair responds to different textures.

    Our Top Edge Control Picks for 2026

    Our Top Edge Control Picks for 2026

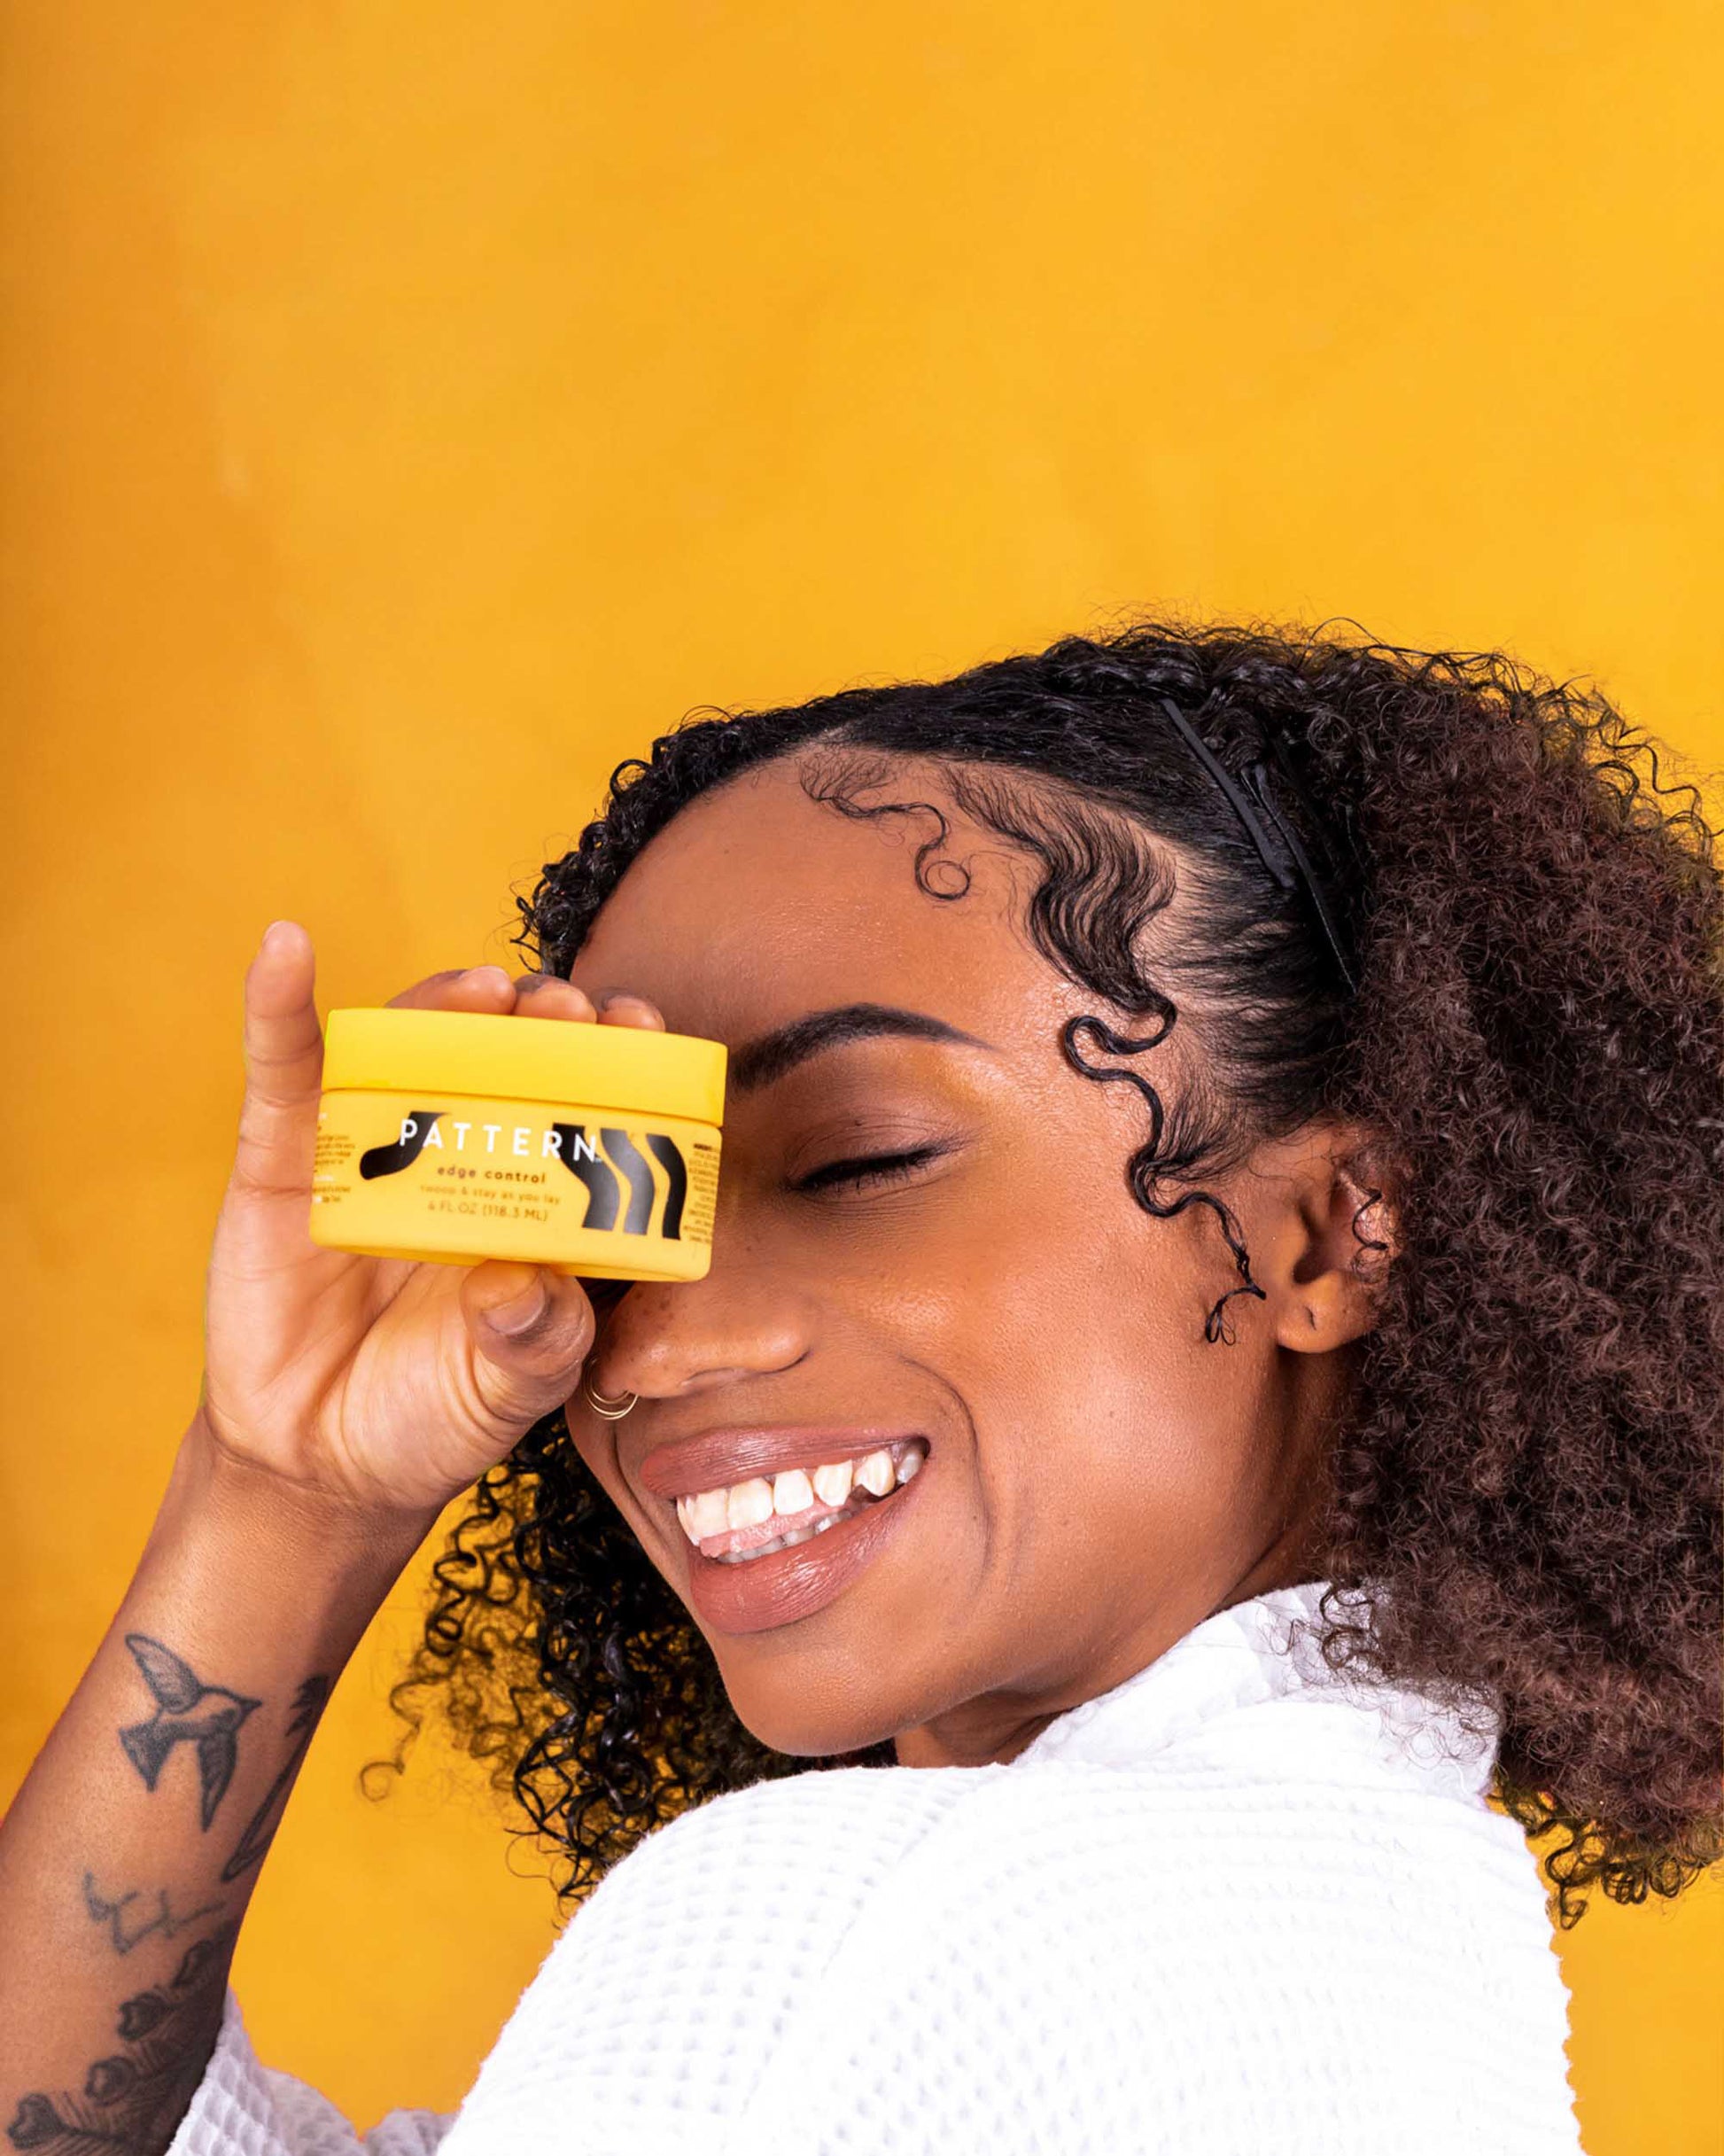
    Best Overall: Pattern Beauty Edge Control

    Best Overall: Pattern Beauty Edge Control

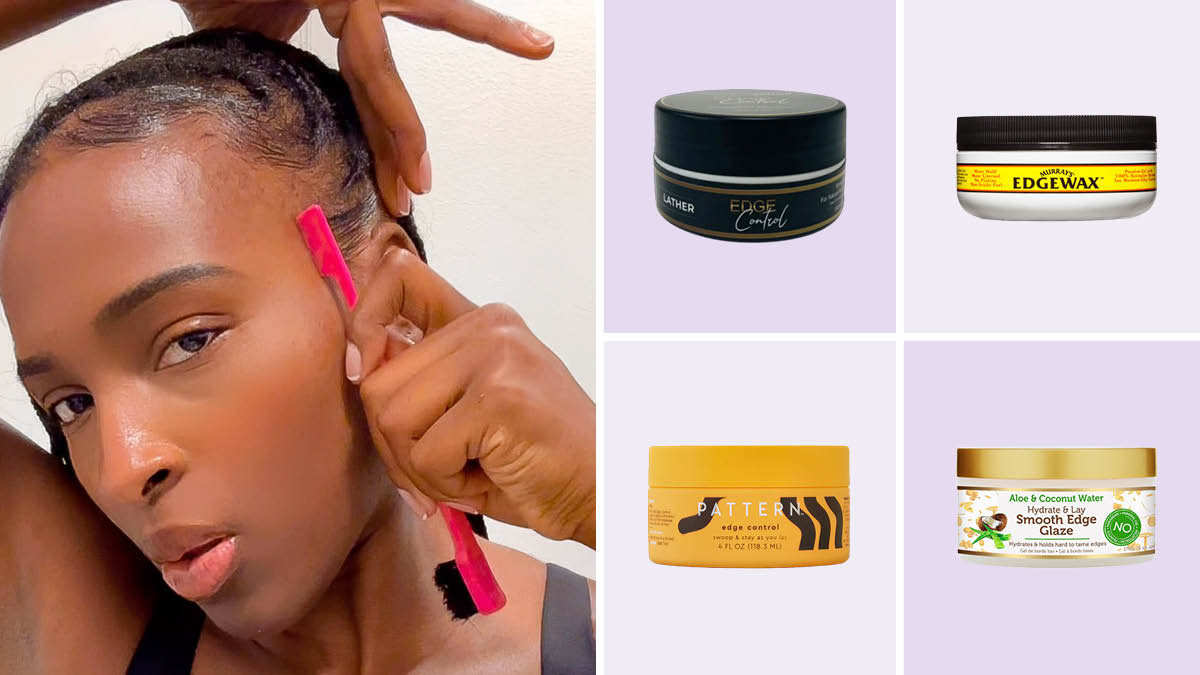
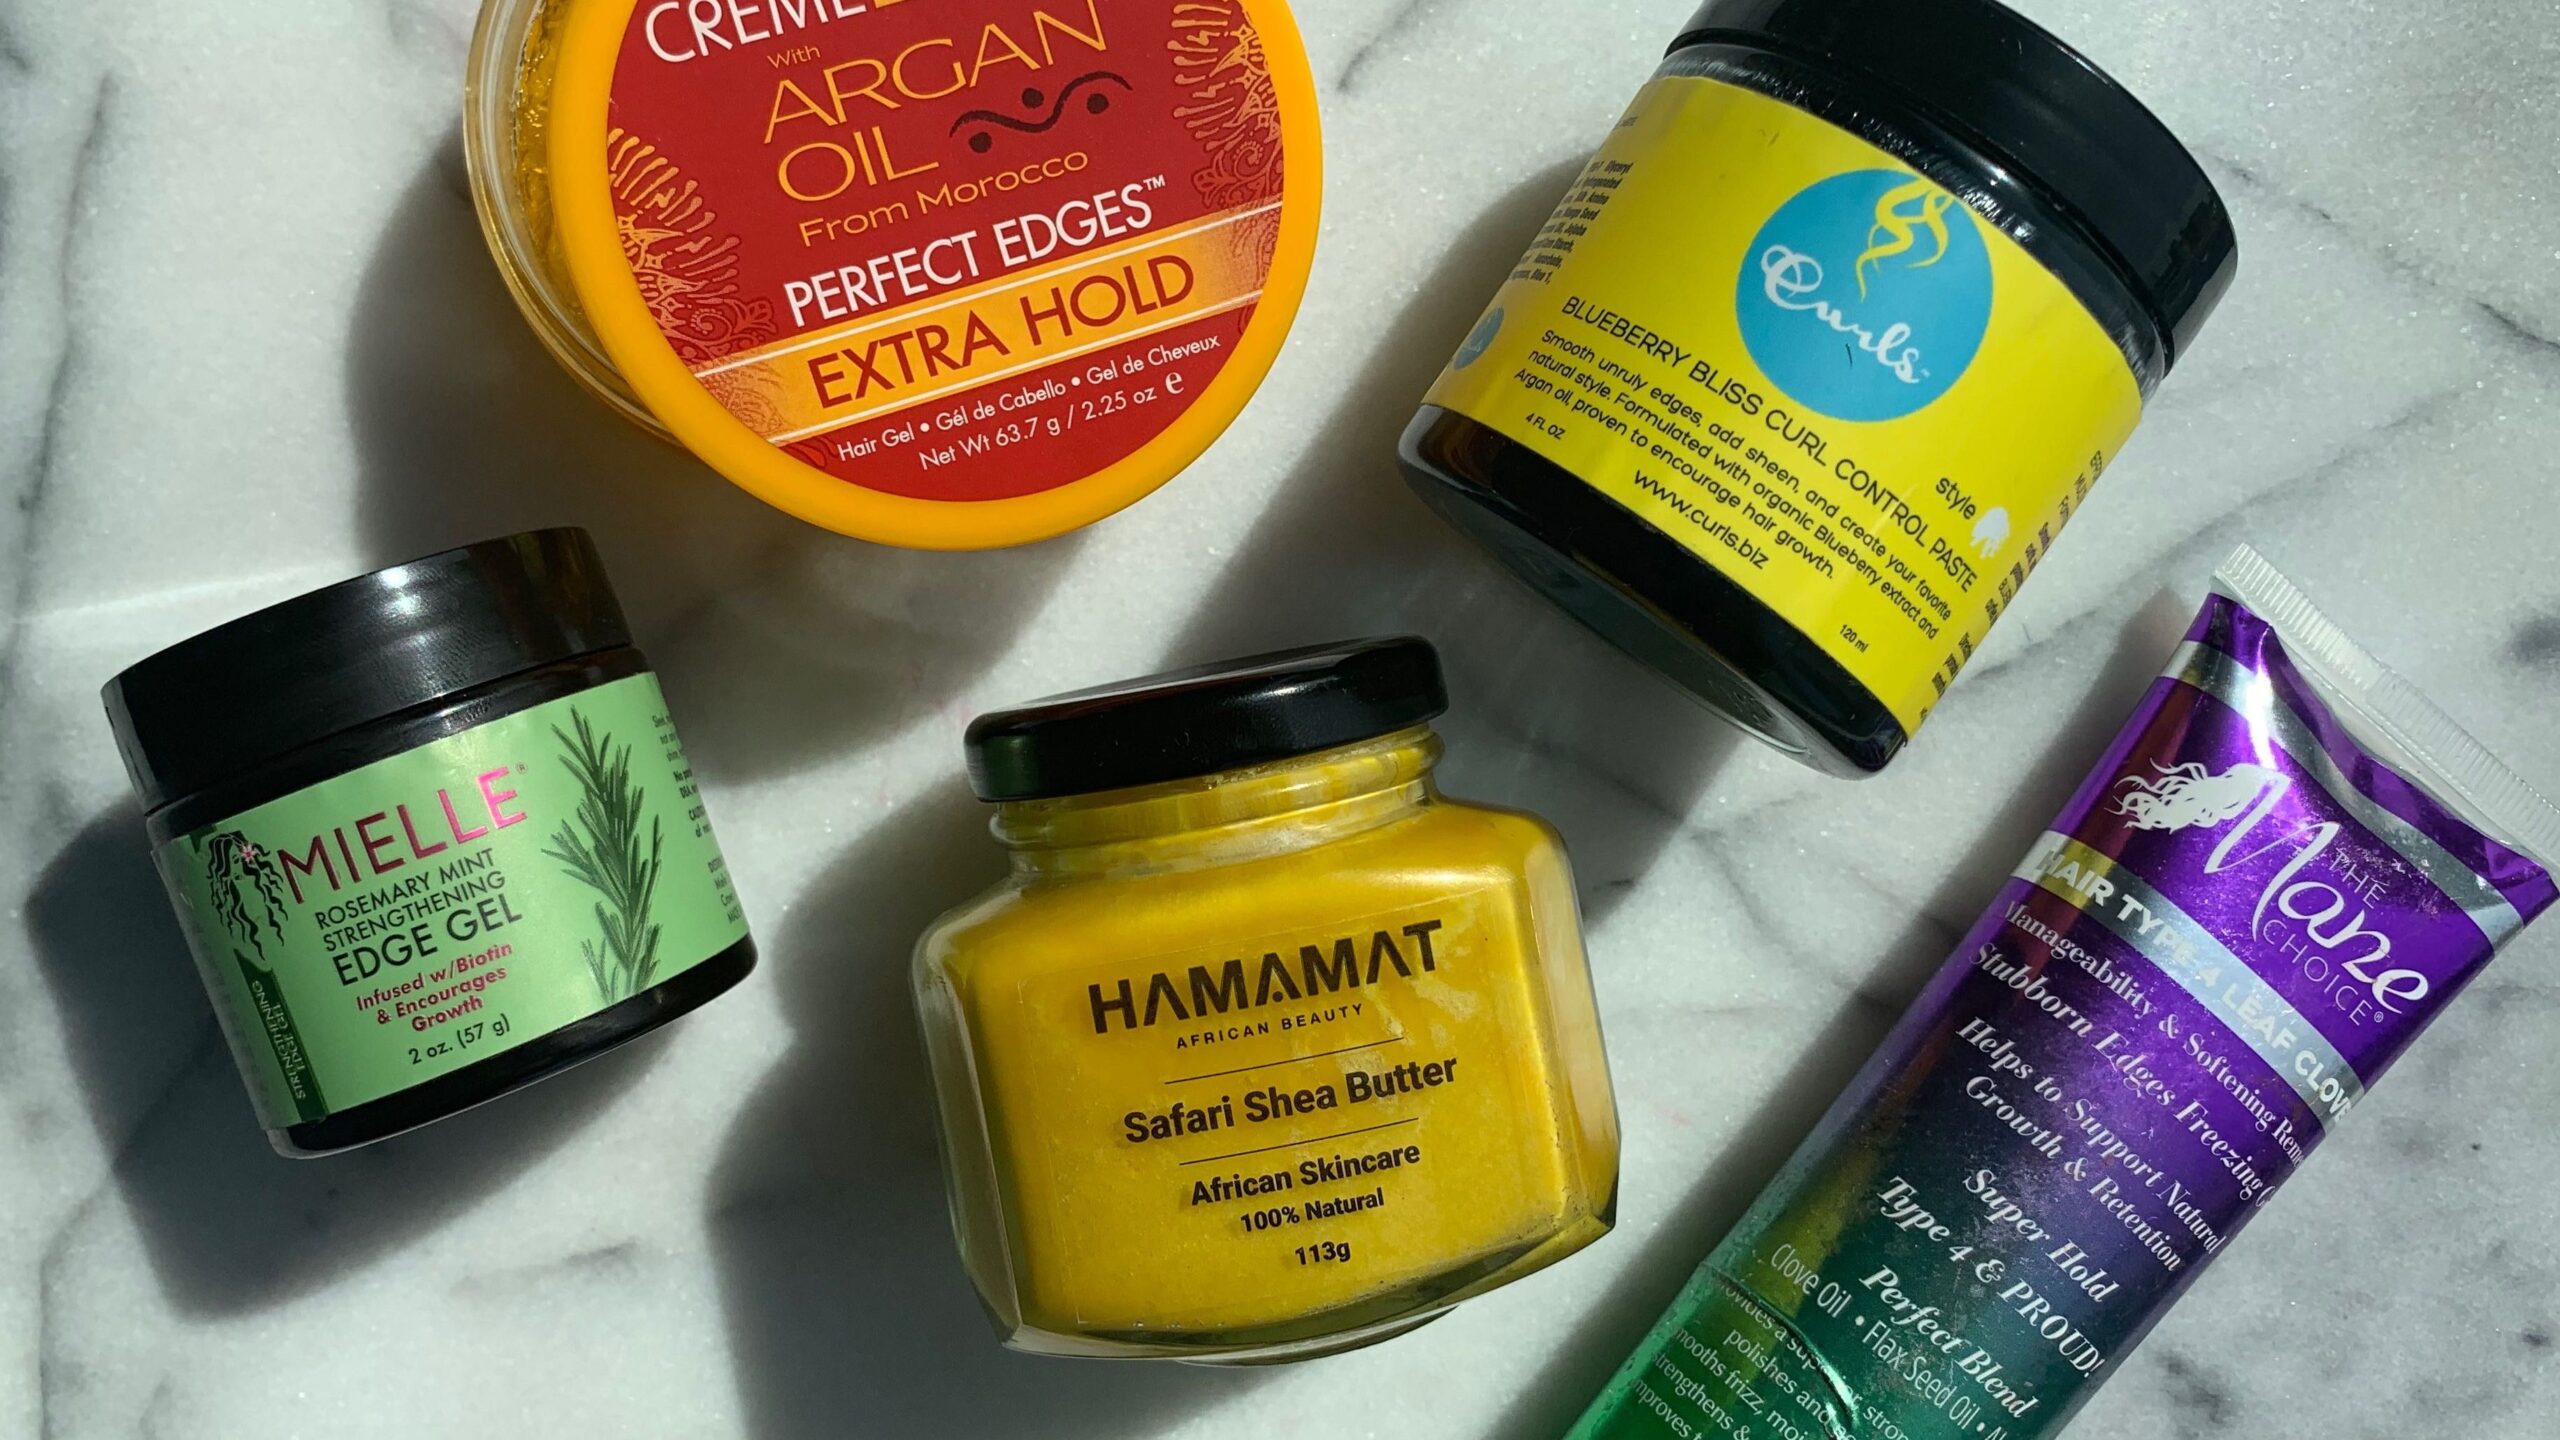
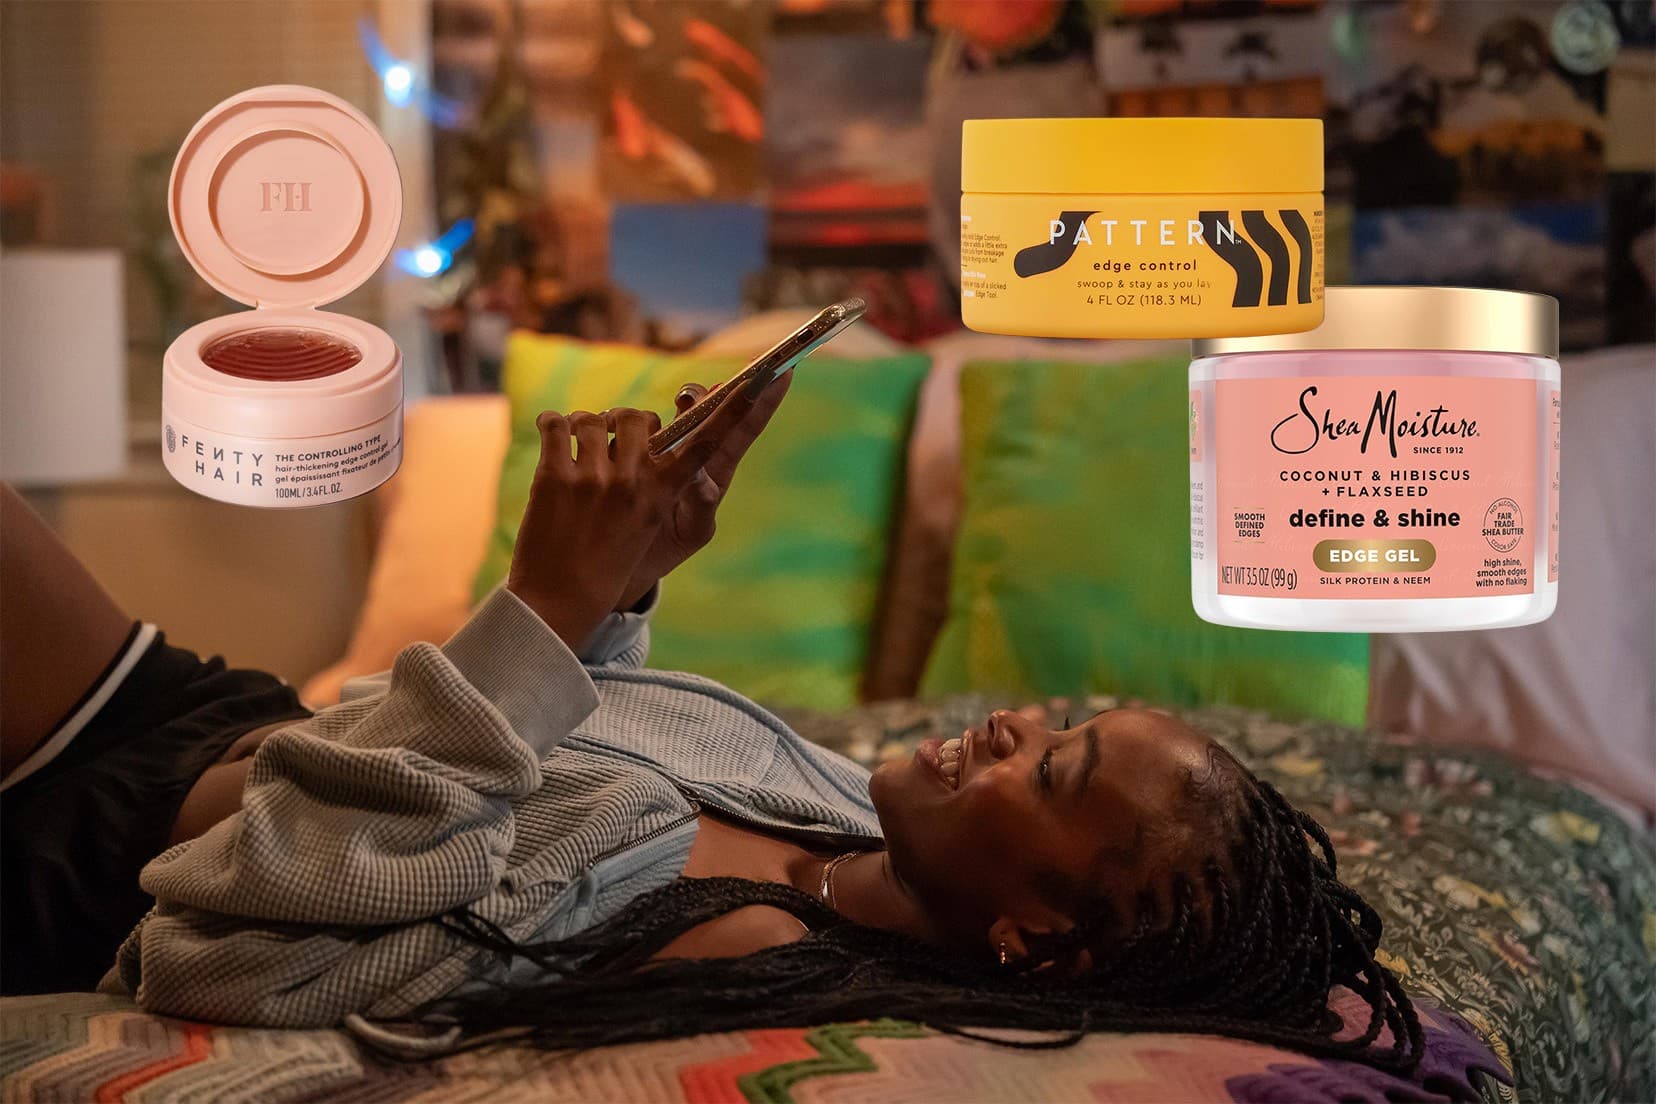
    Pattern Beauty’s edge control gel has become a standout in 2026 for delivering strong, sleek hold without flaking. Infused with beeswax and mango seed butter, it works to strengthen and condition your hair while keeping baby hairs in place. The formula provides a flexible hold that does not turn crispy or leave residue, and it washes out easily. The scent is subtle and pleasant, and the jar packaging makes it easy to control how much product you pick up.

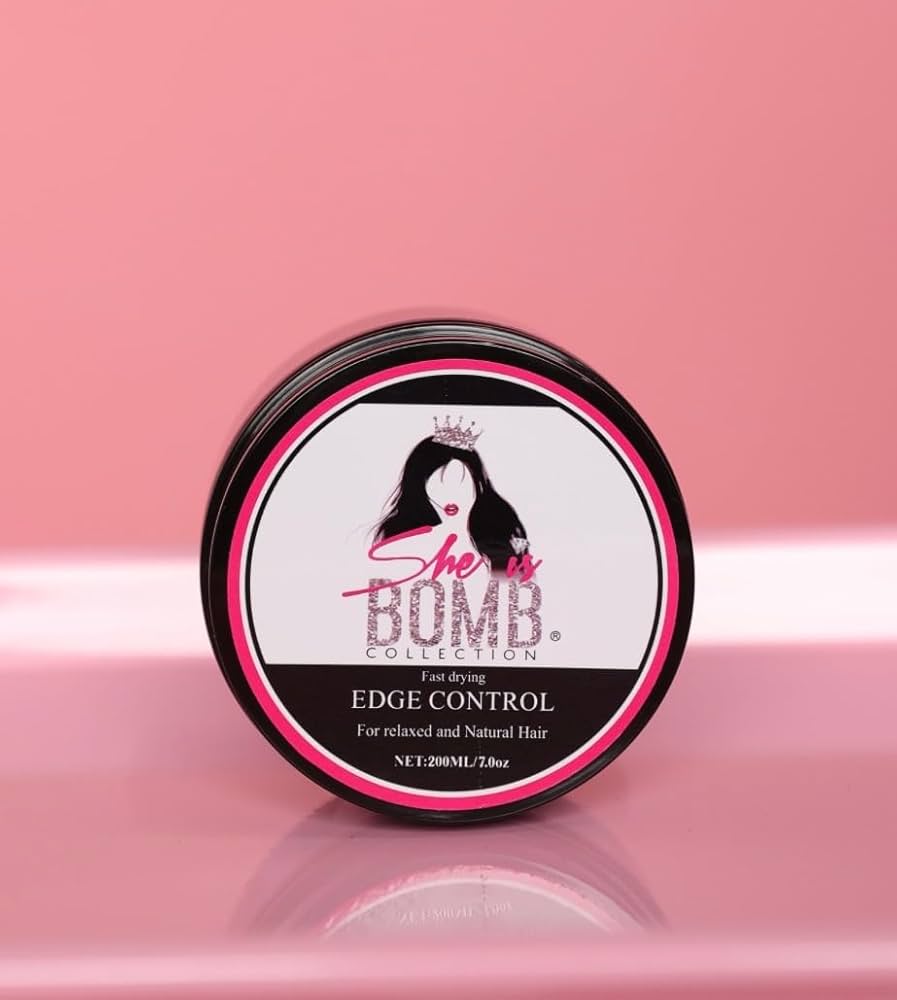
    Best for Extreme Hold: She Is Bomb Collection Edge Control

    Best for Extreme Hold: She Is Bomb Collection Edge Control

    When you need edges that will not budge through anything, She Is Bomb delivers the strongest hold in the game without the flaking that usually accompanies ultra-strong formulas. This edge control has developed a massive following among women with 4C hair who need their edges to last through long workdays, outdoor events, and sweaty workouts. The hold is genuinely all-day, and the formula does not leave the white or ashy residue that many strong-hold products are known for.

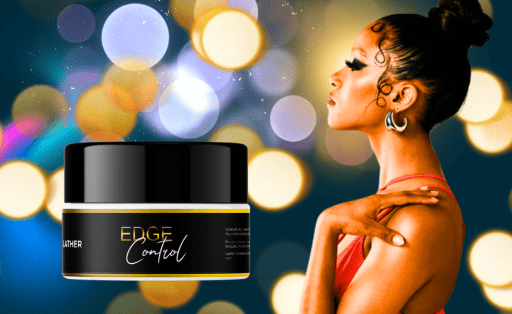
    Best for Moisture: Bask and Lather Edge Cream

    Best for Moisture: Bask and Lather Edge Cream

    If your edges are dry and delicate, Bask and Lather’s edge cream balances moisture and control beautifully. The cream-based formula conditions your hairline while providing a medium hold that looks natural and feels soft to the touch. This is the edge control for women who want their edges styled but not stiff, with a finish that looks like your baby hairs are naturally behaved rather than gelled into submission.

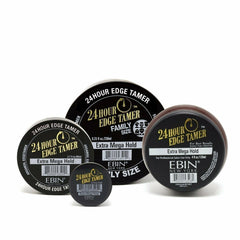
    Best Budget Option: EBIN New York 24 Hour Edge Tamer

    Best Budget Option: EBIN New York 24 Hour Edge Tamer

    At under ten dollars, EBIN’s 24 Hour Edge Tamer offers impressive hold for its price point. Available in multiple formulas including extra mega hold for the thickest hair textures, this edge control has been a staple in the natural hair community for years. The hold is strong and long-lasting, though some formulas can flake slightly in very dry conditions. For the price, it is an excellent option for daily use.

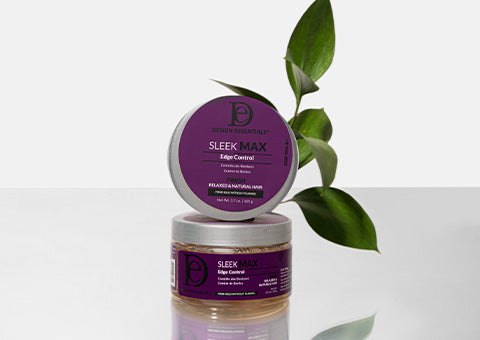
    Best Clean Formula: Design Essentials Sleek MAX Edge Control

    Best Clean Formula: Design Essentials Sleek MAX Edge Control

    Design Essentials Sleek MAX is a versatile maximum hold gel infused with ingredients that help retain moisture and maintain hold. The formula is free from many common irritants and works on all hair types and textures. It is particularly popular among women who want a salon-quality edge control without questionable ingredients, and its availability at major retailers makes it easy to find.

    Best for Fine or Thin Edges: Creme of Nature Perfect Edges

    If your edges are fine, thin, or recovering from damage, Creme of Nature Perfect Edges offers a light-to-medium hold that does not weigh down delicate hairs. Enriched with argan oil, it provides a smooth finish without pulling or stressing fragile strands. This is the edge control for women who need to baby their hairline while still achieving a polished look.

    Flat lay of edge control products with styling brush and edge scarf

    Best Edge Control by Hair Type

    Best Edge Control by Hair Type

    For 3A to 3C Hair

    For 3A to 3C Hair

    Looser curl patterns typically need a lighter hold because the hair texture is naturally smoother and easier to lay flat. A gel-based edge control with light-to-medium hold works best, providing definition without excess product. Cream-based edge controls also work beautifully on these textures, creating a natural-looking smooth finish that does not look overly styled. Avoid extreme-hold products on looser textures, as they can look and feel heavy.

    For 4A Hair

    For 4A Hair

    Type 4A hair has a defined, tightly coiled pattern that responds well to medium-to-firm hold edge controls. The coils lay down smoothly with the right product, and a gel-based formula provides enough grip to keep them in place through the day. Look for edge controls with added moisture to keep 4A hair from drying out and reverting.

    For 4B Hair

    For 4B Hair

    The Z-shaped pattern of 4B hair makes it more challenging to lay edges flat, requiring a firm hold edge control with some wax-based structure. Products that combine gel and wax properties work best on this texture, providing the grip needed to flatten the kink while maintaining a smooth, non-flaky finish. Applying to damp hair rather than dry hair helps 4B edges lay more smoothly.

    For 4C Hair

    For 4C Hair

    The tightest coil pattern demands the strongest hold. For 4C edges, look for extreme-hold formulas that specifically mention 4C hair on their packaging. Layering a light cream or oil on your edges before applying the edge control helps prevent dryness and breakage from the strong-hold formula. She Is Bomb and EBIN Extra Mega Hold are particularly effective on 4C edges.

    How to Apply Edge Control Like a Pro

    Prep Your Edges

    Prep Your Edges

    Start with clean, slightly damp edges. If your hair is dry, mist your edges lightly with water or a leave-in conditioner spray. Applying edge control to slightly damp hair helps the product distribute evenly and provides better hold than applying to completely dry hair. For the smoothest results, gently brush your edges in the direction you want them to lay before applying product.

    Apply in Small Amounts

    Apply in Small Amounts

    The biggest mistake people make with edge control is using too much product. Start with a small amount, roughly the size of a pea for your entire hairline. You can always add more, but too much product leads to buildup, flaking, and stiff, unnatural-looking edges. Use your fingertip or a small brush to pick up a thin layer of product and distribute it along your hairline in sections.

    Use the Right Tool

    Use the Right Tool

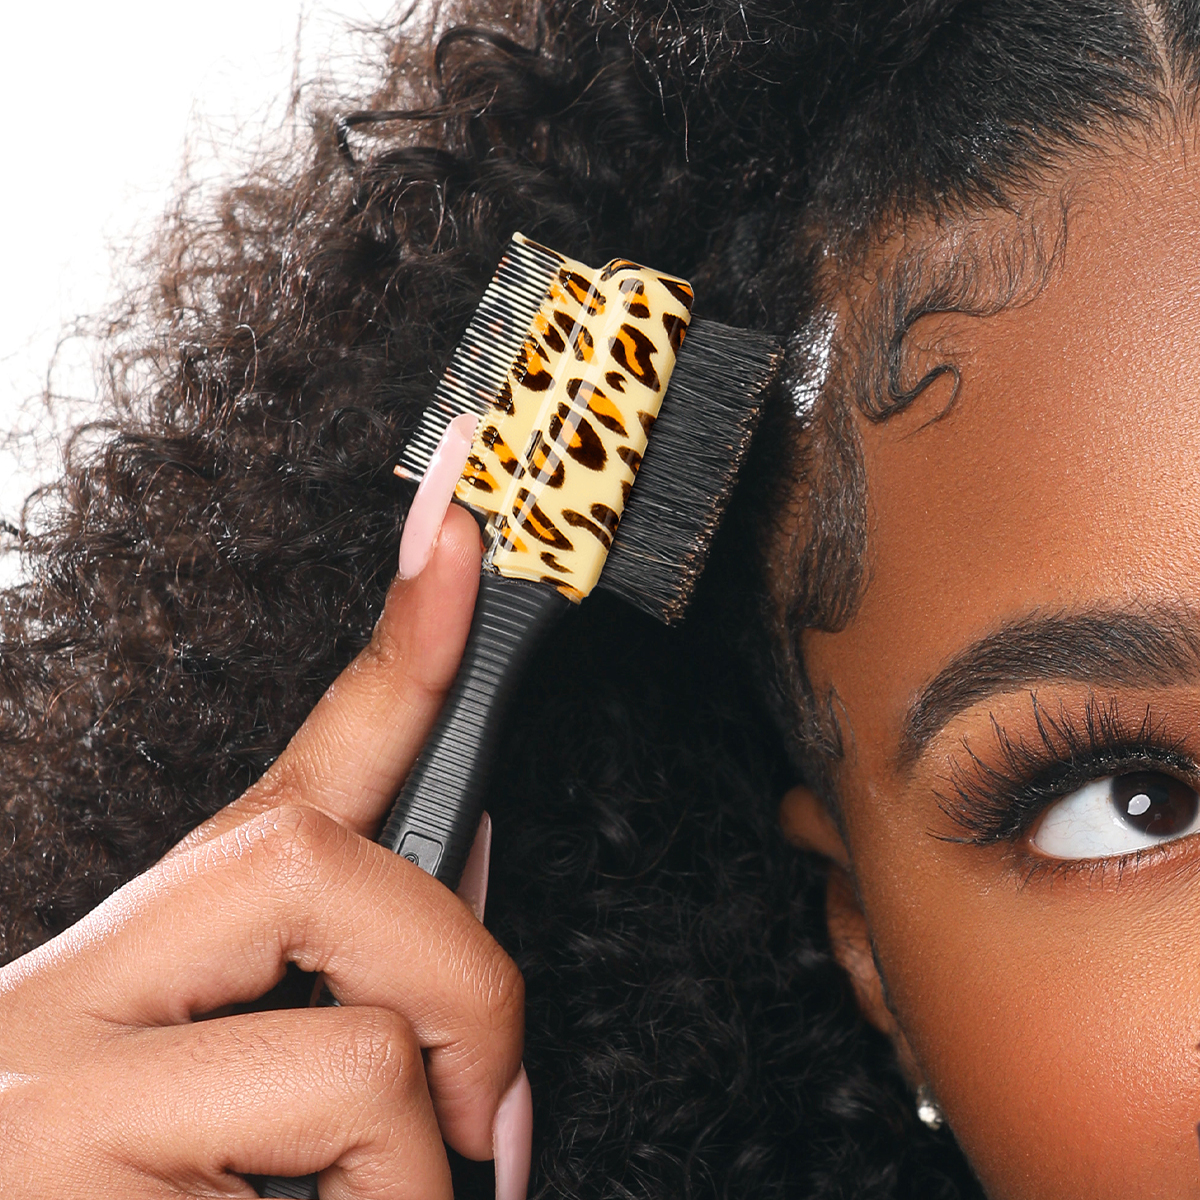
    An edge brush, specifically a soft-bristle brush with a pointed handle, is the essential tool for laying edges. The soft bristles smooth hairs into place without pulling, while the pointed handle helps create defined patterns and swirls. A clean toothbrush works in a pinch, but a dedicated edge brush gives you more control and a smoother finish.

    Style and Set

    Style and Set

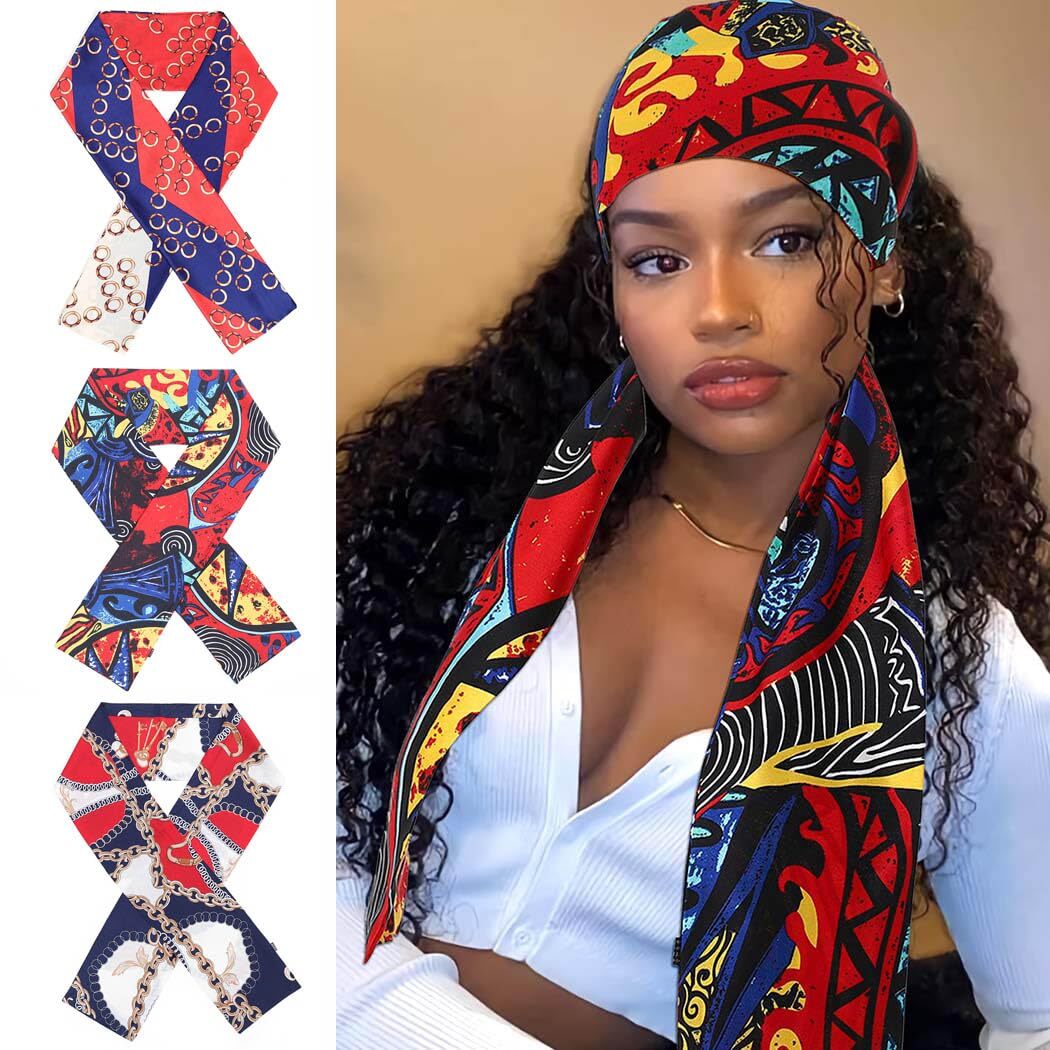
    Once you have applied the product and brushed your edges into place, wrap them with a satin or silk scarf for ten to fifteen minutes. This setting step is what creates the sleek, molded finish that lasts all day. The scarf presses the hairs flat against your skin while the product dries, resulting in a much smoother finish than air-drying alone. When you remove the scarf, your edges should be perfectly laid and set.

    Step-by-step edge control application with edge brush technique

    Essential Tools for Perfect Edges

    Essential Tools for Perfect Edges

    Edge Brushes

    Edge Brushes

    A quality edge brush with soft bristles is non-negotiable. Look for one with a comfortable grip and bristles that are firm enough to smooth but soft enough to avoid pulling. Many edge brushes come with a dual-ended design featuring a brush on one end and a comb or pointed tip on the other, which gives you versatility for different styling techniques.

    Edge Scarves and Wraps

    Edge Scarves and Wraps

    A satin or silk edge scarf, sometimes called an edge band or edge wrap, is a narrow strip of fabric designed specifically to set your edges after styling. Unlike a full head scarf, an edge scarf targets just the hairline area, making it convenient to wear while you finish the rest of your styling routine or go about your morning tasks.

    Rat Tail Comb

    Rat Tail Comb

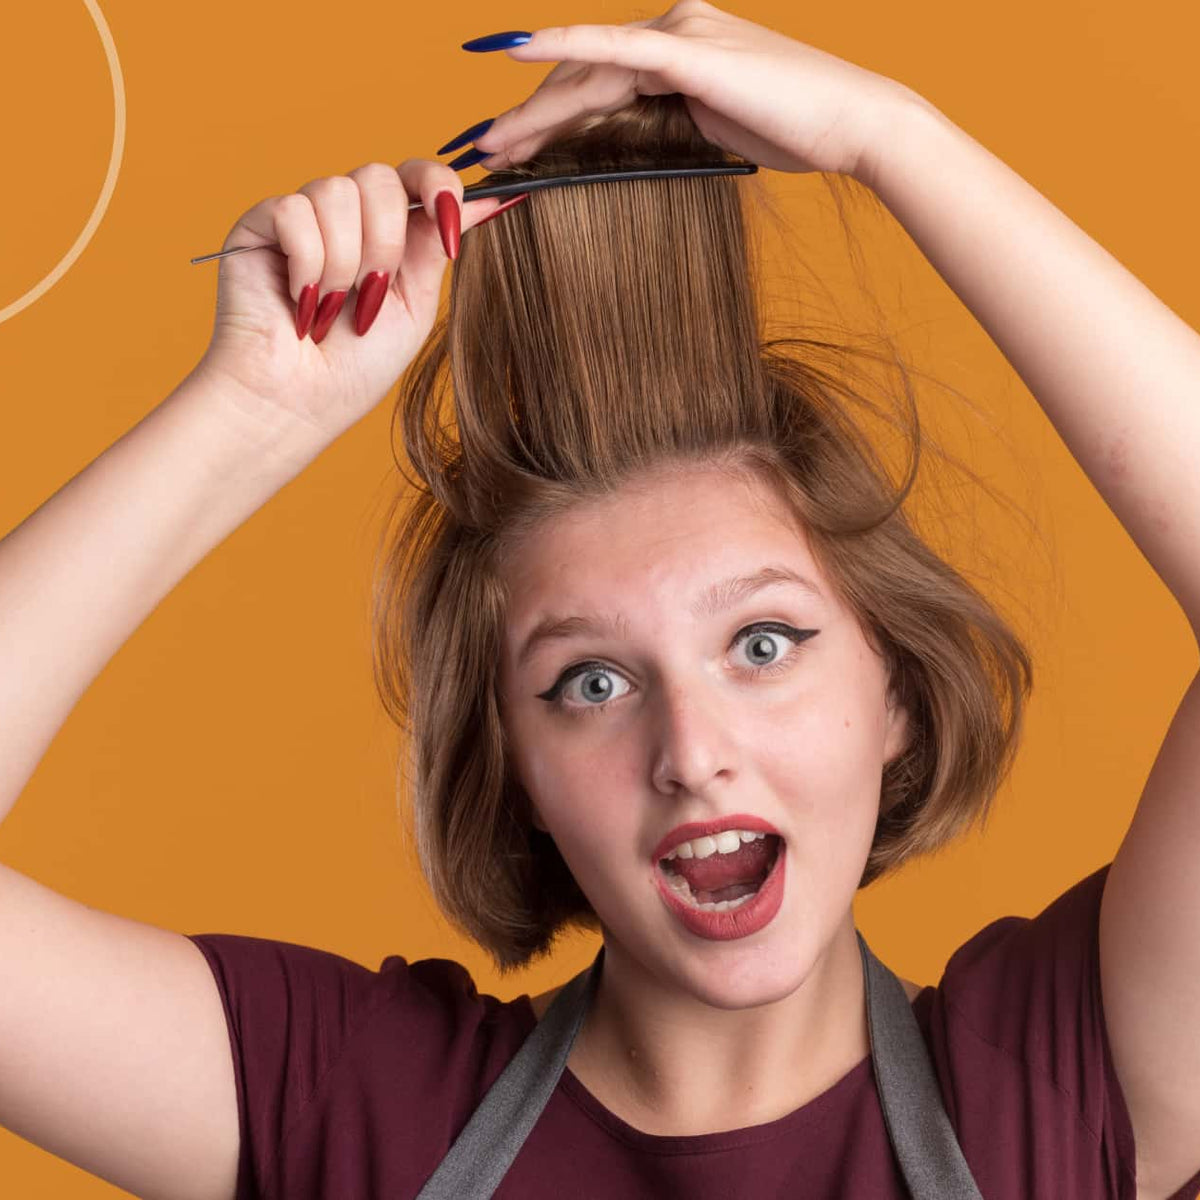
    The pointed end of a rat tail comb helps you create precise parts and detailed edge patterns. It is particularly useful for creating swirl designs and for separating individual baby hairs that you want to style in specific directions.

    Spray Bottle

    Spray Bottle

    A small spray bottle filled with water or a water-based leave-in conditioner helps you dampen your edges before applying product. The fine mist provides just enough moisture for product application without soaking your hair or disrupting the rest of your style.

    Protecting Your Edges From Damage

    Protecting Your Edges From Damage

    All the edge control in the world means nothing if your edges are thinning or receding. Here is how to keep your hairline healthy while still enjoying styled edges.

    Give Your Edges a Break

    Do not style your edges every single day. Give your hairline at least two to three days per week without any edge control product. On these rest days, apply a nourishing oil like Jamaican Black Castor Oil to your hairline to promote strength and growth. This recovery time allows your follicles to rest and reduces the cumulative stress of daily product application and manipulation.

    Be Gentle During Removal

    Be Gentle During Removal

    Never yank or pull at styled edges to remove them. Instead, dampen your edges with water or a gentle cleanser and allow the product to soften before gently brushing or combing it out. Using warm water helps dissolve most edge control formulas more quickly. Forcing removal of dried product is one of the fastest ways to damage your hairline.

    Avoid Excessive Tension

    Avoid Excessive Tension

    Styles that pull tightly on your edges, combined with strong-hold edge control, create a recipe for traction alopecia. If you wear protective styles like braids or ponytails, ensure they are not pulling at your hairline. Your edges should be styled, not stressed. If you notice soreness, bumps, or thinning along your hairline, ease up on both the tension of your styles and the frequency of your edge control use.

    Keep Your Hairline Moisturized

    Keep Your Hairline Moisturized

    Dry edges break more easily than moisturized ones. Incorporate a lightweight oil or serum into your nightly routine, gently massaging it along your hairline. This nightly moisture treatment keeps your edges flexible and resilient, making them easier to style and less likely to snap during manipulation.

    Popular Edge Styles to Try

    Popular Edge Styles to Try

    The Classic Swoop

    The Classic Swoop

    The most popular edge style is the simple swoop, where baby hairs are brushed in a gentle curve across the forehead or along the temples. This style works on every face shape and hair texture and creates a polished, classic look that never goes out of fashion.

    The S-Wave

    The S-Wave

    For a more decorative look, create S-shaped waves with your baby hairs along your hairline. This style requires a bit more product and precision but creates an eye-catching detail that elevates any updo or pulled-back style. Use the pointed end of your rat tail comb to guide the waves into shape.

    The Natural Brush-Back

    The Natural Brush-Back

    For a softer, more natural look, simply smooth your edges back in the direction of your hairstyle without creating any specific pattern. This style works well for everyday wear and requires the least amount of product and time.
    The Temple Tamer

    The Temple Tamer

    Focus your edge styling just on the temples and sideburn area, leaving the front hairline natural. This targeted approach creates a clean, polished look at the sides while keeping the front soft and natural. It is a great option for women with thinner edges at the temples who want to create the appearance of fullness.
    Four edge styling patterns illustrated on diverse skin tones

    Key Takeaways

    • Pattern Beauty and She Is Bomb lead the edge control market in 2026 for hold, flexibility, and no-flake performance.
    • Choose your edge control based on your hair type: lighter holds for type 3 hair, extreme holds for 4C hair.
    • Apply edge control to slightly damp hair in small amounts and set with a satin scarf for the sleekest results.
    • Protect your hairline by giving your edges rest days, being gentle during product removal, and moisturizing nightly.
    • Avoid edge controls with drying alcohols, heavy mineral oils, and excessive fragrance that can damage delicate edges.
    • Look for nourishing ingredients like castor oil, biotin, and shea butter that strengthen your hairline while providing hold.
    • Invest in a quality edge brush and satin edge scarf as essential tools for professional-looking results at home.

    Frequently Asked Questions

    Why does my edge control flake?

    Flaking happens for several reasons. You may be using too much product, which dries into visible white residue. The formula may not be compatible with other products in your hair, creating a reaction that causes flaking. Applying to completely dry hair rather than slightly damp hair can also cause flaking because the product does not distribute evenly. Try using less product, applying to damp edges, and ensuring your other hair products do not conflict with your edge control formula.

    How often should I apply edge control?

    For hair health, aim for no more than four to five days per week of edge control use, giving your hairline at least two rest days. On the days you use it, one application in the morning should last the entire day if you are using the right product for your hair type. Avoid reapplying throughout the day, as layering product on top of dried product leads to buildup and flaking.
    Can edge control cause hair loss?

    The edge control product itself is unlikely to cause hair loss when used correctly. However, the combination of strong-hold products with tight hairstyles and aggressive brushing can contribute to traction alopecia, which is hair loss caused by repeated tension on the hair follicles. Use gentle techniques, avoid excessive tension, and give your edges regular rest to prevent this. If you notice thinning, reduce your edge control use and consult a dermatologist or trichologist.

    What is the best edge control for humid weather?

    What is the best edge control for humid weather?

    In humid conditions, you need an edge control with a strong hold and humidity-resistant formula. She Is Bomb and EBIN Extra Mega Hold perform well in humidity because their formulas resist moisture absorption that causes edges to revert. Layering a light gel over your edge control after setting with a scarf can add an extra layer of humidity protection. Avoid cream-based edge controls in humid weather, as they tend to lose hold faster.

  • 5 DIY Hair Growth Oil Recipes for Natural Hair – Homemade Blends That Boost Length

    5 DIY Hair Growth Oil Recipes for Natural Hair – Homemade Blends That Boost Length

    Why DIY Hair Growth Oils Work So Well for Natural Hair

    Why DIY Hair Growth Oils Work So Well for Natural Hair

    There is something deeply satisfying about mixing up your own hair growth oil, knowing exactly what goes into it and trusting that every single ingredient is there for a purpose. In a world where commercial hair products often come with ingredient lists longer than a grocery receipt, making your own growth oil puts you back in control of what goes on your scalp and strands. And the best part? These homemade blends are not just cheaper than store-bought alternatives – they are often more effective because you can customize them to address your specific hair needs.

    Natural hair thrives on oils. The coily and kinky texture patterns of type 3 and type 4 hair make it harder for the natural sebum produced by your scalp to travel down the entire length of each strand. This is why natural hair tends to feel drier than straight hair and why regular oiling is such an essential part of any natural hair care routine. When you add growth-stimulating ingredients to your oil blends, you are nourishing your hair and encouraging new growth at the same time.

    Science backs up what the natural hair community has known for generations. Studies have shown that certain essential oils like rosemary and peppermint can increase blood circulation to the scalp, stimulate hair follicles, and even rival the effects of minoxidil – the active ingredient in many commercial hair growth products. A 2015 study published in SKINmed Journal found that rosemary oil was as effective as 2% minoxidil for treating androgenetic alopecia after six months of use. When you combine these proven essential oils with nourishing carrier oils, you create blends that feed your hair from root to tip.

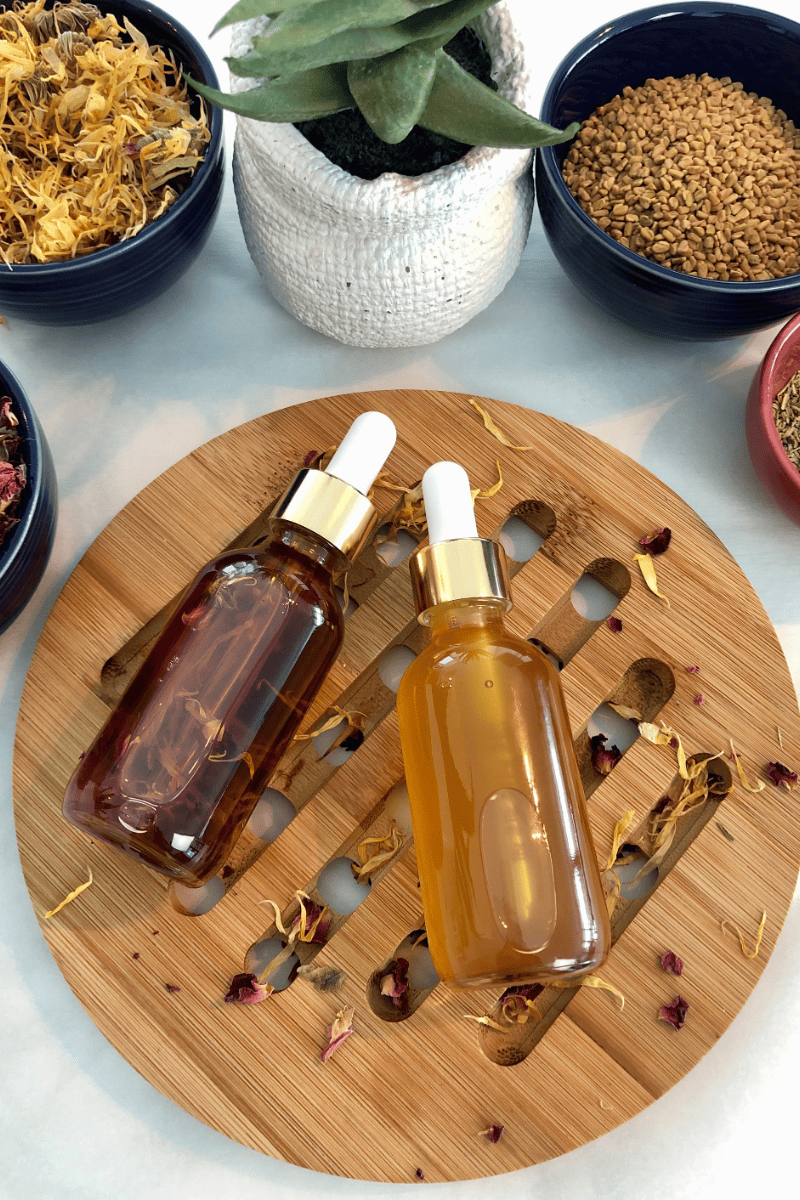
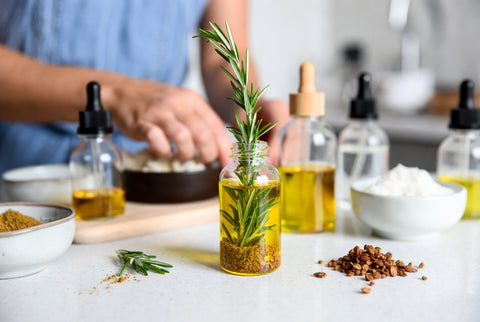
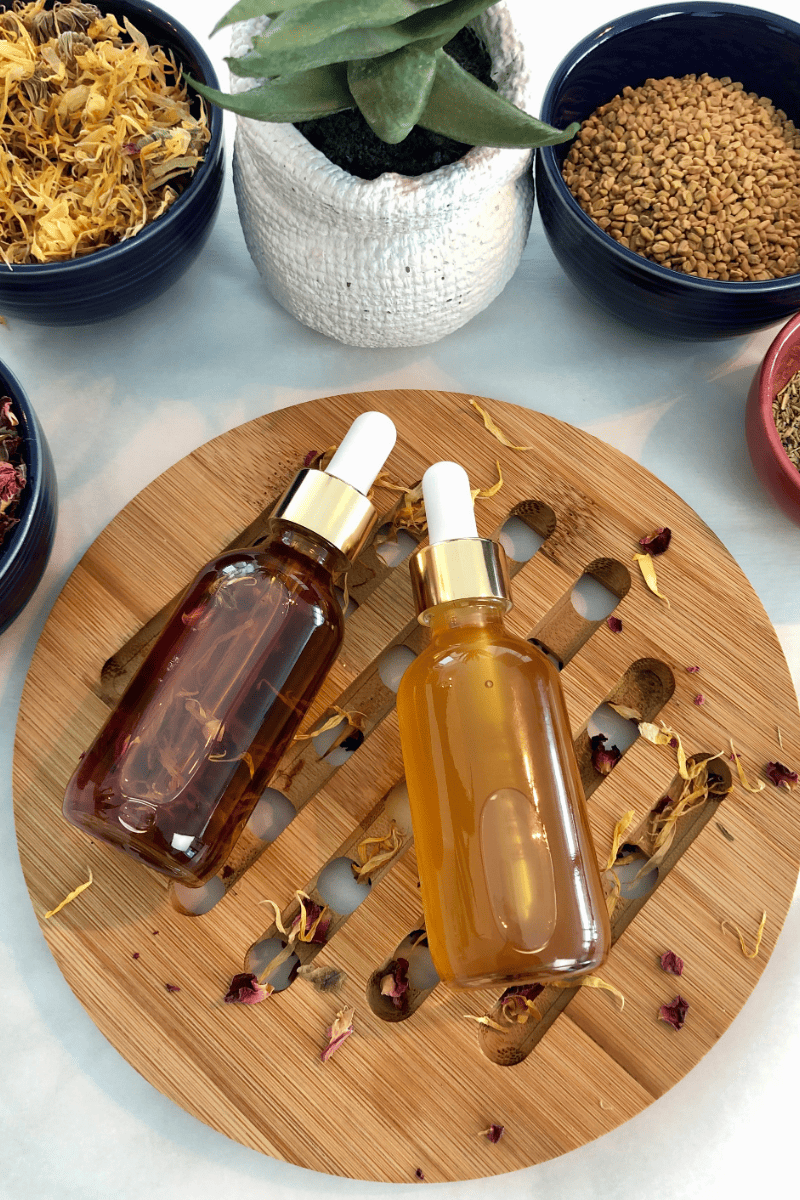
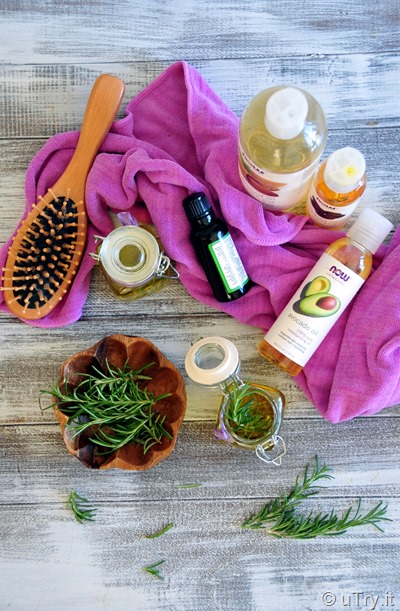
    Beautiful flat lay of DIY hair growth oil ingredients including carrier oils, essential oils, and herbs

    The five recipes in this article are specifically formulated for natural hair. Each one targets different aspects of hair growth – from scalp stimulation and follicle activation to strengthening and moisture retention. You do not need to make all five. Read through them, see which one addresses your biggest hair concern, and start there. You can always experiment with the others once you see how your hair responds to your first blend.

    Understanding Carrier Oils vs Essential Oils

    Understanding Carrier Oils vs Essential Oils

    Before we dive into the recipes, let us cover an important foundation. There are two categories of oils used in these blends, and understanding the difference is crucial for both safety and effectiveness.

    Carrier Oils

    Carrier Oils

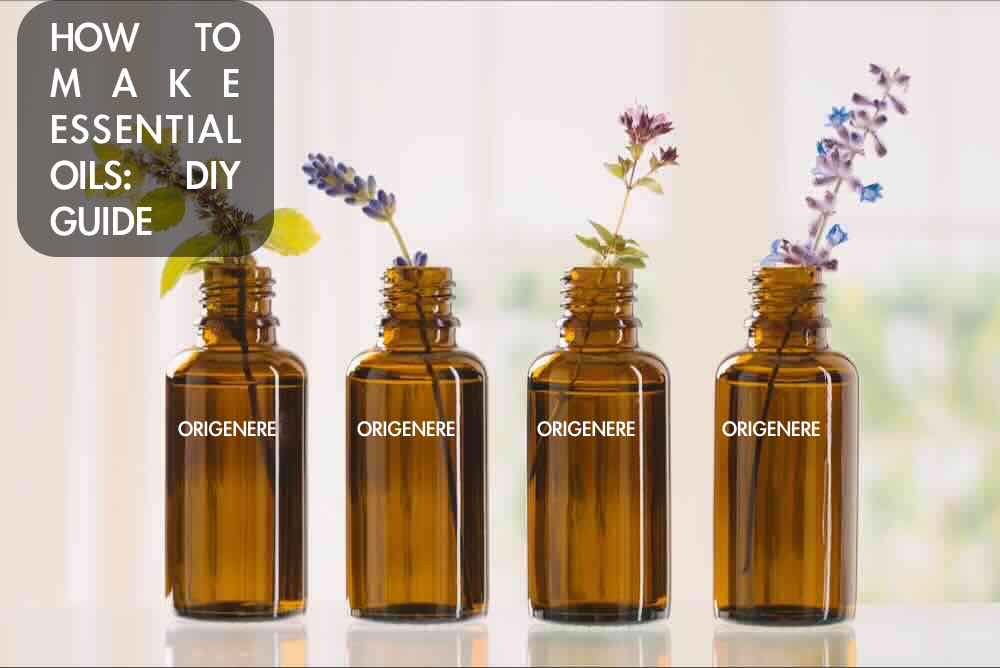
    Carrier oils are the base of any hair oil blend. They are gentle, nourishing oils that can be applied directly to your skin and hair without dilution. Common carrier oils for hair growth include castor oil, jojoba oil, coconut oil, sweet almond oil, argan oil, and grapeseed oil. Each carrier oil has unique properties – castor oil is thick and deeply moisturizing, jojoba oil closely mimics the natural sebum your scalp produces, and coconut oil penetrates the hair shaft to reduce protein loss.

    For the best results, always choose cold-pressed, unrefined versions of your carrier oils. Cold-pressed oils retain more of their natural nutrients and beneficial compounds because they have not been exposed to high heat during processing. Look for organic cold-pressed castor oil like Sky Organics on Amazon which is hexane-free and comes in a convenient dark glass bottle that protects the oil from light degradation.

    Essential Oils

    Essential Oils

    Essential oils are highly concentrated plant extracts that carry potent therapeutic properties. They should never be applied directly to your skin or scalp without being diluted in a carrier oil first, as they can cause irritation or even chemical burns at full strength. In hair growth blends, essential oils are the active ingredients that do the heavy lifting – stimulating blood flow, fighting scalp infections, reducing inflammation, and activating hair follicles.

    A safe dilution ratio for scalp application is generally 2-3% essential oil to carrier oil. This translates to about 12 to 18 drops of essential oil per ounce of carrier oil. Some essential oils, like tea tree and peppermint, are more potent and should be used at the lower end of this range, especially when you are first starting out.

    A Note on Patch Testing

    A Note on Patch Testing

    Before using any new oil blend on your entire scalp, always do a patch test first. Apply a small amount of the blended oil to the inside of your wrist or behind your ear, wait 24 hours, and check for any signs of irritation like redness, itching, or swelling. If you experience any reaction, do not use that particular blend. Essential oils are natural but powerful, and individual sensitivities vary.

    Recipe 1 – The Rosemary and Castor Oil Growth Powerhouse

    Recipe 1 - The Rosemary and Castor Oil Growth Powerhouse

    This is our number one recommended blend for anyone starting their DIY hair oil journey. Rosemary essential oil is the undisputed champion of hair growth essential oils, and when paired with the intense moisturizing power of castor oil, you get a blend that stimulates growth while keeping your strands deeply nourished.

    Ingredients

    Ingredients

    You will need 2 tablespoons of Jamaican black castor oil, 2 tablespoons of jojoba oil, 1 tablespoon of sweet almond oil, 15 drops of rosemary essential oil, and 5 drops of lavender essential oil. The jojoba and almond oils lighten the thick consistency of the castor oil, making the blend easier to apply, while lavender adds calming properties and has been shown to promote hair growth in its own right.

    How to Make It

    How to Make It

    Combine all the carrier oils in a clean, dark glass bottle. Dark glass protects the oils from light, which can degrade their beneficial properties over time. Add the rosemary and lavender essential oil drops, cap the bottle tightly, and shake well to combine everything thoroughly. Let the blend sit for at least 24 hours before first use so the essential oils fully integrate with the carriers. Store at room temperature away from direct sunlight, and your blend will stay potent for up to six months.

    Why This Blend Works

    Rosemary essential oil increases blood circulation to the scalp, which delivers more nutrients and oxygen to your hair follicles. This stimulation encourages follicles that may have become dormant to start producing hair again. Jamaican black castor oil is rich in ricinoleic acid, which has anti-inflammatory properties and helps to strengthen the hair shaft. Together, they create a powerful one-two punch for hair growth. The Plant Therapy Rosemary Essential Oil from Amazon is a wonderful therapeutic-grade option that is affordable and widely trusted.

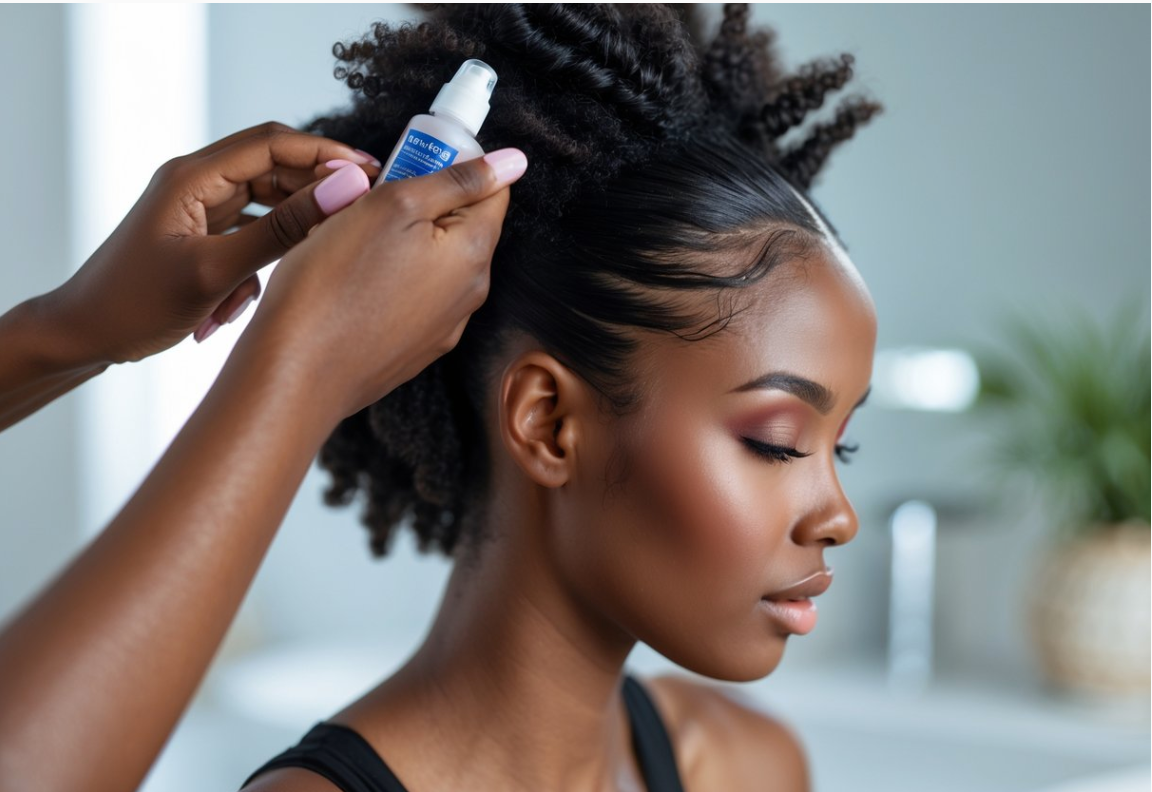
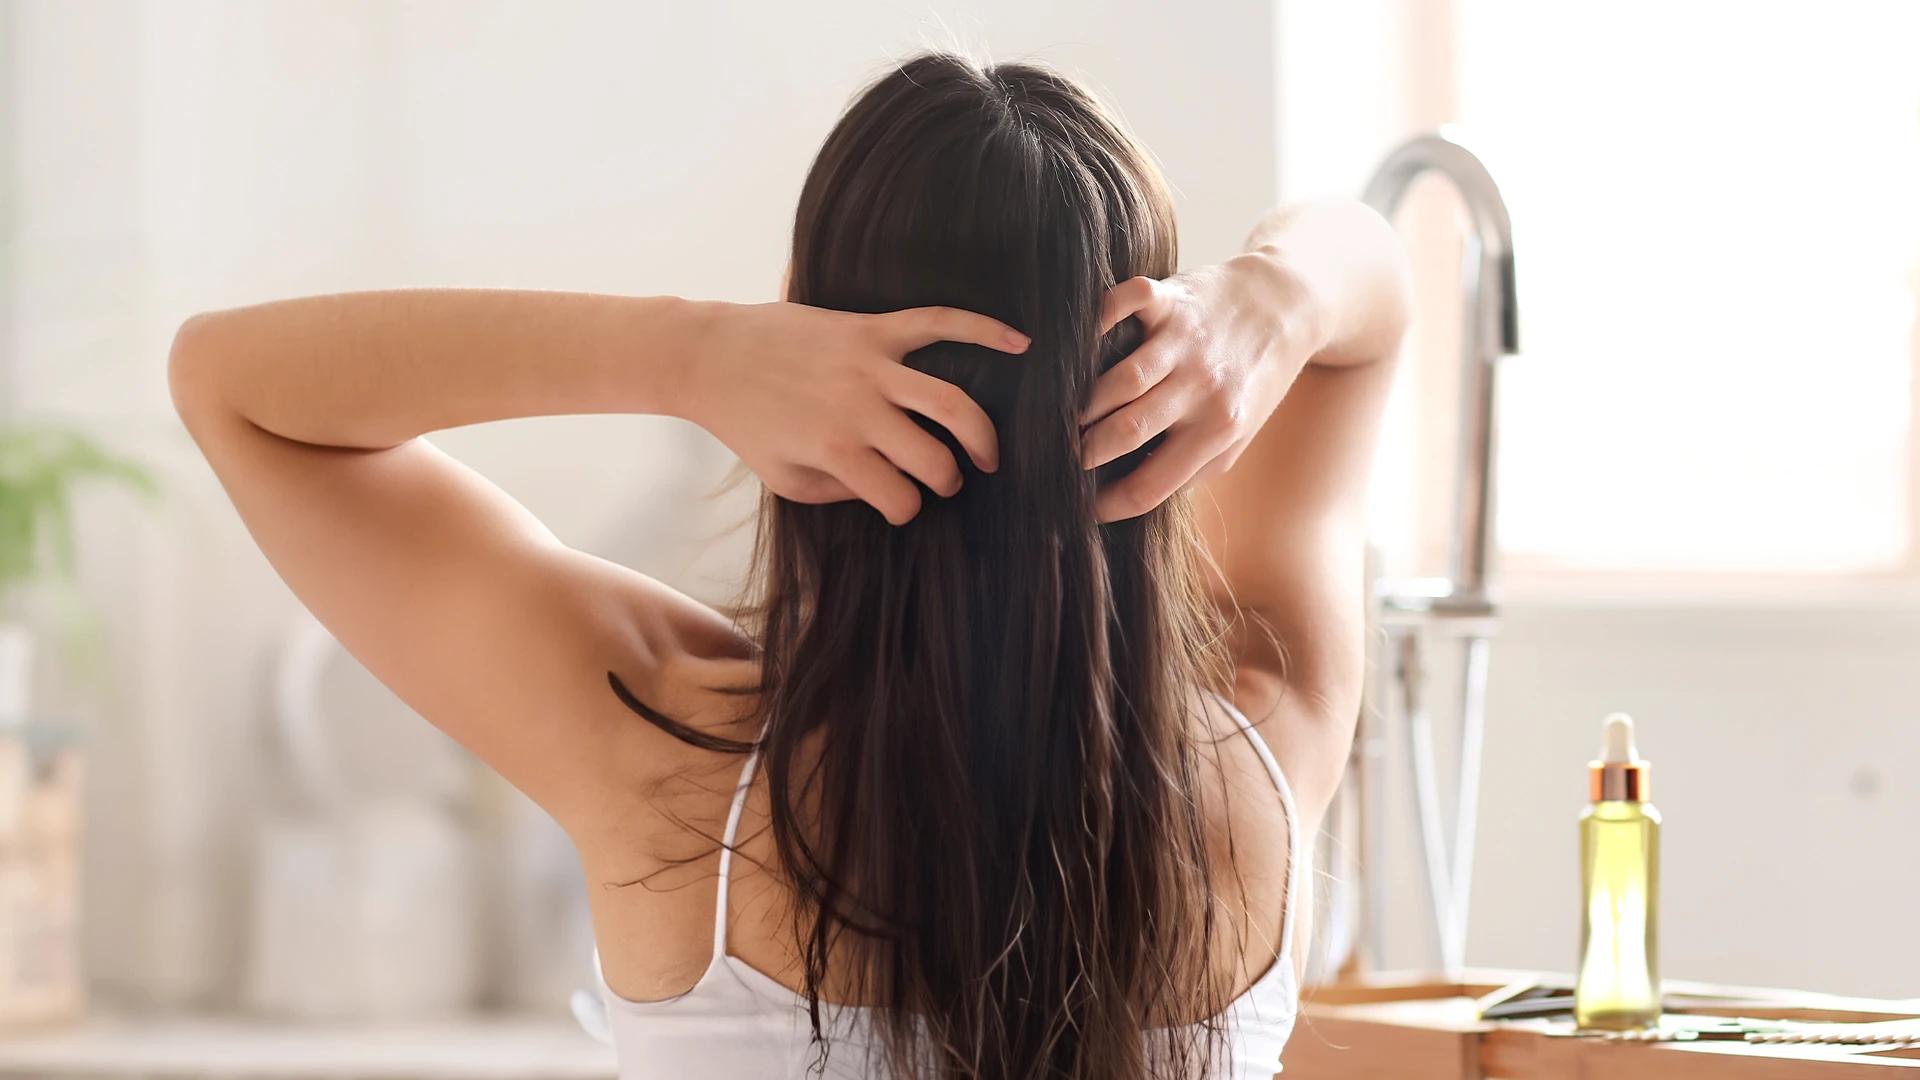
    Woman applying DIY hair growth oil to her natural hair scalp using an applicator bottle

    Recipe 2 – The Peppermint Scalp Stimulator

    Recipe 2 - The Peppermint Scalp Stimulator

    If you love that tingly, refreshing feeling on your scalp, this blend is going to be your new favorite. Peppermint oil is a powerhouse for scalp stimulation, and research has shown it can actually increase the number of hair follicles, follicle depth, and overall hair growth when applied topically.

    Ingredients

    Ingredients

    Gather 2 tablespoons of grapeseed oil, 2 tablespoons of jojoba oil, 1 tablespoon of coconut oil (melted), 10 drops of peppermint essential oil, 5 drops of eucalyptus essential oil, and 5 drops of rosemary essential oil. Grapeseed oil is lightweight and rich in vitamin E, making it an excellent base that will not weigh your hair down.

    How to Make It

    How to Make It

    If your coconut oil is solid, gently warm it until it liquefies – you can do this by placing the jar in a bowl of warm water for a few minutes. Combine all three carrier oils in your glass bottle, then add the essential oils. Shake well and let it sit overnight. This blend has a wonderfully invigorating scent that makes scalp massage feel like a spa experience.

    Why This Blend Works

    A 2014 study published in Toxicological Research found that peppermint oil significantly increased dermal thickness, follicle number, and follicle depth in mice, outperforming even minoxidil. The menthol in peppermint oil creates a cooling sensation that indicates increased blood flow to the area. This rush of blood brings nutrients directly to your hair follicles, creating an optimal environment for new growth. Eucalyptus oil adds additional circulation benefits and has antimicrobial properties that keep your scalp healthy and free from infection.

    Recipe 3 – The Ayurvedic Hair Growth Elixir

    Recipe 3 - The Ayurvedic Hair Growth Elixir

    Ayurvedic hair care practices have been used for thousands of years in South Asia, and for excellent reason – they work. This blend incorporates traditional Ayurvedic ingredients that have stood the test of time for promoting thick, long, healthy hair.

    Ingredients

    Ingredients

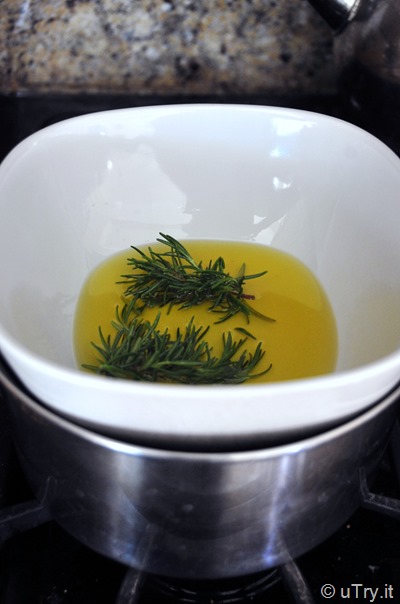
    You will need 3 tablespoons of sesame oil, 2 tablespoons of coconut oil, 1 tablespoon of amla (Indian gooseberry) oil, 1 tablespoon of brahmi oil, and 10 drops of rosemary essential oil. If you cannot find amla and brahmi oils pre-made, you can infuse them yourself by simmering dried amla and brahmi powder in coconut oil on very low heat for several hours, then straining.

    How to Make It

    How to Make It

    Warm the sesame oil and coconut oil together gently until the coconut oil is fully liquid. Add the amla and brahmi oils, then the rosemary essential oil drops. Mix thoroughly and pour into your dark glass bottle. For an enhanced version, you can also add a pinch of dried fenugreek seeds directly to the bottle and let them infuse for a week before using – fenugreek is rich in proteins and nicotinic acid, both of which strengthen hair and prevent breakage.

    Why This Blend Works

    Amla oil is incredibly rich in vitamin C and antioxidants that strengthen hair follicles and prevent premature graying. Brahmi oil nourishes the roots and has been used for centuries to thicken hair and reduce hair loss. Sesame oil, the traditional base oil in Ayurvedic hair treatments, penetrates deeply into the scalp and has natural antibacterial properties. Together, these ingredients create a deeply nourishing blend that addresses hair growth from multiple angles. You can find quality organic amla oil for hair growth on Amazon from several trusted Ayurvedic brands.

    Recipe 4 – The Tea Tree and Jojoba Scalp Healer

    Recipe 4 - The Tea Tree and Jojoba Scalp Healer

    This blend is specifically designed for anyone dealing with scalp issues that may be hindering hair growth – things like dandruff, flakiness, product buildup, or fungal infections. A healthy scalp is the foundation of healthy hair growth, and sometimes the best thing you can do for length is to heal your scalp first.

    Ingredients

    Ingredients

    You will need 3 tablespoons of jojoba oil, 1 tablespoon of argan oil, 1 tablespoon of hemp seed oil, 10 drops of tea tree essential oil, 5 drops of lavender essential oil, and 5 drops of cedarwood essential oil. Jojoba oil is the star carrier here because its molecular structure is the closest to human sebum, making it incredibly effective at balancing your scalp’s natural oil production.

    How to Make It

    How to Make It

    Combine all carrier oils in your glass bottle and add the essential oils. Shake vigorously and allow the blend to sit for 24 hours before first use. This blend has a clean, herbal scent that is pleasant without being overpowering. If you find the tea tree scent too strong, reduce it to 7 drops and increase the lavender to 8 drops.

    Why This Blend Works

    Tea tree oil is one of nature’s most powerful antimicrobial and antifungal agents. It effectively combats the fungus that causes dandruff, clears clogged follicles, and reduces scalp inflammation – all of which can significantly impede hair growth. Cedarwood essential oil has been shown to stimulate the hair follicles by increasing circulation, and it also has antifungal properties that complement the tea tree oil. Lavender rounds out the blend with its calming, healing properties and pleasant scent. The 100% Organic Cold-Pressed Jojoba Oil from The Ordinary at Ulta is an excellent affordable option for the base of this blend.

    Homemade tea tree and lavender hair growth oil in an amber glass dropper bottle

    Recipe 5 – The Black Seed and Argan Strengthening Oil

    Recipe 5 - The Black Seed and Argan Strengthening Oil

    This final recipe focuses on strengthening your existing hair to prevent breakage, because retention is just as important as growth. You can grow all the new hair in the world, but if your ends are breaking off at the same rate, you will never see length. This blend fortifies your strands from the inside out.

    Ingredients

    Ingredients

    Gather 2 tablespoons of black seed oil (also called black cumin seed oil or Nigella sativa oil), 2 tablespoons of argan oil, 1 tablespoon of avocado oil, 8 drops of ylang ylang essential oil, and 7 drops of clary sage essential oil. Black seed oil has been called the remedy for everything except death in traditional Middle Eastern medicine, and its benefits for hair are remarkable.

    How to Make It

    How to Make It

    Black seed oil has a distinctive, strong scent that some people find overpowering. The argan and avocado oils help to mellow it out, and the ylang ylang adds a sweet floral note that balances the overall fragrance. Combine all carrier oils, add the essential oils, shake well, and let it sit for 24 hours. If the scent is still too strong for your preference, you can add 3 to 5 drops of vanilla essential oil, which pairs beautifully with the other ingredients.

    Why This Blend Works

    Black seed oil contains thymoquinone, a powerful antioxidant and anti-inflammatory compound that has been shown to reduce hair loss and promote hair regrowth. It is also rich in fatty acids that nourish and strengthen the hair shaft. Argan oil, often called liquid gold, is packed with vitamin E and essential fatty acids that increase hair’s elasticity – meaning your strands can stretch and bend without breaking. Avocado oil penetrates the hair shaft to moisturize from within, and ylang ylang essential oil has been traditionally used to stimulate hair growth while adding beautiful shine.

    How to Use Your DIY Hair Growth Oils for Best Results

    How to Use Your DIY Hair Growth Oils for Best Results

    Having a great oil blend is only half the equation – how you apply it matters just as much. Here are the application methods that will maximize the growth-boosting benefits of your homemade oils.

    The Scalp Massage Method

    The Scalp Massage Method

    This is the most common and effective application method. Apply your oil blend directly to your scalp using an applicator bottle or your fingertips. Then, using your fingertips – never your nails – massage your scalp in small circular motions for at least five minutes. Cover your entire scalp, paying extra attention to areas where you want to see the most growth, like your edges, crown, and nape. Scalp massage alone has been shown to increase hair thickness by stretching the cells of hair follicles, and when you add growth-stimulating oils to the mix, the benefits multiply.

    The Hot Oil Treatment Method

    The Hot Oil Treatment Method

    For a more intensive treatment, warm your oil blend gently by placing the bottle in a bowl of hot water for a few minutes. Test the temperature on your wrist before applying – it should be comfortably warm, never hot. Apply the warm oil to your scalp and hair, then cover with a plastic cap and a warm towel. The heat opens your hair cuticles and scalp pores, allowing the oils to penetrate more deeply. Leave it on for at least 30 minutes, or for maximum benefits, leave it on overnight and wash it out in the morning.

    How Often to Apply

    For best results, apply your growth oil two to three times per week. Consistency is key – you will not see dramatic results after one application, but after four to six weeks of regular use, many people notice reduced shedding, stronger hair, and new growth along their hairline and throughout their scalp. Take photos at the start of your journey so you can track your progress over time.

    Storage and Shelf Life

    Storage and Shelf Life

    Store all your blends in dark glass bottles at room temperature, away from direct sunlight and heat. Amber or cobalt blue bottles are ideal because they filter out light that can degrade the oils. Most homemade oil blends will stay potent for three to six months. If your oil starts to smell rancid or changes color significantly, it is time to make a fresh batch. Always label your bottles with the date you made the blend and the recipe name so you can keep track.

    Making your own hair growth oils is one of the most empowering things you can do for your natural hair journey. You know exactly what is going into your blend, you can customize it for your specific needs, and you are tapping into centuries of traditional knowledge backed by modern science. Whether you start with the rosemary powerhouse, the peppermint stimulator, or any of the other recipes, your natural hair is going to thank you. Give your chosen blend at least six weeks of consistent use, and we are confident you will be amazed by the results.

    Woman with healthy natural hair holding her homemade DIY hair growth oil

    Key Takeaways

    • DIY hair growth oils let you control exactly what goes on your scalp while being more affordable and often more effective than commercial alternatives.
    • Essential oils like rosemary and peppermint have scientific backing for their ability to stimulate hair follicles and promote growth, rivaling commercial products like minoxidil.
    • Always dilute essential oils in carrier oils before applying to your scalp, and do a patch test with any new blend to check for sensitivities.
    • Consistency is more important than which recipe you choose – apply your growth oil two to three times per week for at least six weeks to see noticeable results.
    • Scalp massage is a critical part of the application process, as it increases blood flow to the follicles and helps the oils penetrate more effectively.

    Frequently Asked Questions

    Can I use these oil blends on relaxed or color-treated hair?

    Yes, these oil blends are safe for relaxed and color-treated hair. In fact, hair that has been chemically processed often benefits even more from regular oiling because the treatments can strip natural moisture. Just be aware that some essential oils, particularly tea tree, can be drying if overused, so start with the rosemary and castor oil blend or the black seed and argan blend for chemically treated hair.

    How long before I see results from using DIY hair growth oils?

    Most people begin to notice reduced shedding and stronger hair within four to six weeks of consistent use. Visible new growth typically becomes noticeable after two to three months. Hair grows an average of half an inch per month, so give your oil blend at least three months before making a final judgment on its effectiveness. Taking monthly progress photos helps you see the gradual changes that might not be obvious day to day.

    Can I mix different recipes together?

    While you technically can combine elements from different recipes, we recommend starting with one complete recipe and using it consistently for at least a month before making changes. This way, you can accurately assess what is working for your hair. If you do want to customize, keep the total essential oil concentration at or below 3% of the total blend to avoid scalp irritation.

    Are these oils safe to use during pregnancy?

    Are these oils safe to use during pregnancy?

    Some essential oils are not recommended during pregnancy, including rosemary, peppermint, and clary sage. If you are pregnant or nursing, consult with your healthcare provider before using any essential oil blends. You can still benefit from applying carrier oils like jojoba and coconut oil to your scalp and hair without adding essential oils during this time.

    Will these oils make my hair greasy?

    Will these oils make my hair greasy?

    If you use the right amount, these oils should not make your hair look greasy. Start with a small amount – about a teaspoon for a full scalp application – and add more only if needed. Focus the oil on your scalp rather than saturating your hair strands. Lighter carrier oils like grapeseed and jojoba absorb more quickly and leave less residue than heavier oils like castor oil.

  • Deep Conditioning for Natural Hair – How Often, Best Products, and DIY Recipes

    Deep Conditioning for Natural Hair – How Often, Best Products, and DIY Recipes

    Why Deep Conditioning Is Non-Negotiable for Natural Hair

    If there is one step in your natural hair routine that you should never skip, it is deep conditioning. Regular conditioner is fine for daily or weekly use, but it only coats the outside of the hair shaft, providing temporary softness and detangling ease. Deep conditioning goes further – it penetrates the hair cuticle to deliver moisture, protein, and nutrients deep into the cortex of each strand, repairing damage from the inside out and building strength that lasts between wash days.

    Natural hair, especially type 4 hair, has a unique structure that makes deep conditioning particularly important. The tight coil pattern creates multiple points along each strand where the cuticle can lift and become damaged. These lifted cuticle layers allow moisture to escape easily, which is why natural hair tends toward dryness. Deep conditioning temporarily smooths and seals these cuticle layers, improving moisture retention, reducing friction-based breakage, and giving your curls and coils that soft, bouncy, well-hydrated feel we all love.

    Think of deep conditioning as feeding your hair. Just as your body needs regular nourishing meals to function at its best, your hair needs regular deep conditioning treatments to stay strong, elastic, and resilient. Without it, natural hair gradually becomes dry, brittle, and prone to breakage – no matter how great your other products and techniques are. Deep conditioning is the foundation that makes everything else in your routine work better.

    How Often Should You Deep Condition

    The ideal deep conditioning frequency depends on your hair’s current condition, porosity, and how you style it. Here are general guidelines to help you find your sweet spot.

    Every Wash Day – For Most Natural Hair

    Every Wash Day - For Most Natural Hair

    If you wash your hair weekly or biweekly, deep conditioning every wash day is a solid baseline. This ensures your hair gets a consistent boost of moisture and strength with each wash cycle. For most people with type 3C to 4C hair, this frequency keeps their hair in optimal condition without overdoing it.

    Twice a Week – For Severely Dry or Damaged Hair

    Twice a Week - For Severely Dry or Damaged Hair

    If your hair is extremely dry, has heat damage, chemical damage, or excessive breakage, you may benefit from deep conditioning twice a week until the condition improves. This intensive approach provides rapid repair and moisture infusion. Once your hair’s condition improves – usually after four to six weeks of intensive treatment – you can reduce to once a week.

    Every Other Week – For Healthy, Low-Porosity Hair

    Every Other Week - For Healthy, Low-Porosity Hair

    If your hair is already in good condition and you have low porosity hair that does not absorb products easily, deep conditioning every other week may be sufficient. Low porosity hair’s tightly sealed cuticle means it retains moisture better than high porosity hair, so it does not need as frequent replenishment. Over-conditioning low porosity hair can actually lead to buildup and limp, mushy-feeling strands.

    Moisture vs Protein Deep Conditioners – Knowing What Your Hair Needs

    Not all deep conditioners are created equal, and understanding the difference between moisture and protein treatments is crucial for getting the results you want.

    Moisture Deep Conditioners

    Moisture Deep Conditioners

    Moisture-focused deep conditioners are designed to hydrate and soften your hair. They contain humectants like glycerin and honey that attract and hold water, emollients like shea butter and oils that seal moisture in, and hydrating ingredients like aloe vera and coconut milk. Your hair needs a moisture treatment when it feels dry, rough, stiff, or lacks elasticity. If a strand of hair snaps immediately when stretched instead of bouncing back, it is crying out for moisture.

    Protein Deep Conditioners

    Protein Deep Conditioners

    Protein treatments repair and strengthen the hair shaft by filling in gaps in the hair’s protein structure – the keratin that makes up the bulk of each strand. They contain ingredients like hydrolyzed keratin, silk protein, wheat protein, or collagen. Your hair needs protein when it feels limp, mushy, overly stretchy, or is breaking easily despite being moisturized. If a strand stretches excessively before breaking rather than bouncing back, it needs protein.

    The Protein-Moisture Balance

    The Protein-Moisture Balance

    Healthy hair requires a balance of both protein and moisture. Too much protein without enough moisture makes hair hard, dry, and brittle. Too much moisture without enough protein makes hair weak, limp, and prone to stretching and snapping. Most people do well with a moisture-focused deep conditioner as their primary treatment and a protein treatment every four to six weeks. Adjust this ratio based on how your hair responds – learning to read what your hair needs is one of the most valuable skills in your natural hair journey.

    The Best Deep Conditioners for Natural Hair in 2026

    The Best Deep Conditioners for Natural Hair in 2026

    Best Moisture Deep Conditioner

    Best Moisture Deep Conditioner

    The SheaMoisture Manuka Honey and Mafura Oil Intensive Hydration Hair Masque from Ulta remains a top choice for moisture-starved natural hair. This rich masque contains manuka honey for deep hydration, mafura oil for sealing, and baobab oil for strengthening. It transforms dry, brittle hair into soft, pliable curls after just one treatment. It is also affordable enough to use as your regular wash day deep conditioner without breaking the bank.

    Best Protein Treatment

    Best Protein Treatment

    The Aphogee Two-Step Protein Treatment from Amazon is the gold standard for protein repair. This professional-grade treatment rebuilds damaged hair bonds and significantly reduces breakage. It is an intensive treatment – your hair will feel very hard while it is on, which is normal – but after the accompanying balancing conditioner, your strands will feel noticeably stronger and more resilient. Use this every six to eight weeks or as needed when your hair shows signs of protein deficiency.

    Best Balanced Deep Conditioner

    Best Balanced Deep Conditioner

    For a deep conditioner that provides both moisture and light protein, the Mielle Organics Babassu Oil and Mint Deep Conditioner from Amazon is excellent. It contains babassu oil for moisture and amino acids for gentle protein support. The mint provides a pleasant tingling sensation and stimulates the scalp. This is a great all-around deep conditioner for maintenance between more targeted moisture or protein treatments.

    Flat lay of deep conditioning supplies for natural hair on marble surface

    5 DIY Deep Conditioner Recipes You Can Make at Home

    5 DIY Deep Conditioner Recipes You Can Make at Home

    You do not always need to buy commercial deep conditioners – some of the most effective treatments can be made from ingredients in your kitchen. These DIY recipes are simple, affordable, and genuinely effective.

    Recipe 1 – The Honey and Olive Oil Moisture Bomb

    Recipe 1 - The Honey and Olive Oil Moisture Bomb

    Mix together half a cup of olive oil, a quarter cup of raw honey, and two tablespoons of coconut milk. Honey is a natural humectant that draws moisture to your hair, olive oil penetrates the hair shaft for deep conditioning, and coconut milk adds protein and fats. Apply to freshly washed hair, cover with a plastic cap, and leave on for 30 to 45 minutes before rinsing thoroughly.

    Recipe 2 – The Avocado and Banana Strength Builder

    Recipe 2 - The Avocado and Banana Strength Builder

    Blend one ripe avocado, one ripe banana, two tablespoons of olive oil, and one tablespoon of honey until completely smooth – no chunks, as they will be nearly impossible to rinse out of curly hair. Avocado is rich in vitamins A, B, D, and E and contains natural oils that penetrate the hair shaft. Banana is loaded with potassium, natural oils, and vitamins that help soften and improve manageability. Leave on for 20 to 30 minutes under a plastic cap.

    Recipe 3 – The Egg and Mayonnaise Protein Treatment

    Recipe 3 - The Egg and Mayonnaise Protein Treatment

    Combine one whole egg with half a cup of full-fat mayonnaise and one tablespoon of olive oil. The egg provides protein directly to repair damage, while mayonnaise – which contains eggs, oil, and vinegar – acts as a rich conditioner. This is an excellent DIY protein treatment for hair that feels weak and mushy. Apply to damp hair, leave on for 20 minutes under a plastic cap, and rinse with cool water – warm water will cook the egg in your hair, and no one wants that experience.

    Recipe 4 – The Coconut Milk and Honey Hydrator

    Recipe 4 - The Coconut Milk and Honey Hydrator

    Mix one can of full-fat coconut milk with three tablespoons of raw honey and one tablespoon of coconut oil. This ultra-hydrating treatment is perfect for very dry hair that needs an intense moisture boost. The coconut milk provides lauric acid, which has a high affinity for hair protein and actually penetrates the hair shaft. Apply generously, cover, and leave on for 30 minutes to an hour for maximum absorption.

    Recipe 5 – The Yogurt and Honey Smoothing Treatment

    Recipe 5 - The Yogurt and Honey Smoothing Treatment

    Combine half a cup of plain full-fat yogurt with two tablespoons of honey and one tablespoon of apple cider vinegar. Yogurt contains lactic acid that gently removes buildup while its proteins strengthen the hair. The apple cider vinegar helps smooth and seal the cuticle, adding shine and reducing frizz. This treatment is particularly good for high porosity hair that struggles to keep its cuticle layer sealed. Leave on for 20 minutes and rinse thoroughly.

    How to Deep Condition for Maximum Results

    How to Deep Condition for Maximum Results

    The technique you use when deep conditioning matters as much as the product itself. Here is how to get the absolute most out of every treatment.

    Start with Clean Hair

    Start with Clean Hair

    Always deep condition after shampooing, not before. Shampooing opens the hair cuticle and removes product buildup, allowing the deep conditioner to penetrate more effectively. If you apply deep conditioner to dirty hair, the buildup acts as a barrier that prevents the treatment from doing its job.

    Section Your Hair

    Section Your Hair

    Work the deep conditioner through your hair in sections to ensure complete, even coverage. On thick natural hair, applying product randomly means some sections get saturated while others barely get any. Use four to eight sections depending on your hair density, and make sure every strand in each section is coated from root to tip.

    Use Heat for Better Penetration

    Use Heat for Better Penetration

    Heat opens the hair cuticle further, allowing the deep conditioner to penetrate more deeply. Cover your treated hair with a plastic cap and then apply heat using one of these methods – sit under a hooded dryer for 15 to 30 minutes, wrap a warm towel around your head, use a thermal heating cap, or simply let your body heat warm the cap naturally for a longer period. Even without external heat, the plastic cap traps your body heat and creates a greenhouse effect that improves absorption.

    Timing Matters

    Timing Matters

    Most deep conditioners need 15 to 30 minutes to work effectively. Leaving them on longer is not always better – some conditioners, especially protein treatments, can actually over-process your hair if left on too long, leading to hard, brittle strands. Follow the instructions on your product, or for DIY treatments, stick to the times recommended in the recipes above. Moisture-only treatments are more forgiving with timing and can generally be left on longer without negative effects.

    Rinse with Cool Water

    Rinse with Cool Water

    After your treatment time is up, rinse with cool or lukewarm water rather than hot. Cool water helps seal the cuticle, locking in the moisture and nutrients you just spent time putting in. Hot water opens the cuticle and can allow some of that goodness to escape. The cool rinse also adds shine by creating a smoother cuticle surface that reflects light.

    Woman rinsing deep conditioner from natural hair showing smooth conditioned texture

    Deep conditioning is the backbone of healthy natural hair care. It is not a luxury or an occasional treat – it is a consistent practice that keeps your curls and coils strong, moisturized, and resilient against the daily challenges they face. Whether you choose a store-bought product or whip up a DIY treatment in your kitchen, the act of regularly nourishing your hair with deep conditioning sets you up for success in every other area of your hair care routine. Your natural hair deserves this love, and you deserve the gorgeous, healthy results that come from giving it.

    Key Takeaways

    • Deep conditioning penetrates the hair shaft to deliver moisture and strength from within, unlike regular conditioner which only coats the outside of the strand.
    • Most natural hair types benefit from deep conditioning every wash day – typically once a week or biweekly – with adjustments based on your hair’s current condition and porosity.
    • Understanding whether your hair needs moisture or protein is crucial – too much of either without the other creates its own set of problems.
    • DIY deep conditioners made from kitchen ingredients like honey, avocado, eggs, and yogurt can be just as effective as commercial products at a fraction of the cost.
    • Using heat during deep conditioning, working in sections, and rinsing with cool water are techniques that significantly improve the effectiveness of every treatment.

    Frequently Asked Questions

    Can I leave deep conditioner in my hair overnight?

    Moisture-based deep conditioners can generally be left in overnight without issues – in fact, the extended time can improve results for very dry hair. However, protein treatments should never be left on longer than recommended, as over-processing can make hair hard and brittle. If you do an overnight deep conditioning session, cover your hair with a plastic cap and a satin bonnet to protect your pillowcase and create a warm, humid environment for maximum absorption.

    What happens if I skip deep conditioning?

    What happens if I skip deep conditioning?

    Over time, skipping deep conditioning leads to progressively drier, weaker hair that is more prone to breakage, tangling, and dullness. Your regular conditioner can maintain day-to-day softness, but it cannot provide the deep repair and nourishment that keeps your strands strong and elastic. Think of it like only drinking water but never eating – hydration alone is not enough to sustain optimal health.

    Can I deep condition too often?

    Yes, though it depends on the type of deep conditioner. Over-conditioning with moisture can lead to hygral fatigue – a condition where the hair cuticle becomes fatigued from swelling and contracting too frequently with water absorption. This makes hair feel mushy and limp. Over-conditioning with protein makes hair hard and brittle. For most people, once a week for moisture and once every four to six weeks for protein is the right balance.

    Should I deep condition before or after a protein treatment?

    Always follow a protein treatment with a moisturizing deep conditioner. Protein treatments strengthen the hair but can leave it feeling hard and stiff. A moisture-based deep conditioner applied after the protein treatment restores softness and flexibility, giving you the best of both worlds – strong yet supple hair. Many protein treatments, like the Aphogee Two-Step, come with a specific moisturizing conditioner designed to be used immediately after the protein step.

  • Crochet Hairstyles for 2026 – Quick, Affordable, and Gorgeous Protective Styles to Try

    Crochet Hairstyles for 2026 – Quick, Affordable, and Gorgeous Protective Styles to Try

    Why Crochet Hairstyles Are the Best Kept Secret in Protective Styling

    If you have never tried crochet hairstyles before, you are about to discover one of the most game-changing techniques in the natural hair world. Crochet braids – or crochet hair, as they are more broadly called now since the technique is not limited to braided styles – offer an unbeatable combination of speed, affordability, and versatility that other protective styles simply cannot match. While box braids might take six to ten hours and cost upward of $200 at a salon, a gorgeous crochet style can be installed in under two hours for a fraction of the price.

    The concept is beautifully simple. Your natural hair is braided into cornrows as a base, and then pre-made hair extensions are looped through those cornrows using a special crochet needle – also called a latch hook. Because the extension hair comes pre-curled, pre-twisted, or pre-locked, you skip all the time-consuming styling that traditional braids and twists require. The result is a protective style that looks salon-quality but takes dramatically less time and money to achieve.

    In 2026, the crochet hair market has absolutely exploded with options. You can get crochet hair that looks like passion twists, Marley twists, faux locs, goddess braids, loose curls, straight blowouts, and everything in between. The quality has improved tremendously too – many crochet hair brands now produce extensions that look incredibly natural and can fool even the most trained eye. Whether you want a look that is sleek and polished or wild and free, there is a crochet style for you.

    What makes crochet styles particularly special for our community is their accessibility. You do not need to spend hours in a salon chair. You do not need a professional stylist – though they are certainly an option. With a little practice and patience, you can install crochet hair yourself at home, on your own schedule, and customize it exactly the way you want. That level of independence and creativity is empowering, and it saves you a significant amount of money over time.

    How Crochet Hair Installation Works

    Understanding the installation process will help you appreciate why crochet is so quick and versatile, and it will prepare you if you decide to try it at home.

    Step 1 – Create Your Cornrow Base

    Step 1 - Create Your Cornrow Base

    The foundation of any crochet style is a solid cornrow base. Your natural hair is braided into cornrows that follow a specific pattern depending on the look you want. For most styles, straight-back cornrows work perfectly. For styles with a side part, you will adjust your cornrow pattern to accommodate the part. The cornrows should be flat, secure, and not too tight – remember, this is a protective style, so protecting your edges and scalp is a priority.

    If you struggle with cornrowing your own hair, you have options. You can ask a friend or family member to help, visit a salon just for the cornrow base – which is much cheaper than paying for a full install – or use a crochet braiding tool kit from Amazon that includes braiding clips and sectioning tools to make self-braiding easier.

    Step 2 – Loop the Hair

    Step 2 - Loop the Hair

    Once your cornrows are done, the fun begins. Thread your crochet needle under a cornrow, hook the pre-looped extension hair onto the needle, and pull it through. The hair creates a loop on one side of the cornrow, and you pull the ends of the hair through that loop to secure it. That is it – one crochet stitch done. Repeat this process all over your head, spacing the loops evenly for consistent fullness.

    Step 3 – Style and Customize

    Step 3 - Style and Customize

    After all the hair is installed, you can cut, shape, and style it to your liking. Many people cut the hair to create layers, face-framing pieces, or a specific shape. If you are going for a curly look, separate the curls and fluff them for more volume. For a more polished look, smooth and define the curls with a light mousse or curl cream.

    The Best Crochet Hairstyles Trending in 2026

    The Best Crochet Hairstyles Trending in 2026

    Let us explore the specific styles that are dominating the crochet scene this year. Each of these can be achieved in under three hours and looks absolutely incredible.

    Crochet Faux Locs

    Crochet Faux Locs

    Faux locs continue to be one of the most requested crochet styles, and in 2026, the variety is better than ever. You can get crochet faux locs in every size from micro to jumbo, in straight or wavy textures, and in every color imaginable. The beauty of crochet faux locs compared to traditionally wrapped faux locs is the time savings – what might take eight to twelve hours with the wrapping method takes just one to two hours with crochet. Goddess faux locs with loose curly sections throughout are especially popular this year and give a gorgeous bohemian look.

    Crochet Passion Twists

    Yes, you can absolutely achieve passion twists using the crochet method, and many people actually prefer it over the traditional twisting method. Crochet passion twists install faster and the pre-made twists often have more consistent curl definition throughout. The pre-looped passion twist crochet hair packs on Amazon come ready to install with no additional prep work needed. Just loop, pull, and go.

    Crochet Marley Hair for Twist Outs and Updos

    Crochet Marley Hair for Twist Outs and Updos

    Marley hair is one of the most versatile crochet textures because it mimics the look of natural Afro-textured hair. You can wear it as is for a beautiful textured Afro look, twist it for twist-outs, braid it, or put it up in updos. Marley crochet hair is also the go-to for creating faux hawk styles and high puff ponytails. The texture blends seamlessly with type 4 natural hair, which makes it one of the most natural-looking crochet options available.

    Crochet Loose Wave Curls

    Crochet Loose Wave Curls

    For a more glamorous, flowing look, crochet loose wave curls give you that fresh-from-the-salon blowout and curl set vibe. This style is perfect for special occasions – weddings, date nights, birthday celebrations – but is also easy enough to wear daily. The curls are bouncy and voluminous right out of the pack, and with a little styling, they look absolutely luxurious. Choose between deep waves, ocean waves, or romantic spirals depending on the mood you want to create.

    Crochet Bob

    Crochet Bob

    Short crochet styles are having a major moment. A crochet bob – whether curly, wavy, or straight – is chic, low-maintenance, and incredibly flattering. The shorter length means you need fewer packs of hair, the installation is faster, and the style is lighter and more comfortable than longer options. Crochet bobs in curly textures are particularly popular in 2026 because they frame the face beautifully and have a youthful, playful energy.

    Crochet Butterfly Locs

    Crochet Butterfly Locs

    Butterfly locs are a style that has taken the natural hair community by storm, and the crochet version makes them accessible to everyone. These locs have a distinctive distressed, messy texture with loops and curls popping out along the length, giving them that butterfly wing effect. They look effortlessly cool and artistic, and the crochet method makes them incredibly easy to install. Pre-made crochet butterfly locs are available at most beauty supply stores and online.

    Three women showing different crochet hairstyle options including faux locs, curls, and bob

    Crochet Senegalese Twists

    Crochet Senegalese Twists

    Senegalese twists have always been a classic protective style, and the crochet version gives you the same sleek, rope-like twists in a fraction of the time. These twists are smooth, uniform, and polished, making them perfect for professional settings. They come in various sizes and lengths, and many brands now offer pre-twisted crochet Senegalese hair that looks virtually identical to hand-twisted extensions.

    Crochet Spring Twists

    Spring twists have a tighter, bouncier curl pattern than passion twists, giving them a lively, springy texture that is absolutely adorable. They are lightweight, fun, and perfect for warmer weather. Crochet spring twists install quickly and have a natural look that works for both casual and dressy occasions. The bouncy texture adds volume without heaviness, making them one of the most comfortable crochet styles to wear long-term.

    How to Choose the Right Crochet Hair for Your Style

    With so many options available, choosing the right crochet hair can feel overwhelming. Here are the factors to consider when making your selection.

    Synthetic vs Human Hair

    Synthetic vs Human Hair

    Most crochet hair is synthetic, which is perfectly fine for the vast majority of styles. Synthetic crochet hair is more affordable, comes pre-styled so it holds its texture without effort, and is available in an endless variety of colors and textures. The downside is that most synthetic hair cannot tolerate heat, so you cannot straighten or curl it with hot tools. If versatility is important to you and you want to change the style with heat tools, invest in human hair crochet extensions, which cost more but offer maximum styling flexibility.

    Pre-looped vs Bulk Hair

    Pre-looped vs Bulk Hair

    Pre-looped crochet hair comes ready to install – each piece has a loop at one end that slides easily onto your crochet needle. This is the most beginner-friendly option and what we recommend for your first crochet install. Bulk hair does not have pre-made loops, so you need to create the loop yourself during installation. Bulk hair gives you more control over the thickness of each section but requires more skill and takes longer to install.

    How Many Packs Do You Need

    How Many Packs Do You Need

    The number of packs you need depends on the style, length, and how full you want the final look. As a general guide, most crochet styles require four to eight packs of hair. Shorter bob styles might need only three to four packs, while very long or very full styles could need up to ten. Always buy one extra pack just in case – leftover hair can be saved for touch-ups or your next install. The multi-pack value bundles on Amazon often offer significant savings compared to buying individual packs.

    Maintaining Your Crochet Hairstyle for Maximum Longevity

    Maintaining Your Crochet Hairstyle for Maximum Longevity

    A well-maintained crochet style can last four to eight weeks, giving you an incredible return on your time and money investment. Here is how to keep your crochet hair looking fresh for as long as possible.

    Nightly Protection

    Nightly Protection

    Just like with any protective style, protecting your crochet hair at night is essential. Wrap your hair in a large satin bonnet designed for voluminous styles or loosely tie a satin scarf around your hair. This prevents the crochet hair from rubbing against your pillowcase, which causes frizz and tangles. For very voluminous styles, you can gently gather the hair on top of your head in a loose pineapple before covering it.

    Scalp Care

    Scalp Care

    Your scalp still needs attention even when it is covered by crochet hair. Use a lightweight scalp oil every few days to prevent dryness and itchiness. You can apply it directly to your cornrows through the crochet hair using an applicator bottle with a narrow tip. If your scalp gets itchy between washes, a diluted witch hazel spray can provide relief without disturbing your style.

    Washing Your Crochet Hair

    Washing Your Crochet Hair

    You can wash most crochet styles, but you need to be gentle to avoid tangling or matting the hair. Dilute your shampoo in water and apply it to your scalp with an applicator bottle, then massage gently. Let the soapy water run through the crochet hair without rubbing it. Rinse thoroughly and gently squeeze out excess water. Allow it to air dry completely – using a blow dryer can cause synthetic hair to frizz or even melt at high temperatures.

    Refreshing the Style

    Refreshing the Style

    If your crochet curls start to lose their definition after a couple of weeks, you can refresh them easily. For curly crochet styles, wrap individual sections around flexi rods or perm rods overnight to restore the curl pattern. For twist and loc styles, smooth any frizz with a light gel or mousse and re-separate any sections that have merged together. These simple refresh techniques can extend the life of your style by an additional two to three weeks.

    DIY Crochet Install Tips for Beginners

    DIY Crochet Install Tips for Beginners

    Ready to try installing crochet hair yourself? Here are the tips that will set you up for success on your first attempt.

    Start Simple

    Start Simple

    For your first crochet install, choose a style that is forgiving – curly or wavy textures are much more forgiving than straight or sleek styles because the texture hides any imperfections in your installation. Crochet curls or passion twists are excellent first-time choices because they look great even if your spacing is not perfectly even.

    Watch Tutorials First

    Watch Tutorials First

    Before you start, watch at least two or three video tutorials all the way through. Pay attention to how they section the hair, how many loops they put in each section, and how they handle the edges and hairline areas. Different creators have different techniques, and watching multiple approaches helps you understand the process from various angles.

    Take Your Time with the Cornrow Base

    Take Your Time with the Cornrow Base

    The cornrow base is the most important part of the entire install. If your cornrows are neat, flat, and secure, the rest of the process is easy. If the cornrows are bumpy, loose, or uneven, your final style will reflect that. Spend the time to get your base right, even if it means the overall process takes a bit longer. If cornrowing is not your strong suit, consider having someone else do just the base and then finishing the crochet part yourself.

    Do Not Overcrowd

    Do Not Overcrowd

    One of the most common beginner mistakes is putting too many loops of hair in each section, resulting in a bulky, heavy style. Start with fewer loops than you think you need – you can always add more. A good rule of thumb is two to three loops per cornrow section for most styles. Space them evenly and check your progress in the mirror regularly to make sure the fullness looks balanced on all sides of your head.

    Blend the Hairline

    Blend the Hairline

    The area around your hairline and part is where crochet styles are most likely to look obviously installed. To create a natural-looking hairline, use thinner sections of hair at the front and gradually increase the fullness as you move toward the back. Some people leave a small section of their natural hair out at the front and blend it with the crochet hair for an even more seamless transition. Apply a small amount of Edge Booster pomade from Ulta to lay your edges beautifully against the crochet style.

    Woman installing crochet hair at home using a latch hook tool through cornrows

    Crochet hairstyles truly are one of the best gifts the natural hair community has embraced. They give you salon-level beauty on a DIY budget, protect your natural hair while you rock stunning looks, and take a fraction of the time that other protective styles require. Whether you are a crochet veteran looking for fresh inspiration or a complete beginner ready to try your first install, 2026 offers more gorgeous crochet options than ever before. Pick your style, grab your supplies, and get ready to fall in love with your next look.

    Key Takeaways

    • Crochet hairstyles install in one to three hours – significantly faster than traditional braids or twists – and cost a fraction of the price of salon-installed protective styles.
    • The variety of crochet hair available in 2026 is incredible, including options for faux locs, passion twists, loose curls, Senegalese twists, butterfly locs, bobs, and much more.
    • A solid cornrow base is the most important element of a great crochet install – take your time getting it right and everything else falls into place.
    • Proper maintenance including nightly satin bonnet use, regular scalp care, and gentle washing can extend the life of your crochet style to four to eight weeks.
    • Crochet styles are beginner-friendly and can be installed at home with minimal tools – just a crochet needle, some hair clips, and your chosen crochet hair.

    Frequently Asked Questions

    Does crochet hair damage your natural hair?

    Does crochet hair damage your natural hair?

    When installed correctly, crochet hair is one of the least damaging protective styles available. The crochet technique does not put excessive tension on individual strands the way tight braiding or twisting can. The main potential for damage comes from the cornrow base being too tight, so always make sure your cornrows are secure but comfortable. Also, do not leave your crochet style in for longer than eight weeks, as prolonged wear can lead to matting and tangling of your natural hair underneath.

    Can I swim with crochet hair?

    You can swim with crochet hair, but take precautions to minimize damage. Wet the hair with fresh water before entering a pool or the ocean, which helps prevent the hair from absorbing as much chlorine or salt water. After swimming, rinse your crochet hair thoroughly with fresh water and allow it to air dry. Keep in mind that some synthetic crochet hair textures can become frizzy or tangled after prolonged exposure to water, so you may need to refresh your style after swimming.

    How do I prevent crochet hair from looking bulky or unnatural?

    The key to avoiding bulk is using fewer loops per section and spacing them strategically. Focus on creating fullness at the crown and sides while using lighter amounts around the hairline and perimeter. After installation, cut and shape the hair to create a natural silhouette – most crochet styles benefit from trimming and customization after they are fully installed. Choosing the right texture for your desired look also matters – lighter, wavier textures tend to look less bulky than very tight or coily textures.

    What is the best crochet hair brand for beginners?

    What is the best crochet hair brand for beginners?

    FreeTress, Sensationnel, and Outre are three popular brands that consistently produce high-quality crochet hair at affordable prices. FreeTress Water Wave and Sensationnel Lulutress are particularly popular for passion twists and loose curly looks. For faux locs, the Bobbi Boss Nu Locs line is a fan favorite. All of these brands offer pre-looped options that make installation straightforward for beginners.

  • Best Products for 4B Hair in 2026 – Moisturizers, Creams, and Oils for Defined Curls

    Best Products for 4B Hair in 2026 – Moisturizers, Creams, and Oils for Defined Curls

    Close-up of defined moisturized 4B natural hair with visible sheen

    Type 4B hair occupies a unique space in the natural hair world. It is not as loosely coiled as 4A, and it is not as tightly packed as 4C. It sits in the middle with its signature Z-shaped pattern, where strands bend at sharp angles rather than forming round coils. This distinctive pattern gives 4B hair incredible volume and density, but it also creates specific care challenges that many mainstream products simply do not address.

    Finding the right products for 4B hair can feel like a never-ending experiment. Products that work beautifully on 4A hair might be too light. Products designed for 4C hair might be too heavy. 4B hair needs its own sweet spot: enough moisture to keep the Z-bends flexible and hydrated, enough hold to define the curl pattern without crunch, and enough oil to seal without weigh-down. It is a balance, and once you find it, everything changes.

    This guide is dedicated entirely to 4B hair. Every product recommendation, every technique, and every piece of advice is specific to the unique needs of your Z-pattern coils. We have researched and compiled the best products available in 2026 across every category, from cleansers to sealants, to help you build a routine that keeps your 4B hair moisturized, defined, and thriving.

    Understanding 4B Hair: What Makes It Unique

    Understanding 4B Hair: What Makes It Unique

    Before you can choose the right products, you need to understand what makes 4B hair different from other type 4 textures.

    The Z-Pattern

    The Z-Pattern

    While 4A hair forms clearly defined S-shaped coils and 4C hair has a very tight, less defined coil pattern, 4B hair bends at sharp angles in a Z or zigzag pattern. These sharp bends create more fragile points along the hair strand compared to the gradual curves of looser textures. Each bend is a potential breakage point, which is why gentle handling and consistent moisture are non-negotiable for 4B hair health.

    Shrinkage

    Shrinkage

    4B hair experiences significant shrinkage, typically appearing 50 to 75 percent shorter than its actual length when dry. This is a natural characteristic of the tight Z-pattern and is not something that needs to be fixed. Understanding shrinkage helps you set realistic expectations for how your hair will look in different styles and conditions, and it helps you appreciate the true length and growth you are achieving even when it does not look as long as it actually is.

    Density and Volume

    Density and Volume

    4B hair tends to be dense, with many strands packed closely together. This density creates gorgeous volume but also means that products need to penetrate through thick sections to reach every strand. Surface application is rarely sufficient for 4B hair, which is why sectioning during product application is so important.

    Moisture Retention

    Moisture Retention

    Like all type 4 textures, 4B hair struggles with moisture retention. The Z-bends in each strand create points where the cuticle lifts, allowing moisture to escape. Combined with the difficulty of sebum distribution through tight patterns, 4B hair requires regular, intentional moisture application to stay hydrated and flexible.

    Essential Product Categories for 4B Hair

    Essential Product Categories for 4B Hair

    A complete 4B hair care routine includes products from six categories, each serving a specific purpose in maintaining moisture, strength, and definition.

    Cleansers remove buildup without stripping natural moisture. Deep conditioners provide intensive moisture and protein treatments. Leave-in conditioners maintain daily hydration. Styling creams define curls and provide hold. Oils seal moisture and add shine. Gels provide additional definition and hold for specific styles. Not every wash day requires all six categories, but having quality options in each ensures you can address whatever your hair needs at any given time.

    Best Shampoos and Cleansers for 4B Hair

    Best Shampoos and Cleansers for 4B Hair

    Best Sulfate-Free Shampoo: As I Am Coconut CoWash

    Best Sulfate-Free Shampoo: As I Am Coconut CoWash

    As I Am Coconut CoWash is a cleansing conditioner that removes buildup without the stripping effect of traditional shampoo. For 4B hair that tends toward dryness, co-washing between shampoo sessions helps maintain moisture while keeping the scalp clean. The coconut and tangerine formula has a pleasant scent and provides enough slip for gentle detangling during the wash process.

    Best Clarifying Shampoo: Kinky-Curly Come Clean Shampoo

    Best Clarifying Shampoo: Kinky-Curly Come Clean Shampoo

    Even with regular co-washing, 4B hair needs periodic clarifying to remove buildup from leave-ins, oils, and creams. Kinky-Curly Come Clean provides a thorough cleanse without harsh sulfates, using mandarin orange extract and sea kelp to purify the hair and scalp. Use this once a month to reset your hair and improve product absorption.

    Best Moisturizing Shampoo: Carol’s Daughter Black Vanilla Moisture and Shine Shampoo

    For regular wash days, Carol’s Daughter Black Vanilla shampoo cleanses while adding moisture back into 4B strands. The sulfate-free formula lathers gently and leaves hair feeling soft rather than stripped. The vanilla and sweet almond oil formula also smells incredible, making wash day a genuinely pleasant experience.

    Best Deep Conditioners and Treatments

    Best Deep Conditioners and Treatments

    Best Moisture Treatment: Mielle Organics Babassu Oil and Mint Deep Conditioner

    Mielle’s Babassu Oil and Mint deep conditioner provides intense hydration with a cooling mint sensation that feels refreshing on the scalp. For 4B hair that is chronically dry, this deep conditioner penetrates the tight Z-pattern to deliver moisture deep into the strand. Use with a heat cap for 20 to 30 minutes for maximum absorption.

    Best Protein Treatment: Aphogee Two-Step Protein Treatment

    Best Protein Treatment: Aphogee Two-Step Protein Treatment

    When your 4B hair feels mushy, overly elastic, or breaks easily when stretched, it needs protein. Aphogee’s Two-Step treatment is the gold standard for rebuilding protein bonds in damaged hair. Use this treatment every six to eight weeks to maintain the moisture-protein balance that keeps 4B hair strong and resilient. Follow with a moisturizing deep conditioner to prevent protein overload.

    Best Hot Oil Treatment: Jamaican Mango and Lime Black Castor Oil

    A warm oil treatment once a month provides deep nourishment for 4B strands. Jamaican Black Castor Oil is particularly beneficial for 4B hair because it strengthens the shaft, promotes growth, and seals moisture effectively. Warm the oil slightly, apply to damp hair in sections, cover with a plastic cap, and leave on for 30 minutes before shampooing.

    4B hair care products arranged aesthetically with natural elements

    Best Leave-In Conditioners and Moisturizers

    Best Leave-In Conditioners and Moisturizers

    Best Leave-In: SheaMoisture Coconut and Hibiscus Curl and Shine Conditioner

    Best Leave-In: SheaMoisture Coconut and Hibiscus Curl and Shine Conditioner

    This SheaMoisture leave-in provides excellent moisture and slip for 4B hair. The coconut oil and silk protein formula strengthens while hydrating, and the consistency is light enough to absorb without weighing down your coils. Apply to soaking wet hair in sections and follow with your preferred sealant for best results.

    Best Daily Moisturizer: Oyin Handmade Hair Dew

    Best Daily Moisturizer: Oyin Handmade Hair Dew

    For mid-week moisture refreshing, Oyin Handmade Hair Dew is a lightweight daily moisturizer that rehydrates 4B hair without buildup. The water-based formula penetrates quickly and can be applied to dry hair with a light misting of water. Use this between wash days when your hair starts feeling dry to extend your moisture from wash day.

    Best Cream Moisturizer: Karen’s Body Beautiful Sweet Ambrosia Leave-In Conditioner

    Best Cream Moisturizer: Karen's Body Beautiful Sweet Ambrosia Leave-In Conditioner

    This cream-based leave-in conditioner provides lasting moisture with a formula that was designed specifically for textured hair. The sweet ambrosia scent is light and pleasant, and the cream absorbs without leaving a heavy residue. It works particularly well on 4B hair because it provides enough moisture for the sharp Z-bends without weighing down the overall texture.

    Best Styling Creams for Curl Definition

    Best Styling Creams for Curl Definition

    Best for Twist-Outs: SheaMoisture Coconut and Hibiscus Curl Enhancing Smoothie

    Best for Twist-Outs: SheaMoisture Coconut and Hibiscus Curl Enhancing Smoothie

    The SheaMoisture Curl Enhancing Smoothie is a classic for 4B twist-outs and braid-outs. The thick, creamy formula coats each strand with moisture and defines the Z-pattern into visible curls when used with twisting or braiding techniques. Apply a generous amount to each twist section for maximum definition and hold that lasts several days.

    Best for Wash-and-Go: Ecostyler Olive Oil Gel

    Best for Wash-and-Go: Ecostyler Olive Oil Gel

    While not a cream, Ecostyler gel is essential for 4B women who want defined curls from a wash-and-go. Apply over your leave-in conditioner using the praying hands method or shingling technique for maximum curl clumping and definition. The olive oil formula provides hold without flaking, and the curl definition improves as you experiment with application amount and technique.

    Best Butter-Based Styler: Cantu Shea Butter for Natural Hair Coconut Curling Cream

    For a softer, less defined look, Cantu’s Coconut Curling Cream provides moisture and light definition with a touchably soft finish. This is the styling cream for women who want their 4B curls to look and feel soft and natural rather than defined and set. It works well for second-day refresh styles and for achieving a fluffy, voluminous look.

    Best Oils for Sealing and Growth

    Best Oils for Sealing and Growth

    Best Sealing Oil: Jojoba Oil

    Best Sealing Oil: Jojoba Oil

    Jojoba oil is the closest natural oil to the sebum your scalp produces, making it an ideal sealant for 4B hair. It absorbs well without feeling greasy, provides a natural shine, and does not clog pores or follicles. Use a few drops after your leave-in conditioner to seal moisture into each section. Pure cold-pressed jojoba oil is affordable and widely available.

    Best for Growth: Jamaican Black Castor Oil

    Best for Growth: Jamaican Black Castor Oil

    Jamaican Black Castor Oil has been used for generations to promote hair growth and thickness. For 4B hair, apply a small amount to your scalp twice a week, massaging in circular motions to stimulate blood flow to the follicles. The thick consistency also makes it an excellent sealant for ends, which are the oldest and driest part of your hair.

    Best Lightweight Oil: Grapeseed Oil

    Best Lightweight Oil: Grapeseed Oil

    For 4B hair that gets weighed down by heavier oils, grapeseed oil provides moisture-sealing benefits with a feather-light consistency. It is rich in vitamin E and linoleic acid, which strengthen the hair strand and reduce breakage. Grapeseed oil is particularly good for fine 4B hair that needs sealing without heaviness.

    Best Multi-Purpose Oil: Argan Oil

    Best Multi-Purpose Oil: Argan Oil

    Argan oil works as a sealant, a shine enhancer, and a heat protectant all in one. Its medium weight works well on most 4B hair densities, and its high vitamin E content nourishes the hair shaft. A small amount applied to styled hair adds shine and helps combat frizz for a polished finish.

    The LOC Method Customized for 4B Hair

    The LOC Method Customized for 4B Hair

    The LOC method, which stands for Liquid, Oil, Cream, is a layered moisture approach that works exceptionally well for 4B hair. Here is how to customize it for your specific texture.

    Step One: Liquid

    Step One: Liquid

    Start with soaking wet hair or heavily mist dry hair with water. Water is the foundation of moisture for 4B hair. Some women add a small amount of leave-in conditioner to their spray bottle for added hydration in this step. Ensure every section is thoroughly dampened.

    Step Two: Oil

    Step Two: Oil

    Apply a light-to-medium weight oil to each section. For 4B hair, jojoba or sweet almond oil works well in this step. The oil begins sealing the water into the hair shaft. Use a few drops per section and distribute with your fingers or a wide-tooth comb.

    Step Three: Cream

    Follow with a cream-based leave-in conditioner or styling cream. The cream provides an additional moisture barrier over the oil and water, locking everything in. For 4B hair, the cream also helps define the Z-pattern into visible curls when combined with a styling technique like twisting or braiding.

    Why This Order Works for 4B

    The LOC order is particularly effective for 4B hair because the oil goes on early, sealing water before it can evaporate from the sharp Z-bends. The cream then locks in both the water and oil, creating multiple layers of moisture protection. Many 4B naturals find that this order keeps their hair moisturized one to two days longer than the LCO method.

    Styling Tips for 4B Curl Definition

    Shingling

    Shingling

    Shingling is the technique of applying product to small sections of hair while smoothing each strand between your fingers. For 4B hair, this technique is the most effective way to achieve defined curls from a wash-and-go. It is time-consuming, but the definition it creates is unmatched. Apply gel over your leave-in and oil, then shingle each small section from root to tip.

    Finger Coiling

    Finger Coiling

    For even more defined curls, wrap small sections of product-coated 4B hair around your finger from root to tip. This creates uniform coils that are more defined than what 4B hair typically achieves on its own. While incredibly time-intensive, the results can last five to seven days with proper nighttime protection.

    Twist-Outs

    Twist-Outs

    The twist-out is the classic 4B styling technique that combines curl definition with volume. Apply your styling cream generously to each section, two-strand twist from root to tip, and allow to dry completely before unraveling. The key to a great 4B twist-out is using enough product, making your twist sections small enough for your desired definition level, and allowing the twists to dry completely before taking them down.

    Step-by-step 4B hair twist-out process showing product to final results

    Key Takeaways

    • 4B hair has a unique Z-shaped pattern that requires specific products for moisture, definition, and gentle care.
    • The LOC method (Liquid, Oil, Cream) works particularly well for 4B hair to maximize moisture retention.
    • SheaMoisture, Mielle Organics, and Carol’s Daughter offer some of the best products for 4B hair in 2026.
    • Jojoba oil is the ideal sealing oil for 4B hair because it mimics natural sebum and absorbs without heaviness.
    • Clarify monthly to remove buildup that blocks product absorption and moisture penetration.
    • Twist-outs, shingling, and finger coiling are the most effective styling techniques for 4B curl definition.
    • Always apply products to wet or damp hair in sections to ensure every strand receives moisture and product.

    Frequently Asked Questions

    What is the difference between 4B and 4C hair?

    What is the difference between 4B and 4C hair?

    4B hair has a distinct Z-shaped or zigzag pattern with sharp angles between bends. 4C hair has an even tighter coil pattern that may appear to have no defined curl pattern when dry. 4B hair typically shows more visible curl definition than 4C hair when products are applied, and the Z-pattern creates a slightly different texture and volume profile. Many people have a mix of both types across different areas of their head.

    How often should I wash 4B hair?

    Most 4B naturals do well washing once a week or every ten days. Washing too frequently strips the natural oils that 4B hair desperately needs, while waiting too long leads to buildup that blocks moisture absorption. A co-wash mid-week can help refresh moisture without the full shampooing process. Adjust your wash frequency based on your scalp health, product buildup, and how quickly your hair feels dry.

    Why does my 4B hair shrink so much?

    Why does my 4B hair shrink so much?

    Shrinkage is a natural characteristic of the tight Z-pattern. Each sharp bend in the strand causes the hair to compact on itself, appearing much shorter than its stretched length. 4B hair commonly shrinks 50 to 75 percent. Shrinkage is actually a sign of healthy, elastic hair. While stretch methods like banding, twisting, and braiding can elongate your hair for certain styles, embracing shrinkage as part of your hair’s natural beauty is the healthiest mindset.

    Can I do a wash-and-go with 4B hair?

    Yes, though wash-and-go results on 4B hair typically look different from results on looser curl types. For the best definition, use the shingling technique with a strong-hold gel over your leave-in conditioner and oil. Make your sections very small for maximum definition. 4B wash-and-go styles tend to have a more fluffy, voluminous appearance than the uniform curl clumps that looser textures achieve, and that look is beautiful in its own right.

  • Best Leave-In Conditioners for 4C Hair in 2026 – Moisture That Lasts All Day

    Best Leave-In Conditioners for 4C Hair in 2026 – Moisture That Lasts All Day

    If you have 4C hair, you already know the struggle. You spend time carefully moisturizing your coils on wash day, and by day two or three, your hair feels dry again. It is like your curls are in a constant state of thirst, no matter how much product you apply. The frustration is real, and it is not your fault. The tight coil pattern of 4C hair creates unique moisture challenges that require targeted solutions.

    The right leave-in conditioner can change everything. It sits on your hair between washes, continuously delivering hydration, softness, and slip that makes your coils more manageable and less prone to breakage. But not just any leave-in will do. 4C hair demands formulas that penetrate the hair shaft rather than sitting on top, that lock moisture in for days rather than hours, and that provide enough slip to reduce the tangles and knots that lead to breakage during styling.

    In 2026, brands have become smarter about formulating for 4C hair specifically. We are seeing leave-in conditioners designed by chemists who understand 4C hair at a molecular level, with ingredients chosen for their ability to penetrate tight coil patterns and create lasting moisture barriers. This guide covers the best options available right now, along with application techniques that maximize moisture retention between wash days.

    Why 4C Hair Needs Specialized Moisture

    Why 4C Hair Needs Specialized Moisture

    Understanding why 4C hair loses moisture so quickly helps you choose better products and develop better habits. Several structural factors contribute to the chronic dryness that 4C naturals experience.

    The Coil Structure

    The Coil Structure

    4C hair has the tightest coil pattern of any hair type, with each strand forming tiny, densely packed Z-shaped or S-shaped coils. Each bend in the coil is a point where the cuticle layer lifts slightly, creating opportunities for moisture to escape. The more bends per inch of hair, the more moisture escape points exist. This is why 4C hair loses moisture faster than looser curl patterns with fewer bends.

    Sebum Distribution

    Sebum Distribution

    Your scalp produces sebum, a natural oil that moisturizes and protects the hair shaft. In straight hair, sebum travels easily from the scalp down the hair shaft. In 4C hair, the tight coils prevent sebum from traveling past the first inch or two of hair. This means that the majority of your hair length receives no natural moisture from your scalp, relying entirely on the products you apply for hydration.

    Porosity Factors

    Porosity Factors

    Many 4C hair types have high porosity, meaning the cuticle layer has gaps that allow moisture to enter easily but also escape quickly. Others have low porosity, where the cuticle layer is so tightly sealed that moisture has difficulty penetrating in the first place. Both porosity types benefit from leave-in conditioners, but the ideal formula and application method differ based on your specific porosity level.

    What Makes a Great Leave-In for 4C Hair

    What Makes a Great Leave-In for 4C Hair

    Penetrating Moisture

    Penetrating Moisture

    The best leave-in conditioners for 4C hair contain humectants and penetrating moisturizers that actually enter the hair shaft rather than just coating the surface. Water is the ultimate moisturizer, which is why the best leave-ins are water-based, with water as the first ingredient. Glycerin, honey, and aloe vera are humectants that draw moisture from the environment into your hair, providing ongoing hydration between applications.

    Sealing Ability

    Sealing Ability

    Moisture that enters the hair needs to be sealed in. The best leave-ins contain a combination of humectants to attract moisture and emollients like natural oils and butters to seal the cuticle and prevent moisture loss. This dual action is what creates all-day hydration rather than a few hours of softness followed by dryness.

    Slip and Detangling

    Slip and Detangling

    4C hair is prone to tangling, and manipulation during detangling is one of the leading causes of breakage. A leave-in conditioner with excellent slip reduces friction between strands, making detangling easier and less damaging. Look for leave-ins that make your comb or fingers glide through your coils rather than snagging and pulling.

    Lightweight Formula

    Lightweight Formula

    4C hair benefits from moisture, but heavy products can weigh down coils and cause buildup that actually blocks further moisture absorption. The best leave-in conditioners are lightweight enough to absorb into the hair without leaving a heavy, greasy coating. If your hair feels coated rather than moisturized after applying a leave-in, the formula may be too heavy for your specific hair needs.

    Top Leave-In Conditioner Picks for 2026

    Top Leave-In Conditioner Picks for 2026

    Best Overall: SheaMoisture Manuka Honey and Yogurt Hydrate and Repair Leave-In

    SheaMoisture’s Manuka Honey and Yogurt leave-in consistently ranks as the best overall option for 4C hair due to its balance of moisture, slip, and affordability. The formula is super nourishing and glides through natural 4C hair with ease, providing immediate softness and manageability. Manuka honey is a powerful humectant that draws moisture to the hair, while yogurt protein strengthens the strand. At around $12, it offers premium performance at a drugstore price.

    Best for Intense Hydration: 4C ONLY Too Soft Leave-In Conditioner

    Best for Intense Hydration: 4C ONLY Too Soft Leave-In Conditioner

    Designed specifically for 4C hair by a Black chemist, the 4C ONLY Too Soft Leave-In delivers 72-plus hours of moisture retention. This is not a marketing claim you hear and ignore. Users consistently report that their hair still feels soft and moisturized two to three days after application, which is remarkable for 4C hair. The formula was developed specifically for the molecular structure of 4C strands, and that targeted approach shows in the results.

    Best for Definition: Briogeo Curl Charisma Leave-In Creme

    Best for Definition: Briogeo Curl Charisma Leave-In Creme

    Briogeo’s Curl Charisma combines rice amino acids, avocado oil, and quinoa extract to help coils stay hydrated while maintaining their shape. If you want your 4C curls to be defined and clumped rather than just moisturized, this leave-in provides the structure and moisture balance needed for visible curl definition on tighter patterns.

    Best Budget Option: tgin Butter Cream Daily Moisturizer

    Best Budget Option: tgin Butter Cream Daily Moisturizer

    tgin’s Butter Cream Daily Moisturizer is one of the best leave-in conditioners for making 4C hair easily manageable at an accessible price point. The rich, buttery formula provides intense moisture without feeling heavy, and it works well as both a wash-day leave-in and a mid-week refresher. At around $14, it is an excellent value for the moisture it delivers.

    Best for Low Porosity: Kinky-Curly Knot Today

    Best for Low Porosity: Kinky-Curly Knot Today

    Low-porosity 4C hair needs a lightweight leave-in that does not sit on the surface and cause buildup. Kinky-Curly Knot Today is a liquid-based formula that provides exceptional slip and detangling power without heavy oils or butters. Its lightweight consistency allows it to be absorbed by low-porosity hair that rejects heavier products. The organic slippery elm and marshmallow root extracts provide slip that makes detangling nearly effortless.

    Best for High Porosity: Camille Rose Naturals Curl Love Moisture Milk

    High-porosity 4C hair absorbs moisture quickly but loses it just as fast. Camille Rose’s Curl Love Moisture Milk provides rich hydration with sealing ingredients that slow moisture loss from porous strands. Rice milk, macadamia nut oil, and honey work together to penetrate, moisturize, and seal, creating a moisture barrier that lasts longer on high-porosity hair.

    Leave-in conditioner products for 4C hair with styling tools

    Key Ingredients That Actually Work for 4C Hair

    Key Ingredients That Actually Work for 4C Hair

    Humectants

    Humectants

    Glycerin is the most common and effective humectant in leave-in conditioners. It draws water from the environment into your hair, providing ongoing moisture. Honey and aloe vera are natural humectants that also provide conditioning benefits. In very dry climates, humectants can sometimes draw moisture out of your hair instead of in, so monitor how your hair responds in different weather conditions.

    Emollients

    Emollients

    Shea butter, mango butter, and cocoa butter soften the hair and create a barrier that slows moisture loss. In leave-in conditioners, these butters are typically in smaller concentrations than in styling creams or deep conditioners, providing moisture-sealing benefits without weighing down the hair.

    Oils

    Oils

    Coconut oil, olive oil, avocado oil, and jojoba oil each offer different benefits for 4C hair. Coconut oil is one of the few oils that can actually penetrate the hair shaft, making it a true moisturizer rather than just a sealant. Jojoba oil closely mimics the natural sebum your scalp produces, making it an excellent all-purpose hair oil. Avocado oil is rich in fatty acids that nourish and strengthen the hair strand.

    Proteins

    Proteins

    Hydrolyzed proteins like keratin, silk, and wheat fill in gaps in damaged cuticles and strengthen the hair strand. For 4C hair that experiences breakage, a leave-in with protein can improve strength and reduce shedding. However, too much protein can make 4C hair feel stiff and dry, so balance is important. If your hair feels hard or brittle after using a protein-rich leave-in, switch to a moisture-focused formula.

    Application Methods for Maximum Moisture Retention

    Application Methods for Maximum Moisture Retention

    Apply to Soaking Wet Hair

    Apply to Soaking Wet Hair

    The single most effective technique for 4C moisture retention is applying your leave-in conditioner to hair that is soaking wet, not just damp. Water is the primary moisturizer, and your leave-in conditioner’s job is to lock that water in. When you apply to dripping wet hair, you are trapping maximum water within the hair shaft before sealing it with the leave-in’s emollients and oils.

    Section and Distribute

    Section and Distribute

    4C hair is dense, and product applied to the surface rarely reaches the interior layers. Section your hair into at least eight to twelve sections and apply your leave-in to each section individually, working the product from roots to ends with your fingers or a wide-tooth comb. This ensures that every strand receives moisture, not just the outermost layer.

    The Praying Hands Method

    The Praying Hands Method

    Place a section of hair between your palms with product on your hands and smooth downward in a praying motion. This technique distributes product evenly along the hair shaft while encouraging coils to clump together, reducing tangles and improving definition. Repeat for each section until all of your hair is covered.

    Seal Immediately

    Seal Immediately

    After applying your leave-in, follow immediately with a sealing oil or butter. This locks the water and leave-in conditioner inside the hair shaft by coating the outer layer of the strand. Without sealing, the moisture from your leave-in begins evaporating almost immediately, especially in dry environments.

    The LOC and LCO Methods Explained

    The LOC and LCO Methods Explained

    LOC Method: Liquid, Oil, Cream

    LOC Method: Liquid, Oil, Cream

    The LOC method involves applying products in a specific order: liquid (water or a water-based product), oil, then cream. The liquid hydrates, the oil seals, and the cream provides an additional moisture barrier. This method works particularly well for high-porosity 4C hair because the oil layer goes on before the cream, creating an earlier seal that prevents moisture from escaping through porous cuticles.

    LCO Method: Liquid, Cream, Oil

    LCO Method: Liquid, Cream, Oil

    The LCO method reverses the order of oil and cream: liquid, cream, then oil. This method works better for low-porosity 4C hair because the cream helps the liquid absorb into resistant cuticles, and the oil goes on last as the final seal. For low-porosity hair, placing a heavier oil directly after the liquid can actually block the liquid from absorbing fully.

    Which Method Is Right for You

    Which Method Is Right for You

    The honest answer is that you need to experiment. Try each method for a few wash cycles and observe which keeps your hair moisturized longer. Many 4C naturals find that one method works during certain seasons and the other works better when humidity and temperature change. There is no single correct answer, only what works for your specific hair.

    Common Moisture Mistakes 4C Naturals Make

    Common Moisture Mistakes 4C Naturals Make

    Using Too Much Product

    Using Too Much Product

    More product does not equal more moisture. Excessive product creates buildup that actually blocks moisture from reaching your hair on subsequent applications. A moderate amount of leave-in thoroughly distributed is more effective than a heavy application concentrated on the surface.

    Skipping Water

    Skipping Water

    Products cannot moisturize without water. If you apply leave-in conditioner to completely dry hair without dampening it first, the leave-in has nothing to seal in. Always start with water, whether from your shower, a spray bottle, or a water-based product, and then follow with your leave-in and sealant.

    Never Clarifying

    Never Clarifying

    Product buildup from leave-ins, oils, and creams accumulates over time and creates a barrier that prevents future moisture absorption. Use a clarifying shampoo once a month to remove buildup and give your hair a clean slate for moisture absorption. You will notice that your products work significantly better on freshly clarified hair.

    Ignoring Your Scalp

    A dry, unhealthy scalp produces hair that is inherently drier and weaker. While leave-in conditioners are designed for the hair shaft, do not neglect your scalp health. A lightweight scalp oil massaged into your scalp regularly promotes healthy follicles and creates a better foundation for moisturized hair growth.

    Building a Complete 4C Moisture Routine

    Building a Complete 4C Moisture Routine

    Wash Day

    Wash Day

    Start with a gentle sulfate-free shampoo or co-wash. Follow with a deep conditioner left on for 15 to 30 minutes under a heat cap for maximum penetration. Rinse, then apply your leave-in conditioner to soaking wet hair in sections. Seal with your preferred oil or cream, then style as desired. This comprehensive wash day routine sets the foundation for moisture that lasts between washes.

    Mid-Week Refresh

    Around day three or four, when your hair starts feeling dry, spritz each section with water or a water-based refresher spray. Apply a small amount of leave-in conditioner to any particularly dry areas, then seal again with a light oil. This refresh extends the moisture from your wash day and keeps your style looking fresh.

    Nightly Protection

    Nightly Protection

    Sleep on a satin or silk pillowcase and wear a satin bonnet or scarf. Cotton pillowcases absorb moisture from your hair overnight, undoing the hydration work you did during the day. Satin and silk allow your hair to retain its moisture and reduce friction that causes tangles and breakage.

    Woman applying leave-in conditioner to sectioned 4C hair in bathroom

    Key Takeaways

    • 4C hair loses moisture faster than other textures due to its tight coil pattern and limited natural sebum distribution.
    • SheaMoisture Manuka Honey and 4C ONLY Too Soft lead the 2026 market for effective 4C leave-in conditioners.
    • Always apply leave-in conditioner to soaking wet hair in sections for maximum moisture penetration and retention.
    • The LOC method works best for high-porosity 4C hair, while the LCO method suits low-porosity 4C hair.
    • Key ingredients to look for include glycerin, honey, aloe vera for moisture, and shea butter, coconut oil for sealing.
    • Clarify monthly to remove product buildup that blocks moisture absorption.
    • Sleep on satin or silk to prevent overnight moisture loss and reduce friction breakage.

    Frequently Asked Questions

    How often should I apply leave-in conditioner to 4C hair?

    Apply a thorough application on wash day and lighter refresh applications mid-week as needed, typically every three to four days. Avoid daily heavy applications, which can cause buildup. The goal is to maintain the moisture from your wash day rather than starting from scratch every day. If your hair feels dry daily, your wash day moisture routine may need adjustment rather than more product between washes.

    Can I use leave-in conditioner on dry 4C hair?

    You can, but it is more effective when applied to damp or wet hair. If applying to dry hair as a refresh, mist the section with water first, then apply a small amount of leave-in and seal with oil. Applying leave-in to completely dry hair without water means the product sits on top of the strand rather than helping moisture penetrate into it.

    What is the difference between a leave-in conditioner and a deep conditioner?

    A deep conditioner is a treatment you apply to wet hair, leave on for 15 to 30 minutes, and then rinse out. It provides intense moisture and repair during that treatment window. A leave-in conditioner is applied to wet hair and stays in the hair, providing ongoing moisture and protection between wash days. Both are important for 4C hair health, and they serve different purposes in your routine. Use a deep conditioner on wash day and a leave-in after rinsing it out.

    My hair still feels dry even with leave-in conditioner. What am I doing wrong?

    Several factors could be at play. You may not be applying to wet enough hair, reducing the moisture available to seal in. You may not be sealing with an oil or cream after your leave-in, allowing moisture to escape. Your hair may have buildup that is blocking product absorption, requiring a clarifying wash. Or your leave-in formula may not be right for your porosity type. Experiment with different products, always apply to soaking wet hair, seal immediately, and clarify monthly to address the most common causes of persistent dryness.

  • Best Affordable Retinol Products at the Drugstore – Start Anti-Aging Without Breaking the Bank

    Best Affordable Retinol Products at the Drugstore – Start Anti-Aging Without Breaking the Bank

    Retinol is the gold standard of anti-aging skincare. Dermatologists have been recommending it for decades because it genuinely works. It speeds up cell turnover, boosts collagen production, fades dark spots, smooths fine lines, and improves overall skin texture. No other over-the-counter ingredient has this much scientific evidence backing its effectiveness.

    But here is the secret the luxury skincare industry does not want you to know: the most affordable retinol products at your local drugstore contain the same active ingredient as the hundred-dollar serums at Sephora. A retinol molecule is a retinol molecule. Your skin cannot tell the difference between a seven-dollar product and a seventy-dollar one. What matters is the concentration, the delivery system, and how you use it.

    We have tested every major drugstore retinol product available in 2026 to find the ones that deliver real results at real-world prices. Whether you are a retinol beginner or a seasoned user looking to save money, this guide has your perfect match.

    Affordable drugstore retinol products arranged on bathroom counter

    Retinol 101 – What It Is and Why It Works

    Retinol is a form of vitamin A that communicates with skin cells, essentially telling them to behave like younger, healthier cells. It works at a cellular level to accelerate the skin’s natural renewal process. In younger skin, cells turn over approximately every twenty-eight days. As we age, this process slows dramatically. Retinol speeds it back up, bringing fresh, new cells to the surface faster.

    This accelerated turnover is what produces the visible anti-aging results. Fresh surface cells look smoother, brighter, and more even-toned than old, damaged cells. Meanwhile, retinol stimulates collagen and elastin production in the deeper layers of skin, which firms and plumps from within. Over time, this combination of surface renewal and deep structural support reduces the appearance of fine lines, wrinkles, and age spots.

    The reason retinol is so effective compared to other anti-aging ingredients is that it works on multiple pathways simultaneously. Most ingredients target one aspect of aging. Retinol targets several at once, making it the most comprehensive single ingredient for anti-aging.

    Types of Retinol and What They Mean

    Types of Retinol and What They Mean

    Retinol

    Retinol

    The most common form in drugstore products. It is converted to retinoic acid by your skin through a two-step process, which means it is gentler than prescription retinoids but also takes longer to produce results. Concentrations typically range from 0.025 percent to 1 percent in over-the-counter products.

    Retinaldehyde

    Retinaldehyde

    One step closer to retinoic acid than retinol, requiring only one conversion step. This means it works faster while still being available without prescription. It is less irritating than retinoic acid but more potent than standard retinol. Less common in drugstore products but available from some brands.

    Retinyl Palmitate and Retinyl Acetate

    Retinyl Palmitate and Retinyl Acetate

    The gentlest forms of vitamin A, requiring three conversion steps to become active retinoic acid. These are found in many moisturizers and eye creams marketed for sensitive skin. They are the least irritating but also the least potent. Good for introducing your skin to retinoids but unlikely to produce dramatic results.

    Encapsulated Retinol

    Encapsulated Retinol

    Retinol wrapped in a protective capsule that releases it gradually. This slow release reduces irritation while maintaining effectiveness. CeraVe uses this technology in their retinol products, making them among the most tolerable drugstore options.

    Best Drugstore Retinol for Beginners

    Best Drugstore Retinol for Beginners

    CeraVe Retinol Serum – Approximately Seventeen Dollars

    CeraVe Retinol Serum - Approximately Seventeen Dollars

    CeraVe Retinol Serum is our top pick for retinol beginners. The encapsulated retinol releases gradually, minimizing the irritation that scares many first-time users away from retinol entirely. The formula includes niacinamide for calming, hyaluronic acid for hydration, and ceramides for barrier support. This is the retinol equivalent of training wheels, effective enough to produce results but gentle enough to keep irritation at bay.

    This product won a Shop TODAY Beauty Award as best budget anti-aging serum, and dermatologists frequently recommend it as a starting point for patients new to retinol. At seventeen dollars, it costs a fraction of premium retinol serums that use the same encapsulated technology.

    The Ordinary Retinol 0.2% in Squalane – Approximately Six Dollars

    The Ordinary Retinol 0.2% in Squalane - Approximately Six Dollars

    The Ordinary Retinol 0.2% in Squalane at just six dollars is the most affordable retinol product you can buy. The low 0.2 percent concentration is perfect for beginners, and the squalane base provides moisture that helps offset the drying effect of retinol. Start with this two to three nights per week and increase as tolerated.

    Neutrogena Rapid Wrinkle Repair Retinol Serum – Approximately Twenty Dollars

    Neutrogena Rapid Wrinkle Repair Retinol Serum - Approximately Twenty Dollars

    Neutrogena’s retinol technology has been refined over years of development. This serum uses accelerated retinol SA to deliver results while minimizing irritation. It is lightweight, absorbs quickly, and layers well under moisturizer. The brand’s long history with retinol gives confidence in the formulation.

    Best Drugstore Retinol for Intermediate Users

    Best Drugstore Retinol for Intermediate Users

    RoC Retinol Correxion Line Smoothing Serum Capsules – Approximately Sixteen Dollars

    RoC Retinol Correxion Capsules are brilliant in their design. Each capsule contains a single application of fresh retinol serum, meaning the formula stays potent until the moment you use it. Retinol degrades with air and light exposure, so traditional bottles gradually lose potency after opening. These capsules solve that problem completely.

    RoC has decades of retinol expertise and their formulations are clinically proven. The capsule delivery also eliminates the guesswork of dosing. One capsule, one application, the perfect amount every time. At sixteen dollars for a month’s supply, the value is excellent.

    The Ordinary Retinol 0.5% in Squalane – Approximately Seven Dollars

    The Ordinary Retinol 0.5% in Squalane - Approximately Seven Dollars

    Once your skin has adapted to the 0.2 percent concentration, stepping up to 0.5 percent provides increased anti-aging benefits. The squalane base remains moisturizing and the formula is stable thanks to the oil-based delivery. At seven dollars, moving up in concentration barely increases your investment.

    Best Drugstore Retinol for Advanced Users

    Best Drugstore Retinol for Advanced Users

    Neutrogena Rapid Wrinkle Repair Retinol Pro+ 0.5% Power Serum – Approximately Twenty-Five Dollars

    This is Neutrogena’s most potent retinol offering at 0.5 percent pure retinol. For experienced retinol users whose skin has built tolerance, this serum delivers visible wrinkle improvement in as little as two weeks. The formula is designed for maximum efficacy, which means it is not suitable for beginners but is exactly what advanced users need.

    The Ordinary Retinol 1% in Squalane – Approximately Eight Dollars

    The Ordinary Retinol 1% in Squalane - Approximately Eight Dollars

    The highest concentration in The Ordinary’s retinol line. At one percent, this is among the most potent over-the-counter retinol products available anywhere, at a price that makes luxury brands look absurd. Only use this if your skin has been successfully tolerating lower concentrations for several months.

    RoC Retinol Correxion Max Hydration Cream – Approximately Twenty Dollars

    RoC Retinol Correxion Max Hydration Cream - Approximately Twenty Dollars

    This combines retinol with hyaluronic acid in a rich cream format. It is ideal for experienced retinol users with dry skin who want anti-aging and hydration in one product. The cream format provides a more comfortable experience than serums for those with drier skin types.

    Close-up of retinol serum dropper showing product texture

    Best Drugstore Retinol for Sensitive Skin

    Best Drugstore Retinol for Sensitive Skin

    Sensitive skin does not mean you cannot use retinol. It means you need the right formulation and approach.

    CeraVe Retinol Serum remains the best option for sensitive skin because the encapsulated delivery minimizes irritation while the ceramides support the skin barrier. Many sensitive-skin users who could not tolerate other retinol products find CeraVe’s version manageable.

    Another approach for sensitive skin is retinol sandwiching. Apply moisturizer first, then your retinol, then another layer of moisturizer. The moisturizer layers buffer the retinol and reduce direct contact with the skin, which dramatically decreases irritation without eliminating effectiveness.

    How to Start Using Retinol Without Irritation

    How to Start Using Retinol Without Irritation

    The most common mistake with retinol is doing too much too soon. Your skin needs time to adapt. Here is the proven approach.

    Week one and two: Apply retinol one night per week. Use a pea-sized amount on dry skin after cleansing. Follow with moisturizer. This gives your skin a gentle introduction.

    Week three and four: Increase to two nights per week. Monitor for redness, peeling, or irritation. If these occur, stay at this frequency longer before increasing.

    Month two: Increase to three nights per week if your skin is tolerating well. Continue to follow with moisturizer.

    Month three and beyond: Gradually work up to every other night and eventually nightly use as tolerated. Some people never need or want to use retinol every night, and that is perfectly fine. Even two to three times per week produces real results.

    Always apply sunscreen during the day when using retinol, as retinol increases sun sensitivity. This is non-negotiable.

    Common Retinol Mistakes That Waste Your Money

    Using Too Much Product

    Using Too Much Product

    A pea-sized amount is sufficient for your entire face. Using more does not produce faster results. It only produces more irritation. Your skin can only absorb a certain amount of retinol at a time, so excess product sits on the surface and causes unnecessary irritation.

    Applying to Wet Skin

    Applying to Wet Skin

    Retinol absorbs more rapidly on damp skin, which increases irritation risk. Always apply to completely dry skin. Wait at least five minutes after washing your face before applying retinol.

    Mixing With Harsh Actives

    Mixing With Harsh Actives

    Do not use retinol on the same night as AHA or BHA exfoliants, vitamin C at high concentrations, or benzoyl peroxide. These combinations can overwhelm your skin and cause significant irritation. Use these products on alternate nights instead.

    Giving Up Too Soon

    Giving Up Too Soon

    Retinol takes time to work. Initial results like brightness and smoother texture may appear in two to four weeks. Wrinkle reduction and significant collagen building take three to six months. If you quit after three weeks because you do not see dramatic changes, you are abandoning the process before it has a chance to work.

    Storing Products Incorrectly

    Storing Products Incorrectly

    Retinol degrades with exposure to light, air, and heat. Store your retinol products in a cool, dark place. Choose products in opaque, airtight packaging rather than clear bottles with dropper applicators, which expose the formula to air and light every time you use them. This is another advantage of RoC’s capsule format.

    How to Layer Retinol With Other Products

    How to Layer Retinol With Other Products

    The correct evening layering order when using retinol is cleanser, then any water-based serums like hyaluronic acid, then retinol on dry skin, then moisturizer. This sandwich approach ensures your retinol is delivered effectively while maintaining hydration and barrier health.

    For your morning routine when using retinol at night, use a gentle cleanser, followed by a vitamin C serum for antioxidant protection, followed by moisturizer, followed by sunscreen. The vitamin C in the morning and retinol at night give you round-the-clock anti-aging coverage.

    The most important layering rule is always to finish with sunscreen in the morning. Retinol increases photosensitivity, and unprotected sun exposure after retinol use can cause more damage than if you were not using retinol at all. SPF 30 or higher, every single day, is mandatory.

    Key Takeaways

    • Retinol is the most scientifically proven over-the-counter anti-aging ingredient, and effective products are available at the drugstore starting at just six dollars.
    • CeraVe Retinol Serum at seventeen dollars is the best starting point for beginners thanks to its encapsulated delivery and skin-barrier supporting ingredients.
    • RoC’s single-dose capsules solve the potency degradation problem that affects all bottled retinol products, keeping each application fresh and effective.
    • The Ordinary’s retinol line offers the most affordable path from beginner to advanced use, with products ranging from six to eight dollars at concentrations from 0.2 to 1 percent.
    • Start slowly with once-weekly application and gradually increase frequency over two to three months to avoid irritation.
    • Daily sunscreen is mandatory when using retinol. Skipping SPF while using retinol can cause more harm than not using retinol at all.
    • Retinol results take time. Expect initial brightness in two to four weeks and significant wrinkle improvement in three to six months.

    Frequently Asked Questions

    Can I use retinol if I have acne-prone skin?

    Yes, and retinol can actually help with acne. It speeds cell turnover, which helps prevent clogged pores. You may experience a temporary purging period in the first few weeks where existing clogs come to the surface faster, but this typically resolves within four to six weeks. Start with a low concentration and be patient through the adjustment period.

    Is retinol safe during pregnancy?

    Is retinol safe during pregnancy?

    No. Retinol and all retinoids should be avoided during pregnancy and breastfeeding. High doses of vitamin A have been linked to birth defects. If you are pregnant, planning to become pregnant, or breastfeeding, switch to pregnancy-safe alternatives like bakuchiol, which provides some similar benefits without the risks.

    What is the difference between retinol and prescription tretinoin?

    What is the difference between retinol and prescription tretinoin?

    Tretinoin is the active form of retinoic acid and works directly on skin cells without conversion. It is more potent and produces faster results but also causes more irritation and requires a prescription. Retinol needs to be converted to retinoic acid by your skin, which makes it gentler but slower. For many people, drugstore retinol provides sufficient results without the prescription hassle and cost.

    Can I use retinol around my eyes?

    Yes, but carefully. The skin around the eyes is thinner and more sensitive. Use only a tiny amount and apply it to the orbital bone area rather than directly to the eyelids or directly under the lash line. If you experience irritation, reduce frequency or switch to a lower concentration specifically for the eye area.