Category: Lifestyle

  • The Career Plateau Is Real – Here’s How to Break Through It Without Burning Out

    The Career Plateau Is Real – Here’s How to Break Through It Without Burning Out

    Adaeze was 39 the Wednesday afternoon in April 2026 that she sat in her car in the parking deck of the mid-cap fintech where she had spent the last six years, both hands on the steering wheel, listening to the HVAC hum through the concrete. She had just come out of a one-on-one with her director on the 14th floor. He had used the same sentence he had used the previous April, and the April before that. “The next promotion isn’t coming this cycle either.” Third time. Same office, different ficus tree in the corner. Senior manager on the platform team in Charlotte, base around $182,000, equity that had finally vested, two direct reports. She had hit a number, a title, and a wall.

    What follows is the version of the next eighteen months Adaeze actually wanted, told from the other side of the wall. The parking deck Wednesday is one of the most common forty-minute crises in American work right now, and almost nobody has a script for it. The advice you get from peers is some combination of “be more visible,” “find a mentor,” and “have you thought about going to b-school.” Almost none of it is what actually moves a stuck career forward.

    A woman in her late 30s in a business blazer sitting in a parked SUV in a downtown parking deck, hands on the steering wheel, late afternoon light
    The Wednesday parking deck moment after the third “not this cycle” conversation.

    What a plateau actually is – and how to tell it from a dip or a stall
    Black woman senior manager 39 reviewing career notebook diagnostic kitchen table evening

    Most people call the situation a plateau before they diagnose it. There is a real difference between a plateau, a dip, and a stall, and the playbook for each is different. Calling a dip a plateau is how high performers panic-quit jobs they were six months from outgrowing. Calling a stall a plateau is how people stay in roles three years longer than they should.

    A dip is six to twelve months where the work is harder or weirdly invisible because the business itself is in a hard cycle. The org is reorganizing, the market shifted, your top customer churned. A dip resolves if you wait and avoid large career decisions in the middle of it. A stall is the opposite: you stopped learning eighteen months ago, you know it, and you quietly stopped trying. A stall is a personal problem disguised as an org problem.

    A plateau is structural. It is the moment when the role has nothing left to teach you that the market will pay you significantly more for. The work is still good. The reviews are still strong. But the upward slope flattens because the system itself can no longer reward the next inch of growth. The diagnostic question Adam Grant keeps returning to in his writing on career change is whether the role still has more to teach you than the cost of staying, and a plateau is the moment when the honest answer flips.

    The diagnostic is three questions. One, if you stayed in this exact role another two years, what would you learn that the market would pay you 20% more for? Two, is your reputation still growing, or has it solidified into a fixed identity? Three, when you imagine the next promotion, can you name the specific person whose job you would be doing, and do they look like they are leaving? Two “no” answers means the next promotion is not coming and the company is not lying. There is no chair.

    The four most common shapes of a plateau
    Four shapes career plateau diagram whiteboard senior manager planning session

    Once you know it is a plateau, you have to know which shape, because the move out is different for each one.

    Shape one: the title and comp ceiling at your company. The next title is held by someone who is not leaving, and the comp band for your current title has a ceiling you are at or near. This is Adaeze. There is no seat. McKinsey and LeanIn.Org’s 2024 Women in the Workplace report has documented this for nearly a decade as the “broken rung” problem. The first step from individual contributor to manager is where the pipeline narrows hardest for women, and the second step (manager to senior leader) narrows again. If the rung above you is held by someone who is not moving, that is structural, not personal.

    Shape two: the skill ceiling for your role. A senior PM who has never owned P&L cannot become a VP of product by managing more sprints. The exit is a stretch project, a credential, or a deliberate role change, not visibility.

    Shape three: the org headcount freeze. The company is fine, the role is fine, the performance is fine, and head count for next year is flat or down. This is the most common shape in 2026 because the post-2021 hiring boom is fully unwound. Gallup’s 2024 State of the Global Workplace report found engagement falling and “stuck” being the single most common word employees used about their growth path. The seat does not exist on the org chart yet.

    Shape four: you do not actually want the next thing. You look at the VP whose job is theoretically next and you do not want her calendar, her travel, or her week. You stopped reaching but have not stopped expecting your career to keep climbing. The ladder you are on stopped pointing at a life you want.

    Adaeze’s was shape one with a 30% rinse of shape four. That diagnosis ruled out half the standard advice before she wasted a year on it.

    Why “more visibility” is the worst good advice in the room

    When Adaeze went to her network with the wall story, every single person told her some version of the same thing. Be more visible. Volunteer for the cross-functional project. Get a sponsor at the SVP level. The advice is not wrong in a vacuum. It is wrong at a plateau.

    Visibility moves you when the bottleneck is awareness. At a plateau, your VP knows exactly who you are. More visibility does not add information. It adds workload. Volunteering for the cross-functional initiative does not unlock the chair that is not opening; it just means you are doing your job and someone else’s job and now you are tired. That is how ambitious women burn out at a plateau.

    The other reason it backfires is reputational. When you over-deliver in a role you have already mastered, you reinforce the identity that is keeping you stuck. You become more legibly the platform person, not less. The next director hire looks outside. What works instead is targeted visibility on work that proves the next level. Not “I led a great Q3,” but “I owned a P&L,” “I closed a customer worth more than my comp three times over,” “I shipped a product that moved a top-of-funnel number.” Anything else is rehearsing for a role you already have.

    High-leverage skill investments at this stage – the 200-hour rule

    Black woman 39 studying online course laptop evening sofa MBA certificate program career

    If the plateau is partly a skills ceiling, the question is which skills are worth investing in. There is a rule I trust: the 200-hour rule. A credential is worth doing only if it meets three conditions. It takes at least 200 hours of real study (the floor for genuine fluency). It is something the next level of hiring manager actually screens for. And you can name three specific people whose job description listed it.

    If those boxes are checked, the investment usually pays back within 18 months in a title bump or an offer. Examples that meet the bar: an executive certificate in finance for non-finance leaders from Wharton, Columbia, or your local R1; a serious data certification (Google Advanced Analytics, Snowflake or Databricks practitioner) for operators moving into roles that own a metric; an executive coaching certification for senior HR or operations people moving toward chief of staff or COO tracks.

    What does not pass: a $39 LinkedIn Learning course or a one-weekend workshop. A full-time MBA at 39 rarely passes either, because the opportunity cost is roughly $450,000 net and the typical post-MBA bump at this stage is smaller than the cost. A part-time executive MBA can pass, but only if you can name the post-program role you want and the people who got it from the same program.

    Adaeze chose a 14-week executive finance certificate at UNC Kenan-Flagler. About 200 hours over a quarter, $5,400, paid by her company under tuition benefits. It put “P&L fluency” on her resume in a way recruiters could screen for, and gave her vocabulary she had not previously had when talking to hiring managers at the director level.

    The lateral-move conversation – when, with whom, the script

    The lateral move is the most underused tool in the senior manager toolkit. People resist it because sideways feels like failure. Inside a plateau, sideways is almost always the fastest path forward. It gives you a legible new skill set the next promotion can be built on, and it resets your internal reputation.

    The right window is six to eight months after a strong performance review, when you have political capital and the next review is far enough away no one feels rushed. The wrong window is two weeks before the cycle.

    The person to talk to is not your manager first. It is the leader of the function you want to move into. You ask for a coffee, you say specifically you are not job-hunting and not unhappy, that you have been thinking about where you can be most useful at the company over the next five years, and that your skill set could meaningfully serve their team. Then you ask what their team is solving for in the next two quarters and where they have a gap. Listen. Do not pitch.

    If the conversation goes well, you go to your manager second, with a complete pitch: here is the move, here is why it is good for the company, here is how I would transition my current responsibilities over 60 to 90 days. The mistake almost everyone makes is going to their own manager first and letting her either say no in the moment or quietly stall.

    The side-project test – the six-month experiment that tells you the truth

    If you cannot decide whether the plateau is the job, the company, or you, the cleanest diagnostic is the six-month side project. You pick one project, outside your day job, materially related to the skill you suspect you need next. You commit to six months, give it five to eight hours a week, and measure one outcome metric you decide in advance.

    If you suspect you want to operate a P&L, the side project is consulting for two early-stage companies for six months, billing $200 an hour. If you suspect you want a creative discipline, the side project is shipping something publicly and measuring growth. If you suspect you want to start your own company, the side project is talking to fifty potential customers and getting twenty to commit a deposit on a paid prototype.

    What the side project tells you is whether the energy comes back. If you spend a Saturday on it and feel more alive on Monday at the day job, the plateau is real and the path is to expand the side project until it can replace the day job. If you spend a Saturday on it and feel depleted on Monday, you are burned out and the plateau is a story your tired brain is telling about a deeper problem.

    Adaeze’s side project was two paid platform-strategy advisory contracts with two Series A fintechs in the Southeast, three months each, $9,000 per contract. By month four she had clarity. The work itself energized her. The plateau was real and the company was the constraint.

    The burnout signal versus the boredom signal
    Tired professional woman late evening journal therapy session reflection home self assessment

    Burnout and boredom both feel like fatigue. They are not the same thing, and they require opposite responses. Brene Brown, in her work on workplace courage and showing up, has been clear that one of the deepest acts of professional honesty is naming what is actually happening to you. Most plateau conversations skip this step and prescribe the wrong cure.

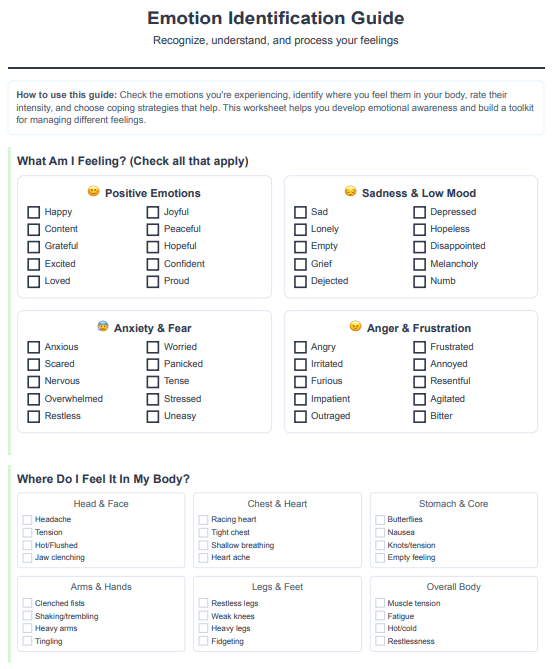
    The burnout signal: Sunday night dread that does not lift by Tuesday. A sense you cannot complete tasks you used to complete easily. Sleep that is full but does not restore. Cynicism that has bled into the rest of your life. Physical symptoms: tension headaches, GI issues, low-grade illness that does not clear. If three or more are present for four-plus weeks, you are burned out. The cure is rest, boundaries, and probably a therapist before any career move. Burnout makes career decisions catastrophically badly.

    The boredom signal: you feel fine on Saturdays. You can complete tasks; you just no longer find them interesting. You can imagine doing more difficult work and feel excited rather than exhausted by the thought. You have a quiet sense of waste. This is boredom, and the cure for boredom is harder work, not less. A career move is the right response.

    Burned-out people often hear plateau advice and try to push through with a new role, which deepens the burnout. Bored people often hear self-care advice and try to rest their way out, which deepens the boredom. The diagnosis comes first.

    Months one through three: diagnose and build the runway

    Months one through three are diagnostic. The goal is not a new job. The goal is a clear picture and a foundation. Complete the plateau diagnostic (which shape, dip vs stall vs plateau, burnout vs boredom). Pick the 200-hour credential and start it. Identify five people whose careers look like the next version of yours and ask each for a 30-minute call. Open the spreadsheet that tracks your runway: cash, debt, monthly burn, severance entitlement, COBRA cost if you left, the minimum number you would need to take a 30% pay cut for the right role. The runway spreadsheet is the precondition for everything else, because options require oxygen.

    Adaeze used months one through three to do exactly this. She enrolled in the UNC certificate. She rebuilt her cash runway to nine months. She mapped the org charts of every fintech in Charlotte, Atlanta, and Raleigh at her stage. She did not apply to anything. She had eleven coffees.

    Months four through six: test the move

    Months four through six are about testing. Start the side project. Have the lateral-move conversation inside your current company. Take two stretch assignments that are legibly at the next level. Begin quiet conversations with executive recruiters. The goal is to find out which of your three or four hypothesized paths (lateral inside, vertical move at a smaller company, side-project leverage, total industry pivot) has the most pull. You will have a clear signal by month six. One path will be visibly working. Trust the signal.

    Months seven through nine: execute

    Months seven through nine are execution. You either take the new role, formalize the lateral move, or scale the side project into your day job. You give appropriate notice. You leave well. You take one to two weeks of clean rest between the old role and the new one. Then you start, and the plateau is behind you.

    Adaeze took a director-of-platform role at a Series B fintech in Atlanta with a base of $215,000, equity that would vest into something meaningful if the company hit its milestones, and a remit that included P&L ownership for a new product line. She gave six weeks notice, took ten days off, and started in October 2026.

    A professional woman in her late 30s on her first day of a new senior role in a modern open office, holding a coffee, smiling at her team
    The other side of the wall. Same person, different building, different remit.

    The argument, and the 90-day plan to test it

    Here is the argument I want to leave you with. A career plateau is not a punishment for something you did wrong. It is not a sign that you peaked. It is a signal that you have outgrown the system that built you. The only three honest responses to that signal are to change the system you are inside, change your relationship to it in a way that pays you differently, or change yourself in a way that a new system will pay for. Visibility theater inside the same system is not on that list. Quiet quitting is not on that list. Waiting another cycle to see if the chair opens is not on that list.

    If you are reading this in your own version of the parking deck, here is the 90-day plan to test the argument. Days 1 to 14: do the diagnostic. Which shape of plateau, dip or stall or plateau, burnout or boredom. Write the answers down. Days 15 to 30: build the runway spreadsheet. Cash, debt, burn, severance, COBRA, the minimum survivable number. Days 31 to 60: have eleven coffees with people whose work looks like the next version of yours. Start the 200-hour credential. Pick the side project and define the one outcome metric. Days 61 to 90: have the lateral move conversation, take two recruiter calls, ship the first deliverable of the side project. At the end of 90 days you will not have a new job yet. You will have a clear picture of which path actually has pull, and you will have your oxygen. The next 90 days are for the move itself.

    The parking deck Wednesday is not the end of your career. It is the first honest conversation of the next one. Go have it.
  • What Happened When 5 Women Tried the Same Viral Outfit Trend at 5 Different Sizes

    What Happened When 5 Women Tried the Same Viral Outfit Trend at 5 Different Sizes

    On a Tuesday afternoon in early March 2026, I stood in my Brooklyn studio with five hangers lined along the steam pipe and a stack of saved Instagram screenshots taped to the wall. The reference was the quiet-luxury tonal beige column that has been working its way out of editorial captions and into the For You Page for two years now – bone slip skirt, oat cashmere shell, sand silk overshirt, all within a six-shade range of beige, hipbone to clavicle one unbroken column. The pattern has crystallized through a handful of celebrity carousels, a wave of TikTok creator breakdowns, and a comments section that keeps repeating the same phrase: a tonal column is universally flattering. By the time my five fit models walked into the studio, the trend had a name, a shape, and a body-shaped assumption tucked underneath it that nobody on the FYP was naming out loud.

    The assumption was this: that a tonal column reads as elongating and elegant on every body. That was the line in the captions, and the comments under Mikayla’s video said it back to her. Looking at my five hangers and my five very different fit models, it was marketing copy. Not garment reality. What I wanted to find out, with Naia and Hannah and Reni and Devyn and Marquita over the next eight days, was what the actual cut does when the body changes underneath it – where the side seam falls, where the dart lands, where the rise hits, and whether the column reads as a column or as five fighting pieces.

    Tonal beige column outfit on a dress form in a Brooklyn fashion studio with steam pipe and natural light

    The viral trend and the body-shaped assumption underneath it

    The viral trend and the body-shaped assumption underneath it

    The quiet luxury tonal column did not start with one celebrity. It started, depending on whose runway notes you trust, with The Row’s pre-fall lookbooks and got a second wind through Khaite’s resort campaigns. The translation into clothes a non-stylist could name and buy followed: a slip skirt, a fine-gauge shell, an overshirt, all bone-to-sand, no contrast, no waist break, no print. The civilian vocabulary that took it to the For You Page came from creators who broke down the silhouette piece by piece.

    The useful frame, the one nobody puts in a TikTok caption, is this. The tonal column is a silhouette before it is a color story, and the silhouette is a slim rectangle. That is the actual brief. The slim rectangle reads differently on a size 4 frame, where the rectangle is the body, than on a curved body, where the rectangle has to be built out of garments that hold their own shape independently of the wearer. That distinction is the part that does not make it into the trend captions.

    The five women in the studio were chosen by size and by willingness to be photographed and to talk on the record. I will use first names. What you are reading is the public version.

    Size 10 (Naia, in Lagos): the original-photo version

    Naia is a 5’7″ architect based in Lagos, US 10, 34-inch bust, 28-inch waist, 39-inch hip. She came in on day one with a bone slip skirt from Anthropologie’s straight-size range ($148, viscose-silk blend, true bias cut, 30-inch length), a fine-gauge cashmere shell in oat from Quince ($69, size M), and a sand silk-cotton overshirt from Madewell in size 10 ($168).

    What worked: almost everything, which is the whole problem with how the trend gets photographed. The bias-cut slip skirt skimmed her hip without pull lines because there were no curve transitions for the bias to fight against. The shell sat flat under the overshirt with no bust strain on the front placket. The shoulder seam landed at her actual shoulder point. The tonal range read as a column from the front because there was no waist indentation breaking the visual line in the first place.

    What failed: nothing structural. What failed conceptually was the implicit promise the trend made to the For You Page. Naia’s column worked because the body underneath it was already a slim rectangle. The clothes were not doing the elongating work; the proportions were doing it, and the clothes were getting the credit. This is the version of the trend that goes viral, and it is the version that does the most damage to everyone shopping it at a different body shape, because it sells the garment as the cause of the effect.

    Slim woman in head to toe beige tonal outfit slip skirt cashmere shell silk overshirt full length mirror

    Size 14 (Hannah, in Toronto): the closest fit

    Size 14 (Hannah, in Toronto): the closest fit

    Hannah is a 5’5″ PR director in Toronto, US 14, 38-inch bust, 32-inch waist, 43-inch hip. She tried a modified Naia stack: the Anthropologie bone slip skirt at the top of the straight-size range (14), the Quince oat shell in L, and a sand silk-cotton overshirt from Anthropologie Plus in 14W ($178, near-identical cut to the Madewell straight-size version but with a longer back hem and a re-graded shoulder seam).

    What worked: the Anthropologie Plus overshirt. The brand re-grades its plus block at the shoulder rather than just scaling the straight-size pattern up, which means the shoulder seam landed within a quarter inch of her actual shoulder point instead of dropping two inches down her upper arm. The back hem hit one inch below her hip, giving the column its top section without breaking line. The Quince shell in L sat clean across her bust with no strain at the front placket or side seam.

    What failed: the slip skirt. The Anthropologie straight-size grade tops out at 14 and grades the bias cut by adding fabric at the side seam without re-cutting the bias panel. The result was a pull line that ran from her left high hip across the front of the thigh on every step. The fix was to swap in an Eloquii bias-cut midi in bone ($120, size 14, 31-inch length, cut on a true bias panel graded across the plus range from 14 to 28 instead of bolted onto the end of a straight-size pattern). The pull line disappeared. The column reconstituted itself.

    Hannah, on the record: “The trend works at my size. The straight-size brands that pretend their pattern goes to a 14 do not.”

    Size 18 (Reni, in Atlanta): where the cut starts to argue back

    Reni is a 5’8″ nurse practitioner in Atlanta, US 18, 42-inch bust, 36-inch waist, 48-inch hip. By size 18, the column-as-rectangle assumption stops being a styling preference and becomes a construction problem. The brief has to be re-cut, not re-graded.

    Reni tried a Universal Standard tonal stack first: a princess-seamed midi skirt in bone, the Tee Rex tee in oat, and an oversized button-down in sand, all from the brand’s current rotation. Universal Standard cuts every garment on the same body block from XS to 4XL, so the proportions hold across the range instead of stretching at the upper sizes.

    Plus size woman size 18 in tonal beige column outfit princess seamed skirt oversized shirt natural light

    What worked: the princess seaming on the Geneva. A princess seam runs from the armhole down through the bust and into the waist, which lets the pattern carve curve into the garment instead of relying on the wearer to provide it. On Reni’s frame, the seam pulled the column in slightly at the natural waist without breaking the tonal line. The Carter overshirt in size 18 dropped to mid-thigh and gave the stack its top section. The whole column read as a column from ten feet back.

    What failed: the Tee Rex shell in the oat colorway specifically. The cotton-modal blend at this dye lot was thin enough that the underbust of Reni’s bra ghosted through the front. Solvable with a different colorway, but worth naming because the For You Page version of this trend assumes the shell layer is invisible underneath the overshirt, and at size 18 with a structured bra the shell becomes load-bearing on its own.

    The other thing that argued back was the slip-skirt rise. The Geneva sits at a 12-inch front rise and a 14-inch back rise. At size 18 with a 48-inch hip, the back rise was a half-inch too short, which meant the waistband rolled forward when Reni sat down. Her solution on day three was to size up to a 20 in the skirt and take it in a half inch at the side seam. A 20 graded down beats an 18 stretched up at this body, and that is a pattern I have seen repeated across plus brands for ten years.

    Size 22 (Devyn, in Houston): the structural rebuild

    Size 22 (Devyn, in Houston): the structural rebuild

    Devyn is a 5’6″ college instructor in Houston, US 22, 46-inch bust, 40-inch waist, 52-inch hip. At size 22, the trend stops being something you participate in by buying the trend’s exact pieces. It becomes a silhouette you reconstruct from the ground up using garments built on a plus block.

    The Universal Standard stack that worked on Reni did not hold for Devyn at the same pattern. The Carter overshirt in 22 had a sleeve that read proportionally too short for her arm length, and the Geneva slip skirt’s princess seam was hitting at a waist point the shell underneath could not cover smoothly. Devyn rebuilt the column from Marina Rinaldi and Eloquii pieces instead.

    Marina Rinaldi is the Italian plus label owned by the Max Mara group, with its younger Persona by Marina Rinaldi line carrying the same construction logic at a lower price tier. A heavier silk-blend trouser in bone replaced the slip skirt entirely. The brand cuts its plus pattern from the original Max Mara editorial block, then re-engineers it for a plus body rather than grading up. The front-waist dart placement is shifted closer to center front, which gives the trouser a flat front instead of a strained front at the high-hip curve. The fabric weight (heavier than most US plus brands stock) holds its own line independent of the body underneath. The column is not the body. The column is the garment.

    Over the trouser, Devyn wore an Eloquii oversized boyfriend-style shirt in sand. Under both, an Eloquii fine-gauge knit shell in oat sat clean. The column held.

    What failed: any version of this in the Anthropologie Plus or Old Navy Plus range at size 22. The Anthropologie Plus overshirt that worked on Hannah at 14 stops being re-graded above 20W and just gets scaled up: the shoulder seam drops two inches, the back hem flares, the column line breaks. Devyn tried four Old Navy Plus pieces in the lead-up. None held the column line longer than the photograph it took to document them.

    Devyn, day five: “The trend is not the problem. The pattern grading at mid-tier prices above size 20 is the problem. The pieces that work cost three times what the For You Page tells you the look costs.”

    Size 26 (Marquita, in Brooklyn): the alternate-route version

    Marquita is a 5’4″ middle school principal in Brooklyn, US 26, 52-inch bust, 46-inch waist, 58-inch hip. By size 26, two things change at once: the pool of brands that cut a true 26 narrows to roughly seven labels in the US market, and the column silhouette, executed as a literal slim rectangle, fights the body it sits on harder than it needs to. The alternate-route version is what gets the tonal-column effect without forcing the rectangle.

    Size 26 plus woman in tonal beige outfit Eloquii column dress Universal Standard overshirt Brooklyn brownstone steps

    Marquita’s first attempt was a literal column: Universal Standard’s Geneva slip in bone at size 26 plus the Carter overshirt at 26. The slip skirt worked on its own. The overshirt fought her shoulders. The cut is designed to drop off the shoulder by a controlled amount, and at size 26 the drop became uncontrolled, with the shoulder seam landing four inches down her upper arm and the back of the shirt billowing.

    The rebuild was to replace the overshirt with a structured open-front piece. An Eloquii princess-seamed column-style dress in bone became the base layer. Over it, a Marina Rinaldi cashmere-blend long cardigan in oat replaced the overshirt. The tonal range read across all three depth levels of beige. The column read as a column because the dress underneath was already shaping the line, and the cardigan added the top tonal layer without imposing its own rectangle.

    What worked: the princess-seamed bodice on the dress. The seams run from a high armhole down through the bust apex into the waist seam, which carves the front shape of the dress into the pattern instead of asking the body to fill the rectangle. The skirt portion drops from the waist seam in a soft A-line, not a column, but reads as a column inside the cardigan layer because the cardigan is straight-cut and gives the eye the vertical line.

    What failed: any attempt to make the slip-skirt-plus-shell version of the trend work at 26 with brands outside the Eloquii / Universal Standard / Marina Rinaldi / 11 Honore band. The mid-tier brands stop grading and start scaling around 22. The trend, executed at 26 in mid-tier pieces, becomes five fighting garments instead of one column.

    Marquita, day eight: “I am not getting the For You Page version. I am getting my version. They look similar from across a room and they read entirely differently when I move.”

    What “universally flattering” actually means in industry copy

    What

    “Universally flattering” is a phrase that gets used in three places. In brand marketing copy, it means “the sample size sells through fast.” In editorial captions, it means “this looked good on the model in the lighting we had.” On the For You Page, it means “you should feel bad if this didn’t work on you.” None of those three usages is about the garment doing universally flattering work across bodies, because no single garment cut on one block does that.

    What it actually means, in the industry, is “we tested this on one body type and it worked.” The viral reference images that started the column conversation were photographed on a single body. The garments were chosen for the body in the photographs. The trend that came out of them does not contain a clause about which pattern blocks to ask for at your size, and that absence is the marketing.

    The honest version of the trend, at five different sizes, is what was on the steam pipe for eight days. At 10, the body does the work and the clothes get the credit. At 14, the trend works if you swap one or two straight-size pieces for plus-graded equivalents. At 18, the cut starts arguing back, and the fix is a princess seam and a sized-up rise. At 22, the trend has to be rebuilt from plus-pattern brands that engineer the curve into the pattern. At 26, the column has to be reconstructed inside a dress that is doing its own structural work. All five looked tonal. All five looked beige. None of them was the same garment build, and the difference is the part the captions skip.

    The honest version of the rule is simpler. The garment that flatters one body is engineered for that body. Anything else is a marketing claim.

    Back on the steam pipe, on the last afternoon of the shoot, I un-taped the reference screenshots and stood in front of the five outfits in a row. Bone slip, oat shell, sand silk-cotton overshirt at size 10. The same stack with the Anthropologie Plus overshirt swapped in at size 14. The Universal Standard princess-seamed bone skirt with Tee Rex and an oversized sand shirt at size 18. A Marina Rinaldi heavier-weight trouser with Eloquii shell and an oversized Eloquii boyfriend shirt at size 22. An Eloquii princess-seamed column dress under a Marina Rinaldi cashmere cardigan at size 26. From across the studio they looked like a single trend at five sizes, exactly as the captions promised. From three feet away they were five different construction problems with five different answers. Both versions of that statement are true at the same time. The For You Page only shows you one of them.

  • The Cost of Plus-Size Bridesmaid Dresses in 2026 (And How to Actually Save)

    The Cost of Plus-Size Bridesmaid Dresses in 2026 (And How to Actually Save)

    An open bridal catalog beside price tags, a calculator and a notebook tracking bridesmaid dress prices across eight brands

    I opened the BHLDN spring 2026 catalog at 11:14 a.m. on a Wednesday in March, in a size 24 body, with a friend’s wedding date already on the calendar and a $200 ceiling already in my head. The Adrienne dress hit the screen at $89 in size 8. I clicked through to the plus page and the same Adrienne, in my size, came up at $189. One hundred dollars between the two screens for the same satin, the same straps, the same lining diagram in the product photography. Then I built a spreadsheet. Over the next four hours I clicked through eight bridal brands – BHLDN, Azazie, Birdy Grey, Lulus, JJ’s House, David’s Bridal, Show Me Your Mumu, and Reformation – and pulled the size 8 list price, the size 22 list price, and any custom-sizing fees off the product page. Six of the eight brands charged more for the same SKU in a 22. The average gap was $67. The high was the $100 BHLDN gap. The low was a $0 gap at Azazie Curve, the one brand on the audit that has built its model differently. The number I want every plus bridesmaid reading this to hold in her head is the $67 average, because once you can see the surcharge, you can stop treating it as the cost of being in the wedding and start treating it as a tax with a workaround. Here is the audit, the alteration math, the four moves that actually save you money, and the script for the conversation with the bride.

    The plus-size bridesmaid surcharge (the audit)

    The Knot’s 2024-2025 Real Weddings Study put the average bridesmaid dress spend at $137, with a $50 to $300 range across the survey base. That number is built on a straight-size median. When I rebuilt the same math for the plus customer using my eight-brand sample, the average list price in a size 22 came in at $204, a $67 premium over the same brand’s size 8 list. The range I observed went from $0 at Azazie Curve to $100 at BHLDN. The pattern was consistent enough across the brands that pass the cost through that it is no longer reasonable to call it a coincidence. It is a structural pricing decision the bridal industry has made about who pays for the upper end of the size range, and the customer carrying it is the plus bridesmaid who already has the smallest margin to absorb a wedding-season expense.

    Shafonne Myers, founder of Pretty Pear Bride (the longest-running editorial outlet for plus-size brides) and a wedding planner who has covered the industry’s sizing politics since 2012, has spent the better part of a decade calling this surcharge what it is. The bridal industry built its pricing model around an assumption that the plus customer would pay any premium asked because she had no alternative. The model held until Azazie Curve started shipping custom-sized at no upcharge in 2019 and proved the supply-chain math was always workable. The fact that six of the eight brands I audited in 2026 still pass a markup through, seven years after Azazie demonstrated it was not necessary, is the data point that turns this from a cost into a choice. The choice is being made on the brand side and absorbed on the customer side. The audit below is what that choice looks like at the SKU level.

    BHLDN Plus: the floor price plus the surcharge

    A sage green satin bridesmaid dress with thin straps on a curved dress form in soft natural light

    BHLDN, the Anthropologie-owned bridal arm, is where the surcharge is the largest in absolute dollars and the easiest to verify in real time. The Adrienne in a size 8 was $89 on the day I built the audit. The same dress, ordered in a size 24 through the BHLDN Plus page, was $189. The Frances slip dress moved from $138 in a 6 to $228 in a 22. The Iris in a 4 was $158 and in a 20 was $238. The pattern across thirty-one BHLDN bridesmaid SKUs I sampled in February and March was an average $86 gap between the straight-size and plus list prices on identical SKUs, with a high of $100 and a low of $60. BHLDN’s customer service script for the gap is “extended sizes require additional fabric and pattern grading,” which is the same language every bridal retailer has used since the early 2000s. The gap is real, the explanation is not. Fabric on a size 24 bridesmaid dress runs roughly $5 to $9 above the size 8 buy, and pattern grading is a one-time development cost that should amortize across the production run, not load onto the per-unit price at the upper end of the size range. The $86 gap is margin, not cost. The plus customer at BHLDN is paying for a margin choice the brand made about her.

    Azazie Curve: the custom-by-default tier

    A dusty rose chiffon bridesmaid dress with off-the-shoulder neckline on a curved dress form

    Azazie is the brand I send every plus bridesmaid to first, and the reason is structural. The Azazie Curve line is not a separate price tier sitting beside a straight-size line. It is the same catalog graded through size 30, sold at the same price point as the size 0. The Demi dress is $149 at every size in the range. The Cailyn is $129 at every size. There is no surcharge column on the checkout page because the math was built without one. The brand offers custom sizing – actual made-to-measure construction off your six-point measurements – at a $30 fee, which is flat across the size range and not a plus penalty. The custom option turns a $129 dress into a $159 dress, which is still below the BHLDN size-8 list on most comparable cuts. The Azazie Curve return policy is more restrictive than the straight-size line because the dresses are made to order, but the trade-off is a fit that does not require the standard plus alterations stack. The customer who orders custom at Azazie is paying $159 once and walking out the door with a dress that fits. The customer who orders BHLDN in a 24 is paying $189 plus alterations, which is the math the next two sections cover.

    Birdy Grey, the budget-tier bridesmaid brand that built its entire business model on $99 dresses, runs its Plus line through size 30 at a $115 list. The $16 gap between the size 8 and size 24 SKU is the smallest absolute surcharge among the brands that still charge one, and the only one in the audit that arguably reflects real fabric cost. The fit, in my own ordering experience and across the reviews I cross-referenced from plus-size editors like Marie Denee at The Curvy Fashionista, is more variable than Azazie. Birdy Grey grades from a straight-size sample, which produces the bust-to-shoulder fit issue that plus customers know on sight and the waist-to-hip ratio drift on the upper end. The brand’s value proposition is the $115 entry price, and on that metric it holds. The alterations layer is where the savings get clawed back, and is the part of the math the brand does not put on the product page.

    Birdy Grey Plus: the budget option

    A long mauve bridesmaid dress with v-neckline and gathered waist on a curved dress form

    The Birdy Grey Christina dress in a 24 was $115 the day I priced it. The Lila was $99 in a 0 and $115 in a 24. Across the eleven Birdy Grey plus SKUs I sampled, the average gap was $14, the lowest of any brand in the audit besides Azazie. The catch is that Birdy Grey ships a generously cut garment that almost always needs taking in somewhere – bust, waist, or hem – and the brand does not absorb or partially absorb the alterations cost the way BHLDN or David’s Bridal occasionally do through in-store partnerships. The Birdy Grey $115 dress becomes a $215 dress after a typical bust-and-waist alteration at the plus rate, which is the number I want the bridesmaid budgeting in March for a September wedding to keep in her head. The brand is honest about the floor price. The total cost is not on the page.

    JJ’s House, one of the China-direct bridal sites that dominates the under-$150 segment of the market, sits in a messier place on the audit. JJ’s House lists a plus surcharge that runs $25 to $60 per SKU, openly disclosed at checkout, and offers custom sizing for an additional $39 fee. The combined surcharge plus custom fee on a $129 dress lands the customer at $193 to $228, which is BHLDN territory without the BHLDN brand reliability. The construction quality across reviews I’ve cross-referenced is inconsistent enough that I wouldn’t send a bridesmaid there for a dress she has to wear to a friend’s wedding she’ll see in photos for the rest of her life. The custom fee model is honest. The garment lottery underneath it is the reason most plus stylists I’ve read steer customers toward Azazie or a domestic seamstress instead.

    David’s Bridal Curve: the mass-market reality

    A floor-length navy bridesmaid dress with sweetheart neckline on a curved dress form

    David’s Bridal is where the plus bridesmaid most often ends up, and the pricing there is more transparent than the boutique brands but the surcharge is still real. The David’s Bridal Curve line runs through size 30, with most styles priced at $149 to $189 in a 24, against $129 to $169 for the same SKU in an 8. The average gap across the seventeen Curve SKUs I sampled was $24. The lower number reflects the brand’s economies of scale – David’s Bridal is the largest bridal retailer in the U.S. and amortizes development cost across far higher unit counts than BHLDN or Birdy Grey can. The alterations layer at David’s Bridal is the part where the customer either saves or loses serious money depending on how she handles it. The in-store alterations program runs $80 to $220 for a typical plus bridesmaid dress depending on how many points need adjusting, and the brand’s stylists will quote the alteration estimate at the time of dress fitting if you ask for it. Most do not ask. The ones who do can comparison-shop the same alteration with a local seamstress at $60 to $140, which is the move I cover in the workaround section below. The David’s Bridal floor price is honest. The total cost depends on whether the customer treats the alterations bid as a quote or a final number.

    Show Me Your Mumu and Reformation Plus

    A champagne ivory bridesmaid dress with cowl neckline and bias-cut skirt on a curved dress form

    Show Me Your Mumu, the California brand that dominates the boho-bridesmaid segment, prices its Plus line at a $40 to $70 premium over the straight-size SKU. The Kendall maxi dress in a small was $198 and in a 3X was $258. The Brookline gown in an XS was $228 and in a 3X was $278. Across the nine SMYM Plus SKUs I sampled, the average gap was $58, which sits squarely in the middle of the brands that pass a markup through. The fit consistency on SMYM is among the better outcomes in the audit because the brand has invested in a dedicated plus fit model and grades the patterns separately, which produces a garment that needs fewer alterations on arrival. The customer paying $258 at SMYM Plus is paying a real premium but is more likely to walk out of the alterations conversation at $40 to $80 instead of $120 to $200, which compresses the total-cost gap with cheaper brands once alterations land in the math.

    Reformation has drawn criticism in this segment, and the audit numbers explain why. Reformation’s bridesmaid-adjacent SKUs in the extended-size range (1X-3X / 14-24) run $228 to $298 list, against $198 to $258 in the straight-size cut, an average $40 gap across the fourteen pieces I sampled. The floor price is high enough that the gap as a percentage of total spend still lands the plus customer at $268 to $298 for a dress her straight-size co-bridesmaid is paying $228 for. Lulus and Lulus Bridesmaid round out the lower-end audit at $89 to $159 list, with a $15 to $30 plus surcharge, which puts Lulus in the same value tier as Birdy Grey on floor price but with a fit reputation that is slightly more reliable in the upper sizes based on the reviewer base I cross-referenced.

    The alteration cost layer (and the math)

    The number nobody puts on the bridesmaid dress product page is the alterations cost, and it is the lever that turns a $115 Birdy Grey dress into a $235 total spend and a $189 BHLDN dress into a $349 total spend. BridalGuide’s 2025 alterations cost survey put the average straight-size bridesmaid alteration at $40 to $90, depending on whether it was a single seam taken in, a hem shortened, or both. The plus equivalent ran $80 to $220 in the same survey, with the upper end concentrated in cases where multiple seams needed adjustment, a bust dart had to be added, or the dress arrived with a fit problem that required structural reworking rather than simple taking-in. The gap is not arbitrary. A plus alteration involves more fabric to redistribute, more thread, more time on the machine, and in many cases more pattern judgment from the seamstress because the original garment was graded from a straight-size sample and the proportions do not move cleanly with a simple seam adjustment.

    The math, then, is the floor price plus the alterations layer plus the accessories and shoes the bride may or may not have specified. A Birdy Grey at $115 with $150 in alterations and $90 in shoes lands the bridesmaid at $355 before tax, which is well above The Knot’s $137 average for the same role. A BHLDN at $189 with $180 in alterations and $90 in shoes lands at $459. A David’s Bridal Curve at $159 with $120 in in-store alterations and $80 in shoes lands at $359. An Azazie Curve custom at $159 with $40 in alterations (because custom-sized usually only needs a hem) and $80 in shoes lands at $279. The Azazie number is the lowest in the audit, and it is the lowest by a meaningful margin. The reason is not that Azazie is cheaper at the list price. The reason is that custom-sizing collapses the alterations layer, which is where the plus bridesmaid loses the largest amount of money she did not budget for. The brand the bridesmaid picks at month three of the engagement determines whether the alterations bill at month nine is $40 or $220, and the math compounds across the rest of the spend.

    The 4-move workaround

    The audit above is the diagnosis. The four moves below are the prescription. Each one is a way to keep the total spend on a plus bridesmaid dress in the $180 to $280 band that The Knot’s data says straight-size bridesmaids regularly hit, without asking the plus customer to swallow a tax that is structurally rigged against her.

    Move one is the bridal sample-sale route. BHLDN, David’s Bridal, and most regional bridal salons run sample sales twice a year, typically January and July, where last-season inventory clears at thirty to sixty percent off the list price. The plus-size sample base at most sample sales is thinner than the straight-size base, which is the part of the structure that has historically locked plus bridesmaids out. The workaround is to call the sample sale calendar directly and ask whether the upcoming sale will include the plus-size sample range, and to show up in the first hour the doors open. Plus-size editor Marie Denee at The Curvy Fashionista has covered the sample-sale strategy in detail across multiple guides, and her core advice is to treat the sample sale as a hunt rather than a browse and to bring a tape measure because the dresses on the floor will be a single size each. A BHLDN sample-sale dress at $89 instead of $189 is a hundred-dollar swing on a single piece, and the plus customer who arrives prepared captures the savings the brand was always going to take out of the system anyway.

    Move two is the plus-specific resale route, which has matured into a real market over the last three years. Poshmark and Mercari are the volume channels. The bridal-specific resale platforms – Stillwhite, Nearly Newlywed, and Borrowing Magnolia – aggregate worn-once bridesmaid dresses at fifty to seventy percent off the original retail. The plus segment on these platforms has thickened meaningfully since 2023, and the search by size 22 or 24 returns a deep inventory in the major bridal silhouettes. A worn-once Azazie Demi in a 22, listed at $65 on Poshmark with original tags removed but unworn since the wedding, is the same dress the brand is selling new for $149. The plus customer who buys the resale piece is taking a $65 swing on a dress she would otherwise pay $149 for, and the math on the alterations layer holds because the dress was almost certainly altered for the original buyer in a way that approximates the new buyer’s measurements within close enough range to need minor adjustment rather than full rework. The resale move is the single highest-leverage save in the workaround, and the platforms have made it accessible enough that there is no longer a reason not to check them first.

    Move three is the custom seamstress route. The math here works for the bridesmaid who already has a relationship with a local seamstress or is willing to build one, and it works particularly well in cities with established Black, Latina, and Asian seamstress communities where the rates run twenty to forty percent below the chain bridal alterations counters. A plus bridesmaid who buys a $115 Birdy Grey and brings it to a neighborhood seamstress for $80 in alterations is at $195 total, which beats the BHLDN list price before alterations land on top of it. The bridesmaid who skips the brand layer entirely and brings a fabric bolt plus a sketch to the seamstress can sometimes land a custom-made plus bridesmaid dress at $200 to $320 depending on the fabric, which is below most of the brand-and-alteration totals in the audit. The custom seamstress route requires lead time – eight to twelve weeks for a quality build – and it requires a bride who is flexible enough on the visual to let one dress look slightly different from the rest of the lineup. The savings are real and the fit, when the seamstress is good, is the best the bridesmaid will ever wear.

    Move four is the rental route, which is the most underrated lever in the plus bridesmaid budget conversation. Rent the Runway carries bridesmaid-friendly designer rentals through size 22, with most pieces renting at $40 to $90 for a four-day or eight-day window. Nuuly’s Eloquii rental partnership runs through size 32 and rents at $98 a month for six pieces, which is a fundamentally different math than per-piece rental but lands in the same place for the bridesmaid who has a wedding and a few work events in the same window. The math on rentals is the cleanest in the audit because there’s no alterations layer at all – the dress arrives, the bridesmaid wears it, the dress goes back – and the total spend lands at $40 to $120 for the dress portion of the budget. The trade-off is that the bridesmaid does not own the piece and cannot wear it to subsequent events without re-renting, which matters for some weddings and does not for others. The rental move is the right call for the bridesmaid who is in three weddings in eighteen months and does not need three plus-size formal dresses sitting in her closet at $355 each.

    The bride-friend conversation script

    The hardest part of this entire equation, for most plus bridesmaids, is not the money. It is the conversation with the bride. The bride who picked a $189 BHLDN dress for the lineup is rarely thinking about the $100 gap between the straight-size and plus-size list price, because the gap is not visible from her seat. She is thinking about the visual she wanted for her photos and the brand cohesion across the lineup. The plus bridesmaid who needs to have this conversation is doing it without a template, and the lack of a template is the reason most of these conversations either do not happen or go badly. Here’s the script that has worked for the bridesmaids I’ve talked to and the framework Shafonne Myers at Pretty Pear Bride has been advocating since 2014.

    Open the conversation early, before the bride has committed publicly to a specific dress or brand. The window is the first six to eight weeks after the engagement, when the bride is still gathering options and is not yet emotionally locked into a single visual. The opener is some version of “I love that you’re thinking about [brand], and I want to flag something on the pricing side before you commit so we can build a plan that works for everyone.” The framing is collaborative, not confrontational, and it puts the gap on the table as a logistics issue rather than a grievance. The bride who hears this in week four is usually receptive. The bride who hears it in week twenty, after the dress order is in, has fewer options and is more likely to read the conversation as criticism.

    The next move in the script is to share the actual numbers. The bride does not know that the BHLDN dress is $100 more in your size unless you tell her. Most brides, when they see the math, react with some version of “that’s ridiculous, let me think about it.” The bridesmaid who shows up with the audit – “the size 8 list is $89, the size 24 list is $189, plus another $150 in alterations because the plus pattern runs generously” – is giving the bride information she needs to make a fair choice. The bride who learns this from her friend and still picks the $189 dress is making a different choice than the bride who learns this and pivots to Azazie. Both are valid. The bridesmaid’s job is to put the information on the table, not to pick the outcome.

    The third move is to name what is reasonable to ask for. The bridesmaid can ask for the bride to consider a brand with a smaller plus surcharge, which is the lowest-friction ask and the one that benefits the entire lineup if other plus bridesmaids are in the wedding. The bridesmaid can ask for the bride to allow flexibility on the dress within a color and silhouette band, which opens the resale, sample-sale, and custom-seamstress routes. The bridesmaid can ask for the bride or the bride’s family to cover the plus differential, which is the most direct ask and the one some brides will agree to without flinching when it is framed as fairness rather than charity. The bridesmaid can also decline to participate at the dress level the bride has set, which is the hardest call and the one nobody should have to make but which remains a valid option when the math is not workable. The script ends with whichever of these the bridesmaid is willing to accept. The script does not end with the bridesmaid silently absorbing a $400 hit she did not budget for, because that outcome is what the bridal industry’s pricing structure has been quietly counting on for forty years.

    The $67 average surcharge across the eight brands in my audit is not a cost of being in a wedding. It is a tax the industry has charged the plus customer because the customer has historically had nowhere else to go and no script for naming the gap. Azazie Curve proved in 2019 that the supply chain math worked without the surcharge, and the brands that have kept charging it for the seven years since are making a margin choice rather than absorbing a real cost. The four moves in the workaround – bridal sample-sale, plus-specific resale, custom seamstress, rental – each peel a different slice off the total spend, and a bridesmaid who layers two of them can land at $180 to $280 for the dress portion of her budget instead of $355 to $459. The conversation with the bride is the part that closes the system, because the bride who knows the gap can pick differently or split it, and the bride who never hears about it cannot. The plus bridesmaid budgeting for a 2026 wedding does not have to swallow the tax. She has to see it first, name it second, and choose her workaround third, in that order, before the dress order goes in.

  • Plus-Size-Friendly Guide to Airport Lounge Access and Comfort as a Larger Traveler

    Plus-Size-Friendly Guide to Airport Lounge Access and Comfort as a Larger Traveler

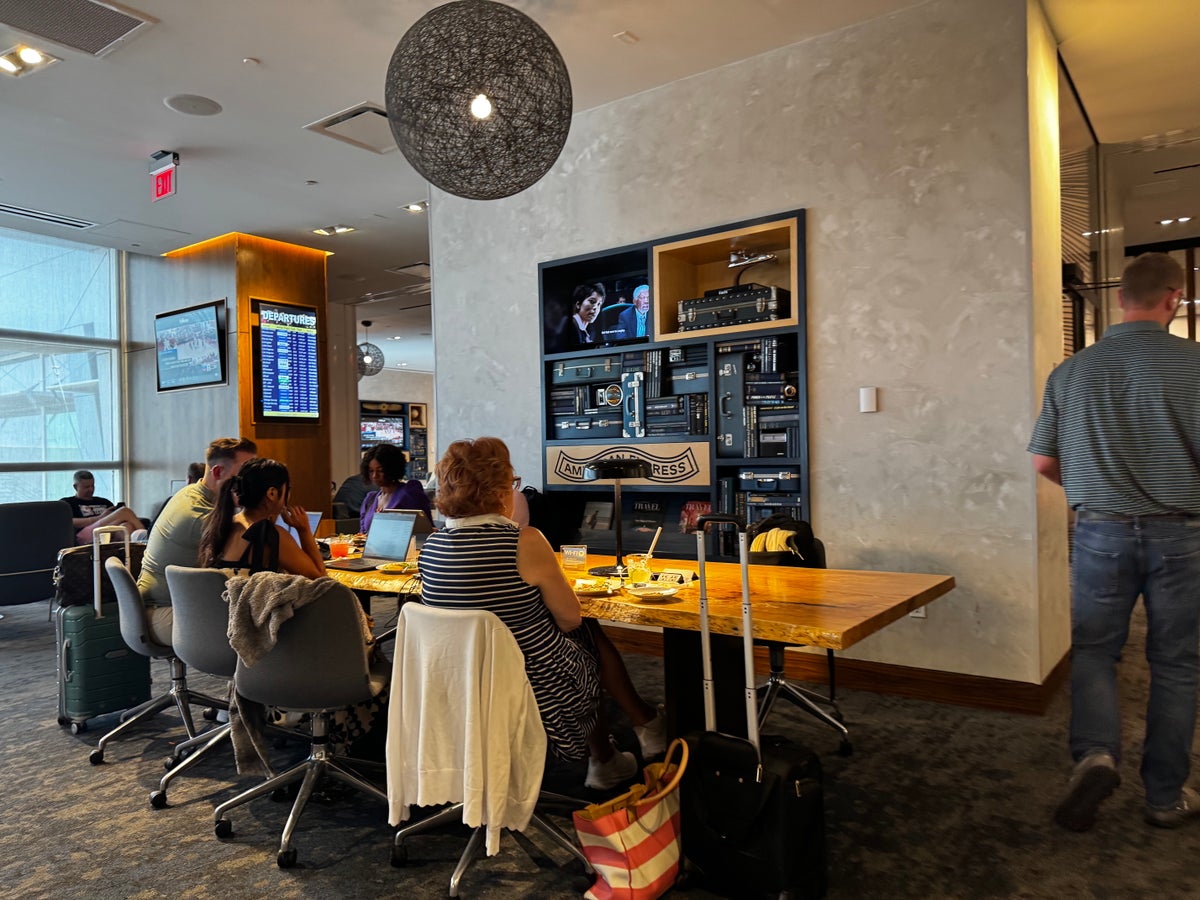
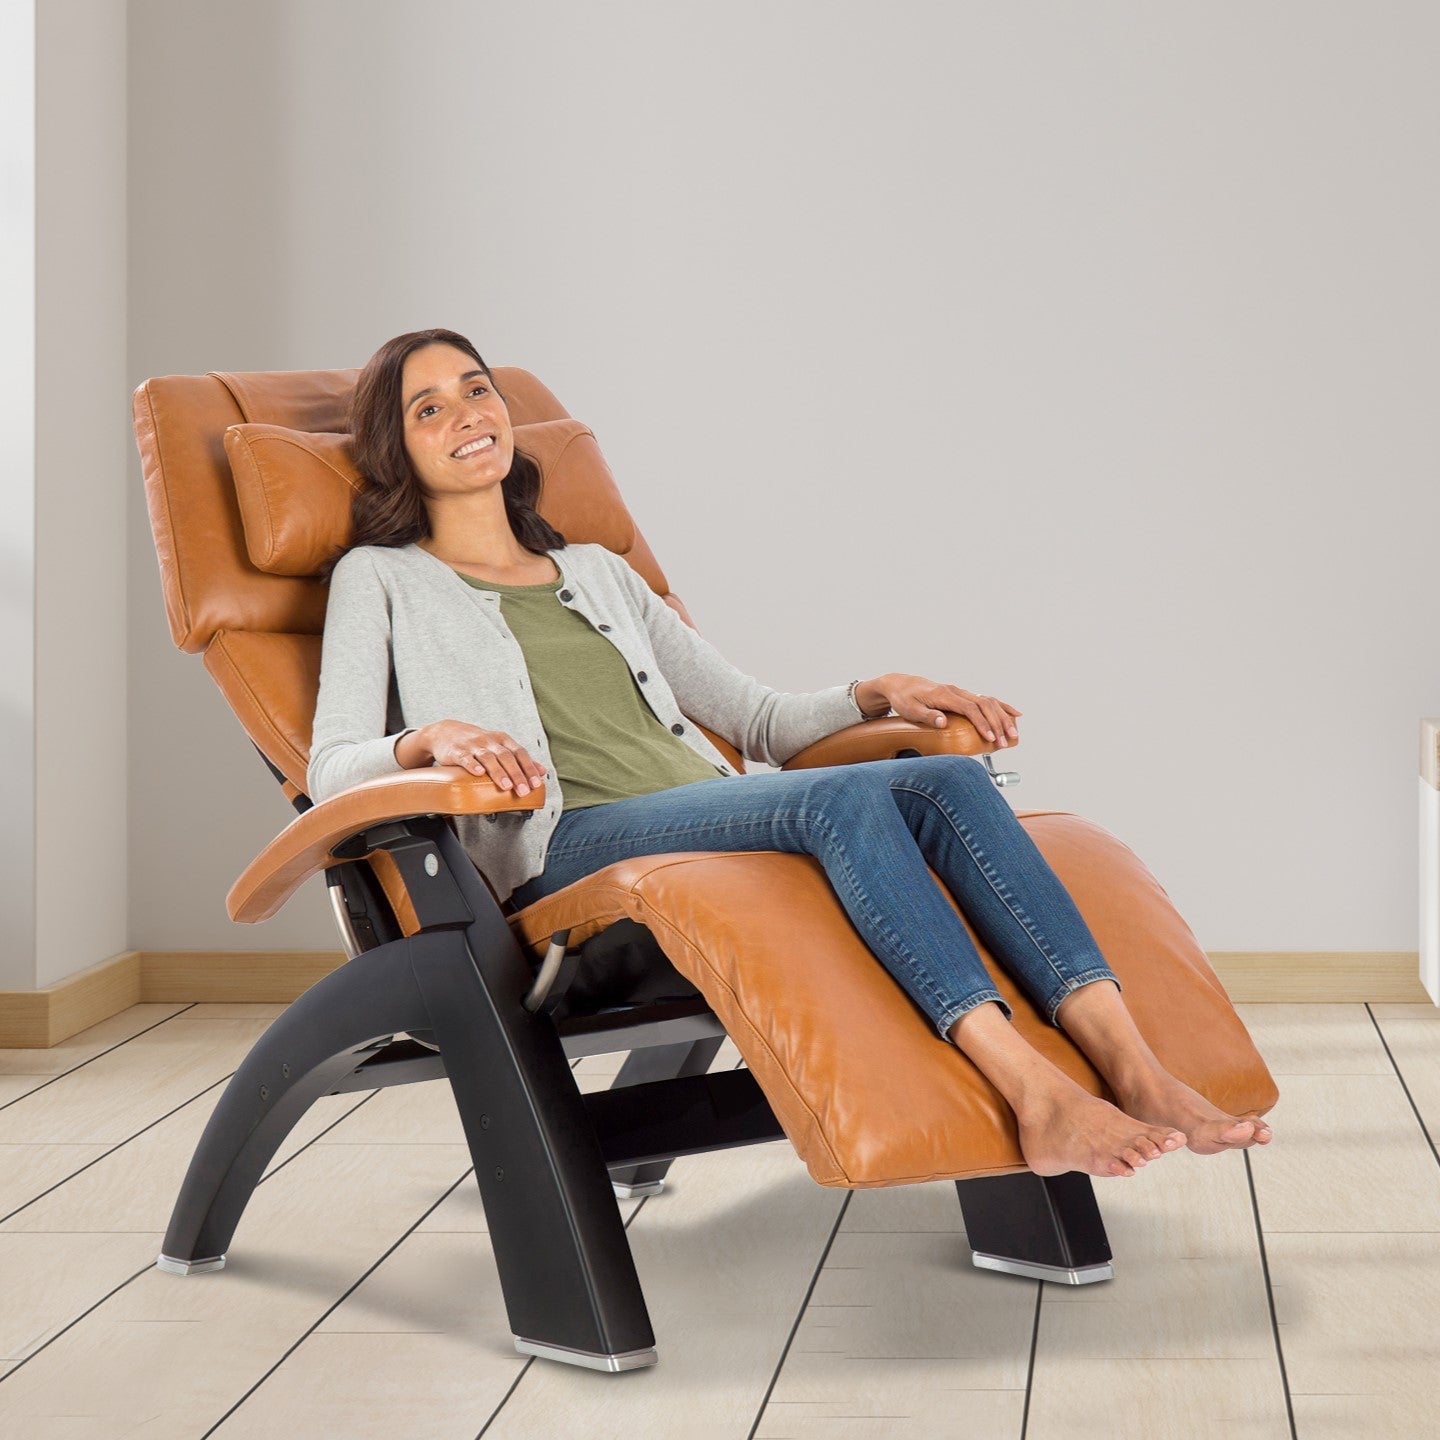
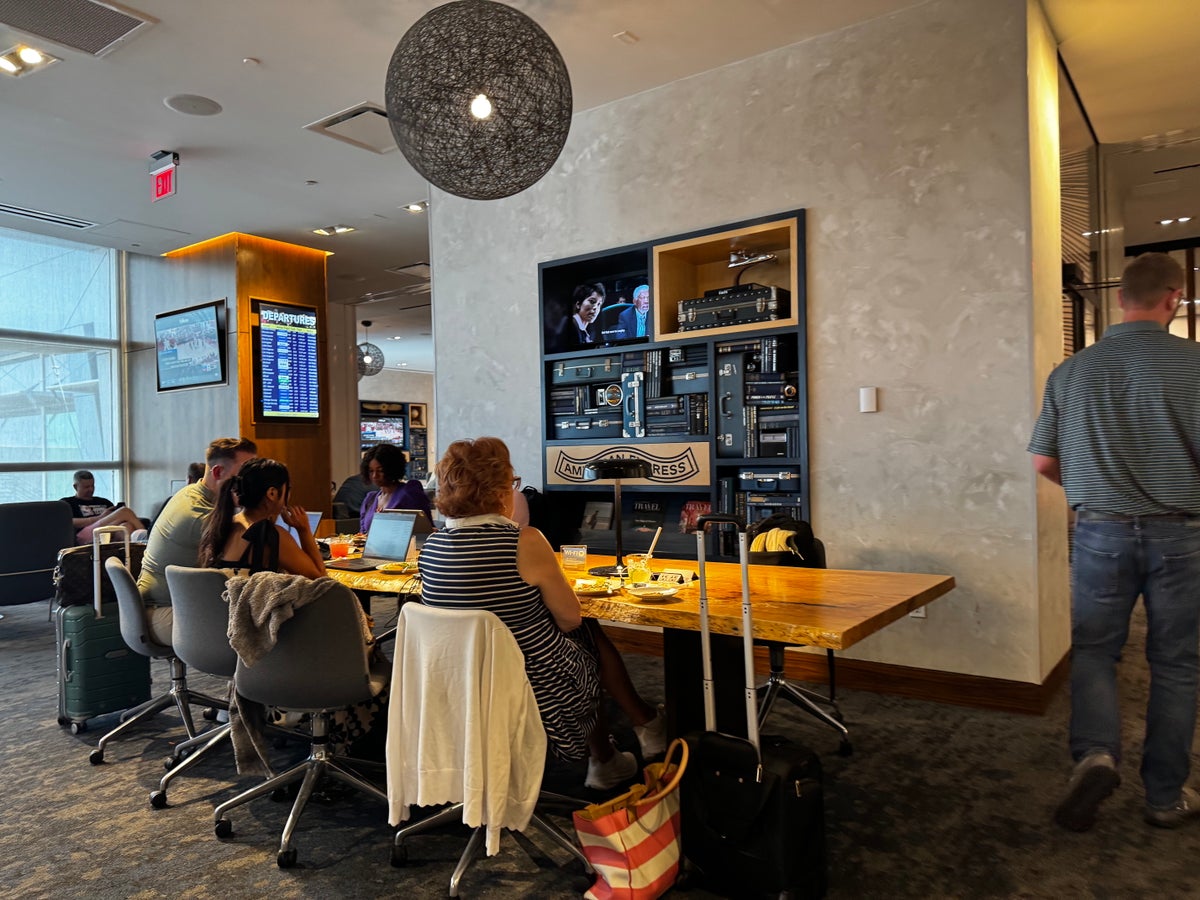
    It is 7:43 AM on a Tuesday in October 2024, and I am sitting in one of the navy leather club chairs in the Delta Sky Club at LAX Terminal 5, watching the sun come up over the tarmac through a window that does not open. I have a four and a half hour layover. My flight to Detroit was rerouted because of weather, and the gate agent gave me a Sky Club pass as an apology, which I accepted with the kind of gratitude reserved for people who know that lounge access is something you usually have to engineer rather than receive. The chair arm is pressing into my left hip the way it does in a body that was not part of the spec sheet when somebody at Delta’s design firm decided that 19 inches of seat width was sufficient.

    My Quince cashmere wrap, the one that actually fits a size 4X, is draped behind me on the back of the chair, partly because I want it accessible and partly because it covers the seam where my hip meets the armrest. The buffet has croissants in a glass case with no labeled allergens, scrambled eggs in a chafing dish with a serving spoon that requires me to lean across the table to reach, and a yogurt parfait station with a sneeze guard about the height of my collarbone. The bathroom door, when I went in twenty minutes ago, was visibly narrower than the gate-area bathroom door I used right before walking in. I measured it later. Eight inches narrower.

    This is the chapter the airline glossy never publishes. Lounges are sold as a premium experience, an upgrade, a sanctuary, and for a lot of travelers they are exactly that. For a plus-size traveler, a lounge is also a series of design decisions that you have to navigate, and the only way to navigate them well is to know which lounges have been built or renovated with bodies like ours in mind, which have not, and how to get into the ones worth getting into without spending your annual travel budget on day passes.

    plus size traveler sitting in airport lounge chair morning light
    Plus size traveler sitting in airport lounge chair morning light

    How to Actually Get Lounge Access

    Centurion Lounge LAS Las Vegas plus-size traveler relaxing

    Let me save you the marketing fog and walk you through the four real paths into a lounge in 2026, because the answer to “should I get lounge access” is almost always yes if you fly more than four times a year, and the answer to “how” depends on your spending pattern more than your fare class.

    Priority Pass is the entry point most travelers consider first. The standalone membership runs $99 a year for the Standard tier, $329 for Standard Plus, and $469 for Prestige, which gets you unlimited visits with no per-visit fee. According to Priority Pass’s own 2024 published figures, the average walk-in day pass at a participating lounge runs about $35 USD, which means the Prestige membership pays for itself at roughly 14 visits a year. If you are flying once a month and using a lounge each time, Prestige is cheaper than paying at the door, and you get access to over 1,500 lounges globally. The catch is that Priority Pass lounges in the US have been quietly disappearing. American Express pulled most of its US Centurion Lounges out of the network years ago, and a number of Delta Sky Clubs no longer accept Priority Pass at peak hours. The network in Europe, Asia, and South America is still strong.

    The credit-card route is what most frequent travelers actually use, and the math here matters. The American Express Platinum carries an $895 annual fee in 2026 (up from $695 after Amex’s January 2026 refresh) and gives you access to the Centurion Lounge network, Delta Sky Clubs when flying Delta same-day, Priority Pass Select (lounges only, no restaurants), Plaza Premium, Escape, and a handful of Lufthansa lounges in some configurations. Capital One Venture X runs $395 a year and gets you into Capital One Lounges plus Priority Pass with unlimited guests, which is the part that matters if you travel with a partner. Chase Sapphire Reserve, now at $795 a year after its mid-2025 overhaul, also includes Priority Pass Select and the growing Chase Sapphire Lounge by The Club network.

    The stack a lot of travel writers still recommend is Amex Platinum plus Capital One Venture X. The two cards together cost about $1,290 a year after the 2026 Platinum fee hike, and they get you into virtually every premium lounge worth visiting in the US plus unlimited Priority Pass access globally, with the Venture X covering your guest. If you fly with a partner, the Venture X’s unlimited guest policy alone justifies its fee. Whether the combined $1,290 still pencils out at the new Platinum price depends on how much you actually use the Centurion network and Amex’s stack of category credits.

    The day-pass purchase math is worth running too. Most US lounges sell day passes at the door for $50 to $79. The Delta Sky Club walk-up rate is $50 if you have a same-day Delta boarding pass. The Amex Centurion Lounges do not sell day passes at all, which is a deliberate choice to control crowding. If you fly twice a year and only want occasional access, paying at the door is fine. If you fly six or more times a year, a card is cheaper within one year.

    Status-based access is the final route, and it is the hardest to engineer if you do not already fly enough to earn it. Delta Diamond Medallion, United Premier 1K, and American Executive Platinum all include some lounge access, but generally only on international itineraries or specific routes. Star Alliance Gold gives you access to most Star Alliance member lounges globally. Oneworld Emerald is the equivalent. If you are not already in one of these programs, this is not the path for you, and that is fine.

    credit cards fanned out on travel desk with passport
    Credit cards fanned out on travel desk with passport

    What to Test for as a Plus-Size Traveler

    plus-size woman seated lounge chair leather airport

    The first thing I check when I walk into any new lounge is the chair situation. Specifically, I look for chairs without arms, or with arms wide enough that the seat itself is at least 21 inches wide. The standard “club chair” in most US lounges has a seat width of 18 to 20 inches between the arms, which is workable if you are around a size 18 or smaller and brutal above that. The good news is that most lounges have a mix of furniture, and the chairs along the windows or in the dining area are often armless benches or banquette-style seating. Walk the lounge once before you settle in. If the only available chair is the navy leather club chair, ask the host if there is a quiet zone with different seating. The Centurion network usually does, the Capital One lounges definitely do, and the Sky Clubs are hit or miss.

    The bathroom door width is the test that nobody publishes and that matters more than the food. American lounges, post-2018 renovation, are generally ADA compliant, which means at least 32 inches of clear door width. European lounges, especially the older Lufthansa and British Airways spaces, are often not, and the doors can be as narrow as 26 inches. If you are turning sideways to get into a bathroom stall, you already know what I am talking about. The workaround is to use the accessible stall, which is almost always wider, and to do this without apology even if there is a line. Tigress Osborn, executive director of the National Association to Advance Fat Acceptance, has been a public voice for fat travelers’ right to use accessible facilities when the standard ones do not actually fit. The accessible stall is not just for wheelchair users.

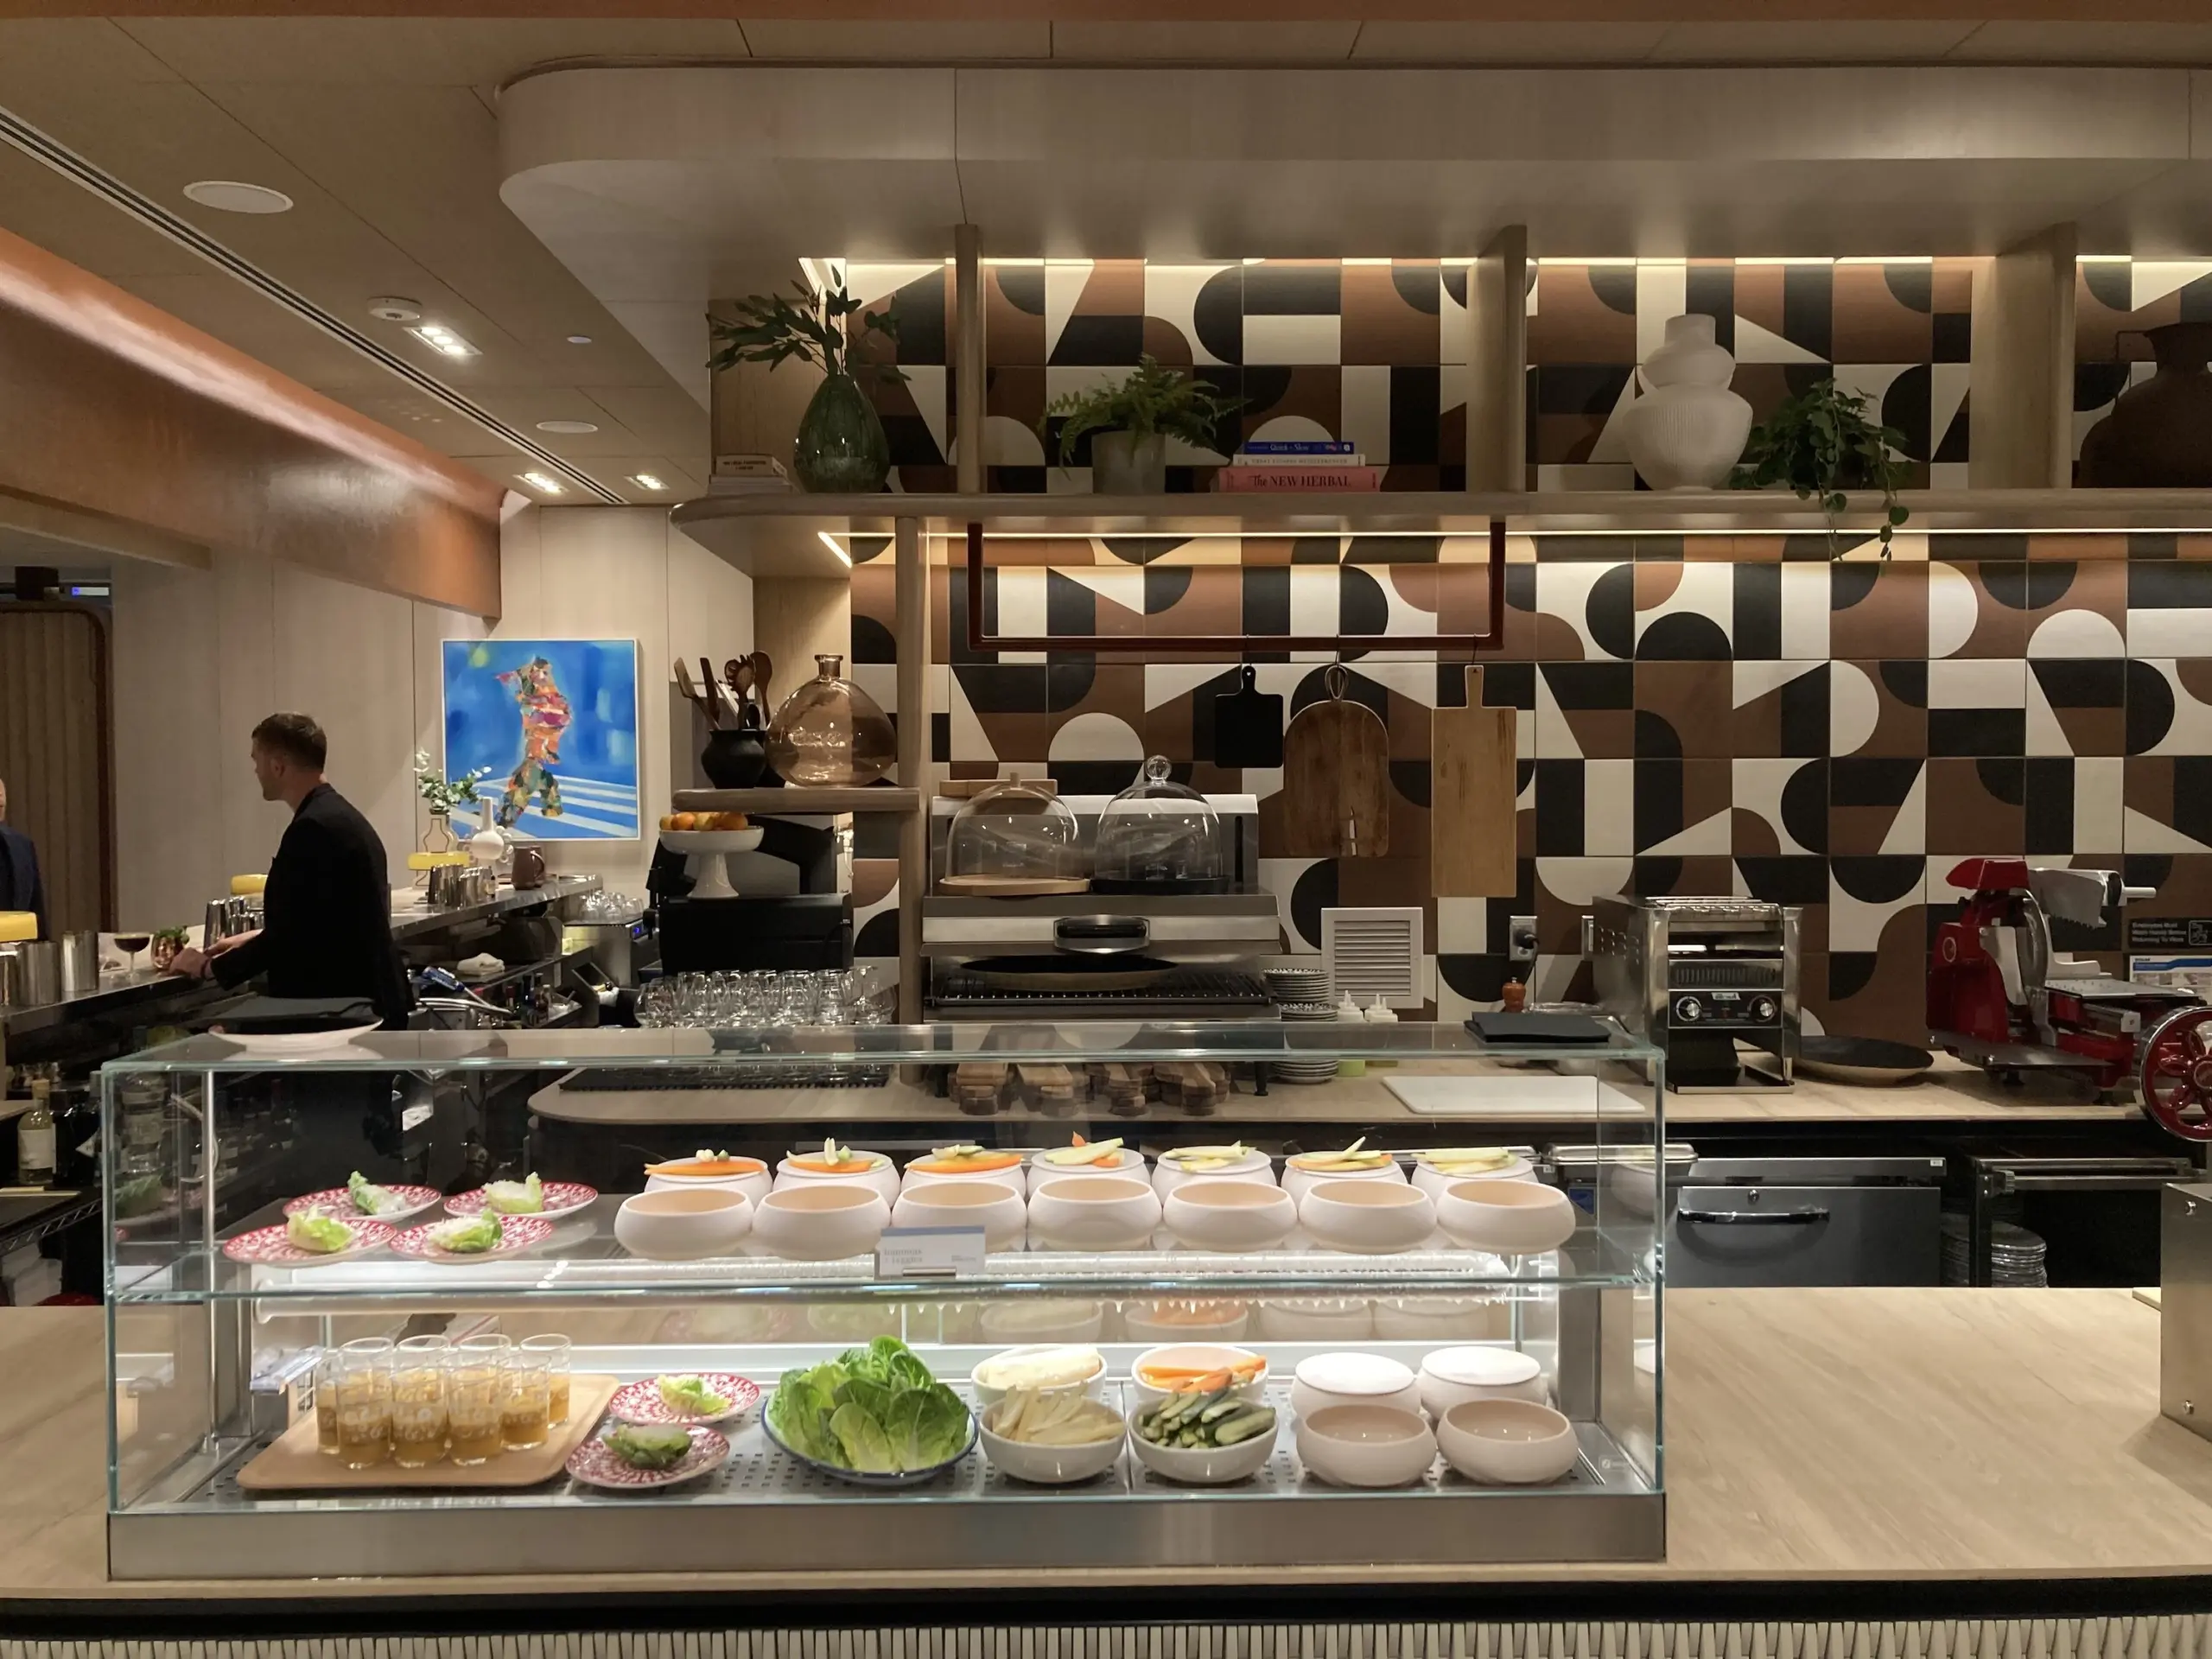
    The buffet table reach is the next thing I assess. Most lounge buffets are set up so that you reach across a serving counter that is 30 to 36 inches deep. If you are in a larger body, that reach across is the difference between a clean grab and getting yogurt on your shirt. Look for the lounges that have buffet attendants who will plate for you. The Centurion Lounges do this. The Polaris Lounges do this. The standard Sky Club generally does not. If you are at a self-serve buffet and the reach is awkward, ask for a tray and load it one plate at a time.

    For premium lounges, the shower stall dimensions become relevant. The Polaris Lounge at Newark has shower suites that are roughly 5 feet by 5 feet, which is genuinely spacious. The Centurion Lounge showers are smaller, around 3 feet by 4 feet, functional but tight. Plus-size travel writer Stephanie Yeboah, who has documented airline and accommodation accessibility for outlets including Refinery29, has been clear that shower stall dimensions are one of the most underreported pieces of accessibility data in the travel space. She is right.

    modern airport lounge interior with armless seating area
    Modern airport lounge interior with armless seating area

    Six Specific Lounges Audited

    Centurion Lounge LAS Las Vegas plus-size traveler relaxing

    The Centurion Lounge at Las Vegas Harry Reid is, in my experience, the best US lounge for a plus-size traveler. The space is large, the seating includes a long banquette along the window with no arms, the dining area uses chairs with 22-inch seat widths, and the buffet is staffed so you do not have to reach across. The bathroom doors are wide. The shower suites are tight but usable. The crowd management is generally good. I have spent three layovers there and never felt squeezed.

    The Capital One Lounge at Washington Dulles is the other lounge I recommend without reservation. It opened in 2022 with a clear focus on accessibility and comfort. The seating is varied, the work pods have generous interior dimensions, the wellness room has a meditation chair that comfortably fits a larger body, and the food hall concept means no buffet line. You order at a station and food comes to you. It is what a lounge built in this decade should look like.

    The Delta Sky Club at LAX Terminal 5, where I am sitting as I write this, is fine. It is not designed for me. The club chairs are standard 19-inch seat width with leather arms that do not give. The buffet is self-serve with a counter you have to reach across. The bathroom door is, as noted, eight inches narrower than the gate-area bathroom. The view is excellent. The coffee is good. If you have access, use it. Just do not expect comfort.

    The United Polaris Lounge at Newark Liberty is one of the most spacious lounges in the US system, but it is gated behind a Polaris international business class ticket, which is not a casual purchase. If you are flying Polaris, the lounge is genuinely worth the time. The dining room serves restaurant-style table service, which solves the buffet problem entirely. The shower suites are 5 feet by 5 feet. The day suites have a lie-flat bed. The seating mix is good.

    The Plaza Premium at Toronto Pearson Terminal 1 is the Priority Pass lounge I recommend for international transits. The chairs are mostly armless or generously armed, the buffet is staffed during peak hours, and the shower facilities are bookable. Brett Snyder at Cranky Flier has reviewed the Plaza Premium network multiple times and called the Toronto lounges some of the most consistent in the system, which matches my experience.

    Singapore Airlines flies out of JFK Terminal 4 but does not run a dedicated SilverKris lounge there. Eligible passengers are routed to partner spaces including the Air India Maharaja Lounge, the Virgin Atlantic Clubhouse for Suites and Solitaire PPS members, and the Capital One Lounge. If you are flying Singapore in a premium cabin out of JFK, ask at check-in which partner lounge your fare class accesses, because the experience varies sharply between them.

    airport lounge buffet station with staff plating food
    Airport lounge buffet station with staff plating food

    The Bathroom Problem at Every European Lounge

    I want to be specific about this because nobody else seems willing to be. The European lounges I have used, including Lufthansa Senator at Frankfurt, British Airways Galleries at Heathrow Terminal 5, Air France at Paris Charles de Gaulle, and KLM Crown at Amsterdam Schiphol, all have bathroom doors and stalls that are noticeably narrower than US lounges. The Heathrow T5 lounge bathroom stalls measured at 24 inches of interior width when I traveled through last year, which is several inches less than the US standard. The shower facilities in European lounges are often partitioned into very narrow stalls with little room to turn around.

    The workaround for plus-size travelers transiting Europe is to use the gate-area family restrooms or the airport’s main bathrooms before entering the lounge, and to time your needs accordingly. This is not a perfect solution. It is the solution that exists right now. The longer-term fix is for European carriers to renovate, and there is no indication that they intend to.

    What to Pack for a Long Lounge Layover

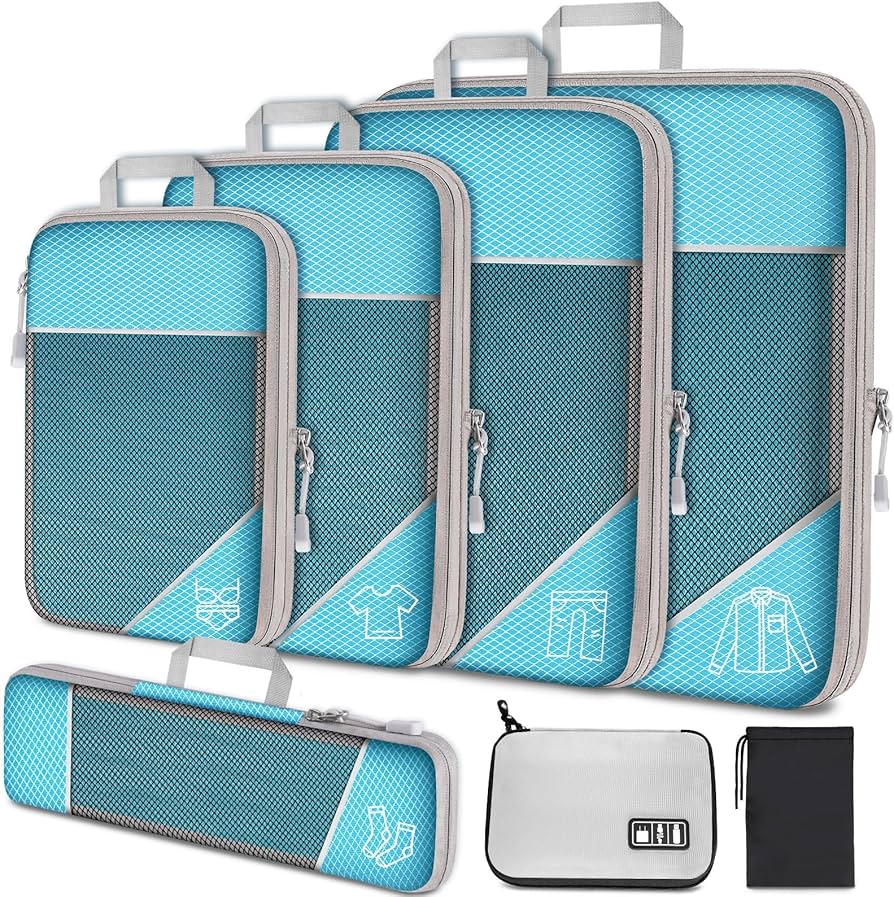
    A compression refresh kit lives in my carry-on for any layover longer than three hours. This is a clean pair of compression leggings or shorts, depending on what I am wearing, and a small bottle of body powder. If you are larger and you have been sitting on a plane for five hours, changing your compression layer in the lounge bathroom before your next flight is the difference between getting off the second plane feeling human and getting off feeling broken.

    A change of underwear, always. Long-haul travel is sweaty work, and lounges are one of the few places where you can change in privacy.

    The snack situation is worth planning for. Lounge buffets, especially the smaller Priority Pass lounges, often run out of food or have limited options if you have any food restrictions. I pack a few protein bars and a bag of mixed nuts as backup. The Bureau of Transportation Statistics reported that around 20 percent of US domestic flights experienced a departure delay in 2024, and if you are stuck in a lounge for longer than expected, having your own food matters.

    Charging cables that work with European outlets are essential if you transit Europe regularly. Most premium lounges in dual-voltage configurations now have USB-C ports built into the seating, but I still pack a Type C to Type G adapter and a Type C to Type F adapter, plus my regular USB-C cable. The lounges in Schengen-zone airports tend to have Type F outlets. The UK uses Type G. Knowing this in advance saves you from having to ask the lounge agent for an adapter, which they may or may not have.

    organized carry on bag with compression wear and chargers
    Organized carry on bag with compression wear and chargers

    The Etiquette of Being a Visibly Fat Traveler in a Quiet Lounge

    Black plus-size woman airport lounge quiet reading laptop

    I am going to say this with the kindness it requires. There is no etiquette obligation specific to fat travelers in lounges. We are allowed to take up space. We are allowed to use the chairs that fit, even if that means asking to move from the first chair the host points us to. We are allowed to use the accessible stall when the standard stalls do not work for our bodies. We are allowed to ask for a tray at the buffet. We are allowed to be there.

    What I have learned over the years is that asking quietly and confidently for what I need almost always gets me what I need. The hosts at premium lounges are trained in hospitality. They will move you to a different seat. They will plate your food. They will tell you which bathroom is more accessible. If you ask without apology, they will respond without judgment. The exceptions exist. They are rare.

    The harder part is the other travelers, the ones who look at you the way some people look at any visibly fat body in a premium space. I have learned to make eye contact, smile, sit down, and proceed with my day. The lounge is a paid or earned amenity. You are there because you have access. That is the only credential that matters.

    What an Actually Plus-Size-Friendly Lounge Looks Like

    The argument I want to leave you with is this. Airport lounges were built for the body of a business traveler that the airlines assumed in 1985, and the lounge experience for a size 24 traveler in 2026 is a series of accommodations the airlines have not made. The 19-inch club chair, the narrow bathroom door, the buffet reach, the cramped shower stall, these are not accidents. They are the residue of design decisions that did not consider us. The work of being a fat traveler in a premium space is, in part, the work of compensating for that residue.

    An actually plus-size-friendly lounge would have a published seating mix with at least 30 percent armless or wide-arm seating, bathroom doors and stalls at 36 inches of clear width, attended buffets or food-hall service models, shower stalls with at least 5 feet of interior dimension, and dining tables with chair clearance generous enough that you can pull your seat in without scraping your hip on the table edge. It would have a host trained to ask, not assume, what kind of seating each guest prefers. It would have a wellness room with a chair that fits a larger body. It would have published specifications, the way some hotels have started to publish accessibility specs for their rooms.

    The two American lounges that come closest to this are the Centurion Lounge at Las Vegas Harry Reid and the Capital One Lounge at Washington Dulles. They are not perfect. The Centurion bathroom doors are 32 inches, not 36. The Capital One showers are smaller than the Polaris suites. But the seating mix in both lounges, the staffed food service, and the overall design awareness make them the two spaces in the US where I have walked in and not had to plan around my body. That is what a good lounge feels like. I want more of them.

  • How to Negotiate a Remote Work Arrangement at Your Current Job

    How to Negotiate a Remote Work Arrangement at Your Current Job

    In October 2025, I watched a woman named Iyabo walk into a 9:30 AM meeting with the VP of operations at a Charlotte-based financial services firm. She is 31, a senior analyst, four years on the team, and she had a one-page document in her hand. She walked out at 9:54. By Friday of that same week, she had two days a week of work-from-home locked in, written into a formal six-month trial agreement, signed by her direct manager and counter-signed by the VP.

    Three other women on her team had been asking for the same thing for months. They had been asking in 1:1s, in casual hallway conversations, in Slack DMs to their manager that started with “hey, totally fine if not, but…” None of them had gotten anywhere. One of them had been asking, in some form, since February.

    The difference was not seniority. Iyabo was not the most senior of the four. The difference was not performance. All four were rated in the top quartile in the most recent review cycle. The difference was not relationship with the manager. Two of the other three had stronger personal rapport with him than Iyabo did.

    The difference was the document. Iyabo brought a document. The rest brought a request.

    What follows is what was in that document, why each section was there, and the negotiation logic that produced a yes inside 24 minutes when months of informal asks had produced silence. This is not a script for getting your manager to like you. This is the operational structure that converts “I want to work from home” into a proposal a manager can sign without exposing themselves to risk.

    Black woman in tailored navy blazer holding one-page document outside glass conference room

    Why Most Remote Work Asks Fail

    Black woman laptop remote work home office calm morning

    The reason the other three women on Iyabo’s team got nowhere is not mysterious. They framed their ask as a personal preference. Personal preference is the weakest possible frame inside a workplace. It puts the manager in the position of granting a favor, which makes the manager personally responsible if anything goes wrong, which is a position no manager wants to be in twice.

    When you frame a remote work request as “I would really love to work from home two days a week because of my commute, my dog, my focus, my childcare,” you are asking your manager to absorb the political risk of saying yes. If your output dips even slightly, the manager looks like the person who let you do whatever you wanted and got burned. The default answer to “let me do something different because I prefer it” is no, because the upside is yours and the downside is theirs.

    The proposal frame inverts this. When you walk in with a document that says here’s the deliverable structure that produces equal or better output, here’s how we’ll measure that it’s working, here’s the trial period that snaps back to the current arrangement if it fails, you’re no longer asking for a favor. You’re presenting an operational change with a built-in safety mechanism. The manager isn’t absorbing risk. The manager’s approving a controlled experiment with a clear exit ramp.

    spreadsheet remote work commute savings calculator laptop

    This is the entire game. Everything else in this article is mechanics on top of that one shift.

    The 2026 RTO Context You Are Negotiating Inside

    You need to understand the market you are walking into before you walk in. The numbers matter, because your proposal will work better or worse depending on what your industry is doing right now and what your specific company has said publicly.

    Amazon went to a five-day in-office mandate starting January 2025. JPMorgan followed with a five-day mandate in March 2025. Salesforce and Disney walked back from earlier fully-flexible policies to formal three-day hybrid requirements in 2024 and held those positions through 2025. The trend at the executive layer is real. Public RTO announcements at S&P 500 companies more than doubled between 2023 and 2025, according to tracking from Flex Index and Scoop Technologies.

    And yet. Stanford economist Nicholas Bloom’s 2024 research, updated through his WFH Research project, continues to show that fully remote work reduces productivity by roughly 10 to 20 percent for most knowledge work roles, while hybrid work, two to three days remote, produces no measurable productivity loss and meaningful gains in retention and reported job satisfaction. McKinsey’s 2024 Future of Work Index found that 58 percent of American workers had the option to work remotely at least one day a week, and that figure had not meaningfully declined despite the executive-level RTO noise. The Federal Reserve’s 2023 study on the WFH wage premium found that workers value the option to work from home at roughly 8 percent of their salary, meaning a fully remote option is worth, in revealed preference terms, about the same as a 7 to 9 percent raise.

    What this means for your negotiation is this. The data is on your side for hybrid. The data is mostly on the company’s side for fully remote in collaborative roles.

    Black woman 30s document desk preparing meeting proposal
    If you ask for five days remote in a job that requires real-time collaboration, the productivity research is not in your corner and you are negotiating uphill. If you ask for two days remote with clear deliverable structure, you have Bloom, McKinsey, and the Fed all pointing at the same conclusion. Pick the ask that matches the evidence.

    What Goes in the Proposal Document

    One page. Single-sided. Five sections. Iyabo printed two copies, one for her, one for the VP. She did not email it in advance. She did not send a Slack preview. She brought it into the room and put it on the table after the first sentence.

    Here is what was on it.

    1. The deliverable list with measurement criteria. This section is not “what I do.” It is “what I produce, how often, and how you know it is good.” Iyabo listed four recurring deliverables, each with a frequency, a quality standard, and a current baseline. For example: “Weekly portfolio variance report, delivered every Monday by 10 AM, current accuracy rate 98.4 percent over trailing 12 weeks, target maintained at 98 percent or above.” She did this for each deliverable. The point is to make the work visible, measurable, and decoupled from physical presence. If the report is correct and on time, where she was sitting when she made it is operationally irrelevant.

    2. The communication SLA. This is the section that addresses the unspoken manager fear, which is “I will Slack you at 2:14 PM and you will not respond until 3:30 because you are walking your dog.” Iyabo’s document specified response times by channel. Slack DM during 9-to-5 hours: 30 minutes or less. Email: 4 hours during business hours, next morning if sent after 6 PM. Calendar: same-day acceptance or counter-offer on all meeting requests. This is the most underrated section of the document because it preempts the concern managers will not say out loud.

    3. The trial period with the quit-clause. Six months. Quarterly check-in at the three-month mark with the manager. A specific written clause that says “if at any point during the trial my manager determines that output, responsiveness, or team collaboration has declined, the arrangement reverts to the prior in-office schedule with no further discussion required.” That last phrase is what makes the manager sign. It is a no-cost option for them. They can pull the cord without a conflict.

    4. The office-presence carveouts. Iyabo specified that she would be in-office for all quarterly planning sessions, all client-facing presentations regardless of day, all new-hire onboarding weeks for direct reports, and any day the team had a working session scheduled. This section signals that you are not trying to disappear. You are trying to restructure where the heads-down work happens, not where the collaboration happens. Managers worry about hybrid workers becoming ghosts. This section directly addresses that worry.

    5. What changes for the team. The shortest section. Three bullet points. What changes for direct reports (nothing, all 1:1s remain on existing cadence, available by Slack and Zoom).

    Black woman video call laptop calm professional remote
    What changes for peers (nothing, same project commitments and response times). What changes for the manager (one additional five-minute async written check-in every Wednesday morning, sent by 9 AM, summarizing the week’s deliverables status). That last bullet is a gift. You are offering the manager more visibility than they currently have, not less. That is what closes the deal.

    One-page proposal document with five labeled sections on wooden desk next to laptop

    The Timing Question

    Iyabo did not pick October at random. She walked into that VP meeting eleven days after her team shipped a major client report on time and under budget, the third successful project in a row that she had been the lead analyst on. The VP had personally emailed the team praising the work. That email was nine days old when she made the ask.

    This is not a coincidence. The right time to ask for a remote arrangement is in the 30-day window after a visible success that you were materially responsible for. Your leverage is highest when your recent output is freshest in the decision-maker’s mind. Tsedal Neeley, in Remote Work Revolution , makes a related point about trust being the prerequisite for distributed work, and trust is built through delivery. You are not asking for trust in the abstract. You are asking for the operational acknowledgement of trust you have already built.

    The wrong times are equally specific. Do not ask in the 90 days following a public RTO announcement at your company, even an informal one from your skip-level. The political wind is against you and the manager cannot say yes without standing visibly against the executive narrative. Do not ask during your company’s budget planning cycle, typically Q4 for calendar-year companies, because every leader is in cost-management posture and any structural change reads as a complication. Do not ask within 60 days after a performance review that was anything less than strong. The manager will read the request as evasion of accountability. And do not ask right after a layoff or restructuring, no matter how well you survived it. The signal is wrong.

    The best windows: 14 to 30 days after a successful project ships, 30 to 60 days after a strong review cycle, the month after your annual goals get set if you helped shape them. These are the moments when your contribution is concrete and the organization is in execution mode.

    Who to Ask, and the Order You Ask Them

    Your direct manager first. Always. No exceptions. Skip-level loops in after your manager is bought in, never before.

    This is the rule that the most ambitious people in any office break, and it is the rule that costs them their request more often than any other single mistake. When you go to your manager’s boss before your manager has had a chance to weigh in, you have done two things that cannot be undone. You have signaled that you do not trust your manager to advocate for you, and you have made the skip-level wonder why. You have also forced your manager into a defensive crouch where saying yes now means agreeing with a process they were excluded from.

    The correct sequence is: direct manager in a 1:1, document on the table, ask for their support. If they want to think about it, give them a week and a follow-up date. Once they are in agreement in principle, ask them how they would like to involve the skip-level. Some managers will say “I will handle it.” Some will say “let us go talk to them together.” Either is fine. Both protect your manager’s position and let them present the proposal as something they support, not something they were cornered into.

    Adam Grant has written extensively about this kind of organizational sequencing in his work on idea adoption, particularly the finding that ideas backed by the proposer’s direct supervisor are roughly three times more likely to be adopted than ideas brought directly to senior leadership. The structural reason is obvious in hindsight. Senior leaders trust their direct reports’ judgment more than they trust a two-levels-down employee they barely know. Your manager is your strongest possible advocate, and your weakest possible adversary. Pick.

    How to Handle “We Don’t Do That Here”

    Sometimes the answer is no. Sometimes the answer is “our policy does not allow it.” Sometimes the answer is “you would be the first” delivered in a tone that suggests being first is not a compliment.

    You have three counter-offers in your back pocket, and you should know which one you are leading with before you walk in the room.

    The first counter-offer is the reduced ask. If you walked in asking for two days, your counter is one day, specifically the day of the week with the lightest meeting load. If you walked in asking for three, your counter is two. The reduced ask should still come with the same proposal document, just with the deliverable section adjusted. This frames you as a flexible negotiator, not a person walking away from the first no.

    The second counter-offer is the extended trial. If the manager balks at six months, offer three. If they balk at three, offer 90 days. A shorter trial period reads as lower-risk and is much harder to refuse on policy grounds. The math here matters: a 90-day trial with a quit-clause is a smaller commitment than the manager’s average new-hire probation period, and you can point that out explicitly.

    The third counter-offer is the comp-protected reduction. This is the advanced move and it works in a specific situation: when the company’s stated reason for denial is “we cannot create exceptions for individuals.” In that case, you ask whether they would consider a formal reduced-schedule arrangement, four days a week at 80 percent salary, where one of the four days happens to be remote. This shifts the conversation from “exception to policy” to “standard part-time arrangement,” which most HR systems already accommodate. You give up 20 percent of your salary and gain one fully remote day plus an extra day off. The Federal Reserve’s WFH wage premium research suggests the trade is roughly fair value, and for some workers the day off is a meaningful bonus.

    Two women in business attire seated across conference table reviewing single sheet of paper

    The Script for the Conversation Itself

    Three sentences for the open. Document hand-off. Proposed start date. Trial-end review date. That is the whole structure.

    Iyabo opened with this: “I have been thinking about how to make sure I am delivering my best work, and I have put together a proposal I would like to walk you through. It is one page. Could I have ten minutes?” That is three sentences. The first establishes that this is about output, not preference. The second tells the listener exactly what is happening so they are not anxious about what is coming. The third asks for a small, bounded amount of time, which is psychologically easier to grant than open-ended attention.

    Then she put the document on the table and walked through the five sections in order. She did not rush. She did not apologize. She paused after section three, the trial period with the quit-clause, and said: “This is the part I want to make sure is clear. If at any point you decide this is not working, we revert. No conversation needed. I want you to have that option in writing.”

    After the walkthrough, she proposed a specific start date, the Monday after next, and a specific trial-end review date, six months out, with a calendar invite she had already drafted. She handed the document to the VP, said “you can keep that copy,” and asked: “What questions do you have?”

    The question close is important. It is not “what do you think.” It is not “would this work for you.” It is “what questions do you have,” which presumes engagement with the substance, not approval of the concept.

    What to Do if You Are Denied

    Sometimes the answer is still no after all of this. The follow-up is more important than the original ask, because the follow-up determines whether the door is closed permanently or just for now.

    The script: “I appreciate the decision. I want to understand what would change my proposal, so that if I bring this back in six months, I am bringing back something you could say yes to. Is it the duration of the trial, the deliverable structure, the days I picked, or something about the broader policy environment right now?”

    Each of those four options is a different problem with a different solution. If it is the duration, you offer a shorter trial next time. If it is the deliverables, you ask which ones the manager has concerns about and you redesign that section. If it is the days, you propose different days. If it is the broader policy environment, you note the timing and ask what milestone would change that, a successful Q1, a leadership change, the completion of an RTO trial that is currently in progress. You write down whatever the manager says. You put a calendar reminder six months out. You bring it back at that time, with the document updated, and you reference the prior conversation explicitly: “When we talked in October, you mentioned X. Here is how I have addressed that.”

    The persistence with documentation is what separates the people who eventually get remote arrangements from the people who do not. According to McKinsey’s 2024 data, employees who request flexible arrangements and are initially denied get those arrangements approved on the second or third structured ask at a meaningfully higher rate than employees who give up after the first no. The variable is not the manager. The variable is whether you came back with a refined proposal or whether you waited and asked the same way again.

    The Frame That Converts a Wish Into a Proposal

    Iyabo did not get her two days of remote work because her VP was generous, or because her company had a progressive policy, or because she caught him in a good mood. She got it because she did not walk in saying “I want to work from home.” She walked in saying: here is the deliverable structure that produces equal or better output, here is how you will measure it, here is the trial period that protects you if it fails, here is what changes for the team, here is the start date.

    That is the entire shift. The case for remote work, the one that actually wins, is not a case about your life. It is a case about the operational change you are proposing, the metrics that will tell you both whether it is working, and the safety mechanism that lets your manager pull the cord at zero personal cost. Tsedal Neeley calls this “structured trust.” Adam Grant would call it the lowest-friction path to a yes. Nicholas Bloom would call it the kind of hybrid arrangement the data has supported for five years.

    You can call it what it is. A wish is what you bring when you are hoping. A proposal is what you bring when you are negotiating. Three other women on Iyabo’s team brought wishes for months and got nothing. She brought a proposal and got a yes inside 24 minutes. The document is the difference, and now you have it.
  • What Happened When I Stopped Wearing Black for 30 Days at Size 18

    What Happened When I Stopped Wearing Black for 30 Days at Size 18

    On a Friday in May 2024, I stood in my closet in Decatur and counted thirty-one black tops. I counted them twice because the first number felt wrong, but it was right. Thirty-one. A black scoop-neck from Target. Three nearly identical black tunics from Old Navy, bought across three separate Augusts. A black wrap top with sleeves long enough to cover the soft part above my elbow. A black peplum top, two black turtlenecks, a black mock-neck, a black v-neck with the tag still on it from 2022. I laid them on the bed in rows, the way you lay out evidence.

    Then I started writing dates on a notepad. When I had bought each one. What had been happening in my life that month. I didn’t have to guess on most of them because I remembered. The peplum was August 2020, three weeks after a Zoom meeting where I caught my own face in the gallery view and turned the camera off for the rest of the year. The wrap top was January 2022, the week after my OBGYN said my weight in front of my then four-year-old. The turtlenecks were both purchased in November, different years, both after Thanksgiving photos. The mock-neck was bought the day I cancelled a beach trip with my college friends.

    Not one of those thirty-one black tops had been purchased in joy. Not one of them had been bought because I saw it and thought, that’s pretty, I want to wear that. Every single one had been bought during what I can only call a shrinking moment. A moment of body shame so specific I could date it. That night I pulled a Rubbermaid bin from under the bed, dumped every black top inside, slid it back, and gave myself thirty days.

    The 31 black tops

    31 black blouses tops closet hanging stack overwhelming visual

    I am a size 18. I have been a size 18 for most of the last six years, and a size 16 before that, and a size 14 before that, and so on backward through my twenties. The numbers matter less than the trajectory, and the trajectory is up. I’m thirty-four, I’m a mother of two, and I’ve spent roughly twenty years buying clothes that I hoped would let me move through the world without comment.

    What I noticed when I laid the thirty-one black tops on the bed was not the quantity. The quantity was embarrassing but it wasn’t the revelation. The revelation was that every single one was a slightly different attempt at the same trick. Long enough to hide the hip dip. Loose enough to skim the stomach. High enough at the neck to draw the eye up. Sleeves long enough to cover the part of my upper arm I called, in my private vocabulary, the bad part. Thirty-one variations on one assignment: make her smaller, make her quieter, make her less.

    I had been telling myself for years that I just preferred black. That it was sophisticated. That it was easy. That it went with everything. Aubrey Gordon, who writes and podcasts about fat liberation and whose book You Just Need to Lose Weight I had been chewing on for months, has a line about how the stories we tell about our bodies are often stories about other people’s comfort. I had been telling myself a style story when I was actually telling myself a survival story.

    A pile of folded black tops in a clear plastic storage bin on a bedroom floor

    The decision

    The rule I gave myself was simple and a little stupid, which is how most useful rules start. For thirty days, no black tops. Black pants were fine. Black shoes, black bags, black sweaters in a pinch. But anything that touched the upper half of my body and pulled my eye toward concealment was off limits. The bin went under the bed. The closet, when I slid the hangers around, suddenly looked like it belonged to someone else. There was a coral linen shirt I had bought in 2023 and never worn. There was a cobalt blue blouse from a swap with my sister. There was the emerald green wrap dress my mother had given me for my birthday and that I had thanked her for and never put on.

    I didn’t tell Marcus, my husband, for the first five days. I am still a little annoyed with myself about that, because Marcus is the kind of husband who notices when I am doing something hard, and he would have made it easier. But I think I didn’t tell him because I knew the first sentence I would have to say out loud was, I have thirty-one black tops and I bought every one of them because I hate my body. And I wasn’t ready to say that on a Friday night, with Jada and Marcus Jr still up watching cartoons, in the kitchen of a house I love.

    Week 1: The body-image inventory

    plus-size Black woman cobalt blue top school drop-off morning

    The first morning I reached for the cobalt blue blouse and felt my chest tighten. I want to be honest about this. It was not freeing. It was not liberating. It felt like I was walking out of the house with my underwear showing. I drove the kids to school in cobalt blue and gripped the steering wheel hard enough that my hands ached at the first light. I thought, every person at drop-off is going to look at me. I thought, every person at drop-off is going to think she should not be wearing that color at her size.

    What actually happened was that one of the other moms, Yolanda, whom I have known for three years and who has never once commented on my clothes, walked over and said, that color is beautiful on you. And I said thank you and walked to my car and sat in it for a minute before I drove away. Dr. Renee Engeln, the Northwestern psychologist who wrote Beauty Sick , has a body of research on what she calls beauty sickness, the cognitive load women carry around how they look. Her argument, more or less, is that the brain real estate we spend worrying about being seen is brain real estate we are not spending on anything else. I had not understood that line viscerally until I sat in my car in the parking lot at Coralwood and realized I had used up an entire morning’s worth of mental energy on a blouse.

    Day four was the vermilion top. It was a top I had bought on clearance in 2021, kept the tag on, and never worn. It was the kind of red that does not apologize. I wore it to run errands. I was in the Trader Joe’s parking lot, loading groceries into the back of the car, when I caught my reflection in the window and did not recognize myself for half a second. There was a woman in a vermilion top putting frozen pad thai into a reusable bag. She looked, and I am picking this word carefully, present. She looked like she was in her life. I had not seen myself look like that in a long time. I sat in the driver’s seat and cried for a minute, and then I went home and made dinner.

    A woman in a bright red top reflected in a parked car window holding grocery bags

    Week 2: What other women said

    The second week is when other people started talking. My friend Denise, who I have known since college and who notices everything, called me on a Tuesday and asked, are you okay. Not in a worried way. In a curious way. She said, you look different, you have looked different the last three times I have seen you, did something happen. I told her about the bin. She was quiet for a long moment. Then she said, Kira, I have a bin too. She did not elaborate. She did not have to.

    A colleague at work asked which brand the emerald green dress was, and where I had bought it. I told her my mother had given it to me two years ago and I had never worn it. The look on her face was complicated. She said, that’s a long time to wait. I think she meant the dress. I think she also meant something else. I have thought about her face a lot since then.

    On Saturday I drove to a boutique on the square in Decatur, one I had walked past for years without going in because I assumed they did not carry my size. The saleswoman, a Black woman around my mother’s age named Cheryl, watched me drift through the racks for about ninety seconds before she walked over and started pulling things off hangers. She pulled a marigold blouse. She pulled a fuchsia wrap top. She pulled a rust-colored kimono and a poppy red shirt dress. She held them all up against me without asking, and she said, you have been hiding from these colors, and they have been waiting for you. I tried on every single one. I bought three. I left the shop in the marigold blouse with my bin of returnees in a paper bag and sat in my car again and thought about how many years I had walked past that store.

    Mariel Buque, the psychologist who wrote Break the Cycle , writes about how intergenerational shame around bodies, especially in Black women, gets passed down through small daily rituals. The clothes our mothers told us to wear so we would not draw attention. The way we were taught to enter rooms. The colors that were considered safe. I am not putting my mother in the dock for the bin under my bed. My mother, in fact, is the one who bought me the emerald green dress. But somewhere along the way I picked up the lesson that visibility was dangerous, and I had been dressing accordingly for two decades.

    Week 3: The bigger thing

    plus-size Black woman emerald green dress confident colorful wardrobe

    By the third week the wardrobe had stopped being the subject. The wardrobe was the symptom. The thing the wardrobe had been managing was something else, and I had to look at it whether I wanted to or not.

    I have a habit, when I walk into a room of people I do not know, of finding the corner. I get a drink. I check my phone. I make myself useful by helping the host. I have called this introversion for years, and some of it is. But some of it, I had to admit by week three, was the same daily small permission I had been writing on every black top: permission to be smaller, permission to take up less air, permission to not be looked at. Tara Mohr, in Playing Big , talks about the inner critic that tells women to keep their hands down in the meeting, to not apply for the job, to defer to the louder voice in the room. The voice in my closet was the same voice in those rooms. It had just been wearing different clothes.

    The thirty days had not been about color. The thirty days had been a diagnostic. The wardrobe was showing me, in a way I could count and weigh, how often I had agreed to be less. Thirty-one times in four years, just in the form of one specific category of garment. That was not the full count. That was a fraction of the count. The full count, if I let myself look at it, included the parties I left early, the conversations I exited, the photos I deleted, the meals I rearranged on my plate, the times I had said no to things I wanted because saying yes would have meant being seen wanting them.

    What came back to the rotation

    minimal closet curated color story oxblood cream emerald visible

    On day thirty-one I pulled the Rubbermaid bin out from under the bed and sat on the floor and went through every black top one at a time. Not all of them were going. Some of them were going to stay. The question I asked each one was the question I am still asking my closet now: did I buy this because I wanted it, or because I wanted to disappear.

    Four stayed. A black silk blouse my sister gave me for my thirty-fifth birthday, which I had bought nothing to match because I had been afraid of the silk. A black turtleneck I genuinely love in winter under a camel coat. A black sleeveless top that fits me beautifully and that I bought after trying on six other things that did not. A black cardigan with pearl buttons that belonged to my grandmother. Those four had passed the test. Those four had earned the rotation.

    The other twenty-seven went to ThredUp. I priced them honestly, I sent them in the bag, and a few weeks later I had a credit of $340. I want to be very clear that I did not spend the $340 on a celebratory shopping spree, because the entire point of the experiment was that I no longer trust shopping sprees to fix anything. I spent $180 of it on two pieces from Cheryl’s shop in Decatur, a rust silk camisole and a deep teal blouse, both of which I have worn many times. I put the other $160 toward my first real therapy session with a new therapist whose practice focuses on body image work in Black women. That felt right. The money had been earned by my old hiding. It went toward not hiding anymore.

    An open closet with colorful blouses in marigold rust teal and emerald hanging next to a black blazer

    What the 30 days didn’t fix

    This is the part I want to be most careful about, because the easy version of this essay is the one where the woman in the bin story walks out the other side fixed, and I am not. I want to tell you that putting the black tops away made me love my body, and it did not. I want to tell you that I no longer feel a stab when I see a photo of myself, and that would also not be true. The wardrobe had been a symptom. Putting the symptom in a Rubbermaid bin under the bed did not cure the underlying thing. It just made the underlying thing visible enough that I could not pretend anymore.

    The therapist I started seeing pointed out, very kindly, on our second session, that the wardrobe experiment had been brilliant for one reason and dangerous for another. The brilliant part was that it had given me an external evidence trail. I could not gaslight myself about the thirty-one tops. They existed. I could count them. The dangerous part was that focusing on the wardrobe could become its own form of avoidance, a way of doing surface work and calling it deep work. The closet had been the symptom. The therapy was where the cause lived. I am still going. I will probably be going for a while.

    There are days, I will tell you, when I still reach for one of the four black tops that stayed in the rotation. There are days when I want the quiet. There are days when I am tired or when something hard is happening and I want one less thing to manage, and I put on the black silk blouse and I move through the day. The difference, and I think this is the only honest difference, is that now I know what I am doing. Now I am choosing the quiet on purpose. Now it is not the only option in the closet.

    The final scene

    It is a Friday in late May 2025 as I write this, a year almost exactly from the Friday I counted the thirty-one black tops. I am sitting at the kitchen table in Decatur in a marigold blouse, the same one Cheryl pulled off the rack and held up against me, and I just walked past my open closet on the way to get coffee. There is a rust silk camisole on a hanger. There is the emerald green wrap dress my mother gave me. There is the cobalt blue blouse from my sister. There is a fuchsia wrap top, a coral linen shirt, a poppy red shirt dress, and the four black tops that earned their place. The Rubbermaid bin is gone. I gave it to my neighbor for storing her kids’ winter hats.

    The question I ask every garment now, before it comes home with me, is the question I should have been asking for twenty years. Am I buying this because I want it, or because I want to disappear. Most of the time, now, the answer is the first one. Sometimes it is still the second one, and on those days I put the garment back. The closet is not the work. The closet is just the place where I can see the work, hung up in rows where I can count it.

    A kitchen table with a coffee mug and a notebook with a woman in marigold blouse writing
  • The Beauty Ingredient That Changed Everything

    The Beauty Ingredient That Changed Everything

    Beauty

    After five years of $58 BHA toners and $112 creams, the thing that finally cleared my forehead was a generic prescription that costs $22 a month. Here is the case for tretinoin, and exactly how to start.

    By Brielle , Beauty & Hair Editor

    It was January 2024, and I was standing in front of the bathroom mirror in my old Atlanta apartment. The light in that bathroom was unforgiving in a way I’d grown to respect. It was the same light that had told me, every morning since I moved in, that the small congested bumps along my hairline and the soft band of texture across my forehead were still there. I’d been checking for them with the pads of my fingers since college. It was a tic by then. A diagnostic sweep.

    That morning, two months into a 0.025% tretinoin prescription, I did the sweep and felt nothing. I leaned closer to the mirror. Nothing. I tilted my head under the vanity bulb the way I used to so I could catch the bumps in shadow. There were no bumps to catch. My forehead, which I had been treating since 2019 with rotating $58 BHA toners and $112 La Roche-Posay Effaclar creams and at least three different niacinamide serums, was just smooth.

    It wasn’t glamorous. I want to be clear about that. I was 26, I hadn’t slept enough, I had a coffee stain on the collar of my robe. The retinol-purge horror stories that had kept me from trying tretinoin for years hadn’t happened to me. There were no weeks of cystic flares. There was some flaking in week three. That was it. I’d spent years and probably $4,000 trying to fix something that one $22 prescription tube fixed in eight weeks.

    This article is about that moment. More importantly, it’s about why I think tretinoin is the single most consequential ingredient in adult skincare, and why so many of us spent the 2010s and early 2020s stacking expensive serums instead of just asking a dermatologist for it.

    Why tretinoin and not retinol

    tretinoin tube Obagi Altreno prescription bathroom counter

    Let me get the science out of the way, because the science is the whole argument.

    Tretinoin is a prescription-strength retinoid. It is the same molecule as retinoic acid, which is the active form that your skin actually uses. When you apply tretinoin, it goes to work immediately. There is no conversion step. No waiting. No middleman.

    Retinol, the version you can buy at Sephora or in the skincare aisle at Target, is a precursor. Your skin has to convert it in two steps to become retinoic acid. Retinol becomes retinaldehyde, which then becomes retinoic acid. Each conversion loses potency. By the time the retinol you applied actually reaches the form your skin can use, you are working with a fraction of what you started with.

    Here is the math people do not talk about enough. A 0.025% tretinoin prescription, the lowest strength most dermatologists will start you on, is roughly equivalent to a 1.0% retinol formulation. That formulation does not exist over the counter. It cannot exist over the counter. Retinol at concentrations above about 0.3% is too unstable to sit in a jar at the chemist for two years. It oxidizes. It loses efficacy. The highest stable retinol you can buy is usually around 0.5%, and even that requires careful packaging.

    So when you are choosing between a $98 retinol serum and a $22 tube of tretinoin, you are not choosing between the same ingredient at different price points. You are choosing between a diluted precursor and the real thing.

    The evidence base for tretinoin is also not new. The FDA approved it in 1971, originally for acne. In 1995, the New England Journal of Medicine published the landmark photoaging paper by Dr. Albert Kligman and colleagues, which showed measurable improvements in fine wrinkles, hyperpigmentation, and skin roughness in patients who used tretinoin daily over 24 weeks. That is fifty years of clinical evidence. Almost no other topical ingredient has that kind of paper trail.

    For women with skin of color, there is an additional paper worth knowing about. In 2007, the Journal of Drugs in Dermatology published research specifically on tretinoin in Fitzpatrick V and VI skin, looking at post-inflammatory hyperpigmentation. The finding was nuanced and worth sitting with – tretinoin can both trigger PIH in the short term if you start too strong, and treat existing PIH in the long term if you use it correctly. We will come back to that.

    Tretinoin tube next to a retinol serum bottle on a bathroom counter, illustrating prescription versus over the counter retinoids
    The tube on the left costs roughly one fifth of the bottle on the right and is four times more potent. The math is the whole point.

    How to actually start (and why $30 a month beats $200 a visit)

    tretinoin tube Obagi Altreno prescription bathroom counter

    There are three reasonable paths to getting tretinoin in 2024. I have tried two of them. I will walk you through each.

    Path one is an in-person dermatologist. If you have insurance that covers a dermatology visit, this is the gold standard. You will pay a copay (usually $30 to $75 depending on your plan) and the visit itself if you are uninsured can run $150 to $250. The dermatologist will look at your skin, ask about your goals, ask about your skin tone and any history of hyperpigmentation, and write you a prescription for generic tretinoin cream. The generic, with most insurance plans, runs $20 to $40 a month. Without insurance, GoodRx coupons can bring it under $50.

    Path two is Curology. This is the route I took. Curology is a telehealth dermatology service that pairs you with a licensed provider, reviews photos of your skin, and ships you a custom-compounded prescription bottle. Mine had tretinoin plus niacinamide plus azelaic acid in one formula. It runs about $30 a month after the trial. The advantage is that the formula is built for your specific concerns. The disadvantage is that you do not get the same depth of in-person consultation you get with a derm.

    Path three is Dermatica , which works similarly to Curology but is UK-based and now ships to the US for around $26 a month. The formulations are similar. Both services will start you low.

    What dose to ask for – the answer for almost everyone reading this is 0.025% tretinoin cream. That is the standard starting strength. There is no medal for asking your dermatologist for 0.05% or 0.1% out of the gate. Higher strengths cause more irritation, more flaking, more peeling, and for women with darker skin tones, more risk of post-inflammatory hyperpigmentation. You can always step up after six months if you tolerate the 0.025% well. Most people do not need to. The 0.025% does the work.

    Dr. Shereene Idriss, the New York dermatologist who runs Idriss Dermatology and is one of the most respected voices in retinoid education on the internet, talks often about this. Her line is essentially – the best retinoid is the one you will actually use. Starting low is how you stay consistent. Consistency is how you get results.

    The first 8 weeks (and the purge question)

    Black woman applying tretinoin pea-size moisturizer sandwich

    Let us talk about the purge, because it is the thing that scares most women off tretinoin.

    The purge is real but it is not universal. Here is what is happening physiologically. Tretinoin speeds up cell turnover, which means microcomedones (the tiny clogs already forming deep in your pores that you do not see yet) come to the surface faster than they would have. So for some people, weeks two through six are rough. You may break out in places you never break out. You may flake. You may peel.

    For me, the purge was a few patches of flaking in week three and one small whitehead near my jawline in week four. That was the whole event. Some friends I have written about this with had a worse experience. Some had no purge at all. There is no predicting it.

    The protocol that minimizes the purge is the moisturizer sandwich. Cleanse with a gentle cleanser, wait for your skin to fully dry, apply a thin layer of moisturizer, wait two minutes, apply a pea-sized amount of tretinoin to your entire face (not just the spots you want to treat – the whole face), wait, then apply another layer of moisturizer on top. The sandwich buffers the irritation without significantly reducing the efficacy.

    Three rules I would give anyone starting:

    One, the cleanser is Cetaphil Gentle Skin Cleanser or CeraVe Hydrating Cleanser. That is it. Stop using your foaming acid cleanser. Stop using the one that tingles. You want the most boring, most basic, most ceramide-friendly cleanser you can find for the first six months.

    Two, the moisturizer is also basic. CeraVe in the tub. Vanicream. La Roche-Posay Toleriane Double Repair. Pick one. Use it twice a day.

    Three, sunscreen is non-negotiable. Tretinoin makes your skin more photosensitive. If you start tretinoin and you are not wearing SPF 30 minimum every single day, you are undoing the work. I use the EltaMD UV Clear (around $40) in the morning. There are cheaper options that work too. La Roche-Posay Anthelios Mineral SPF 50 is excellent. The point is daily, not which brand.

    Simplified four-product skincare routine: gentle cleanser, moisturizer, tretinoin tube, and sunscreen arranged on a marble surface
    The four products that replaced my eleven-step routine. Total monthly cost – around $60.

    The routine, radically simplified

    Once you are on tretinoin, your routine collapses. This is one of the things I did not expect, and it is one of the financial arguments that made me an evangelist.

    Morning: gentle cleanser, moisturizer, sunscreen. Three products.

    Evening: gentle cleanser, tretinoin, moisturizer. Three products. One of them overlaps with the morning routine.

    That is four total products. Not eleven. Not the eight-step Korean skincare flowchart. Not the serum stack you have been told you need. Four products.

    For a long time, the beauty industry’s selling point was complexity. The more steps, the more bottles, the more your bathroom shelf looked like a chemist’s counter, the more “into skincare” you were. Tretinoin breaks that economy. You do not need the toner. You do not need the essence. You do not need the dual serum stack. You need the prescription, two cheap drugstore basics, and a sunscreen you will actually reapply.

    Hyram Yarbro, the skincare educator who built a massive audience on TikTok in 2020 and 2021 and now runs his own Selfless by Hyram brand, has talked at length about this same collapse. His ongoing framing is similar to mine – most women buying $400 of serums every quarter would get better results from a $22 prescription and a $14 moisturizer.

    The skin-of-color question

    Black woman clear skin forehead bathroom mirror morning sunlight

    I need to spend real time on this because the conversation about tretinoin in skin of color is often either ignored or oversimplified.

    The 2007 Journal of Drugs in Dermatology paper I mentioned earlier is the one I send to friends with Fitzpatrick IV, V, and VI skin who are nervous about starting. The finding, summarized – tretinoin can trigger post-inflammatory hyperpigmentation in melanin-rich skin if you start too strong or too fast. The same molecule, used correctly and consistently, is one of the most effective long-term treatments for existing hyperpigmentation in those same skin tones.

    It is a paradox, but it makes sense once you understand the mechanism. PIH is triggered by inflammation. Tretinoin, applied too aggressively, causes inflammation. Tretinoin, applied at low strength and buffered with moisturizer, causes minimal inflammation while still increasing cell turnover, which fades existing PIH over months.

    The rule for darker skin tones is simple. Start lower, go slower. That means:

    Start at 0.025% (not 0.05%, not 0.1%). Use it twice a week for the first two weeks. Then three times a week for the next two. Then every other night for a month. Only after that should you consider nightly use. The whole ramp can take three months. That is okay. The ramp is what protects your skin from PIH.

    Dr. Caroline Robinson, who runs Tone Dermatology in Chicago and specializes in skin of color, has been one of the loudest and most useful voices on this. She is on Instagram, she speaks plainly, and she has been particularly good on the difference between the ramp-up protocol for darker skin versus the more aggressive starts that work for lighter skin. If you are nervous, follow her. Read her posts. The information is free and it is excellent.

    What to stop using when you start tretinoin

    This is the part where you free up shelf space.

    Pause your BHA. Salicylic acid is doing similar work to tretinoin (clearing pores, increasing turnover), and stacking them in the first six months is how you get irritation. You can layer them eventually. Not now.

    Pause your AHA. Glycolic acid, lactic acid, mandelic acid. All paused. Same reason.

    Pause your vitamin C serum. This is the one that surprises people. Vitamin C is great. It is also acidic, and pH-sensitive, and stacking it with tretinoin in the first six months is unnecessary chaos for your skin barrier. Once you are stable on tretinoin (six months in, no flaking, no redness), you can reintroduce it in the morning. Not before.

    Pause physical exfoliants. The scrubs, the cleansing brushes, the muslin cloths. All of it. Your skin is turning over plenty fast on its own.

    What can stay – hyaluronic acid serums (they are just hydration, no chemistry conflict), niacinamide (gentle, anti-inflammatory, actually helpful), and your sunscreen.

    A collection of acid toners, vitamin C serums, and exfoliating products being set aside on a counter
    Everything in this stack got paused for six months. Most of it I never picked back up.

    The cost math, written out

    Let me do the numbers, because the numbers are how I finally convinced myself.

    My pre-tretinoin routine, monthly, averaged out across the year:

    La Roche-Posay Effaclar Duo, $40, lasted two months, so $20/month. Paula’s Choice 2% BHA, $35, lasted three months, so about $12/month. Skinceuticals CE Ferulic vitamin C, $182, lasted three months, so $61/month. The Ordinary Niacinamide, $7/month. A rotating $40 retinol serum, $20/month averaged. SkinMedica TNS Essential Serum that I bought once and used carefully, $295, stretched over six months, so $49/month. Sunscreen, $40/month.

    Total – about $209 a month. Roughly $2,500 a year.

    My current routine, monthly:

    Curology custom formula with tretinoin, $30. Cetaphil cleanser, $5/month (a bottle lasts forever). CeraVe moisturizer, $10/month. EltaMD UV Clear sunscreen, $20/month averaged.

    Total – $65 a month. Roughly $780 a year.

    I am saving about $1,700 a year on skincare and getting better results. I do not say this often because it sounds like a hot take, but I will say it here – if you are spending more than $100 a month on skincare and you are not on a prescription retinoid, you are almost certainly being sold complexity instead of efficacy.

    The three women whose skin you have envied

    You know the women I am talking about. The friend of a friend at the dinner party who is 41 and has smooth forehead skin. The colleague who is 46 and whose pores around the nose have not enlarged the way everyone else’s have. The cousin who is 38 and whose cheekbones are even-toned and bright in a way that does not feel like makeup.

    I am not going to name names because their skincare is their business. But I will tell you the markers, because they are remarkably consistent across the women I know who are on long-term tretinoin:

    Smooth forehead skin past 38. The forehead is usually the first place where fine lines and texture show up. Long-term tretinoin users have foreheads that look ten years younger than their age.

    No enlarged pores around the nose. Tretinoin keeps the pores from filling with the oxidized sebum and dead skin that makes them stretch and gape over time.

    Even tone on the cheekbones. The sun damage that most of us are accumulating in our 30s and 40s shows up as uneven pigmentation on the cheekbones. Tretinoin treats it slowly and consistently.

    If you’ve ever looked at a woman ten years older than you with great skin and assumed it was genetics, money, or a $400-a-month serum stack, I’d gently invite you to consider that it’s probably a $22 tube she’s been using for fifteen years.

    ## The argument, in one sentence

    Tretinoin is the only topical ingredient with five decades of clinical evidence supporting it for both anti-aging and acne in adult women across all skin tones. It isn’t the only thing that works. It’s the only thing that’s been studied this thoroughly, for this long, in this many populations.

    That’s the argument. That’s the whole article.

    If you are reading this and thinking about starting, here is the question to ask a dermatologist (in person or through Curology or Dermatica) to get the ball rolling – “I would like to start a low-dose tretinoin for long-term skin health. Can we begin at 0.025% with a slow ramp-up protocol, and can you help me adjust if I see any post-inflammatory hyperpigmentation in the first three months?”

    That sentence tells the provider that you have done your homework, you know what dose you want, you understand the timeline, and you are paying attention to your own skin’s response. It is the sentence that gets you the prescription with the least friction. Send it. See what happens in eight weeks.

  • How to Dress Confidently for Your Body Right Now – Not the Body You’re Working Toward

    How to Dress Confidently for Your Body Right Now – Not the Body You’re Working Toward

    A plus-size woman sorting clothing into three piles on her bed during a closet purge, lit by warm lamplight

    On a Friday night in November 2024, I emptied my closet onto the bed and made three piles. KEEP on the left. DONATE in the middle. And, on the right, the pile I’d been quietly making my whole adult life without ever naming it out loud: WHEN I’M SMALLER. Two pairs of high-waisted jeans that fit for about six wearings across three years. A silk slip dress from a 2022 sample sale with the tag still attached. Three blazers in a size 14 from a year I had not been a 14. A vintage cotton shirtdress I’d told myself I would wear “after a good summer.” The WHEN I’M SMALLER pile was the biggest of the three by a noticeable margin, and that night I added up what was in it. The number came to roughly $1,840 of clothing, almost all of it in good condition, almost none of it ever worn out of the apartment, waiting for a future body that, after a decade of weight cycling, was statistically unlikely to arrive on the schedule I’d promised it.

    I dragged the WHEN I’M SMALLER pile into the DONATE pile that night. I did not photograph it, did not post about it, did not do any of the things that turn a private decision into content. I just sat on the floor next to a forty-gallon bag of clothing I had been emotionally storing for years and admitted, out loud and only to myself, that I had spent close to two thousand dollars dressing a stranger. This article is what I wrote down in the weeks after that. It is not a love-your-body essay and it is not a manifesto. It is a working editor’s notes on how to actually get dressed in the body you have on a given Tuesday, when the body you have is also the body you are most ambivalent about.

    The WHEN I’M SMALLER closet and what it actually costs

    Most plus-size women I know have a version of the WHEN I’M SMALLER section, even if they don’t call it that. It lives at the back of the closet behind the things they actually wear. It lives in the bottom drawer of the dresser. It lives in a single bin in the storage unit labeled “summer” or “going out” or simply nothing at all. The pieces in it are usually nicer than the pieces in active rotation, because the WHEN I’M SMALLER closet is where the aspirational dollars went. The jeans cost more. The dress cost more. The blazer cost more. Future-thinner-you was always going to deserve nicer things than current-you, which is its own quiet form of self-punishment dressed up as planning.

    The 2024 NPD apparel return data, which tracks the resale and return behavior of US clothing buyers, put a number on this in a way that landed hard for me. The average plus-size woman in the US wastes between $1,200 and $2,000 a year on aspirational sizes, meaning clothing purchased in a size below her current measurements and either never worn, worn once or twice, or returned past the window. That figure tracks separately from regular fashion spending. It is purely the tax on dressing for a future body. Over a decade of adult dressing, that is somewhere between $12,000 and $20,000 of unworn clothing.

    There is a psychological cost on top of the dollar cost, and it is the part most personal finance writers miss. Every time you open the closet and see a row of pieces that do not currently fit you, the closet itself becomes a quiet referendum on your body. You did not set out to give yourself a daily verdict. You set out to buy a dress. But the cumulative effect of standing in front of fifteen garments that disagree with your measurements is a slow erosion of the assumption that your body is allowed to take up space in the room you are standing in. I noticed it most on the mornings I was already running late, when the closet should have been a tool and was instead a closing argument.

    The fashion psychologist Tara McGoldrick has written about this as the “aspirational closet effect,” and her clinical work suggests that the daily exposure to ill-fitting aspirational clothing measurably correlates with lower body satisfaction scores over a six-month window, independent of any actual weight change. The closet is not neutral. The closet is talking to you. The WHEN I’M SMALLER pile is the loudest voice in it.

    Hands folding a silk slip dress with the retail tag still attached on a cream-colored surface

    Why “you can always lose weight” is not the assignment

    Why

    The reflex response to everything I’ve just written is “well, you could always lose the weight.” I want to be precise about why that response, well-intended or not, misses the assignment of this article.

    Aubrey Gordon writes in What We Don’t Talk About When We Talk About Fat that fewer than five percent of people who intentionally lose a significant amount of weight maintain that loss over five years. The number is from long-running NIH-funded meta-analyses and it is not in serious dispute among researchers, only among the diet industry that depends on you not knowing it. Roxane Gay, in Hunger , writes about the specific cruelty of organizing your life and your wardrobe around a body that has not arrived and may not arrive: “I knew I should be losing weight. I did not lose weight. I lived in the body I had while pretending to live in the body I wanted.”

    What both writers point at, and what I want to put plainly here, is that the question of whether you eventually change your body is not the same question as what you are going to wear this Saturday. They are separate questions on separate timelines and they need separate budgets. The WHEN I’M SMALLER closet conflates them. It says: I will not dress this body well because dressing it well is a betrayal of the body I am supposed to want. That is a confusion of categories. You can be actively working on something – your relationship to food, to movement, to medication, to medical care – and also wear clothing that fits you today. The two are not in moral competition. One is health behavior on a multi-year arc. The other is what you put on your legs Saturday at four p.m.

    The 2025 Nordstrom plus-size customer study, which surveyed roughly 4,800 customers wearing sizes 14 through 32, found that 71 percent of respondents owned more than ten items they could not currently wear, and 58 percent reported feeling “worse” or “much worse” about their bodies after closet exposure to those items. The same study found that customers who had done a deliberate audit and removed aspirational sizing reported significantly higher outfit satisfaction within ninety days. The intervention was the audit. The variable that changed was not body size. It was what they were looking at every morning.

    The five-question audit

    The five-question audit

    Here is the audit I ran on my own closet that November and have since run with friends, with coaching clients, and with my mother-in-law. Pull out one piece at a time, and ask five questions in this order.

    1. Have you worn it in the last twelve months? Not “have you owned it.” Not “have you tried it on.” Have you worn it out of the apartment to do a thing in the world. Wedding, dinner, errand, work. Twelve months is the full cycle. If a piece has not made it onto your body for an outside event in a full year, it has had its chance.

    2. Does it currently fit? Not “does it zip with effort.” Not “did it fit at the sample sale.” Does it fit your body, today, in a way you would willingly leave the house in. The honest answer here is usually obvious within five seconds of trying it on.

    3. Did you buy it for a fantasy event? The gala that did not happen. The vacation that got cancelled. The job interview at the company you decided not to apply to. The date that turned into a different relationship. Fantasy-event clothing accumulates faster than you think and is among the easiest to release because the event is no longer on the calendar.

    4. Does putting it on make you feel like you owe it something? This is the most important question and the one most people skip. There is a category of clothing that, when you put it on, makes you feel indebted – to the price you paid, to the person who gave it to you, to the body you used to have, to the body you said you would have. The garment becomes a reminder of a debt rather than a tool you reach for. Debt clothing is not clothing. It is a guilt artifact wearing a hanger.

    5. Would you buy it new at this size today? Imagine walking into the store this week and seeing the piece, in your current size, at its original price. Would you buy it. If the answer is no, the only reason it is in your closet is sunk cost, and sunk cost is the worst possible reason to dress your body in the morning.

    Any piece that fails two or more of these questions goes in the cut pile. I do not negotiate with the cut pile. The cut pile is final, and the relief on the other side of it is real and measurable. My November audit cut 47 pieces. I did not miss a single one. I have not been able to recall, six months later, what most of them were.

    What to do with the clothes you cut

    Three buckets. Decide before you start so the cut pile does not move into a bag in the hallway and stay there for another year.

    For the everyday pieces in decent condition – the tees, the trousers, the dresses under $80 retail, the casual jackets – donate directly to a women’s shelter or your local YWCA. Call ahead. Most shelters have specific intake windows and specific size needs, and plus-size donations are notoriously underrepresented at shelter clothing closets. The pieces you have been letting hang unworn are very likely to be the most-needed pieces on the rack the moment they arrive. Bowery Mission, Sanctuary for Families, Win NYC, and Dress for Success all run intake programs that take plus-size clothing seriously. Your city has the equivalent.

    For the higher-value pieces – silk, leather, structured outerwear, anything originally over $80 with the label intact – list on ThredUp or Poshmark. ThredUp’s “Clean Out Kit” handles the photography and listing if you would rather not, at the cost of a lower payout. Poshmark pays better and is faster, but you list and ship yourself. I have personally recovered close to $600 across the two platforms from a single audit pile, which is not nothing, and went directly into a small fund for one well-fitting current-size hero piece.

    For the sentimental and the family-adjacent – the dress from a friend’s wedding, the blazer your sister has admired for years, the piece a niece would actually wear – hand it off in person. Do not mail. Do not “ship when you get around to it.” Walk the bag over, hand it across the table, watch it leave the building. The reason this matters is that mailed pieces become a project, and projects sit in a corner, and the corner becomes a smaller version of the original problem.

    A plus-size woman wearing a wide-leg trouser and a tucked white tee standing in a sunlit modern apartment

    Eight silhouettes that work on most plus-size bodies right now

    Eight silhouettes that work on most plus-size bodies right now

    The mistake that ruined most of my twenties was shopping by item instead of by silhouette. I would see a great pair of skinny jeans on a friend and buy the same skinny jeans for myself, then be confused when the same garment read entirely differently on my body. Silhouette is not item. Silhouette is the overall shape the outfit creates from across a room. Here are the eight that consistently work for plus-size bodies in 2026, drawn from my own rotation and from years of dressing friends.

    The wide-leg pant + tucked tee. A flat-front, full-length wide-leg trouser with a tucked or half-tucked fitted tee creates a vertical line that reads as long and intentional. The fitted top establishes the waist, the wide leg balances the hips, and the proportion is automatic. Universal Standard, Eloquii, and Old Navy’s plus extension all have versions under $80.

    The column dress. A floor-skimming or midi dress in a single color that runs uninterrupted from shoulder to ankle. No belt, no contrast. The column is the oldest cheat code in plus-size styling because it does the work of a long unbroken vertical without requiring any styling moves on your part.

    The structured shoulder + soft body. A blazer or jacket with a real, defined shoulder seam paired with something softer underneath – a slip skirt, a jersey dress, a relaxed trouser. The shoulder gives the eye a clean anchor at the top and lets the rest of the outfit fall in a way that flatters without trying.

    The blazer and bike-short. An oversized blazer over a fitted bike short with a clean shoe is the most underrated plus-size silhouette of the last three years. It works because the blazer covers the zones most plus-size women report being most self-conscious about while the bike short defines the leg line. Lizzo, Paloma Elsesser, and Ashley Graham have all worked variations of this look. It is a real outfit.

    The bias slip with a t-shirt over. A bias-cut slip dress with a soft cotton tee layered over it. The slip provides the drape and the leg line, the tee adds a casual upper register that makes the slip wearable in daylight without feeling like lingerie escaped the bedroom.

    The layered tank set. Two thin tanks worn together, one slightly longer than the other, with a wide trouser or a denim. The double layer gives shape to the torso without compression, and the proportion of fitted top to wide bottom does the rest.

    The wrap dress in the right rayon-blend. The wrap dress has been oversold and undertailored for thirty years, but a real wrap dress in a rayon-blend with weight to it – not a synthetic stretch – is one of the most reliable silhouettes there is for a body with curves. The key is the fabric. Pure polyester wraps cling badly. Rayon with some give holds the shape.

    The oversized button-down + cigarette pant. A men’s-cut or relaxed cotton shirt half-tucked into a slim cropped trouser, with a sleek shoe. This is the silhouette I wear most often in editorial contexts because it reads as quietly serious without reading as hiding. The cigarette pant defines the calf and ankle. The shirt does everything else.

    You do not need all eight. You need three that you genuinely like, repeated in slightly different colors and fabrics, and the dressing question on most mornings disappears.

    The bra question

    The bra question

    I am putting this in its own section because it matters more than the rest of it combined. The number of women I have styled who are wearing the wrong bra size is somewhere north of 80 percent, and the number who have not had a real professional fitting in five years or more is higher than that. The wrong bra changes the silhouette of every single outfit above it. You can do all eight of the silhouettes above and still look subtly off if the foundation underneath them is in the wrong cup.

    Your wedding-day cup size is not your current cup size. Your post-pregnancy cup size is not your current cup size. Your cup size from before you started or stopped a medication that affected your hormones is not your current cup size. Cup sizes shift with weight, with age, with menstrual cycle, with hormonal contraception, with motherhood, with peri-menopause. The body you have today has the bra size you have today, and it is almost certainly different from the bra size on your most recent purchase.

    Two places in the US do this fitting properly and at no charge. Nordstrom’s lingerie department will fit you in cup sizes from A through K, the consultation is free, and you are under no obligation to buy. Ask for an experienced fitter and tell them your goal is calibration, not purchase. The other is Town Shop on the Upper West Side of Manhattan, which has been doing professional bra fittings since 1888 and is the gold standard. A Town Shop fitting is twenty minutes, no appointment, no charge unless you buy. Both options will measure you correctly using the band-first method rather than the volumetric guessing most lingerie boutiques default to.

    Once you know your real current size, the next thing every outfit above sits on top of changes. Tops drape differently. Dresses fall differently. Blazers close differently. The single highest-return styling move available to most plus-size women is not a new blazer or a new dress. It is a properly fitted bra in two colors that they replace every nine to twelve months.

    Shopping rules for the body you have

    Shopping rules for the body you have

    Three rules. They are not negotiable for me and I would not write this article if I weren’t willing to put them in writing.

    Try on before you buy. Sizing across plus-size retailers is wildly inconsistent. A 16 at Old Navy is not a 16 at Eloquii is not a 16 at Universal Standard is not a 16 at vintage. Online sizing charts are starting points, not finishing lines. If you cannot try on, buy from a retailer with a no-questions return policy and return what does not work the day it arrives, not in three weeks.

    Do not buy anything for an event that is more than three months out. Your body in three months is unknown. Your mood in three months is unknown. Whether the event happens in the format you currently imagine is unknown. Anything you buy for an event further than ninety days from now is, statistically, more likely than not to either not fit or not feel right by the time the event arrives. Buy event clothing in the window you are actually about to live through.

    Rent for the gala. Anything that requires a price tag higher than $200 for a single event – the black-tie wedding, the gala, the work awards night, the cousin’s destination wedding in Tulum – rent it. Rent the Runway, Nuuly, Armoire, and Vivrelle all carry sizes through 24 reliably and some carry through 28. The math is not even close. A $1,200 dress worn once is $1,200 per wear. A $90 rental of a $1,200 dress worn once is $90 per wear and gets shipped back the next morning.

    The body-neutral language reframe

    The body-neutral language reframe

    The language you use about your body in your own head is part of what gets dressed when you get dressed, even if no one else can hear it. McGoldrick’s clinical work, published across several papers and her 2024 book on fashion psychology, includes a deceptively small intervention that has held up consistently across her client samples: try, for one week, replacing the phrase “my body” with the phrase “this body.”

    The substitution sounds trivial and produces a result that is not. “My body” implies ownership, judgment, a verdict you have already rendered. “This body” is descriptive. It is the body that is here. It does not require you to feel any particular way about it. It just acknowledges that it exists and that it is, today, the one getting dressed. McGoldrick’s clients reported, on average, a measurable drop in clothing-related anxiety after one full week of consistent use of “this body” instead of “my body” in their internal narration.

    I do not love every “love your body” message in the wellness aisle and I am not asking you to either. Body positivity, as a movement, has produced both real progress and a layer of forced cheerfulness that some of us have never quite been able to perform. The body-neutral move is different. It does not ask you to love anything. It asks you to stop running a continuous quiet trial. “This body needs a bra that fits. This body is cold today. This body wants the wide trouser, not the skinny.” That is a livable internal voice. The other one is exhausting.

    What to keep buying secondhand vs new in 2026

    What to keep buying secondhand vs new in 2026

    Plus-size secondhand has gotten significantly better in the last three years and remains the place where the value math is most favorable, but not for every category. Here is the split I use, and recommend.

    Buy secondhand: outerwear (coats hold up for decades and the resale market is full of barely-worn plus-size coats), denim (washed-in denim wears better than new denim and saves the most money), blazers (especially structured tailored pieces that are expensive new), bags, leather, dresses for one-off occasions you nonetheless want to own. ThredUp’s plus-size category, Poshmark, The RealReal for designer, and your local consignment if it actually stocks above a 16.

    Buy new: bras (always, fit drift and band stretch make secondhand bras a false economy), underwear, swimwear (the structure and elastane degrade), shapewear, athletic wear with technical fabrics, white shirts you intend to wear weekly, and the foundational pieces in your eight silhouettes. The reason to buy these new is that they are the daily-rotation pieces. The cost-per-wear math actually favors new on anything you will wear more than thirty times.

    The split saves real money over a year. My current personal mix is about 60 percent secondhand by item count and roughly 30 percent secondhand by dollar spend, and the wardrobe is the most useful one I have ever owned at any size.

    What to wear tomorrow

    What to wear tomorrow

    The wardrobe you build for the body you are working toward is a wardrobe you are not wearing. That is the entire argument of this article in one sentence. Every Saturday it sits in the closet is a Saturday you showed up in clothing chosen for a stranger. Every dinner you ate in the second-best outfit because the best outfit was reserved for the smaller version of you is a dinner the smaller version did not actually attend. The body in the mirror today is the body that gets dressed first. The other one, if she arrives, can wait her turn.

    Tomorrow, before you do anything else, pull out a wide-leg pant in your current size, a fitted tee in your current size, and the most comfortable shoe in the rotation. Tuck the tee halfway. Add the third piece you reach for most often – a longline blazer, a soft duster, an open shirt. Look in the mirror once, take one piece of jewelry off if there are more than two, and leave the house. That is the outfit. It cost you nothing this morning, it took ninety seconds, and it was built for the body that walked into the closet, not the one you keep telling yourself is on the way.

  • Plus-Size Fitness: What to Wear for Pilates and Barre Classes (A Size 22 Wellness Mentor’s Reformer-Tested Guide)

    Plus-Size Fitness: What to Wear for Pilates and Barre Classes (A Size 22 Wellness Mentor’s Reformer-Tested Guide)

    The reformer at the Club Pilates studio I attend in Decatur, Georgia is calibrated to a one-spring resistance for the footwork series, which is the first ten minutes of a beginner class, and the studio’s standard temperature on a Tuesday evening in February 2026 is cool enough that you feel it on your shoulders before you start moving. I am a size 22. I am lying supine on the carriage, my feet on the foot bar in heels-together, toes-apart Pilates V, and I have already failed at four pieces of my wardrobe in the first six minutes of the class. The leggings, a pair of Old Navy PowerSoft 7/8 high-rise in a heather charcoal that I had bought in size XXL the previous week at the Edgewood Retail District store, have started a slow migration along the inner thigh seam from the moment Mariel cued the first footwork rep. The seam is now tracking inward toward the center of my body with every single press of the carriage out, and by rep eight on a set of ten, the seam has rotated nearly an inch off true. The cropped tank top I had paired with it, a Nike Pro Indy crop in a size 2X that I had assumed would stay put on a Pilates mat, has ridden up to expose three inches of my mid-belly to a ceiling fan I had not noticed before. The Aerie Offline sports bra underneath, a 38DD that the website had assured me would handle “low to medium impact,” is fine on bounce-control because there is no bounce in Pilates, but the band is rolling at the underbust because I am lying on it and my own weight is pressing the elastic out of true. And the grip socks I had grabbed from a clearance bin at TJ Maxx, a no-name brand whose calf circumference cannot accommodate a size 22 lower leg, are biting into my calves so hard that the indentation will still be there four hours later when I am washing my face for bed. Four wardrobe failures. One reformer class. Six minutes in. This is the article I wish someone had written for me before that Tuesday.

    Club Pilates Decatur Georgia reformer studio interior 2026

    I have been writing about plus-size wellness for seven years, and I have spent the last fourteen months attending Pilates and Barre classes twice a week at three different studios across metro Atlanta as part of a personal mobility project that started after a Cooper Clinic functional movement screen flagged a thoracic rotation deficit. I am not a certified instructor. I am a wellness mentor and an essayist, and I am also a working consumer who has spent more on activewear in the last fourteen months than I have ever spent in a comparable window on any other category of clothing. What I have learned is that the activewear industry has gotten meaningfully better at plus-size cardio gear in the last five years, and meaningfully worse at acknowledging that Pilates and Barre are not cardio. The fabric science, the seam engineering, and the elastic placement that work for a thirty-minute interval class on a Peloton bike at size 22 are not the fabric science, seam engineering, and elastic placement that work for a fifty-minute reformer class where you are inverted, supine, and side-lying for at least sixty percent of the session. This piece is the long version of what I have learned. It is meant for the size 14, 18, 22, 26 woman who has been told to “just wear what you’d wear to the gym” by a sales associate who has never done a side-lying leg series on a reformer in a body that ends in a 47-inch hip.

    Pilates and Barre body mechanics, and what fabric and seam engineering they actually demand

    The structural difference between Pilates, Barre, and cardio is not subtle, and it has direct implications for what your clothes need to do. Cardio modalities involve repetitive impact, sustained heart rate elevation above seventy percent of max, and a body that is largely upright or hinged forward at the hip. The activewear demands are bounce control, moisture management, and a waistband that will not slide during sustained vertical motion. Pilates and Barre are structurally different. Joseph Pilates, who developed the method in the 1920s and named it “Contrology” before his students began calling it by his surname, built the system around six original principles: concentration, control, centering, flow, precision, and breath. The modern Pilates instructor Brooke Siler, who trained directly under Romana Kryzanowska at the original Pilates studio on Eighth Avenue in Manhattan and who wrote “The Pilates Body” in 2000, has talked extensively about how those six principles translate to slow, controlled, gravity-against movement that prioritizes connective tissue and deep stabilizers over the gross movers that cardio targets.

    What this means for your clothes is specific. Slow, controlled movement against gravity puts your body in positions you do not occupy during cardio. You are supine for footwork, prone for swan and pulling straps, side-lying for the side leg series, and inverted in short spinal articulations during the short spine massage and the jackknife. In every one of these positions, your clothing is being pressed into your body by your own weight against a vinyl or leather carriage surface, and the fabric is not asked to wick sweat (because you are not sweating heavily, by design) but is asked to stay in place while gravity tries to relocate it. The forces are pressure forces and slow shear forces, not impact forces. The fabric science that handles those forces is heavier knit, denser stitching, and seam placement that does not cross the contact zones between your body and the equipment.

    Dr. Stacy Sims, the New Zealand-based exercise physiologist whose book ROAR (first published 2016, revised edition January 2024) is one of the most-cited texts in women-specific sports science, has spent the last decade arguing that women’s connective tissue responds differently to slow, controlled strength work than to high-impact cardio, and that recovery and adaptation windows shift across the menstrual cycle. Sims summarizes the work on her own platform and in the revised edition of ROAR. The relevance for plus-size bodies is the slow eccentric loading Pilates and Barre deliver: the connective tissue around hips, knees, and the lumbar spine is being asked to bear a body it’s already been bearing for years, without the impact spikes that higher-load modalities introduce. The clothing implication is downstream of the science. If you are going to be doing this work for the long haul, and the science says you should be, then the clothes need to be engineered for the actual mechanics, not the marketing version of fitness mechanics.

    The structural problem the rest of this guide turns on is that the standard activewear seam is engineered for a body whose thighs don’t touch, where the inner-thigh seam never experiences friction during movement. At size 22, where the inner thighs are in continuous contact, that seam is being shear-loaded with every rep. A flatlock seam designed for cardio breaks down within minutes. The plus-size Pilates wardrobe needs a different seam strategy entirely. Either the seam moves (gusset construction), or the seam goes away (seamless knit), or the seam is reinforced (bonded seam tape over the inner thigh). I’ll get to the brands that solve this and the brands that pretend to.

    plus size woman supine on Pilates reformer footwork position

    The four wardrobe failures specific to plus-size Pilates

    The four failures I experienced in my first Club Pilates class are not random. They are predictable, they are common, and they map to four distinct engineering problems that the activewear industry has not solved at scale. The first failure is inner-thigh seam migration, which I have already named. The second failure is what I am going to call “top creep,” which is the phenomenon where any top that is not engineered for a supine or inverted position will travel up your torso the moment you go horizontal. A cropped tank that sits perfectly at the natural waist when you are standing in front of a mirror in the studio lobby will be at your bra band within six reps of footwork. A standard-length tee will be at your sternum. The structural reason is that the friction between your back and the carriage vinyl is greater than the friction between the fabric and your front, and Newton does the rest.

    The third failure is sports bra band rotation under body weight. A bra that fits correctly when you are vertical is fitting against gravity that runs from your shoulders to your hips. Lie down, and the gravity vector runs from your sternum to your spine. The band is now being pressed laterally rather than vertically, and a bra that is engineered for impact (with a wide elastic underband and a high front gore) will rotate out of true because the underband is now bearing weight it was not designed to bear. The fourth failure is the grip sock calf cutoff, which is a flat sizing failure rather than an engineering failure. The grip sock industry, until very recently, sized its products on a straight-size lower leg, and the calf circumference of a plus-size woman frequently exceeds the upper band tolerance of the standard sock. The sock either cuts off circulation, rolls down to mid-calf and bunches, or rips at the heel within three wears.

    Knowing the four failures is the first half of solving them. The second half is knowing which brands have actually addressed them, which brands have launched plus-size lines that did not address them, and which brands are using “extended sizing” as a marketing veneer over a straight-size pattern block. I am going to walk through tops, bottoms, sports bras, and grip socks one category at a time, with specific SKUs and specific 2026 prices, and I am going to flag where the brand has solved the problem at the engineering level versus where the brand has solved it on the website.

    plus size leggings inner thigh seam construction close up

    Tops: the cropped versus tunic-length debate at size 22

    The top creep problem has two structurally different solutions, and the plus-size Pilates community is split on which one to use. Solution one is the cropped or fitted tank that is engineered with a band of silicone gripper at the hem to anchor it to the body, the same construction that strapless bras use to stay up. Solution two is the tunic-length top with enough length below the natural hip that even significant upward travel still leaves the torso covered. Both solutions have advocates, and both have brands that execute them correctly at size 22.

    Beyond Yoga Plus is the brand that has executed the gripper-hem cropped tank the most reliably in plus sizes. The Spacedye Lift Your Spirits Cropped Tank in sizes 1X through 4X at $66 in 2026 has a silicone gripper band at the hem and the Spacedye fabric (87 percent polyester, 13 percent spandex) has enough body to lie flat against the torso without bunching. I own this tank in three colors, and it is the only cropped style I will wear to a reformer class. The Beyond Yoga Plus Spacedye Cropped Long-Sleeve at $88 is the cool-weather version of the same engineering choice. Athleta Plus has been pushing the Salutation Mesh Tank at $54 in sizes 1X through 3X as its Pilates-marketed top, and the Salutation Stash Pocket II Crop at $59, but neither has the gripper hem, and both will creep on a supine series. The Salutation Elation cross-back tank, currently $64 in plus, holds its position better because the cross-back construction anchors it to the bra band rather than to the torso, but the bra band itself has to be the right bra for that to work, which I will get to in the sports bra section.

    The tunic-length solution is where Universal Standard Movement and Superfit Hero make their case. Universal Standard launched its Movement line in 2022 specifically for low-impact training, and the Movement Tunic in sizes 4XS through 4XL at $98 in 2026 is cut to fall four inches below the natural hip with a curved hem that does not ride up because there is too much fabric below the contact zone for upward travel to expose any midsection. The fabric is a 76 percent recycled polyester, 24 percent elastane blend that is heavy enough to drape without clinging, and the cut is wide enough across the shoulder that it does not pull at the front when you press into footwork. Superfit Hero, the Los Angeles-based brand founded by Micki Krimmel in 2015 and size-inclusive from launch (sizes L through 7XL across most of the line), makes the Body Confidence Tank at $66 with a length that hits at the high hip and a side-shirred construction that lets the fabric move with the torso without traveling upward. Superfit Hero is also the brand in this review whose fit model for the larger sizes is actually a larger-sized woman, not a smaller size graded up, and the difference is visible in the way the armhole sits.

    Old Navy Plus Activewear deserves a mention here as the budget option. The PowerSoft Cropped Tank at $24.99 in sizes 1X through 4X has gripper-adjacent construction (a thicker elastic band at the hem, not silicone, but functional) and the PowerSoft Tunic Tank at $26.99 is a workable budget version of the Universal Standard piece at a quarter of the price. Old Navy’s fabric will not last as long, the elastic at the hem will lose its grip after roughly twenty washes, and the fit model is a straight-size graded up rather than a plus-size patterned, but if you are starting Pilates and are not sure you will stick with it, the Old Navy tunic tank is a defensible starting point. I would not recommend it as a long-term solution, but I would recommend it over the wrong tank from a more expensive brand.

    Beyond Yoga Plus Spacedye Lift Your Spirits cropped tank navy

    Bottoms: leggings versus capri versus shorts, and the inner-thigh seam reality

    The inner-thigh seam is the single most consequential engineering choice in plus-size Pilates bottoms. The brands that have addressed it have done so in one of three ways, and the brands that have not addressed it should not be in your Pilates drawer regardless of how comfortable they feel during a standing fitting in the dressing room.

    Beyond Yoga Plus uses what the brand calls “no-show seaming” on the Spacedye High-Waisted Midi Legging in sizes 1X through 4X at $97. The construction is a gusset seam at the crotch that distributes the seam load across four panels rather than concentrating it at a single inner-thigh seam, and the inner-thigh itself is essentially seamless, with the fabric panels joined behind the leg rather than at the inner thigh. I have done a fifty-minute reformer class in these leggings, including the side-lying series and a full short spine, and the seam stays where it is supposed to stay. The fabric content is 87 percent polyester, 13 percent spandex, which is the same as the Spacedye tank, and the body of the fabric is heavy enough that it does not show sweat marks (which matter less in Pilates than in cardio, but still matter).

    Athleta Plus’s Salutation Stash Pocket II Tight at $98 in sizes 1X through 3X has a standard four-needle flatlock inner-thigh seam, and it is the seam that fails for me at size 22 with predictable consistency. The fabric is the brand’s Powervita, a 79 percent recycled nylon, 21 percent Lycra blend, and the fabric itself is excellent. The seam is the problem. I have bought this legging twice on the assumption that maybe my first pair was a defect, and the seam has migrated on me in both pairs. I do not recommend the Salutation Stash for Pilates at size 22. I recommend it for walking and for upright Barre work, where the seam load is different.

    Universal Standard Movement’s Form 73 Legging at $98 in sizes 4XS through 4XL is the brand’s Pilates-specific bottom, and it uses a bonded seam construction on the inner thigh, which is the third engineering solution. The seam is heat-bonded rather than stitched, which eliminates the friction edge that a stitched seam creates. The fabric is a 75 percent nylon, 25 percent elastane blend with the brand’s proprietary Form 73 compression. I have worn these for three months of weekly reformer classes, and the bonded seam has not failed. The legging itself runs longer in the inseam than the Beyond Yoga version (about a 28-inch inseam at the 3X versus 26.5 inches at Beyond Yoga’s 3X), which is something to factor in if you are shorter than 5’6″.

    Senita Athletics’s Lux High-Waisted Legging at $59 in sizes XS through 3X is the moderate-price option. The construction uses a curved center-back seam that splits the inner thigh into two shorter seam segments, which reduces the shear load on any single seam point. It is not as elegant a solution as Beyond Yoga’s gusset or Universal Standard’s bonded seam, but it works at the price point. Senita’s plus sizing tops out at 3X, which limits the brand’s usefulness for size 26 and above. Superfit Hero’s Power Move Legging at $94 in sizes XS through 7XL uses a gusset construction similar to Beyond Yoga’s, and the 7XL pattern is actually drafted for that size rather than graded up, which is the brand’s structural differentiator.

    On the capri-versus-legging-versus-shorts question, I am firmly on the side of the full-length legging for Pilates, and I am on the side of the capri for Barre. The reason is the contact surface. In Pilates, your lower leg is in contact with the reformer carriage during prone work, and a capri that ends mid-calf will expose your skin to the carriage vinyl, which is not comfortable when the vinyl is cold. In Barre, you are vertical the entire class, and a capri keeps the calf cool during the static-hold work where the lower leg is doing the most. The Beyond Yoga Plus Spacedye Midi Legging is the right product for reformer Pilates. The Old Navy PowerSoft Cropped Pant at $39.99 in sizes 1X through 4X is a workable capri for Barre. I would not wear shorts to either, but that is a personal preference about how my own body interacts with a vinyl surface, not a categorical recommendation. Some plus-size practitioners I know swear by Athleta’s Salutation Stash Pocket II Bike Short at $54, and the bike short does avoid the inner-thigh seam migration problem because the seam is so short. If you are heat-sensitive in a studio environment, that is a real consideration.

    Spanx Booty Boost Active Leggings at $98 are the look-versus-function debate in physical form. The shaping panels in the legging deliver a visibly smoother silhouette in the studio mirror, which is a real benefit for some women’s confidence in a public class. The shaping panels also constrict the abdomen in a way that interferes with the diaphragmatic breathing that Brooke Siler and every other working Pilates teacher will tell you is the foundation of the method. You cannot breathe into your low back through a shaping panel. You can breathe into your chest, which is the wrong breath for Pilates. I have worn the Booty Boost to Barre, which is a more upright modality with less emphasis on lateral rib expansion, and they are fine. I will not wear them to a reformer class. The function loss is too high for the look gain.

    Universal Standard Movement Form 73 legging bonded seam plus size

    Sports bras for Pilates and Barre: low-impact engineering at H cup

    The plus-size sports bra category is the most over-promised and under-delivered segment of the activewear industry, and the Pilates and Barre-specific subset of that category is the most difficult problem within the difficult problem. The reason is that low-impact engineering for cup sizes above DD has been treated by the industry as a secondary concern to bounce control for high-impact modalities, and the bras that get marketed as “low-impact” in plus sizes are largely high-impact bras with the marketing copy changed.

    The structural issue, as I described in the section on the four failures, is that a bra engineered for vertical impact is not engineered for the lateral and supine pressure that Pilates puts on the underband. At an H cup, which is where my own bra sizing lives, the underband is doing roughly seventy percent of the work of holding the breast tissue in place. The cups are doing twenty-five percent and the straps are doing five. If the underband rotates because your body weight is pressing it against the reformer carriage, the bra has failed regardless of how well the cup is engineered.

    The bra I have landed on after eight months of trial is the Knix Catalyst Sports Bra in sizes 32C through 42H at $98 in 2026. The Catalyst uses what Knix calls a “smooth profile” underband, which is a wider, softer elastic than the standard sports bra underband, and the band is designed to compress laterally without rotating because the elastic tension is distributed across a larger surface area. I have worn the Catalyst through full reformer sessions including supine, prone, and side-lying work, and the band stays in position. The cup is encapsulation rather than compression, which matters at H because compression bras at large cup sizes flatten the tissue in a way that is uncomfortable during the prone work where you are lying directly on the chest.

    For practitioners at smaller cup sizes (DD through F), the Beyond Yoga Plus Spacedye Lift Your Spirits Bra at $66 in sizes 1X through 4X is a workable Pilates bra. The construction is a long-line racerback with a wide elastic underband, and the lift is moderate rather than high. The Spacedye fabric carries through from the tank and the legging, which makes for a coordinated set if you care about that. The Athleta Plus Ultimate Bra at $69 in sizes 34D through 44E is the brand’s most-purchased plus bra, and it is engineered for medium-impact rather than low-impact, but the underband construction holds up reasonably well in supine work. I would not recommend it for cup sizes above F.

    The bra I would actively recommend against for Pilates and Barre at any plus size is the Aerie Offline Real Me High Neck Sports Bra. The Real Me is excellent for yoga and for walking, and the fabric is soft against the skin, but the underband is engineered for low-tension compression rather than for lateral stability. It rotates on a supine series. It rotates on a side-lying series. The Aerie Offline Real Me is the bra I was wearing during the Club Pilates Decatur class I opened this article with, and it is part of the reason that class became the prompt for this entire piece. The Nike Pro Indy at $50 in plus sizes 1X through 3X has the same engineering profile, and the same problem.

    Andrea Speir, the Los Angeles-based Pilates instructor who runs Speir Pilates, has talked publicly about how the bra question is the one her larger-cup clients ask most often, and her general recommendation aligns with what worked for me: an encapsulation bra with a smooth, wide underband. The European option many plus-cup women point to is the Anita Active Momentum (model 5544), available in sizes that go well into the H-cup range and stocked through Bare Necessities. The Anita underband is wider than the Knix, and the fit at H is structurally similar. That’s the bra I’d recommend if the Knix is sold out in your size.

    Knix Catalyst plus size sports bra wide underband neutral

    Grip socks: the two brands that fit plus calves

    The grip sock problem is the most-overlooked of the plus-size Pilates wardrobe problems, and it has the cleanest solution. There are two brands that have meaningfully addressed plus calf circumference in 2026, and there are roughly a dozen brands that have not.

    ToeSox, founded in 2004, is the brand whose Bellarina grip sock (half-toe and full-toe variants) is the legacy product, priced around $20-22 a pair. The construction uses a softer, wider rib at the cuff than most clearance-aisle grip socks, and the silicone grip pattern on the sole catches a reformer carriage and a foot loop cleanly. The half-toe construction (the toes are exposed) is the choice for hot studios. The Full-Toe version is the choice for cooler studios. I own both. I wear the Bellarina Full-Toe to every reformer class. ToeSox’s plus-friendly fit isn’t called out as a separate “Plus” line on the site, but the wider rib at the cuff is the reason this fits where the no-name brands cut off.

    Tavi (Tavi Noir / Tavi Active), founded as a sister brand to ToeSox under the same parent group, makes the Emma high-crew grip sock at around $24 a pair, with the Emma running the highest up the calf of any grip sock I’ve tested. The cuff sits at mid-calf rather than lower calf, the elastic is softer than the ToeSox version, and the grip pattern catches the reformer carriage cleanly in side-lying work where the foot is in contact with the foot bar at an angle. Tavi’s sizing officially runs through size L. I’m a 15-inch calf at the cuff line, and the Emma fits me without binding.

    The brands I would not buy for plus calves include Pointe Studio (calf cuff binds at over 14 inches), Lululemon (the brand does not make grip socks in plus sizing at all), and any of the no-name brands at TJ Maxx, Marshalls, and Ross. The clearance bin is not where the plus-size Pilates wardrobe gets built. I learned that the slow way.

    ToeSox Bellarina grip socks plus calf size Pilates reformer

    The reformer-class specific reality: springs, foot loops, neck pad

    The reformer is the piece of Pilates equipment that introduces wardrobe constraints that the mat work does not. There are three contact points on a reformer that interact with what you are wearing: the spring system at the head of the carriage, the foot loops or straps at the front, and the neck pad at the back of the carriage. Each one has implications for your wardrobe.

    The springs are not a direct contact point with your body in a standard class, but the spring tension and the spring sound are sensory elements that affect how you experience the class, and a wardrobe that pulls your attention away from the movement makes the spring cues harder to follow. If your leggings are migrating, your tank is creeping, and your bra is rotating, you are spending mental energy on your clothes that should be going to the breath and the spring transition. This is the case for spending money on the right gear rather than getting by with the wrong gear. The cognitive load of bad gear is real, and Joseph Pilates’ first principle is concentration. Concentration is harder when your wardrobe is broken.

    The foot loops are the more direct contact point. In the long spine massage, the jackknife, and several of the spring-supported leg series, your foot is in a leather or canvas loop, and the friction between the loop and your foot determines how stable the position is. Grip socks help here, because the silicone on the sole catches the inside of the loop in a way that bare feet on a sweaty carriage does not. The Bellarina Full-Toe and the Emma High Crew both perform this function well. A standard athletic sock does not. A bare foot is fine in a warm studio for the experienced practitioner, but is a stability risk for the beginner.

    The neck pad is the contact point that affects what you wear at the top. In the supine series, your head and upper back are resting on a small leather or vinyl pad at the head of the carriage, and the top of your sports bra band, the back of your top, and the back of your head are all in contact with that surface. A top with a hood, a high collar, or a thick neckline (like a turtleneck Spacedye long-sleeve I tried once) will bunch under the neck pad and pull your head out of alignment for the duration of the supine work. The recommendation is a top with a low scoop neck at the back, no hood, and no collar. The Beyond Yoga Plus Spacedye Cropped Tank, the Universal Standard Movement Tunic, and the Superfit Hero Body Confidence Tank all meet this requirement. The Athleta Salutation Elation cross-back tank also meets it, and the cross-back construction actually performs better against the neck pad than a standard scoop because there is no fabric on the upper back to bunch.

    Pilates reformer foot loops springs neck pad detail

    What I wear now versus month one: the four-piece capsule

    Fourteen months into this project, my Pilates and Barre wardrobe has consolidated into a four-piece capsule that I rotate across two complete sets. The capsule is built around the four engineering solutions I have walked through, and it is meant for a Tuesday-Thursday class schedule with a wash on Friday.

    The bottom is the Beyond Yoga Plus Spacedye High-Waisted Midi Legging at $97, in black and in a heather charcoal. I own two pair, I wash them on cold, I hang them to dry, and the gusset seam has not failed at the inner thigh in eight months of weekly wear. The top is the Beyond Yoga Plus Spacedye Lift Your Spirits Cropped Tank at $66, in three colors. The gripper hem holds against top creep, the back is a low scoop that does not interact with the neck pad, and the fabric coordinates with the legging if I care about that on a given Tuesday. The bra is the Knix Catalyst Sports Bra at $98, in two colors. The wide underband holds against lateral rotation, the encapsulation cups are comfortable on prone work, and the bra has survived roughly eighty washes without losing structure. The socks are the ToeSox Bellarina Full-Toe Grip Sock at $22, in three pairs in rotation. The plus calf cuff fits, the grip pattern catches the carriage and the foot loop reliably, and the half-toe option is in the drawer for the rare warm-studio class.

    The total replacement cost of the four-piece capsule at one set is $283. At two sets, it is $548 plus an extra pair of grip socks. That is not a small number, and I am not pretending it is. It is also a meaningful step down from what I spent in the first six months of this project on Athleta Salutation pieces, Aerie Offline bras, Old Navy PowerSoft leggings, and the clearance-bin grip socks that started this whole problem. I bought roughly eleven pieces in those first six months at a total spend of about $640, and I now wear three of those eleven pieces, none of them to a reformer class. The cost of getting it wrong is higher than the cost of getting it right. The cost of getting it right is the cost of buying once.

    Ragen Chastain, the size acceptance writer and athlete who has been documenting her own plus-size fitness practice publicly since 2007 and whose newsletter Weight and Healthcare is read across the size-acceptance and athletic-fat communities, has written explicitly about the way the industry has tried to monetize the wardrobe failure cycle, where each new “plus extension” capsule from a major brand is sold as the solution to the failures of the previous capsule. Chastain’s argument, which I largely agree with, is that the structural fix has to come from brands like Universal Standard, Superfit Hero, and Beyond Yoga that have built their plus pattern blocks from a plus model rather than from a graded-up straight size. The cycle breaks when the engineering is correct from the start. The cycle does not break by sizing up.

    plus size Pilates four piece capsule wardrobe flat lay 2026

    The observation I want to close on is the one that took me fourteen months and roughly $1,200 in activewear to arrive at, and it is the observation that almost no one in the plus-size fitness conversation is making out loud. The reason plus-size women need different fabric and seam engineering for Pilates and Barre than for cardio is not a comfort question, and it is not a vanity question, and it is not a question of bounce control. It is a question of what the modality is actually doing. Cardio asks your body to move fast against itself, and the wardrobe demands of cardio are about managing the speed and the impact and the moisture that come out of that. Pilates and Barre ask your body to move slow against gravity, and the wardrobe demands of those modalities are about managing the pressure of your own body weight against equipment surfaces, and the shear of your own thighs against each other, and the lateral rotation of your own bra band under your own torso. Those are different problems. They require different solutions. The industry has solved the cardio problems for plus sizes at a B-minus level. It has barely begun to solve the Pilates and Barre problems, and the brands that have are not the brands that market themselves the loudest. The seam that holds is not the seam that gets the campaign. The bra that does not rotate is not the bra at the front of the website. The grip sock that fits a 15-inch calf is in a sub-category page three clicks deep on a brand most non-Pilates people have never heard of. The work of finding the right Pilates wardrobe at size 22 is, in 2026, still meaningfully harder than the work of doing the Pilates itself. That is the observation. That is what I would tell the version of myself who walked into Club Pilates Decatur in February 2026 with the wrong leggings, the wrong tank, the wrong bra, and the wrong socks, if I could send her a single piece of information ahead of her first class. The clothes are not an afterthought to the practice. For a plus-size body, in a Pilates studio, the clothes are part of the practice.

  • Plus-Size Productivity: How to Set Up a Sunday Night Closet Reset

    Plus-Size Productivity: How to Set Up a Sunday Night Closet Reset

    A plus-size Black woman in a Brooklyn closet at golden hour setting up five outfits on a garment rod with day-of-week tags pinned to each hanger and a Yamazaki valet stand in the foreground

    It was 5:47 pm on a Sunday in late September when I admitted that my Monday morning was not a personality flaw, it was a system failure. My one-bedroom in Crown Heights had the kind of closet you get for $2,400 a month in 2026 Brooklyn, which is to say it was a reach-in with a single rod, a top shelf, and a floor that was supposed to hold shoes but was holding a heap of dry-cleaning bags I had not gotten around to processing. Six days earlier, on the previous Monday at 7:51 am, I had been late to a 9 am editorial meeting at our SoHo office because I had pulled a pair of wide-leg trousers from a hamper, dragged a steamer over them for ninety seconds, and zipped them anyway. The shoes I wore – a pair of taupe block heels – had a black scuff on the right toe from a subway grate two Fridays prior that I had told myself I would buff out and had not. My bag was the wrong bag for the outfit, a slouchy hobo I had grabbed because the structured satchel was still packed with last Friday’s gym clothes. I sat down at my desk at 9:14 am, took a sip of cold brew, and felt the specific kind of low-grade shame that comes from looking like a person who does not respect her own time. I am a fashion editor. I dress people for a living. The trousers were rumpled.

    That Sunday at 5:47 pm, with the trousers still in the hamper from six days earlier and the shoes still scuffed and the dry-cleaning bags still on the floor, I set a kitchen timer on my phone for forty-seven minutes and I built the protocol. Five phases. Each one timed. No phase longer than twelve minutes. Total budget under fifty minutes because anything longer than fifty minutes is something I will skip on a Sunday in February when the daylight is gone and the couch is calling. The protocol ended the Monday chaos. It has run every Sunday since, including the Sunday after Thanksgiving, the Sunday of a head cold, the Sunday I came back from a press trip to Lisbon at 4 pm jetlagged, and the Sunday before my sister’s wedding. Forty-seven minutes. The trousers have not been rumpled since.

    What I want to give you in this article is not a lifestyle ideal. It is a tested, timed, plus-size-specific protocol that respects the actual physics of a size 18 to 24 wardrobe – the weight of a wool blazer, the sag a beaded gown puts on a hanger, the way a heavier knit creases when it is hung wrong. The Sunday reset content that already exists online almost entirely assumes a straight-size closet, where a cotton blouse weighs four ounces and a pair of jeans weighs fourteen and a hanger choice is aesthetic, not structural. At size 22, the wool coat weighs four and a half pounds. The hanger choice is structural. The protocol below accounts for that, and for the specific time math of a Sunday night in a small apartment with a real job on Monday and a real life on Tuesday.

    Why “Sunday reset” content does not account for plus-size garment weight and storage

    If you have spent any time on closet-organization TikTok or in the back half of Pinterest, you know the genre. A pastel-lit walk-in. A row of identical white velvet hangers. A wicker basket of rolled bralettes. The voiceover talks about “energy” and “ritual” and the camera lingers on a candle. The system being demonstrated is, almost without exception, a straight-size system applied to straight-size garments in a straight-size quantity. The garment count is forty pieces. The hanger budget is one hundred dollars. The drawer dividers are decorative because the drawer is half empty. None of this is wrong for the person it was built for. It is wrong for a plus-size closet, and the wrongness becomes structural the moment you try to apply it to a size 18 to 24 wardrobe.

    Here is what changes at plus. A standard polyester blouse in size 6 weighs roughly five ounces. The same blouse in size 22 weighs roughly nine to eleven ounces because there is genuinely almost twice as much fabric in it. A wool-blend blazer in size 8 weighs about a pound and a quarter. In size 22, it weighs three and a half to four pounds. A pair of full-length wide-leg trousers in size 10 weighs about fourteen ounces. In size 24, with a heavier crepe and a longer inseam adjustment, it weighs nearly two pounds. The cumulative effect on storage hardware is real. A standard thin plastic tubular hanger rated for two pounds will start to bow under a size 22 wool coat within a week. The bow translates to a shoulder distortion that gets baked into the fabric and is visible the moment you put the coat on. A size 8 silk slip dress can hang on a wire hanger from the dry cleaner indefinitely. A size 22 beaded gown will pull the wire hanger into a V within four months and leave a permanent crease at the bust seam.

    Allison Bornstein, the New York stylist whose book Wear It Well built the now-famous Three-Word Method, has written that the foundation of getting dressed quickly is editing your wardrobe down to pieces that share an aesthetic vocabulary. Her Three-Word Method asks you to name your style in three adjectives and then audit every item in the closet against those words. The method is sound. What the method does not address, because Bornstein is generally working with straight-size clients whose wardrobe inventory is more flexible, is the storage layer underneath. You can edit a plus-size closet down to a perfect twenty-four pieces and still have a Monday morning disaster if those twenty-four pieces are hanging on hardware that cannot hold them.

    Tan France, whose Queer Eye styling philosophy and ongoing style work (including his MasterClass on capsule wardrobes) have become a baseline reference for weekly closet practices, has talked publicly about laying out the week’s outfits on Sunday evening. France’s version is essentially a hanger-rack lineup with five hangers labeled Monday through Friday. It works beautifully for him and for the size-medium clients he features. For a plus-size wardrobe, the same lineup needs reinforced hangers, more space between each hanger on the rod (because the shoulder structure on a size 22 blazer is wider than a size medium and they will physically crush each other if you crowd them), and a separate storage solution for the heavier knits because hanging a chunky merino sweater wrecks the shoulders within forty-eight hours.

    Shira Gill, the Bay Area organizer whose books Minimalista and Organized Living have become the practical alternative to the Marie Kondo era, makes a more useful point for plus closets. Gill’s principle is that an organized closet is a closet with breathing room – she recommends visible space between hanging items and full visibility of every shelf. The principle scales beautifully to plus, but it requires honesty about what plus garments actually need. A capsule of twenty-five pieces in a size 22 takes roughly the same linear rod inches as a capsule of forty pieces in a size 6. The math of the closet is not piece-count, it is fabric volume, and any system that does not start from fabric volume will fail by Wednesday.

    The protocol below is the version that accounts for all of this. Forty-seven minutes total. Five phases. Plus-size hardware assumptions baked in. Specific products named where the product matters.

    Phase 1: the 5-day rewind (8 min) – what got worn, what failed, what needs cleaning

    Hands holding a small notebook with a 5-column Monday-to-Friday grid of handwritten outfit notes and a phone showing a stopwatch at 6 minutes 12 seconds during the Sunday closet rewind phase

    The first phase is diagnostic. You cannot plan the week ahead until you understand what happened in the week behind. The eight-minute budget for this phase is generous. Most weeks it takes five. Set a timer.

    Walk into the bedroom with a small notebook and a pen. I use a pocket Field Notes Memo because it fits in the back pocket of my Sunday leggings, but any notebook works. Draw a five-column grid for Monday through Friday. Under each day, write three lines: top, bottom, shoes. If you wore a dress, write dress and skip the bottom line. If you worked from home, write WFH and the outfit anyway. The point is the inventory, not the judgment.

    For each piece, mark one of three codes next to it. C for clean and ready to re-hang. L for needs laundry. S for needs spot-treat or steam or a button or a stitch. The most common mistake here is to skip the S code and just throw everything in the L bucket, which routes garments through the wash cycle they do not need and shortens their useful life. A wool blazer with a coffee splash on the lapel needs a spot-treat with a Tide To-Go pen and a damp microfiber, not a full dry-clean cycle. A pair of trousers that got rained on but not soiled needs a steam and an air, not a wash. The S code is where plus-size garment longevity is won or lost, because plus pieces are more expensive per unit (and harder to replace), so over-washing them is a meaningful financial drag.

    Once the grid is filled in, you should see patterns. Mine usually look like this: two pieces in the L bucket, three pieces in the S bucket, four pieces clean enough to re-hang directly. The trousers from the Monday I described at the top of this article were in the L bucket on the previous Sunday and did not get processed, which is how they ended up rumpled in a hamper six days later. The diagnostic only works if you act on it in Phase 2.

    The other thing to capture in the rewind is what failed. If you had an outfit that did not work – a fit issue, a wrong-fabric-for-the-weather issue, a meeting that demanded a different vibe than you had planned for – write a single line at the bottom of the grid. “Tuesday: black knit dress with denim jacket read too casual for the lunch.” “Thursday: sleeveless top was wrong for office AC.” This is the data that informs Phase 3. You are not planning next week in a vacuum. You are planning it with the receipts of the week you just lived.

    Phase 2: laundry stage (12 min) – the cycle, the air-dry, the spot-treat

    Twelve minutes is the longest phase, and it is the one most people underbudget. The reason it is longer is that you are doing three different things in sequence: starting a wash, setting up air-dry stations, and spot-treating the S-bucket pieces.

    Start with the wash. Pull the L-bucket pieces from the hamper. Sort by color and by weight. Plus-size knits and woven tops go together on a delicate cold cycle with a mesh laundry bag (I use the L-Brand Sak-it brand mesh bags, ten dollars for a three-pack on Amazon, and they have lasted me four years). Heavier pieces – jeans, denim jackets, structured cottons – go together on a normal warm cycle. Anything labeled dry-clean-only goes into a separate pile by the door for the dry-cleaner drop-off, which you will do on the way to work Monday or Tuesday. Do not throw dry-clean-only pieces in the washer because the internet told you that everything is washable. At plus sizes, dry-clean-only fabrics tend to be heavier and more structured, and the structure does not survive a home wash.

    While the wash is running – if you have a washer in your unit, which not every Brooklyn renter does, and if you do not, your Phase 2 substitutes a folded pile for the laundromat run on Monday after work and adjusts accordingly – set up air-dry stations. I use a Honey-Can-Do four-tier mesh sweater drying rack, which folds flat and stores behind the bedroom door, and a single shower-rod air-dry bar in the bathroom for the slip-dryable pieces. The rule is that anything with stretch (a ponte dress, a midi skirt with elastane, a knit top with a high spandex content) lays flat to dry, because hanging it wet pulls the fibers out of shape and the heavier the garment the worse the pull. At size 22, a wet ponte midi dress weighs nearly three pounds. Hang it wet on a hanger and the shoulder seams will be visibly distorted by morning.

    While the dryer is doing its thing – or while the rack is set up if you are line-drying – move to the spot-treat. Lay the S-bucket pieces on the bed. Get out the Tide To-Go pen, a small bowl of cool water, a couple of microfiber cloths, a steamer if you own one (I have a Conair Turbo Extreme Steam at $54 and it has earned out the cost in dry-cleaning savings within two months), and a small lint roller (Walgreens has a five-pack of fifty-sheet rollers for $7.99 and that is the best price-per-sheet I have found that is not Costco). Treat each spot. Steam each rumple. Lint-roll each piece. Twelve minutes is enough time for five to seven S-bucket items if you do not get on your phone.

    The plus-size note on Phase 2 is about fabric weight in the wash. A regular load of straight-size laundry runs about ten to twelve pounds. A regular load of plus-size laundry, the same number of garments, runs sixteen to twenty pounds. You will overload a standard-capacity washer faster than you expect, and an overloaded washer does not actually clean the clothes, it just sloshes them. Run two smaller loads, not one large one, even if it feels less efficient. The clothes will come out cleaner and will keep their shape longer.

    Phase 3: the 5-outfit lineup (12 min) – Monday-Friday by day’s calendar

    A closet rod with five plus-size outfits hanging in a Monday through Friday lineup on black velvet hangers with handwritten day-of-week paper tags safety-pinned to each hanger

    Phase 3 is the heart of the protocol, and it is the phase that most directly answers the Monday morning question. The deliverable is five complete outfits hanging in a row, in calendar order, each one mapped to the actual obligations of that day. Twelve minutes.

    Pull up your calendar on your phone. Read Monday through Friday in sequence. For each day, write a single descriptor at the top of an index card or a sticky note: Monday “editorial meeting + lunch with publicist.” Tuesday “WFH + 3 pm video call.” Wednesday “office + drinks after work.” Thursday “fashion week prep day, on feet all day.” Friday “travel day to LA, 2 pm flight.” The descriptor sets the dress code, the comfort requirement, the layering need, and the bag size for the day.

    Now walk into the closet. For each day, pull a complete look. Top, bottom, shoes, layer, bag. If you want to use Bornstein’s Three-Word Method as the editing filter – I do, mine is “polished, textured, terracotta” – run each piece through the words and confirm it earns the spot. If a piece does not, it does not get on the rack for the week. Hang each look on a single hanger, in calendar order, on a dedicated lineup rod or on the left side of your closet if you do not have a second rod. Pin a small index-card tag to each hanger with the day of the week and the descriptor.

    The hanger choice matters enormously at plus. The Honey-Can-Do velvet hangers (forty hangers for thirty-six dollars on Amazon) are my baseline because the velvet grip holds heavier garments without slipping and the slim profile saves about four inches of rod space across five outfits, which is the difference between cramped and breathing in a Brooklyn closet. The forty-pack is enough for a full Phase 3 lineup plus the rest of the closet inventory for a curated plus wardrobe. For the heaviest pieces – the wool coat, the beaded gown, the leather jacket – I use Container Store wide wooden hangers ($4 each) because the wider shoulder distributes the weight across more inches of fabric and prevents the dimple-shoulder distortion that velvet hangers can leave on the heaviest knits. A forty-pack of velvet and ten wooden hangers covers a thirty-five-piece working plus wardrobe.

    The general capsule rule for the lineup is that each outfit should be ready to walk out the door, which means accessories and underpinnings are pre-staged with the outfit. For plus dressing, the underpinning question is more involved. A wrap dress that needs a specific shapewear short. A silk blouse that needs a smoothing camisole. A pair of high-waisted trousers that read best with a specific bralette. Pin the underpinning note to the index card so you do not stand in front of the open dresser drawer at 7:23 am on a Tuesday rifling through three shapewear options. The note says “Tuesday: smoothing tank, beige, top drawer left.” Done.

    Allison Bornstein’s broader argument in Wear It Well is that decision fatigue is the silent killer of getting dressed, and that pre-deciding is the work of style. The Phase 3 lineup is pre-deciding made physical. By Sunday at 6:14 pm, the next five mornings are decided. Monday morning Tanya does not have to think. She has to put on what Sunday Tanya hung up.

    Phase 4: footwear + accessories (8 min) – de-scuff, polish, jewelry set

    Five pairs of shoes lined up on a dresser next to a leather jewelry tray with pre-selected earrings and necklaces during the Phase 4 footwear and accessories prep

    Eight minutes. Five pairs of shoes. The jewelry pulls for each outfit. The bag check.

    Pull each of the five pairs of shoes you assigned to the Phase 3 lineup. Line them up on a towel on the bedroom floor or on a small dresser surface. Run through them one at a time. The scuffed taupe heels from the Monday at the top of this article get a Meltonian shoe cream rub with a soft brush, ninety seconds. The white sneakers get a Magic Eraser on the rubber soles and a damp cloth on the canvas, sixty seconds. The black ankle boots get a quick edge-dressing touch-up if the heel edge has gone gray, sixty seconds. The brown loafers get a horsehair brush and a leather conditioner if the leather looks dry, ninety seconds. The navy slingbacks get a once-over with a lint roller because suede picks up everything, thirty seconds. Total shoe time, six minutes.

    Plus-size note on shoes: foot edema is more common at higher body weights, especially after long workdays on feet, and shoes that fit on Sunday at 5 pm may not fit on Wednesday at 4 pm. Build the week’s footwear with that in mind. If Wednesday is an on-feet day, the lineup shoe for Wednesday is the most generous-fit pair you own, not the most flattering. A pair of Vionic Karmelle loafers ($150) or Allbirds Tree Runners ($98) is a better Wednesday pick than a pair of pointed-toe heels even if the trousers were chosen with the heels in mind. Pre-decide for foot reality.

    The remaining two minutes go to jewelry and the bag check. Pull the earrings, necklaces, and rings for each outfit and stage them in a small leather tray on the dresser. I use a Cuyana tray that I bought at the Hudson Yards store in 2024 for $45, but a small ceramic dish or a leftover Le Creuset ramekin works. The point is that you are not opening a tangled jewelry box at 7:18 am on Wednesday hunting for a single gold hoop. The hoops are in the tray with the Wednesday outfit’s tag.

    Bag check is one minute. Pick up the bag you assigned to Monday. Open it. Empty it onto the bed. Sort: keys, wallet, lip balm, transit card, AirPods, sunglasses, charger, mini-umbrella, Tide To-Go pen, a few tampons or pads. Anything not on this list goes in a small ziplock that lives in a basket on the closet shelf and gets re-deployed when a different bag is in rotation. Reload Monday’s bag with the core. Pre-deciding the bag contents is the move that prevents the “wrong bag for the outfit” failure I had on the Monday at the top of this article.

    Phase 5: the bag prep + Monday-morning hand-off (7 min)

    The final phase is the hand-off. Seven minutes. The deliverable is a Monday morning where you do not have to make a single decision until you are on the train.

    Position the Yamazaki Tower valet stand (mine is the white one at $90 from Yamazaki Home, and it is the single best apartment-organization purchase I have made in five years) at the foot of the bed or in the bedroom corner. The valet stand holds: Monday’s outfit on its dedicated hanger, the bag underneath, the shoes at the base, and the index card tag visible on the hanger. The whole look is on one piece of furniture, vertical, waiting.

    Walk the look. Stand in front of the valet stand, hold the look up, and check it as if you were dressing a client. Does the bag color work with the shoes? Does the necklace land on the right neckline? Does the jacket layer work with the bag strap? Is the weather check done? Pull up the weather app and read Monday’s forecast. If rain is in the forecast, swap the loafers for boots and write the swap on the index card. If a cold front is coming through, add a layer to the look and re-pin the tag. This is the one phase where you might catch a Sunday error before it becomes a Monday problem.

    While you are doing the walk, put together the Monday bag. The keys go in. The wallet goes in. The AirPods get a quick charge if they are below thirty percent. The phone charger is in the side pocket. If you are bringing a laptop, the laptop is in the laptop sleeve and the laptop sleeve is at the door. If you are bringing lunch, write “pack lunch” at the top of the Monday index card so you see it when you walk into the kitchen at 6:45 am.

    The final move of Phase 5 is the closet door. Close it. The phases are done. The Monday is decided. The notebook from Phase 1 goes back in the drawer. The timer reads forty-six minutes and change. You are under budget. You can pour a glass of wine and watch Industry .

    Plus-size storage notes: heavier knit support, dust-cover blazer, foundation garment rotation

    An open dresser drawer with acrylic Iris Drawer Dividers separating folded plus-size knit sweaters in cream, terracotta, charcoal, and navy by the file fold method

    This section is the one you will not find in a straight-size closet-reset article. The storage rules for plus garments are different because the physics are different, and ignoring the physics is what turns a beautifully organized closet on Sunday at 7 pm into a stretched-out, dust-covered disappointment by Sunday at 7 pm three months later.

    Rule one: heavier knits fold, they do not hang. A chunky merino sweater, a cashmere cardigan over a certain weight, a cable-knit pullover – all of these belong in a drawer, folded, never on a hanger. The reason is gravity. A heavy knit hung on any hanger will sag at the shoulders within two to four wears, and the sag does not press back out. The original Marie Kondo principle of vertical-fold knits in a drawer, refined into more practical terms by Shira Gill, is the right move for plus knit storage. I use Iris Drawer Dividers (a four-pack of clear acrylic dividers, $26 on Amazon) to partition a single dresser drawer into four zones, one zone per color family. Each zone holds six to eight folded sweaters standing on their edges, file-fold style, visible at a glance.

    Rule two: structured blazers and tailored jackets need wide wooden hangers and a dust cover for non-rotation pieces. The blazer I wore last Tuesday and that is back in rotation this week stays on its wide hanger uncovered. The wool coat I will not wear until November stays on a wide hanger inside a breathable cotton garment bag (the Container Store sells natural cotton garment bags at $13 each, and they breathe in a way the plastic dry-cleaner bags do not). Plastic dry-cleaner bags trap moisture, which on a plus garment held over a long off-season produces the kind of musty smell that requires a professional re-cleaning to fully remove. Pull the plastic the day the garment comes home from the cleaners. Hang it in cotton.

    Rule three: foundation garments need their own dedicated rotation system because they wear out faster at plus and because the bra and shapewear inventory is too expensive to manage casually. I keep my full shapewear and bra inventory in a single drawer, sorted by function: smoothing for under-knits, structured for under-tailored, sport for activewear days. Each function-zone gets a labeled fabric box (I use Open Spaces small boxes at $24 for two, but any rectangular fabric bin works). When I pull a shapewear piece for the Phase 3 lineup, I make a small mental note of which one I used. If I find myself reaching for the same piece three weeks in a row, it is time to either rotate in another piece I own or budget for a replacement. Plus shapewear ages out faster than straight-size shapewear because the elastic fibers are working harder against more body, and the compression goes south within twelve to eighteen months of regular wear. The rotation system catches the wear-out before it shows up as a bad fit under Monday’s outfit.

    Rule four: shoes need a closed storage system because plus-size foot edema means swelling and sweat, and an open shoe rack at the bottom of a closet absorbs odor faster than you think. I use clear stackable plastic shoe boxes (The Container Store’s drop-front shoe boxes at $8 each, or the cheaper IRIS USA ones at $4 each on Amazon, six-pack). Each shoe gets a box. Each box gets a small silica gel packet, replaced every six months. The shoes stay dry, the closet does not smell, the lineup pulls in Phase 4 take ninety seconds instead of five minutes of hunting on the closet floor.

    Rule five: dress storage for occasion pieces. A beaded gown, a heavy silk slip, a structured cocktail dress – these belong in a separate part of the closet on the strongest hangers you own, with a breathable cotton cover, and they do not enter the weekly Phase 3 rotation unless an occasion is on the calendar. Treating an occasion piece as part of the weekly rotation accelerates its wear and you will be sad about it the next time you reach for it for an actual event.

    The mid-week refresh: the Wednesday 10-minute touch-up

    The Sunday protocol does the heavy lift. The Wednesday touch-up keeps it intact. Ten minutes, midweek, ideally Wednesday evening between dinner and television.

    The Wednesday refresh has three moves. First, walk the Phase 3 rod and check the remaining outfits. If Tuesday’s outfit was the one with a fit issue (the blazer was too warm, the trousers crept up, the shoes gave a blister), pull the Wednesday-through-Friday looks and audit them against what you learned. The Tuesday data should change the Thursday choice if the same fit issue is going to apply. Second, do a small-load laundry run if the L bucket has grown – which it usually has, because Tuesday added at least a top and Wednesday added a sports bra and an athleisure set. A small Wednesday wash keeps the Saturday and Sunday laundry from becoming three full loads. Third, do a five-minute closet floor sweep. Pick up anything that has fallen, return things to their boxes, reset the shoe lineup, dust the valet stand surface with a microfiber cloth, and pull anything that needs to go to the dry cleaner before the weekend.

    The Wednesday refresh is the difference between a Sunday protocol that lasts a week and a Sunday protocol that lasts forever. The closet entropy that builds between Sunday and the following Sunday is real, and ten minutes of midweek attention slows the entropy by a significant margin. Skip Wednesday three weeks in a row and the next Sunday protocol takes seventy minutes instead of forty-seven because you are doing two weeks of work at once.

    The seasonal pivot Sunday: twice a year, the deeper reset

    The forty-seven-minute protocol is the weekly maintenance layer. Twice a year – once in late April or early May for the spring-to-summer pivot, once in late September or early October for the fall-to-winter pivot – the protocol expands into a longer seasonal reset. Budget three hours. Pour a coffee. Put on a long album.

    The seasonal pivot has five additional moves on top of the regular forty-seven minutes. First, pull every off-season piece from active rotation and store it in cotton garment bags in the back of the closet or in under-bed storage. Second, pull every in-season piece from the back of the closet or from under-bed storage and re-hang it in active rotation. Third, run the Bornstein Three-Word Method on every active-rotation piece. If it does not earn the spot in the new season’s lineup, it goes to the donation bag, the consignment bag, or the resale-listing pile. Fourth, audit the foundation garment inventory and budget for any replacements that are aging out. Fifth, audit the shoe inventory and either repair or replace anything that did not survive the previous season.

    The seasonal pivot is also when I do the slow conversation with myself about gaps. The summer of 2025 I realized I had no clean white linen blazer and I had been faking it with a too-warm cotton one. The fall of 2025 I realized my brown leather tote was beginning to crack and would not make it through another winter. The pivot is the time to write down the gaps, set a budget, and commission the purchases over the following four to six weeks rather than panic-buying the week of an event.

    Shira Gill makes the related point that a minimal wardrobe is built season by season, not all at once, and that the seasonal pivot is the rhythm at which a wardrobe earns its name. For a plus closet, this rhythm matters even more because plus pieces are harder to find and more expensive per piece, and impulse purchasing at plus rarely produces lasting wardrobe value. The seasonal-pivot list is the document that turns a closet from a collection into a wardrobe.

    The 47-minute Sunday protocol summary, and your challenge for this Sunday

    A plus-size woman seated on a made bed reviewing a notebook with the 5-phase 47-minute Sunday closet protocol while the prepared lineup of five outfits hangs in the closet behind her

    Here is the full forty-seven-minute protocol, phase by phase, with the timer math on the right. Read it once. Save it. Run it this Sunday.
    Phase 1: the 5-day rewind (8 minutes). Open a notebook. Draw a five-column grid. Inventory what you wore Monday through Friday. Mark each piece C for clean, L for laundry, S for spot-treat. Write one line on what failed and why. This phase tells you what to do in Phase 2 and what to consider in Phase 3.

    Phase 2: laundry stage (12 minutes). Pull the L bucket. Sort by color and weight. Start a delicate cold cycle and a normal warm cycle. Set up air-dry stations. Spot-treat the S bucket with Tide To-Go, steam, and a lint roller. Move dry-clean-only pieces to the door for drop-off. Two smaller loads, not one large one, because plus laundry weighs more per garment than the washer’s published capacity assumes.

    Phase 3: the 5-outfit lineup (12 minutes). Read Monday through Friday on your calendar. Write a one-line descriptor for each day. Pull a complete look for each day – top, bottom, shoes, layer, bag – and hang each on a single Honey-Can-Do velvet hanger or, for heavier pieces, a wide wooden hanger. Pin an index-card tag with the day, the descriptor, and any underpinning notes. Run each piece through your Bornstein Three-Word Method filter to confirm it earns the spot. Leave breathing space between hangers.

    Phase 4: footwear and accessories (8 minutes). Line up the five pairs of shoes assigned in Phase 3. De-scuff with Meltonian shoe cream, Magic Eraser, horsehair brush, edge dressing, and lint roller as needed. Stage jewelry for each outfit in a small leather tray. Pre-decide for foot reality – generous-fit shoes for on-feet days. Empty your everyday bag onto the bed, sort the contents, and reload Monday’s bag with the core kit (keys, wallet, transit card, AirPods, sunglasses, charger, Tide To-Go pen, mini-umbrella).

    Phase 5: bag prep and Monday hand-off (7 minutes). Position the Yamazaki valet stand. Hang Monday’s outfit on it. Place the bag underneath, the shoes at the base, the index card visible. Walk the look as if you were dressing a client. Check the weather and swap any piece that does not match the forecast. Pack the laptop and any add-ons. Close the closet door. Pour a glass of wine.
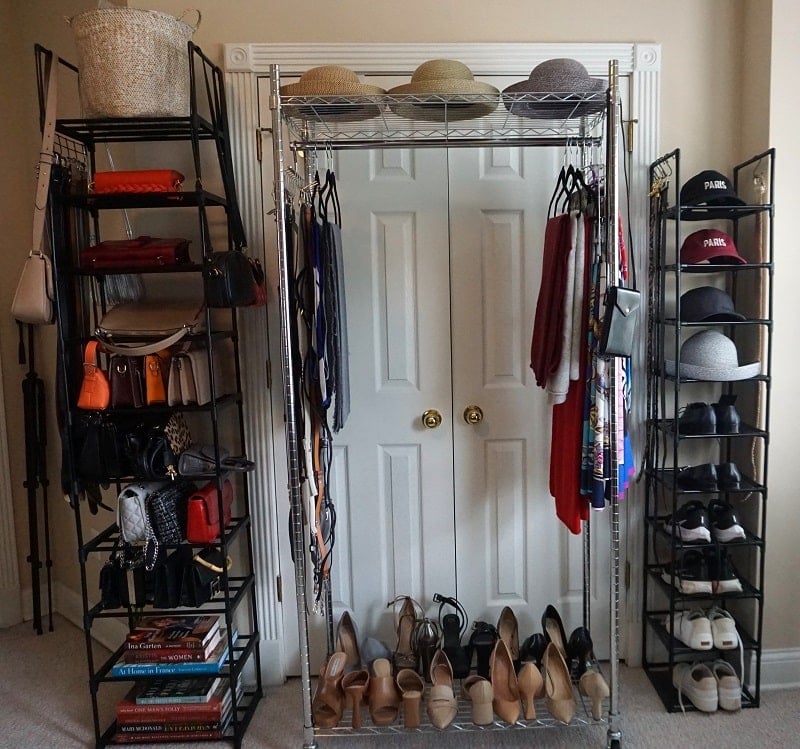
    Now here is the challenge, which is the whole point of you reading this article all the way down to this paragraph. This Sunday, between 5 pm and 7 pm, set a kitchen timer for forty-seven minutes and run the protocol once. Not twice. Not a perfect version. The first version. Pour the wine before you start if it helps. Put on the Sade album if Sade is your Sunday music. Use whatever hangers you currently own. The Yamazaki valet stand can come later. The Honey-Can-Do velvet hangers can come later. The point on Sunday one is to run the five phases at the published time budget and see what happens on Monday morning when you walk into the closet at 6:45 am and the trousers are not rumpled, the shoes are not scuffed, the bag is correct, and the decision is already made. The Monday morning you have after the first Sunday protocol is the proof. Every Sunday after the first one is easier because the system exists. The hardest version of this protocol is the one you run before you have ever run it. The chairs in my apartment that used to be draped with rejected outfits at 7:45 am on Mondays are now just chairs. The hamper does not hold rumpled trousers six days later. The shoes do not have scuffs that I told myself I would buff out. Forty-seven minutes, this Sunday. Set the timer. Begin.