Tag: Editor Pick

  • Best Airlines for Plus-Size Passengers – Ranked by Seat Width and Policies

    Best Airlines for Plus-Size Passengers – Ranked by Seat Width and Policies

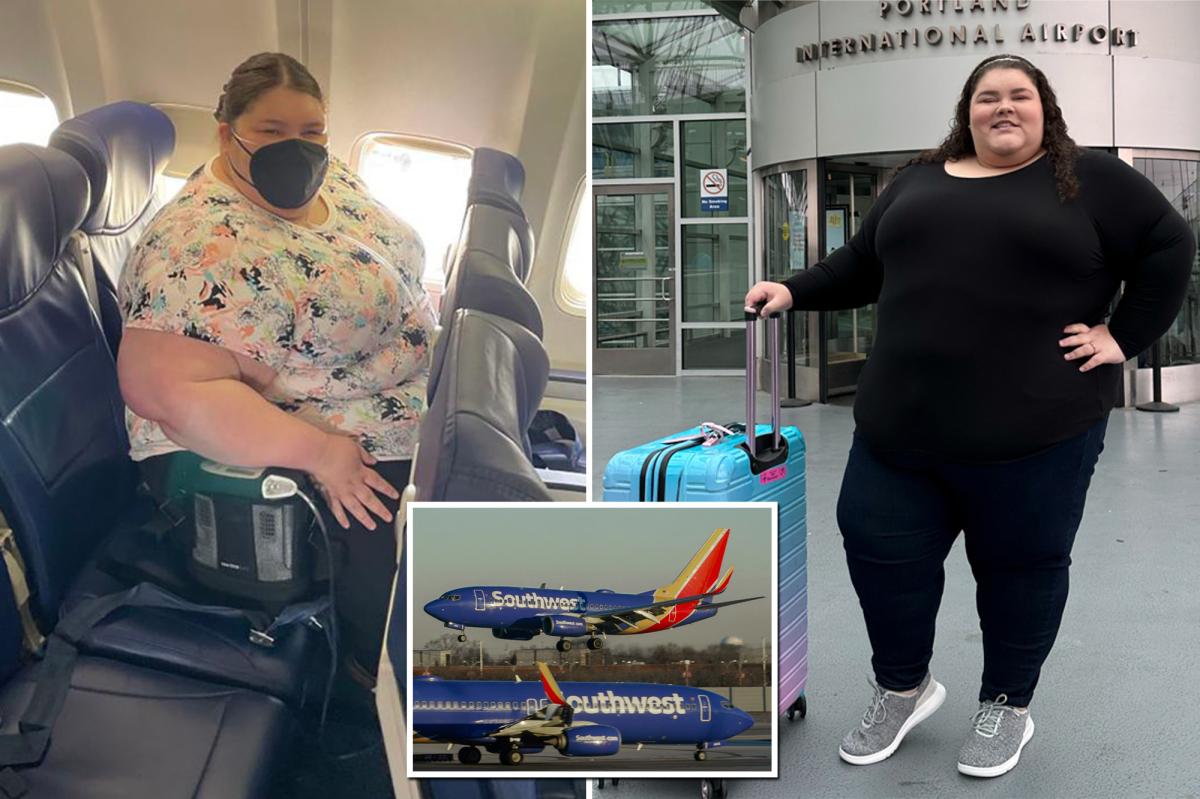
    Why Flying as a Plus-Size Passenger Is Still a Challenge

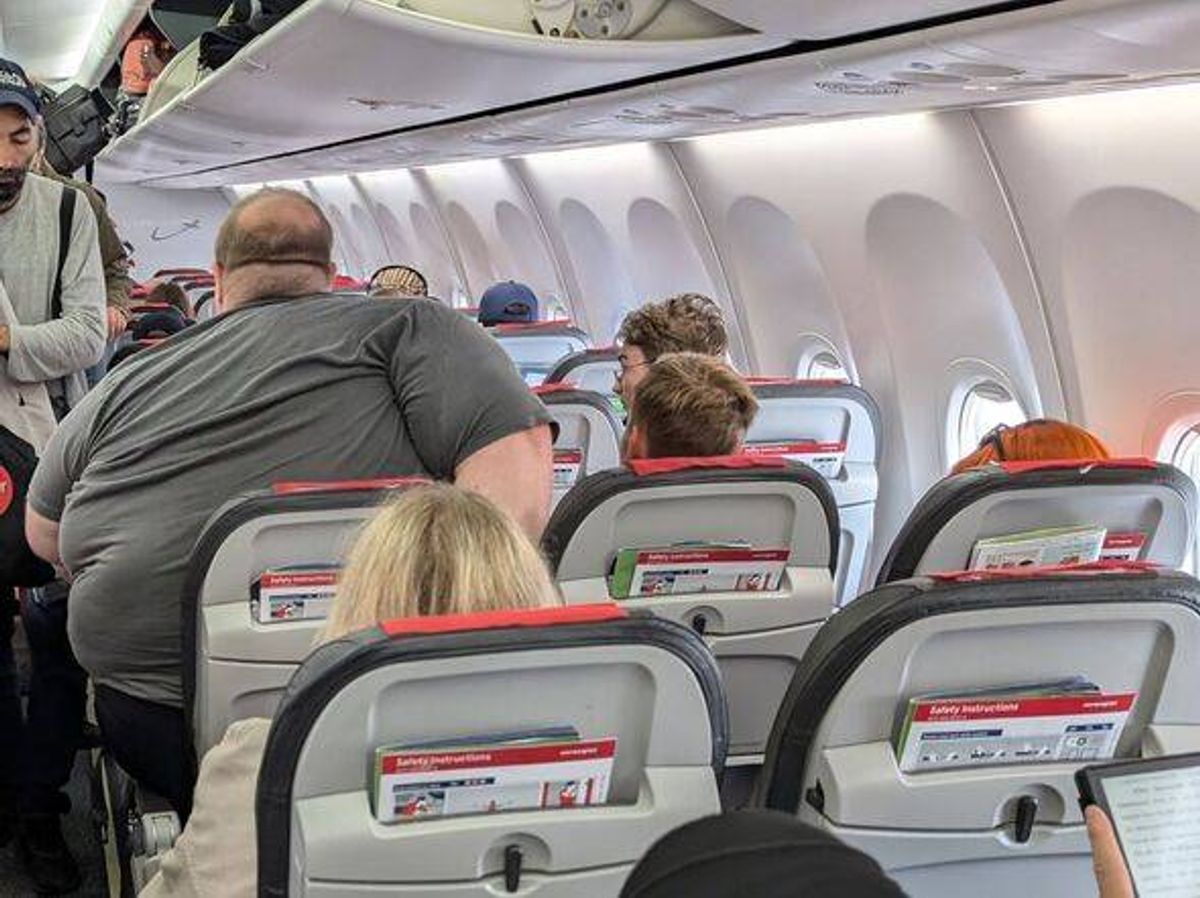
    Air travel in 2026 is still not designed for larger bodies. The average economy airline seat is 17 to 18 inches wide – a width that was established decades ago when the average American body was significantly smaller. Today, this seat width is uncomfortable for many average-sized adults and genuinely painful for plus-size passengers. Add narrow armrests, tight seatbelt lengths, and the anxiety of potentially being asked to purchase an additional seat, and flying becomes a source of stress rather than excitement.

    The good news is that awareness is growing, policies are slowly improving, and some airlines are significantly better than others for plus-size passengers. Knowing which airlines offer more space, better policies, and more respectful treatment can transform your flying experience from dreaded to manageable, and in some cases, genuinely comfortable.

    This guide ranks airlines based on three factors that matter most to plus-size passengers: seat width in economy class, their official policy regarding passengers of size, and real-world experiences reported by plus-size travelers. Because you deserve to travel wherever you want without your body being treated as a problem to solve.

    What to Look For in an Airline as a Plus-Size Passenger

    What to Look For in an Airline as a Plus-Size Passenger

    Seat Width

    Seat Width

    Seat width is measured from the inside of one armrest to the inside of the other armrest. For economy class, the industry standard ranges from 17 to 18.5 inches, but some airlines go as low as 16.5 inches. Every half inch matters when you are a larger person. For reference, a plus-size woman wearing a size 18 to 20 typically has a seated hip width of approximately 20 to 22 inches. That means even the widest economy seats are a tight squeeze, and the narrowest ones are nearly impossible.

    Seat Pitch

    Seat Pitch

    Seat pitch refers to the distance between your seat and the one in front of you. Standard economy pitch ranges from 28 to 34 inches. More pitch means more legroom, which matters if you carry weight in your thighs and belly. Extra legroom seats (often available for an upgrade fee) can make a significant difference in comfort.

    Armrest Configuration

    Armrest Configuration

    Fixed versus movable armrests can make or break your comfort. Movable armrests allow you to lift them up for more hip room, which is a game-changer for plus-size passengers. Many airlines have at least some rows with movable armrests, but window-side and aisle-side armrests are typically fixed.

    Seatbelt Length

    Seatbelt Length

    Standard airline seatbelts are approximately 45 inches long, which is not long enough for many plus-size passengers. Seatbelt extenders add 12 to 25 inches of additional length. Most airlines provide them upon request, but asking can feel embarrassing. Knowing the policy in advance and requesting discreetly helps.

    Customer-of-Size Policy

    Customer-of-Size Policy

    Each airline has its own policy regarding passengers who need more than one seat. Some require you to purchase a second seat at full price. Some offer complimentary second seats or refunds for second seats. Some handle it on a case-by-case basis. Knowing the policy before you book saves you from unpleasant surprises at the gate.

    Best U.S. Airlines for Plus-Size Passengers

    Best U.S. Airlines for Plus-Size Passengers

    1. Southwest Airlines – Best Overall for Plus-Size Passengers

    1. Southwest Airlines - Best Overall for Plus-Size Passengers

    Southwest Airlines has the best customer-of-size policy in the U.S. airline industry, and it is not even close. If you need additional space, Southwest allows you to purchase a second seat and then receive a full refund for it after your flight. Essentially, you fly with an empty seat next to you at no additional cost. To use this policy, purchase two seats at the lowest fare, then contact Southwest customer service to request a refund for the extra seat after travel. Southwest’s economy seats are 17 inches wide with 32 to 33 inches of pitch, which is average, but the free second seat policy more than compensates.

    2. JetBlue – Most Comfortable Economy Seats

    2. JetBlue - Most Comfortable Economy Seats

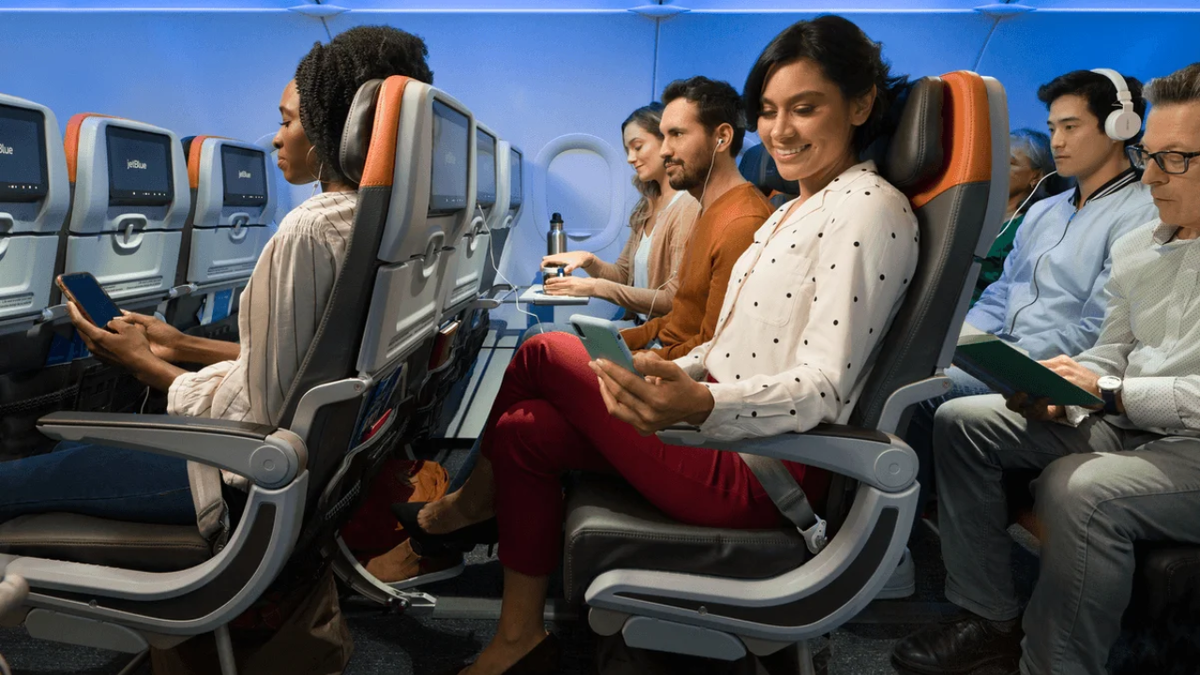
    JetBlue offers some of the most generous seat dimensions in U.S. economy class, with seats measuring 18 to 18.4 inches wide and pitch ranging from 32 to 34 inches. Their “Even More Space” seats offer up to 38 inches of pitch, which is approaching premium economy comfort. JetBlue does not have a formal customer-of-size policy, but their wider seats mean many plus-size passengers fit comfortably in a single seat. JetBlue’s service is also consistently rated highly for courtesy and respect.

    3. Delta Air Lines – Best Premium Economy Option

    3. Delta Air Lines - Best Premium Economy Option

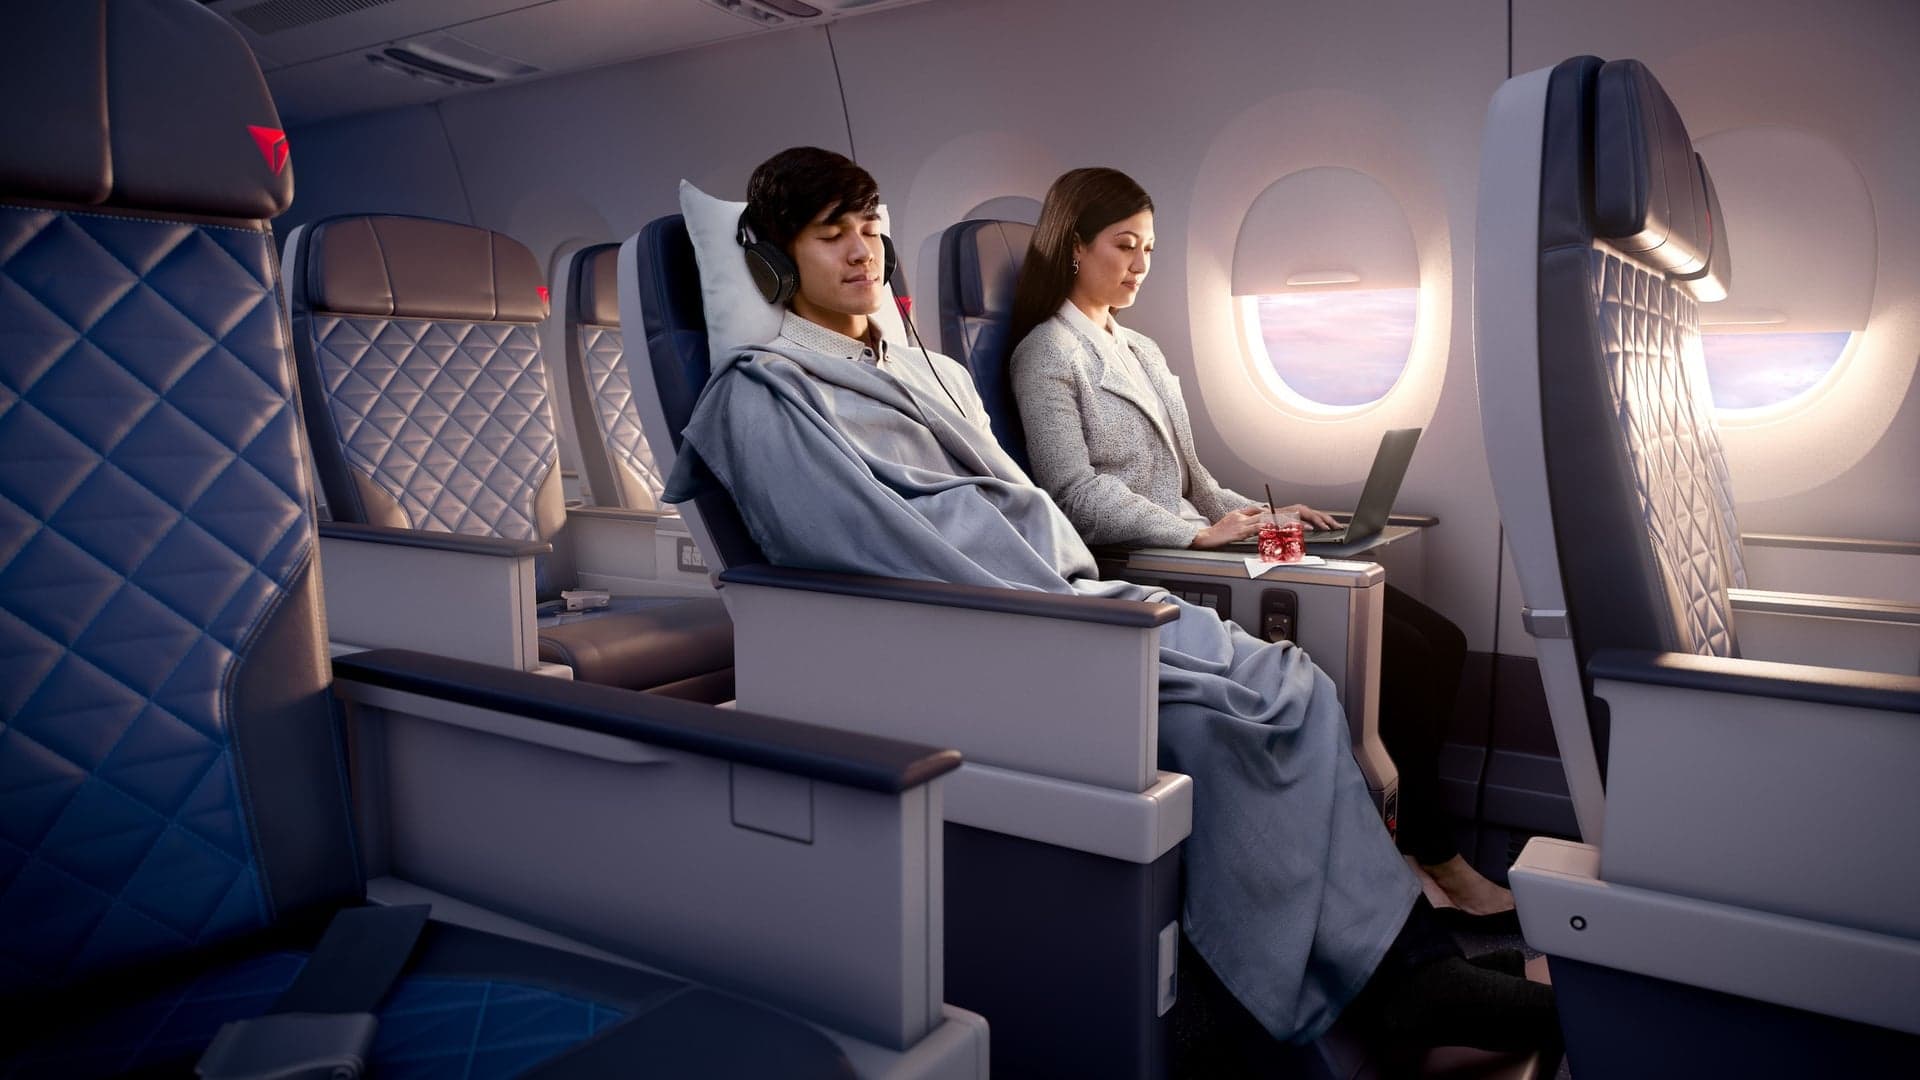
    Delta’s standard economy seats are 17.2 to 18.6 inches wide depending on the aircraft, with 31 to 33 inches of pitch. Their Comfort Plus class offers 34 to 36 inches of pitch with wider seats on some aircraft. Delta does not have a formal free second seat policy, but their gate agents are generally trained to handle passenger-of-size situations with discretion. Delta’s newer aircraft (particularly the A321neo) tend to have the most generous dimensions.

    4. Alaska Airlines – Good Dimensions with Upgrade Options

    4. Alaska Airlines - Good Dimensions with Upgrade Options

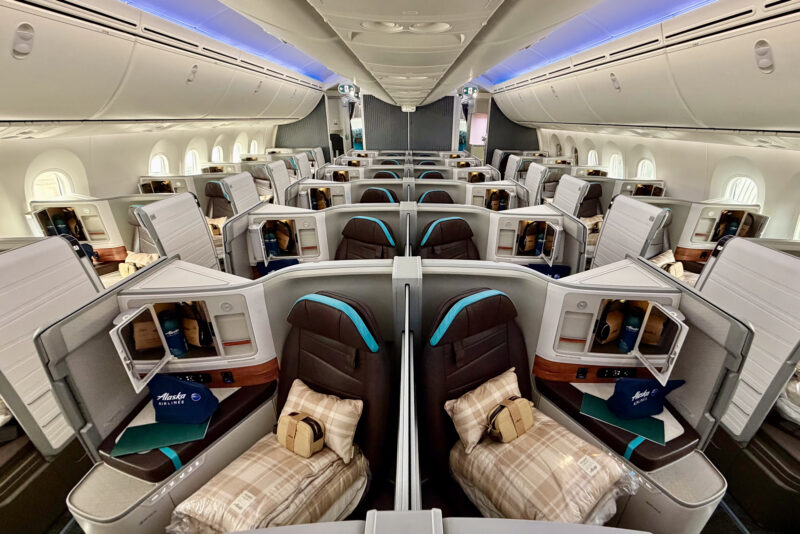
    Alaska Airlines’ economy seats are 17 to 18 inches wide with 31 to 32 inches of pitch. Their Premium Class seats offer significantly more legroom (35 to 40 inches) at a modest upgrade cost. Alaska’s customer service is well-regarded, and plus-size passengers report generally positive experiences. Alaska does not offer free second seats but their upgrade pricing to Premium Class is often reasonable.

    5. United Airlines – Improving but Still Average

    United’s standard economy seats range from 17 to 18 inches wide depending on the aircraft. Their Economy Plus seats offer 34 to 35 inches of pitch, which is a meaningful improvement. United does not have a customer-of-size policy and may require passengers to purchase a second seat without refund options. United’s newer Polaris business class seats on international flights are spacious and comfortable for larger passengers.

    Airlines to Use with Caution

    Airlines to Use with Caution

    Spirit Airlines and Frontier Airlines have some of the narrowest seats in the industry (as low as 17 inches wide with 28 inches of pitch) and limited customer-of-size accommodations. While their low fares are appealing, the cramped seating can make the experience miserable for plus-size passengers. If you fly these carriers, seriously consider upgrading to an exit row or Big Front Seat (Spirit) for a more comfortable experience.

    Best International Airlines for Plus-Size Passengers

    Best International Airlines for Plus-Size Passengers

    Emirates

    Emirates

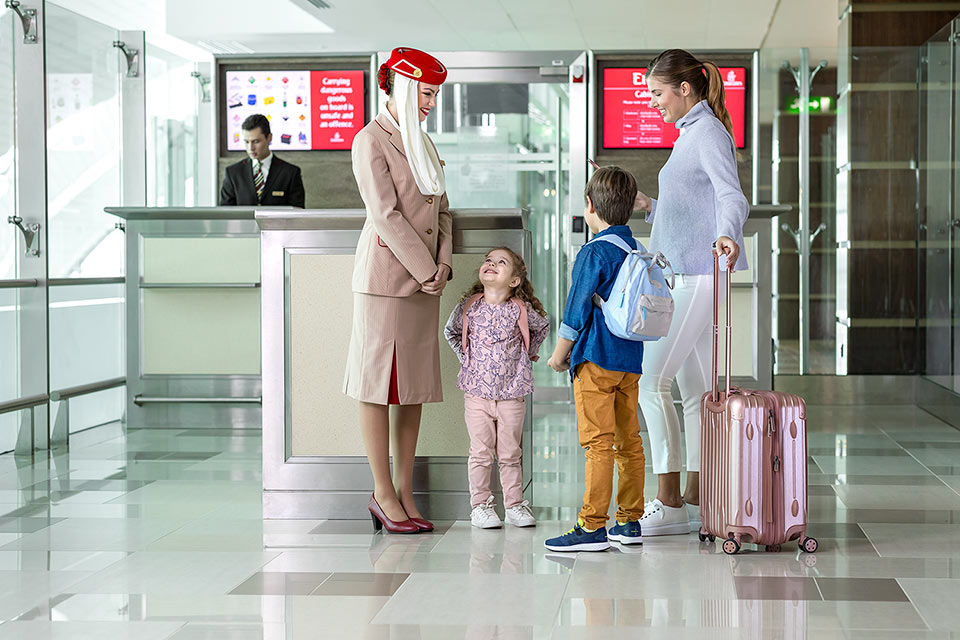
    Emirates’ economy class seats are among the widest internationally at 18 to 18.5 inches, with 32 to 34 inches of pitch. Their newer aircraft (A380 and 777X) offer the most space. Emirates’ service culture emphasizes comfort and hospitality, and plus-size passengers report respectful, accommodating treatment. Their business class seats are among the most spacious in the world.

    Singapore Airlines

    Singapore Airlines

    Singapore Airlines offers economy seats measuring 18 to 19 inches wide with 32 inches of pitch. Their A380 economy class is particularly generous. Singapore Airlines is consistently rated the world’s best airline for service quality, and their inclusive, respectful approach extends to passengers of all sizes.

    Air New Zealand

    Air New Zealand

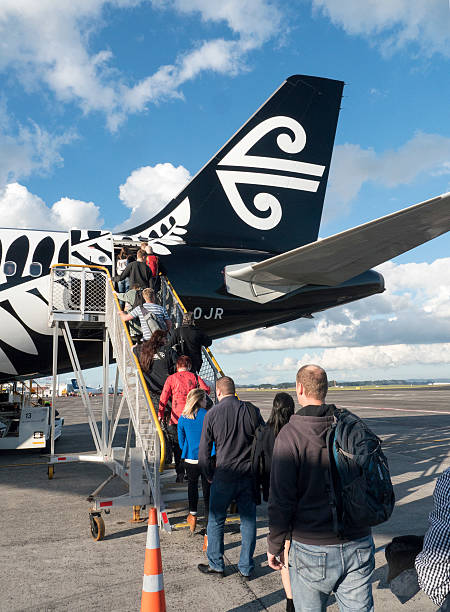
    Air New Zealand stands out for its innovative Skycouch product – a row of three economy seats that converts into a flat surface, essentially creating a mini bed. This option, while designed for couples or families, is a game-changer for plus-size passengers on long-haul flights who need extra space. Their standard economy seats are 17.2 inches wide.

    Lufthansa

    Lufthansa

    Lufthansa’s economy seats are 17 to 18 inches wide with 31 to 32 inches of pitch. Their Premium Economy offers 18.5-inch-wide seats with 38 inches of pitch, making it one of the most comfortable premium economy products for larger passengers. Lufthansa’s service is professional and respectful.

    Qantas

    Qantas

    Qantas offers economy seats of 17.5 inches wide with 31 inches of pitch. Their customer-of-size policy is relatively accommodating – they will work with passengers who need additional space on a case-by-case basis. Qantas Premium Economy seats are 19.5 inches wide, which is among the widest premium economy seats available.

    Know Your Rights and Airline Policies

    Know Your Rights and Airline Policies

    Understanding your rights as a plus-size airline passenger helps you advocate for yourself and avoid mistreatment.

    U.S. Department of Transportation Guidelines

    U.S. Department of Transportation Guidelines

    In the U.S., there is no federal law requiring airlines to provide accommodations for passengers of size (unlike disability accommodations, which are protected under the Air Carrier Access Act). Each airline sets its own policy. However, you cannot be removed from a flight solely because of your size if you have purchased a seat and can properly fasten your seatbelt (with an extender if needed). If an airline requires you to purchase a second seat, they must inform you of this policy at the time of booking.

    Canadian Regulations

    Canadian Regulations

    Canada has stronger protections. The Canadian Transportation Agency’s “one person, one fare” policy requires Canadian airlines to provide a second seat at no additional cost to passengers who need it due to size or disability. This applies to domestic flights within Canada on Canadian carriers.

    How to Request Accommodations

    How to Request Accommodations

    Call the airline directly before your flight to discuss your needs. This is more effective than trying to handle things at the gate. Ask about seatbelt extender availability, movable armrests, and their customer-of-size policy. Request to be seated in a row with an empty middle seat if possible. Some airlines will note your request in your reservation, increasing the chances of a comfortable experience.

    Seatbelt Extenders

    Seatbelt Extenders

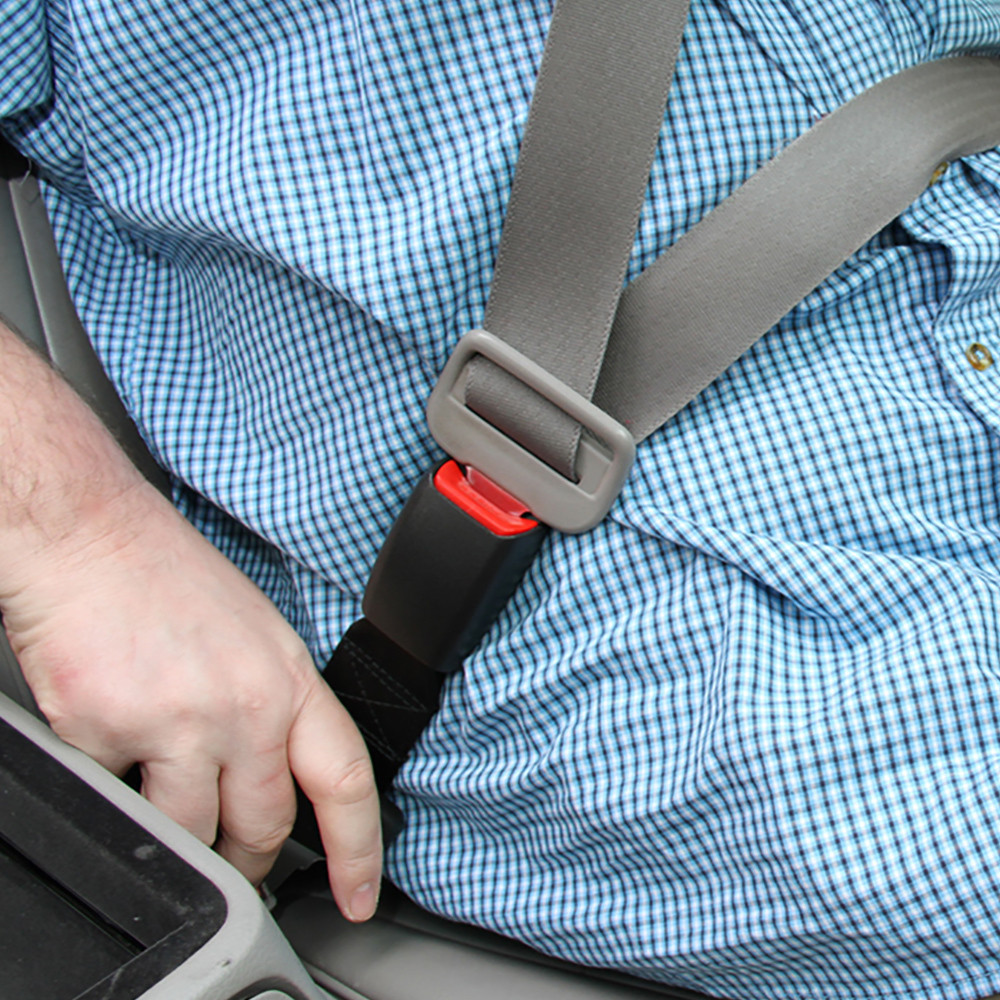
    All U.S. airlines are required to have seatbelt extenders available on every flight. You can request one from a flight attendant before takeoff. If you prefer not to ask in front of other passengers, board early and make your request as you pass a flight attendant. You can also purchase your own FAA-approved seatbelt extender to bring on flights, which eliminates the need to ask entirely. FAA-approved airline seatbelt extenders are available online and are universally compatible with most airline seatbelt types.

    Tips for a More Comfortable Flight

    Tips for a More Comfortable Flight

    Choose Your Seat Strategically

    Choose Your Seat Strategically

    Aisle seats give you the ability to lean slightly into the aisle for extra shoulder room. Exit row seats offer significantly more legroom. Bulkhead seats (the first row of a cabin) have no seat in front to crowd your space. Window seats can be more comfortable if you like leaning against the wall for support. Use SeatGuru.com to check specific seat dimensions and reviews for your exact aircraft before choosing.

    Board Early

    Board Early

    Take advantage of early boarding options (many airlines offer them for purchase or through loyalty programs) so you can settle in, stow your bag, request a seatbelt extender, and get comfortable without the pressure of a line of passengers behind you. Southwest’s open seating policy actually works in your favor – boarding in the A group gives you the best seat selection.

    Wear Comfortable Clothes

    Wear Comfortable Clothes

    Tight jeans and restrictive waistbands make a cramped seat feel even worse. Wear stretchy, comfortable clothing – leggings, joggers, or soft pants with elastic waists. Plus-size travel joggers with pockets give you comfort without sacrificing functionality. Layers help you adjust to varying cabin temperatures.

    Bring Your Own Comforts

    Bring Your Own Comforts

    A neck pillow, compression socks, noise-canceling headphones, snacks, and a large water bottle make any flight more tolerable. A personal blanket or shawl provides warmth without the thin airline blanket that barely covers your shoulders. Having your own comfort items reduces your dependence on airline provisions that are often designed for smaller bodies.

    Stay Hydrated and Move

    Stay Hydrated and Move

    Airplane cabins have extremely low humidity, which dehydrates your skin and body. Drink water throughout the flight and avoid excessive alcohol and caffeine, which increase dehydration. Get up and walk the aisle every hour or two on longer flights to reduce swelling, prevent blood clots, and relieve stiffness. Seated stretches – ankle circles, calf raises, and gentle torso twists – also help.

    What to Do If You Are Treated Unfairly

    What to Do If You Are Treated Unfairly

    Unfortunately, size discrimination by airline staff does happen. Knowing how to respond protects your rights and your dignity.

    If you are asked to purchase a second seat or are threatened with removal, remain calm and ask for the specific written policy that supports their request. Ask for the gate supervisor or a customer service manager. Document the interaction – names, times, and exactly what was said. If you feel you have been discriminated against, file a complaint with the airline’s customer service department after the flight and with the U.S. Department of Transportation.

    Record everything in writing. Keep confirmation emails, boarding passes, and any receipts for additional seats purchased. If you were treated disrespectfully, describe the specific behavior in your complaint rather than making general statements. Specific details are harder to dismiss and more likely to result in meaningful response.

    Consider sharing your experience (after filing the formal complaint) on social media. Airlines are responsive to public accountability, and your experience can help other plus-size travelers know what to expect. Use your voice not just for yourself but for the community – every complaint filed and every experience shared moves the industry toward better treatment of larger passengers.

    Key Takeaways

    • Southwest Airlines has the best customer-of-size policy in the U.S. with free second seats (purchased then refunded after travel).
    • JetBlue offers the widest standard economy seats among U.S. carriers at 18 to 18.4 inches.
    • Seat width, pitch, armrest type, and seatbelt length are the four dimensions that matter most for plus-size comfort.
    • Always call the airline before your flight to discuss accommodations rather than trying to handle things at the gate.
    • You can purchase your own FAA-approved seatbelt extender to avoid the awkwardness of requesting one on board.
    • If you experience discrimination, document everything and file complaints with both the airline and the Department of Transportation.

    Frequently Asked Questions

    Do I have to buy two seats if I am plus size?

    It depends on the airline and your specific size. Most airlines state that if you cannot lower both armrests and need to “encroach” on the adjacent seat, you may be required to purchase a second seat. However, Southwest Airlines offers a policy where the second seat cost is refunded. Many plus-size passengers in the size 18 to 22 range fit in a single economy seat comfortably on airlines with wider seats (JetBlue, Emirates). If you are unsure, call the airline to discuss your specific situation before booking.

    Can I bring my own seatbelt extender on a plane?

    Yes, but it must be FAA-approved and Type A certified. FAA-approved extenders are widely available online and compatible with most airline seatbelt types. Having your own eliminates the need to ask a flight attendant, which many plus-size passengers find embarrassing. Keep it in your carry-on bag for easy access during boarding.

    Which seat should I choose for maximum comfort?

    Which seat should I choose for maximum comfort?

    Aisle seats give you the most flexibility to lean out for extra shoulder room and make it easier to get up and move. Exit row seats provide significantly more legroom. Bulkhead seats offer no obstruction in front of you. Avoid middle seats whenever possible, as you are squeezed between two fixed armrests with no room to expand. Use seat selection tools like SeatGuru to check the specific dimensions and reviews for seats on your aircraft type.

    Are first class or business class seats worth the extra cost?

    If your budget allows, premium cabins offer dramatically more space for plus-size passengers. Domestic first class seats are typically 20 to 21 inches wide with 36 or more inches of pitch. International business class seats often convert to fully flat beds. The comfort difference is significant, and many plus-size travelers find that the reduced stress and physical discomfort is worth the additional investment, especially on longer flights. Watch for fare sales and use credit card points to make premium cabins more accessible.

  • 25 Plus-Size Travel Influencers to Follow for Real Vacation Inspiration

    25 Plus-Size Travel Influencers to Follow for Real Vacation Inspiration

    Why Plus-Size Travel Influencers Matter

    Why Plus-Size Travel Influencers Matter

    When you search for travel inspiration online, the vast majority of travel content features thin, conventionally attractive women in bikinis on beaches. Beautiful? Sure. Representative of what most women actually look like? Not even close. For plus-size women who love to travel – or who want to start traveling but feel held back by body-related anxiety – seeing someone who looks like them exploring the world is not just nice. It is necessary.

    Plus size travel influencers do something that mainstream travel content consistently fails to do. They show you what it actually looks like to navigate airports, airplane seats, hiking trails, hotel bathrooms, and tourist attractions in a larger body. They share honest reviews about whether hotel robes fit, whether restaurant chairs have weight limits, whether excursion providers accommodate all body types, and whether specific destinations are size-friendly.

    This information is practical, not superficial. It can determine whether a vacation is enjoyable or miserable. And it is information that you simply cannot get from a thin travel influencer, no matter how well-intentioned they are, because they have never had to think about these things.

    We have curated 25 plus-size travel influencers whose content goes beyond pretty photos. These creators share real experiences, practical tips, honest reviews, and the kind of representation that makes the travel world feel more accessible for all of us. Follow them, learn from them, and let their adventures inspire your own.

    Adventure and Outdoor Travel Influencers

    Adventure and Outdoor Travel Influencers

    These creators prove that outdoor adventure is for every body. They hike, swim, kayak, zip-line, and explore nature without apologizing for their size.

    1. The Fat Explorer

    This influencer specializes in outdoor adventures and national park travel, sharing detailed accessibility reviews including trail difficulty, seating options, and plus-size gear recommendations. Their content consistently challenges the idea that outdoor spaces are only for fit, thin bodies.

    2. Curvy Hiker Co

    2. Curvy Hiker Co

    Focused specifically on hiking and trail adventures, this creator shares trail reviews with honest assessments of difficulty for larger bodies, gear that works (and does not work) in extended sizes, and stunning nature photography that features diverse body types on the trail.

    3. Plus-Size Passport

    3. Plus-Size Passport

    A globe-trotting adventure traveler who has visited over 40 countries. They share everything from zip-lining in Costa Rica to camel riding in Morocco, with candid commentary about which experiences are truly size-inclusive and which ones fall short.

    4. Fat Girls Hiking

    4. Fat Girls Hiking

    More of a community than a single influencer, Fat Girls Hiking organizes group hikes across the country and shares trail resources for hikers of all sizes. Their social media provides representation, trail recommendations, and a supportive community for plus-size outdoor enthusiasts. They prove that the trail belongs to everyone.

    5. Wilderness Curves

    5. Wilderness Curves

    This creator combines camping, hiking, and wildlife photography with body-positive messaging. Their camping gear reviews specifically address weight limits, sizing, and comfort for larger bodies – information that is nearly impossible to find elsewhere. They recommend gear like heavy-duty camping chairs rated for higher weight capacities that make outdoor experiences genuinely comfortable.

    Luxury and Resort Travel Influencers

    Luxury and Resort Travel Influencers

    If your travel style leans more toward resort pools, spa treatments, and room service, these influencers curate luxury experiences with a plus-size lens.

    6. Curves and Cabanas

    6. Curves and Cabanas

    Specializing in resort and beach travel, this creator reviews all-inclusive resorts, cruise lines, and tropical destinations with specific attention to plus-size accommodations. Their hotel reviews include details about robe sizes, towel availability, pool chair comfort, and spa treatment room sizes.

    7. Lush Travels

    7. Lush Travels

    A luxury travel influencer who reviews five-star hotels, Michelin-star restaurants, and premium travel experiences. They bring a refreshing perspective to luxury travel by showing that opulence and larger bodies are not mutually exclusive. Their content challenges the assumption that luxury spaces were not designed for us.

    8. Curvy Cruiser

    8. Curvy Cruiser

    Focused specifically on cruise travel, this influencer reviews cruise lines, cabin sizes, dining experiences, excursion accessibility, and onboard activities through a plus-size lens. Their detailed reviews of different cruise lines’ policies and accommodations are invaluable for curvy travelers considering their first (or next) cruise.

    9. Suite Life Plus

    9. Suite Life Plus

    A boutique and luxury hotel reviewer who photographs the most stunning accommodations around the world. Their content includes honest notes about bathroom sizes, bed comfort, accessibility, and whether the hotel’s complimentary robes and slippers come in extended sizes.

    10. Poolside Queen

    Dedicated to pool and beach culture, this creator reviews swimwear, cover-ups, and resort poolside experiences. Their confidence in swimwear is infectious, and their honest reviews of plus-size swimwear brands help followers invest in pieces that look and feel amazing. They often feature brands like Target’s plus-size swim collection alongside higher-end options.

    Budget and Solo Travel Influencers

    Budget and Solo Travel Influencers

    These creators prove that you do not need a big budget or a travel companion to see the world as a plus-size woman.

    11. Budget Curves Abroad

    11. Budget Curves Abroad

    This influencer specializes in affordable travel, sharing hostel reviews, budget flight tips, free activity recommendations, and money-saving hacks – all from a plus-size perspective. They address the unique budget considerations of plus-size travel, like when paying for an extra seat is worth it versus when you can skip it.

    12. Solo Plus Wanderer

    12. Solo Plus Wanderer

    A solo female traveler who navigates the world independently in a plus-size body. Their content addresses the intersection of body anxiety and solo travel anxiety, offering practical tips and emotional encouragement for women who want to travel alone but are hesitant because of their size.

    13. Thrifty Curvy Travel

    13. Thrifty Curvy Travel

    Focused on finding affordable plus-size travel outfits, packing smart, and stretching a travel budget as far as possible. Their packing videos and thrift-store travel hauls prove that you can look amazing on vacation without spending a fortune.

    14. Backpack and Curves

    14. Backpack and Curves

    A backpacker and hostel traveler who challenges the assumption that backpacking is only for thin, young travelers. Their reviews of backpack fits, hostel bunk beds, and shared accommodation comfort for larger bodies fill a real information gap.

    15. Nomad Queen Plus

    15. Nomad Queen Plus

    A digital nomad who works remotely while traveling the world. Their content combines travel reviews with practical advice about remote work, co-working spaces, and extended-stay accommodations that work for plus-size bodies.

    Cultural and Food-Focused Travel Influencers

    Cultural and Food-Focused Travel Influencers

    For travelers who care more about local food, cultural experiences, and authentic connections than resort amenities, these influencers deliver.

    16. Taste the World Plus

    16. Taste the World Plus

    A food-focused travel influencer who explores local cuisine, street food, and food markets around the world. Their content celebrates food without guilt or diet culture, showing the joy of eating your way through a new country. Restaurant reviews include notes about seating, portion sizes, and dietary accommodation.

    17. Culture Curves

    17. Culture Curves

    This creator focuses on cultural travel – museums, historical sites, local traditions, and off-the-beaten-path experiences. Their content goes deeper than typical tourist highlights, exploring the cultural fabric of each destination while sharing accessibility information for plus-size travelers.

    18. Plus and Local

    18. Plus and Local

    Specializing in immersive local experiences rather than tourist attractions, this influencer connects with local communities, takes cooking classes, visits artisan workshops, and participates in cultural events. Their content shows that meaningful travel is about connection, not just sightseeing.

    19. Curvy Foodie Traveler

    19. Curvy Foodie Traveler

    Equal parts food blog and travel blog, this creator reviews restaurants, food tours, and culinary experiences in destinations around the world. Their approach is joyful, unapologetic, and deeply knowledgeable about global cuisine.

    20. Heritage Plus

    20. Heritage Plus

    This influencer focuses on heritage and diaspora travel – visiting countries connected to their ancestry and exploring cultural identity through travel. Their content is deeply personal, beautifully photographed, and resonates with anyone who has ever wanted to connect with their roots through travel.

    Accessibility and Advocacy-Focused Influencers

    Accessibility and Advocacy-Focused Influencers

    These creators go beyond personal travel stories to advocate for systemic change in the travel industry.

    21. Access Plus Travel

    21. Access Plus Travel

    An advocacy-focused influencer who documents size discrimination in travel and pushes for industry change. Their content includes airline policy comparisons, accessibility audits of popular destinations, and resources for filing complaints when accommodation falls short.

    22. Every Body Flies

    22. Every Body Flies

    Specifically focused on air travel advocacy, this creator provides detailed airline reviews, seat measurement comparisons, and guides for navigating Customer of Size policies across different carriers. Their side-by-side seat comparisons are the most useful resource for plus-size flyers on the internet.

    23. Travel Without Limits

    This creator reviews the intersections of size, disability, and travel accessibility. Their content is valuable for anyone navigating multiple accessibility needs and shows that travel should be designed for all bodies, not just the ones that fit the current infrastructure.

    24. Plus Size Travel Alliance

    24. Plus Size Travel Alliance

    A community-driven account that aggregates tips, reviews, and recommendations from plus-size travelers worldwide. They amplify voices from across the community and provide a platform for travelers to share both positive and negative experiences to help others plan their trips.

    25. Curves Across Borders

    25. Curves Across Borders

    An internationally-focused influencer who reviews travel experiences specifically in countries and regions where plus-size travelers may face unique challenges – smaller infrastructure, different cultural attitudes toward body size, or limited plus-size shopping options. Their guides are essential reading for curvy travelers venturing off the typical tourist path. They always recommend having a universal travel adapter to keep all your devices charged no matter where in the world you are exploring.

    How to Use Travel Influencer Content for Planning

    How to Use Travel Influencer Content for Planning

    Following plus-size travel influencers is inspiring, but the real value comes from using their content to plan better trips.

    Save Destination-Specific Content

    Save Destination-Specific Content

    When an influencer you follow visits a destination on your bucket list, save that content. Note their hotel reviews, restaurant recommendations, and accessibility observations. This crowd-sourced, lived-experience information is more valuable than any generic travel guide.

    Engage and Ask Questions

    Engage and Ask Questions

    Most travel influencers love answering questions from their community. If you are planning a trip and want to know about a specific hotel, airline, or experience, ask in the comments or send a direct message. They have likely dealt with the exact question you have.

    Look for Patterns Across Multiple Creators

    Look for Patterns Across Multiple Creators

    If several plus-size travel influencers rave about the same resort, airline, or destination, that is a strong signal. Similarly, if multiple creators warn about a specific place or experience, take that seriously. Patterns across independent reviewers are more reliable than a single opinion.

    Support Their Work

    Support Their Work

    Many of these influencers rely on affiliate links, brand partnerships, and community support to sustain their content. When you book a trip based on their recommendation, use their affiliate links when possible. Share their content. Leave comments. The more these creators are supported, the more content they can produce, and the better the information ecosystem becomes for all plus-size travelers.

    Create Your Own Content

    Create Your Own Content

    You do not need thousands of followers to contribute to the plus-size travel community. Share your own honest reviews of hotels, airlines, and destinations. Tag plus-size travel hashtags so others can find your experiences. Your trip review might be exactly the information another curvy traveler needs to book their dream vacation with confidence.

    Key Takeaways

    • Plus size travel influencers provide practical, size-specific travel information that mainstream travel content consistently overlooks.
    • Influencers span every travel style from adventure and outdoor to luxury, budget, solo, cultural, and advocacy-focused content.
    • Their honest reviews of airlines, hotels, excursions, and destinations help curvy travelers plan trips with confidence.
    • Use influencer content actively for trip planning – save destination-specific reviews, ask questions, and look for patterns across multiple creators.
    • Supporting these creators through engagement, sharing, and affiliate link usage sustains the plus-size travel content ecosystem.
    • Your own travel experiences are valuable – share them to help other curvy travelers plan their adventures.

    Frequently Asked Questions

    How do I find plus-size travel influencers to follow?

    Start with hashtags like #PlusSizeTravel, #CurvyTraveler, #FatTravel, #BodyPositiveTravel, and #PlusSizeAdventure on Instagram and TikTok. Follow the influencers listed in this article and explore who they interact with and recommend. Plus-size travel Facebook groups are another excellent resource for finding creators whose content resonates with your travel style.

    Are these influencers’ reviews trustworthy?

    Are these influencers' reviews trustworthy?

    Like all influencer content, some reviews are sponsored and others are independent. Look for creators who disclose partnerships clearly and who share negative experiences as well as positive ones. The most trustworthy influencers are honest about what did not work, not just what did. Cross-referencing reviews across multiple creators also helps you identify genuine consensus versus marketing.

    What if there are no plus-size travel influencers who have visited my dream destination?

    If you cannot find specific plus-size content about your destination, reach out to the broader community. Post in plus-size travel Facebook groups asking if anyone has been there. Contact hotels and tour operators directly and ask specific questions about accommodations. And when you go, document and share your experience so the next person searching has the information you wished you had.

    Can I become a plus-size travel influencer myself?

    Absolutely. The community always needs more voices, especially from different regions, travel styles, budgets, and body types. Start by sharing honest reviews and tips on your personal social media accounts. Use relevant hashtags to reach the community. Consistency and authenticity are more important than production quality when you are starting out. Your unique perspective has value.

  • 20 Most Body-Positive Travel Destinations Around the World

    20 Most Body-Positive Travel Destinations Around the World

    What Makes a Destination Body-Positive for Curvy Travelers

    What Makes a Destination Body-Positive for Curvy Travelers

    Travel should be about discovery, joy, and freedom – not about worrying whether you will fit in the chairs, whether people will stare at you on the beach, or whether the local culture will make you feel unwelcome in your body. But the reality is that some destinations are more size-inclusive than others, and knowing which places will greet your curves with celebration rather than judgment makes for a significantly better travel experience.

    A body-positive travel destination is one where curvy bodies are culturally normalized or even celebrated. Where tourism infrastructure accommodates a range of body sizes comfortably. Where you can find clothing in your size if you want to shop locally. Where restaurants serve generous, delicious portions without judgment. Where beaches, spas, and activities are accessible and welcoming regardless of your size. And where the overall cultural attitude toward bodies is relaxed, accepting, and kind.

    These 20 destinations for curvy travelers were chosen based on a combination of cultural attitudes toward body diversity, the physical accessibility of tourist infrastructure, the availability of size-inclusive shopping and activities, and real feedback from plus-size travelers who have visited and loved these places. Let us explore the world through a body-positive lens.

    Destinations 1 Through 5 – The Americas

    Destinations 1 Through 5 - The Americas

    1. Jamaica

    1. Jamaica

    Jamaica consistently ranks as one of the most body-positive destinations in the world. Jamaican culture genuinely celebrates curves, and fuller-figured women are considered beautiful and attractive. You will see women of all sizes confidently wearing swimsuits, crop tops, and fitted clothing without a trace of self-consciousness. The beaches are welcoming, the food is incredible and generous, and the overall vibe is one of celebration, joy, and acceptance. Plus, resorts and all-inclusive properties generally have spacious seating and accommodations that comfortably fit larger bodies.

    2. Brazil

    2. Brazil

    Brazilian culture has long celebrated the female body in all its forms, and while beauty standards exist everywhere, Brazil’s appreciation for curves is deeply embedded in its cultural DNA. The famous beaches of Rio de Janeiro, Salvador, and Florianopolis are filled with women of every size wearing bikinis with complete confidence. Brazilian fashion also tends to be designed for curves – shopping in Brazilian markets and boutiques often yields pieces with generous cuts and body-celebrating silhouettes that are hard to find elsewhere.

    3. New Orleans, Louisiana, USA

    3. New Orleans, Louisiana, USA

    New Orleans is a city that celebrates excess, joy, and indulgence in the best possible way. The food scene is legendary and judgment-free – this is a city where savoring every bite is a cultural value, not a guilt trip. The live music scene, festivals, and nightlife welcome everyone regardless of size. The fashion is eclectic, bold, and self-expressive. And the general attitude of New Orleans – laissez les bons temps rouler (let the good times roll) – applies to bodies just as much as it applies to everything else. Come as you are and enjoy every moment.

    4. Mexico (Riviera Maya and Oaxaca)

    4. Mexico (Riviera Maya and Oaxaca)

    Mexico’s tourism infrastructure has become increasingly size-inclusive, and the cultural attitude toward fuller bodies is relaxed and accepting. The all-inclusive resorts along the Riviera Maya feature spacious beach loungers, comfortable dining seating, and activities that accommodate all sizes. Oaxaca, with its incredible food scene, artisan markets, and cultural richness, offers a more authentic experience where you will feel welcomed as you are. Mexican culture values warmth, hospitality, and good food – three things that make any curvy traveler feel right at home.

    5. Colombia (Cartagena and Medellin)

    5. Colombia (Cartagena and Medellin)

    Colombia’s beauty standards are famously curve-celebrating, and women with fuller figures are considered gorgeous. Cartagena’s colorful streets, beach clubs, and restaurant scene welcome diverse bodies warmly. Medellin’s modern infrastructure, pleasant climate, and vibrant nightlife provide a comfortable and exciting travel experience. Colombian fashion embraces fitted, body-celebrating styles, and shopping for clothes in your size is significantly easier here than in many other international destinations.

    For any tropical destination, a plus-size high-waisted bikini set with tummy control and underwire support gives you the confidence to hit any beach in the world feeling supported and stunning.

    Destinations 6 Through 10 – Europe

    Destinations 6 Through 10 - Europe

    6. London, England

    6. London, England

    London is one of the most size-inclusive cities in Europe. The fashion scene embraces diverse body types, with numerous plus-size boutiques, mainstream retailers carrying extended sizes, and a cultural attitude that celebrates individuality over conformity. Public transportation seating is generally comfortable, restaurants accommodate different body sizes without making it an issue, and the city’s overall diversity means that people of all shapes and sizes blend seamlessly into the landscape.

    7. Iceland

    7. Iceland

    Iceland’s hot springs, glaciers, and otherworldly landscapes are an incredible travel experience, and the culture is remarkably body-positive. Icelanders have a relaxed relationship with nudity and bodies – the famous Blue Lagoon and public hot pots require you to shower nude before entering (with private shower stalls available), and nobody bats an eye at different body sizes. The outdoor adventure activities – glacier walks, whale watching, Northern Lights tours – are accessible and focused on the experience rather than your appearance.

    8. Greece

    8. Greece

    Greek culture loves food, celebration, and the pleasures of life – and that extends to a relaxed attitude about bodies. The Mediterranean lifestyle of enjoying meals slowly, swimming in warm seas, and spending long evenings socializing over wine creates an environment where body anxiety tends to melt away. Greek beach culture is inclusive, and you will see women of all sizes enjoying the crystal-clear waters without the body policing you might encounter in other European beach destinations. The food alone is worth the trip, and nobody in Greece will judge you for going back for seconds.

    9. Amsterdam, Netherlands

    9. Amsterdam, Netherlands

    The Netherlands’ progressive culture extends to body acceptance. Amsterdam is a city built on tolerance, diversity, and individual freedom. The cycling culture means comfortable, practical fashion is the norm – nobody expects you to be in stilettos and fitted clothing while biking through the canal district. The restaurant and cafe scene is welcoming and comfortable, and the city’s general attitude of “live and let live” means you will rarely encounter body-related judgment. Plus, the museums, markets, and canal tours are fully accessible to people of all sizes.

    10. Spain (Barcelona and the Balearic Islands)

    10. Spain (Barcelona and the Balearic Islands)

    Spanish culture has a warm, celebratory relationship with food, bodies, and enjoying life. Barcelona’s beach culture is relaxed and body-diverse, and the Balearic Islands (Mallorca, Ibiza, Menorca) offer stunning beaches where bodies of all sizes are welcome. Spanish dining culture encourages long meals with multiple courses, and the tapas tradition is all about communal enjoyment without portion guilt. The fashion scene in cities like Barcelona and Madrid is trend-forward but also very body-diverse, and finding stylish clothing in larger sizes at Zara, Mango, and local boutiques is increasingly easy.

    Destinations 11 Through 15 – Africa and the Middle East

    Destinations 11 Through 15 - Africa and the Middle East

    11. Ghana

    11. Ghana

    West African countries, and Ghana in particular, are among the most body-positive cultures on the planet. Fuller figures are associated with beauty, prosperity, and health. In Ghana, you will be complimented on your curves, welcomed warmly, and surrounded by women who celebrate their bodies through stunning, colorful fashion. The vibrant markets, rich cultural heritage, incredible food, and some of the friendliest people you will ever meet make Ghana an unforgettable destination for curvy travelers.

    12. South Africa (Cape Town)

    12. South Africa (Cape Town)

    Cape Town offers world-class dining, stunning natural beauty, and a culture that embraces diversity in all forms, including body diversity. The wine country, Table Mountain, and beautiful beaches provide endless activities, and the city’s modern tourism infrastructure is generally comfortable for travelers of all sizes. South Africa’s multicultural society means diverse beauty standards coexist, and the overall atmosphere is one of acceptance and celebration of difference.

    13. Morocco (Marrakech)

    13. Morocco (Marrakech)

    Moroccan culture values hospitality above almost everything else, and visitors of all sizes are welcomed with incredible warmth. The food is extraordinary – tagines, couscous, pastries, and mint tea served in generous portions because feeding guests well is a point of pride. The souks (markets) are filled with beautiful, flowing clothing like caftans and djellabas that look gorgeous on every body. The riads (traditional guesthouses) often feature plunge pools, spa treatments, and relaxation spaces designed for comfort and indulgence.

    14. Nigeria (Lagos)

    14. Nigeria (Lagos)

    Like Ghana, Nigerian culture celebrates curves enthusiastically. Lagos is a vibrant, energetic city where fashion is bold, bodies are celebrated, and confidence is considered the most attractive quality a woman can have. Nigerian fashion designers create stunning pieces for curvy bodies, and the local fabric markets offer gorgeous materials that can be tailored to your exact measurements for a fraction of Western prices. The food scene is incredible, the music is infectious, and the energy of Lagos is unlike anything else on earth.

    15. Dubai, UAE

    15. Dubai, UAE

    Dubai’s luxury tourism infrastructure is designed for comfort on a grand scale. Hotels, restaurants, and attractions are spacious and well-appointed. While modesty in public dress is expected (covering shoulders and knees in public areas), the beach clubs, resort pools, and private beaches within hotels are cosmopolitan and body-diverse. Shopping in Dubai includes access to international brands carrying extended sizes, and the spa and wellness experiences are world-class. Just be prepared for the heat and dress accordingly.

    A lightweight travel scarf and wrap is essential for destinations where modest dress is appreciated – it works as a shawl over bare shoulders, a headcovering for religious sites, and a beach blanket when you want one.

    Destinations 16 Through 20 – Asia and the Pacific

    Destinations 16 Through 20 - Asia and the Pacific

    16. Fiji

    16. Fiji

    Fijian culture celebrates larger body types as a sign of health and status. You will feel welcomed and celebrated in Fiji, where the warm hospitality extends to everyone regardless of size. The overwater bungalows, pristine beaches, and crystal-clear snorkeling waters provide a paradise experience. Resort seating and facilities are generally spacious and comfortable, and the Fijian people are some of the friendliest and most welcoming in the world.

    17. Thailand

    17. Thailand

    While Asian destinations can sometimes present challenges for plus-size travelers (particularly regarding clothing availability), Thailand stands out for its body-acceptance culture and incredible hospitality. Thai culture emphasizes kindness, service, and making guests comfortable. The food is spectacular. The temples, beaches, and islands are awe-inspiring. Thai massage and spa culture is accessible to all body types. Just note that clothing shopping may be limited in local markets – bring what you need and enjoy everything else the country has to offer.

    18. New Zealand

    18. New Zealand

    New Zealand’s outdoor adventure culture is surprisingly size-inclusive. Many adventure activities – bungee jumping, zip-lining, kayaking, hiking – accommodate a wide range of body sizes with appropriate equipment. The country’s Maori culture values diverse body types, and the overall Kiwi attitude is friendly, laid-back, and accepting. The stunning landscapes, world-class wine regions, and adventure opportunities make New Zealand a dream destination for active curvy travelers who want to experience nature without body anxiety.

    19. Bali, Indonesia

    19. Bali, Indonesia

    Bali’s wellness culture, stunning rice terraces, and incredible temples create a travel experience focused on inner peace and spiritual exploration rather than external appearance. The Balinese people are warm, welcoming, and non-judgmental. The wellness retreats and spas cater to all body types, and the yoga and meditation scene emphasizes internal experience over external performance. Plus, the food is incredible, affordable, and served with generosity and love. Bali encourages you to slow down, tune inward, and appreciate your body for what it can experience rather than how it looks.

    20. Hawaii, USA

    20. Hawaii, USA

    Hawaiian culture has deep respect for larger bodies, and the islands’ overall vibe of aloha (love, peace, and compassion) extends to people of all sizes. Beach culture in Hawaii is relaxed and inclusive. The natural beauty – volcanoes, waterfalls, black sand beaches, tropical rainforests – provides endless wonder. The food (poke, plate lunches, shave ice) is generous and delicious. And the tourism infrastructure has been serving diverse visitors for decades, meaning you will find comfortable accommodations, seating, and activities throughout the islands.

    Tips for Body-Positive Travel Anywhere

    Tips for Body-Positive Travel Anywhere

    While these 20 destinations are particularly welcoming for curvy travelers, you deserve to travel anywhere your heart desires. Here are universal tips for making any trip more body-positive.

    Research seating and accommodation specifics before booking. Check airline seat widths, tour bus and activity equipment weight limits, and hotel bathroom configurations if these are concerns for you. Many travel bloggers in the plus-size community share detailed, honest reviews of these practical considerations for specific destinations.

    Pack with intention. Bring clothing you feel amazing in – not clothing you think you “should” wear. Bring the bikini. Bring the crop top. Bring the bright colors. Your vacation photos should capture you feeling your most confident and joyful, wearing whatever makes you feel that way.

    Connect with other plus-size travelers online before your trip. Facebook groups, Instagram hashtags like #plussizetravel, and dedicated blogs share firsthand experiences, tips, and recommendations from travelers who understand the unique considerations that come with traveling in a larger body. Their insights are invaluable for planning a trip that feels comfortable and exciting.

    And finally, remember that you belong everywhere. Every beach, every restaurant, every museum, every hiking trail, every city street. Your body is not a barrier to experience – it is the vehicle that carries you through every incredible adventure. Travel boldly, unapologetically, and with the confidence that the world is meant to be explored by bodies of every shape and size.

    A travel journal designed for documenting adventures helps you capture the memories, feelings, and discoveries from each trip, creating a keepsake that you will treasure for years.

    Key Takeaways

    • Body-positive travel destinations are defined by cultural acceptance, comfortable infrastructure, size-inclusive activities, and welcoming attitudes toward diverse body types.
    • Caribbean and West African countries like Jamaica, Ghana, and Nigeria are among the most curve-celebrating cultures in the world.
    • European destinations like London, Iceland, and Amsterdam offer progressive attitudes and comfortable infrastructure for plus-size travelers.
    • Pacific islands like Fiji and Hawaii have deep cultural appreciation for larger body types and provide relaxed, welcoming beach experiences.
    • Practical preparation – researching seating, packing with confidence, and connecting with plus-size travel communities – makes any destination more body-positive.
    • You deserve to travel everywhere – your body is the vehicle for adventure, not a barrier to it.

    Frequently Asked Questions

    What should I do if I experience body shaming while traveling?

    Unfortunately, body shaming can happen anywhere, even in the most body-positive destinations. If it happens, remember that the judgment says everything about the person delivering it and nothing about you. Lean on your travel companions for support. Document the incident if it involves a business so you can report it. And remind yourself that one negative interaction does not define your trip or your worth. Most travelers of all sizes report overwhelmingly positive experiences, and the joy of travel far outweighs the rare negative encounter.

    Are airplane seats comfortable for plus-size travelers on international flights?

    Are airplane seats comfortable for plus-size travelers on international flights?

    Airline seat width varies significantly between carriers and aircraft types. Research seat widths before booking – sites like SeatGuru provide detailed measurements for specific flights. Airlines with wider economy seats include JetBlue, Emirates, and Delta on many routes. Consider upgrading to economy plus or premium economy for extra width and legroom on long-haul flights. Some plus-size travelers purchase two seats for maximum comfort on longer flights, and many airlines have policies that accommodate this. A seatbelt extender can be requested discreetly from flight attendants on any airline.

    How do I find size-inclusive activities and tours at my destination?

    Contact tour operators and activity providers directly before booking to ask about weight limits, equipment sizes, and accessibility. Most reputable companies will be honest about their accommodations. Plus-size travel bloggers and review sites often list specific companies that have been tested and recommended by larger travelers. When in doubt, choose activities that are naturally size-inclusive – walking tours, boat excursions, food tours, cultural experiences, spa treatments, and nature exploration rarely have size restrictions.

    What are the best travel insurance options for plus-size travelers?

    What are the best travel insurance options for plus-size travelers?

    Standard travel insurance covers plus-size travelers the same as anyone else – there are no size-based exclusions in reputable travel insurance policies. Look for comprehensive policies that cover trip cancellation, medical emergencies, luggage loss, and travel delays. If you have any pre-existing health conditions, check the policy’s pre-existing condition clause to ensure you are covered. Companies like World Nomads, Allianz, and SafetyWing are popular among frequent travelers and provide straightforward, comprehensive coverage.

  • The 30-Day Mirror Confidence Challenge – A Step-by-Step Plan for Body Acceptance

    The 30-Day Mirror Confidence Challenge – A Step-by-Step Plan for Body Acceptance

    Let us be honest for a moment. How do you feel when you catch your reflection? If your first instinct is to look away, to zero in on the parts of your body you have been taught to dislike, or to avoid mirrors altogether, you are not alone. So many of us have spent years absorbing messages that told us our bodies were problems to be solved. But what if you could rewire that response? What if, in just 30 days, you could build a mirror confidence challenge practice that helps you see yourself with kindness instead of criticism?

    This is not about forcing yourself to love every inch of your body overnight. That kind of pressure is just another form of perfectionism dressed up in self-help language. Instead, this 30-day mirror confidence challenge is about building a slow, steady, and sustainable path toward body acceptance. It is about replacing the automatic negativity with something gentler, something truer, and something that actually serves you.

    Whether you are a size 14 or a size 34, whether you have always struggled with your reflection or are just going through a rough patch, this challenge meets you exactly where you are. No toxic positivity. No before-and-after photos. Just you, your mirror, and a daily practice that thousands of women have used to shift their mindset in ways they never thought possible.

    Why a Mirror Confidence Challenge Can Transform Your Relationship With Your Body

    The mirror confidence challenge is not some trendy internet dare. It is rooted in actual psychological principles. Exposure therapy, one of the most well-researched techniques in cognitive behavioral therapy, works by gradually and repeatedly exposing someone to something they avoid or fear. For many plus-size women, mirrors have become a source of anxiety, and this challenge uses a similar principle to gently desensitize that response.

    Research published in the journal Body Image found that mirror exposure exercises – where participants spent structured time looking at their bodies with guided neutral or positive commentary – significantly reduced body dissatisfaction over time. Participants reported feeling less anxious around mirrors, less preoccupied with perceived flaws, and more able to appreciate their bodies as they are.

    But here is the part that research alone cannot capture: the feeling of looking at yourself and not flinching. The quiet power of being able to get dressed in the morning without a wave of self-criticism. The freedom of walking past a store window and not automatically sucking in your stomach. These shifts are subtle, but they change the texture of your entire day.

    This mirror confidence challenge works because it is progressive. You are not being asked to stand naked in front of a full-length mirror on Day 1 and recite affirmations. Instead, you are building up to it, layer by layer, at a pace that respects your emotional bandwidth.

    Before You Begin – Setting Yourself Up for Success

    Before you start your 30-day mirror confidence challenge, take a few minutes to set yourself up for the best possible experience. This is not about perfection – it is about intention.

    Choose Your Mirror

    Choose Your Mirror

    Pick a mirror that you will use consistently throughout the challenge. Ideally, this should be a full-length mirror in a private space where you feel safe and uninterrupted. If you do not own a full-length mirror, a bathroom mirror works perfectly fine for the first two weeks. You can always upgrade later.

    If you want to invest in a good mirror for this challenge, a full-length floor mirror with a sturdy frame is a great option. Look for one with good lighting – avoid mirrors in dim corners or ones that distort your image. You deserve to see yourself clearly.

    Set Your Time

    Set Your Time

    Each daily exercise takes between 3 and 10 minutes. Choose a consistent time – maybe after your morning shower, during your skincare routine, or right before bed. Consistency is more important than duration. Three minutes every day beats twenty minutes once a week.

    Get a Journal

    Get a Journal

    You will want somewhere to jot down your thoughts after each session. This does not need to be fancy. A simple notebook, the notes app on your phone, or a guided self-love journal all work beautifully. The act of writing helps solidify the shifts you are making internally.

    Tell Someone You Trust

    Tell Someone You Trust

    Accountability matters. Tell a friend, a partner, a therapist, or an online community that you are doing this. You do not have to share details – just the fact that you are working on something meaningful for yourself. Having someone check in on you can make the difference between finishing and fading out around Day 12.

    Week One – Days 1 Through 7 – The Foundation Phase

    The first week of the mirror confidence challenge is gentle by design. You are simply building the habit of spending intentional time with your reflection. No big emotional asks. Just showing up.

    Day 1 – The Neutral Gaze

    Day 1 - The Neutral Gaze

    Stand in front of your mirror for three minutes. You can be fully clothed – whatever makes you comfortable. Your only goal is to look at your face. Not to evaluate it, not to pick it apart, just to look. Notice your eye color, the shape of your brows, the curve of your lips. If critical thoughts come up, acknowledge them and let them pass. You are practicing neutral observation.

    Day 2 – Three Nice Things About Your Face

    Day 2 - Three Nice Things About Your Face

    Same position as yesterday, but today, name three things about your face that you appreciate. These do not have to be things you love – just things you can acknowledge. Maybe it is that your eyes crinkle when you smile. Maybe it is the freckles across your nose. Write them down afterward.

    Day 3 – Smile at Yourself

    Day 3 - Smile at Yourself

    This sounds silly, and that is exactly the point. Stand in front of your mirror and genuinely smile at yourself for one full minute. Not a forced grin – try to think of something that makes you happy and let it reach your face. Notice how your reflection changes. Most of us never see ourselves smiling naturally. It can be surprisingly emotional.

    Day 4 – Hands and Arms Appreciation

    Day 4 - Hands and Arms Appreciation

    Expand your gaze to include your hands and arms. Look at them in the mirror. Think about everything they do for you – the meals they prepare, the people they hug, the work they accomplish. Say out loud: “These hands carry me through my life.” Write down any feelings that come up.

    Day 5 – The Outfit Check

    Put on an outfit you feel good in. Stand in front of the mirror and take in the full picture – not just the parts you usually fixate on, but the whole image. Notice colors, textures, how the fabric moves. If you need outfit inspiration that makes you feel amazing, the Torrid Studio Knit collection is designed to drape beautifully on curves.

    Day 6 – Gratitude for Function

    Day 6 - Gratitude for Function

    Today, stand in front of the mirror and focus on what your body does rather than how it looks. Your legs carry you. Your lungs breathe without you asking. Your heart has been beating since before you were born. Spend three minutes thanking your body for its function. Write down five things your body did for you today.

    Day 7 – Weekly Check-In

    Take ten minutes to journal about your first week. What felt easy? What felt hard? Did any emotions surprise you? Rate your comfort level with the mirror from 1 to 10 – this is your baseline. You will check in again at the end of each week.

    Week Two – Days 8 Through 14 – The Observation Phase

    Now that you have built the habit, Week Two introduces deeper observation. You are learning to see your body as a whole rather than a collection of problem areas.

    Day 8 – Full Body Scan With Neutrality

    Day 8 - Full Body Scan With Neutrality

    Wearing something comfortable – leggings and a tank top, a soft robe, whatever feels right – stand in front of the mirror and slowly scan your body from head to toe. Your goal is neutral description, like a painter studying their subject. “I have round shoulders. My stomach is soft. My thighs are strong.” No judgment words – just observation.

    Day 9 – The Posture Experiment

    Day 9 - The Posture Experiment

    Stand in front of the mirror and try three different postures: shoulders hunched, neutral standing, and shoulders back with chin slightly lifted. Notice how each posture changes not just how you look but how you feel. Body confidence lives in your posture as much as in your thoughts. For extra support during the day, a plus-size posture corrector can be a helpful reminder to stand tall.

    Day 10 – Soft Belly Day

    This is often the hardest day of the challenge, and it is placed early in Week Two intentionally. Stand in front of the mirror, place your hands on your belly, and breathe. Do not suck in. Do not tense up. Let your belly be soft. Spend three minutes with your hands there, breathing normally. If tears come, let them. This is where so much of our body shame lives, and giving it gentleness instead of tension is a radical act.

    Day 11 – Movement in the Mirror

    Put on your favorite song and move in front of the mirror. Dance, sway, stretch – whatever feels natural. Watch your body in motion. Bodies in motion look different from bodies standing still, and there is something beautiful about seeing yourself move freely. Let it be fun. Let it be silly. Let it be whatever it wants to be.

    Day 12 – The Touch Exercise

    Day 12 - The Touch Exercise

    While looking in the mirror, gently touch different parts of your body with kindness. Run your hands down your arms, across your shoulders, over your hips. Touch your body the way you would comfort a friend. This exercise builds a connection between physical sensation and visual input, rewiring the way your brain processes your reflection.

    Day 13 – Wearing Something You Have Been Avoiding

    Pull out that piece of clothing you bought but never wore. The sleeveless top. The bodycon dress. The shorts. Put it on and stand in front of the mirror for five minutes. You do not have to love how it looks. You just have to see yourself in it and sit with whatever comes up. If the item does not fit comfortably, that is information about the clothing, not about your body.

    Day 14 – Weekly Check-In

    Journal again. Rate your comfort level from 1 to 10. Compare it to last week. Write about any shifts you have noticed – in front of the mirror and outside of it. Many women report that by this point, they are catching themselves being less critical throughout the day, not just during the challenge.

    Week Three – Days 15 Through 21 – The Affirmation Phase

    Week Three is where you start actively replacing critical self-talk with affirmations. By now, you have built enough comfort with the mirror that adding positive language will feel more natural than it would have on Day 1.

    Day 15 – Your First Mirror Affirmation

    Day 15 - Your First Mirror Affirmation

    Look into your own eyes in the mirror and say: “I am allowed to take up space.” Say it three times. The first time might feel awkward. The second time might feel forced. The third time, something might shift. Write about the experience afterward.

    Day 16 – Body Part Affirmations

    Day 16 - Body Part Affirmations

    Choose three body parts – including one you struggle with – and give each one a compliment out loud. “My arms are strong and capable.” “My thighs carry me through every adventure.” “My belly is soft, and that is perfectly fine.” Specificity matters here. Generic affirmations slide off. Specific ones stick.

    Day 17 – The Letter to Your Body

    Day 17 - The Letter to Your Body

    Write a short letter to your body as if it were a friend you had been neglecting. Apologize for the harsh words. Acknowledge what it has been through. Promise to try harder. Then read the letter out loud to your reflection. This exercise is borrowed from therapeutic practice and is one of the most powerful days of the entire challenge.

    Day 18 – Affirmations in Your Skincare Routine

    Today, combine your mirror time with your skincare routine. As you apply each product, say something kind to the skin you are caring for. When you apply moisturizer to your face, say “I am taking care of you.” When you apply body lotion, say “You deserve softness.” A nourishing body cream like Sol de Janeiro Brazilian Bum Bum Cream turns this into a sensory experience that reinforces the positive message.

    Day 19 – The Power Pose

    Social psychologist Amy Cuddy popularized the idea of power posing – standing in an expansive, confident posture to shift your internal state. Today, try three power poses in front of the mirror: hands on hips (the Wonder Woman), arms raised in a V (the victory pose), and hands clasped behind your head with elbows wide. Hold each for two minutes. Notice how your reflection looks powerful and commanding. That is you. That has always been you.

    Day 20 – Affirmations for Your Younger Self

    Day 20 - Affirmations for Your Younger Self

    Look at your reflection and imagine your younger self standing beside you – the little girl who first learned to feel bad about her body. What would you say to her? Speak those words out loud to the mirror. Many women find this exercise deeply healing because it connects the dots between old wounds and current self-perception.

    Day 21 – Weekly Check-In

    Day 21 - Weekly Check-In

    Rate your comfort level again. By Week Three, most women report a 3 to 5 point increase from their baseline. Journal about the affirmation exercises. Which ones felt powerful? Which felt difficult? What surprised you about hearing your own voice say kind things about your body?

    Week Four – Days 22 Through 30 – The Celebration Phase

    The final phase is about anchoring everything you have built. These exercises are designed to be joyful, celebratory, and deeply affirming. You have done the hard work. Now it is time to enjoy the results.

    Day 22 – The Photo Shoot

    Set up your phone on a timer or prop it against the mirror and take photos of yourself. Not for social media – for you. Try different poses, different angles, different expressions. Look at the photos afterward and pick three that make you smile. Save them somewhere you can easily access them on hard days.

    Day 23 – Dress Up Day

    Day 23 - Dress Up Day

    Put together your most confident outfit. Do your hair. Do your makeup if that is your thing. Put on jewelry. Go all out. Then stand in front of the mirror and take yourself in. This is you at your most put-together, and the goal is to see the full picture with appreciation. A statement accessory like a chunky gold chain necklace can add that extra boost of confidence to your look.

    Day 24 – Bare Skin Day

    If you are ready – and only if you are ready – spend time in front of the mirror in minimal clothing. Underwear, a bralette, whatever your comfort level allows. This is not about being brave or pushing past your limits. It is about meeting your body without the armor of clothing and offering it the same kindness you have been practicing all month.

    Day 25 – The Compliment Collection

    Day 25 - The Compliment Collection

    Write down every compliment you can remember receiving about your appearance, your energy, your presence – anything. Then read them to your reflection. Sometimes we dismiss compliments the moment we hear them. Today, you are going to let them land.

    Day 26 – Mirror Dancing – The Full Version

    Remember Day 11? Today, you are doing it again, but bigger. Create a playlist of songs that make you feel unstoppable. Dance in front of the mirror for at least three songs. Watch yourself move. Let yourself be mesmerized by your own body in motion. This is freedom.

    Day 27 – Share Your Journey

    Day 27 - Share Your Journey

    If it feels right, share something about your experience. Post on social media, tell a friend, write a blog post, or simply text someone you love and tell them about this challenge. Vulnerability shared becomes strength multiplied.

    Day 28 – Create Your Personal Affirmation

    Day 28 - Create Your Personal Affirmation

    Using everything you have learned about yourself over the past 27 days, write one personal affirmation that resonates deeply with you. Not something generic from the internet – something that speaks directly to your journey. Write it on a sticky note and put it on your mirror. This is your anchor.

    Day 29 – The Forgiveness Exercise

    Day 29 - The Forgiveness Exercise

    Look in the mirror and say: “I forgive myself for every unkind thing I have ever thought about you.” Say it as many times as you need to. Some women say it once and feel complete. Others need to repeat it for five minutes before it starts to sink in. There is no right way. There is only your way.

    Day 30 – The Celebration

    Day 30 - The Celebration

    You did it. Stand in front of your mirror one final time – for now – and simply say “Thank you.” Thank your body for carrying you through this challenge. Thank yourself for showing up every day. Thank the mirror for being a tool for healing instead of harm. Then do something wonderful for yourself. Take a bath, buy yourself flowers, order that gorgeous satin robe set from Savage X Fenty you have been eyeing, or simply sit with the quiet pride of having completed something meaningful.

    How to Handle Difficult Days During the Challenge

    How to Handle Difficult Days During the Challenge

    Let us be real – not every day of this mirror confidence challenge will feel good. Some days you will stand in front of the mirror and the old critical voice will be louder than anything else. Some days you will cry. Some days you will want to skip. Here is what to do when that happens.

    Lower the Bar, Do Not Drop It

    If a day’s exercise feels too intense, scale it back. Instead of a full body scan, just look at your hands. Instead of saying affirmations out loud, whisper them. Instead of five minutes, do one. The goal is not to complete each exercise perfectly – it is to maintain the habit of showing up. A scaled-back practice still counts.

    Name the Voice

    When critical thoughts come up, it helps to externalize them. Some women name their inner critic – “Oh, there goes Karen again, telling me my thighs are too big.” This creates distance between you and the thought. You are not your inner critic. You are the person who is brave enough to challenge it.

    Write It Out

    Write It Out

    If a session brings up big emotions, write them down immediately. Do not try to analyze or fix them. Just get them out of your body and onto paper. This is one reason the journal component of this challenge is so important. It gives your feelings somewhere to go besides back into your body as tension and shame.

    Reach Out

    Reach Out

    If a day feels particularly heavy, text the person you told about this challenge. You do not have to explain everything – just say “Today was hard” and let someone hold that with you. Body acceptance work can surface deep stuff, and you do not have to carry it alone.

    Remember Why You Started

    Remember Why You Started

    On the hardest days, come back to your why. Maybe you started because you are tired of dreading getting dressed. Maybe you started because you want your daughter to see a woman who likes her reflection. Maybe you started because you deserve peace with your body after decades of war. Whatever your reason, it is enough. It is more than enough.

    What Happens After the 30 Days Are Over

    What Happens After the 30 Days Are Over

    The mirror confidence challenge does not end on Day 30. It simply shifts from a structured program to a sustainable practice. Here is how to maintain the gains you have made.

    Keep the Mirror Time

    Continue spending at least one minute per day in intentional mirror time. This can be during your skincare routine, while getting dressed, or as a standalone practice. The key word is intentional – you are choosing to look at yourself with presence rather than rushing past your reflection on autopilot.

    Update Your Affirmation

    Update Your Affirmation

    Every few weeks, check in with your personal affirmation. Does it still resonate? Does it need updating? As you grow, your affirmation should grow with you. Some women keep a running list and rotate through them.

    Build a Body-Positive Environment

    Build a Body-Positive Environment

    Your mirror work is most effective when supported by a body-positive environment. Curate your social media feeds to include diverse body types. Follow plus-size creators who celebrate their bodies without apology. Read books like “The Body Is Not an Apology” by Sonya Renee Taylor or body-positive book collections available on Amazon . Surround yourself with images and messages that reinforce what you are building in front of the mirror.

    Dress for Joy, Not Hiding

    Dress for Joy, Not Hiding

    One of the most practical outcomes of this challenge is a shift in how you get dressed. Many women report that after 30 days, they start reaching for clothes that make them feel good rather than clothes that hide their bodies. If your wardrobe needs a refresh to match your new mindset, brands like Universal Standard and Eloquii offer beautiful, well-made pieces designed for curvy bodies.

    Consider Professional Support

    Consider Professional Support

    If this challenge surfaced deep-seated body image issues, trauma around your appearance, or symptoms of disordered eating, please consider working with a therapist who specializes in body image. This challenge is a wonderful starting point, but it is not a substitute for professional support when you need it. Organizations like the National Eating Disorders Association (NEDA) offer free resources and referrals.

    The 30-day mirror confidence challenge is not magic. It will not erase years of internalized fatphobia overnight. But it will crack the door open. It will show you that another way of seeing yourself is possible. And once that door is open, even just a crack, the light that comes through can change everything.

    You deserve to look at your reflection and feel peace. Not perfection. Not forced positivity. Just peace. And that starts with 30 days, a mirror, and the willingness to try.

    Key Takeaways

    • The 30-day mirror confidence challenge uses principles from exposure therapy to gradually build a healthier relationship with your reflection, moving through foundation, observation, affirmation, and celebration phases.
    • Starting with neutral observation rather than forced positivity makes the practice sustainable and prevents the challenge from feeling overwhelming or fake.
    • Difficult days are normal and expected – scaling back the exercise is always better than skipping it entirely.
    • Combining mirror work with journaling, supportive community, and a body-positive environment amplifies the results beyond what mirror time alone can achieve.
    • The real goal is not to love every part of your body but to reach a place of peace and acceptance where your reflection no longer triggers shame or avoidance.

    Frequently Asked Questions

    Do I have to do the mirror confidence challenge every single day without missing one?

    No. Life happens, and missing a day does not erase your progress. If you miss a day, simply pick up where you left off the next day. What matters most is the overall pattern of showing up, not achieving a perfect streak. Some women take 35 or 40 days to complete the 30 exercises, and the results are just as meaningful.

    What if I start crying during one of the exercises?

    What if I start crying during one of the exercises?

    Tears are a completely normal and healthy response during this challenge, especially during exercises like the soft belly day or the letter to your body. Crying means something is moving through you. Let it happen, write about it afterward, and be extra gentle with yourself for the rest of the day. If the emotions feel overwhelming or unmanageable, consider reaching out to a therapist for additional support.

    Can I do this challenge with a friend or partner?

    Absolutely. Many women find it helpful to do the challenge alongside a friend, checking in daily or weekly to share their experiences. However, the actual mirror exercises should be done privately. Body image work is deeply personal, and you need the freedom to be vulnerable without an audience. Share your reflections afterward, but keep the mirror time just for you.

    I have a history of eating disorders. Is this challenge safe for me?

    Mirror exposure can be powerful, and for individuals with a history of eating disorders, it should ideally be done under the guidance of a therapist who specializes in body image and eating disorders. This challenge is designed for general body acceptance work, not clinical treatment. If you have an active eating disorder or are in early recovery, please consult with your treatment team before starting.

    Will this challenge help me lose weight?

    This challenge is not about weight loss. It is about changing your relationship with your body as it is right now. Many women find that when they stop fighting their bodies and start caring for them, their overall health behaviors naturally improve – but weight loss is not the goal, the metric, or the measure of success here. The measure of success is how you feel when you look in the mirror on Day 30 compared to Day 1.

  • Best Concealers for Dark Circles on Dark Skin – Color Correcting Tips That Work

    Best Concealers for Dark Circles on Dark Skin – Color Correcting Tips That Work

    By the Curvy Girl Journal Team |

    Why Dark Circles on Dark Skin Need a Different Approach

    Why Dark Circles on Dark Skin Need a Different Approach

    If you have ever applied a concealer marketed for dark circles only to end up looking ashy, gray, or like you have two white patches under your eyes, you are not alone. The majority of concealer advice, shade recommendations, and product formulations were developed with lighter skin tones in mind. When those same principles are applied to melanin-rich skin, the results range from ineffective to actively unflattering.

    Dark circles on dark skin are different. The hyperpigmentation tends to run deeper, with undertones that skew brown, purple, and gray rather than the blue that dominates on lighter skin. This means the color correction approach needs to be more saturated, the concealer shades need to be warmer, and the application technique needs to account for the way product sits on melanin-rich skin, which has different texture and oil production patterns.

    This guide covers everything you need to know: the color theory behind color correcting on dark skin, the specific products that actually work, the step-by-step application technique that prevents creasing and ashiness, and the common mistakes that trip up even experienced makeup users. By the end, you will have a clear, actionable system for concealing dark circles that looks natural, lasts all day, and actually enhances your beautiful melanin-rich complexion.

    Color Correcting 101 for Dark Skin

    Color Correcting 101 for Dark Skin

    Understanding Color Theory for Deeper Complexions

    Understanding Color Theory for Deeper Complexions

    Color correcting works on the principle that opposite colors on the color wheel cancel each other out. For dark circles on dark skin, the colors you are neutralizing are brown, purple, and deep gray. The correctors that cancel these tones are peach, orange, and red, with the specific shade depending on how deep your skin tone is.

    Here is the critical rule that most mainstream beauty advice gets wrong: the deeper your skin, the more saturated your color corrector needs to be. A light peach that works on medium skin will do nothing on deep skin. You need actual orange or even reddish-orange tones to effectively neutralize the depth of pigmentation. This is not a mistake; it is correct color theory applied to deeper skin tones.

    Matching Your Corrector to Your Skin Depth

    Matching Your Corrector to Your Skin Depth

    For medium-dark skin tones, a saturated peach corrector will effectively neutralize most under-eye darkness. For dark to deep skin tones, you need an orange corrector. For very deep skin tones, a red-orange or even a true warm red corrector provides the pigmentation intensity needed to cancel out the deepest hyperpigmentation. If your corrector looks too light or too pastel against your under-eye, it is not saturated enough for your depth.

    Why You Need Both a Corrector and a Concealer

    On dark skin, concealer alone cannot effectively address dark circles because the pigmentation is too deep to cover in a single layer. A color corrector neutralizes the dark tones first, creating a more even base. Then the concealer goes on top to match the area to the rest of your face. This two-step approach is what makeup artists use on dark skin tones, and it is the key to natural-looking, effective coverage.

    Best Color Correctors for Dark Skin

    Best Color Correctors for Dark Skin

    1. Live Tinted Hueguard Color Corrector ($28)

    1. Live Tinted Hueguard Color Corrector ($28)

    Live Tinted was literally created to solve color correction challenges on melanin-rich skin. Their Hueguard formula adapts to your skin tone, providing neutralizing correction without the chalky aftermath that plagues so many correctors on dark skin. The creamy, blendable formula sits beautifully under concealer without creasing or separating throughout the day.

    The shade range is specifically calibrated for deeper skin tones, avoiding the too-light, too-pastel problem that makes many correctors useless on dark skin. The formula also contains skincare ingredients that treat the under-eye area while correcting, including caffeine to reduce puffiness and vitamin C to gradually brighten the area over time.

    Shop Live Tinted Hueguard Color Corrector ($28)

    2. L.A. Girl Pro Concealer in Orange ($5)

    2. L.A. Girl Pro Concealer in Orange ($5)

    The L.A. Girl Pro Concealer in orange is one of the most recommended products in the entire dark skin beauty community, and at $5 it is also one of the most accessible. The orange shade is perfectly saturated to neutralize dark circles on medium-deep to deep skin tones. The liquid formula blends easily and provides a smooth base for concealer without being too thick or cakey.

    Professional makeup artists working on dark skin frequently carry this product in their kits because it works consistently across different depths. The applicator tip allows for precise placement in the under-eye area. For $5, this is the must-try product for anyone beginning their color correction journey on dark skin.

    Shop L.A. Girl Pro Concealer in Orange ($5)

    3. NYX Professional Makeup Color Correcting Palette ($14)

    3. NYX Professional Makeup Color Correcting Palette ($14)

    The NYX color correcting palette includes multiple shades in one compact, allowing you to customize your correction by mixing and matching. For dark skin, the orange and peach pans are the most useful, and the included green can address any redness or hyperpigmentation around the nose and chin. The cream formula blends smoothly and works well under both liquid and powder concealer.

    Having multiple correcting shades in one palette is particularly useful because your under-eye darkness can vary throughout the month due to sleep, stress, and hormonal changes. On days when the circles are deeper, use a more saturated orange. On lighter days, a peach tone suffices. The palette format gives you flexibility without buying multiple individual products.

    Shop NYX Color Correcting Palette ($14)

    Best Concealers for Dark Skin Tones

    Best Concealers for Dark Skin Tones

    4. Fenty Beauty Pro Filt’r Concealer ($30)

    4. Fenty Beauty Pro Filt'r Concealer ($30)

    With 50 shades that include multiple options for every depth and undertone, Fenty Beauty’s Pro Filt’r Concealer is the gold standard for concealer shade matching on dark skin. The creamy, soft matte formula builds from medium to full coverage while feeling light on the skin. It does not settle into fine lines, crease heavily, or oxidize throughout the day, which are common issues with concealers on deeper skin.

    The shade range specifically includes warm, cool, and neutral undertones within the deep shade range, so you are not forced to choose between a shade that is technically the right depth but has completely wrong undertones. The formula lasts up to 12 hours and resists the midday fading that can reveal corrected dark circles. This is the concealer that makeup artists reach for first on dark skin.

    Shop Fenty Beauty Pro Filt’r Concealer ($30)

    5. NARS Radiant Creamy Concealer ($32)

    5. NARS Radiant Creamy Concealer ($32)

    The NARS Radiant Creamy Concealer has been a bestseller for over a decade because it delivers consistently impressive results across all skin tones. The medium-to-full coverage formula has a natural finish that avoids both the matte flatness and the overly dewy slip that can be problematic under the eyes. The built-in skincare ingredients hydrate the delicate under-eye area.

    With 30 shades spanning the full spectrum of skin tones, the deep shade range includes warm, cool, and neutral options. The concealer has excellent staying power without setting powder, though a light dusting of translucent powder extends wear even further. The doe-foot applicator deposits the right amount of product for the under-eye area without over-application.

    Shop NARS Radiant Creamy Concealer ($32)

    6. Maybelline Instant Age Rewind Concealer ($12)

    6. Maybelline Instant Age Rewind Concealer ($12)

    If Fenty and NARS represent the prestige tier, Maybelline Instant Age Rewind is the drugstore champion. The sponge-tip applicator provides easy, precise application, and the lightweight formula delivers medium coverage that can be built up. The shade range has expanded significantly and now includes multiple deep shades with warm undertones that work on dark skin.

    The formula contains goji berry and haloxyl to address dark circles from within while providing immediate cosmetic coverage. At $12, it offers remarkable performance for the price. The only caveat is that the sponge applicator can harbor bacteria and should be cleaned regularly. Many women prefer to dab the product onto a clean brush or beauty sponge rather than applying directly from the applicator.

    Shop Maybelline Instant Age Rewind Concealer ($12)

    7. Too Faced Born This Way Super Coverage Concealer ($33)

    7. Too Faced Born This Way Super Coverage Concealer ($33)

    For the darkest circles that need maximum coverage, Too Faced Born This Way Super Coverage delivers. This full-coverage concealer provides significant pigment in a single layer, which means less layering and less risk of a heavy, cakey finish. The coconut water and alpine rose ingredients keep the formula hydrated and comfortable throughout the day.

    The shade range includes deep shades with accurate undertones, and the formula resists oxidation, which is critical for dark skin tones where a shade shift can make the concealer look orange or ashy within hours. The paddle applicator allows for controlled placement, and the formula sets to a natural satin finish without settling into creases.

    Shop Too Faced Born This Way Concealer ($33)

    Step-by-Step Application Guide

    Step-by-Step Application Guide

    Step 1: Prep the Under-Eye Area

    Step 1: Prep the Under-Eye Area

    Apply a hydrating eye cream or primer to the under-eye area and let it absorb for two to three minutes. This creates a smooth, moisturized canvas that prevents concealer from clinging to dry patches or settling into fine lines. A caffeine-based eye cream also reduces puffiness, creating a flatter surface for product application.

    Step 2: Apply Color Corrector

    Step 2: Apply Color Corrector

    Using a small brush or your ring finger, apply a thin layer of orange or peach corrector directly to the darkest areas under your eye. Typically this is the inner corner where the dark circle is deepest. Use the smallest amount possible; you are neutralizing, not covering. Blend gently with your ring finger, which applies the lightest pressure and the most warmth for smooth blending.

    Step 3: Let the Corrector Set

    Step 3: Let the Corrector Set

    Allow the corrector to set for 30 to 60 seconds before applying concealer. This prevents the two products from mixing and diluting each other. While you wait, you can work on other areas of your makeup like foundation, brows, or eyes.

    Step 4: Apply Concealer

    Step 4: Apply Concealer

    Apply concealer in an inverted triangle shape under the eye, with the base along the lower lash line and the point reaching toward the cheek. This shape brightens the entire under-eye area and creates a lifted effect. Use a damp beauty sponge to blend, pressing and patting rather than rubbing. Patting builds coverage without disturbing the corrector underneath.

    Step 5: Set with Powder (Optional)

    Step 5: Set with Powder (Optional)

    If your under-eye tends to crease, lightly set the concealer with a finely milled translucent or setting powder using a small fluffy brush. Use the lightest possible hand, as too much powder will look chalky on dark skin. Banana powder or warm-toned setting powders are better choices than pure white translucent powders, which can create an ashy cast on deeper complexions.

    Common Mistakes to Avoid

    Common Mistakes to Avoid

    Using a Concealer That Is Too Light

    Using a Concealer That Is Too Light

    The instinct to “brighten” the under-eye with a shade that is two to three levels lighter than your skin tone creates a reverse raccoon effect on dark skin. Your concealer should be no more than one shade lighter than your skin tone. On dark skin, the brightening effect comes from neutralizing the dark tones, not from using a dramatically lighter product.

    Skipping Color Correction

    Skipping Color Correction

    On dark skin with significant under-eye hyperpigmentation, concealer alone will never fully mask the darkness. Skipping the color correction step means you have to layer on more concealer to compensate, which leads to a thick, cakey finish that creases and looks unnatural. The corrector does the heavy lifting so the concealer can finish the job with a lighter touch.

    Using White Translucent Powder to Set

    Using White Translucent Powder to Set

    Pure white translucent powder creates a visible ashy cast on dark skin, especially in flash photography. Choose a setting powder with a yellow or warm undertone, or use a banana powder specifically designed for medium to deep skin tones. Ben Nye Banana Luxury Powder and Sacha Buttercup Powder are both excellent options for dark skin.

    Rubbing Instead of Patting

    Rubbing Instead of Patting

    Rubbing your concealer moves the product around and creates streaks. Patting with a damp beauty sponge presses the product into the skin for seamless, even coverage. This technique is especially important when layering corrector and concealer, as rubbing will disturb the corrector layer and reduce its effectiveness.

    Long-Term Solutions for Dark Circles

    Long-Term Solutions for Dark Circles

    Skincare Ingredients That Actually Help

    Skincare Ingredients That Actually Help

    While concealer addresses the cosmetic appearance of dark circles, certain skincare ingredients can reduce the actual pigmentation over time. Eye creams containing caffeine, niacinamide, and vitamin E have been shown in studies to decrease periocular hyperpigmentation. Vitamin C brightens the under-eye area, and retinol increases cell turnover to fade dark spots.

    Start with a caffeine-based eye cream for immediate depuffing and gradual brightening, and consider adding a retinol eye cream two to three times per week for long-term improvement. Always apply these products at night and use sunscreen during the day to prevent further darkening.

    Lifestyle Factors

    Lifestyle Factors

    Adequate sleep, proper hydration, and limiting salt intake all reduce the appearance of under-eye darkness and puffiness. Sleeping with your head slightly elevated prevents fluid pooling under the eyes. A cold compress or chilled spoons applied for five minutes in the morning can reduce morning puffiness and temporarily brighten the area.

    When to See a Dermatologist

    When to See a Dermatologist

    If your dark circles are severe, do not respond to topical treatments, or have suddenly worsened, consult a dermatologist who specializes in skin of color. They can assess whether the darkness is caused by hyperpigmentation, thin skin revealing blood vessels, allergies, or other medical factors, and recommend professional treatments like chemical peels, laser therapy, or prescription-strength brightening agents.

    Key Takeaways

    • Dark circles on dark skin require a two-step approach: color correcting first, then concealing, for natural-looking coverage.
    • The deeper your skin tone, the more saturated your color corrector needs to be. Deep skin needs orange; very deep skin needs red-orange.
    • Fenty Beauty Pro Filt’r and NARS Radiant Creamy are the top prestige concealers for dark skin. L.A. Girl Pro Concealer in Orange is the unbeatable drugstore corrector at $5.
    • Your concealer should be no more than one shade lighter than your skin tone to avoid an ashy or reverse-raccoon effect.
    • Always set with warm-toned or banana powder, never pure white translucent powder, to avoid ashiness.
    • Pat your products instead of rubbing for seamless, crease-free coverage that lasts all day.

    Frequently Asked Questions

    Do I need a color corrector or just a better concealer?

    If your dark circles are moderate to severe, you need both. Color corrector neutralizes the dark tones that concealer alone cannot mask. If your dark circles are very mild, a full-coverage concealer in the right shade might suffice, but for most women with melanin-rich skin and noticeable dark circles, the corrector step is what makes the difference between adequate and flawless coverage.

    Why does my concealer look gray or ashy after a few hours?

    This typically happens because the concealer shade has cool undertones that oxidize on your skin. Choose concealers with warm undertones, and look for formulas that specifically resist oxidation. Setting with a warm-toned powder helps maintain the correct color throughout the day. Also ensure your concealer is not too light for your skin tone, as lighter shades tend to look gray as they wear.

    Can I use my lipstick as a color corrector?

    In a pinch, a warm red or orange lipstick can work as a color corrector under the eyes. However, lipstick formulas are designed for the lips and may be too heavy, waxy, or drying for the delicate under-eye area. Dedicated color correctors have thinner, more blendable textures and often include skincare ingredients that benefit the under-eye area. Lipstick is a temporary hack, not a long-term solution.

    How do I prevent concealer from creasing under my eyes?

    Start with a hydrating eye cream as your base. Use a thin layer of corrector and a thin layer of concealer rather than thick applications of either. Set with a light dusting of finely milled powder, and bake for one to two minutes maximum before brushing away excess. Avoid over-powdering, which creates a dry, cakey texture that is more prone to cracking and creasing throughout the day.

  • 20 Gorgeous Plus Size Maternity Photoshoot Ideas That Celebrate Your Bump

    20 Gorgeous Plus Size Maternity Photoshoot Ideas That Celebrate Your Bump

    Here is something we need you to hear before we dive into the inspiration: you deserve maternity photos. Full stop. Not “despite” your size. Not “if you can find the right angles.” Not “once you find the perfect outfit that hides everything.” You – exactly as you are, at exactly this size, carrying this baby in your beautiful body – deserve to have this moment captured and treasured forever.

    Too many plus-size women skip maternity photoshoots because they do not feel “photogenic enough” or worry they will not look like the maternity photos they see on Pinterest (which, let us be honest, overwhelmingly feature one very specific body type). But pregnancy is a temporary, miraculous experience, and the photos you take now will become some of the most precious images you ever own. Your future child will treasure seeing their mama’s pregnant glow. Your future self will be so grateful you did this.

    These 20 plus size maternity photoshoot ideas are designed to celebrate your bump, your body, and this incredible chapter of your life. Every idea works beautifully at every size. Let us create something gorgeous.

    Why Every Plus Size Mama Deserves a Maternity Photoshoot

    Maternity photography is not about looking perfect. It is about documenting one of the most transformative experiences of your life. Your body is literally creating another human being. That is astounding. And regardless of whether you feel glowy and beautiful every day of your pregnancy (most of us do not – and that is normal), the photographs from a professional shoot capture something magical that you cannot see in the mirror during those hard days.

    Years from now, you will look at these photos and see a woman who was strong, brave, and radiant. You will see the curve of your belly and remember the kicks. You will see the softness in your eyes and remember the anticipation. You will see a body that did something extraordinary. And your child will look at these photos and see the woman who loved them before they even arrived.

    That is worth every moment of vulnerability it takes to step in front of a camera. So let us make those photos absolutely stunning.

    20 Stunning Maternity Photoshoot Ideas

    20 Stunning Maternity Photoshoot Ideas

    1. Golden Hour in a Field or Meadow

    1. Golden Hour in a Field or Meadow

    The classic for a reason. Golden hour – the hour before sunset – creates the most flattering, warm, glowing light imaginable. Find a field, meadow, or open area with tall grass or wildflowers. Wear a flowing dress that catches the wind. The backlighting creates a beautiful halo effect that is universally gorgeous. This lighting is incredibly forgiving and makes every skin tone glow.

    2. Milk Bath Photography

    2. Milk Bath Photography

    Milk bath maternity photos are ethereal and intimate. You sit in a bathtub filled with warm water and milk (which creates the opaque, creamy look) with floating flowers and greenery arranged around you. The milky water provides natural coverage while creating a dreamy, fine-art aesthetic. This concept works beautifully for plus-size mamas because the water level provides as much or as little coverage as you are comfortable with. A set of silk flower petals creates the perfect finishing touch for milk bath photos.

    3. Silhouette Against a Window

    3. Silhouette Against a Window

    Stand sideways in front of a large, bright window. Your photographer shoots toward the window, creating a dramatic silhouette that highlights the beautiful curve of your bump in profile. This is one of the most stunning and simple maternity photo concepts, and it celebrates the bump shape in the most artistic way possible. The silhouette format also means you can wear anything – or nothing – and still look incredible.

    4. Intimate Home Session

    4. Intimate Home Session

    Some of the most meaningful maternity photos are taken in your own home – in the nursery you are preparing, in the bedroom where you will snuggle your newborn, in the kitchen where your family gathers. These photos tell a story about your real life and create a time capsule of this moment in your home. Wear something comfortable and authentically you.

    5. Partner Connection Shots

    5. Partner Connection Shots

    Photos that capture the connection between you and your partner are incredibly powerful. Your partner’s hands on your bump. Forehead-to-forehead closeness. Laughing together. A kiss. These photos are not about how you look – they are about how you feel together. And that emotion always photographs beautifully, at every size.

    6. Dramatic Fabric Draping

    6. Dramatic Fabric Draping

    Using long lengths of flowing fabric (chiffon, tulle, or silk) draped artfully around your body creates a dramatic, editorial look. The fabric can be arranged to highlight your bump while providing coverage wherever you want it. Popular color choices include white, deep jewel tones, and earthy neutrals. This concept looks particularly stunning in studio settings with controlled lighting.

    7. Nature Goddess in the Forest

    7. Nature Goddess in the Forest

    Deep in the woods, surrounded by towering trees and dappled sunlight, this concept creates an earthy, powerful aesthetic. Wear a flowing earth-toned or forest-green dress. Add a flower crown for a bohemian touch. The natural setting creates depth and visual interest, and the filtered forest light is beautifully flattering.

    8. Beach or Waterfront Session

    8. Beach or Waterfront Session

    The combination of water, sky, and natural light creates a serene backdrop for maternity photos. You can wade into shallow water, stand at the water’s edge, or pose on rocks or a pier. A flowing dress that moves in the ocean breeze creates dynamic, beautiful images. Early morning or golden hour provides the best lighting.

    9. Boudoir-Style Maternity

    9. Boudoir-Style Maternity

    Maternity boudoir photography celebrates your pregnant body in an intimate, sensual way. Wearing lingerie, a silk robe, or even just a bra and underwear, these photos are about owning your beauty and power during pregnancy. A good boudoir photographer will make you feel comfortable, empowered, and absolutely gorgeous. A Savage X Fenty plus-size robe makes a stunning wardrobe choice for boudoir-style maternity photos.

    10. Include Your Other Children

    10. Include Your Other Children

    If this is not your first baby, including your older children in the shoot creates heartwarming images of your growing family. Capture them kissing the bump, hugging you, or just being their adorable, chaotic selves. Some of the best maternity photos are the unscripted moments when kids are just being kids around their pregnant mama.

    11. Urban/City Backdrop

    11. Urban/City Backdrop

    For the city mama, urban settings – brick walls, graffiti murals, architecturally interesting buildings, city streets – create a modern, editorial backdrop for maternity photos. This concept works especially well for women whose personal style is more urban and contemporary than ethereal and flowy.

    12. Seasonal Theme

    Lean into the season you are in. Fall: pumpkin patches, autumn leaves, cozy sweaters. Winter: string lights, snow, plaid blankets. Spring: cherry blossoms, flower gardens, pastel colors. Summer: sunflower fields, poolside, bright dresses. Seasonal elements add visual interest and create a natural timestamp for your photos.

    13. Black and White Fine Art

    13. Black and White Fine Art

    Black and white maternity photography has a timeless, fine-art quality that transcends trends. It strips away the distraction of color and focuses entirely on form, emotion, and light. The curve of a pregnant belly in black and white is one of the most beautiful shapes in photography. This concept works in any setting – studio, home, or outdoors.

    14. Belly Cast or Henna

    14. Belly Cast or Henna

    Documenting the art form of belly henna (mehndi designs painted on the bump) or a belly casting session creates unique, culturally rich maternity photos. Henna designs photograph beautifully and celebrate the artistic traditions of many cultures. A belly cast session captures the exact shape of your bump in plaster – document the process for memorable behind-the-scenes photos.

    15. Flat Lay With Baby Items

    15. Flat Lay With Baby Items

    While you are part of these photos, the focus is on tiny details – baby shoes, a onesie, an ultrasound photo, a special toy – arranged beautifully around your bump or in your hands. These detail shots add variety to your album and capture the anticipation of waiting for your little one.

    16. Joy and Movement

    16. Joy and Movement

    Instead of posed, still portraits, ask your photographer to capture you in motion – dancing, twirling, laughing, walking. Movement creates natural, dynamic images that capture your personality and energy. These photos tend to be the most authentic and the ones you love most when you look back years later.

    17. Rainbow Baby Celebration

    17. Rainbow Baby Celebration

    For mamas who have experienced pregnancy loss, a rainbow baby photoshoot can be incredibly meaningful. Incorporate rainbow elements – a rainbow backdrop, colorful smoke bombs, a spectrum of ribbons, or rainbow-colored clothing. These photos honor both the journey and the joy of this pregnancy.

    18. Underwater Maternity

    18. Underwater Maternity

    Underwater maternity photography is breathtaking. Floating in a pool with flowing fabric creating artistic shapes around your body, the weightlessness of water, and the dreamy quality of underwater light create truly unique images. This requires a photographer who specializes in underwater work, but the results are extraordinary.

    19. Matching Outfits With Partner

    19. Matching Outfits With Partner

    Coordinating (not identical) outfits with your partner creates a cohesive, polished look in your photos. This might mean both wearing neutral tones, both in denim and white, or color-coordinating your accessories. Matching outfits signal unity and teamwork, which is a beautiful message in maternity photos.

    20. Empowerment Portrait

    20. Empowerment Portrait

    A single, powerful portrait that captures you at your most confident. Standing tall, looking directly at the camera, hands on your bump, wearing whatever makes you feel most like yourself. This is the photo you frame. This is the photo that reminds you, decades from now, of the extraordinary woman you were in this moment. Because that is what you are – extraordinary.

    What to Wear for Your Plus Size Maternity Photos

    What to Wear for Your Plus Size Maternity Photos

    Your outfit sets the tone for your entire shoot. Here are guidelines for choosing well.

    Flowing Maxi Dresses and Gowns

    Flowing Maxi Dresses and Gowns

    These are the most popular choice for maternity photos because they create beautiful movement and drama. Look for dresses with stretch in the bodice to accommodate your bump and fabric that flows and catches wind or motion. Chiffon, jersey, and tulle all photograph beautifully. A plus-size maternity photoshoot gown designed specifically for photography creates stunning images at a fraction of designer prices.

    Solid Colors Over Busy Prints

    Solid Colors Over Busy Prints

    Solid colors tend to photograph better than busy prints because they keep the focus on you and your bump rather than competing for attention. Rich, saturated colors – burgundy, emerald, navy, blush, ivory, mauve – photograph beautifully and create a timeless look. Avoid neon colors and very bold patterns unless that is specifically the vibe you want.

    Layers and Texture

    Layers and Texture

    A lace robe over lingerie, a sheer fabric draped over the shoulders, a chunky cardigan falling off one shoulder – layers add visual interest and give you the ability to adjust your coverage level throughout the shoot. Bring multiple outfit options so you can switch things up and get variety in your final images.

    Comfort Is Non-Negotiable

    Comfort Is Non-Negotiable

    You will be standing, posing, and moving for an hour or more. If your outfit is uncomfortable, it will show in your face and body language. Choose clothes that genuinely feel good. If heels make you uncomfortable, wear flats (or go barefoot – bare feet in grass or sand look gorgeous in maternity photos). If you prefer more coverage, honor that. Your comfort translates directly to your confidence, which translates directly to beautiful photos.

    How to Find a Body-Positive Maternity Photographer

    Your photographer makes or breaks your maternity photo experience. Finding someone who celebrates all body types – not just tolerates them – is essential.

    Check their portfolio. Do they feature plus-size clients? Not just one or two, but regularly? A photographer who consistently showcases diverse body types in their portfolio is someone who knows how to light, pose, and photograph different bodies beautifully. If every photo in their portfolio features the same body type, they may not have the experience to make you feel your best.

    Read reviews from plus-size clients specifically. How did they feel during the session? Were they put at ease? Were the final images as beautiful as the ones featuring smaller-bodied clients?

    Have a conversation before booking. Tell them your body type and ask how they approach photographing different body types. A good photographer will be enthusiastic and reassuring. A red flag is any photographer who suggests “slimming” techniques or implies you need to hide parts of your body.

    Trust your gut. If a photographer makes you feel anything less than excited and confident about your session, keep looking. The right photographer will make you feel like the most beautiful woman they have ever had in front of their camera – because in that moment, you are.

    Posing Tips That Make You Look and Feel Amazing

    Posing Tips That Make You Look and Feel Amazing

    Turn Sideways

    Turn Sideways

    The classic maternity pose is sideways for a reason – it shows the beautiful profile of your bump most dramatically. A three-quarter turn (between facing the camera and facing sideways) is often the most flattering angle because it shows both your bump profile and your face.

    Hands on the Bump

    Hands on the Bump

    One or both hands cradling the bump is the most natural and meaningful maternity pose. It draws attention to the bump, creates beautiful hand positioning, and expresses the tenderness of the moment. Your partner’s hands joining yours on the bump adds another layer of meaning.

    Elongate Your Neck

    Elongate Your Neck

    Gently push your forehead slightly forward and down while lifting through the crown of your head. This subtle adjustment elongates the neck, defines the jawline, and is universally flattering regardless of size. Your photographer should guide you through this, but knowing the technique helps you feel more confident.

    Relax Your Shoulders

    Relax Your Shoulders

    Tension shows immediately in photographs, especially in the shoulders. Take a deep breath, drop your shoulders away from your ears, and relax. Relaxed shoulders create a more natural, confident posture that photographs beautifully.

    Look Away from the Camera

    Look Away from the Camera

    Not every photo needs to be a direct-to-camera gaze. Some of the most beautiful maternity photos show the subject looking down at her bump, gazing at her partner, looking off into the distance, or with eyes closed in a quiet moment. These poses feel more candid and emotional than a standard smile-at-the-camera shot.

    Your maternity photos are not about looking perfect. They are about documenting a moment in time that you will never experience again in quite this way. Whether you choose a grand outdoor shoot or a simple session at home, whether you wear a designer gown or your favorite comfortable dress, the magic is in the meaning. These photos capture the beginning of a love story between you and your baby – and that story is beautiful at every size.

    So book the session. Wear the dress. Strike the pose. And let yourself be seen, celebrated, and photographed. You and your bump deserve every gorgeous frame.

    Key Takeaways

    • Every plus-size mama deserves a maternity photoshoot – these photos become treasured keepsakes that you and your child will cherish for a lifetime.
    • The 20 ideas range from classic (golden hour in a field) to creative (milk bath, underwater, boudoir) – there is a concept that matches every personality and comfort level.
    • Flowing maxi dresses in solid, rich colors are the most universally flattering choice for maternity photos, but the most important thing is that your outfit feels comfortable.
    • Finding a body-positive photographer who regularly photographs diverse body types is essential – check their portfolio, read reviews from plus-size clients, and trust your gut.
    • Simple posing tips like turning sideways, placing hands on the bump, and relaxing the shoulders create beautiful, flattering images at every size.
    • The best maternity photos capture emotion and connection rather than physical perfection – a laughing, joyful photo is always more beautiful than a stiff, posed one.

    Frequently Asked Questions

    When is the best time during pregnancy to do a maternity photoshoot?

    When is the best time during pregnancy to do a maternity photoshoot?

    Most photographers recommend scheduling your maternity photoshoot between 28 and 36 weeks of pregnancy. At this stage, your bump is beautifully round and prominent but you are still comfortable enough to pose and move around for an extended session. Earlier than 28 weeks, the bump may not be as visible in photos. Later than 36 weeks, you may be too uncomfortable for a lengthy session, and there is always the chance of early arrival. For plus-size mamas, the bump sometimes shows later, so 30 to 36 weeks may be the sweet spot. Book your photographer early (around 20 weeks) to secure your preferred date.

    Should I get professional hair and makeup for my maternity photos?

    This is entirely a personal choice, but professional hair and makeup can make a noticeable difference in both how you look and how you feel during the shoot. Feeling polished and pampered boosts confidence, which translates into better photos. If it is within your budget, professional styling is a worthwhile investment. If not, you can achieve great results with your regular routine – just go slightly heavier on makeup than usual because camera lighting tends to wash out features. Focus on defined brows, lashes, and a natural-looking foundation with good coverage.

    What if I feel self-conscious during the shoot?

    What if I feel self-conscious during the shoot?

    This is completely normal, and a good photographer will know how to help. Communicate honestly with your photographer about your concerns before the session. Tell them which areas you feel most and least confident about. They can adjust lighting, angles, and poses to make you feel comfortable. Most women find that any nervousness disappears within the first 10 to 15 minutes as they relax into the session. Looking at a few beautiful images on the camera display early in the shoot often provides a confidence boost that carries through the rest of the session.

    How much do maternity photoshoots typically cost?

    How much do maternity photoshoots typically cost?

    Maternity photoshoot prices vary widely based on location, photographer experience, and what is included. Budget ranges include: $150 to $300 for newer or mini-session photographers, $300 to $800 for experienced photographers with a standard package, and $800 to $2,000 or more for premium photographers or elaborate setups (milk bath, underwater, etc.). Most packages include one to two hours of shooting time and 15 to 50 edited digital images. Some photographers offer maternity-and-newborn bundles that save money if you book both sessions together. Always ask what is included before booking.

    Can I do a maternity photoshoot at home by myself?

    Yes, a DIY maternity photoshoot at home can produce beautiful results with some planning. Use natural window light (stand facing a large window for the most flattering illumination). Set up your phone or camera on a tripod and use the self-timer or a remote shutter. Choose a clean, uncluttered background. Wear a flowing dress or drape fabric artfully. Take many photos from different angles – you can sort through and find the gems later. While professional photography offers a different level of quality, DIY photos can be meaningful and beautiful, especially if budget is a concern.