Category: Home & Living

  • A 15-Minute Morning Routine That Keeps Your Home Tidy Without Effort

    A 15-Minute Morning Routine That Keeps Your Home Tidy Without Effort

    Why 15 Minutes Is All You Need

    Why 15 Minutes Is All You Need

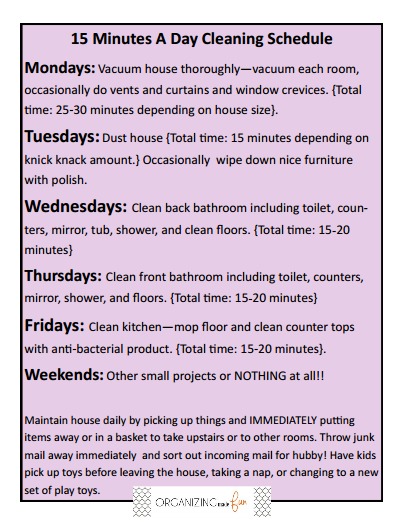
    Here is a truth that might surprise you: maintaining a tidy home does not require hours of cleaning every day. It requires fifteen minutes of the right actions at the right time. That is it. Fifteen minutes each morning, done consistently, can keep your entire home in a state of comfortable order that never spirals into weekend-consuming chaos.

    The reason this works is simple math. Mess accumulates gradually. A jacket draped over a chair. A cup left on the nightstand. Mail tossed on the counter. Each individual item takes seconds to deal with in the moment but creates a mountain of work when left for days. By spending fifteen focused minutes each morning addressing yesterday’s small messes, you prevent them from compounding into a disaster that takes hours to clean.

    Fifteen minutes is also the sweet spot psychologically. It is short enough that your brain does not resist it. Nobody dreads a fifteen-minute task the way they dread an all-day cleaning session. It fits into any morning routine without requiring you to wake up earlier, sacrifice breakfast, or feel rushed. And once you start seeing results – coming home to a tidy space every single evening – the habit reinforces itself because the reward is immediate and tangible.

    This routine is not about deep cleaning, scrubbing grout, or reorganizing closets. Those tasks have their place, usually in a weekly or monthly schedule. The morning routine is about surface-level maintenance – the visible stuff that makes your home feel put together and welcoming. It is about spending just enough time to keep things nice without letting housework dominate your life.

    Woman making her bed as part of a 15-minute morning tidying routine

    The Psychology Behind Morning Tidying

    The Psychology Behind Morning Tidying

    There is a reason why nearly every productivity expert recommends making your bed as the first task of the day. It is not because a made bed changes the world. It is because completing a small, tangible task first thing in the morning triggers a chain reaction of accomplishment that carries through the rest of your day.

    This is called the domino effect of habits. When you make your bed, you feel a tiny sense of achievement. That sense of achievement makes you more likely to wipe down the bathroom counter. Which makes you more likely to put the dishes away. Each small win builds momentum, and before you know it, fifteen minutes have passed and your entire home looks noticeably better.

    Morning tidying also sets an intention for the day. When you take a few minutes to care for your space, you are telling yourself that you and your environment matter. You are starting the day from a place of order rather than chaos. This mental shift affects everything from your mood to your productivity to how stressed you feel when you walk through the door at the end of the day.

    There is also the underrated benefit of coming home to a tidy space. When you leave a messy house in the morning, there is a low-level anxiety that follows you all day. You know the mess is waiting for you. You dread coming home to it. When you spend fifteen minutes tidying before you leave, you eliminate that background stress entirely. Coming home to a clean space feels like a gift from your past self, and it is one of the easiest ways to improve your daily quality of life.

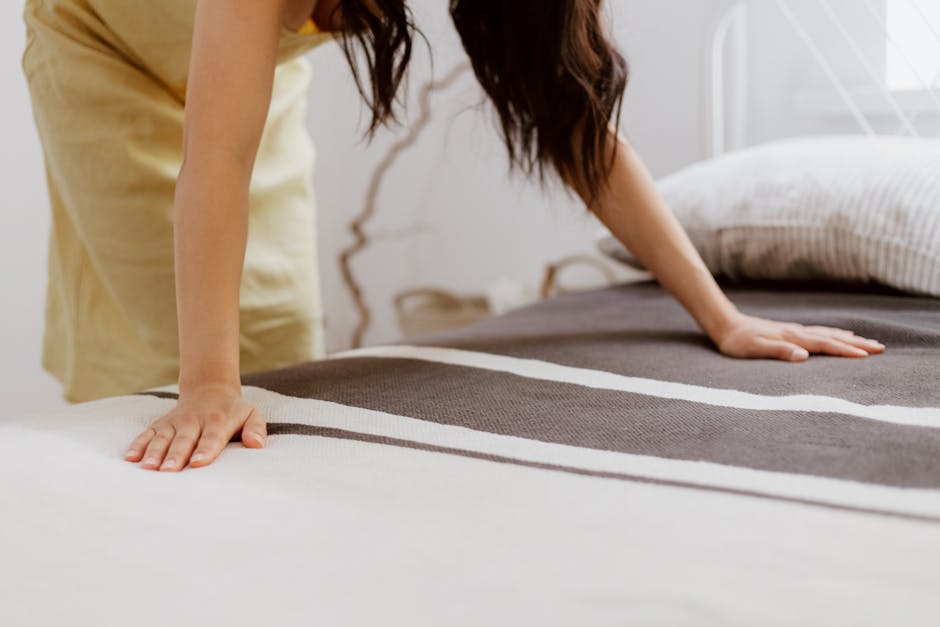
    Minutes 1-3 – Make Your Bed

    Minutes 1-3 - Make Your Bed

    You knew this was coming, and yes, it really does make that big of a difference. A made bed instantly makes your entire bedroom look cleaner, even if there are other things out of place. It is the single highest-impact tidying task you can do, and it takes less than three minutes.

    Pull the sheets tight, smooth the comforter or duvet, fluff and arrange your pillows, and fold or drape any throw blankets. It does not need to look hotel-perfect. Just neat enough that walking into your bedroom feels calm instead of chaotic.

    While you are in the bedroom, take thirty seconds to scan the room for anything that does not belong. Last night’s water glass goes to the kitchen. Clothes on the floor go in the hamper or back in the closet. Phone charger cord gets tucked away. These micro-tasks happen almost automatically once you build the habit and prevent bedroom clutter from building up over the week.

    If making the bed feels like a waste of time because you are just going to unmake it in twelve hours, consider this: you also wash dishes you are going to eat off again. You brush teeth that will get dirty again. Maintenance is not pointless just because it is recurring. The purpose is not permanence – it is the quality of the hours between making and unmaking the bed. Those hours are better when your bedroom is tidy.

    Investing in bedding that is easy to make up quickly helps a lot. A simple duvet with a microfiber duvet cover set eliminates the hassle of tucking in flat sheets and arranging multiple blankets. One pull, one smooth, pillows on top, done. The simpler your bedding setup, the more likely you are to make it every single day.

    Minutes 4-6 – Quick Bathroom Wipe Down

    Minutes 4-6 - Quick Bathroom Wipe Down

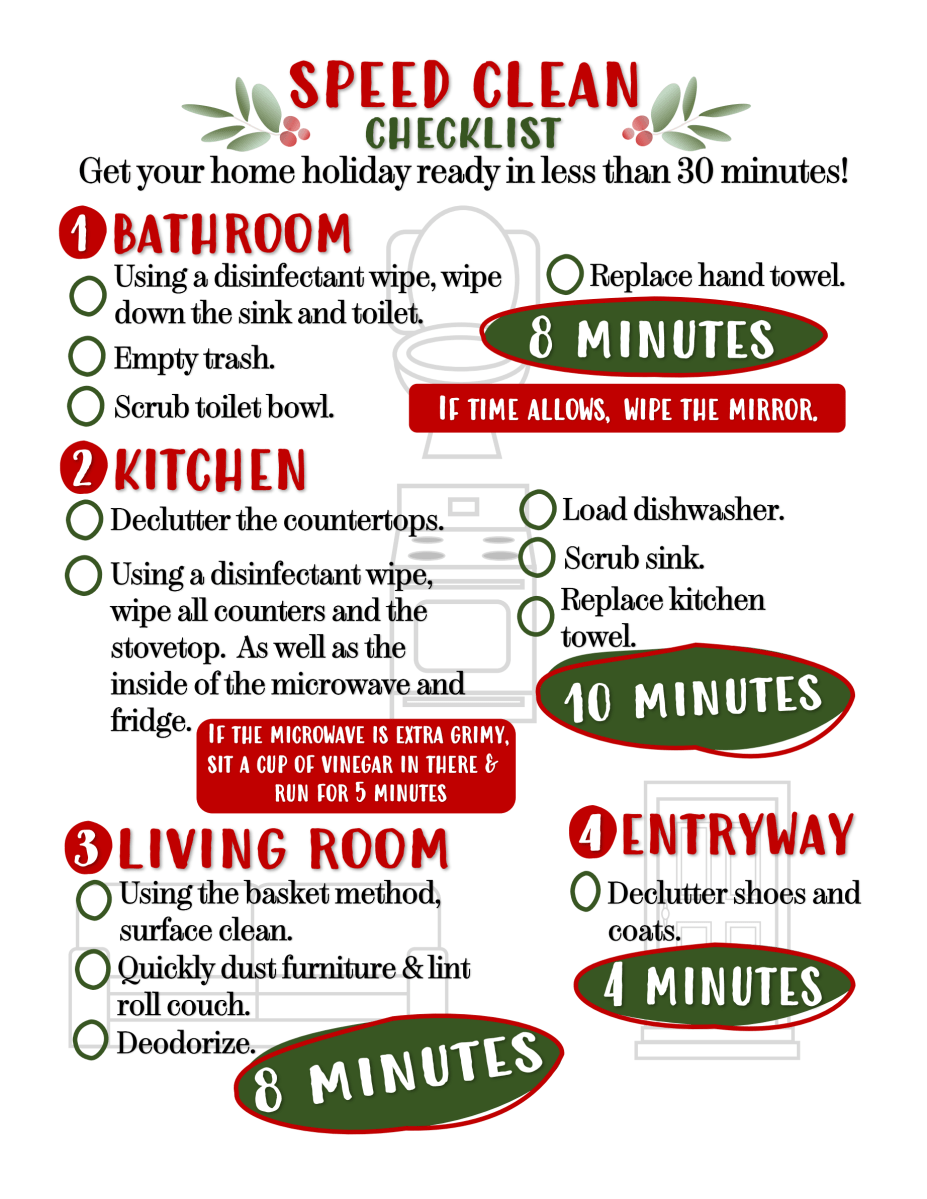
    Your bathroom is one of those spaces that goes from clean to grimy faster than almost any other room. But a daily sixty-second maintenance wipe prevents the kind of buildup that requires heavy-duty cleaning later. This is not a bathroom deep clean. This is a quick surface pass that keeps things fresh.

    Keep a container of disinfecting wipes or a spray bottle with cleaner and a microfiber cloth under the bathroom sink for easy access. After you finish your morning bathroom routine, take sixty seconds to wipe the counter and sink. That is it. Just the counter and sink. The toothpaste splatter, the water spots, the hair product residue – all of it comes off in one quick wipe.

    Every other day, add thirty seconds to swipe the mirror with a dry microfiber cloth or a glass wipe. Mirrors show toothpaste splatter and water spots almost immediately, and a clean mirror makes the entire bathroom look cleaner even if nothing else has been touched.

    Hang up your towel properly after using it. Straighten the bath mat. Put your toiletries back in their designated spots instead of leaving them scattered on the counter. These tiny actions take seconds individually but collectively prevent the slow descent into bathroom chaos that happens when nobody picks up after themselves.

    Once a week during your Sunday reset, you will do a more thorough bathroom clean. But these daily sixty-second wipes mean that your weekly clean is genuinely quick because there is never much buildup to tackle. The Method daily shower spray from Target is a favorite because you just spritz it on shower walls after your last shower of the day and it prevents soap scum and mildew without any scrubbing.

    Minutes 7-9 – Kitchen Counter Clear and Dishes

    Minutes 7-9 - Kitchen Counter Clear and Dishes

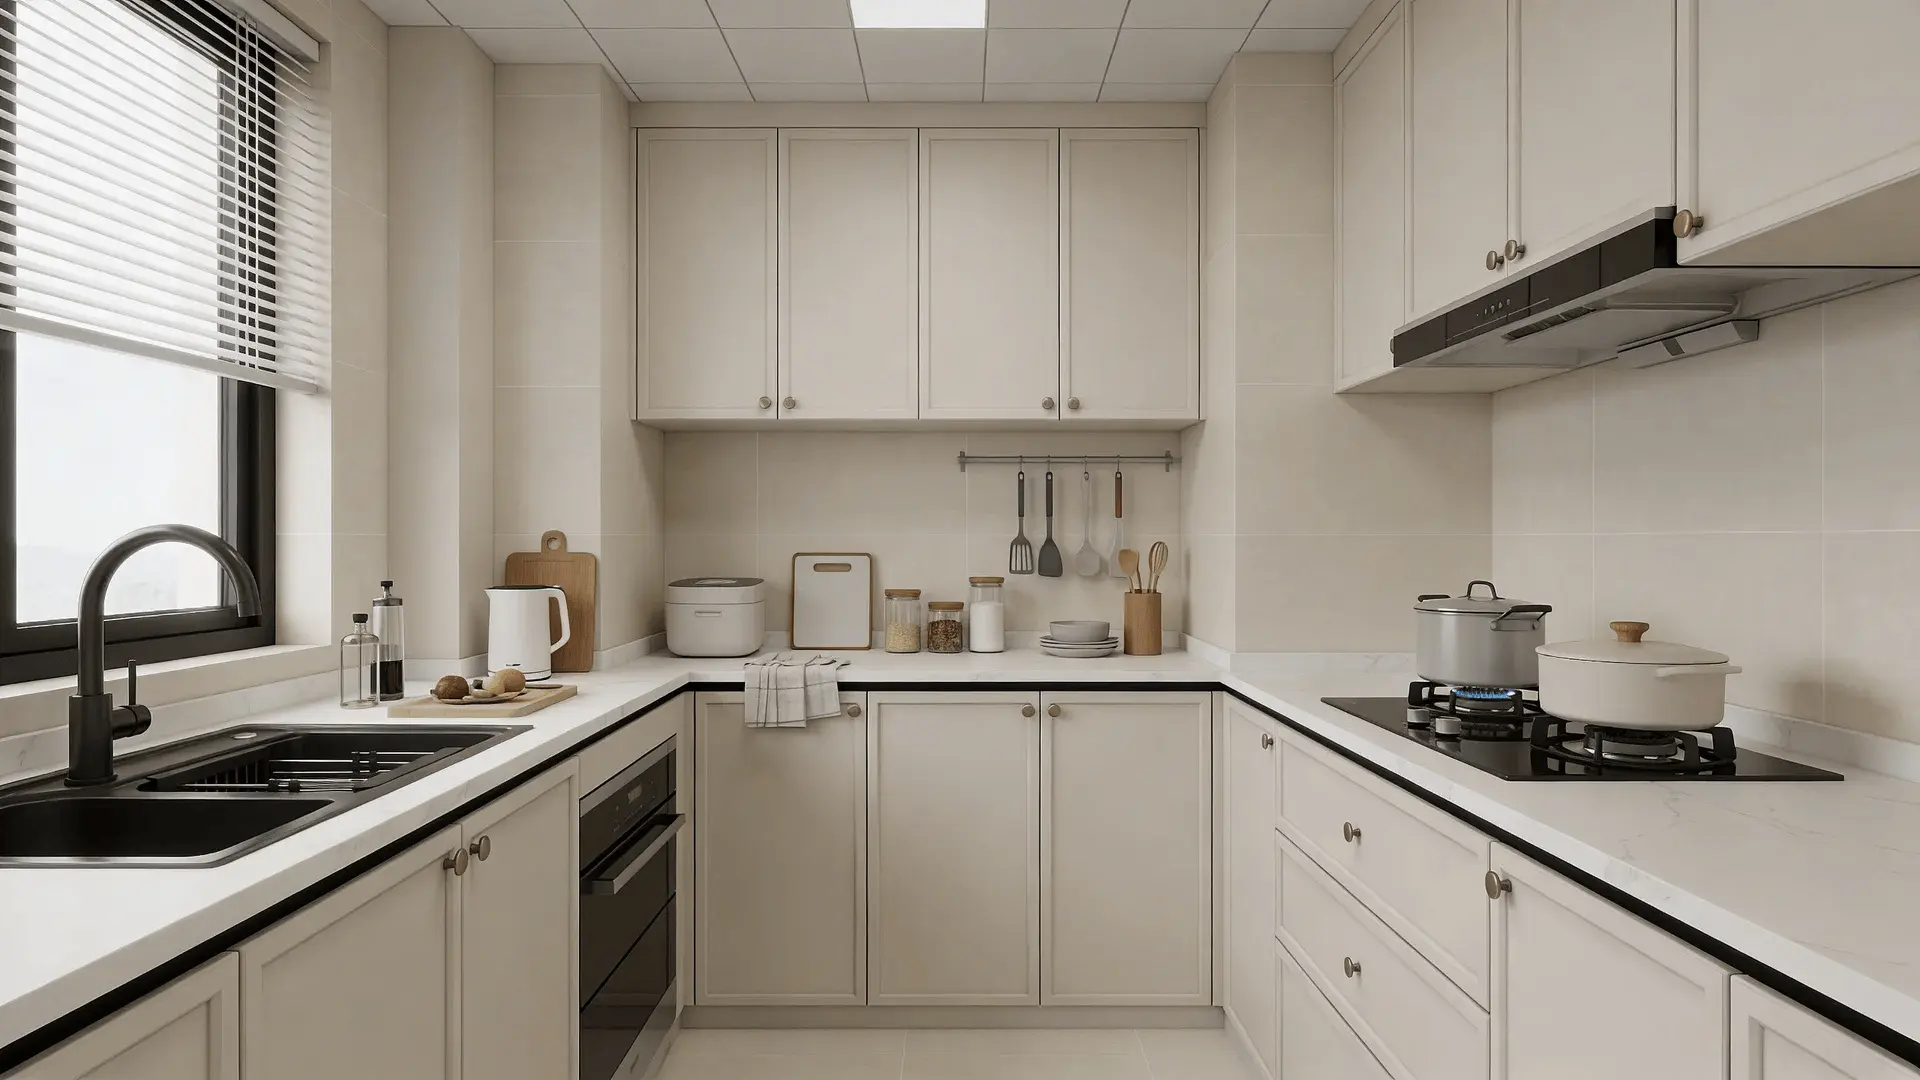
    The kitchen is the heart of most homes and the room that gets messy fastest. Your morning three-minute kitchen task is focused on one thing: clear, clean counters. When the counters are clear, the entire kitchen looks under control regardless of what might be lurking in the pantry or refrigerator.

    Load any dishes from the sink into the dishwasher, or hand wash them if you do not have a dishwasher. This includes last night’s dinner dishes if they did not get done, morning coffee mugs, and breakfast plates. The goal is an empty sink. An empty sink is the kitchen equivalent of a made bed – it transforms the visual impact of the entire room.

    Wipe down all counter surfaces. Clear any items that have migrated to the counter and do not belong there – mail, keys, phones, random bags. Put food items back in the pantry or fridge. Return appliances you used during breakfast to their spots. The counter should be clear except for the items that permanently live there, like the coffee maker and maybe a fruit bowl.

    If you made breakfast, clean as you go rather than leaving everything for later. Rinse the pan, wipe the stove if there are splatters, and put ingredients away. This takes an extra minute during breakfast preparation but saves significant cleanup time later. The morning version of you is always more energetic than the evening version, so front-loading kitchen cleanup pays dividends.

    Take out the trash if it is full. Nothing makes a kitchen feel and smell less fresh than an overflowing trash can. Keep extra trash bags at the bottom of the can so a fresh one is always ready when you pull the full bag out. This tiny prep step eliminates the excuse of not having a bag ready as a reason to delay taking out the trash.

    Clean kitchen with clear countertops after morning tidying routine

    Minutes 10-12 – Living Area Speed Pickup

    Minutes 10-12 - Living Area Speed Pickup

    The living room and common areas are where life happens, which means they are also where clutter happens. Your morning two-minute living area pickup is a quick scan-and-scoop operation that returns everything to its home.

    Walk through the living room with intention. Pick up any items that do not belong – cups, plates, remote controls left on couch cushions, shoes, charging cables, magazines, toys if you have kids. Either put each item away immediately or toss it in a small basket designated as a “put away” bin that you can distribute to the right rooms when you have a moment.

    Straighten throw pillows and fold blankets. These two actions take about twenty seconds and instantly make a living room look tidied. If cushions have shifted on the sofa, push them back into place. If magazines or books are scattered, stack them neatly on the coffee table or return them to a shelf.

    Do a quick visual scan of the floor. Pick up anything that has fallen – a dropped pen, a receipt, a hair tie. If the floor looks dusty or has visible debris in high-traffic areas, a thirty-second sweep with a broom or quick pass with a cordless electric floor sweeper handles it. You are not mopping or vacuuming thoroughly here. Just addressing the visible issues that make a room feel unkempt.

    If you have a dining table that doubles as a catch-all surface – and most of us do – clear it completely during this step. A clear dining table is a sign of an organized home and makes mealtimes more enjoyable because you are not eating surrounded by clutter. Return everything on the table to its proper place, and commit to keeping the surface clear going forward.

    Minutes 13-15 – Final Sweep and Launch Prep

    Minutes 13-15 - Final Sweep and Launch Prep

    The last two minutes of your morning routine are about preparing to leave the house with everything you need while doing a final visual check that leaves your home in good shape for the rest of the day.

    Do a final walkthrough from the front door backward through the house. Look at each room with fresh eyes and ask: would I be embarrassed if someone stopped by unexpectedly right now? You are not aiming for perfection – just a level of tidiness that you would feel comfortable with if a friend knocked on the door. If anything jumps out as noticeably messy, take thirty seconds to address it.

    Gather everything you need for the day – bag, keys, phone, water bottle, lunch if you prepped one. Having a designated launch pad near the front door where these items live prevents the frantic last-minute search that derails your morning and wastes precious time. A small console table, a set of hooks, or even a dedicated shelf works perfectly as a launch pad.

    Check that all lights are off in rooms you are not using, the thermostat is set appropriately, and windows are closed if rain is expected. These small checks take seconds but save energy costs and prevent coming home to unpleasant surprises. If you have pets, make sure their water bowls are filled and food is out before you leave.

    As you walk out the door, take one last look behind you. What you see should make you feel good – a home that is cared for, organized, and ready to welcome you back at the end of the day. That visual sets the tone for your entire day and is one of the most underrated mood boosters available. It costs nothing and takes virtually no time, but the impact on your mental state is significant.

    How to Build This Habit When You Are Not a Morning Person

    If you are reading this and thinking that you can barely function in the morning, let alone clean, you are not alone. Many people struggle with morning routines, and the idea of adding fifteen minutes of tidying before coffee sounds like cruel and unusual punishment. Here is how to make it work even if mornings are not your thing.

    Start with just one task. For the first week, only commit to making your bed. That is it. One task, less than three minutes, done before your brain fully wakes up. Once that becomes automatic – which usually takes about two weeks – add the bathroom wipe down. Then add the kitchen clear. Build up gradually instead of trying to implement all fifteen minutes at once.

    Pair the routine with something you already do. If you always make coffee first thing, use the time while it brews to wipe the kitchen counters. If you always brush your teeth, wipe the bathroom counter immediately after. Attaching new habits to existing habits is the most reliable way to make them stick.

    Set a timer. Knowing that you only have to tidy for fifteen minutes – and that the timer will tell you when to stop – removes the open-ended dread that makes cleaning feel overwhelming. When the timer goes off, you stop, regardless of whether everything is done. The fifteen-minute boundary is what makes this sustainable.

    Do not try to be perfect. Some mornings you will only get through making the bed and loading the dishwasher before time runs out. That is fine. A partial routine is infinitely better than no routine at all. The goal is consistency, not perfection. Show up for your fifteen minutes most mornings, and the results will speak for themselves within the first week.

    Adapting the Routine for Different Living Situations

    Adapting the Routine for Different Living Situations

    Not everyone lives in the same type of space, and your morning routine should reflect your specific situation. Here is how to adapt the core routine to different living arrangements.

    For studio apartments, the good news is that you have less space to cover, so fifteen minutes might actually be more time than you need. Your bed, kitchen, and living area are essentially the same room, so a single pass through the space handles everything. Focus on the bed, the kitchen counter, and picking up stray items. A studio can go from messy to tidy in under ten minutes.

    For families with kids, morning tidying requires some delegation. Assign each child an age-appropriate morning task – older kids can make their own beds, younger kids can put toys in a bin. Your fifteen minutes covers the common areas while each family member handles their own space. The morning routine is also a great opportunity to teach kids about responsibility and caring for their environment.

    For shared housing with roommates, focus only on your personal spaces and the areas you used. You cannot control how your roommates maintain shared spaces, but you can keep your own room and your portion of shared areas clean. If kitchen messes are a shared issue, consider establishing a house agreement where everyone handles their own dishes before leaving in the morning.

    For people who work from home, the morning routine is even more important because your home is also your office. A messy home environment directly impacts your focus and productivity when you are working from the same space. Add an extra minute to tidy your workspace – clear your desk, organize papers, make sure your work area is set up for a productive day.

    For people with physical limitations, adapt the routine to what you can comfortably do. If bending is difficult, focus on surface-level tasks like wiping counters and straightening items within reach. Use tools like a lightweight grabber reacher tool to pick up items from the floor without bending. Any amount of daily maintenance, no matter how small, makes a meaningful difference over time.

    Common Mistakes That Derail Your Morning Routine

    Common Mistakes That Derail Your Morning Routine

    Understanding what trips people up helps you avoid those pitfalls and maintain your routine consistently. Here are the most common mistakes and how to sidestep them.

    The biggest mistake is trying to do too much. Your morning routine is not a cleaning session. It is maintenance. When you start deep cleaning baseboards at 7 AM instead of doing a quick surface tidy, you blow past your fifteen minutes, feel overwhelmed, and eventually abandon the whole routine. Stay disciplined about the scope – surfaces only, visible messes only, fifteen minutes maximum.

    Another common mistake is skipping the routine when you are running late. On rushed mornings, at minimum make the bed and clear the kitchen counter. Even sixty seconds of tidying is better than nothing because it maintains the habit loop in your brain. The moment you start allowing exceptions, the habit weakens. Protect the habit by doing something, even a tiny version, every single morning.

    Getting distracted by your phone is a routine killer. Picking up your phone to check notifications during your tidying minutes leads to scrolling that eats your entire fifteen-minute window. Leave your phone on the charger until your routine is complete, or use it only for playing music or a timer. Notifications can wait fifteen minutes.

    Expecting immediate perfection is also a trap. Your home will not transform overnight. The first few days might feel like you are barely making a dent. But by the end of the first week, you will notice that the baseline level of tidiness is higher. By the end of the month, maintaining your home will feel almost effortless because you are never starting from a place of significant mess.

    Finally, doing everything yourself when you share your space is a recipe for burnout and resentment. If other people live in your home, they need to contribute to the morning maintenance. This is not your job alone, and establishing shared expectations from the beginning prevents the routine from becoming yet another thing on your plate that nobody else helps with.

    Tidy welcoming home interior after completing morning routine

    The Evening Companion Routine

    The Evening Companion Routine

    While this article focuses on the morning routine, having a brief evening companion routine makes your mornings even smoother. Think of the evening routine as setting future-you up for success. It takes about five to ten minutes and happens naturally during the wind-down period before bed.

    After dinner, clean the kitchen completely. Wash or load dishes, wipe counters, sweep if needed. Waking up to a clean kitchen makes your morning routine faster because the kitchen step is already partially done. A clean kitchen also makes breakfast preparation more pleasant and less stressful.

    Do a five-minute living room pickup before heading to bed. Return any items that migrated during the evening – blankets, snack dishes, remote controls, devices. Fluff pillows one more time. This ensures that the living area is ready for morning and you are not starting your day by cleaning up last night’s mess.

    Lay out tomorrow’s outfit the night before. This eliminates morning wardrobe stress and prevents the tornado of rejected outfits that often creates bedroom mess. Check the weather, plan your look, and hang or lay out everything you need including accessories, shoes, and undergarments. Morning you will thank evening you for this thoughtfulness.

    The evening routine is the bookend to the morning routine. Together, they create a rhythm of small, consistent actions that maintain your home in a permanent state of casual tidiness. Neither routine is demanding or time-consuming, but their combined effect is transformative. People who visit your home will marvel at how clean it always looks, never realizing it only takes about twenty-five minutes total per day.

    What Happens After 30 Days of Consistent Morning Tidying

    What Happens After 30 Days of Consistent Morning Tidying

    Let us talk about results, because they come faster than you might expect. After thirty days of consistent morning tidying, here is what most people experience.

    First, the routine becomes automatic. Around day fourteen, you stop needing to think about what to do next. Your body moves through the routine on autopilot while your brain is free to think about other things or simply enjoy the quiet of the morning. The habit has been encoded, and it requires about as much willpower as brushing your teeth – which is to say, almost none.

    Second, your home reaches and maintains a noticeably higher baseline of tidiness. The chronic mess that used to accumulate throughout the week simply does not happen anymore because you are addressing it daily before it compounds. Your Sunday reset becomes shorter and easier because there is so much less to catch up on. Some people find they can cut their weekly cleaning time in half.

    Third, your stress levels decrease measurably. Multiple studies have linked cluttered environments to elevated cortisol levels, and people who maintain tidy homes consistently report lower stress, better sleep, and improved mood. After thirty days of waking up in a tidy space and coming home to one, you will feel this difference in your bones.

    Fourth, the habit starts to expand naturally. People who commit to a fifteen-minute morning routine often find themselves spontaneously tidying at other times of the day because it feels good to maintain the order they have created. Cleaning up after yourself becomes second nature rather than a dreaded task, and this shift in attitude transforms your entire relationship with your home.

    The fifteen-minute morning routine is not about having a perfect home. It is about having a home that supports your life rather than detracting from it. It is about spending less time cleaning and more time living. And it is about the quiet confidence that comes from knowing your space is handled, your day is prepared, and you are walking out the door into the world as your best, most organized self. A simple habit tracker journal can help you stay accountable during those crucial first thirty days while the routine solidifies into a permanent part of your morning.

    Key Takeaways

    • A fifteen-minute morning tidy routine prevents mess from accumulating and keeps your home in constant baseline order.
    • The routine covers five quick tasks: make the bed, wipe the bathroom, clear the kitchen, pickup the living area, and prep to leave.
    • Starting with just one task and building up gradually is the most reliable way to make the habit stick.
    • Setting a timer prevents the routine from expanding into a full cleaning session and keeps it sustainable.
    • An evening companion routine of five to ten minutes makes the morning routine even more effective.
    • After thirty days of consistency, the routine becomes automatic and your home maintains a noticeably higher level of tidiness.

    Frequently Asked Questions

    Do I really need to do this every single morning including weekends?

    For the first thirty days, yes, daily consistency is important for building the habit. After that, most people find the routine happens automatically even on weekends because it is so ingrained. If you skip a weekend morning here and there, it will not derail your progress. But during the habit-building phase, treat it like brushing your teeth – non-negotiable every day.

    What if I have a really small space – do I still need fifteen minutes?

    If you live in a studio or small apartment, you might only need eight to ten minutes. The principles are the same – make the bed, wipe surfaces, clear clutter, check the kitchen – but there is simply less ground to cover. Use the extra minutes for self-care or enjoy a slower morning. The routine adapts to your space.

    How do I get my family to participate in the morning routine?

    Start by modeling the behavior yourself for a week or two. Then have a family conversation about everyone contributing to the home. Assign each person one or two simple tasks – making their own bed, putting breakfast dishes in the dishwasher, picking up personal items from common areas. Keep expectations age-appropriate and celebrate when people follow through.

    Will this routine actually reduce my overall cleaning time?

    Will this routine actually reduce my overall cleaning time?

    Yes, significantly. People who maintain a daily fifteen-minute morning routine typically report cutting their weekly deep cleaning time by thirty to fifty percent. This happens because daily maintenance prevents the kind of buildup that requires intensive cleaning. Your Sunday reset or weekly clean becomes a quick polish rather than a major restoration project.

    Before and after living room transformation from 15-minute morning tidy routine
  • 10 DIY Home Decor Projects You Can Finish in One Afternoon

    10 DIY Home Decor Projects You Can Finish in One Afternoon

    Why DIY Home Decor Is Worth Your Time

    Why DIY Home Decor Is Worth Your Time

    There is something deeply satisfying about looking around your home and seeing things you created with your own hands. Store-bought decor is convenient, sure, but it lacks the personality and story that comes with a handmade piece. Plus, when you make things yourself, you can customize every detail – the color, the size, the texture, the vibe – to match your space perfectly.

    DIY home decor is also incredibly budget-friendly. Many of the projects in this article cost less than twenty dollars in materials, and some can be done with supplies you already have at home. When you consider that a single decorative vase from a home store can run forty to sixty dollars, making your own version for a fraction of that price just makes sense.

    The projects in this list are specifically chosen because they are achievable in a single afternoon, even if you have never done a DIY project before. None of them require power tools, advanced skills, or a dedicated craft room. A kitchen table, some basic supplies, and a few hours of your time are all you need. Each project includes a rough time estimate so you can pick and choose based on how much time you have available.

    Whether you are refreshing a room that feels stale, decorating a new apartment on a budget, or just looking for a creative way to spend a Saturday afternoon, these projects will give you beautiful results that look anything but homemade – in the best possible way.

    Project 1 – Painted Terracotta Pots

    Project 1 - Painted Terracotta Pots

    Time needed: 1-2 hours (including drying time)

    Budget: Under $15

    Terracotta pots are one of the most versatile DIY canvases you can find. They are cheap, widely available, and transform beautifully with just a coat of paint. You can create everything from sleek modern planters to bohemian patterned pots, depending on your style.

    Start by gathering your pots. Basic terracotta pots are available at any garden center or dollar store for a couple of dollars each. Grab a few in different sizes for visual interest. You will also need acrylic craft paint in your chosen colors, a few paintbrushes in different sizes, and a clear spray sealant to protect your finished work.

    Before painting, wipe the pots clean and let them dry completely. If you want a smooth, opaque finish, apply a coat of white primer first. For a more rustic look where the terracotta peeks through, skip the primer and paint directly on the clay.

    For a modern minimalist look, paint the entire pot in a solid matte color – white, sage green, dusty rose, or terracotta orange are all gorgeous options. For something more playful, try color blocking by taping off sections with painter’s tape and using two or three complementary colors. Geometric patterns, stripes, and abstract designs are all easy enough for beginners and create stunning results.

    Let everything dry completely, then spray with a clear matte or glossy sealant to protect the paint from water damage. Group your finished pots on a shelf, windowsill, or entryway table with some mini faux succulents from Amazon for a display that looks like it came straight from a boutique home store.

    Hand-painted terracotta pots in modern colors arranged on a shelf

    Project 2 – Gallery Wall with Thrifted Frames

    Project 2 - Gallery Wall with Thrifted Frames

    Time needed: 2-3 hours

    Budget: Under $30

    A gallery wall is one of the most impactful decor elements you can add to any room, and it does not have to cost a fortune. The secret is thrifted frames. Hit your local thrift store, Goodwill, or garage sales and grab a collection of frames in various sizes and shapes. Do not worry about matching – an eclectic mix actually looks more interesting and intentional than a perfectly matched set.

    Once you have your frames, decide on a unifying element. The easiest approach is to spray paint all the frames the same color. Gold, black, or white frames create a cohesive look regardless of the original frame styles. Alternatively, you can keep them in their original finishes if they work well together.

    For the content inside your frames, the options are endless and mostly free. Print family photos in black and white for a classic look. Download free printable art from sites that offer creative commons artwork. Frame pages from old books, botanical prints, or even fabric swatches that complement your color scheme. A mix of photographs, art prints, and text-based prints creates the most visually interesting gallery wall.

    Before hammering any nails, plan your layout on the floor first. Arrange all the frames in your desired configuration, take a photo for reference, then transfer the layout to the wall. Start with the largest piece in the center and work outward, keeping about two to three inches between each frame for a balanced look.

    Use Command picture hanging strips if you are renting or prefer not to put holes in your walls. They hold securely, come off cleanly, and make it easy to adjust your layout without patching holes. Your finished gallery wall will be a personal, artistic statement piece that makes every guest ask where you got it.

    Project 3 – Customized Throw Pillow Covers

    Project 3 - Customized Throw Pillow Covers

    Time needed: 1-2 hours

    Budget: Under $20

    New throw pillows can completely change the mood of a room, but buying them adds up fast. Making your own pillow covers is surprisingly easy, even if you cannot sew. The no-sew method uses fabric glue or iron-on hemming tape to create professional-looking pillow covers in under an hour.

    Start with inexpensive pillow inserts in your desired size. The 18×18 inch size is the most versatile and fits most standard throw pillow covers. For the fabric, check the remnant bins at your local fabric store where you can find beautiful materials at a fraction of the regular price. Choose fabrics that complement your existing decor – a mix of solids, patterns, and textures creates the most polished look.

    For the simplest no-sew method, cut your fabric into a square about two inches larger than your pillow insert on each side. Fold the edges under, secure with iron-on hemming tape, and press with an iron. Create an envelope closure on the back by overlapping two fabric panels so you can easily insert and remove the pillow form for washing.

    If you want to add extra personality, consider embellishments like tassels, pom-pom trim, or iron-on patches. These can be attached with fabric glue and add a designer touch without any sewing required. You can also use stencils and fabric paint to create custom patterns or monograms.

    The beauty of making your own pillow covers is that you can change them seasonally without breaking the bank. Keep your pillow inserts year-round and simply swap out the covers – cozy flannel or velvet in winter, light linen or cotton in summer. A set of quality pillow inserts from Target will last for years and serve as the base for endless cover changes.

    Project 4 – Decorative Candle Holders from Glass Jars

    Project 4 - Decorative Candle Holders from Glass Jars

    Time needed: 1 hour

    Budget: Under $10

    This is the kind of project that makes people think you spent way more money than you actually did. Empty glass jars – from candles, pasta sauce, jams, or pickles – become stunning decorative candle holders with just a few simple techniques.

    Clean your jars thoroughly, removing all labels and adhesive. Soaking in warm soapy water for thirty minutes usually loosens labels enough to peel them off. For stubborn adhesive residue, a cotton ball soaked in rubbing alcohol or cooking oil does the trick. Make sure the jars are completely clean and dry before decorating.

    There are several decoration techniques to choose from. For a frosted glass look, spray the outside of the jar with frosted glass spray paint, available at any craft store. For a textured bohemian look, wrap the jar with twine or jute rope, securing with hot glue as you go. For an elegant look, paint the inside of the jar with metallic gold or copper paint, swirling it around to create a luminous coating.

    You can also create stunning mercury glass effect candle holders by spraying the inside of the jar with mirror-effect spray paint, then lightly misting with water and vinegar before the paint dries to create that characteristic speckled, antiqued look. This technique creates candle holders that genuinely look like expensive mercury glass from a home decor store.

    Place tea light or votive candles inside your finished jars and group them on a tray, mantel, or dining table centerpiece. The candlelight filtering through the decorated glass creates a warm, ambient glow that makes any room feel cozy and inviting. For safety and convenience, use flameless LED tea lights that look realistic without any fire risk.

    Project 5 – Rope Wrapped Vases

    Project 5 - Rope Wrapped Vases

    Time needed: 45 minutes to 1 hour

    Budget: Under $12

    Rope wrapped vases are a staple of coastal and bohemian home decor, and they are ridiculously easy to make. All you need is a vase or bottle (any shape works), some natural jute or cotton rope, and a hot glue gun. The result is a textured, organic-looking piece that adds warmth and visual interest to any shelf or table.

    Choose your base vessel. Old wine bottles, glass vases from the dollar store, or even empty tin cans work perfectly. The shape is up to you – tall and narrow creates a different look than short and wide. Clean and dry your vessel completely before starting.

    Starting at the bottom of the vessel, apply a line of hot glue and press the rope firmly into place. Continue wrapping the rope tightly around the vessel, adding glue every few rows to keep everything secure. Keep the rows close together so no base material shows through. When you reach the top, cut the rope and tuck the end under the last row, securing with an extra dab of glue.

    For variation, try using different thicknesses of rope on different vases for a collected look. You can also incorporate colored rope sections, wrap in a pattern leaving some of the base exposed, or add embellishments like wooden beads, shells, or dried flowers tucked between the rope rows.

    Group several rope-wrapped vases of different heights and sizes together for a display that looks like a curated collection. Fill them with dried flowers, pampas grass, or eucalyptus branches for a finished look that is both stylish and low-maintenance since dried arrangements never need watering.

    Project 6 – Fabric Covered Storage Boxes

    Project 6 - Fabric Covered Storage Boxes

    Time needed: 1-2 hours

    Budget: Under $15

    Storage boxes are essential for keeping a tidy home, but plain cardboard or plastic bins do not exactly scream style. Covering them in fabric transforms them into decorative pieces that look beautiful on shelves, in closets, or stacked in a living room while hiding all the random items you need to stash out of sight.

    Start with sturdy boxes in the sizes you need. Shoe boxes, shipping boxes, or inexpensive plain storage boxes from the dollar store all work well. Choose fabric that coordinates with your room – cotton, linen, and canvas are the easiest fabrics to work with for this project.

    Cut your fabric large enough to cover the outside of the box with about two inches of overlap on all sides to fold over the edges. Apply spray adhesive or fabric glue evenly to one side of the box at a time, smooth the fabric into place, and fold the excess neatly over the edges like wrapping a gift. Pay special attention to the corners, folding them neatly for a clean finish.

    For the inside of the box, cut a separate piece of coordinating or contrasting fabric and glue it to the interior for a polished, lined look. Add a ribbon or leather handle to each end of the box for easy pulling off shelves. You can also label your boxes with handwritten tags or printed labels for organized storage that is beautiful and functional.

    These fabric-covered boxes are perfect for organizing everything from craft supplies and accessories to paperwork and seasonal items. Line them up on a bookshelf or closet shelf for a custom storage solution that looks intentional and expensive. A fat quarter fabric bundle from Amazon gives you multiple coordinating patterns for less than ten dollars.

    Fabric-covered storage boxes organized on shelves

    Project 7 – Painted Accent Wall or Feature Section

    Project 7 - Painted Accent Wall or Feature Section

    Time needed: 2-4 hours

    Budget: Under $25

    Painting is one of the most transformative things you can do to a room, and you do not have to paint the entire space to make a huge impact. A single accent wall – or even a feature section like the wall behind your bed or a small reading nook – adds drama, depth, and personality to any room in just a few hours.

    Choose your color carefully because it sets the mood for the entire space. Deep, rich colors like navy blue, forest green, or charcoal gray create a cozy, intimate feeling. Warm terracotta, dusty rose, or golden yellow bring energy and warmth. Soft sage, light blue, or lavender create a calming, spa-like atmosphere. Consider how the color will look with your existing furniture and decor before committing.

    A single quart of paint is usually enough for one accent wall in a standard room, and quarts are available in virtually any color from home improvement stores. You will also need painter’s tape, a roller with a tray, and a small angled brush for cutting in around edges and corners. If your wall is currently a dark color, pick up a small container of primer too.

    Prep the wall by cleaning it with a damp cloth to remove dust and cobwebs. Apply painter’s tape along the ceiling, baseboards, and where the accent wall meets the adjacent walls. Pour your paint into the tray, and start by cutting in around the edges with the angled brush, then fill in the center with the roller using long, even strokes. Two coats usually gives the best coverage – let the first coat dry completely before applying the second.

    Remove the painter’s tape while the final coat is still slightly tacky for the cleanest lines. Step back and admire the transformation. A single accent wall can make a room feel entirely different, and it is one of the most reversible changes you can make since you can always paint over it if your taste changes.

    Project 8 – DIY Woven Wall Hanging

    Project 8 - DIY Woven Wall Hanging

    Time needed: 2-3 hours

    Budget: Under $20

    Woven wall hangings add texture and artisanal charm to any wall, and they are much easier to make than they look. You do not need a loom or any weaving experience. A simple technique using a wooden dowel, yarn, and your hands creates a beautiful bohemian-inspired piece that looks like something from an artisan market.

    Gather your materials. You will need a wooden dowel or driftwood branch about twelve to eighteen inches long, several skeins of yarn in coordinating colors and textures, and scissors. Choose a mix of thick and thin yarns, and consider incorporating different textures like chunky wool, smooth cotton, and metallic thread for visual interest.

    The simplest technique is a series of lark’s head knots attached to the dowel, creating a fringe-style hanging. Cut your yarn into pieces roughly twice the length you want your finished piece to be. Fold each piece in half, loop the folded end over the dowel, and pull the loose ends through the loop. Repeat across the entire dowel, mixing colors and textures as you go.

    Once all your yarn is attached, you can create patterns by trimming the fringe at different angles or in a V shape. Add visual interest by braiding some sections, knotting groups of strands together at intervals, or weaving horizontal pieces through the vertical strands. There is no wrong way to do this – the beauty of fiber art is its organic, imperfect nature.

    Hang your finished piece using a piece of yarn or twine tied to each end of the dowel. These wall hangings look stunning above a bed, sofa, or in an entryway. They add warmth and texture to minimalist spaces without overwhelming the room. For the best selection of textured craft yarn, macrame cotton cord variety packs from Amazon give you multiple colors and weights in one purchase.

    Project 9 – Custom Serving Tray Makeover

    Project 9 - Custom Serving Tray Makeover

    Time needed: 1-2 hours

    Budget: Under $15

    A decorative tray is one of the most versatile home decor items you can own. It corrals items on a coffee table, dresses up an ottoman, organizes a bathroom counter, or serves as a breakfast-in-bed essential. And making one from a thrifted or dollar store tray is ridiculously easy.

    Find a tray with a flat bottom and raised edges. Thrift stores, dollar stores, and home clearance sections are all great sources. The shape, size, and current condition do not matter much because you are going to transform it completely. Even a scratched, ugly tray becomes gorgeous with the right treatment.

    For a modern look, spray paint the entire tray in a bold color or metallic finish. Gold, brass, or matte black are timeless choices. For a more unique piece, decoupage the bottom of the tray with decorative paper, fabric, or even a map or pages from a vintage book. Apply a thin layer of Mod Podge to the tray surface, smooth your chosen material into place, and seal with additional coats of Mod Podge once dry.

    Marble-look contact paper applied to the bottom of the tray creates an upscale, elegant finish that is basically indistinguishable from a real marble tray. Peel-and-stick wallpaper samples work beautifully too and come in thousands of patterns. You can also line the bottom with fabric, cork, or tile samples for a completely custom look.

    Style your finished tray with a small grouping of objects. A candle, a small plant or faux greenery, a decorative bowl for keys or jewelry, and a stack of coasters make a classic coffee table tray arrangement. The tray ties everything together and creates an intentional display out of items that would otherwise look random sitting loose on the surface.

    Project 10 – Decorative Book Stack Display

    Project 10 - Decorative Book Stack Display

    Time needed: 30-45 minutes

    Budget: Under $10

    Stacked books are a decorator’s secret weapon. They add height, color, and intellectual charm to any surface. But rather than buying expensive coffee table books you will never read, create your own decorative book stacks from inexpensive thrift store finds.

    Visit your local thrift store and grab a handful of hardcover books in pleasing sizes. The content does not matter – you are choosing based on spine width, cover color, and size. Look for books with interesting titles or beautiful covers, but also grab some with ugly dust jackets because you are going to remove those.

    Remove the dust jackets to reveal the hardcover underneath. Most hardcover books have neutral-toned cloth or paper covers in shades of cream, beige, blue, gray, or red that look far more elegant than their busy dust jackets. If you want a cohesive look, choose books whose bare covers fall within the same color family.

    For a more customized look, you can wrap book covers in kraft paper, linen fabric, or decorative paper. Write the titles on the spines in a pretty script or leave them blank for a minimalist look. This technique lets you create a perfectly color-coordinated stack regardless of the original book covers.

    Stack three to five books on a coffee table, nightstand, or shelf. Place the largest book on the bottom and the smallest on top. Crown the stack with a small decorative object – a candle, a small plant, a crystal, or a decorative object that reflects your personality. These book stacks work beautifully on their own or as part of a larger styled vignette on a decorative round tray from Target .

    Decorative book stack display on a coffee table with candle and plant

    Tips for Success with Any DIY Project

    Tips for Success with Any DIY Project

    Before you dive into any of these projects, here are some universal tips that will help you get the best results with the least frustration.

    Gather all your materials before you start. Nothing kills creative momentum like having to stop mid-project to run to the store for something you forgot. Read through the entire project description first, make a list of everything you need, and have it all laid out and ready before you begin.

    Protect your workspace. Cover your table or floor with a drop cloth, old newspapers, or a plastic tablecloth before painting, gluing, or spraying anything. Cleanup is so much easier when your surfaces are protected, and you will not have to stress about drips or spills.

    Start simple and build your confidence. If you are new to DIY, begin with one of the easier projects like the painted pots or book stack display before tackling the accent wall or woven hanging. Early success builds the confidence and enthusiasm that carries you through more challenging projects.

    Embrace imperfection. Handmade items have character precisely because they are not factory-perfect. A slightly uneven paint line, an asymmetrical fringe, or a minor color variation is what makes your piece unique and authentic. Do not let perfectionism rob you of the joy of creating.

    Document your process and results. Take before and after photos, share them with friends, or post them on social media. Seeing the transformation gives you a sense of accomplishment and motivates you to tackle the next project. Plus, your photos might inspire someone else to try their hand at DIY decorating.

    Most importantly, have fun with it. Put on your favorite music, pour yourself a drink, and enjoy the process. DIY is supposed to be a creative outlet and a form of self-expression, not another item on your to-do list. When you approach it with a playful mindset, the results are always better because you are relaxed and willing to experiment. A basic craft supply starter kit from Amazon has most of the basics you need across multiple projects – glue gun, scissors, brushes, tape, and more – so you are always ready when inspiration strikes.

    Key Takeaways

    • All ten projects can be completed in one afternoon with basic supplies and no advanced skills required.
    • Most projects cost under twenty dollars, making them a budget-friendly alternative to buying expensive home decor.
    • Thrift stores, dollar stores, and items you already own at home provide the best starting materials for DIY projects.
    • Customizing colors, patterns, and textures lets you create pieces that perfectly match your existing decor and personal style.
    • Starting with simpler projects builds confidence for tackling more involved ones over time.
    • Imperfection is part of the charm – handmade items have character that mass-produced decor never will.

    Frequently Asked Questions

    What if I am not creative or artistic – can I still do these projects?

    What if I am not creative or artistic - can I still do these projects?

    Absolutely. These projects are designed for beginners and do not require any artistic talent. Techniques like painting a pot a solid color, wrapping rope around a vase, or covering a box with fabric are straightforward skills that anyone can master. Creativity is a muscle that grows with practice, and starting with simple projects is the best way to build it.

    Where can I find affordable DIY supplies?

    Where can I find affordable DIY supplies?

    Dollar stores, thrift stores, and the clearance sections of craft stores are your best friends. Online retailers also offer great deals on bulk supplies like yarn, paint, and brushes. Many projects use items you already have at home, like glass jars, cardboard boxes, and old fabric. Before buying anything new, check what you already have on hand.

    How do I choose which projects match my home decor style?

    Think about the overall vibe of your space. If your home leans modern and minimal, stick with clean lines, solid colors, and simple materials. If your style is more bohemian or eclectic, embrace textures, patterns, and mixed materials. The beauty of DIY is that you control every aspect, so you can adapt any project to fit your aesthetic by changing the colors, materials, or finishing touches.

    Can I do these projects with kids?

    Many of these projects are kid-friendly with supervision. Painted pots, book stacks, and rope-wrapped vases are great for older children. Younger kids can help with tasks like choosing colors, applying stickers, or sorting materials. Just avoid projects involving hot glue, spray paint, or sharp tools for very young helpers and always supervise closely.

    DIY crafting workspace with supplies and finished home decor projects