Category: Fitness & Movement

  • The 30-Day Walking for Weight Loss Plan That Actually Gets Results

    The 30-Day Walking for Weight Loss Plan That Actually Gets Results

    Why Walking Is the Most Underrated Weight Loss Tool

    Why Walking Is the Most Underrated Weight Loss Tool

    The 30-day walking for weight loss plan you are about to follow is not a flashy fitness trend or an extreme challenge designed for people who already work out five days a week. This is a progressive, realistic plan built specifically for plus-size women who want to start moving more, feel stronger, and see real changes in their bodies and energy levels. Walking is the exercise that actually sticks, and this plan is designed to prove it.

    Here is why walking deserves more respect than it gets. Research published in the Journal of Exercise Nutrition and Biochemistry found that women who walked 50 to 70 minutes three times per week for 12 weeks reduced their body fat, waist circumference, and BMI significantly. Another study in the British Journal of Sports Medicine showed that brisk walking produces comparable fat loss results to running when the energy expenditure is matched. You do not need to run to lose weight. You need to walk consistently and progressively.

    Walking has several advantages over more intense forms of exercise, especially for plus-size women. It is low impact, meaning less stress on your joints, knees, and back. It does not require gym equipment or a membership. It can be done anywhere – your neighborhood, a park, a shopping mall, a treadmill at home. And perhaps most importantly, it does not leave you so exhausted and sore that you dread doing it again tomorrow. Sustainability is the secret ingredient in any weight loss plan, and walking is the most sustainable exercise on the planet.

    The plan ahead gradually increases your walking time, pace, and intensity over four weeks. You will start where you are – not where someone else thinks you should be – and build from there. Every day has a specific goal, but every day also has built-in flexibility because real life does not pause for a fitness plan. If you miss a day, you pick up where you left off. No guilt, no starting over, no quitting.

    Before You Start – Setting Yourself Up for Success

    Check in With Your Body

    Check in With Your Body

    If you have been mostly sedentary, have joint issues, or have any health conditions that might be affected by increased physical activity, talk to your doctor before starting. This is not about getting permission to move your body – your body is yours and you are allowed to move it. It is about making sure you have any information you need to move safely and comfortably. If you have knee issues, your doctor might suggest a knee brace. If you have plantar fasciitis, you might need specific shoes. This information helps, not hinders.

    Get Your Baseline

    Get Your Baseline

    Before day one, go for a walk at your normal comfortable pace and time how long you can walk before you feel like you need to stop or slow down significantly. This is your baseline. Maybe it is 10 minutes. Maybe it is 25 minutes. Maybe it is 5 minutes. Whatever it is, that number is your starting point and there is absolutely nothing wrong with it. Write it down. You are going to be amazed by how much that number changes over 30 days.

    Choose Your Walking Route

    Choose Your Walking Route

    Pick two to three routes near your home or workplace. Having options prevents boredom and gives you choices based on weather, time, and energy levels. A flat neighborhood loop is perfect for easy days. A route with some gentle hills adds natural intensity for harder days. An indoor option – a mall, a big box store, a treadmill – gives you a backup for bad weather days. Knowing your routes in advance removes one more decision from your daily routine, which makes it easier to just go.

    Schedule Your Walks

    Schedule Your Walks

    Put your walks on your calendar like appointments. Research consistently shows that people who schedule their workouts are significantly more likely to complete them than people who try to fit them in when they have time. Morning walkers tend to be the most consistent because they get it done before the day’s demands pile up, but the best time to walk is whatever time you will actually do it. If that is your lunch break, after dinner, or during your kid’s soccer practice, that is perfect.

    Track Your Progress

    Track Your Progress

    You need a way to track your walks. A simple notebook works. A step counter on your phone works. A fitness tracker works. The method does not matter as much as the habit of recording what you did. Tracking creates accountability, shows your progress over time, and gives you concrete evidence that you are changing even on days when the scale does not move.

    Week 1 – Building Your Foundation (Days 1 through 7)

    Week 1 - Building Your Foundation (Days 1 through 7)

    The goal of week one is simple – build the habit. You are not trying to break records or push limits. You are teaching your body and brain that walking is now a regular part of your routine. Consistency matters more than intensity this week.

    Day 1 – Your Starting Walk

    Day 1 - Your Starting Walk

    Walk for 15 minutes at a comfortable, conversational pace. This means you could hold a full conversation with someone without getting winded. If 15 minutes feels like too much, walk for whatever your baseline time was and work up from there. If 15 minutes feels easy, resist the urge to do more. You are building a habit, not proving anything.

    Day 2 – Same Pace, Same Time

    Day 2 - Same Pace, Same Time

    Walk for 15 minutes again at the same comfortable pace. Same route or a different one. Notice how your body feels compared to yesterday. Some people feel a little stiff after day one. That is completely normal and typically resolves within the first few minutes of walking.

    Day 3 – Add Five Minutes

    Day 3 - Add Five Minutes

    Walk for 20 minutes at a comfortable pace. This small increase is enough to challenge you slightly without feeling overwhelming. If you need to slow down during the last five minutes, slow down. Finishing the walk matters more than maintaining a specific speed.

    Day 4 – Rest or Light Movement

    Day 4 - Rest or Light Movement

    Rest days are part of the plan, not a break from the plan. Your muscles repair and strengthen during rest. Today, you can take a complete rest day or do some gentle stretching, a slow stroll around your neighborhood, or some light housework. Listen to your body.

    Day 5 – 20 Minutes With Purpose

    Walk for 20 minutes, but this time, focus on your posture. Stand tall with your shoulders back and down, engage your core by gently pulling your belly button toward your spine, and swing your arms naturally. Good posture while walking increases calorie burn, reduces back pain, and strengthens your core without any extra effort.

    Day 6 – 20 Minutes Exploring

    Day 6 - 20 Minutes Exploring

    Walk for 20 minutes on a different route than you have been using. A new route keeps your brain engaged, makes the walk feel shorter, and prevents the boredom that kills walking plans. If possible, find a route with some natural beauty – a park, a tree-lined street, a path near water.

    Day 7 – Your First Longer Walk

    Day 7 - Your First Longer Walk

    Walk for 25 minutes at your comfortable pace. This is ten minutes more than day one, which is a meaningful increase. Pay attention to how you feel at minute 25 compared to how you felt at minute 15 on day one. You are already building endurance.

    Week 1 Summary

    Week 1 Summary

    Total walking days: 6 (with 1 rest day). Total walking time: approximately 115 minutes. Average daily walk: about 19 minutes. You have established the habit, built a small amount of endurance, and proven to yourself that you can do this consistently. That is a massive win.

    Week 2 – Increasing Duration and Pace (Days 8 through 14)

    Week two builds on your foundation by gradually increasing both how long and how fast you walk. You are ready for more, and your body is adapting. This week introduces the concept of pace variation, which is one of the most effective tools for increasing calorie burn during walks.

    Day 8 – 25 Minutes With a Speed Check

    Walk for 25 minutes. During the middle ten minutes, pick up your pace slightly. You should still be able to talk, but you might need to pause between sentences to breathe. This slightly faster pace is often called a brisk walk, and it is where the real calorie burning happens. Slow back down for the last five minutes as a cool-down.

    Day 9 – 25 Minutes Steady

    Walk for 25 minutes at a steady, moderate pace. Not your slowest, not your fastest, just a consistent moderate effort. Focus on keeping your stride even and your breathing rhythmic. Consistency of effort teaches your cardiovascular system to work more efficiently.

    Day 10 – 30 Minutes With Intervals

    Day 10 - 30 Minutes With Intervals

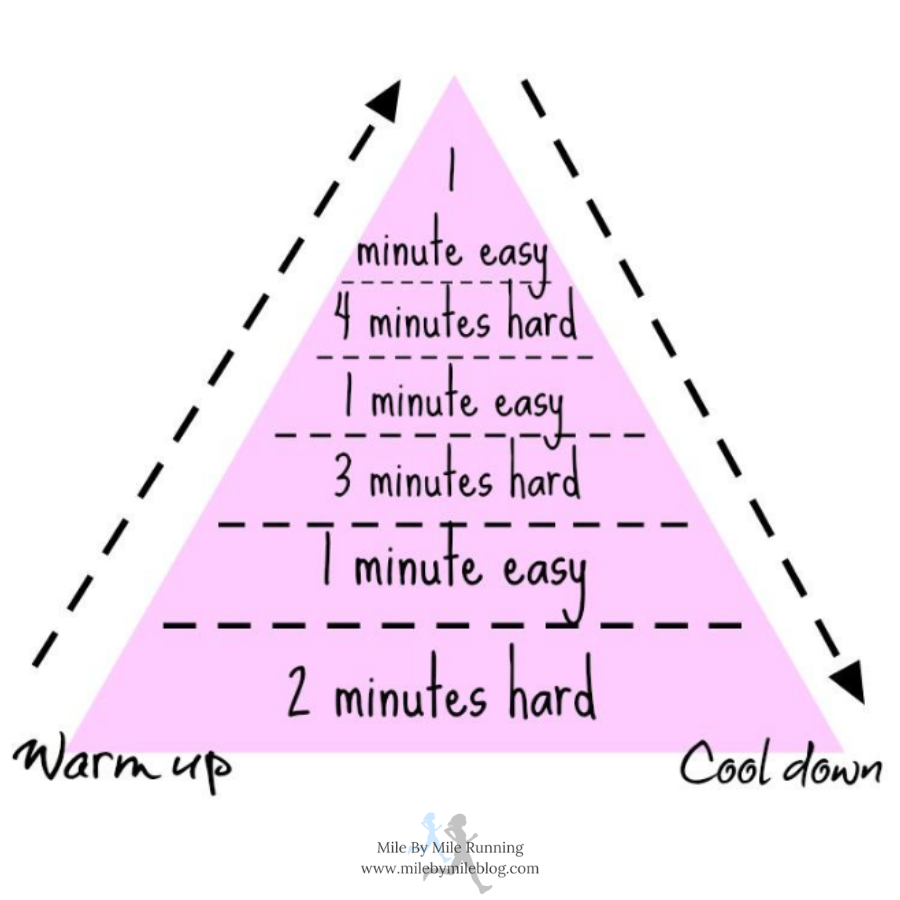
    Walk for 30 minutes. After a five-minute warm-up at an easy pace, alternate between two minutes of brisk walking and two minutes of comfortable walking. Repeat this pattern until you reach the 25-minute mark, then cool down with five minutes of easy walking. These intervals boost your heart rate and increase calorie burn without requiring sustained high-intensity effort.

    Day 11 – Rest or Gentle Movement

    Day 11 - Rest or Gentle Movement

    Your second rest day of the plan. Use it wisely. Gentle stretching, foam rolling, or a slow walk of 10 minutes or less is fine. Your body needs this recovery time especially as you start increasing intensity.

    Day 12 – 30 Minutes Steady Brisk

    Day 12 - 30 Minutes Steady Brisk

    Walk for 30 minutes at a brisk pace for the entire walk (after a brief warm-up). Brisk walking typically means 3 to 3.5 miles per hour, but do not worry about exact speed. The talk test is your best guide – you can talk but you would rather not sing. This is the pace that research links most strongly to weight loss and cardiovascular improvement.

    Day 13 – 30 Minutes With Hills

    Day 13 - 30 Minutes With Hills

    Walk for 30 minutes on a route that includes some incline. Hills naturally increase your effort level, engage your glutes and hamstrings more than flat walking, and boost calorie burn significantly. If you do not have hills nearby, use a treadmill with a 2 to 4 percent incline, or find a parking garage and walk the ramps. Slow your pace on the uphills as needed. The incline is doing the work.

    Day 14 – 35 Minutes at Your Choice

    Day 14 - 35 Minutes at Your Choice

    Walk for 35 minutes. You choose the pace and the route. This is about building your longest walk yet while also giving you ownership of the process. Some people prefer a steady moderate pace. Others prefer intervals. Some want hills. Choose what felt best this week and do more of it.

    Week 2 Summary

    Week 2 Summary

    Total walking days: 6 (with 1 rest day). Total walking time: approximately 175 minutes. Average daily walk: about 29 minutes. You have increased your walking time by over 50 percent from week one and introduced pace variation and incline. Your cardiovascular fitness is noticeably improving.

    Week 3 – Adding Intensity and Variety (Days 15 through 21)

    By week three, you are a walker. The habit is forming, your endurance has grown, and your body is ready for more challenge. This week introduces longer walks, more structured intervals, and some strength elements that amplify your results.

    Day 15 – 35 Minutes With Power Intervals

    Day 15 - 35 Minutes With Power Intervals

    Walk for 35 minutes. After a five-minute warm-up, do one minute of your fastest sustainable walking pace followed by two minutes of moderate recovery pace. Repeat this pattern for 25 minutes, then cool down for five minutes. These power intervals are where significant calorie burn happens because your heart rate spikes during the fast portions and stays elevated during recovery.

    Day 16 – 35 Minutes Steady With Arm Movement

    Day 16 - 35 Minutes Steady With Arm Movement

    Walk for 35 minutes at a brisk, steady pace. Add intentional arm movement – pump your arms in a controlled, 90-degree angle motion as you walk. This turns your walk into a full-body exercise by engaging your upper body, core, and increasing your overall calorie burn by 5 to 10 percent. It also naturally increases your walking speed without feeling like you are pushing harder with your legs.

    Day 17 – 40 Minutes Easy Pace

    Walk for 40 minutes at a comfortable, easy pace. This is a recovery-paced walk with a longer duration. The purpose is to build endurance and burn calories through duration rather than intensity. Put on a podcast, call a friend, or just enjoy being outside. Not every walk needs to be hard to be effective.

    Day 18 – Rest Day

    Day 18 - Rest Day

    Full rest or very gentle activity. At this point in the program, rest days are essential for preventing overuse injuries and allowing your muscles, joints, and connective tissue to adapt to the increased demands you are placing on them. Use this day to stretch, take a bath, or do some gentle yoga.

    Day 19 – 35 Minutes With Walking Lunges

    Day 19 - 35 Minutes With Walking Lunges

    Walk for 35 minutes at a brisk pace. At the 10-minute mark and again at the 20-minute mark, stop and do 10 walking lunges (5 per leg). If lunges are uncomfortable for your knees, substitute 30 seconds of marching in place with high knees. Adding these brief strength bursts to your walk increases muscle engagement and boosts your metabolic rate for hours after your walk ends.

    Day 20 – 40 Minutes With Hills

    Day 20 - 40 Minutes With Hills

    Walk for 40 minutes on your hilliest available route. By now, hills that felt challenging in week two should feel more manageable. Push yourself to maintain a brisker pace on the inclines than you did last week. Your legs are stronger, your heart is more efficient, and you can handle more.

    Day 21 – 45 Minutes at Your Pace

    Day 21 - 45 Minutes at Your Pace

    Walk for 45 minutes. This is your longest walk yet and a milestone worth celebrating. Choose your pace and route based on how your body feels. If you are energized, make it a brisk, challenging walk. If you are tired from the week, keep it moderate and steady. Either way, 45 minutes of walking is an incredible achievement and a major jump from where you started.

    Week 3 Summary

    Week 3 Summary

    Total walking days: 6 (with 1 rest day). Total walking time: approximately 230 minutes. Average daily walk: about 38 minutes. You are now walking nearly double your week-one average and incorporating intensity techniques that significantly boost calorie burn. Most people notice tangible changes in their energy levels, sleep quality, and how their clothes fit by this point.

    Week 4 – Pushing Your Limits (Days 22 through 30)

    Week 4 - Pushing Your Limits (Days 22 through 30)

    The final week is nine days instead of seven, giving you a full 30-day experience. This week challenges you with your longest walks, your most structured intervals, and culminates in a walk that would have seemed impossible on day one. You are ready for this.

    Day 22 – 40 Minutes Power Walk

    Day 22 - 40 Minutes Power Walk

    Walk for 40 minutes at the briskest pace you can sustain for the full duration. This is not a sprint. This is your fastest comfortable walking pace maintained consistently. Focus on posture, arm swing, and heel-to-toe foot placement. A sustained power walk at this duration burns significant calories and builds serious cardiovascular endurance.

    Day 23 – 40 Minutes Pyramid Intervals

    Day 23 - 40 Minutes Pyramid Intervals

    Walk for 40 minutes using pyramid intervals. After a five-minute warm-up, walk fast for one minute, recover for one minute, walk fast for two minutes, recover for one minute, walk fast for three minutes, recover for two minutes, then work back down – fast for two minutes, recover for one minute, fast for one minute, recover for one minute. Repeat the pyramid if time allows, then cool down. Pyramids prevent boredom and push your cardiovascular system in a progressive, manageable way.

    Day 24 – 45 Minutes Steady

    Day 24 - 45 Minutes Steady

    Walk for 45 minutes at a moderate to brisk pace. This is a workhorse walk – not your hardest, not your easiest, just solid consistent effort. These steady-state walks are the backbone of any walking program and are responsible for the majority of your cumulative calorie burn over 30 days.

    Day 25 – Rest Day

    Your final scheduled rest day. You have earned it. Stretch, foam roll, hydrate, and mentally prepare for the final push. Look back at your tracking log and appreciate how far you have come. Your day-one baseline probably feels laughable now, and that is exactly the point.

    Day 26 – 45 Minutes With Strength Stops

    Walk for 45 minutes at a brisk pace. At the 15 and 30-minute marks, stop and do a mini strength circuit: 10 squats, 10 calf raises, and a 20-second wall sit (use a bench, tree, or wall). These strength additions build the muscles that support your walking form and increase your resting metabolic rate, meaning you burn more calories even when you are not walking.

    Day 27 – 50 Minutes Easy Exploration

    Day 27 - 50 Minutes Easy Exploration

    Walk for 50 minutes at an easy, enjoyable pace on a route you have never tried before or rarely use. A new environment stimulates your brain, makes the time fly, and reminds you that walking is not just exercise – it is a way to explore and enjoy the world around you. This is your longest walk yet, and the easy pace makes it achievable and pleasant.

    Day 28 – 45 Minutes With Maximum Intervals

    Day 28 - 45 Minutes With Maximum Intervals

    Walk for 45 minutes. After a five-minute warm-up, alternate between 90 seconds of your absolute fastest walking pace and 90 seconds of recovery. This 1:1 interval ratio is demanding and incredibly effective for calorie burn and cardiovascular improvement. Continue this pattern for 35 minutes, then cool down for five minutes. Your fastest walking pace by day 28 is significantly faster than your fastest pace on day 10, which shows real fitness improvement.

    Day 29 – 50 Minutes Moderate Steady

    Day 29 - 50 Minutes Moderate Steady

    Walk for 50 minutes at a moderate, steady pace. This walk is about endurance and reflection. Think about how far you have come, how much stronger you feel, and what you want your walking practice to look like going forward. This is not the end of your walking journey – it is the foundation for everything that comes next.

    Day 30 – Your Celebration Walk (60 Minutes)

    Day 30 - Your Celebration Walk (60 Minutes)

    Walk for 60 minutes. One full hour. Choose your favorite route, your favorite pace, and your favorite playlist or podcast. This walk is a celebration of 30 days of commitment, consistency, and growth. Four weeks ago, you walked for 15 minutes. Today, you are walking for a full hour. That transformation is extraordinary, and it happened because you showed up day after day.

    Week 4 Summary

    Week 4 Summary

    Total walking days: 8 (with 1 rest day). Total walking time: approximately 410 minutes (6 hours and 50 minutes). Average daily walk: about 51 minutes. You are now a strong, consistent walker who can comfortably walk for an hour. Your cardiovascular fitness, endurance, and calorie-burning capacity have transformed.

    Essential Gear for Comfortable Walking

    Essential Gear for Comfortable Walking

    Walking Shoes

    Walking Shoes

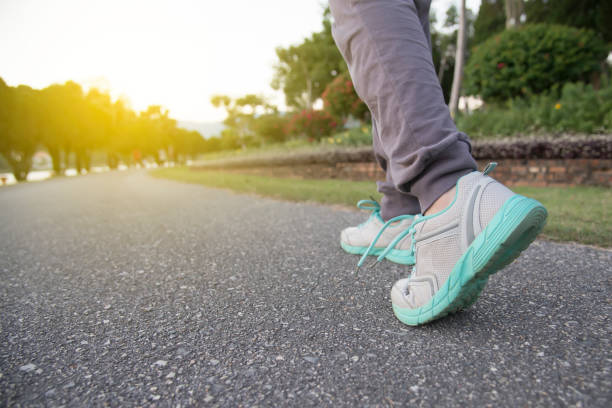
    Your shoes are the single most important investment for a walking program. For plus-size walkers, proper footwear is even more critical because your feet support more weight with every step. Look for shoes with ample cushioning (especially in the heel and forefoot), a wide toe box that does not squeeze your toes, sturdy arch support, and a sole that provides good shock absorption.

    The Nike Air Monarch IV is a classic walking shoe that comes in wide and extra-wide widths with excellent cushioning. For women who need maximum support, the Brooks Addiction Walker 2 is a podiatrist-recommended walking shoe available in wide widths that provides exceptional stability and motion control.

    Replace your walking shoes every 300 to 500 miles, or roughly every three to six months of regular walking. Worn-out shoes lose their cushioning and support, which leads to foot, knee, and hip pain. If you notice aches that were not there before, your shoes might be the culprit.

    Moisture-Wicking Clothing

    Moisture-Wicking Clothing

    Cotton absorbs sweat and stays wet, which causes chafing, discomfort, and temperature regulation problems. Moisture-wicking fabrics pull sweat away from your skin and dry quickly, keeping you comfortable during longer walks. The plus-size moisture-wicking walking sets on Amazon are affordable and come in sizes up to 5X.

    Anti-Chafe Products

    Anti-Chafe Products

    Thigh chafing is real, it is painful, and it can derail your walking plan faster than anything else. Prevention is simple. Apply an anti-chafe balm or cream to your inner thighs, under your arms, and anywhere skin rubs together before every walk. Products like Body Glide or Megababe Thigh Rescue create a invisible barrier that prevents friction. Some walkers also wear bike shorts or slip shorts under their walking clothes for additional protection.

    A Supportive Sports Bra

    A Supportive Sports Bra

    Walking creates repetitive motion that can be uncomfortable without proper breast support, especially for larger cup sizes. A high-impact sports bra is not necessary for walking – a medium-support encapsulation bra that separates and supports each breast individually tends to be more comfortable than a compression style. The All in Motion sports bras at Target offer excellent support in extended sizes at an accessible price point.

    A Water Bottle

    A Water Bottle

    Hydration during walks longer than 20 minutes matters, especially in warm weather. A handheld water bottle or a waist-mounted hydration belt keeps water accessible without interrupting your stride. Aim for 8 ounces of water every 20 minutes during your walk, and more in heat or humidity.

    Nutrition Tips to Maximize Your Walking Results

    Fuel Before Your Walk

    Fuel Before Your Walk

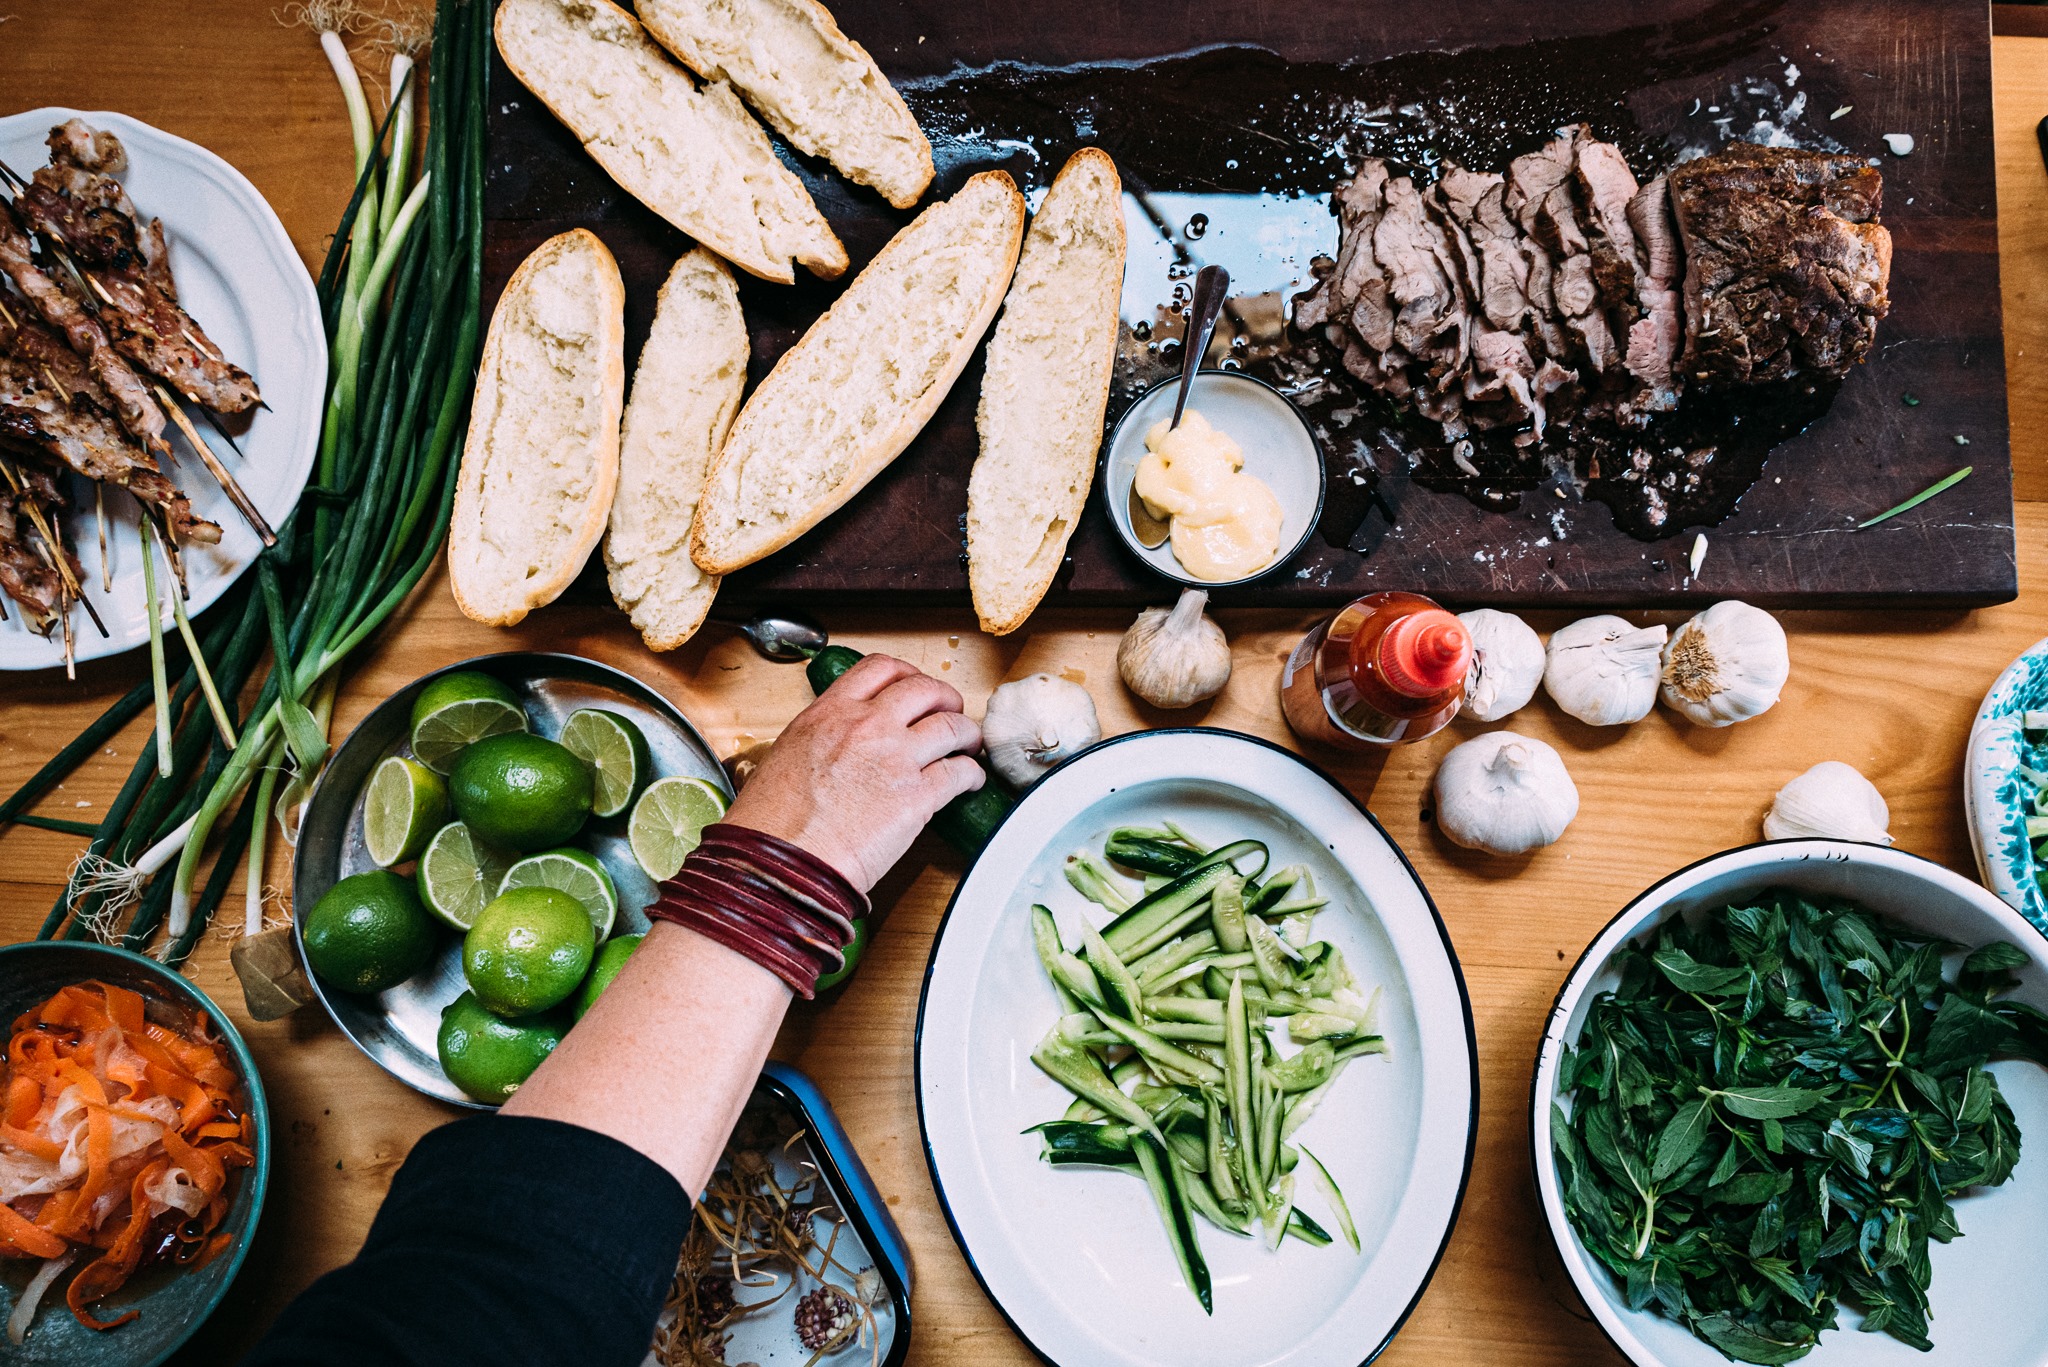
    Walking on a completely empty stomach can leave you lightheaded and low-energy, while walking on a full stomach causes cramps and discomfort. The sweet spot is a small snack 30 to 60 minutes before your walk – something with simple carbohydrates and a little protein. A banana with a tablespoon of peanut butter, a small handful of trail mix, or a piece of toast with avocado gives you enough energy to power through your walk without weighing you down.

    Recover After Your Walk

    Recover After Your Walk

    Eat a balanced meal or snack within an hour of finishing your walk. This helps your muscles recover and prevents the ravenous hunger that leads to overeating later. Include protein (to repair muscles), complex carbohydrates (to replenish energy stores), and some healthy fat (to keep you satisfied). A Greek yogurt parfait with fruit and granola, a turkey and avocado wrap, or a smoothie with protein powder, banana, and spinach are all excellent post-walk options.

    Focus on Whole Foods

    Focus on Whole Foods

    You do not need to follow a strict diet to see results from your walking plan. Focus on eating more whole, minimally processed foods – vegetables, fruits, lean proteins, whole grains, and healthy fats – and less of the processed, high-sugar, high-sodium foods that make up the modern diet. Small, sustainable nutrition improvements paired with consistent walking produce better long-term results than any crash diet.

    Stay Hydrated All Day

    Stay Hydrated All Day

    Hydration affects everything from your energy levels to your appetite to your walking performance. Aim for half your body weight in ounces of water per day, plus additional water during and after your walks. If plain water bores you, add sliced fruit, cucumber, or a splash of lemon juice. Herbal teas count toward your water intake too.

    Do Not Eat Back All Your Calories

    One common mistake is using exercise as an excuse to eat significantly more. Walking burns real calories – a 200-pound woman walking briskly for 45 minutes burns approximately 300 to 350 calories. But that does not mean you should add 350 calories to your daily intake. A small post-walk snack is fine. Rewarding every walk with a large treat undermines your calorie deficit and stalls weight loss. This is not about deprivation – it is about awareness.

    Troubleshooting Common Walking Challenges

    Troubleshooting Common Walking Challenges

    Shin Splints

    Shin Splints

    Pain along the front of your lower leg during or after walking is usually shin splints, caused by doing too much too soon, worn-out shoes, or walking on hard surfaces. Treatment includes rest, ice for 15 minutes several times a day, and stretching your calves. Prevention means increasing your walking time gradually (this plan is designed with that in mind), wearing proper shoes, and walking on softer surfaces like tracks or trails when possible.

    Knee Pain

    Knee Pain

    If your knees hurt during or after walking, check your shoes first – worn-out or unsupportive shoes are the most common culprit. Second, check your walking form – taking too-long strides puts extra stress on your knees. Shorter, quicker steps are easier on your joints. Third, consider your route – constant downhill walking is harder on knees than flat or uphill walking. If knee pain persists, a knee support sleeve can provide compression and stability during walks.

    Boredom

    Boredom

    Walking the same route at the same time every day gets monotonous. Combat boredom by rotating routes, listening to podcasts, audiobooks, or music, walking with a friend or family member, joining a walking group, or using a walking app that gamifies your routes. Some walkers track their cumulative miles and plot them on a virtual journey – like walking the equivalent distance from one city to another.

    Weather

    Weather

    Bad weather is the most common excuse for skipping walks. Have an indoor backup plan ready at all times. A treadmill, a large store or mall, an indoor track, or even walking in place at home while watching TV are all valid alternatives. You do not lose progress because you walked indoors instead of outdoors. You lose progress by not walking at all.

    Time Constraints

    Time Constraints

    On days when you genuinely cannot fit in the full walk, do a shorter version rather than skipping entirely. Even a 10-minute walk maintains your habit and provides real health benefits. Research shows that three 10-minute walks throughout the day provide similar health benefits to one continuous 30-minute walk. Split your walk into morning, lunch, and evening segments if that is what fits your schedule.

    Lack of Motivation

    Lack of Motivation

    Motivation is unreliable. It comes and goes depending on your mood, energy, sleep, and stress levels. Do not depend on motivation – depend on routine. Set out your walking clothes the night before. Put your shoes by the door. Tell someone your walking plan so they can check in on you. On the days you least want to walk, commit to just five minutes. Most of the time, once you start, you will keep going.

    What Happens After Day 30

    What Happens After Day 30

    What You Can Expect to Have Achieved

    What You Can Expect to Have Achieved

    After 30 days of consistent walking, most people experience measurable changes. These typically include weight loss of 3 to 8 pounds (depending on starting weight and nutrition), reduced waist circumference, improved cardiovascular endurance, better sleep quality, higher daily energy levels, improved mood and reduced stress, and better blood pressure and blood sugar numbers. Your body has adapted to regular movement, and it now expects and craves it.

    Keep the Momentum Going

    Day 30 is not a finish line – it is a launching pad. You have built a walking habit, and now you get to decide what to do with it. You have several options for continuing your progress. You can repeat the plan with increased baseline times, starting at 25 minutes instead of 15 and scaling up from there. You can maintain your week-four walking schedule as your regular routine, walking 45 to 60 minutes most days. You can add other forms of exercise alongside your walking, like strength training, swimming, or yoga. Or you can train for a specific goal, like a 5K walk, a charity walk event, or hitting 10,000 steps daily.

    Beyond the Scale

    Weight loss may have been your initial motivation, and that is completely valid. But after 30 days, many women discover that the non-scale benefits of walking are even more valuable. The mental clarity, the stress relief, the quiet time with your own thoughts, the sense of accomplishment, the physical strength, the improved sleep – these benefits last long after you reach any number on the scale. Walking changes your body, but it also changes your relationship with movement. And that relationship is worth more than any number.

    The fitness trackers with plus-size bands on Amazon can help you track your continued progress beyond the 30-day plan, monitoring steps, distance, heart rate, and calories burned throughout the day.

    Key Takeaways

    • Walking is one of the most effective and sustainable forms of exercise for weight loss, especially for plus-size women, because it is low impact, free, accessible, and produces real results when done consistently.
    • This 30-day plan progressively builds from 15-minute walks to 60-minute walks, gradually increasing duration, pace, and intensity so your body adapts without injury or burnout.
    • Proper gear – especially supportive walking shoes and moisture-wicking clothing – prevents pain, chafing, and discomfort that can derail your progress.
    • Rest days are built into the plan because recovery is when your body gets stronger, and skipping rest leads to overuse injuries.
    • Small, sustainable nutrition changes paired with consistent walking produce better long-term results than any extreme diet.
    • After 30 days, most women experience 3 to 8 pounds of weight loss plus significant improvements in energy, sleep, mood, and cardiovascular fitness.
    • Day 30 is a launching pad, not a finish line – use the habit you have built to keep walking, add new exercises, or train for specific goals.

    Frequently Asked Questions

    How many calories does walking burn for a plus-size woman?

    How many calories does walking burn for a plus-size woman?

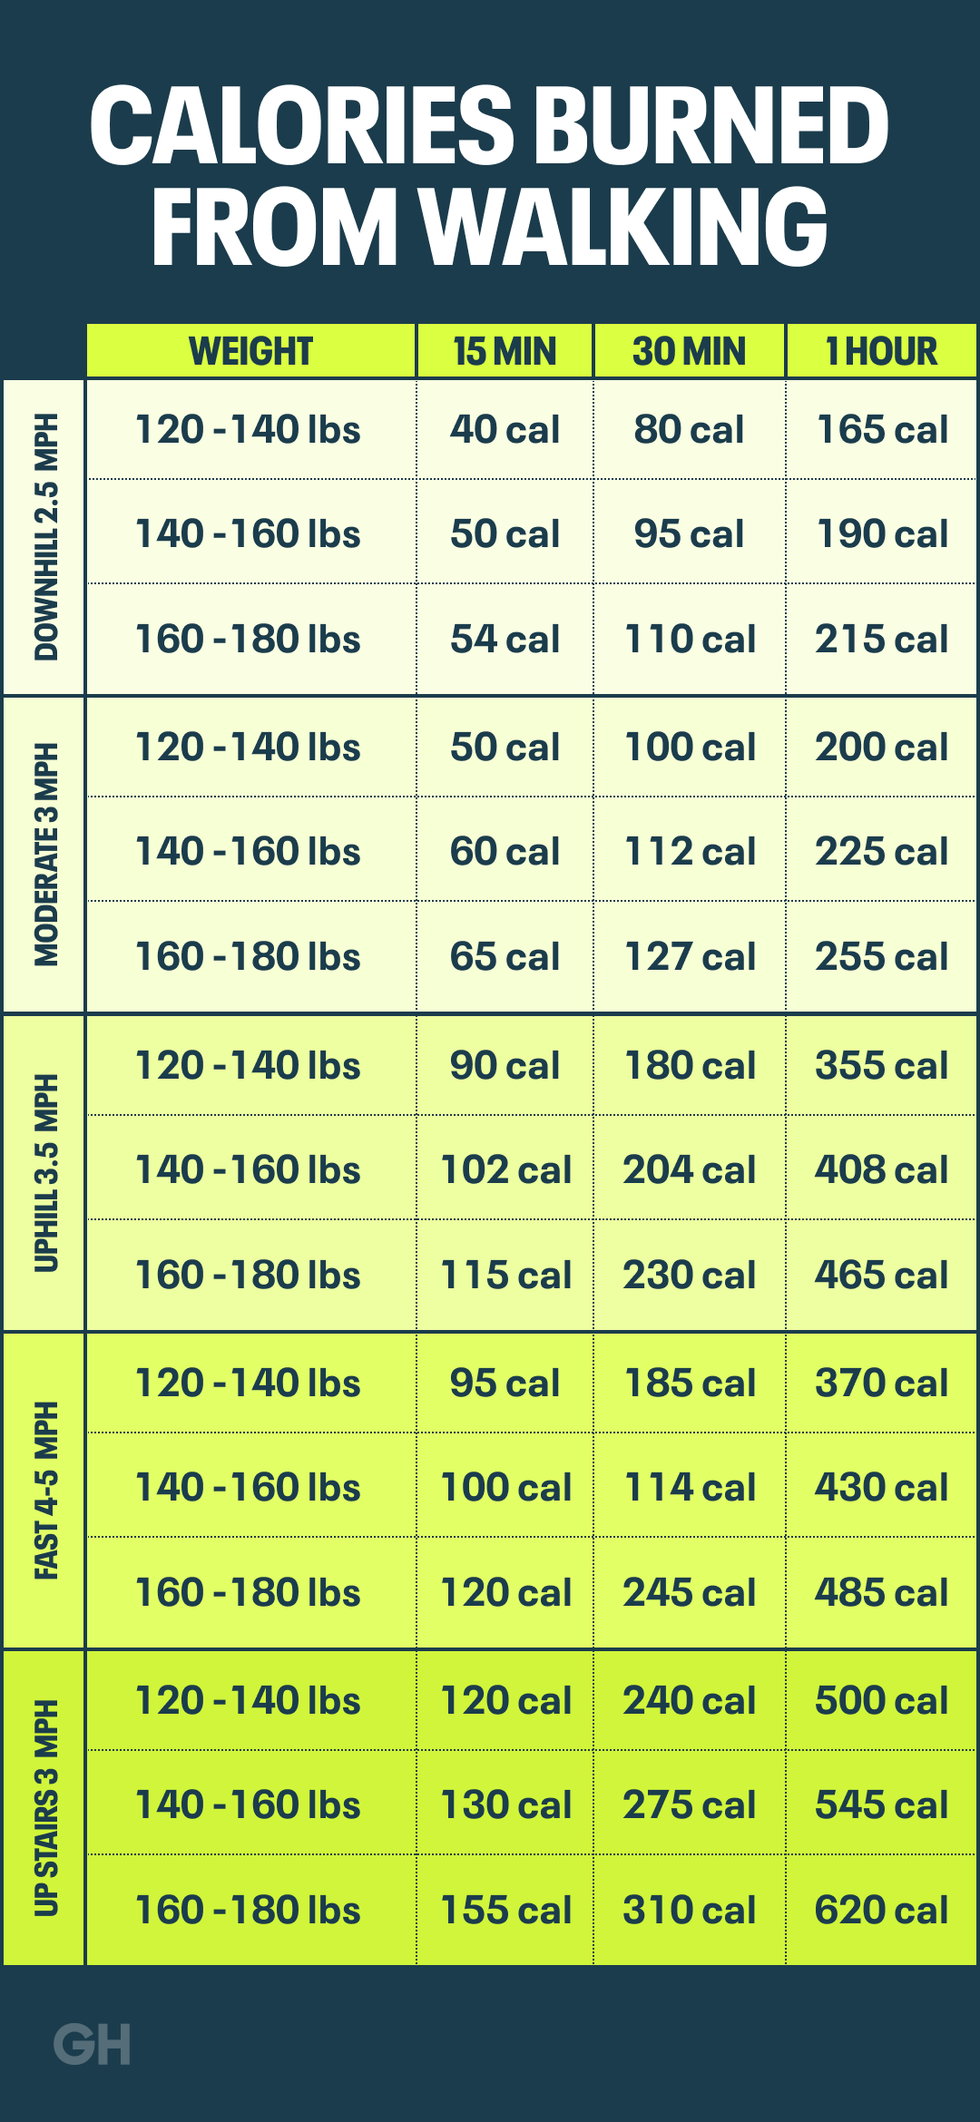
    Calorie burn depends on your weight, walking speed, terrain, and duration. As a general estimate, a 200-pound woman walking at a brisk pace (3.5 mph) burns approximately 350 to 400 calories per hour. A 250-pound woman burns approximately 430 to 480 calories per hour at the same pace. Heavier bodies burn more calories during the same activity because they are moving more mass. Walking on hills or at faster speeds increases these numbers further. Over the course of this 30-day plan, total calorie burn from walking alone is approximately 7,000 to 12,000 calories, which translates to 2 to 3.5 pounds of fat loss from walking alone before accounting for any nutritional changes.

    Can I walk every day or do I need rest days?

    You can walk every day if your body feels good, but scheduled rest days are included in this plan for important reasons. Rest allows your muscles, joints, and connective tissue to recover and adapt. Without rest, you risk overuse injuries like shin splints, plantar fasciitis, and joint inflammation that could sideline you for weeks. If you feel great on rest days and want to move, keep it light – a gentle 10-minute stroll, some stretching, or easy yoga. Save your full-effort walks for the scheduled walking days.

    Is walking enough for weight loss or do I need to diet too?

    Is walking enough for weight loss or do I need to diet too?

    Walking alone can produce weight loss, especially if you were previously sedentary, because it creates a calorie deficit through increased activity. However, combining walking with mindful eating produces significantly better results. You do not need to follow a strict diet. Focus on eating more whole foods, watching portion sizes, staying hydrated, and reducing highly processed snacks and sugary drinks. The combination of regular walking and moderate nutritional improvements is the most sustainable and effective approach to lasting weight loss.

    What if I miss a few days during the 30-day plan?

    Missing days does not mean you failed or need to start over. Life happens – illness, bad weather, family emergencies, exhausting work days. If you miss one day, simply do that day’s walk tomorrow and shift the plan by one day. If you miss several days, go back to the last day you completed and pick up from there. The plan is designed to be flexible. Completing it in 35 or 40 calendar days still gives you the same progressive benefit as completing it in exactly 30. Consistency over time matters far more than perfection.

    Should I walk on a treadmill or outside?

    Both are effective. Outdoor walking offers natural terrain variation, fresh air, sunlight (which helps vitamin D production and mood), and changing scenery that reduces boredom. Treadmill walking offers climate control, consistent surfaces, precise speed and incline control, and convenience. The best choice is whichever one you will do consistently. Many successful walkers use both – outdoor walks when the weather cooperates and treadmill walks when it does not. If you primarily use a treadmill, set the incline to at least 1 percent to simulate the natural resistance of outdoor walking.

  • A 15-Minute Daily Stretching Routine to Improve Flexibility at Any Size

    A 15-Minute Daily Stretching Routine to Improve Flexibility at Any Size

    Why Flexibility Matters More Than You Think

    Why Flexibility Matters More Than You Think

    Flexibility is the quiet hero of physical health. It does not get the glamorous attention that strength training or high-intensity cardio receives, but it is arguably just as important for your daily quality of life. Flexibility determines how easily you can bend to tie your shoes, reach for something on a high shelf, turn to check your blind spot while driving, get up from the floor, or simply move through your day without stiffness and discomfort.

    When flexibility declines – which happens naturally with age, sedentary lifestyles, and lack of stretching – everything gets harder. Your range of motion shrinks. Simple movements become uncomfortable. Your risk of injury increases because tight muscles pull on joints and create imbalances. Poor flexibility contributes to back pain, neck tension, hip stiffness, and that general feeling of being “locked up” that so many people accept as normal but that is actually very addressable.

    For plus-size women, flexibility work offers specific benefits that are often underappreciated. It can reduce the joint stiffness that sometimes accompanies carrying more weight. It improves circulation, which supports cardiovascular health. It reduces muscle tension caused by postural compensation. And it feels genuinely amazing – there is an almost meditative quality to a good stretching session that calms your nervous system and leaves you feeling longer, looser, and more at peace in your body.

    The best part? You can start improving your flexibility today, at any age, at any size, with just 15 minutes and no equipment. Flexibility responds quickly to consistent attention. Most people notice meaningful improvements within two to three weeks of daily stretching. And unlike many fitness pursuits, stretching has virtually no barrier to entry – if you can breathe and move even a little, you can stretch.

    Plus-size woman doing a peaceful standing side stretch in a sunlit living room

    Stretching Myths That Need to Go

    Stretching Myths That Need to Go

    Myth – You Need to Be Flexible to Start Stretching

    This is like saying you need to be clean to take a shower. Stretching is how you become flexible. You start wherever your body is right now, and you improve from there. If you cannot touch your toes, that is not a reason to avoid stretching – it is a reason to start.

    Myth – Stretching Should Hurt

    Myth - Stretching Should Hurt

    Good stretching feels like tension, not pain. The sensation should be a gentle pull – noticeable but not sharp, intense, or wincing. If a stretch hurts, you have gone too far. Back off until you feel a comfortable pull, and hold there. Pain is not progress – it is a warning signal.

    Myth – You Need to Hold Every Stretch for 60 Seconds

    Myth - You Need to Hold Every Stretch for 60 Seconds

    Research shows that holding a stretch for 15 to 30 seconds is effective for most people. While longer holds can be beneficial for deep connective tissue stretching (like in yin yoga), you do not need marathon holds to see improvement. Consistency matters far more than duration of individual stretches.

    Myth – Stretching Is Only for Before and After Workouts

    Myth - Stretching Is Only for Before and After Workouts

    Stretching is a standalone practice that benefits your body whether or not you are doing other exercise. A daily stretching routine that exists independently of any workout program is one of the best things you can do for your body. Think of it as maintenance for your muscles and joints – like brushing your teeth for your physical body.

    Myth – Plus-Size Bodies Cannot Be Flexible

    Myth - Plus-Size Bodies Cannot Be Flexible

    This is completely false. Flexibility is about the length and elasticity of your muscles and connective tissue, not your body size. Plus-size dancers, yogis, martial artists, and gymnasts demonstrate extraordinary flexibility every day. Your body may need different positions or modifications to access certain stretches comfortably, but the potential for flexibility improvement is the same regardless of size.

    Modifications That Make Stretching Accessible for Every Body

    Modifications That Make Stretching Accessible for Every Body

    Some traditional stretching positions were designed without considering diverse body types. Here are universal modifications that make stretching comfortable and effective for every body.

    Use Props

    Use Props

    A yoga strap or stretching strap extends your reach, allowing you to hold stretches that your arms cannot quite reach. If you cannot touch your toes, loop a strap around your feet and hold the ends. If you cannot clasp your hands behind your back, hold a strap between them. Props are not cheating – they are tools that make stretches accessible.

    Widen Your Stance

    Widen Your Stance

    In forward folds, seated stretches, and any position where your legs are close together, widening your stance creates space for your belly and chest. This allows you to fold deeper and more comfortably without feeling compressed.

    Use Elevation

    Use Elevation

    If getting down to the floor is difficult, many stretches can be done seated in a chair, standing with wall support, or lying in bed. You do not need to be on a yoga mat on the floor to stretch effectively. A sturdy chair is actually one of the most versatile stretching tools available.

    Bend Your Knees

    Bend Your Knees

    In hamstring stretches and forward folds, keeping a slight bend in your knees takes pressure off your lower back and lets you access the stretch more comfortably. Straight legs are not required for effective stretching – what matters is that you feel the stretch in the target muscle.

    Plus-size woman using a yoga strap for a seated hamstring stretch with props nearby

    The 15-Minute Morning Stretching Routine

    The 15-Minute Morning Stretching Routine

    This routine is designed to wake up your body, release overnight stiffness, and set a positive tone for your day. Do each stretch gently – your body is still warming up in the morning.

    Neck Rolls (1 Minute)

    Neck Rolls (1 Minute)

    Standing or seated, slowly drop your chin to your chest and roll your head in a half circle from shoulder to shoulder. Do 5 half circles in each direction. This releases tension in your neck and upper traps that accumulates during sleep.

    Shoulder Rolls and Arm Circles (1 Minute)

    Shoulder Rolls and Arm Circles (1 Minute)

    Roll your shoulders forward 10 times, then backward 10 times. Follow with arm circles – small for 15 seconds, gradually getting larger for another 15 seconds. Reverse direction. This warms up your shoulders and upper body.

    Standing Side Stretch (1 Minute)

    Standing Side Stretch (1 Minute)

    Stand with feet hip-width apart. Reach your right arm overhead and lean gently to the left, feeling a stretch along your right side. Hold for 20 seconds. Switch sides. Repeat once more per side. This opens up your intercostal muscles and lats.

    Standing Cat-Cow (1.5 Minutes)

    Standing Cat-Cow (1.5 Minutes)

    Stand with hands on your thighs, knees slightly bent. Round your spine (cat) by tucking your chin and curling forward, then arch your spine (cow) by lifting your chest and looking slightly upward. Move slowly between these positions for 1.5 minutes. This mobilizes your entire spine.

    Standing Quad Stretch (1.5 Minutes)

    Standing Quad Stretch (1.5 Minutes)

    Holding a wall or chair for balance, bend your right knee and bring your heel toward your glute. Hold your ankle or use a strap if needed. Hold for 30 seconds per leg, repeat once per side. If balance is challenging, do this lying on your side instead.

    Standing Hamstring Stretch (1.5 Minutes)

    Standing Hamstring Stretch (1.5 Minutes)

    Place one foot on a low step, chair, or stool. Keeping your back flat, hinge forward from your hips until you feel a gentle pull in the back of your raised leg. Hold 30 seconds per leg, repeat once per side.

    Hip Circles (1 Minute)

    Hip Circles (1 Minute)

    Stand with hands on your hips and make large, slow circles with your hips. Do 10 circles in each direction. This mobilizes your hip joints and warms up your lower body.

    Calf Stretch (1 Minute)

    Calf Stretch (1 Minute)

    Stand facing a wall with hands on the wall. Step one foot back, keeping it straight with the heel on the floor. Lean forward until you feel a stretch in your back calf. Hold 20 seconds, switch sides, repeat.

    Standing Chest Opener (1 Minute)

    Standing Chest Opener (1 Minute)

    Clasp your hands behind your back (or hold a strap between them) and gently lift your arms away from your body while squeezing your shoulder blades together. Hold for 30 seconds, release, and repeat. This counteracts the forward-slumping posture that many of us develop from sitting.

    Full Body Reach and Release (1 Minute)

    Full Body Reach and Release (1 Minute)

    Inhale and reach both arms overhead, stretching as tall as you can. Exhale and release your arms down. Repeat 5 times, making each reach a little bigger and each release a little more complete. Finish by shaking out your hands and feet for 15 seconds.

    Deep Breathing (1.5 Minutes)

    Deep Breathing (1.5 Minutes)

    Stand or sit comfortably. Take 5 slow, deep breaths – inhaling for 4 counts, holding for 2, and exhaling for 6. This activates your parasympathetic nervous system and sets a calm, centered tone for your day.

    The 15-Minute Evening Wind-Down Routine

    The 15-Minute Evening Wind-Down Routine

    This routine is gentler and more relaxing than the morning version. It is designed to release the tension accumulated during your day and prepare your body and mind for restful sleep.

    Seated Neck Stretches (1.5 Minutes)

    Seated Neck Stretches (1.5 Minutes)

    Sit comfortably. Drop your right ear toward your right shoulder and hold for 20 seconds. Switch sides. Then drop your chin to your chest and hold for 20 seconds. Gently place your hand on your head to deepen each stretch slightly.

    Seated Spinal Twist (2 Minutes)

    Seated Spinal Twist (2 Minutes)

    Sitting cross-legged or in a chair, place your right hand on your left knee and gently twist your torso to the left. Hold for 30 seconds while breathing deeply. Switch sides. Repeat once per side. This releases tension throughout your spine.

    Seated Forward Fold (1.5 Minutes)

    Seated Forward Fold (1.5 Minutes)

    Sitting with legs extended in front of you (wide apart for comfort), slowly walk your hands forward along your legs. Go only as far as comfortable and hold for 45 seconds. Rest, then repeat. Use a strap around your feet if needed.

    Reclined Figure Four (2 Minutes)

    Reclined Figure Four (2 Minutes)

    Lying on your back, cross your right ankle over your left knee. Gently pull your left thigh toward your chest. Hold for 45 seconds, then switch sides. This deeply stretches the piriformis and outer hip – an area that gets very tight from sitting.

    Supine Spinal Twist (2 Minutes)

    Supine Spinal Twist (2 Minutes)

    Lying on your back, bring your knees to your chest, then let them drop to the right side while keeping your left shoulder on the floor. Hold for 45 seconds, then switch sides. This stretch feels incredible for the lower back.

    Knees-to-Chest (1.5 Minutes)

    Knees-to-Chest (1.5 Minutes)

    Lying on your back, hug both knees toward your chest. Rock gently side to side if that feels good. Hold for 1 minute. This releases the lower back and stretches the glutes.

    Legs Up the Wall (2.5 Minutes)

    Legs Up the Wall (2.5 Minutes)

    Lie on your back with your legs extended up a wall (or resting on the seat of a couch). Let your arms rest at your sides and breathe deeply. This gentle inversion improves circulation, reduces leg swelling, and is deeply calming. Stay here for the full 2.5 minutes and feel the day’s tension melt away.

    Final Relaxation (2 Minutes)

    Lie flat on your back with arms at your sides and legs slightly apart. Close your eyes and take 10 slow, deep breaths. Scan your body from head to toe, consciously releasing any remaining tension. This is your transition from wakefulness to rest.

    Desk Stretches for When You Have Been Sitting Too Long

    Desk Stretches for When You Have Been Sitting Too Long

    If you sit at a desk for work, these stretches can be done right in your chair without anyone knowing you are having a mini yoga session.

    Seated Cat-Cow

    Seated Cat-Cow

    Sit at the edge of your chair with feet flat on the floor. Place hands on knees. Round your back and tuck your chin (cat), then arch your back and look up (cow). Do 10 rounds. Takes 1 minute.

    Seated Pigeon

    Seated Pigeon

    Cross your right ankle over your left knee and gently lean forward until you feel a stretch in your right hip. Hold 30 seconds per side. Takes 1 minute.

    Chest Opener

    Chest Opener

    Clasp your hands behind your head and open your elbows wide, squeezing your shoulder blades together. Hold 20 seconds, release, repeat 3 times. Takes 1 minute.

    Wrist and Forearm Stretch

    Wrist and Forearm Stretch

    Extend one arm straight ahead, palm up. Use your other hand to gently pull your fingers down toward the floor. Hold 15 seconds. Flip your hand palm-down and push your fingers toward your body. Hold 15 seconds. Switch hands. Takes 1 minute.

    Seated Figure Four

    Seated Figure Four

    Cross your right ankle over your left knee. Sit tall and gently press your right knee down. Hold 30 seconds per side. Takes 1 minute.

    Set a reminder to do these desk stretches every hour or two. A simple posture reminder device can buzz gently when it is time to stretch, helping you build the habit of regular movement breaks throughout your workday.

    How to Progress Your Flexibility Over Time

    How to Progress Your Flexibility Over Time

    Flexibility improves with consistent practice, but it does require some patience. Here is how to progress safely and effectively.

    Add Time Gradually

    Add Time Gradually

    Once a stretch feels comfortable at 20 seconds, extend to 30 seconds, then 45, then 60. Longer holds allow your muscles to relax more deeply into the stretch, producing greater flexibility gains over time.

    Increase Depth Gradually

    Increase Depth Gradually

    As a stretch becomes easier, go slightly deeper. The key word is slightly – pushing too far too fast can cause strains. Aim for a small increase each week. Progress is often measured in millimeters, not inches, and that is perfectly fine.

    Try New Stretches

    Try New Stretches

    Your body adapts to the same stretches over time. Adding new stretches that target the same muscle groups from different angles keeps your flexibility progressing. A set of yoga blocks opens up dozens of additional stretching positions by bringing the floor closer to you and supporting your body in new poses.

    Be Patient With Tight Areas

    Be Patient With Tight Areas

    Some muscle groups – particularly hamstrings, hip flexors, and shoulders – can be stubbornly tight. These areas may take longer to show improvement, and that is normal. Consistent daily stretching will produce results, but some areas need weeks or months of patient work. Do not get discouraged by areas that seem to resist change – they will eventually respond to consistent attention.

    Progress comparison of a plus-size woman's forward fold flexibility showing improvement over time

    Tools and Props That Make Stretching Easier

    Tools and Props That Make Stretching Easier

    While you can stretch with nothing but your body, a few inexpensive props can significantly enhance your practice.

    Yoga Strap

    Yoga Strap

    A 10-foot yoga strap extends your reach for hamstring stretches, shoulder stretches, and any position where your hands cannot quite reach their target. This is the single most useful prop for people with limited flexibility.

    Yoga Blocks

    Yoga Blocks

    Blocks bring the floor closer to you. Place them under your hands in forward folds, under your hips in seated stretches, or between your thighs in bridge poses. A set of two blocks gives you the most versatility.

    Foam Roller

    Foam Roller

    A medium-density foam roller is excellent for self-myofascial release – a form of self-massage that helps release tight muscle fascia and improve flexibility. Rolling your calves, quads, IT band, and upper back can dramatically improve how your stretches feel.

    Thick Mat

    Thick Mat

    A mat that is at least 15mm thick cushions your knees, hips, and spine during floor stretches, making them much more comfortable and sustainable.

    A Chair

    A Chair

    A sturdy chair without arms is an incredibly versatile stretching tool. Use it for seated stretches, as a balance aid for standing stretches, for elevated foot placement in hamstring stretches, and for support in numerous other positions. You probably already have one.

    Fifteen minutes a day is all it takes to transform your flexibility, reduce your stiffness, and feel more comfortable in your body. That is one percent of your day invested in feeling significantly better for the other 99 percent. Whether you choose the morning routine, the evening routine, or create your own combination, the most important thing is to start. Your body will thank you, and the results will speak for themselves.

    Key Takeaways

    • Flexibility impacts every aspect of daily life from tying your shoes to turning your head while driving – it is far more important than most people realize.
    • You do not need to be flexible to start stretching, stretching should not hurt, and plus-size bodies absolutely can achieve impressive flexibility gains.
    • Props like yoga straps, blocks, and a sturdy chair make stretching accessible for every body by extending reach, providing support, and offering elevation options.
    • The morning routine focuses on waking up your body and mobilizing your joints, while the evening routine focuses on releasing tension and preparing for sleep.
    • Desk stretches done every hour or two prevent the stiffness and discomfort that comes from prolonged sitting.
    • Progress comes from consistency – 15 minutes daily produces better results than an hour once a week, and most people see improvement within two to three weeks.

    Frequently Asked Questions

    Should I stretch before or after exercise?

    Before exercise, do dynamic stretches (movement-based) like arm circles, leg swings, and hip rotations to warm up your muscles. After exercise, do static stretches (hold positions) to cool down and improve flexibility. The routines in this article are standalone practices that can be done at any time of day, independent of other exercise.

    Is it normal to feel stiff when I first start stretching?

    Completely normal. If you have not been stretching regularly, your muscles and connective tissue will be tight. The first few sessions might feel like your body has the flexibility of a two-by-four, and that is okay. This stiffness decreases noticeably within the first week of daily stretching, and significant improvements usually appear within two to three weeks.

    Can stretching help with back pain?

    Can stretching help with back pain?

    For many people, yes. Back pain is often caused or worsened by tight muscles in the hips, hamstrings, and back itself. Regular stretching of these areas can reduce tension, improve spinal alignment, and decrease pain. However, if you have chronic or severe back pain, consult a healthcare provider before starting a stretching routine to rule out conditions that require specific treatment.

    How long until I can touch my toes?

    This depends on your starting flexibility, consistency of practice, and individual anatomy (some people have naturally longer hamstrings and arms than others). Most people who stretch their hamstrings daily see meaningful progress within four to six weeks. Touching your toes is a nice milestone, but it is not the ultimate goal of stretching – improved comfort, reduced stiffness, and easier daily movement are far more important markers of success.

    Can I stretch every day, or do I need rest days?

    Gentle stretching can be done daily – it is one of the few physical activities that does not require rest days because it does not create the muscle damage that strength training does. In fact, daily stretching produces better results than intermittent stretching because your muscles respond to consistent, repeated lengthening. Just make sure you are stretching gently and not pushing into pain, and daily practice is not only safe but optimal.

  • 15 Home Workouts That Require Zero Equipment and Only 20 Minutes

    15 Home Workouts That Require Zero Equipment and Only 20 Minutes

    Why 20-Minute Home Workouts Actually Work

    Why 20-Minute Home Workouts Actually Work

    There is a persistent myth in fitness culture that if you are not spending an hour or more at the gym, you are wasting your time. This could not be further from the truth, and honestly, this kind of thinking keeps a lot of people from exercising at all. If the only “real” workout is a long one, and you cannot find an hour in your schedule, why even bother? That logic sounds reasonable, but it is completely wrong.

    Twenty minutes of focused, intentional movement is more than enough to improve your cardiovascular health, build strength, boost your mood, improve your sleep, and increase your energy levels. A 2025 meta-analysis published in the British Journal of Sports Medicine found that as little as 15 to 20 minutes of moderate physical activity per day was associated with significant reductions in all-cause mortality and improvements in cardiovascular markers. That is not twenty minutes as a warm-up to the “real” workout – that is twenty minutes as the whole workout, and it makes a real difference.

    For plus-size women especially, the 20-minute home workout removes virtually every barrier to exercise. No gym membership needed. No commute. No worrying about what to wear or who might be watching. No expensive equipment. Just you, your body, a small space in your home, and twenty minutes. That is it. If you have a body and a floor, you have everything you need.

    The workouts in this article are designed to be done in your living room, bedroom, or any space where you have enough room to stand with your arms outstretched. They require absolutely no equipment – not even a mat, though having one makes floor exercises more comfortable. Each workout can be modified for different fitness levels, and every one of them can be completed in 20 minutes or less.

    Plus-size woman with curly hair exercising enthusiastically in her bright living room

    Before You Start – Tips for Success

    A few practical tips will help you get the most out of these workouts and keep you coming back for more.

    Wear Supportive Shoes or Go Barefoot

    Wear Supportive Shoes or Go Barefoot

    If you are doing standing exercises with any impact (marching, stepping, light bouncing), supportive shoes protect your feet and ankles. For floor-based work, barefoot is perfectly fine and actually helps you grip the surface better. A pair of Nike Revolution training shoes are lightweight and supportive enough for home workouts without being heavy or bulky.

    Have Water Nearby

    Have Water Nearby

    Even a 20-minute workout can make you thirsty. Keep a water bottle within arm’s reach so you can sip between exercises without losing momentum.

    Listen to Your Body

    Listen to Your Body

    Every workout includes modifications, but you are the expert on your own body. If something hurts (not muscle burn – actual pain), stop and move on to the next exercise. If you need longer rest breaks, take them. If you can only do half the repetitions, that is absolutely fine. You are building a practice, not competing in a fitness contest.

    Wear What Makes You Comfortable

    Wear What Makes You Comfortable

    You are in your own home – there is no dress code. Pajamas, leggings, a big t-shirt, full athletic wear, whatever helps you feel good and move freely. For those who want supportive activewear, Target’s All in Motion plus-size leggings are affordable, stretchy, and stay in place during all types of movements.

    Workouts 1 Through 5 – Cardio and Energy Boosters

    Workouts 1 Through 5 - Cardio and Energy Boosters

    Workout 1 – The Morning Wake-Up Call

    Workout 1 - The Morning Wake-Up Call

    This workout is designed to get your blood pumping first thing in the morning. It uses simple standing movements that require zero warm-up because the warm-up is built in. Start with 2 minutes of marching in place, lifting your knees as high as is comfortable. Follow with 2 minutes of step-touches side to side, adding arm movements as you go. Then do 2 minutes of standing knee lifts, alternating legs. Next, 2 minutes of arm circles – 1 minute forward, 1 minute backward. Then 2 minutes of gentle jumping jacks – if jumping is not comfortable, do stepping jacks instead by stepping one foot out at a time while raising your arms. Repeat this entire circuit once more for the remaining 10 minutes, pushing slightly harder the second time through.

    Workout 2 – The Dance Party Cardio

    Workout 2 - The Dance Party Cardio

    Put on your favorite playlist and commit to moving for 20 minutes straight. There are no specific exercises here – just dance. Roll your hips, pump your arms, step side to side, spin around, shimmy your shoulders, and let the music guide you. The only rule is that you keep moving for the full 20 minutes. Take it easy during slower songs, go all out during your favorite bangers, and have the time of your life. This is exercise at its most joyful, and it burns just as much energy as a structured routine.

    Workout 3 – The Low-Impact Cardio Circuit

    Workout 3 - The Low-Impact Cardio Circuit

    Do each of these exercises for 1 minute, rest for 30 seconds, then move to the next. March in place with high knees, side steps with arm raises, standing oblique crunches (elbow to knee), hamstring curls (kicking your heels toward your glutes), boxing punches (alternate arms while stepping), standing side leg lifts, toe taps forward and back, wide marching with overhead reach, gentle torso twists with arms swinging, and finish with a cool-down march. Run through the circuit once and you are done in exactly 20 minutes including rest periods.

    Workout 4 – The Walking Workout (Indoor Edition)

    Workout 4 - The Walking Workout (Indoor Edition)

    You do not need to leave your house to walk for exercise. In your living room or hallway, walk at a brisk pace for 2 minutes, then switch to a power walk with exaggerated arm swings for 2 minutes. Add side steps for 2 minutes, walk backward carefully for 1 minute, then repeat. Throw in some walking lunges every 5 minutes if you want an extra challenge. Walking at home lets you control the environment completely – blast your music, watch your favorite show, or listen to a podcast while you move.

    Plus-size woman dancing joyfully in her living room with wireless earbuds and a big smile

    Workout 5 – The Commercial Break Blast

    Workout 5 - The Commercial Break Blast

    This workout is designed around watching TV. During each commercial break (or every 10 minutes if you are streaming), do one exercise at maximum effort until the break ends. First break – marching with high knees. Second break – standing squats (as deep as comfortable). Third break – wall push-ups. Fourth break – standing calf raises. Fifth break – arm circles. Sixth break – standing hip circles. By the end of a one-hour show, you have accumulated 20 or more minutes of exercise without ever feeling like you “worked out.” This is one of the sneakiest and most sustainable ways to build a fitness habit.

    Workouts 6 Through 10 – Strength and Toning

    Workouts 6 Through 10 - Strength and Toning

    Workout 6 – The Upper Body Builder

    Workout 6 - The Upper Body Builder

    Your own body weight provides all the resistance you need for an excellent upper body workout. Start with 2 minutes of arm circles to warm up. Then do 10 wall push-ups (stand arm’s length from a wall, place your palms flat, and push-up against the wall), 10 tricep dips using a sturdy chair or couch edge, 10 standing shoulder presses (press your fists from shoulder height to overhead), 10 bicep curls using filled water bottles or canned goods as light weights, and 30-second plank holds (modified on knees is absolutely fine). Rest 30 seconds between exercises and repeat the circuit twice.

    Workout 7 – The Lower Body Powerhouse

    Workout 7 - The Lower Body Powerhouse

    This one targets your legs and glutes with zero equipment. Warm up with 2 minutes of marching. Then do 12 bodyweight squats (only go as deep as comfortable – even a quarter squat counts), 10 reverse lunges per leg (step back instead of forward for easier balance), 12 standing calf raises, 10 side leg lifts per leg, 12 glute bridges lying on your back, and 30 seconds of wall sits. Rest between exercises as needed and repeat the circuit once more.

    Workout 8 – The Core Connector

    Workout 8 - The Core Connector

    A strong core supports everything else you do. Start with 2 minutes of gentle standing twists. Then do 10 standing crunches (bring your elbow to your opposite knee while standing), 10 seated leg extensions (sit on a chair and extend one leg at a time), 30-second modified plank hold, 10 lying pelvic tilts, 10 bridges, and 10 dead bugs (lying on your back, extend opposite arm and leg while keeping your core stable). Rest as needed and complete two rounds.

    If you find that floor exercises are uncomfortable on hard surfaces, a wide, extra-thick exercise mat makes a significant difference. Look for one that is at least 72 inches long and half an inch thick for proper cushioning.

    Workout 9 – The Full Body Fusion

    Workout 9 - The Full Body Fusion

    This workout hits every major muscle group in 20 minutes. Warm up with 2 minutes of marching and arm swings. Then do each of these exercises for 45 seconds with 15 seconds of rest between them – squats, wall push-ups, standing knee lifts, glute bridges, standing shoulder presses with water bottles, side lunges, standing oblique crunches, calf raises, modified plank, and standing boxing punches. That is one round. Rest for 1 minute and repeat. Two rounds brings you to exactly 20 minutes.

    Workout 10 – The Staircase Workout

    Workout 10 - The Staircase Workout

    If you have stairs in your home, you have a built-in workout machine. Walk up and down the stairs at a moderate pace for 2 minutes. Then do 10 step-ups on the bottom stair (alternate legs). Walk up and down again for 2 minutes. Do 10 incline push-ups using the stair railing or a step. Walk the stairs again. Do 10 calf raises on the bottom step. Continue alternating stair walks with exercises for 20 minutes. Stairs naturally elevate your heart rate and build leg strength without any equipment whatsoever.

    Workouts 11 Through 15 – Flexibility and Recovery

    Workouts 11 Through 15 - Flexibility and Recovery

    Workout 11 – The Gentle Yoga Flow

    Workout 11 - The Gentle Yoga Flow

    This is not a full yoga class, but a simple flow that improves flexibility and relaxes your body. Spend 2 minutes in a comfortable seated position, breathing deeply. Move to cat-cow stretches on hands and knees for 2 minutes. Hold a child’s pose (or modified version with knees wide) for 1 minute. Do standing forward folds for 2 minutes. Hold warrior II on each side for 1 minute. Seated spinal twists for 2 minutes per side. Reclined figure-four stretch for 2 minutes per side. Finish with 2 minutes of lying flat in savasana (complete relaxation). This workout is perfect for rest days or evenings when you want to wind down.

    Workout 12 – The Foam-Free Myofascial Release

    Workout 12 - The Foam-Free Myofascial Release

    You do not need a foam roller to release tight muscles. Using a tennis ball or even a rolled-up towel, you can target tight spots effectively. Spend 2 minutes rolling each foot on a tennis ball. Then sit on the floor and roll the ball under each thigh for 2 minutes per side. Lie on the ball to target your upper back for 2 minutes per side. Stand against a wall with the ball between you and the wall to target your shoulders for 2 minutes per side. Finish with 2 minutes of gentle full-body stretching. This workout relieves muscle tension and improves mobility without any impact.

    Workout 13 – The Mobility Reset

    Workout 13 - The Mobility Reset

    Mobility is different from flexibility – it is about moving your joints through their full range of motion with control. Start with neck circles (1 minute), shoulder rolls (1 minute), arm circles getting progressively larger (2 minutes), torso circles (2 minutes), hip circles (2 minutes per direction), ankle circles (1 minute per foot), knee circles (1 minute), wrist circles (1 minute), and full-body reach and bend (3 minutes). Repeat any movements that feel particularly good. This is an incredible routine for people who sit at a desk all day.

    Plus-size woman doing a gentle seated stretch in her calm, cozy bedroom

    Workout 14 – The Balance Builder

    Workout 14 - The Balance Builder

    Balance tends to decline if we do not actively work on it, and improving your balance has huge benefits for everyday life. Start by standing on one foot for 30 seconds per side (hold a chair for support if needed). Then do heel-to-toe walking forward and backward for 2 minutes. Standing leg swings (hold a wall) for 1 minute per leg. Single-leg calf raises for 10 per leg. Side leg lifts with a 3-second hold at the top for 10 per leg. Standing knee lifts with a pause at the top for 10 per leg. Finish with tree pose (or modified tree with your toe on the floor) for 1 minute per side. Repeat the circuit to fill 20 minutes.

    Workout 15 – The Breathwork and Movement Flow

    Workout 15 - The Breathwork and Movement Flow

    This workout connects breath with movement for a deeply calming experience. Stand comfortably. Inhale and raise your arms overhead, exhale and lower them. Do this for 2 minutes. Inhale and reach right, exhale center. Inhale reach left, exhale center. Do this for 2 minutes. Inhale and gently arch your back, exhale and round forward. Do this for 2 minutes. Continue creating slow, breath-led movements for 20 minutes total – gentle twists, side bends, forward folds, and standing backbends. The pace should be slow enough that your breathing stays calm and deep throughout. This is movement as meditation, and it is profoundly restorative.

    How to Build a Weekly Schedule With These Workouts

    How to Build a Weekly Schedule With These Workouts

    With 15 workouts to choose from, you have more than enough variety to keep things interesting all month. Here is a sample weekly schedule that balances cardio, strength, and recovery.

    Sample Week

    Sample Week

    Monday – Workout 1 (Morning Wake-Up Call). Tuesday – Workout 6 (Upper Body). Wednesday – Workout 11 (Gentle Yoga Flow). Thursday – Workout 3 (Low-Impact Cardio). Friday – Workout 7 (Lower Body). Saturday – Workout 2 (Dance Party). Sunday – Workout 13 (Mobility Reset) or rest day.

    This gives you a mix of cardio, strength, and flexibility work throughout the week with built-in variety so you never get bored. Feel free to swap workouts around based on your energy and mood – the important thing is consistency, not rigid adherence to a specific schedule.

    For added comfort during floor exercises, a pair of exercise knee pads protects your knees during lunges, planks, and any kneeling positions. They are inexpensive and make a big difference in comfort.

    Progressing Over Time

    Progressing Over Time

    After a few weeks, you will notice the workouts getting easier. When that happens, you have options – add more repetitions, reduce rest time between exercises, combine two workouts into a longer session, or increase the intensity by moving faster or holding positions longer. The beauty of bodyweight exercise is that progression is built right in. You are never stuck at one level unless you choose to be.

    Making Your Home Workout Space Work for You

    Making Your Home Workout Space Work for You

    You do not need a home gym or even a dedicated room to work out at home. You need roughly the space of a yoga mat – about 6 feet by 3 feet – and a clear path to move around in. Here are some tips for making any space workout-friendly.

    Push furniture aside temporarily. A couch against the wall and a coffee table moved to the corner creates plenty of room in most living spaces. Use a sturdy chair, couch, or counter for support exercises like dips, incline push-ups, and balance work. Make sure the floor surface is not slippery – if you have hardwood floors, a non-slip exercise mat prevents sliding during standing exercises.

    Keep your workout “gear” (water bottle, towel, mat, sneakers) in one place so you do not have to hunt for them when it is time to exercise. The fewer barriers between you and your workout, the more likely you are to actually do it. Some people find that laying out their workout clothes the night before creates a visual cue that helps them follow through in the morning.

    Consider making your workout space feel good. A candle, a favorite playlist, or even just opening the curtains for natural light can transform a mundane exercise session into something you genuinely look forward to. This is your time, in your space, on your terms. Make it feel like a treat, not a chore.

    Key Takeaways

    • Twenty minutes of focused exercise is scientifically proven to improve cardiovascular health, mood, sleep, and energy levels – you do not need an hour to make a difference.
    • All 15 workouts require zero equipment and can be done in any small space at home, eliminating virtually every barrier to exercise.
    • Workouts 1 through 5 focus on cardio and energy, 6 through 10 build strength, and 11 through 15 improve flexibility and recovery.
    • A balanced weekly schedule mixing all three types gives you well-rounded fitness without monotony.
    • Every exercise can be modified to match your current fitness level – the goal is consistency, not perfection.
    • Making your workout space inviting and keeping your gear accessible removes friction and helps you build a lasting habit.

    Frequently Asked Questions

    Can I really get fit with just 20 minutes a day?

    Yes. Research consistently shows that 20 minutes of moderate-intensity exercise provides significant health benefits including improved cardiovascular health, better mood, increased energy, and reduced disease risk. The key is consistency – 20 minutes done regularly is far more effective than an hour done sporadically. Many people who start with 20 minutes find themselves naturally extending their workouts over time, but even if you stick to 20 minutes indefinitely, you are doing your body a tremendous amount of good.

    What if I cannot do some of the exercises?

    What if I cannot do some of the exercises?

    Skip them and substitute something you can do. If you cannot get on the floor, do standing exercises instead. If jumping is not comfortable, march or step instead. If an exercise causes pain, move on to the next one. There is no rule that says you must do every exercise in a workout for it to be effective. Doing six out of eight exercises is still a great workout. The goal is to move your body in ways that feel challenging but not painful.

    Do I need to warm up before these workouts?

    Most of these workouts have warm-ups built into their structure, starting with easier movements and building in intensity. For the strength workouts, 2 to 3 minutes of marching in place or gentle arm swings before starting is sufficient. For the flexibility and recovery workouts, the gentle nature of the movements means a separate warm-up is not necessary. Always listen to your body – if you feel stiff, take an extra minute or two to loosen up before diving in.

    How many days per week should I do these workouts?

    How many days per week should I do these workouts?

    Aim for three to five days per week, with at least one or two rest or recovery days. Your body needs time to repair and adapt, especially when you are starting a new routine. A good approach is to alternate between cardio, strength, and flexibility workouts so you are not working the same muscle groups on consecutive days. As your fitness improves, you can increase frequency, but even three sessions per week will produce noticeable benefits.

  • 10 Low Impact Workouts Perfect for Curvy Women Who Hate the Gym

    10 Low Impact Workouts Perfect for Curvy Women Who Hate the Gym

    Why the Gym Is Not the Only Path to Fitness

    Why the Gym Is Not the Only Path to Fitness

    If you are a curvy woman who hates the gym, you are not lazy, unmotivated, or making excuses. You are simply someone who has not found the right form of movement yet. The fitness industry has spent decades telling everyone that real exercise happens inside a gym, surrounded by mirrors, machines, and judgment. That message has kept millions of women from discovering forms of movement that they would actually enjoy and sustain.

    Low impact workouts are perfect for curvy women for several important reasons. They are easier on your joints, which matters when your body carries more weight. They reduce the risk of injury that comes with high-impact movements like jumping and running. They can be done at home, outdoors, or in community spaces that feel more welcoming than a traditional gym. And they are effective – research consistently shows that low impact exercise produces significant improvements in cardiovascular health, strength, flexibility, and weight management when done consistently.

    The key word there is consistently. The best workout in the world does nothing if you hate it so much that you stop doing it after two weeks. Finding a form of movement you genuinely enjoy is not a luxury – it is the single most important factor in long-term fitness success. A woman who happily swims three times a week for years will always be healthier and stronger than a woman who suffers through intense gym sessions for a month before quitting.

    This guide covers 10 low impact workouts that are accessible, effective, and genuinely enjoyable for plus-size women. Each section explains what the workout is, why it works for curvy bodies, what you need to get started, and how to modify it for your comfort level. At least one of these is going to make you think – I could actually do that. And that thought is where everything changes.

    Collage of diverse plus-size women enjoying swimming, dancing, biking, hiking, and resistance band exercises

    Swimming and Water Aerobics

    Swimming and Water Aerobics

    Why It Works for Curvy Bodies

    Water is the great equalizer. The moment you step into a pool, the buoyancy of the water supports up to 90 percent of your body weight, instantly reducing stress on your joints, back, and feet. Movements that feel heavy and difficult on land feel weightless and fluid in water. At the same time, water provides 12 times more resistance than air, meaning every movement builds strength and burns calories without the pounding impact of land-based exercise.

    For plus-size women specifically, water exercise eliminates most of the physical barriers that make other forms of exercise uncomfortable. Knee pain, foot pain, back strain, overheating, and excessive sweating are all dramatically reduced or eliminated in the water. You can move through a full range of motion without gravity working against you, which means you can exercise longer, more comfortably, and with better form than you might on land.

    What to Try

    Lap swimming is a full-body cardiovascular workout that builds endurance and strength simultaneously. If you do not know how to swim or are not comfortable with your swimming ability, water aerobics classes provide structured workouts in shallow water where you can always touch the bottom. Many community pools and recreation centers offer plus-size-friendly water aerobics classes. Water walking – simply walking back and forth in chest-deep water – is another excellent option that requires no swimming skill and burns roughly 500 calories per hour for a 200-pound woman.

    What You Need

    A swimsuit you feel comfortable in is the most important piece of equipment. The plus-size athletic swim sets on Amazon offer full coverage with a sporty look that feels more like workout wear than a bathing suit, which many women prefer for pool workouts. Swim leggings paired with a rash guard top are another option that provides full coverage and UV protection. Water shoes protect your feet on pool decks and in outdoor swimming areas. Goggles are helpful if you plan to swim laps.

    Getting Started

    Call your local community pool or recreation center and ask about water aerobics classes, open swim hours, and any size-inclusive programs. Many pools offer reduced rates, punch cards, or monthly passes that make regular swimming affordable. If you are self-conscious about being in a swimsuit around others, look for early morning or late evening open swim times when pools tend to be less crowded, or seek out facilities with private or semi-private pool areas.

    Dance Workouts

    Dance Workouts

    Why It Works for Curvy Bodies

    Dancing is exercise disguised as fun. When you are following choreography, vibing to a beat, or just freestyle moving to your favorite playlist, your brain is focused on the music and the movement – not on calories, reps, or how much longer you have to endure. This mental shift is powerful because it means you exercise longer and more intensely than you would if you were counting down the minutes on a treadmill.

    Dance workouts also celebrate curves rather than trying to minimize them. Hip rolls, body waves, shimmies, and sways are movements that look and feel incredible on curvy bodies. Many plus-size women discover a new relationship with their bodies through dance – one based on what their body can do and how good it feels to move, rather than how it looks in a mirror.

    What to Try

    Zumba is the most popular dance fitness format and is available as in-person classes and online videos. Many instructors offer low-impact modifications for every move. Body Groove is a dance workout platform created specifically to be size-inclusive, with instructors of all sizes and an emphasis on moving in whatever way feels good to your body. YouTube has thousands of free plus-size dance workout videos ranging from 10-minute quickies to 60-minute full sessions. Belly dancing, salsa, line dancing, and even pole fitness are all forms of dance that build strength, flexibility, and cardiovascular fitness while being genuinely enjoyable.

    What You Need

    Supportive shoes with good lateral (side-to-side) support – cross-trainers work well. Comfortable clothing that lets you move freely without riding up or falling down. A clear space of about six feet by six feet in your home if you are following online videos. That is it. Dance workouts have the lowest barrier to entry of almost any form of exercise.

    Getting Started

    Search YouTube for “plus-size dance workout beginner” and try a few different styles and instructors until you find one that clicks. The Nike Renew In-Season TR cross-trainers are available in wide widths and provide the lateral support you need for dance movements without being heavy or stiff. Start with 15 to 20-minute videos and work up to longer sessions as your endurance builds.

    Joyful plus-size woman dancing in her living room following an online dance workout

    Resistance Band Training

    Resistance Band Training

    Why It Works for Curvy Bodies

    Resistance bands provide progressive strength training without the intimidation factor of a weight room full of barbells and machines you do not know how to use. They are lightweight, portable, inexpensive, and infinitely adjustable – you control the resistance by choosing a lighter or heavier band or by adjusting how much slack you leave in the band. This makes them perfect for beginners and experienced exercisers alike.

    For plus-size women, resistance bands offer several unique advantages. They allow you to build strength in a controlled range of motion, which reduces the risk of injury. They do not require getting down on the floor for most exercises, which can be challenging for larger bodies. They work every muscle group including areas that are particularly important for curvy women – the core, glutes, back, and shoulders. And they provide constant tension throughout the movement, which builds lean muscle more effectively than body weight alone.

    What to Try

    A full-body resistance band workout can be done in 20 to 30 minutes and hits every major muscle group. Key exercises include band squats (stand on the band with feet hip-width apart, hold the handles at shoulder height, and squat), seated rows (sit on the floor with legs extended, loop the band around your feet, and pull the handles toward your ribs), overhead presses (stand on the band and press the handles overhead), lateral walks (place a loop band around your ankles and step side to side), and bicep curls (stand on the band and curl the handles toward your shoulders).

    What You Need

    A set of resistance bands with multiple resistance levels gives you the most versatility. The resistance band sets with door anchors on Amazon come with five to seven bands of increasing resistance, handles, ankle straps, and a door anchor that expands your exercise options dramatically. Look for sets that include bands rated up to at least 50 pounds of resistance, as lighter bands will feel too easy for lower-body exercises very quickly.

    Getting Started

    Start with the lightest band in your set and focus on learning proper form for each exercise before adding resistance. Two to three resistance band sessions per week, with at least one rest day between sessions, is enough to build noticeable strength within a month. YouTube has excellent free resistance band workout videos specifically designed for plus-size bodies and beginners.

    Cycling and Stationary Biking

    Cycling and Stationary Biking

    Why It Works for Curvy Bodies

    Cycling removes your body weight from the equation almost entirely. The bike seat supports you, so your knees, ankles, and feet experience minimal impact. This makes cycling accessible for plus-size women who find walking or running painful due to joint issues. It is also an excellent cardiovascular workout – a moderate cycling session burns 400 to 600 calories per hour depending on your weight and intensity.

    Stationary bikes are especially appealing because they are private, weather-proof, and allow you to exercise while watching TV, listening to podcasts, or scrolling your phone. There is no balance requirement, no traffic to navigate, and no one watching you. For women who feel self-conscious exercising in public, a stationary bike at home removes that barrier entirely.

    What to Try

    A stationary recumbent bike (the kind with a backrest and the pedals in front of you rather than below you) is often the most comfortable option for plus-size women because it supports your back, has a wider seat, and puts less pressure on your wrists and shoulders. Upright stationary bikes work well too but may require a wider, more cushioned seat replacement. Outdoor cycling on a comfort or cruiser-style bike is wonderful exercise and doubles as transportation and exploration.

    What You Need

    For home use, a stationary recumbent bike with a high weight capacity (300 pounds or more) and an adjustable seat is the best investment. Padded cycling shorts or a gel seat cover dramatically improves comfort for longer rides. For outdoor cycling, a comfort bike with a step-through frame (no high bar to swing your leg over), wide tires for stability, and an upright riding position is ideal for plus-size riders. Make sure any bike you purchase has a weight capacity that accommodates you comfortably.

    Getting Started

    Begin with 15 to 20 minutes of cycling at a comfortable resistance level and gradually increase both duration and resistance over time. If using a stationary bike, start with minimal resistance and increase it as your leg strength builds. If cycling outdoors, start on flat terrain and add hills gradually. Aim for three cycling sessions per week to build cardiovascular fitness and leg strength.

    Hiking and Nature Walks

    Hiking and Nature Walks

    Why It Works for Curvy Bodies

    Hiking combines physical exercise with mental health benefits that no gym can replicate. Research published in the Proceedings of the National Academy of Sciences found that people who walked in nature for 90 minutes showed decreased activity in the brain region associated with depression compared to those who walked in urban settings. For plus-size women who may carry stress, anxiety, or negative body image, the mental health benefits of hiking are as valuable as the physical ones.

    Hiking also burns significantly more calories than flat walking because of uneven terrain, inclines, and the engagement of stabilizing muscles that flat surfaces do not require. A 200-pound woman hiking moderate terrain burns approximately 450 to 550 calories per hour – comparable to many high-intensity gym workouts but with fresh air, beautiful scenery, and birdsong instead of fluorescent lights and thumping music.

    What to Try

    Start with easy, well-maintained trails that are rated as beginner-friendly. National parks, state parks, and local nature preserves typically have trail maps that rate difficulty. Look for trails under two miles with minimal elevation gain for your first few hikes. As your fitness improves, gradually tackle longer trails with more elevation. Hiking with a friend or group adds a social element and provides safety on more remote trails.

    What You Need

    Sturdy hiking shoes or boots with ankle support and good traction are essential. The Columbia Newton Ridge Plus hiking boots come in wide widths and offer waterproof protection with excellent ankle support at a reasonable price. A daypack with water, snacks, sunscreen, and a basic first aid kit rounds out your essentials. Trekking poles are extremely helpful for plus-size hikers because they reduce knee strain on descents by up to 25 percent and provide stability on uneven terrain.

    Getting Started

    Search AllTrails or a similar app for beginner trails within 30 minutes of your home. Start with one hike per week on a weekend morning when trails are less crowded and temperatures are cooler. Bring more water than you think you need – a general rule is a half liter per hour of hiking, more in heat. Tell someone where you are going and when you expect to be back, even on easy trails.

    Plus-size woman hiking on a sunlit forest trail with daypack looking peaceful and strong

    Pilates

    Pilates

    Why It Works for Curvy Bodies

    Pilates builds core strength, improves posture, increases flexibility, and tones muscles through controlled, precise movements. Unlike many forms of exercise that rely on speed or impact, Pilates emphasizes slow, intentional movement with proper alignment. This makes it accessible for people of all fitness levels and sizes because you can always modify the speed, range, and intensity of each movement.

    For plus-size women, Pilates is particularly valuable because it strengthens the deep core muscles that support your back and improve your posture. Strong core muscles reduce back pain (which is common in larger bodies), improve balance, and create a visible difference in how you carry yourself. Many plus-size women report that Pilates gives them a feeling of being “held together” – a sense of core engagement and postural alignment that carries into everyday life.

    What to Try

    What to Try

    Mat Pilates requires only a mat and your body weight and can be done at home following online videos. Reformer Pilates uses a sliding bed with springs for resistance and is typically done in a studio setting. Both are effective, but mat Pilates is more accessible for beginners and requires no investment beyond a mat. Many Pilates exercises can be modified for larger bodies by adjusting the range of motion, using props for support, or performing exercises in a seated or standing position rather than lying on the floor.

    What You Need

    What You Need

    A thick exercise mat (at least 10mm for cushioning), a Pilates ring for added resistance, and a small inflatable ball for core exercises. If you find getting up and down from the floor difficult, many Pilates exercises can be done standing or seated in a chair. Search YouTube for “standing Pilates” or “chair Pilates” for routines that avoid floor work entirely.

    Getting Started

    Start with beginner mat Pilates videos that focus on fundamentals – breathing, core engagement, and basic movement patterns. Sessions of 20 to 30 minutes, three times per week, are enough to feel significant improvements in core strength and posture within four to six weeks. If you try a studio class, look for one that specifically welcomes beginners and has instructors experienced in modifying for different body sizes.

    Rowing

    Rowing

    Why It Works for Curvy Bodies

    Rowing is one of the most efficient full-body exercises available. A single rowing stroke engages 86 percent of your muscles – legs, core, back, arms, and shoulders all work together in a smooth, continuous motion. It is completely non-impact (no pounding on joints), and the sliding seat means your body weight is always supported. For plus-size women, rowing provides an intense cardiovascular workout without the joint stress that makes many cardio exercises uncomfortable.

    Rowing also burns a remarkable number of calories. A 200-pound woman rowing at a moderate intensity burns approximately 500 to 600 calories per hour. Even short 15 to 20-minute rowing sessions burn significant calories and build both strength and endurance simultaneously, making it one of the most time-efficient workouts available.

    What to Try

    What to Try

    A rowing machine (also called an ergometer or erg) at home or in a gym is the most accessible way to start rowing. Water rowing machines provide the most natural feel and a soothing sound, while air resistance machines are popular in gyms and fitness studios. If you have access to a river or lake, on-water rowing through a community rowing club is an extraordinary experience, though it typically requires some instruction to learn proper technique.

    What You Need

    What You Need

    If purchasing a home rowing machine, look for one with a weight capacity of at least 300 pounds, a comfortable and adjustable seat, and a smooth, quiet operation. The seat rail length matters for taller rowers. Rowing requires no special clothing beyond comfortable, moisture-wicking workout wear and supportive shoes or grippy socks.

    Getting Started

    Proper rowing form is essential to prevent back strain. The sequence is legs-back-arms on the pull and arms-back-legs on the return. Many beginners make the mistake of pulling with their arms first, which puts excessive strain on the back and shoulders. Watch a proper rowing form video before your first session. Start with 10-minute sessions and increase by two to three minutes per week. Aim for a steady, rhythmic pace rather than pulling as hard and fast as possible.

    Tai Chi

    Tai Chi

    Why It Works for Curvy Bodies

    Tai chi is a centuries-old Chinese martial art that involves slow, flowing movements performed in a continuous sequence. It looks like meditation in motion, and that is essentially what it is. Tai chi improves balance, flexibility, coordination, and lower body strength through gentle, weight-bearing movements that never involve jumping, pounding, or sudden impacts.

    For plus-size women, tai chi offers benefits that go far beyond physical fitness. Research published in the British Journal of Sports Medicine found that tai chi reduces stress, anxiety, and depression as effectively as conventional exercise. It also significantly improves balance and reduces fall risk, which is important for larger-bodied individuals who may feel unsteady during other forms of exercise. And because tai chi is performed standing with slow, controlled movements, it is accessible regardless of your current fitness level.

    What to Try

    What to Try

    Yang-style tai chi is the most common and the most beginner-friendly form. It features large, slow, graceful movements that are easy to learn and gentle on the body. A basic Yang-style form contains 24 movements that flow together in a sequence that takes about six to eight minutes to perform once learned. Most beginners take four to eight weeks to learn the full basic form, and the learning process itself is the exercise – you do not need to master the form before you benefit from practicing it.

    What You Need

    What You Need

    Flat, comfortable shoes with flexible soles (or bare feet on a soft surface), loose comfortable clothing, and enough space to take two steps in any direction. That is genuinely all you need. Tai chi has the lowest equipment requirement of any exercise form. Classes are available at community centers, parks (many offer free outdoor tai chi), YMCAs, and online through YouTube and dedicated tai chi apps.

    Getting Started

    Search YouTube for “tai chi for beginners” and try a 15 to 20-minute introductory session. Focus on following the movements without worrying about perfection. Tai chi is a practice, not a performance. Many women find that the meditative quality of tai chi reduces their stress levels, improves their sleep, and gives them a sense of calm that carries through the rest of their day. Practice three to four times per week for best results.

    Rebounding (Mini Trampoline)

    Rebounding (Mini Trampoline)

    Why It Works for Curvy Bodies

    A mini trampoline, also called a rebounder, absorbs up to 80 percent of the impact from each bounce, making it dramatically gentler on your joints than jumping on a hard surface. Despite being low impact, rebounding is surprisingly effective for cardiovascular fitness and calorie burn. NASA research found that rebounding is 68 percent more efficient than running at the same effort level, meaning you get more workout in less time with less stress on your body.

    Rebounding also stimulates the lymphatic system, which helps reduce swelling and water retention – a common concern for plus-size women. The gentle bouncing motion moves lymphatic fluid through your body more effectively than almost any other form of exercise. Many women notice reduced bloating and improved skin appearance within weeks of starting a regular rebounding practice.

    What to Try

    What to Try

    A basic rebounding workout involves bouncing gently on the trampoline (your feet can stay on the mat – you do not need to jump high), marching in place, doing side-to-side steps, and adding arm movements for a full-body workout. As you get comfortable, you can add higher bounces, twists, and dance-style movements. YouTube has hundreds of free rebounding workout videos from 10 to 45 minutes in length.

    What You Need

    What You Need

    A rebounder with a high weight capacity is essential. Look for models rated for at least 300 pounds with a stability bar (a handlebar attached to the trampoline that you can hold for balance). The stability bar is particularly important for plus-size beginners because it provides confidence and safety while you develop your balance. Budget models start around 60 to 80 dollars, while higher-quality rebounders with better springs and higher weight capacities cost 150 to 300 dollars.

    Getting Started

    Start by simply standing on the rebounder and doing gentle bounces where your feet barely leave the mat. Get comfortable with the balance and the sensation before adding any other movements. Use the stability bar at first and gradually use it less as your balance improves. Start with 10-minute sessions and build to 20 to 30 minutes over a few weeks. Rebounding in front of the TV makes the time fly and turns screen time into active time.

    Plus-size woman bouncing on mini trampoline with stability bar in bright home workout space

    Seated and Chair Workouts

    Seated and Chair Workouts

    Why It Works for Curvy Bodies

    Chair workouts eliminate the biggest physical barriers to exercise for many plus-size women – getting down to and up from the floor, standing for extended periods, and balancing during movements. A sturdy chair provides support, stability, and a fixed point of reference that makes exercise accessible regardless of mobility limitations, joint issues, or fitness level.

    Do not mistake accessible for easy. A well-designed chair workout can elevate your heart rate, build significant strength, and burn meaningful calories. Seated exercises engage your core, arms, shoulders, and upper back effectively, and many leg exercises can be performed from a seated position as well. Chair workouts are also excellent for office workers who want to incorporate movement into their workday without changing clothes or leaving their desk.

    What to Try

    What to Try

    A complete chair workout includes seated marches (lift alternating knees toward your chest), seated jacks (open and close your arms and legs simultaneously), chair squats (stand up from the chair and sit back down with control), seated leg extensions (straighten one leg at a time from a seated position), chair push-ups (place hands on the armrests or seat and push your body up), and seated twists (rotate your torso side to side while engaging your core). A 20 to 30-minute chair workout combining these movements with 30-second rest periods between exercises provides a solid full-body workout.

    What You Need

    What You Need

    A sturdy chair without wheels, arms optional. The chair should not move when you push against it or shift your weight. A standard dining chair or folding chair works perfectly. Add a set of light dumbbells (3 to 8 pounds) or a resistance band to increase the challenge for upper body exercises. The neoprene dumbbell sets with rack on Amazon come in multiple weight options and have a comfortable, non-slip grip.

    Getting Started

    YouTube has an extensive library of free chair workout videos for every fitness level. Search “chair workout for beginners” or “seated workout plus size” for options tailored to larger bodies. Start with 15-minute sessions and build to 30 minutes as your strength and endurance improve. Chair workouts can be done daily since they tend to be lower intensity, or you can alternate them with other forms of exercise on your weekly schedule.

    How to Build a Routine Without the Gym

    How to Build a Routine Without the Gym

    Choose Two to Three Activities

    Choose Two to Three Activities

    You do not need to do all ten of these workouts. Pick two to three that genuinely appeal to you – not the ones you think you should do, but the ones that make you think “that sounds fun” or “I could try that.” Variety prevents boredom and works different muscle groups, but too many options creates decision fatigue that leads to doing nothing. Two to three activities that you rotate throughout the week is the sweet spot.

    Set a Realistic Weekly Schedule

    Set a Realistic Weekly Schedule

    Three to four workout sessions per week is enough to see significant improvements in cardiovascular fitness, strength, and body composition. If you are starting from zero, begin with three 20-minute sessions per week and gradually increase the frequency or duration as your fitness improves. A sample beginner week might look like this: Monday – 20-minute dance workout, Wednesday – 25-minute resistance band session, Saturday – 30-minute nature walk. Rest days in between allow recovery and prevent burnout.

    Create a Dedicated Space

    Create a Dedicated Space

    Having a specific spot in your home where you exercise makes the habit easier to maintain. It does not need to be a full home gym. A clear area of about six feet by six feet in your living room, bedroom, or garage is enough for most of these workouts. Keep your equipment – bands, mat, weights, water bottle – in or near this space so everything is ready when you are. Removing setup friction is one of the most effective strategies for maintaining an exercise habit.

    Track Progress Beyond the Scale

    Track Progress Beyond the Scale

    The scale is one measure of progress, but it is not the most important one and it is often the most misleading. Track your progress by recording how long you can exercise before needing a break, how many reps or sets you can complete, how your clothes fit, how your energy levels feel throughout the day, how well you sleep, how your mood and stress levels compare to before you started, and any physical milestones like walking farther, lifting more, or touching your toes for the first time. These non-scale victories are more meaningful and more motivating than any number on a scale.

    Invest in Good Gear Gradually

    You do not need to buy everything at once. Start with whatever you have. As you discover which activities you enjoy most, invest in quality gear for those specific activities. Good shoes are worth the investment for any activity that involves your feet. A quality pair of plus-size leggings from Girlfriend Collective that stay in place during any workout is a worthwhile purchase. The All in Motion sports bras at Target provide excellent support at a price that allows you to buy multiples for frequent washing.

    Be Patient and Kind to Yourself

    Be Patient and Kind to Yourself

    Fitness is a lifelong practice, not a 30-day transformation. Some weeks you will exercise four times and feel amazing. Other weeks, life will intervene and you will manage once. Neither week defines you. What matters is that you keep coming back. The woman who exercises inconsistently for years is infinitely healthier than the woman who never starts. Give yourself grace, celebrate your effort, and remember that every single time you move your body – regardless of how long, how hard, or how “perfectly” – you are doing something powerful for your health and your life.

    Organized home workout corner with mat, resistance bands, dumbbells, and water bottle

    Key Takeaways

    • The gym is not the only path to fitness – low impact workouts performed at home, outdoors, or in community spaces are just as effective for weight loss, strength building, and cardiovascular health.
    • Swimming and water aerobics eliminate up to 90 percent of your body weight from the equation, making them ideal for plus-size women with joint concerns.
    • Dance workouts disguise exercise as fun, and movements like hip rolls and body waves celebrate curvy bodies rather than trying to minimize them.
    • Resistance bands provide progressive strength training without gym intimidation, and most exercises can be done standing without getting on the floor.
    • The best workout is the one you enjoy enough to do consistently – finding a form of movement you genuinely like is the most important factor in long-term fitness success.
    • Pick two to three activities you enjoy, schedule three to four sessions per week, and track progress beyond the scale using energy levels, endurance, strength, and how your clothes fit.
    • Start where you are with what you have, invest in quality gear gradually as you discover your preferences, and give yourself grace on the weeks when life gets in the way.

    Frequently Asked Questions

    Are low impact workouts effective enough for weight loss?

    Are low impact workouts effective enough for weight loss?

    Absolutely. Low impact does not mean low calorie burn. Swimming burns 400 to 700 calories per hour depending on intensity. Cycling burns 400 to 600 calories per hour. Even gentle activities like tai chi burn 200 to 300 calories per hour while building strength and flexibility. The key factor in weight loss is consistency over time, and low impact workouts are easier to sustain long-term because they do not cause the pain, injury, and burnout that drive people away from high-impact exercise. A study published in Obesity Reviews found that exercise adherence – not exercise intensity – was the strongest predictor of long-term weight loss success. Low impact workouts you do consistently will always outperform high-intensity workouts you quit after a month.

    How many times per week should I work out?

    How many times per week should I work out?

    For general health and weight management, aim for three to five sessions per week, each lasting 20 to 45 minutes. The American Heart Association recommends 150 minutes of moderate-intensity activity per week, which works out to about 30 minutes five days a week or 50 minutes three days a week. If you are just starting, three 20-minute sessions per week is a perfect beginning point. Increase gradually as your fitness improves. Rest days between workout days are important for recovery, especially when you are building new fitness habits. Doing too much too quickly leads to burnout and injury, which defeats the purpose entirely.

    What if I have mobility issues or chronic pain?

    What if I have mobility issues or chronic pain?

    Several workouts on this list are specifically well-suited for people with mobility limitations. Chair workouts can be done entirely from a seated position. Swimming and water aerobics support your body weight and reduce joint stress to near zero. Tai chi involves slow, controlled movements that can be modified for limited range of motion. Resistance band exercises can be done seated and adjusted to any strength level. Always consult your doctor or physical therapist before starting a new exercise program if you have chronic pain or mobility issues. They can help you identify which activities are safest for your specific condition and suggest modifications that keep you comfortable while building strength.

    Do I need to buy expensive equipment?

    No. Many of these workouts require little to no equipment. Dance workouts need only a clear space and music. Tai chi needs nothing but comfortable clothes. Hiking requires only appropriate shoes. Walking costs nothing. A set of resistance bands (under 30 dollars) and a yoga mat (under 25 dollars) open up dozens of workout options. The most important investment is a good pair of supportive shoes appropriate for your chosen activity – this is the one area where spending a bit more pays off in comfort, injury prevention, and workout enjoyment. Everything else can be acquired gradually as your practice evolves.

    How do I stay motivated when I am working out alone at home?

    Home workouts require different motivation strategies than gym workouts. Schedule your workouts on your calendar and treat them as non-negotiable appointments. Follow along with video instructors so you feel guided rather than alone. Join online fitness communities where plus-size women share their workout experiences and encourage each other. Track your progress in a journal or app and celebrate milestones. Create a workout playlist that energizes you. Set out your workout clothes the night before so there is less friction in the morning. Find an accountability partner – a friend, family member, or online buddy who checks in with you about your workouts. And on days when you truly do not want to exercise, commit to just five minutes. Most of the time, once you start moving, the resistance fades and you finish the full workout.