A desk chair usually fails slowly, then all at once. First it develops a lean, then the seat starts sinking a few inches every hour so you spend the afternoon pumping the lever, and then one day the whole thing drops or a caster snaps off the base while you are reaching for a pen. If that has happened to you more than once, the story you were probably told is that the chair was not made for a body like yours. The more useful version is that most office chairs are built to a price against a rating that assumes an average sitter, and the parts that give out are entirely predictable. Once you know which spec lines matter and which are marketing, buying a chair that lasts becomes a straightforward job.
What a weight rating actually promises
Every chair carries a capacity figure, and it is far less generous than it sounds. Most published ratings describe a static load, meaning a weight resting evenly on a seat that is not moving, tested for a defined period under laboratory conditions. Real sitting is dynamic: you drop into the seat, you push back, you lean, you swivel, you roll across a floor, and every one of those actions loads the cylinder and the base with more force than your body weight alone. Testing standards for commercial furniture cover cycles of that kind of use, but a rating on its own does not tell you which standard was applied or how long the chair is expected to survive at the top of its range. Treat the number as a ceiling, not a target.
Why you buy above your weight, not at it
The practical rule that saves most people a repeat purchase is to buy a chair rated meaningfully above your own weight rather than one that just clears it. Sitting at the very top of a chair’s range means every component spends its whole life at maximum stress, and the failure that follows is a lifespan problem rather than a dramatic one: the cylinder starts leaking, the seat foam flattens into a dish, the base flexes, the tilt mechanism develops play. Give yourself real headroom and the same components coast. This is also why a chair rated for a higher capacity often feels better from day one, since the extra rating is usually delivered through a thicker cylinder, a steel base, denser foam, and a heavier frame rather than through a sticker.
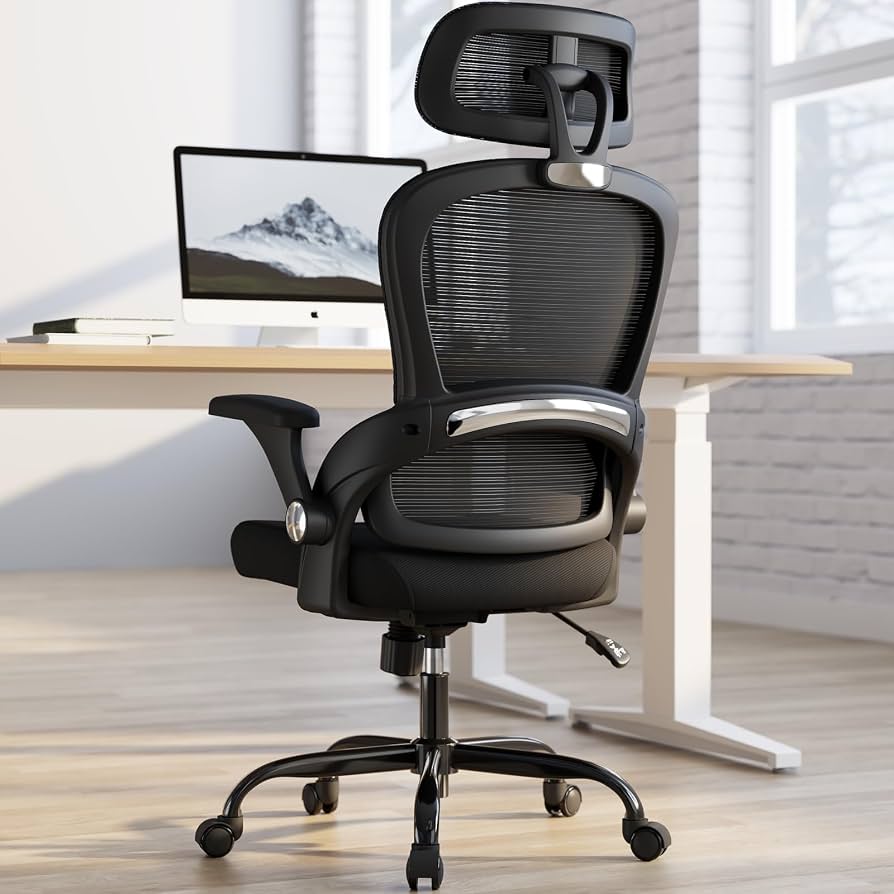
The unglamorous parts underneath are the ones that decide how long a chair lasts.
Seat width is a separate spec from capacity
A chair can be rated for a very high capacity and still be too narrow to sit in comfortably, because capacity is about load and width is about geometry. Manufacturers usually publish a seat width and sometimes a seat depth in the specification table, and those are the numbers to compare, not the marketing copy. Measure yourself sitting rather than standing: sit on a firm bench, measure across the widest point of your hips and thighs where they meet the seat, and look for a seat pan wider than that measurement with room to spare on both sides. Depth matters too, because a seat that is too deep forces you to perch forward and lose the backrest entirely, which is why a sliding seat depth adjustment is worth more than most premium features.
Arms are the hidden width limit
The specification says the seat is wide. The armrests say otherwise. Fixed arms mounted close to the seat pan narrow the usable width dramatically, and they are the single most common reason a chair that looked right online feels wrong in the room. There are three good answers. Width adjustable arms slide outward on a track and are the best option when you can find them. Removable arms let you take them off entirely, which many people prefer once they try it. Fully armless chairs, sometimes sold as task or drafting chairs, sidestep the problem completely and often cost less. Check whether arms are height adjustable as well, since arms that sit too high push your shoulders up and undo any good the seat is doing.
The gas cylinder is where chairs die
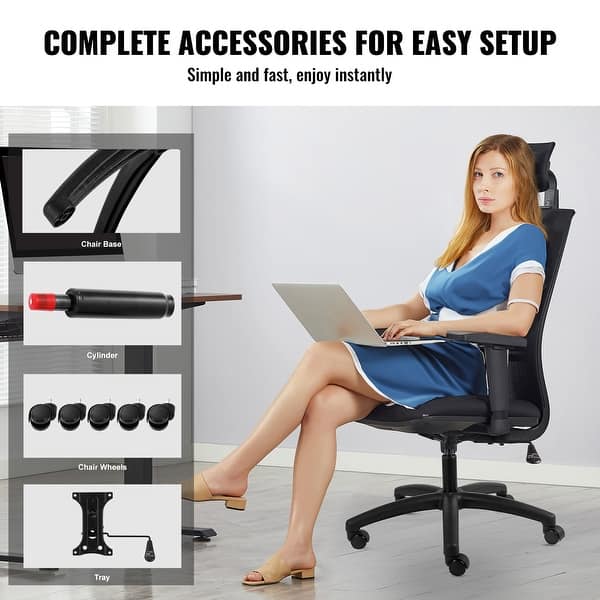
Ask anybody who repairs office furniture what fails first and the answer is almost always the pneumatic cylinder. It is the sealed gas strut in the column that lets the seat rise and fall, and when it wears it either sinks under load or refuses to hold height at all. Cylinders are graded by class, with the higher classes built for heavier loads and longer cycle life, and a chair sold for higher capacities should specify a heavy duty or high class cylinder rather than staying silent about it. The genuinely good news is that a cylinder is a replaceable part on most chairs and generally inexpensive, so a sinking seat is a repair rather than a write off. If a listing will not tell you the cylinder class, that silence is information.
Steel base, five points, and the parts nobody photographs
Underneath the seat, the base is the other component that separates a chair that survives from one that cracks. Nylon and reinforced plastic are standard on cheaper chairs, while steel and aluminium are what serious capacity ratings are built on. Look for five points and a wide footprint, since a wider spread resists tipping. Casters matter more than they look, and larger diameter wheels roll better under weight while stressing the base less.
Seat width and adjustable arms decide comfort long before the fabric choice does.
Big and tall chairs, explained honestly
Big and tall is a furniture category, not a compliment or an insult, and it is worth understanding on its own terms. It generally means a chair engineered for higher capacity and larger dimensions, which in practice tends to bring a steel base, a heavier duty cylinder, a wider and deeper seat, a taller backrest, and thicker foam. Some of the category is genuinely well built. Some of it is an ordinary chair with a higher number printed on the box and a bulkier appearance, particularly in the executive style with thick padded upholstery that flattens within a year. The useful test is to ignore the label and read the specification: base material, cylinder class, seat width, warranty terms. If a product is truly built for the job it will publish those numbers without being asked.
Warranty length is the real quality signal
Of every number attached to an office chair, the warranty tells you the most, because it is the manufacturer betting its own money on how long the chair will survive. Read what is actually covered rather than the headline figure. A chair may carry one term on the frame, a shorter one on mechanisms and the cylinder, and a shorter one again on foam and upholstery, and those component terms are the honest ones. Check whether the warranty is stated at your weight, since some are reduced or voided above a certain load or for use beyond a set number of hours per day. A long, plainly written warranty that covers the cylinder and the base at your capacity is a stronger buying signal than any material or ergonomic claim on the page.
Spec line
What to look for
Why it matters
Capacity rating
Comfortably above your weight, not just clearing it
Parts sitting at maximum load wear out fastest
Seat width
A published measurement wider than your seated hips
Capacity and width are separate specs
Armrests
Width adjustable, removable, or absent
Arms, not the seat pan, usually set the real width
Gas cylinder
A stated heavy duty or high class rating
The most common failure point, and replaceable
Base
Steel or aluminium, five points, wide footprint
Resists cracking and tipping under load
Warranty
Component terms, stated at your weight
The maker’s own bet on how long it lasts
Budget, mid range, and premium: what more money buys
Prices move constantly, so think in tiers rather than figures. At the budget end you get plastic bases, standard cylinders, thin foam, and fixed arms, and a chair here can work for light use if the rating has real headroom, though it is a chair you expect to replace. The mid tier is where most people should shop: steel base, upgraded cylinder, adjustable or removable arms, adjustable lumbar, and a warranty measured in years rather than months. Premium buys durability and adjustability rather than luxury, meaning long component warranties, replaceable parts sold individually, and mechanisms that hold their settings for a decade. A well specified heavy duty office chair with a steel base from the middle tier outlasts two cheap ones and usually costs less across the same years.
Home setups that skip the office chair entirely
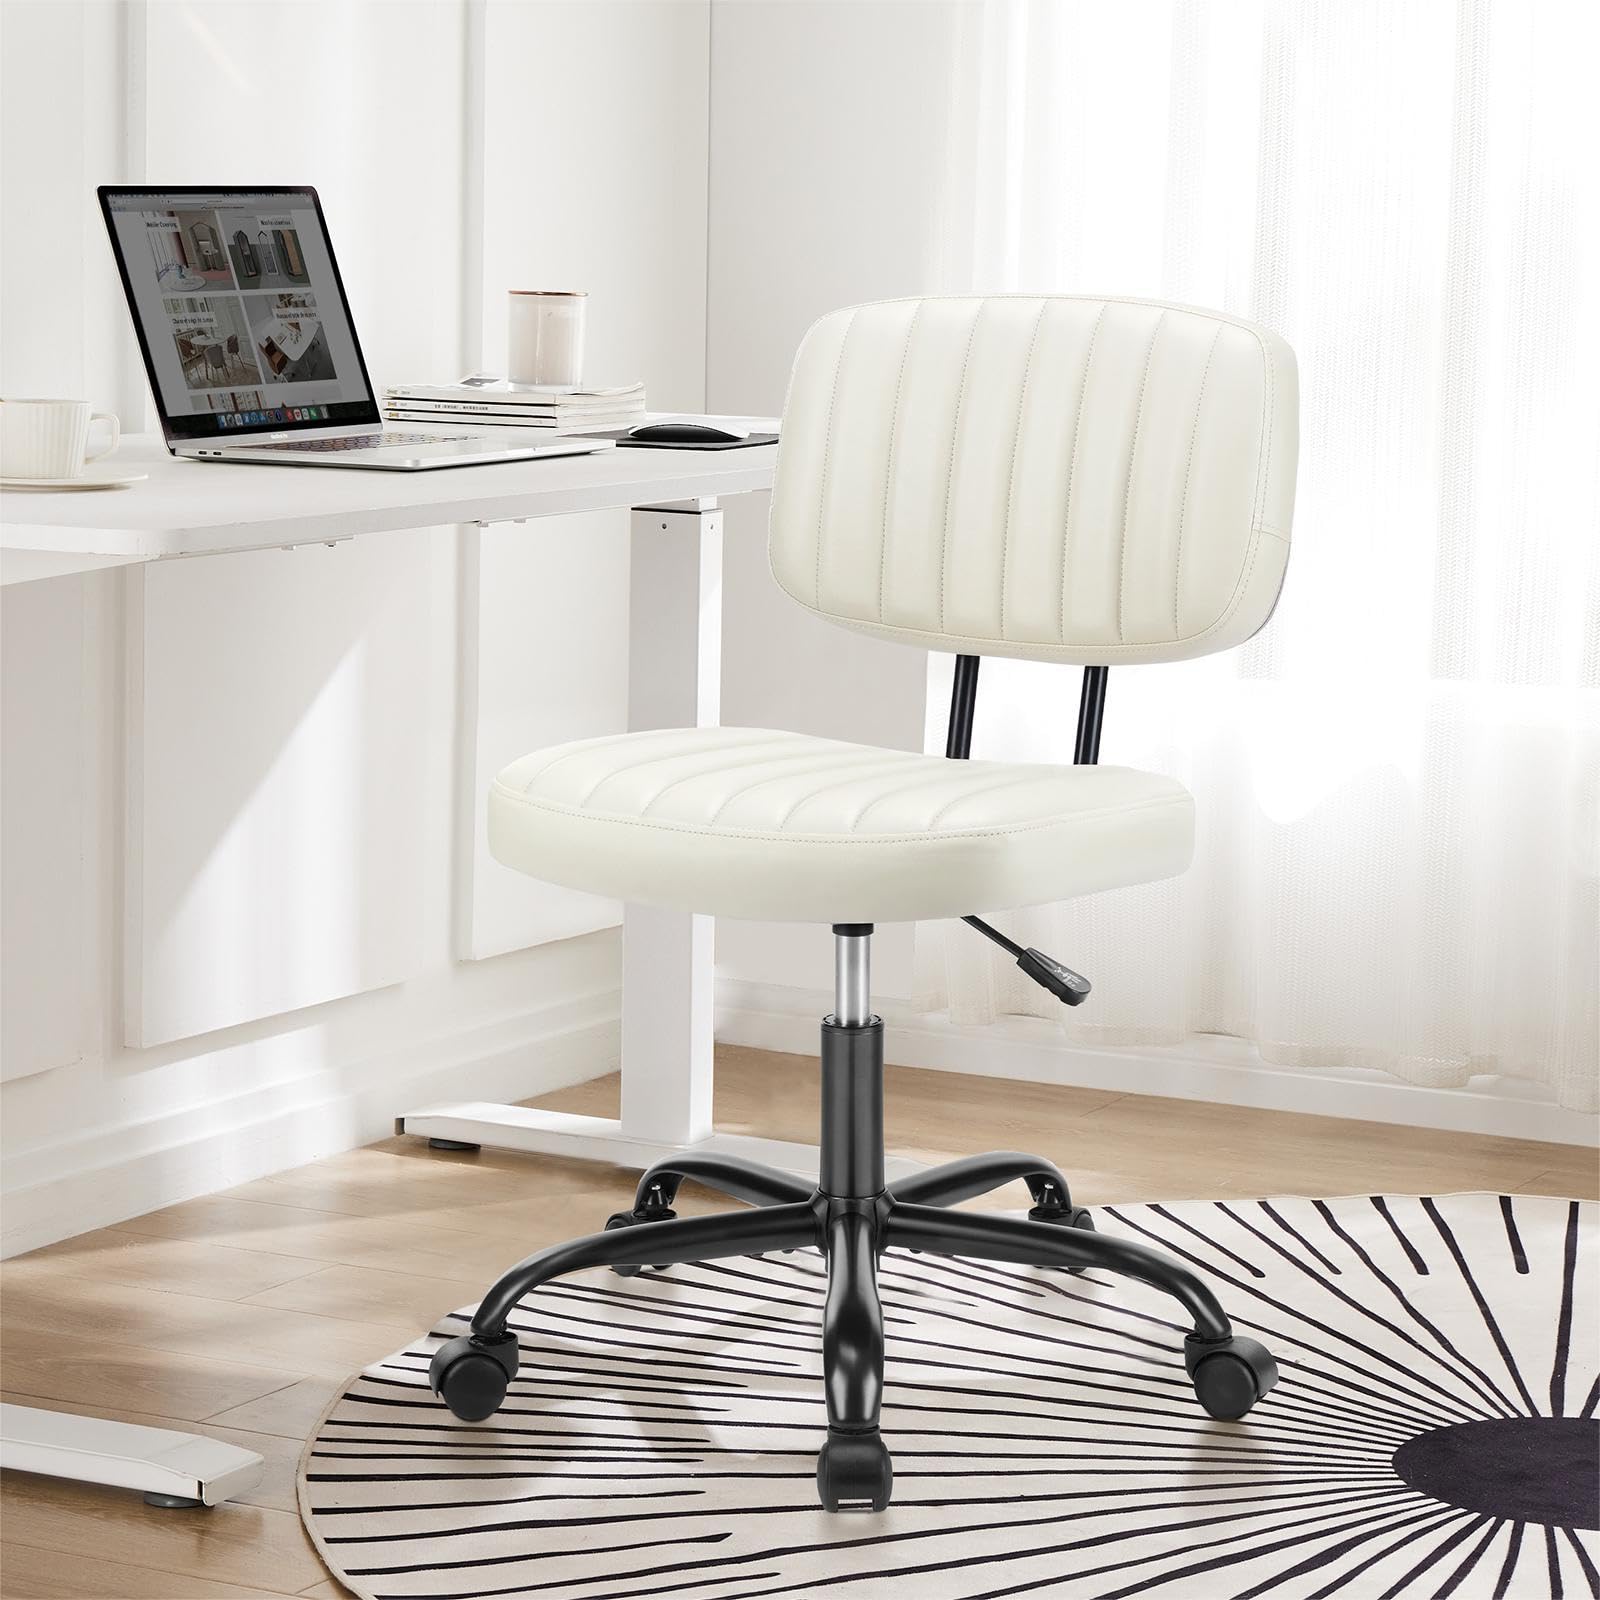
Not every desk needs a wheeled task chair, and some of the most comfortable home offices do not have one. A sturdy dining or side chair with a wide flat seat and no arms works well for a desk used a few hours a day, especially with a cushion for support. Bench seating suits shared or craft desks and removes the width question completely, though it gives you no back support, so it is best for short sessions or paired with a wall. Stools and saddle seats encourage an open hip angle that some people find far more comfortable than a bucket shaped seat, but capacity ratings on stools tend to run lower than on office chairs and are often quoted vaguely, so check the figure before you buy. A high capacity armless wide seat task chair is often the simplest fix of all.
An armless chair with a wide flat seat solves more problems than most ergonomic features.
Setting the chair up once you have it
A good chair set badly is a bad chair. Start with height: feet flat on the floor, thighs roughly level, and a footrest if the desk forces the seat up. Set seat depth so there is a small gap behind your knees, then bring the lumbar support to the curve of your lower back rather than to your waistband. Then unlock the tilt, because chairs are designed to move and a locked upright seat holds you in one posture all day.
Quick answers to the questions everyone asks
How much above my weight should a chair be rated? Give yourself real headroom rather than buying a chair that only just clears your weight. Sitting at the top of the range keeps the cylinder, base, and foam under maximum stress all day, which shortens their life. Higher rated chairs also tend to include a steel base and a heavier cylinder, which is the durability you are actually paying for.
Why does my office chair keep sinking down? Almost always a worn pneumatic cylinder, which is the sealed gas strut inside the column. Under repeated load it loses the ability to hold height. It is a replaceable part on most chairs and generally inexpensive, so a sinking seat is usually a repair rather than a reason to replace the whole chair.
Is a big and tall chair genuinely different? Sometimes. The label describes a category built for higher capacity and larger dimensions, and the good ones bring a steel base, a heavy duty cylinder, a wider seat, and thicker foam. Others are ordinary chairs with a bigger number printed on the box, so read the specification rather than the label.
Should I get a chair with arms or without? Armless or width adjustable arms if hip room is your priority, because fixed arms usually set the real width limit regardless of the seat measurement. Removable arms give you the choice later. If you keep arms, make sure they adjust for height so your shoulders stay relaxed rather than lifted.
What is the single best quality signal on a listing? The warranty, read in detail. Component terms covering the frame, mechanisms, cylinder, and foam tell you what the manufacturer expects to fail and when. Check whether cover is reduced or voided above a certain weight or beyond a set number of hours per day, since that clause changes what the headline term means.
A chair you stop thinking about
The measure of a good desk chair is that it disappears. You sit down in the morning, the seat holds its height until you get up, nothing digs into your hips, and you never once think about the mechanism underneath you. Getting there is mostly about ignoring the parts of a listing designed to impress and reading the four lines that matter: seat width, cylinder, base, warranty. Buy with headroom above your weight, choose arms you can move or remove, and keep the receipt and the warranty document somewhere you can find them. If seating in public spaces is the other half of this problem for you, our guide to seats in restaurants, stadiums, and theaters covers the chairs you do not get to choose.
There is a particular half second that most plus size people know by heart. You walk into a restaurant, the host gestures toward a booth, and your brain does a fast, silent calculation about the gap between the table edge and the bench. Nobody else at the door notices it happening. You notice, and then you spend the first ten minutes of dinner managing a table edge pressing into your ribs instead of reading the menu. That calculation is not vanity and it is not anxiety. It is a reasonable response to furniture that was specified to a set of body measurements you were never included in. This guide is about doing that calculation ahead of time, in daylight, with real information, so that the seat stops being the thing that decides whether you enjoy your evening.
The seat is the problem, not your body
Almost every fixed seat you meet in public was sized from an old standard, then narrowed further because a venue wanted more seats in the same square footage. Booths get bolted at a fixed distance from the table. Stadium rows get compressed to sell an extra column. Theater armrests get welded in place because a fixed armrest is cheaper than a hinge. None of those decisions were made about you, and none of them are a verdict on you. Holding that clearly in your head changes how you ask for things, because a person who believes the furniture is at fault asks calmly for an alternative, while a person who believes their body is at fault apologizes and then accepts whatever they are given. The first version gets a better table.
Booths are bolted at a fixed distance from the table, which is exactly why a movable table is the better ask.
Restaurants: the booth question and how to ask for a table
The booth is the least adjustable seat in any restaurant, because the table is anchored and the bench is anchored and neither will move for you. A table with chairs, by contrast, is entirely adjustable: you can push it away, turn a chair, or pull the chair back and sit slightly angled. So the single most useful sentence in your dining life is short and requires no explanation. “We would prefer a table rather than a booth, please.” That is a complete request. Hosts hear seating preferences all night from people with bad backs, big bags, small children, and long legs, and they do not require a reason from any of them. If the host says the booths are all that is free, ask how long the wait for a table is, then decide. You are allowed to wait.
Why the armless chair is the quiet win
Arms on a dining chair are the thing that turns a comfortable seat into a narrow one, and most restaurants own both kinds. Captain chairs with arms usually go at the head of a table, while the side chairs are frequently armless, so simply choosing the side seat solves the problem without a word to anybody. When you sit down, check what is under you as much as beside you: a chair with a wide, flat seat pan and four straight legs takes weight far more comfortably than a tapered seat perched on a narrow pedestal or a wobbly bistro frame. Outdoor patios are worth extra attention, because folding metal and thin plastic stacking chairs are the least sturdy seats most venues own and they tend to be the ones set out for overflow.
Stadiums and arenas: what seat width really means
Stadium seats are sold with a listed width, and that number is measured differently from venue to venue, which is why two seats described identically can feel nothing alike. Newer builds tend to be more generous while older ballparks and legacy arenas often run notably narrower, and the fixed armrest between seats is usually what limits you rather than the seat pan itself. Two things help. First, look for seats sold as club, box, loge, or premium level, because those are frequently wider and sometimes have movable or absent armrests. Second, buying two adjacent seats is a completely legitimate solution that plenty of people quietly use, and it needs no justification at the gate. Aisle seats also give you one side with no neighbor, which is often the difference that matters most over three hours.
In most arenas the fixed armrest, not the seat pan, is what sets the real limit.
Accessible and companion seating, and who it is for
Accessible seating sections exist for people with a range of mobility and access needs, and many venues sell them with a companion seat alongside. These areas usually have movable chairs rather than fixed ones, wider spacing, and shorter distances to walk from the entrance, which can matter as much as the seat itself. Policies vary widely on who may book them and whether documentation is requested, so the honest answer is that you should call the venue’s accessibility line and ask directly rather than guess from a forum post. Ask what the seating actually consists of, whether chairs are fixed or loose, and whether a companion ticket is available. Plenty of venues will simply help. Some will not, and knowing which one you are dealing with before you buy is the entire point of calling.
Theaters: recliners, fixed armrests, and reading a seat map
Cinemas have quietly split into two very different experiences. Recliner houses have wide, individually mounted seats, usually with a hinged or removable armrest and a footrest, and they are far and away the more comfortable option for most bigger bodies. Traditional houses have narrow seats in a continuous row with armrests that do not move at all. The seat map on the booking site rarely tells you which you are getting, but the ticket price and the words “luxury,” “recliner,” or “premium” in the auditorium name usually do. Live theaters are a harder case, since historic buildings often have the tightest rows in town and very little that can be changed about them. For those, call the box office and ask about the widest seats in the house, which are typically at the end of a row or in a box.
Rollercoasters: restraints, test seats, and what to check first
Rides are the one category where the fit question is a genuine safety mechanism rather than a comfort preference, and it is worth treating it that way. The restraint style determines nearly everything. Lap bars generally accommodate a wider range of bodies than over the shoulder harnesses, and rides with belts that must click into a fixed buckle are usually the strictest of all. Most large parks place a test seat at the entrance to each major ride precisely so you can check privately before joining a queue, and using it is completely normal. Modern coasters increasingly offer a modified seat with an extended belt, sometimes marked on the ride or on the park map. Our detailed walkthrough of ride fit at Cedar Point shows exactly how to work through a park ride by ride.
Restraint style, not the ride’s height or speed, is what decides whether a coaster will fit you.
Scripts that get you a real answer
Vague questions get vague answers, and “is it plus size friendly?” is the vaguest question of all, because the person answering has no idea what you mean and will usually say yes to be kind. Ask about the furniture instead. Every question below is neutral, specific, and answerable by whoever picks up the phone, and none of them requires you to describe your body to a stranger. Phrase it as logistics, the same way somebody planning around a wheelchair, a stroller, or a large group would, because that is genuinely what it is. Email works just as well if calling feels like too much, and it has the advantage of giving you the answer in writing to show at the door.
Venue
What to ask
What the answer tells you
Restaurant
Do you have tables with movable chairs, or is it all booth seating?
Whether you can adjust anything once seated
Restaurant
Are your dining chairs armless?
The real width of the seat
Arena or stadium
Do any sections have seats without fixed armrests?
Where the wider seating actually is
Cinema
Which auditoriums have recliner seating?
Wide seats with a movable armrest
Live theater
Which seats in the house are the widest, and where are the boxes?
Your best option in an old building
Theme park
Which rides have test seats at the entrance?
Where you can check privately
The plan-ahead checklist
Doing this in advance takes about ten minutes and removes nearly all of the doorway math. Before you book, check the venue’s own accessibility page, because it is often more detailed than the ticket site and it frequently lists seat dimensions or seating types outright. Look at recent photos rather than the marketing gallery, since customer photos show the actual chairs. Book an aisle or end of row seat where one is available. If it is a long event, a portable cushion earns its place in a bag, and a slim wide stadium seat cushion takes the edge off a hard bench without adding width. For outdoor events where you bring your own chair, an extra wide folding chair with a high weight rating is the one purchase that reliably pays for itself.
Quick answers to the questions everyone asks
How do I ask for a table instead of a booth without explaining myself? Say it as a preference at the host stand: “We would prefer a table rather than a booth, please.” Hosts take seating preferences constantly and rarely ask why. If only booths are free, ask about the wait for a table. Choosing to wait is a normal thing that customers do.
Is it acceptable to buy two stadium seats for one person? Yes, and plenty of people do it without ever being questioned. You have paid for both seats, so the space is yours. Nobody at the gate needs an explanation. If the row is tight, an aisle pair gives you a free side as well, which usually helps more than the extra seat alone.
Can I use accessible seating as a plus size person? Policies differ by venue, so call the accessibility line and ask rather than assuming either way. Some venues welcome any patron whose access needs are met by that seating, others apply narrower criteria. Ask what the seating physically consists of too, since movable chairs matter more than the label.
Which cinema seats are best for a bigger body? Recliner auditoriums, almost always. The seats are wider, individually mounted, and the armrest usually lifts or slides away, which is the part that makes the difference. Look for the words recliner, luxury, or premium in the auditorium name when you book, since the seat map rarely says outright.
How do I know if I will fit on a rollercoaster before queueing? Use the test seat at the ride entrance, which most large parks provide for exactly this reason. Check the restraint style first, because lap bars generally suit a wider range of bodies than over the shoulder harnesses. Park apps and ride pages sometimes list modified seats with extended belts.
Walking in already knowing where you are sitting
The good version of a night out starts before you leave the house, with a two minute phone call and a booking made on purpose. You know the restaurant has tables with real chairs. You know your row has an aisle end. You know which auditorium has the recliners and which coaster has a test seat by the gate. What that planning buys you is not just comfort, it is attention: the whole evening spent on the food, the game, the film, the person across from you, rather than on a table edge in your ribs. Venues get this right slowly and unevenly, so until they do, the information is the tool. Ask the specific question, take the seat that works, and let the furniture carry the blame it has always deserved.
An under-breast rash is one of those problems almost nobody talks about and an enormous number of people deal with. Warm skin folded against warm skin, trapped moisture, a little friction, and within a day or two you have a red, stinging, sometimes itchy patch that catches every time you move. It has a proper medical name, intertrigo, and it is extremely common in anyone with larger breasts, simply because there is more skin in contact for longer. That is anatomy doing what anatomy does, not a hygiene failure, and treating it as a hygiene failure is the reason so many people scrub at it and make it worse.
The good news is that uncomplicated intertrigo usually settles quickly once you break the moisture and friction cycle. The complication worth knowing about is that a damp skin fold is also an inviting place for yeast, and a rash that has tipped into a yeast overgrowth needs a different treatment. Below is how to tell those apart, what actually clears each one, how to stop it returning, and the specific signs that mean you should stop self-treating and get it looked at.
What an under-breast rash actually is
Intertrigo is inflammation caused by skin rubbing against skin in a warm, moist environment. It typically shows up as a red or reddish-brown patch that mirrors the fold itself, often symmetrical on both sides, and it can sting, burn or itch. The skin may feel raw or look slightly shiny, and in stubborn cases it can crack or weep a little. Heat, humidity, sweat, tight or non-breathable fabrics and prolonged contact all push it along, which is why it flares in summer, after exercise, and during long days in a bra that traps moisture rather than moving it away.
Breaking the moisture and friction cycle is the whole treatment. Everything else supports that
The important thing to understand is the cycle. Moisture softens the skin barrier, friction damages the softened skin, damaged skin weeps slightly, and that moisture feeds the next round. Every effective treatment works by interrupting that loop at one point or another, which is why keeping the area genuinely dry does more than any cream can on its own. If your underlying issue is heavy sweating in that area rather than an active rash, our guide on how to stop boob sweat and under-breast sweat tackles the root cause and is worth reading alongside this.
How to tell whether yeast has moved in
This distinction changes what you should put on it, so it is worth a careful look before you treat. Plain intertrigo tends to be a fairly uniform red patch confined to where skin touches skin. A candidal, or yeast, overgrowth usually looks angrier and more defined: a brighter red patch with a clear scalloped border, often with small separate spots or pustules just beyond the main area. Those outlying spots, called satellite lesions, are the most useful single clue, because plain friction rash does not scatter like that. Yeast also tends to itch more intensely than it stings.
Sign
Friction rash
Likely yeast
Needs a doctor
Shape
Follows the fold
Defined scalloped edge
Spreading outward fast
Outlying spots
No
Yes, satellite spots
Pustules with pus
Sensation
Stings, burns
Intense itch
Severe or deep pain
Other signs
None
Sometimes odour
Fever, foul odour
There is a third possibility worth naming, which is bacterial infection. That tends to bring genuine pain rather than itch, warmth, swelling, sometimes pus or a distinctly unpleasant smell, and redness that spreads beyond the fold. Bacterial infection is not something to treat with drugstore creams, and it is covered in the escalation section further down. If you are ever unsure which of the three you have, that uncertainty is itself a good reason to have someone qualified look at it rather than cycling through products.
Treating it, step by step
Start with cleansing, and be gentler than instinct suggests. Wash the area with lukewarm water and a mild, fragrance-free cleanser, then rinse properly so no residue sits in the fold. Skip antibacterial or heavily perfumed soaps, which strip an already compromised skin barrier and frequently make the stinging worse. Then dry the fold completely, which is the step most people rush and the one that matters most. Pat rather than rub, and if patting is not getting it properly dry, a hairdryer on its cool setting held at a distance works well and takes under a minute.
Once the skin is genuinely dry, apply a barrier. A zinc oxide ointment is the standard choice because it physically separates the two skin surfaces and repels moisture rather than absorbing it. If you have identified likely yeast, an over-the-counter antifungal cream containing clotrimazole or miconazole is the appropriate treatment, applied thinly twice daily and continued for the full course on the packet even after it looks better, because stopping early is the most common reason yeast comes straight back. Do not reach for a steroid cream on its own, since steroids calm redness but can let a fungal infection flourish underneath.
Dry the fold completely before any cream goes on. A barrier applied over damp skin traps the problem in
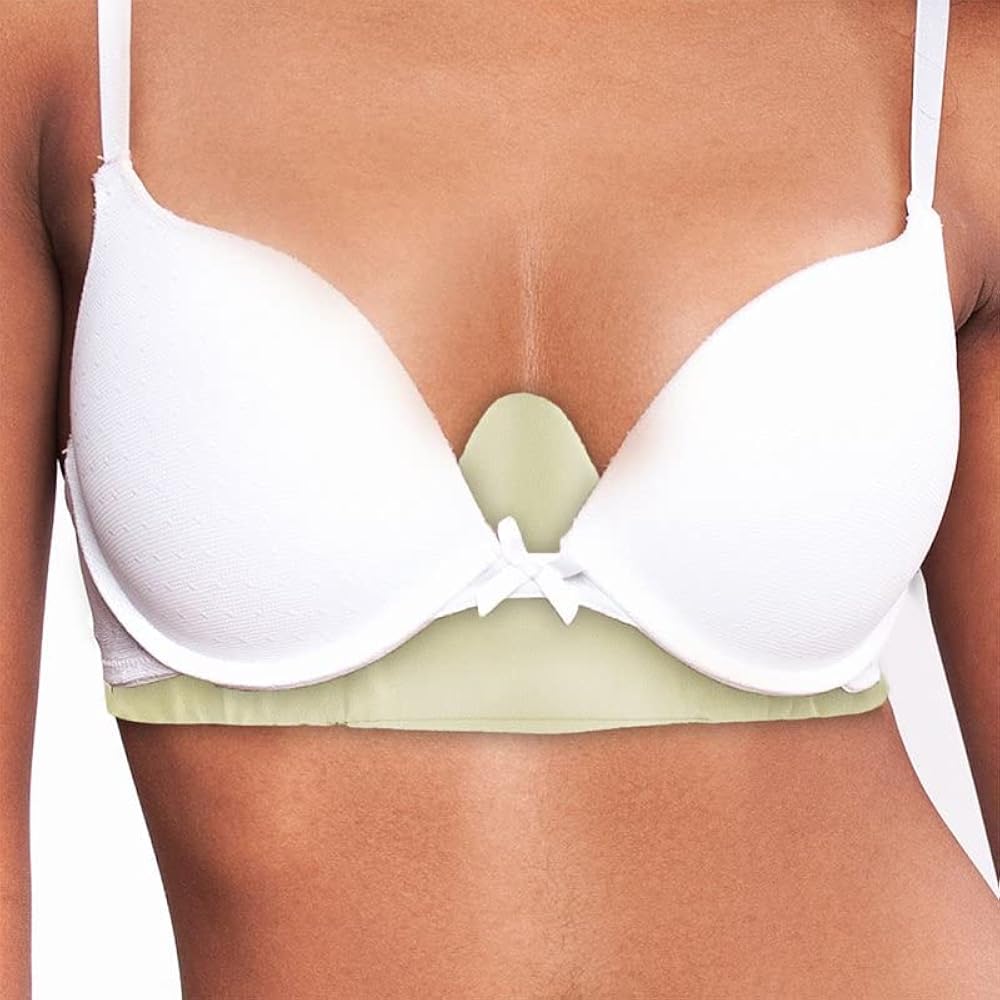
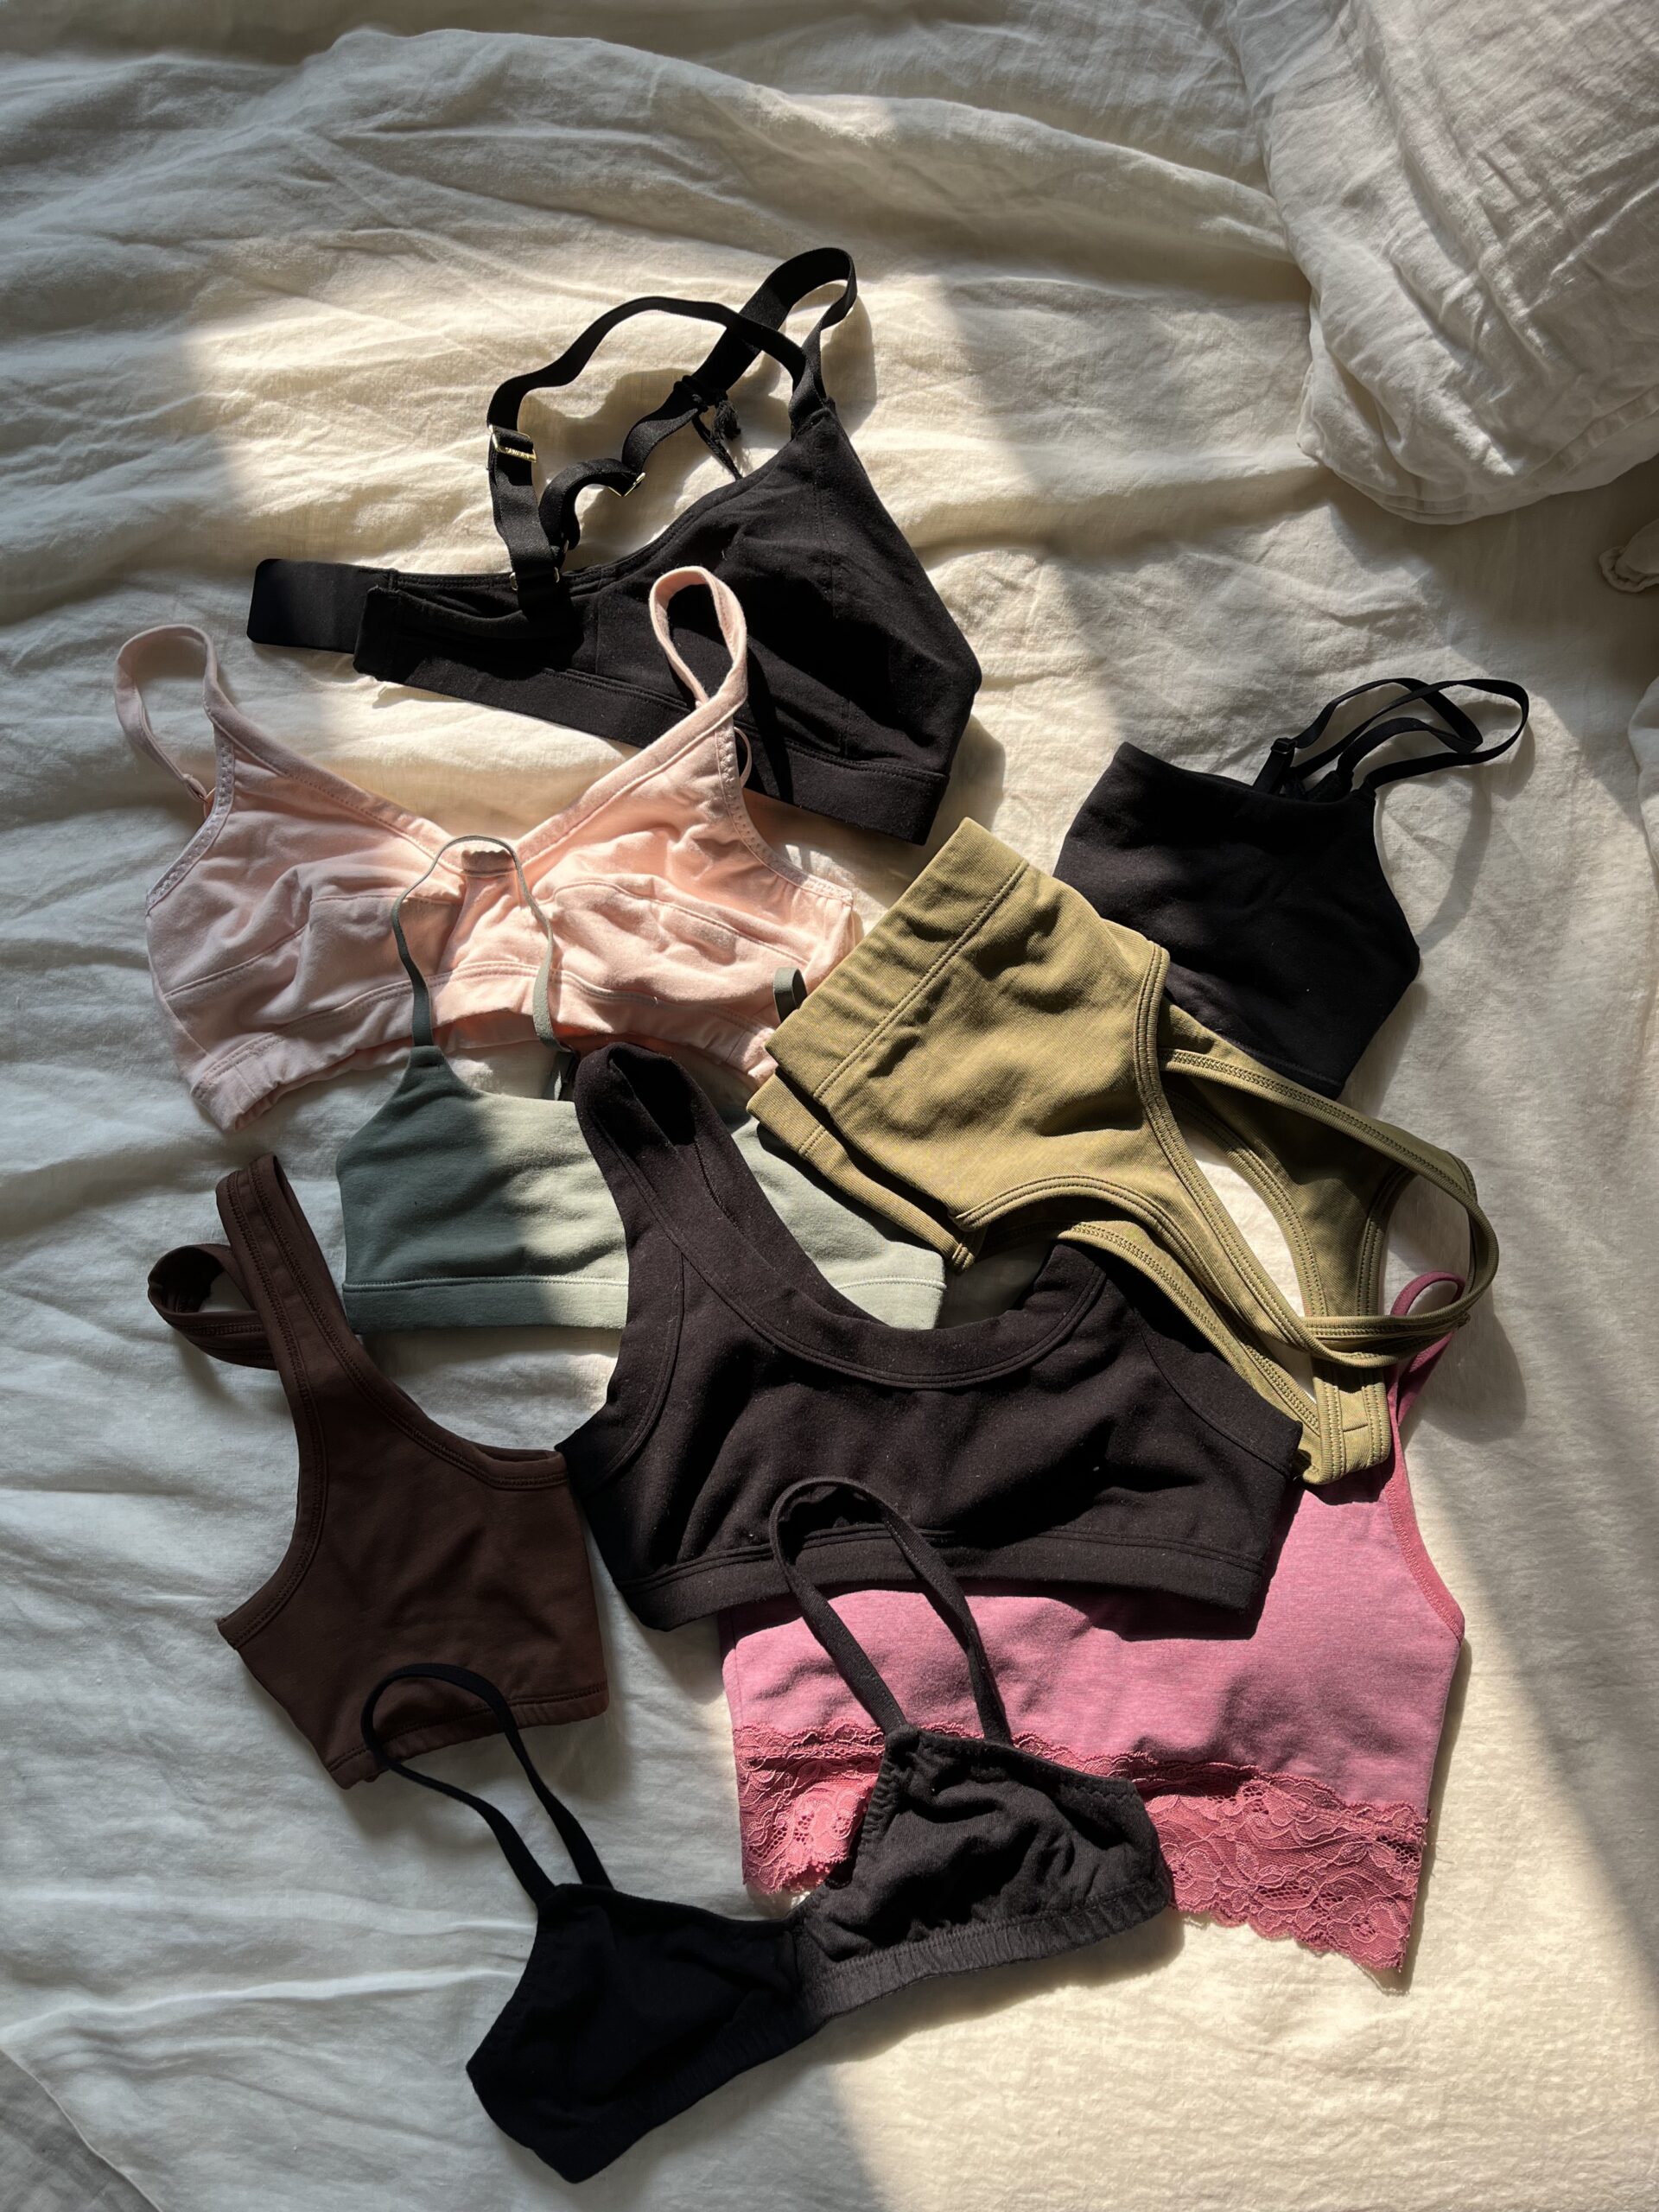
Between treatments, keep the surfaces apart. A soft cotton or bamboo bra liner sits in the fold, absorbs moisture and stops skin touching skin, and it is probably the single most useful object you can own if this happens to you regularly. Change it whenever it feels damp rather than once a day. Giving the area genuine air time also helps more than people expect, so a stretch braless in a loose cotton top in the evening is doing real work, not nothing.
Stopping it from coming back
Prevention is mostly a fabric and fit problem. A supportive, well-fitting bra that actually holds breast tissue up and away reduces how much skin sits in contact, which is why a proper fit does more for recurrent intertrigo than any cream. Choose breathable materials, cotton or a technical moisture-wicking knit, over synthetics that hold sweat against you, and be honest about whether an underwire is sitting in the fold and adding friction. A breathable cotton-lined supportive bra in your correct size solves a surprising amount of this on its own.
A supportive, breathable, correctly fitted bra reduces how much skin sits in contact, which prevents more flares than any cream treats
The rest is routine. Change out of a sweaty bra promptly rather than letting it dry on you, and never re-wear a damp one. Wash bras more often than feels necessary in hot weather, since old sweat and product residue irritate compromised skin. If you are prone to flares in summer, applying a barrier preventively on hot days is far easier than treating a rash after it appears. And if you notice it recurring constantly despite doing all of this, that pattern is worth mentioning to a doctor, because persistent skin-fold yeast can occasionally be a flag for undiagnosed diabetes or another underlying issue.
When to stop self-treating and see a doctor
Most uncomplicated cases improve noticeably within a few days and clear within one to two weeks of consistent care. Anything that does not follow that pattern deserves professional attention rather than another product. Book an appointment if the rash has not improved after about two weeks of proper treatment, if it is spreading beyond the fold, or if it keeps returning as soon as you stop treating it.
Seek care promptly, rather than waiting, if you have pus or open sores, a foul odour, significant pain, a fever, or redness that is expanding and warm to the touch, since those suggest a bacterial infection that may need prescription treatment. The same urgency applies if you have diabetes, a weakened immune system, or are taking immunosuppressive medication, because skin-fold infections can escalate faster and are harder to clear. None of this is cause for alarm in the typical case, but knowing the line means you can treat confidently at home without wondering whether you are missing something.
Common mistakes that make it worse
A few well-intentioned habits actively prolong this. Scrubbing the area, using antibacterial or fragranced soap, and applying alcohol-based products all damage the skin barrier you are trying to rebuild. Cornstarch is a popular home remedy and a poor one when yeast is involved, because it can feed the overgrowth rather than starve it. Talc is best avoided too, both because of longstanding safety questions and because it cakes into damp folds and adds grit where you wanted smoothness.
The other frequent error is applying cream to skin that is still damp, which seals moisture against the very surface you needed to dry out. And covering an active rash with a tight synthetic bra for a twelve-hour day undoes whatever the cream achieved that morning. Treatment and clothing have to work together, otherwise you spend weeks treating something that is being re-created daily.
Quick answers to the questions everyone asks
What causes a rash under the breast? Most often intertrigo, which is inflammation from skin rubbing against skin in a warm, damp fold. Sweat, heat, friction and non-breathable fabrics drive it. It is a common consequence of having larger breasts and more skin in contact, not a sign of poor hygiene.
How do I get rid of an under-breast rash fast? Cleanse gently with a mild fragrance-free wash, dry the fold completely, then apply a zinc oxide barrier. Use a cotton liner to keep skin surfaces apart and change it when damp. If there are satellite spots and intense itch, use an antifungal cream instead.
Is my under-breast rash a yeast infection? Likely if it is bright red with a clearly defined scalloped edge, itches intensely, and has small separate spots just outside the main patch. Plain friction rash follows the fold uniformly without those outlying spots. When unsure, get it looked at rather than guessing.
Can I put powder under my breasts? A moisture-absorbing barrier helps, but skip talc and skip cornstarch, since cornstarch can feed a yeast overgrowth. A zinc oxide ointment or a purpose-made body powder is a better choice, and a fabric liner usually outperforms powder because it does not cake in the fold.
How long should an under-breast rash take to clear? Uncomplicated cases usually improve within a few days and resolve in one to two weeks with consistent care. If yours has not improved after two weeks, keeps recurring, or shows pus, odour, fever or spreading redness, stop self-treating and see a doctor.
Treating the fold, not just the rash
The reason this problem recurs for so many people is that they treat the rash and ignore the conditions that produced it. Cream clears the current flare, then the same bra, the same fabric and the same trapped moisture rebuild it within a fortnight. The version that actually works treats both at once: settle the skin with gentle cleansing, thorough drying and the right barrier or antifungal, then change what happens in that fold day to day with a properly fitted breathable bra, a liner you swap when damp, and a bit of air in the evenings. Watch for the red flags, take them seriously when they appear, and this moves from a recurring misery to something you handle in a few days and mostly forget about.
This article is general information, not medical advice. If your rash is painful, spreading, producing pus or not improving, please see a doctor or pharmacist.
If you have ever peeled a damp bra away from your skin at the end of a hot day, or found a red, stinging line in the crease under your breasts, you already know that under-boob sweat is one of the least talked about and most annoying parts of having a fuller chest. It is completely normal. Bigger breasts trap more heat, skin sits against skin, and the area stays warm and damp no matter how clean you are or what you weigh. The good news is that this is one of the most fixable body annoyances there is, and you do not have to hide in dark tops, skip the silk shirt, or quietly dread every heatwave. Here is exactly what stops boob sweat and the rash that so often comes with it, in the order I would actually try it.
Staying cool and comfortable on a warm day is completely doable
Why it happens (the 20-second version)
Under-boob sweat is heat, moisture, and skin-on-skin contact, all trapped with nowhere to go. The band of your bra and the fold beneath each breast hold warmth against the skin, so sweat that lands there cannot evaporate the way it would on your arm. A warm, damp crease that never fully dries also happens to be the exact environment a heat rash loves, and sometimes a yeast flare on top of it. Once you see it that way, every real fix starts to make sense, because they all do one of three things: keep the area dry, wick the moisture away, or put a breathable barrier between skin and skin. You can mix and match the fixes below depending on how hot the day is and what you are wearing.
The fastest fix: keep the crease dry
If you want relief today, start by drying the area out and keeping it that way. After every shower, dry thoroughly under and between your breasts, and do not feel silly using a hair dryer on the cool setting for a few seconds, because a crease that goes back under a bra even slightly damp is a crease that will stay damp all day. Then reach for something built for skin folds rather than a general body lotion. A talc-free anti-sweat powder like Megababe Bust Dust absorbs moisture for hours without caking, and a clinical antiperspirant such as Carpe Underboob Antiperspirant can go directly onto the skin under the breasts, though never on the nipple or on skin that is already broken. Apply the antiperspirant at night on clean, dry skin so it has time to work before you sweat, and keep the powder in your bag for a midday top-up when it is properly hot.
A talc-free anti-sweat powder keeps the crease dry for hours
Bra liners: the under-boob game changer
The single best tool most women have never heard of is the bra liner, a soft absorbent strip that tucks into the fold under your breasts and soaks up sweat before it ever reaches your skin. They are washable, invisible under clothes, and they quietly save your bras from that stretched-out, stained underband that makes an expensive bra look old long before it should. Cotton bra liners for larger busts are the plus-size favourite because they actually cover a full underband rather than stopping halfway, which is exactly where the cheaper ones fall down. Keep a couple in your bag and swap them out when they feel damp. It is the cheapest fix on this list and the one women most often tell me changed their summers.
A bra liner catches sweat before it reaches your skin
The right bra and fabric
What sits against your skin all day matters more than any product you can buy. Choose a bra in a breathable, moisture-wicking fabric rather than a thick foam or slick synthetic cup, because foam holds heat against exactly the place you are trying to keep cool. Fit matters just as much as fabric, and this is the part most women miss: a band that is too tight clamps the fold shut and seals the sweat inside it, so a properly fitted band is quietly doing half the work here. Cotton-lined styles, mesh panels, and moisture-wicking plus-size bras all let the area breathe, and in serious heat a lighter unlined bralette will often beat a heavy underwire outright. Keep the layer on top breathable too, because a quick-dry natural fabric over the bra lets the whole system work instead of sealing it all back in.
A breathable, well-fitting bra lets the area actually breathe
Already have a rash? Here is how to calm it down
If the skin under your breasts is red, raw, or itchy, treat it properly before you go back to prevention, because layering powder onto broken skin will only sting. Clean the area with a mild, non-stripping cleanser, pat it completely dry, and smooth on a thin barrier or zinc-oxide cream, the sort sold for nappy rash, a few times a day so the skin stays protected while it heals. There is one variation worth knowing about. If the patch is bright red and itchy with a faint yeasty smell, or you can see small spots spreading out from the edges, that is often a yeast overgrowth rather than a simple heat rash, and an over-the-counter antifungal such as clotrimazole cream usually clears it within a week or two, provided you keep the area dry while it works. If the skin blisters, oozes, or simply is not improving after a week, see a doctor rather than pushing through it, because broken skin in a warm fold can get infected quickly.
A barrier cream protects and calms an under-breast rash
The same fixes work for your other folds
The trapped-heat problem is not unique to your chest. It shows up in the crease of your belly, along your back, and anywhere else skin meets skin, which means everything above travels with you. Keep those spots dry with the same powder or antiperspirant, choose a moisture-wicking cami or a breathable shaper instead of a clingy synthetic layer, and rinse and dry off reasonably soon after you sweat rather than sitting in a damp layer for hours. A quick midday reset, blotting dry and re-powdering, is usually all it takes to stop a warm patch turning into a raw one.
Quick answers to the questions everyone asks
Can you put antiperspirant under your breasts? Yes, and it is one of the most effective things you can do. Apply it to the skin under the breasts, never on the nipple or on skin that is already broken. A regular or clinical-strength formula works best applied at night on clean, dry skin, so it has time to do its job before you start sweating.
Why do I sweat so much under my breasts? Because the area is warm, covered, and pressed skin against skin, so sweat has nowhere to evaporate. A fuller chest traps more heat and holds a deeper fold, which is why heavier-chested women feel it most. It is completely normal and it has nothing to do with hygiene.
What is the best fabric to stop boob sweat? Breathable, moisture-wicking fabrics such as cotton, bamboo, or performance mesh, rather than thick foam or clingy synthetics. You are really looking for two things: airflow, and a fabric that actively pulls moisture away from your skin instead of holding it against you.
How do I stop boob sweat right now, today? Dry the crease completely, dust on a sweat-absorbing powder or apply antiperspirant to the skin, and tuck in a bra liner. That combination alone gets most women comfortably through a hot day.
Your simple everyday routine
Pulling it all together, the whole system is smaller than it sounds. Dry the crease properly after every shower, use powder or antiperspirant to keep it that way, add a bra liner to catch whatever gets through, and wear a breathable, well-fitting bra so the area can actually breathe. Keep a spare liner and a travel powder in your bag for a midday reset, and a barrier cream in the cupboard for the days a rash sneaks up on you. You do not need all of it at once, so start with drying the area and a liner, then add the rest as you find you need it. Do that for a week and under-boob sweat stops being the thing that quietly decides what you can wear.
Curvy Girl Journal only recommends products we would use ourselves. Some links are affiliate links, which means we may earn a small commission at no extra cost to you. It helps keep the guides free.
If you have ever peeled your thighs apart after a summer walk and felt that hot, raw sting, you already know what chub rub is. You also already know it has nothing to do with your worth, your size, or how “in shape” you are. Thighs that touch are normal. Most women’s thighs touch. The friction is just physics: skin plus movement plus a little sweat. The good news is that it is one of the most fixable body annoyances there is, and you do not have to give up dresses, walk like you are being timed, or spend a fortune to make it stop. Here is exactly what works, in the order I would actually try it.
A plus-size woman walking comfortably outdoors on a warm day
Why it happens (the 20-second version so the fixes make sense)
Chafing is friction plus moisture plus heat. Skin rubs against skin, sweat softens the surface, and the repeated rubbing wears it raw. That is the whole story, and it is why every real fix does one of three things: reduces the friction, keeps the area dry, or puts a barrier between skin and skin. Once you see it that way, you can mix and match the solutions below to fit your day: a balm for a quick errand, shorts for a long one, bands for a dress.
The fastest fix: an anti-chafe balm or stick
If you need relief today, this is where to start. An anti-chafe stick glides on like deodorant and leaves a thin, invisible layer that lets your thighs slide past each other instead of dragging. The dermatologist-favorite is Megababe Thigh Rescue, which uses aloe and grapeseed oil to hydrate while it protects and lasts most of a day. If you want the sportier, sweat-proof option that runners swear by, Body Glide Anti-Chafe Balm is the classic.
How to use it well: apply to clean, dry skin before you get dressed, cover the whole area that touches (usually higher up than you think), and reapply if you are out for more than a few hours or sweating hard. A stick lives in your bag; a smaller one lives in your car. That is the entire routine.
An anti-chafe balm stick, the fastest thigh-chafing fix
No-slip thigh bands for dresses and skirts
When you want to wear a dress and skip shorts entirely, thigh bands are the move. They are soft bands that sit around each thigh with a strip of silicone to keep them from rolling down, so your thighs never actually touch. The best-known are Bandelettes Thigh Bands, and the reason they matter for us specifically is sizing: they run up to 3XL, they come in lace styles that look intentional if they peek out, and the stay-up silicone genuinely holds through a full day of walking. They are lighter and cooler than shorts, which makes them the summer-wedding, hot-day answer.
Lace thigh bands that prevent chafing under dresses
Slip shorts and bike shorts: the invisible barrier
If bands are not your thing, a thin pair of shorts under your dress does the same job and doubles as smoothing. Look for a slip short with at least a 7-inch inseam so it actually covers where you rub, in a breathable, moisture-wicking fabric rather than thick shapewear that traps heat. Thigh Society Slip Shorts are the plus-size favorite here because they are cut long, cut wide, and made to disappear under clothes without digging in. For leggings-weather, a pair of bike shorts under a longer top does the same thing.
Slip shorts give a smooth, invisible barrier under dresses
Powder and the right fabrics (the free-ish fixes)
Two habits cost almost nothing and quietly prevent a lot of chafing. First, keep the area dry: a talc-free body powder or a moisture-absorbing product like Gold Bond Friction Defense cuts the sweat that softens skin. Second, choose what touches your legs carefully. Moisture-wicking, quick-dry fabrics pull sweat away, while cotton soaks it up and holds it against you. If you sit for long stretches, try not to cross your legs, which traps heat and moisture right where you do not want it.
A talc-free body powder keeps the area dry to prevent chafing
Already chafed? Here is how to calm it down fast
If you are reading this because you are already raw, stop the friction first and let it heal. Rinse the area with warm water and a gentle, non-stripping cleanser (a mild Dove-type bar is fine), pat it dry, and smooth on a barrier ointment a few times a day. Dermatologists reach for A&D ointment or plain petroleum jelly to seal in moisture and protect the skin while it recovers. Give it a couple of days in loose, breathable clothing before you go back to your prevention routine. If the skin blisters, oozes, or does not start improving in a few days, that is your cue to see a doctor rather than push through it, because broken skin can get infected.
A barrier ointment soothes and protects already-chafed skin
The dark patches chafing can leave behind (and how to fade them)
If the skin high on your inner thighs has gone darker than the rest of your leg, that is post-inflammatory hyperpigmentation, and it is one of the most common things women go looking for after they have dealt with the chafing itself. Repeated friction and low-grade irritation tell the skin to make extra melanin, so the fix has two parts. First, stop the rubbing using everything above, because nothing will fade while the friction is still happening. Then, once the skin is calm and unbroken, help it turn over: a gentle niacinamide serum like The Ordinary Niacinamide 10% + Zinc, or an ingredient like azelaic or kojic acid used a few nights a week, will even the tone over weeks rather than days. Moisturize daily so the barrier stays healthy, and use sunscreen on the area if it ever sees sun, since UV deepens the very marks you are trying to fade. Be patient and be kind to yourself here. Darker inner thighs are extremely normal, they are not a hygiene problem, and they fade fastest when you stop chasing quick fixes and just stay consistent.
Fading dark inner-thigh patches with a gentle niacinamide serum
Chafing at the gym, on a run, or on a long walk
Workout chafing is its own beast, because you add heavy sweat and hundreds of repeated strides to the mix, so a light morning balm often will not last. Two things solve it. Apply a sweat-proof balm like Body Glide Anti-Chafe Balm generously before you change, not after you are already damp, and reapply at the halfway point of anything long. Then let your clothing do half the work: a pair of moisture-wicking bike shorts with a long inseam under your dress, skirt, or running shorts keeps skin off skin the whole time. Baleaf Plus-Size Bike Shorts are a favorite because they are cut long and wide, they wick instead of trap, and they do not roll down mid-stride. Rinse and dry the area soon after you finish, since sitting in salty, damp fabric is what turns a warm patch into a raw one.
Moisture-wicking bike shorts prevent chafing during workouts
Quick answers to the questions everyone asks
Does Vaseline help thigh chafing? For healing, yes. A layer of petroleum jelly seals and protects raw skin overnight. For preventing chafe during a long, sweaty day it is not ideal, because it is heavy, traps heat, and rubs off. Use a proper anti-chafe balm to prevent, and save the Vaseline for calming skin that is already sore.
Why do my thighs chafe when I am not overweight? Because chafing is about your thighs touching and moving, not about fat. Plenty of slim women and elite runners chafe. If your thighs make contact when you walk, which is true for most bodies, friction can happen. It is normal, and it is not a sign of anything being wrong with you.
How do I stop chafing right now, today? Smooth an anti-chafe balm onto clean, dry skin before you head out. No balm in the house? A thin layer of a barrier ointment works in a pinch, or pull on a pair of long-inseam bike shorts under what you are already wearing.
What stops it for good? Not one single product, but a small system: balm on ordinary days, bands or slip shorts under dresses, powder and wicking fabrics in the heat, and a barrier ointment on standby.
Your simple everyday routine
Pulling it together, this is the whole system: balm on a normal day, bands or slip shorts under dresses, a sweat-proof balm plus bike shorts for workouts, powder and smart fabrics when it is hot, and a barrier ointment on standby for the days you get caught out. If chafing has already left darker patches, calm the friction first and fade them slowly with a gentle niacinamide routine. You do not need all of it at once. Start with the balm, add the piece that fits your wardrobe, and chub rub stops being a thing you plan your outfits around. Your thighs touching was never the problem, and now the sting is not either.
Curvy Girl Journal only recommends products we would use ourselves. Some links are affiliate links, which means we may earn a small commission at no extra cost to you. It helps keep the guides free.
Let us be honest for a moment. How do you feel when you catch your reflection? If your first instinct is to look away, to zero in on the parts of your body you have been taught to dislike, or to avoid mirrors altogether, you are not alone. So many of us have spent years absorbing messages that told us our bodies were problems to be solved. But what if you could rewire that response? What if, in just 30 days, you could build a mirror confidence challenge practice that helps you see yourself with kindness instead of criticism?
This is not about forcing yourself to love every inch of your body overnight. That kind of pressure is just another form of perfectionism dressed up in self-help language. Instead, this 30-day mirror confidence challenge is about building a slow, steady, and sustainable path toward body acceptance. It is about replacing the automatic negativity with something gentler, something truer, and something that actually serves you.
Whether you are a size 14 or a size 34, whether you have always struggled with your reflection or are just going through a rough patch, this challenge meets you exactly where you are. No toxic positivity. No before-and-after photos. Just you, your mirror, and a daily practice that thousands of women have used to shift their mindset in ways they never thought possible.
Why a Mirror Confidence Challenge Can Transform Your Relationship With Your Body
The mirror confidence challenge is not some trendy internet dare. It is rooted in actual psychological principles. Exposure therapy, one of the most well-researched techniques in cognitive behavioral therapy, works by gradually and repeatedly exposing someone to something they avoid or fear. For many plus-size women, mirrors have become a source of anxiety, and this challenge uses a similar principle to gently desensitize that response.
Research published in the journal Body Image found that mirror exposure exercises – where participants spent structured time looking at their bodies with guided neutral or positive commentary – significantly reduced body dissatisfaction over time. Participants reported feeling less anxious around mirrors, less preoccupied with perceived flaws, and more able to appreciate their bodies as they are.
But here is the part that research alone cannot capture: the feeling of looking at yourself and not flinching. The quiet power of being able to get dressed in the morning without a wave of self-criticism. The freedom of walking past a store window and not automatically sucking in your stomach. These shifts are subtle, but they change the texture of your entire day.
This mirror confidence challenge works because it is progressive. You are not being asked to stand naked in front of a full-length mirror on Day 1 and recite affirmations. Instead, you are building up to it, layer by layer, at a pace that respects your emotional bandwidth.
Before You Begin – Setting Yourself Up for Success
Before you start your 30-day mirror confidence challenge, take a few minutes to set yourself up for the best possible experience. This is not about perfection – it is about intention.
Choose Your Mirror
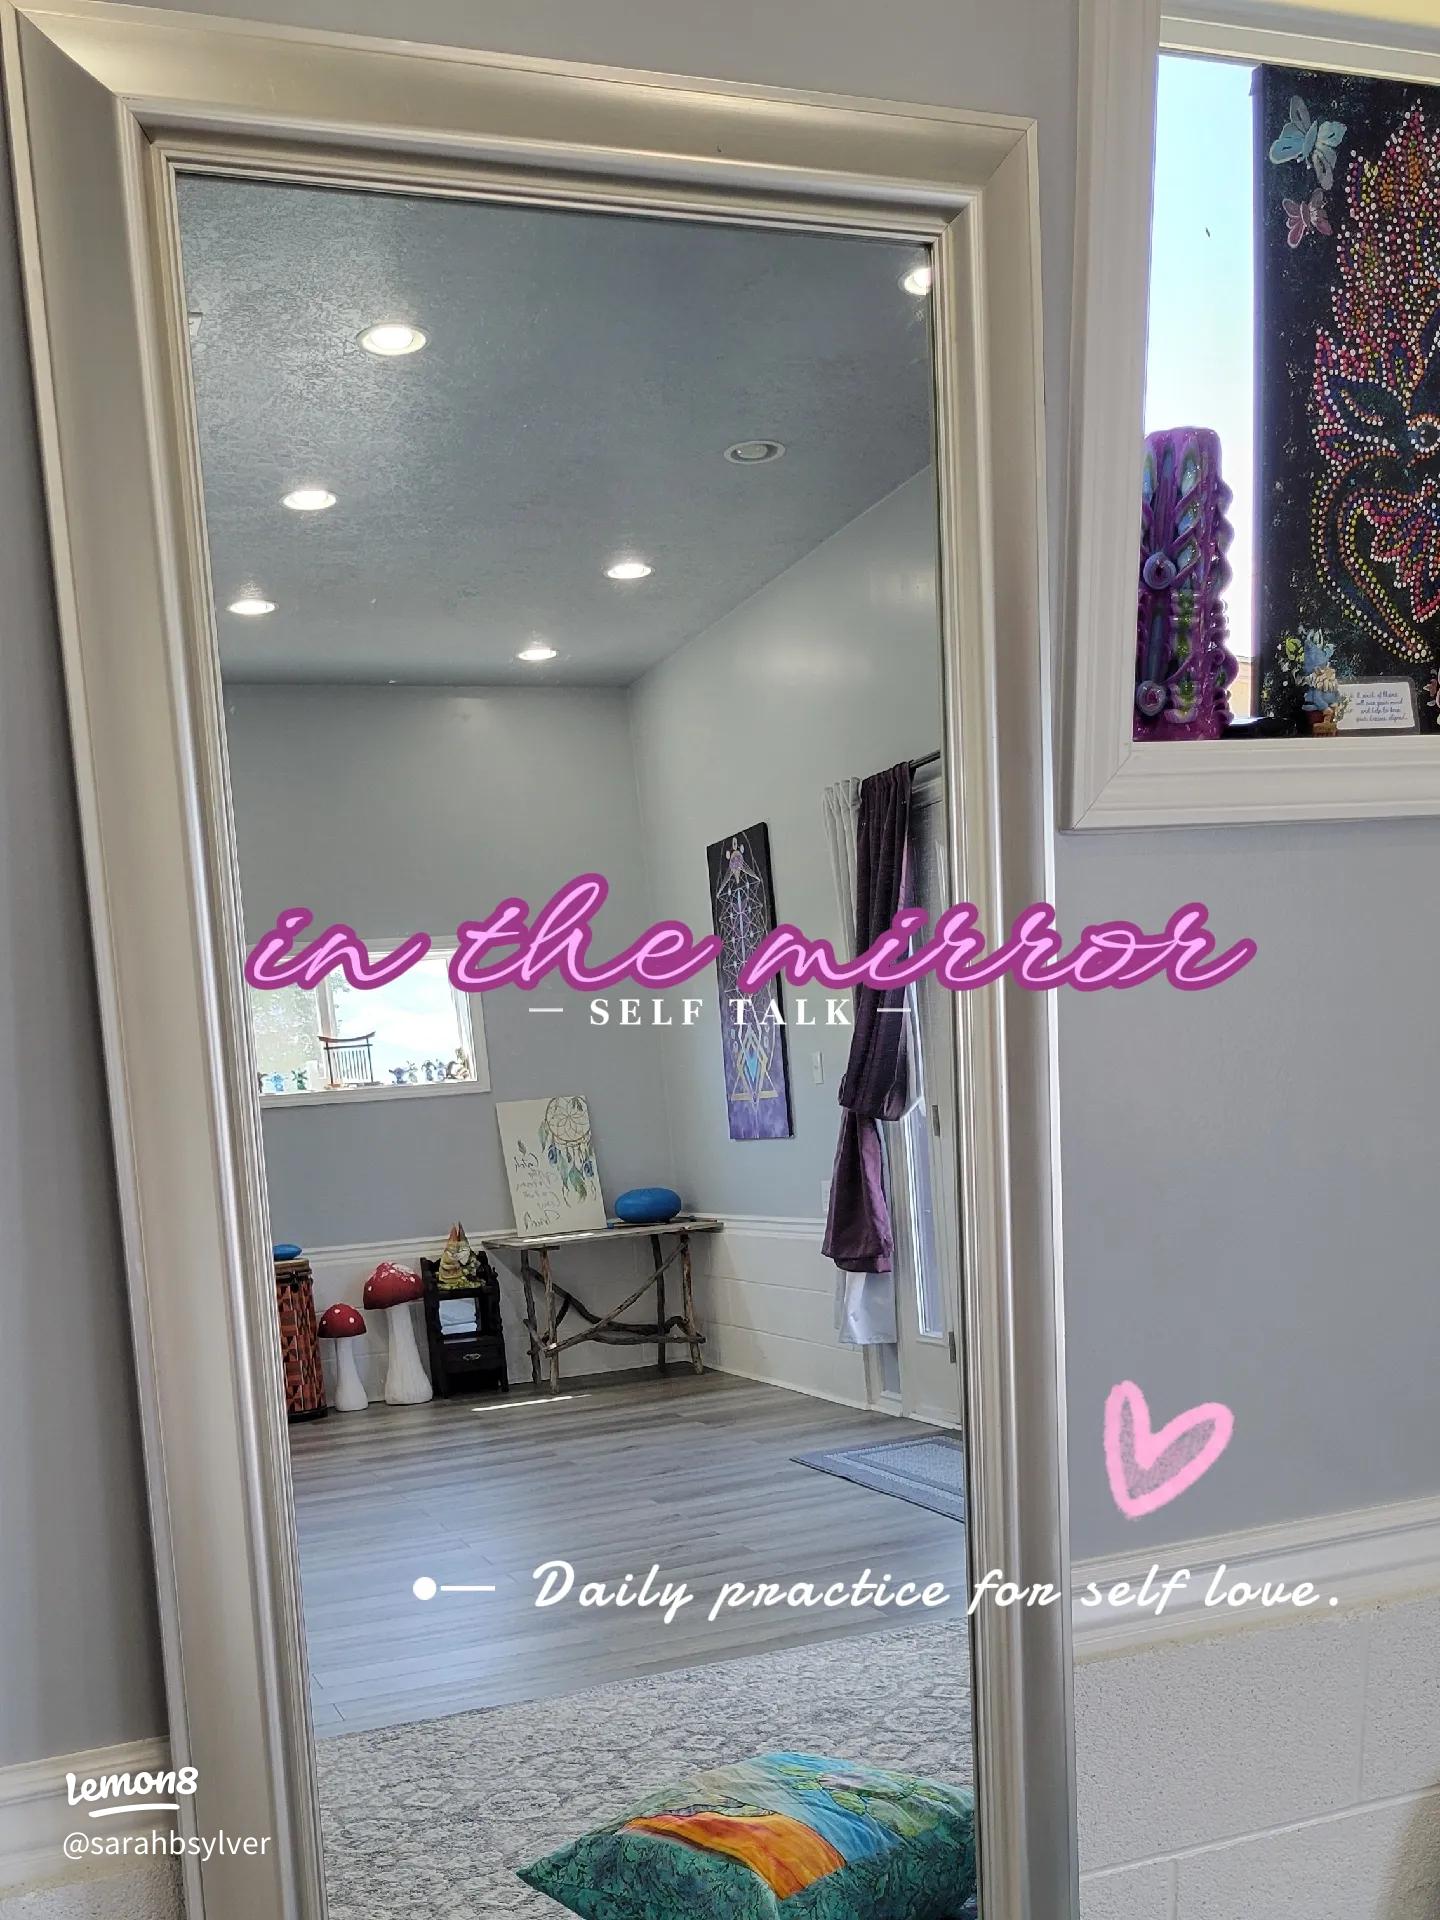
Pick a mirror that you will use consistently throughout the challenge. Ideally, this should be a full-length mirror in a private space where you feel safe and uninterrupted. If you do not own a full-length mirror, a bathroom mirror works perfectly fine for the first two weeks. You can always upgrade later.
If you want to invest in a good mirror for this challenge, a
full-length floor mirror with a sturdy frame
is a great option. Look for one with good lighting – avoid mirrors in dim corners or ones that distort your image. You deserve to see yourself clearly.
Set Your Time
Each daily exercise takes between 3 and 10 minutes. Choose a consistent time – maybe after your morning shower, during your skincare routine, or right before bed. Consistency is more important than duration. Three minutes every day beats twenty minutes once a week.
Get a Journal
You will want somewhere to jot down your thoughts after each session. This does not need to be fancy. A simple notebook, the notes app on your phone, or a
guided self-love journal
all work beautifully. The act of writing helps solidify the shifts you are making internally.
Tell Someone You Trust
Accountability matters. Tell a friend, a partner, a therapist, or an online community that you are doing this. You do not have to share details – just the fact that you are working on something meaningful for yourself. Having someone check in on you can make the difference between finishing and fading out around Day 12.
Week One – Days 1 Through 7 – The Foundation Phase
The first week of the mirror confidence challenge is gentle by design. You are simply building the habit of spending intentional time with your reflection. No big emotional asks. Just showing up.
Day 1 – The Neutral Gaze
Stand in front of your mirror for three minutes. You can be fully clothed – whatever makes you comfortable. Your only goal is to look at your face. Not to evaluate it, not to pick it apart, just to look. Notice your eye color, the shape of your brows, the curve of your lips. If critical thoughts come up, acknowledge them and let them pass. You are practicing neutral observation.
Day 2 – Three Nice Things About Your Face
Same position as yesterday, but today, name three things about your face that you appreciate. These do not have to be things you love – just things you can acknowledge. Maybe it is that your eyes crinkle when you smile. Maybe it is the freckles across your nose. Write them down afterward.
Day 3 – Smile at Yourself
This sounds silly, and that is exactly the point. Stand in front of your mirror and genuinely smile at yourself for one full minute. Not a forced grin – try to think of something that makes you happy and let it reach your face. Notice how your reflection changes. Most of us never see ourselves smiling naturally. It can be surprisingly emotional.
Day 4 – Hands and Arms Appreciation
Expand your gaze to include your hands and arms. Look at them in the mirror. Think about everything they do for you – the meals they prepare, the people they hug, the work they accomplish. Say out loud: “These hands carry me through my life.” Write down any feelings that come up.
Day 5 – The Outfit Check
Put on an outfit you feel good in. Stand in front of the mirror and take in the full picture – not just the parts you usually fixate on, but the whole image. Notice colors, textures, how the fabric moves. If you need outfit inspiration that makes you feel amazing, the
Torrid Studio Knit collection
is designed to drape beautifully on curves.
Day 6 – Gratitude for Function
Today, stand in front of the mirror and focus on what your body does rather than how it looks. Your legs carry you. Your lungs breathe without you asking. Your heart has been beating since before you were born. Spend three minutes thanking your body for its function. Write down five things your body did for you today.
Day 7 – Weekly Check-In
Take ten minutes to journal about your first week. What felt easy? What felt hard? Did any emotions surprise you? Rate your comfort level with the mirror from 1 to 10 – this is your baseline. You will check in again at the end of each week.
Week Two – Days 8 Through 14 – The Observation Phase
Now that you have built the habit, Week Two introduces deeper observation. You are learning to see your body as a whole rather than a collection of problem areas.
Day 8 – Full Body Scan With Neutrality
Wearing something comfortable – leggings and a tank top, a soft robe, whatever feels right – stand in front of the mirror and slowly scan your body from head to toe. Your goal is neutral description, like a painter studying their subject. “I have round shoulders. My stomach is soft. My thighs are strong.” No judgment words – just observation.
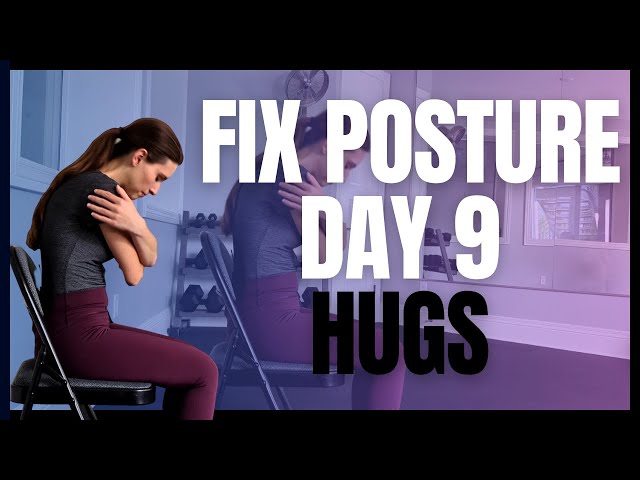
Day 9 – The Posture Experiment
Stand in front of the mirror and try three different postures: shoulders hunched, neutral standing, and shoulders back with chin slightly lifted. Notice how each posture changes not just how you look but how you feel. Body confidence lives in your posture as much as in your thoughts. For extra support during the day, a
plus-size posture corrector
can be a helpful reminder to stand tall.
Day 10 – Soft Belly Day
This is often the hardest day of the challenge, and it is placed early in Week Two intentionally. Stand in front of the mirror, place your hands on your belly, and breathe. Do not suck in. Do not tense up. Let your belly be soft. Spend three minutes with your hands there, breathing normally. If tears come, let them. This is where so much of our body shame lives, and giving it gentleness instead of tension is a radical act.
Day 11 – Movement in the Mirror
Put on your favorite song and move in front of the mirror. Dance, sway, stretch – whatever feels natural. Watch your body in motion. Bodies in motion look different from bodies standing still, and there is something beautiful about seeing yourself move freely. Let it be fun. Let it be silly. Let it be whatever it wants to be.
Day 12 – The Touch Exercise
While looking in the mirror, gently touch different parts of your body with kindness. Run your hands down your arms, across your shoulders, over your hips. Touch your body the way you would comfort a friend. This exercise builds a connection between physical sensation and visual input, rewiring the way your brain processes your reflection.
Day 13 – Wearing Something You Have Been Avoiding
Pull out that piece of clothing you bought but never wore. The sleeveless top. The bodycon dress. The shorts. Put it on and stand in front of the mirror for five minutes. You do not have to love how it looks. You just have to see yourself in it and sit with whatever comes up. If the item does not fit comfortably, that is information about the clothing, not about your body.
Day 14 – Weekly Check-In
Journal again. Rate your comfort level from 1 to 10. Compare it to last week. Write about any shifts you have noticed – in front of the mirror and outside of it. Many women report that by this point, they are catching themselves being less critical throughout the day, not just during the challenge.
Week Three – Days 15 Through 21 – The Affirmation Phase
Week Three is where you start actively replacing critical self-talk with affirmations. By now, you have built enough comfort with the mirror that adding positive language will feel more natural than it would have on Day 1.
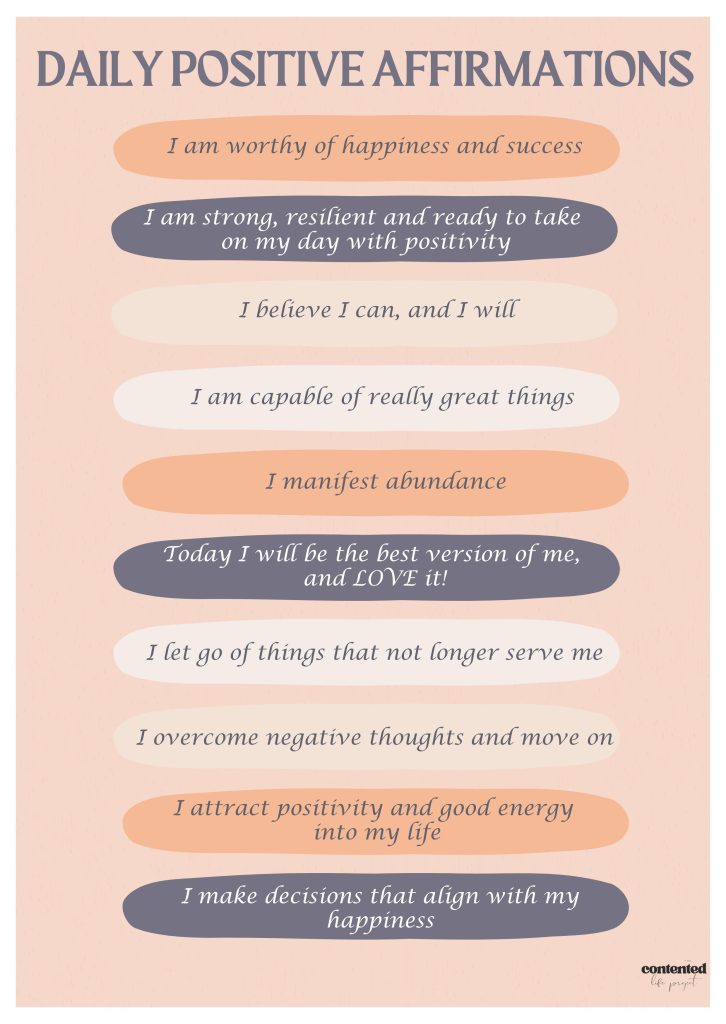
Day 15 – Your First Mirror Affirmation
Look into your own eyes in the mirror and say: “I am allowed to take up space.” Say it three times. The first time might feel awkward. The second time might feel forced. The third time, something might shift. Write about the experience afterward.
Day 16 – Body Part Affirmations
Choose three body parts – including one you struggle with – and give each one a compliment out loud. “My arms are strong and capable.” “My thighs carry me through every adventure.” “My belly is soft, and that is perfectly fine.” Specificity matters here. Generic affirmations slide off. Specific ones stick.
Day 17 – The Letter to Your Body
Write a short letter to your body as if it were a friend you had been neglecting. Apologize for the harsh words. Acknowledge what it has been through. Promise to try harder. Then read the letter out loud to your reflection. This exercise is borrowed from therapeutic practice and is one of the most powerful days of the entire challenge.
Day 18 – Affirmations in Your Skincare Routine
Today, combine your mirror time with your skincare routine. As you apply each product, say something kind to the skin you are caring for. When you apply moisturizer to your face, say “I am taking care of you.” When you apply body lotion, say “You deserve softness.” A nourishing body cream like
Sol de Janeiro Brazilian Bum Bum Cream
turns this into a sensory experience that reinforces the positive message.
Day 19 – The Power Pose
Social psychologist Amy Cuddy popularized the idea of power posing – standing in an expansive, confident posture to shift your internal state. Today, try three power poses in front of the mirror: hands on hips (the Wonder Woman), arms raised in a V (the victory pose), and hands clasped behind your head with elbows wide. Hold each for two minutes. Notice how your reflection looks powerful and commanding. That is you. That has always been you.
Day 20 – Affirmations for Your Younger Self
Look at your reflection and imagine your younger self standing beside you – the little girl who first learned to feel bad about her body. What would you say to her? Speak those words out loud to the mirror. Many women find this exercise deeply healing because it connects the dots between old wounds and current self-perception.
Day 21 – Weekly Check-In
Rate your comfort level again. By Week Three, most women report a 3 to 5 point increase from their baseline. Journal about the affirmation exercises. Which ones felt powerful? Which felt difficult? What surprised you about hearing your own voice say kind things about your body?
Week Four – Days 22 Through 30 – The Celebration Phase
The final phase is about anchoring everything you have built. These exercises are designed to be joyful, celebratory, and deeply affirming. You have done the hard work. Now it is time to enjoy the results.
Day 22 – The Photo Shoot
Set up your phone on a timer or prop it against the mirror and take photos of yourself. Not for social media – for you. Try different poses, different angles, different expressions. Look at the photos afterward and pick three that make you smile. Save them somewhere you can easily access them on hard days.
Day 23 – Dress Up Day
Put together your most confident outfit. Do your hair. Do your makeup if that is your thing. Put on jewelry. Go all out. Then stand in front of the mirror and take yourself in. This is you at your most put-together, and the goal is to see the full picture with appreciation. A statement accessory like a
chunky gold chain necklace
can add that extra boost of confidence to your look.
Day 24 – Bare Skin Day
If you are ready – and only if you are ready – spend time in front of the mirror in minimal clothing. Underwear, a bralette, whatever your comfort level allows. This is not about being brave or pushing past your limits. It is about meeting your body without the armor of clothing and offering it the same kindness you have been practicing all month.
Day 25 – The Compliment Collection
Write down every compliment you can remember receiving about your appearance, your energy, your presence – anything. Then read them to your reflection. Sometimes we dismiss compliments the moment we hear them. Today, you are going to let them land.
Day 26 – Mirror Dancing – The Full Version
Remember Day 11? Today, you are doing it again, but bigger. Create a playlist of songs that make you feel unstoppable. Dance in front of the mirror for at least three songs. Watch yourself move. Let yourself be mesmerized by your own body in motion. This is freedom.
Day 27 – Share Your Journey
If it feels right, share something about your experience. Post on social media, tell a friend, write a blog post, or simply text someone you love and tell them about this challenge. Vulnerability shared becomes strength multiplied.
Day 28 – Create Your Personal Affirmation
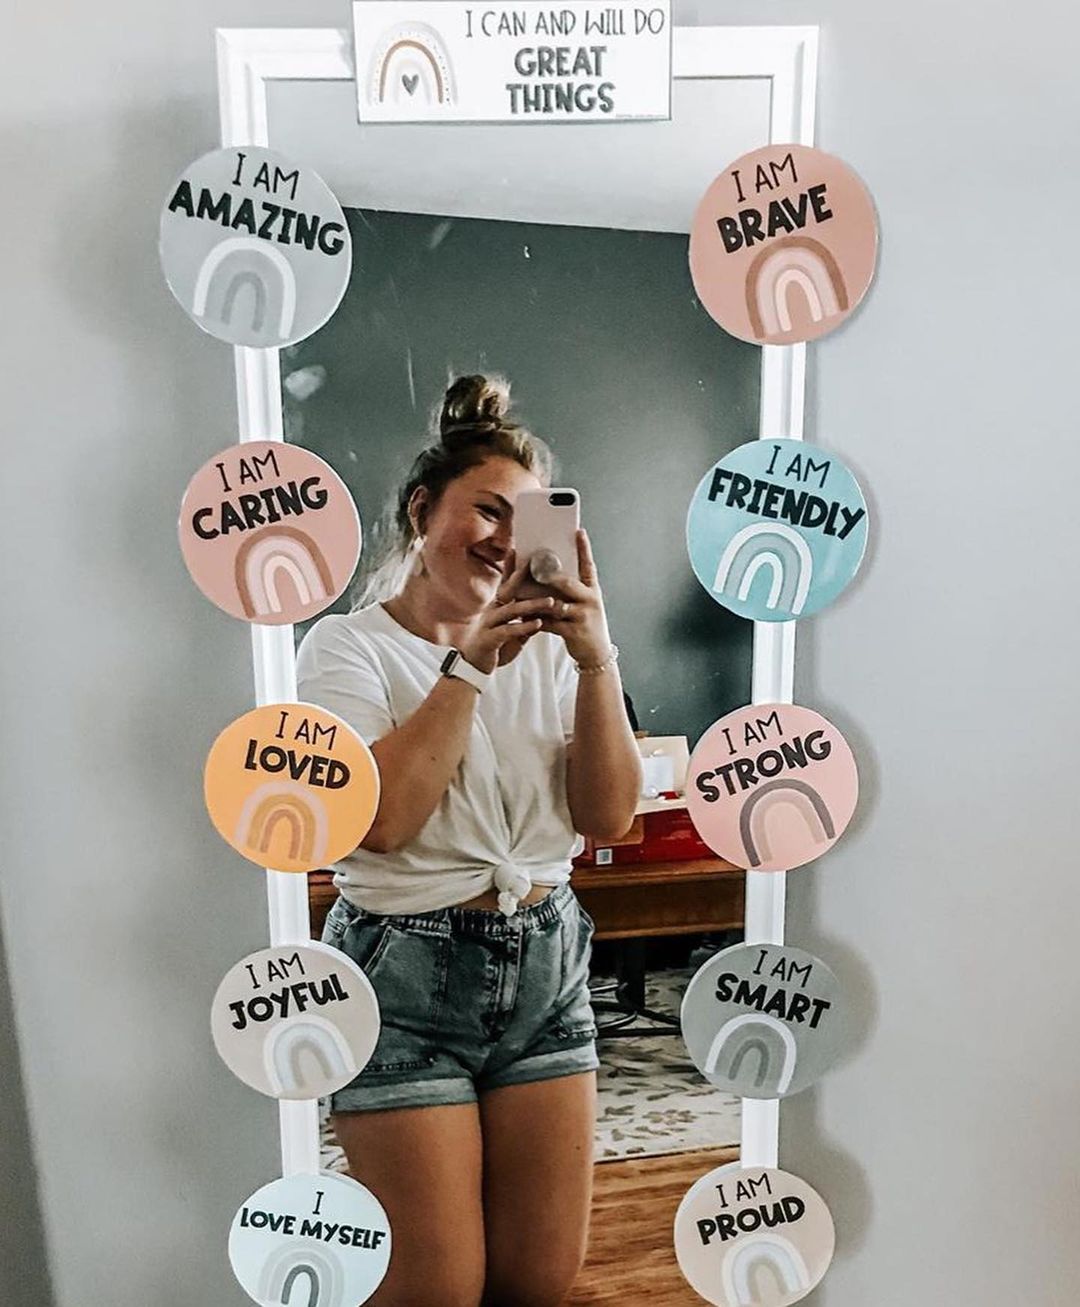
Using everything you have learned about yourself over the past 27 days, write one personal affirmation that resonates deeply with you. Not something generic from the internet – something that speaks directly to your journey. Write it on a sticky note and put it on your mirror. This is your anchor.
Day 29 – The Forgiveness Exercise
Look in the mirror and say: “I forgive myself for every unkind thing I have ever thought about you.” Say it as many times as you need to. Some women say it once and feel complete. Others need to repeat it for five minutes before it starts to sink in. There is no right way. There is only your way.
Day 30 – The Celebration
You did it. Stand in front of your mirror one final time – for now – and simply say “Thank you.” Thank your body for carrying you through this challenge. Thank yourself for showing up every day. Thank the mirror for being a tool for healing instead of harm. Then do something wonderful for yourself. Take a bath, buy yourself flowers, order that
gorgeous satin robe set from Savage X Fenty
you have been eyeing, or simply sit with the quiet pride of having completed something meaningful.
How to Handle Difficult Days During the Challenge
Let us be real – not every day of this mirror confidence challenge will feel good. Some days you will stand in front of the mirror and the old critical voice will be louder than anything else. Some days you will cry. Some days you will want to skip. Here is what to do when that happens.
Lower the Bar, Do Not Drop It
If a day’s exercise feels too intense, scale it back. Instead of a full body scan, just look at your hands. Instead of saying affirmations out loud, whisper them. Instead of five minutes, do one. The goal is not to complete each exercise perfectly – it is to maintain the habit of showing up. A scaled-back practice still counts.
Name the Voice
When critical thoughts come up, it helps to externalize them. Some women name their inner critic – “Oh, there goes Karen again, telling me my thighs are too big.” This creates distance between you and the thought. You are not your inner critic. You are the person who is brave enough to challenge it.
Write It Out
If a session brings up big emotions, write them down immediately. Do not try to analyze or fix them. Just get them out of your body and onto paper. This is one reason the journal component of this challenge is so important. It gives your feelings somewhere to go besides back into your body as tension and shame.
Reach Out
If a day feels particularly heavy, text the person you told about this challenge. You do not have to explain everything – just say “Today was hard” and let someone hold that with you. Body acceptance work can surface deep stuff, and you do not have to carry it alone.
Remember Why You Started
On the hardest days, come back to your why. Maybe you started because you are tired of dreading getting dressed. Maybe you started because you want your daughter to see a woman who likes her reflection. Maybe you started because you deserve peace with your body after decades of war. Whatever your reason, it is enough. It is more than enough.
What Happens After the 30 Days Are Over
The mirror confidence challenge does not end on Day 30. It simply shifts from a structured program to a sustainable practice. Here is how to maintain the gains you have made.
Keep the Mirror Time
Continue spending at least one minute per day in intentional mirror time. This can be during your skincare routine, while getting dressed, or as a standalone practice. The key word is intentional – you are choosing to look at yourself with presence rather than rushing past your reflection on autopilot.
Update Your Affirmation
Every few weeks, check in with your personal affirmation. Does it still resonate? Does it need updating? As you grow, your affirmation should grow with you. Some women keep a running list and rotate through them.
Build a Body-Positive Environment
Your mirror work is most effective when supported by a body-positive environment. Curate your social media feeds to include diverse body types. Follow plus-size creators who celebrate their bodies without apology. Read books like “The Body Is Not an Apology” by Sonya Renee Taylor or
body-positive book collections available on Amazon
. Surround yourself with images and messages that reinforce what you are building in front of the mirror.
Dress for Joy, Not Hiding
One of the most practical outcomes of this challenge is a shift in how you get dressed. Many women report that after 30 days, they start reaching for clothes that make them feel good rather than clothes that hide their bodies. If your wardrobe needs a refresh to match your new mindset, brands like
Universal Standard
and
Eloquii
offer beautiful, well-made pieces designed for curvy bodies.
Consider Professional Support
If this challenge surfaced deep-seated body image issues, trauma around your appearance, or symptoms of disordered eating, please consider working with a therapist who specializes in body image. This challenge is a wonderful starting point, but it is not a substitute for professional support when you need it. Organizations like the National Eating Disorders Association (NEDA) offer free resources and referrals.
The 30-day mirror confidence challenge is not magic. It will not erase years of internalized fatphobia overnight. But it will crack the door open. It will show you that another way of seeing yourself is possible. And once that door is open, even just a crack, the light that comes through can change everything.
You deserve to look at your reflection and feel peace. Not perfection. Not forced positivity. Just peace. And that starts with 30 days, a mirror, and the willingness to try.
Key Takeaways
The 30-day mirror confidence challenge uses principles from exposure therapy to gradually build a healthier relationship with your reflection, moving through foundation, observation, affirmation, and celebration phases.
Starting with neutral observation rather than forced positivity makes the practice sustainable and prevents the challenge from feeling overwhelming or fake.
Difficult days are normal and expected – scaling back the exercise is always better than skipping it entirely.
Combining mirror work with journaling, supportive community, and a body-positive environment amplifies the results beyond what mirror time alone can achieve.
The real goal is not to love every part of your body but to reach a place of peace and acceptance where your reflection no longer triggers shame or avoidance.
Frequently Asked Questions
Do I have to do the mirror confidence challenge every single day without missing one?
No. Life happens, and missing a day does not erase your progress. If you miss a day, simply pick up where you left off the next day. What matters most is the overall pattern of showing up, not achieving a perfect streak. Some women take 35 or 40 days to complete the 30 exercises, and the results are just as meaningful.
What if I start crying during one of the exercises?
Tears are a completely normal and healthy response during this challenge, especially during exercises like the soft belly day or the letter to your body. Crying means something is moving through you. Let it happen, write about it afterward, and be extra gentle with yourself for the rest of the day. If the emotions feel overwhelming or unmanageable, consider reaching out to a therapist for additional support.
Can I do this challenge with a friend or partner?
Absolutely. Many women find it helpful to do the challenge alongside a friend, checking in daily or weekly to share their experiences. However, the actual mirror exercises should be done privately. Body image work is deeply personal, and you need the freedom to be vulnerable without an audience. Share your reflections afterward, but keep the mirror time just for you.
I have a history of eating disorders. Is this challenge safe for me?
Mirror exposure can be powerful, and for individuals with a history of eating disorders, it should ideally be done under the guidance of a therapist who specializes in body image and eating disorders. This challenge is designed for general body acceptance work, not clinical treatment. If you have an active eating disorder or are in early recovery, please consult with your treatment team before starting.
Will this challenge help me lose weight?
This challenge is not about weight loss. It is about changing your relationship with your body as it is right now. Many women find that when they stop fighting their bodies and start caring for them, their overall health behaviors naturally improve – but weight loss is not the goal, the metric, or the measure of success here. The measure of success is how you feel when you look in the mirror on Day 30 compared to Day 1.