Category: Beauty

  • Cetaphil vs CeraVe Moisturizing Cream: The Tub That Actually Earns the Bathroom Shelf

    Cetaphil vs CeraVe Moisturizing Cream: The Tub That Actually Earns the Bathroom Shelf

    Cetaphil Moisturizing Cream and CeraVe Moisturizing Cream tubs placed side by side on a beige linen background

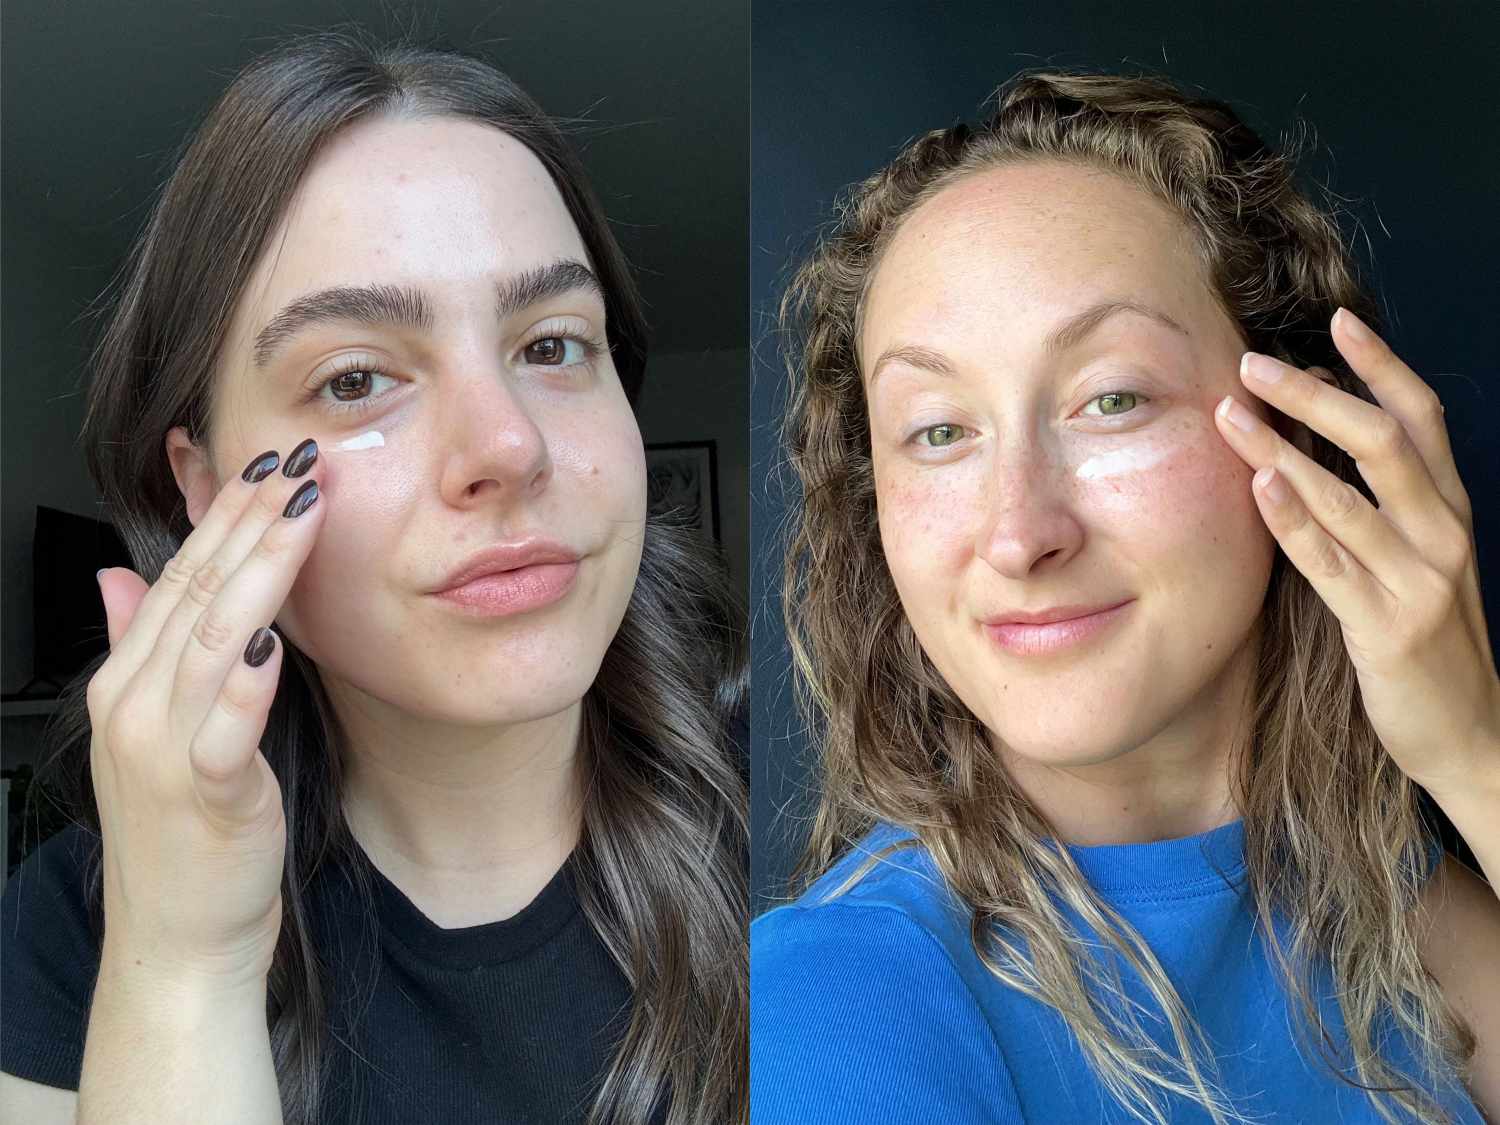
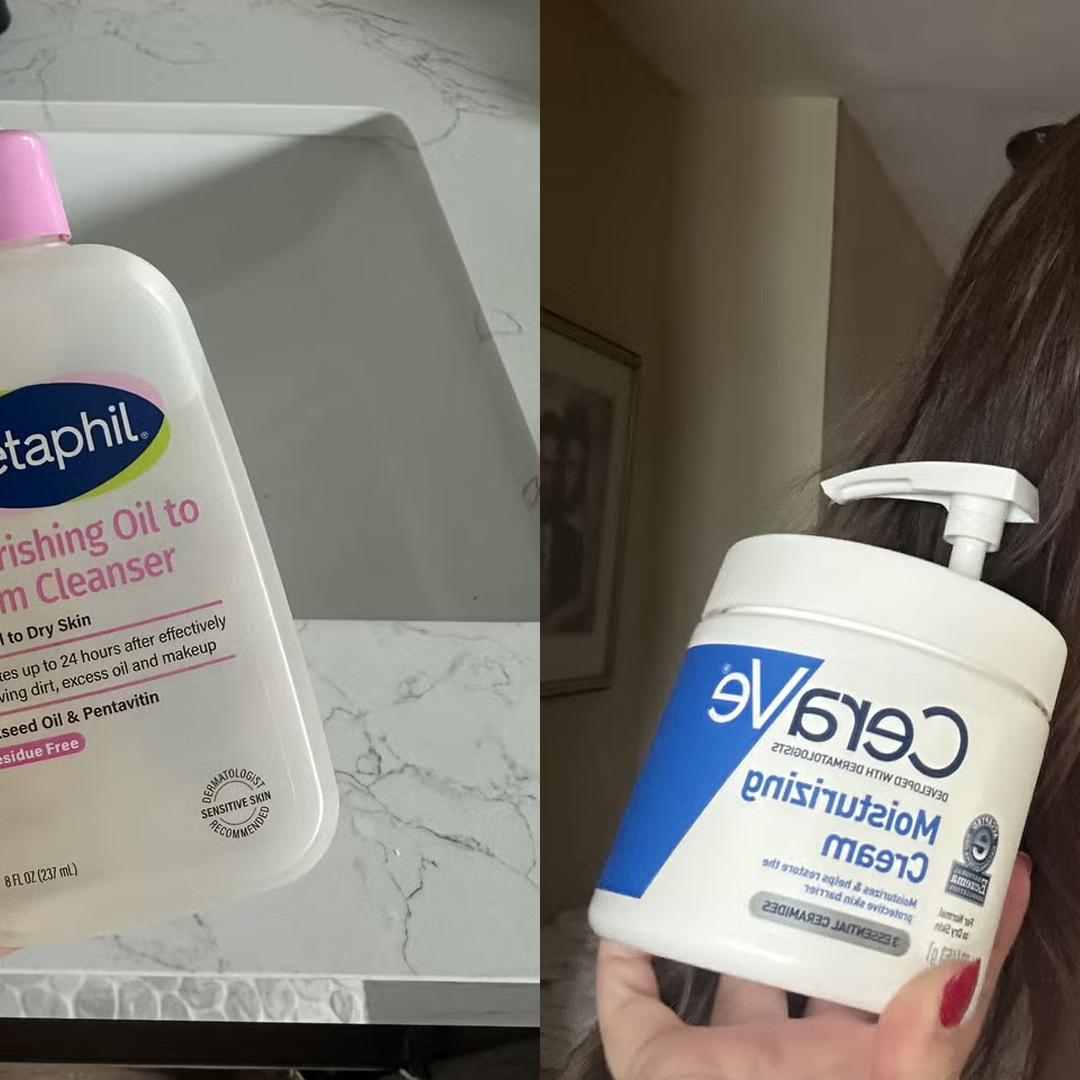
    The cream with the heavier feel, the bigger occlusive load, and the smaller TikTok footprint is the one that earned permanent shelf space in my bathroom for body, and the one most readers expect to win for face is the wrong pick for half the people buying it. Cetaphil Moisturizing Cream and CeraVe Moisturizing Cream sit on the same drugstore shelf, in nearly identical white tubs, for nearly identical prices. After five months of using both on my NC45 neutral-warm skin (face first 30 days each, then body for the remainder), the answer is not “they are basically the same tub.” One is built around a glycerin and petrolatum occlusive structure with no real actives. The other is built around three ceramides and hyaluronic acid in a slower-release vehicle. On a deeper complexion that runs combination-oily on the T-zone and dry on the cheeks, that difference is not academic.

    Most reviews of these creams are written by people who tested only on face, only for a week, on one skin type. Moisturizer is hydration plus occlusion, barrier support, texture under makeup, and humidity behavior. I tested both as face cream first, then as body cream, tracking four specific things: pilling under foundation, T-zone behavior at hour six, eczema patch response on the back of my hands, and how each layered with chemical SPF the next morning. The verdict is split by use case, not by brand loyalty.

    Quick verdict if you only have 30 seconds

    CeraVe Moisturizing Cream wins for face on combination, dry, or barrier-compromised skin and is the better pick for anyone layering actives like retinol, niacinamide, or AHAs. Cetaphil Moisturizing Cream wins for body, eczema-prone hands, and the kind of deep-winter cracked-knuckle situation where you need a real occlusive seal more than you need active ingredients. For my face long-term, CeraVe stayed. For my body and post-shower routine, Cetaphil stayed. Both stayed in the rotation, but for genuinely different jobs.

    What they are and why they get compared

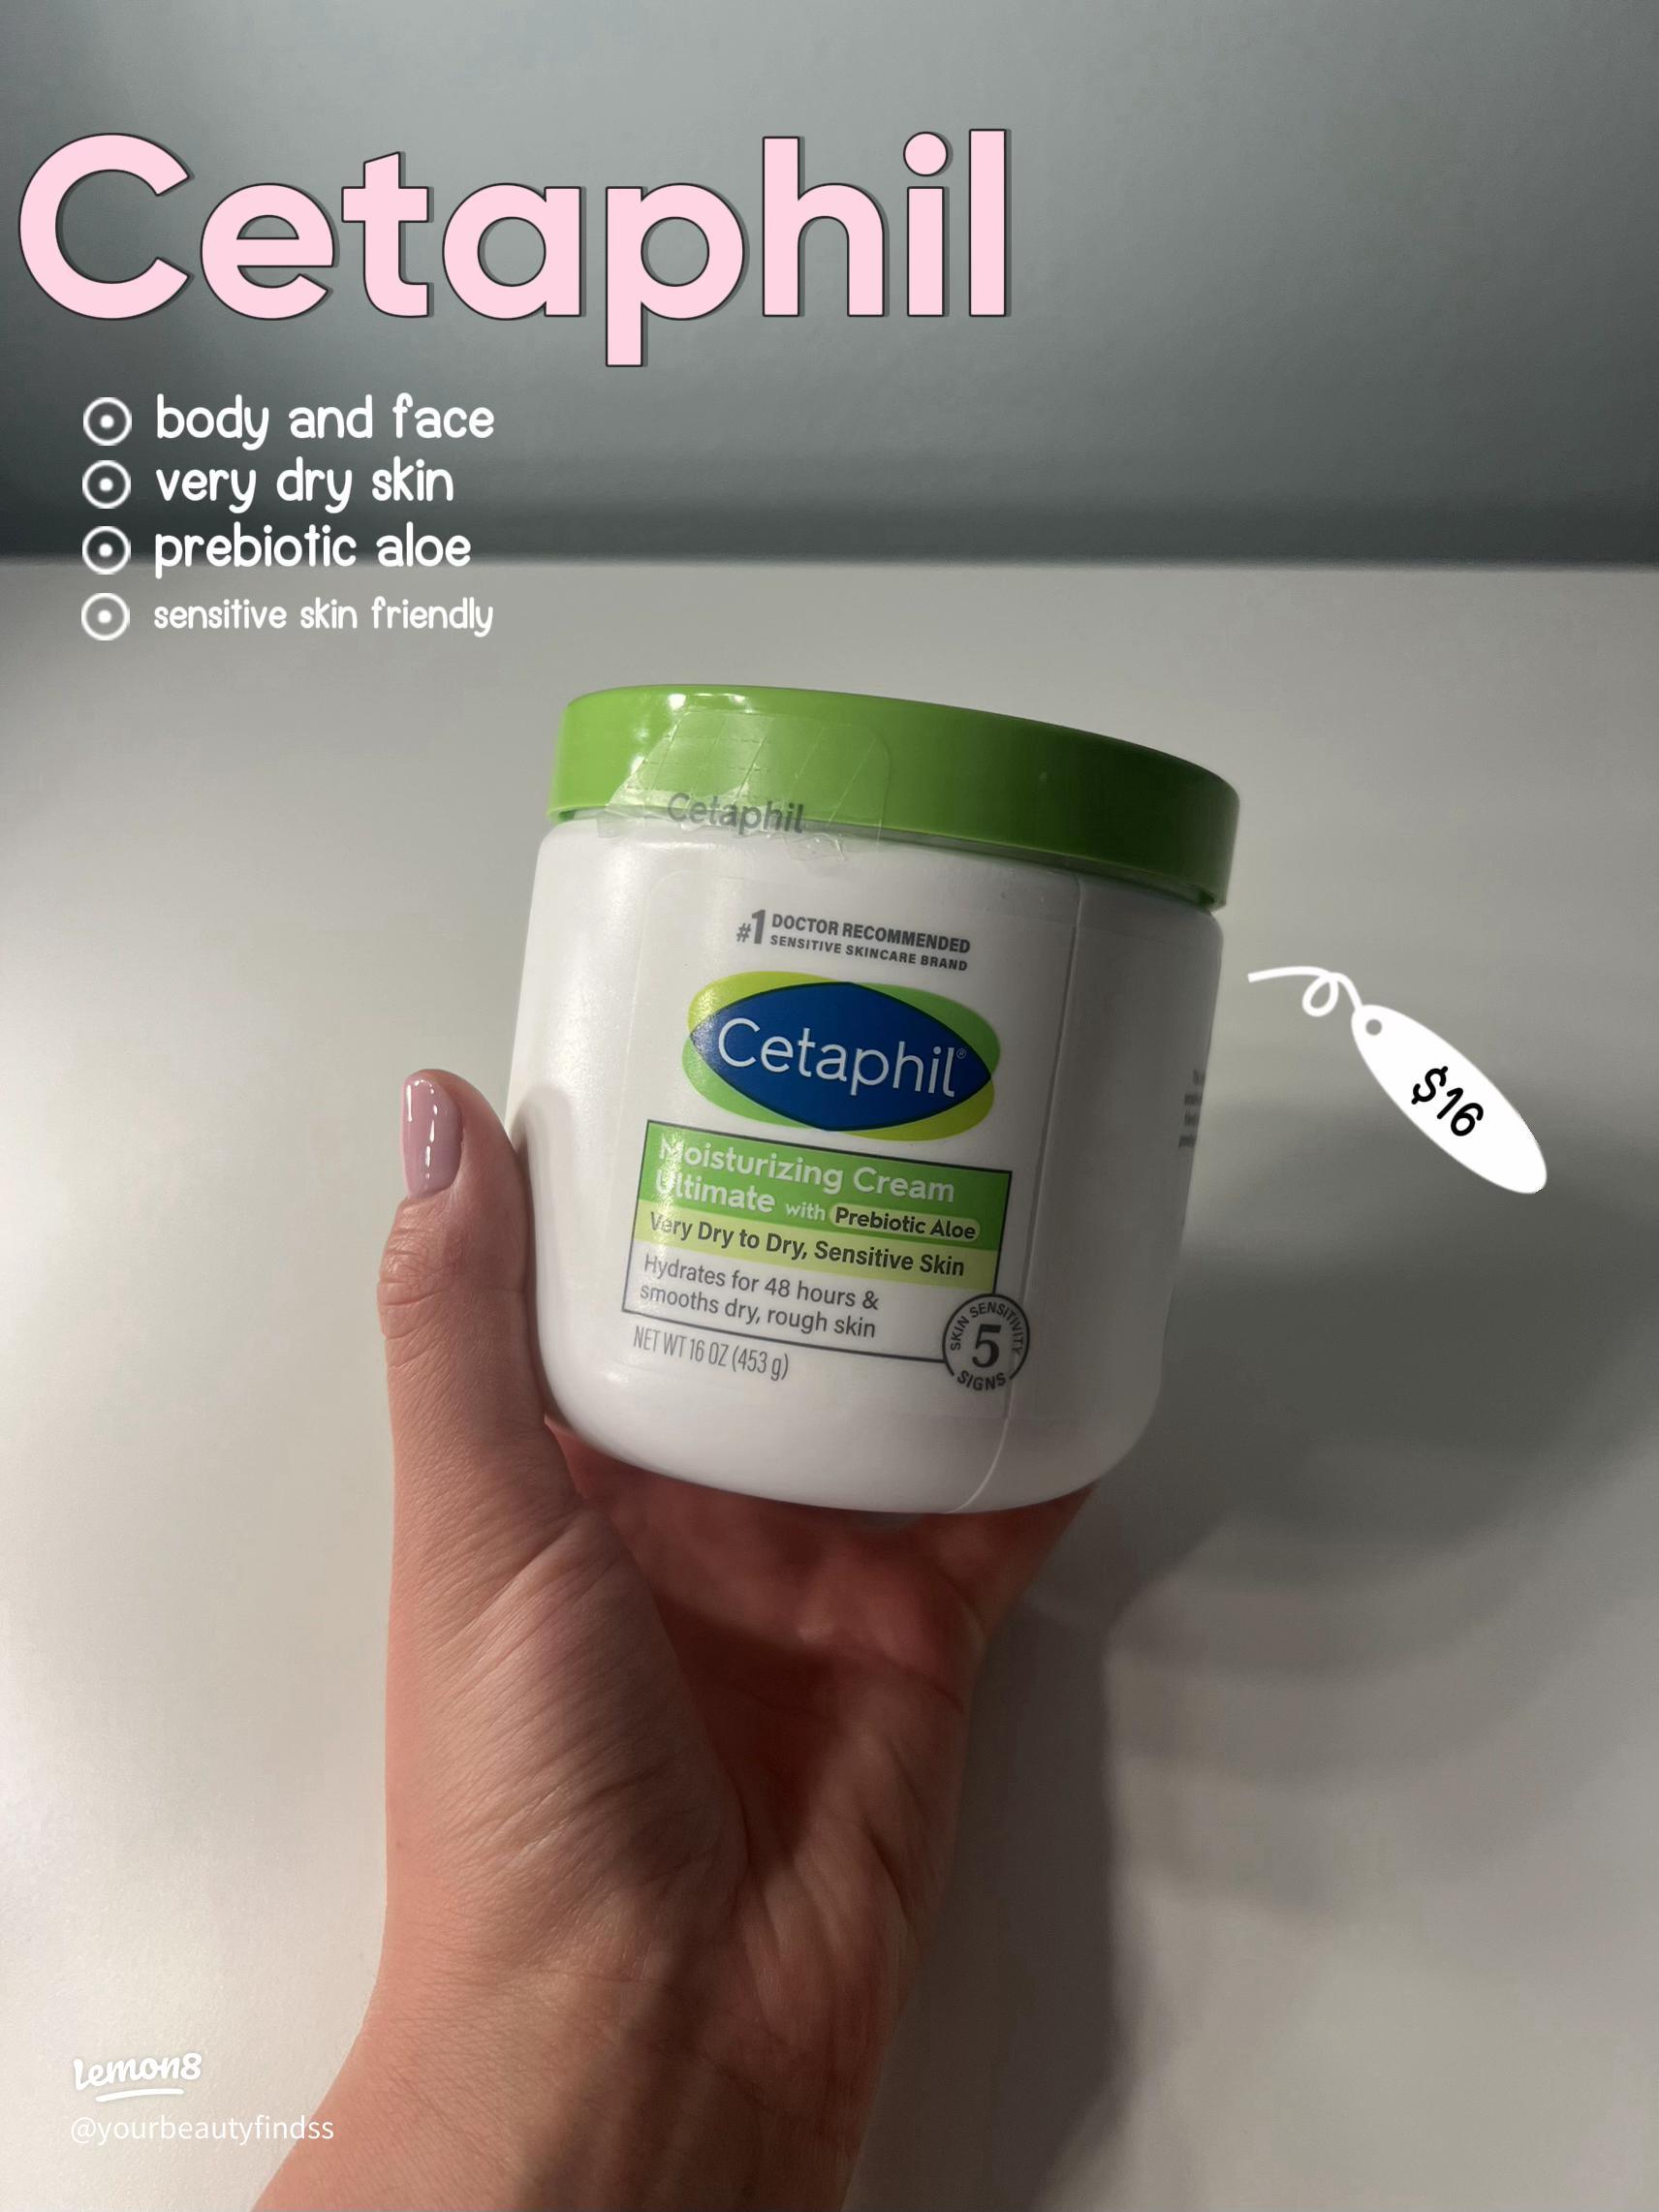
    Cetaphil launched in 1947 in a Texas pharmacy as a soap-free line for patients with eczema, rosacea, and post-procedure skin. The Moisturizing Cream came later, built on the same do-no-harm philosophy: a thick, fragrance-free, occlusive-leaning tub with glycerin, petrolatum, and dimethicone doing the heavy lifting. Galderma owns the brand. The pitch has run unchanged for almost 80 years – no fragrance, no harsh surfactants, no fancy actives, just a barrier seal that does the boring work.

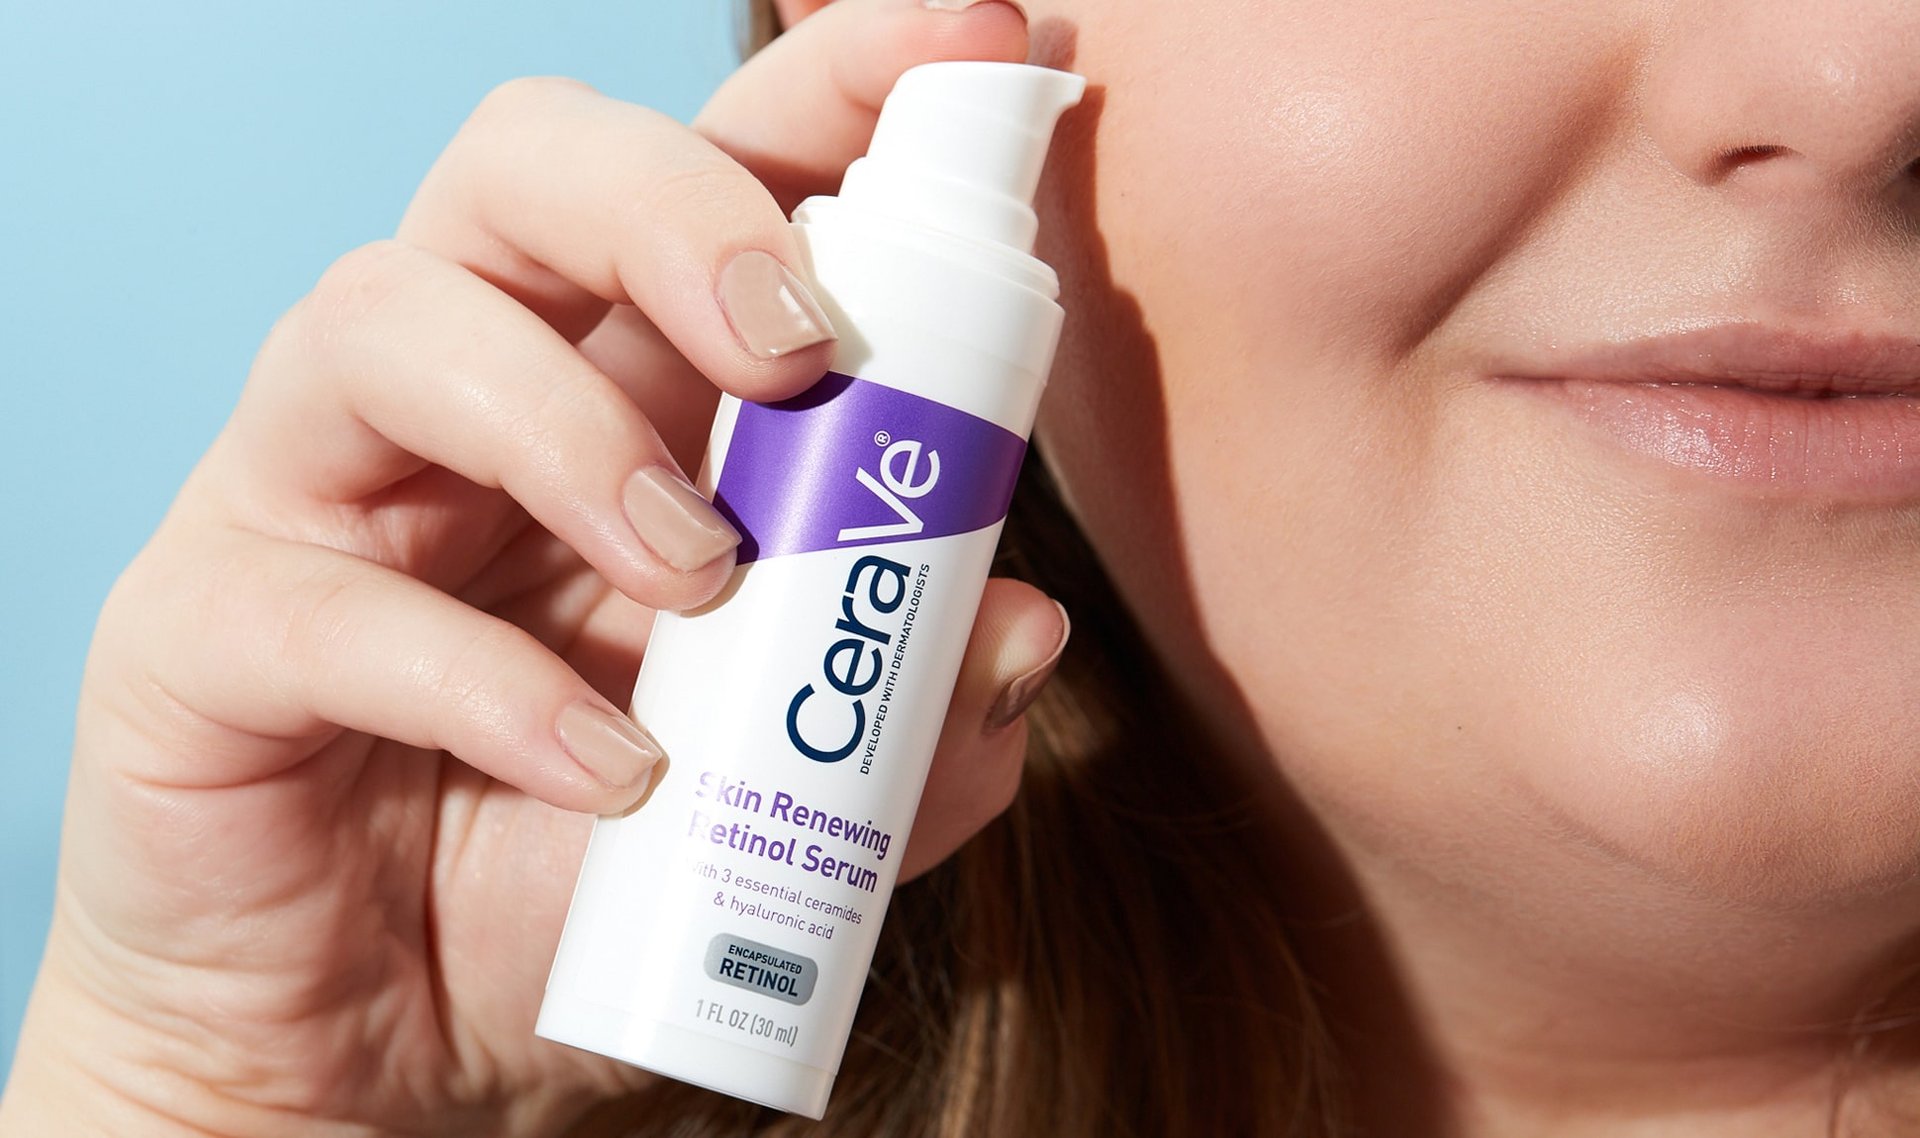
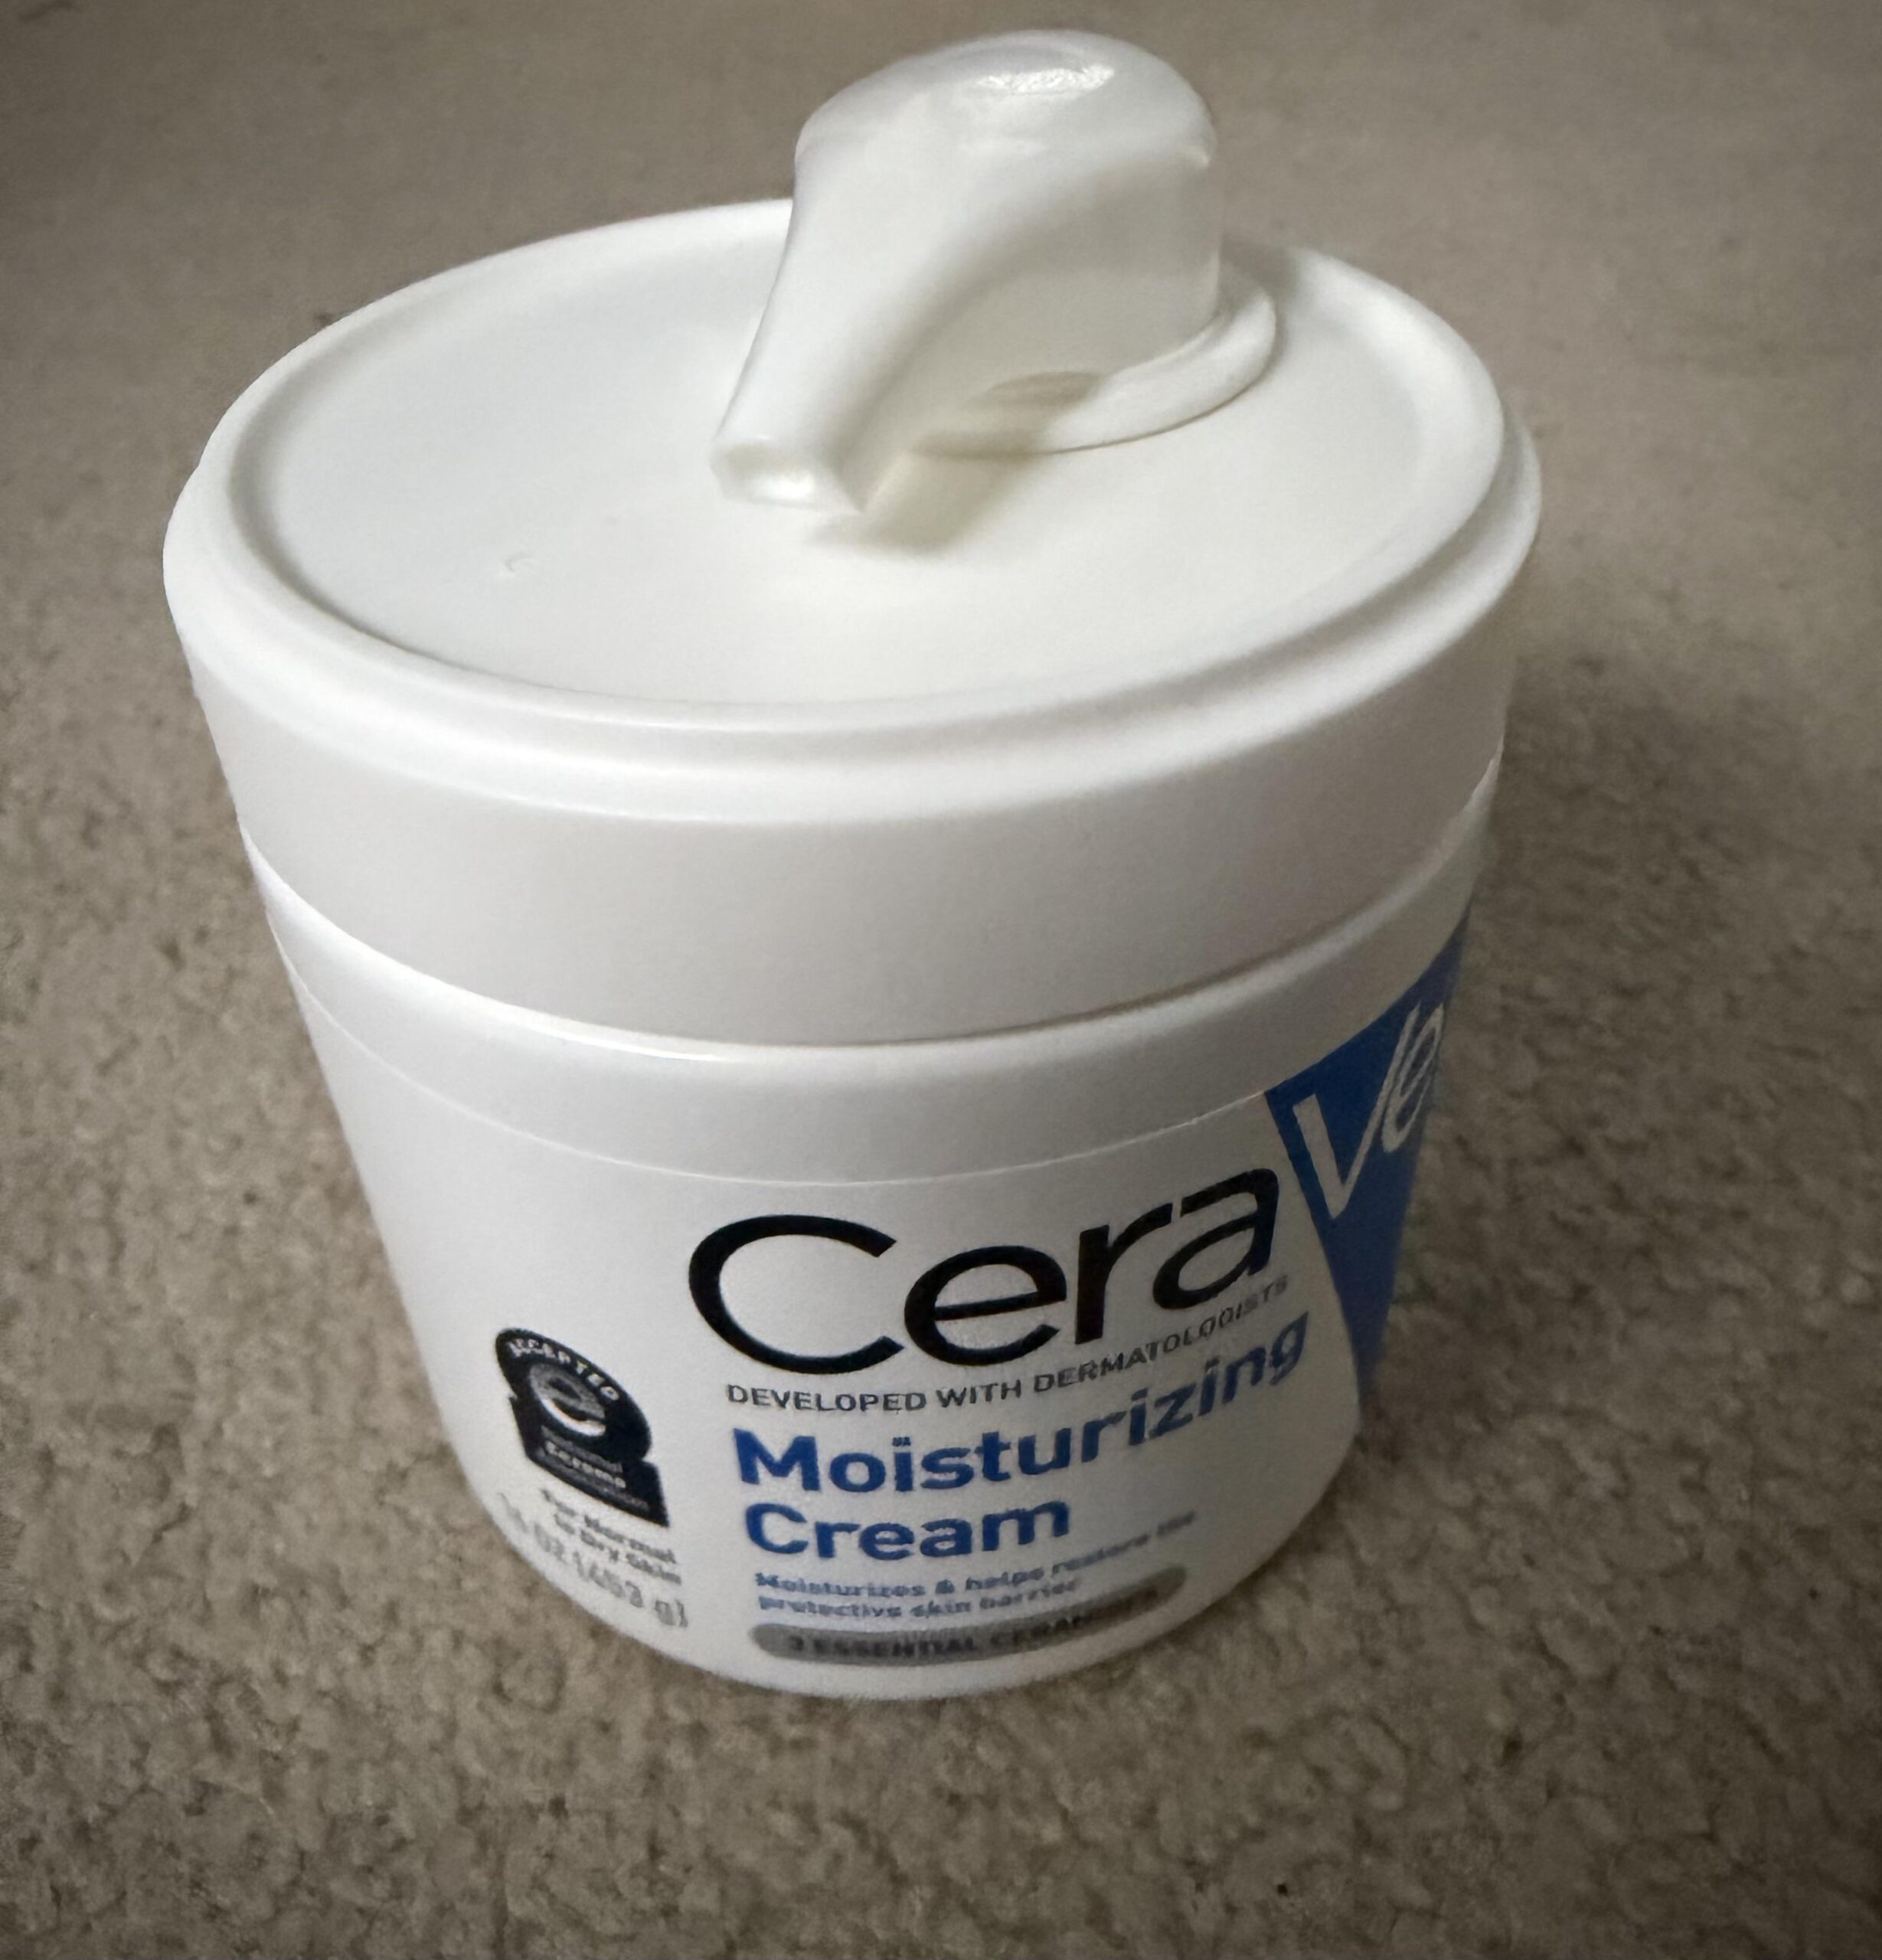
    CeraVe launched in 2005 with a more modern pitch. Developed with dermatologist input, the brand built its identity on three ceramides (1, 3, and 6-II) plus hyaluronic acid, delivered through a patented MultiVesicular Emulsion that releases the actives slowly. L’Oreal acquired CeraVe in 2017 and the TikTok pipeline did the rest. The Moisturizing Cream is the flagship tub: ceramide-heavy, glycerin-rich, slightly thinner than Cetaphil, designed for dry-to-very-dry skin on face and body.

    Both are positioned for dry, sensitive, and barrier-compromised skin. Both retail around $16 to $19 for a 16oz tub at Target, Walmart, and Amazon. Both are dermatologist-recommended, fragrance-free, non-comedogenic. The packaging is so similar I have grabbed the wrong tub off the shelf, twice. This is exactly why the side-by-side question keeps getting asked.

    Side-by-side comparison

    Feature Cetaphil Moisturizing Cream CeraVe Moisturizing Cream
    Price (16oz tub) Around $16 Around $19
    Key actives Glycerin, petrolatum, dimethicone, sweet almond oil 3 ceramides (1, 3, 6-II), hyaluronic acid, glycerin
    Texture Thick, dense, slightly waxy Thick lotion, slightly whippy, easier to spread
    Occlusion level High – petrolatum-based seal Medium – barrier support without heavy occlusion
    Pilling under makeup Pills badly under powder foundation after 2 minutes No pilling under MAC Studio Fix at 7 minutes
    Fragrance None None
    Best primary use Body, hands, eczema patches Face, neck, layered with actives

    Cetaphil Moisturizing Cream: the occlusive heavyweight

    Open Cetaphil Moisturizing Cream tub with a swipe of the thick cream across a glass surface

    Cetaphil Moisturizing Cream is the heavier, denser, more old-school formula. Scoop a fingertip out of the tub and you get a thick white cream that holds its shape on the spatula before it relaxes. The slightly waxy mouth-feel comes from petrolatum sitting close to the top of the ingredient list. On the skin it leaves a real film, and that film is the point.

    What worked: as a body cream this is one of the best occlusive seals in the drugstore tier. I have a patch of mild eczema on the back of my left hand that flares up in winter and after long days of dish soap. Four nights of a thick layer of Cetaphil after my shower, sealed under cotton gloves while I slept, cleared the patch faster than anything I have used in the last two years. On elbows, knees, and shins it holds moisture longer than any drugstore lotion I have tested. I can put it on at 8am and still feel hydrated skin at 6pm, which CeraVe could not match at the same dose.

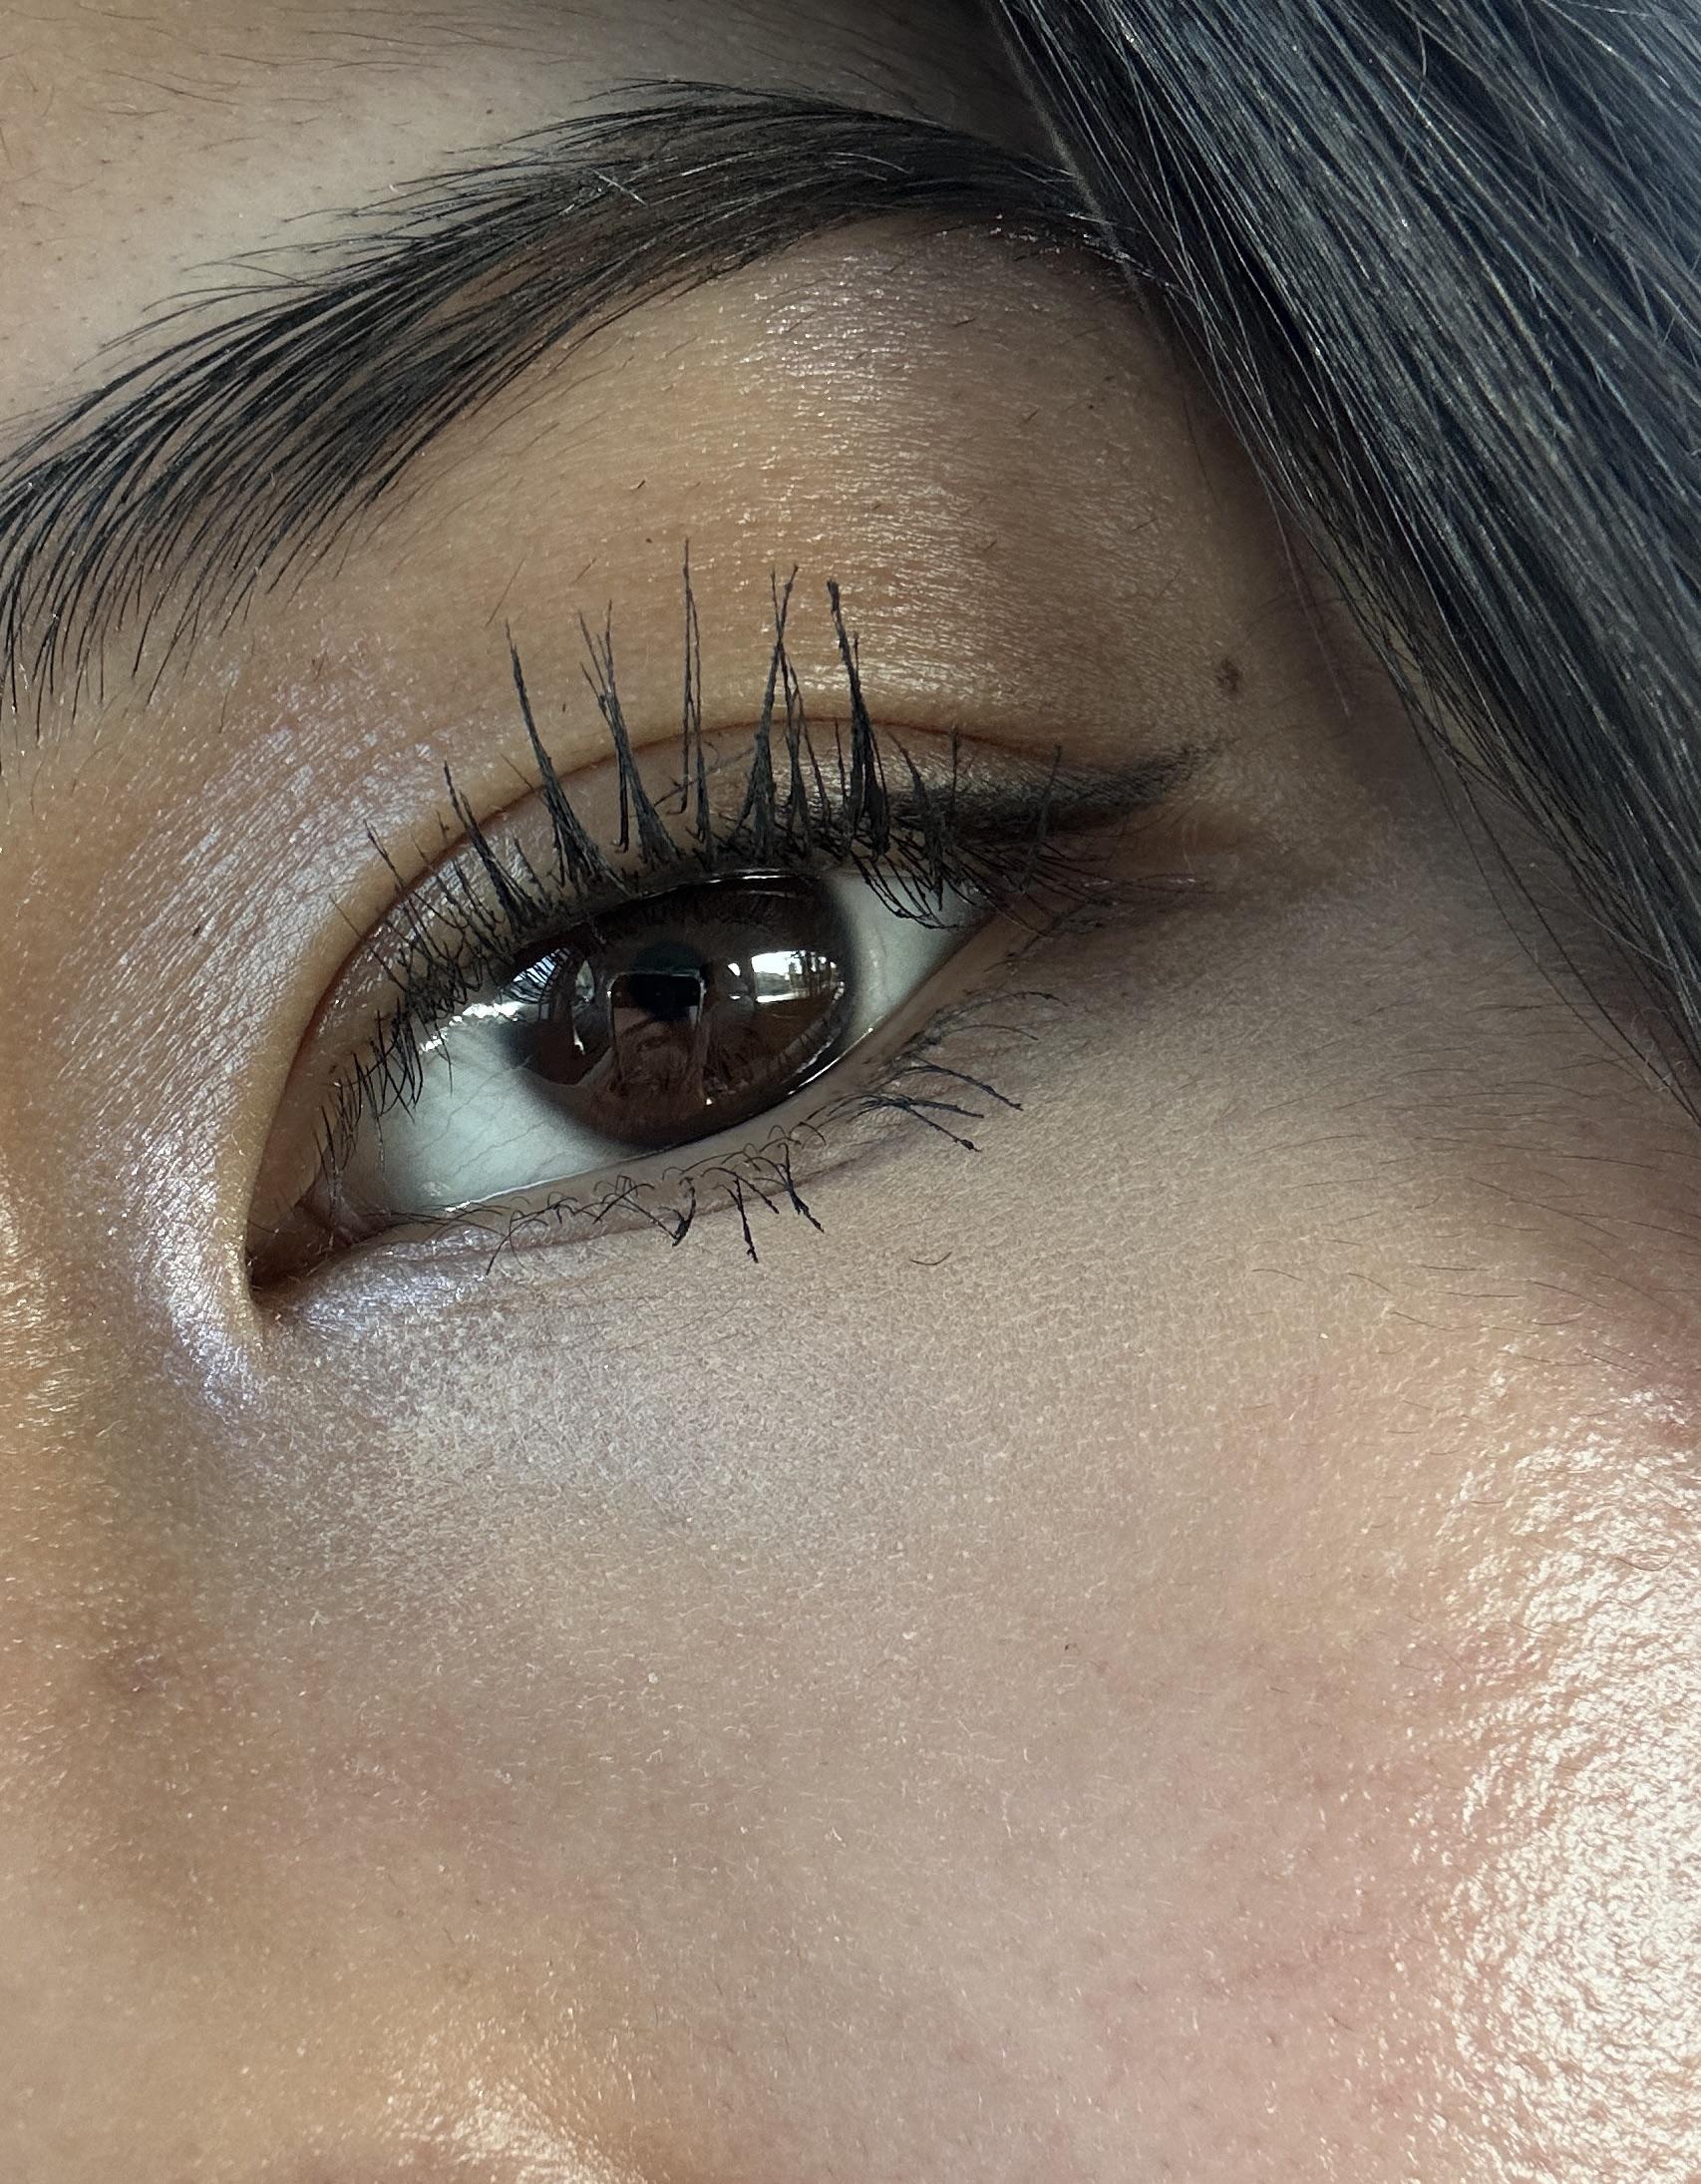
    What did not work: on my face it was a disaster. The same petrolatum and dimethicone film that makes it a great body sealant pills under any powder product within two minutes. I tried it with MAC Studio Fix NC45 and with a thin dust of L’Oreal True Match powder. Every single time I got little gray flecks of product rolling off my cheekbones the moment I touched my face. It also sat on top of my skin instead of sinking in, which on a combination-oily T-zone meant a slick that made the rest of my routine slide. For face it is too occlusive for anyone whose skin is not in active eczema crisis.

    For body and eczema-patch use, Cetaphil Moisturizing Cream on Amazon ships in the 16oz tub at the lowest consistent price I have tracked, with Subscribe & Save knocking another 5 to 15 percent off depending on the month.

    CeraVe Moisturizing Cream: the ceramide tub doing real face work

    Open CeraVe Moisturizing Cream tub with a dollop of the whippy cream on a glass surface

    CeraVe Moisturizing Cream looks like the same product in a different label. It is not. Scoop a fingertip out of the tub and you get a slightly whippy, lotion-adjacent cream that spreads and sinks in. Ceramides 1, 3, and 6-II are the lipids your skin barrier already uses, and the MultiVesicular Emulsion delivery system is one of the few things in drugstore skincare that has the clinical literature to back its marketing claim.

    What worked: on my face, this is one of the only thick creams I have used that did not pill under foundation. I gave it seven minutes to sink in before applying MAC Studio Fix NC45 and got zero flaking, zero rolling, zero gray flecks on my cheekbone when I touched my face. The slow-release ceramide load also showed up in my mid-afternoon barrier state. By hour six on a normal indoor day, my cheeks still felt comfortable rather than the slight tightness I get from gel moisturizers. On the T-zone it did not push my oil production higher.

    I tested it under La Roche-Posay Anthelios Melt-In Milk SPF 60 the next morning and it layered cleanly with no white cast and no slip. For anyone running a daily actives routine – retinol at night, niacinamide in the morning, weekly AHA – the ceramide replenishment CeraVe provides supports the barrier those actives wear down. This is the actual case for ceramides, and the cream is one of the cheapest ways to get them on your face.

    What did not work: on body it underperformed Cetaphil. The lighter texture that makes it ideal for face means it does not hold moisture on my shins or elbows the same way. On the eczema patch on my hand it helped, but did not clear it the way Cetaphil did under the same overnight-glove test. The hyaluronic acid is humectant, meaning in low-humidity winter heating it can pull water out of skin if nothing more occlusive is layered on top.

    For face use, CeraVe Moisturizing Cream at Target is the easiest pickup at the consistent $19 price point with the 90-day return policy if you react to it.

    Where they overlap and where they differ

    Both creams share the same baseline positioning: fragrance-free, dermatologist-recommended, non-comedogenic, drugstore-priced. Both use glycerin as a primary humectant. Both work as gentle starter moisturizers for anyone building a routine from scratch.

    The differences land in three places. First, occlusion profile – Cetaphil leans heavier on petrolatum and dimethicone, meaning a thicker seal, better for body and barrier crisis, worse for face under makeup. CeraVe uses a lighter occlusive load with ceramides doing the barrier work, suitable for face under makeup and for daily actives layering. Second, ingredient philosophy – Cetaphil is intentionally minimal, designed for skin that cannot tolerate anything. CeraVe is intentionally fortified to actively support a working barrier. Third, use case – Cetaphil shines for body and for the small group whose skin is so reactive even ceramides feel like too much. CeraVe shines for face and for the much larger group running actives.

    Price is real but not the deciding factor – Cetaphil runs roughly $3 cheaper per 16oz tub, which is rounding error in a yearly skincare budget. The lazy take is “they are interchangeable, get whichever is on sale.” They are not interchangeable.

    Which one for which person

    If you are building a face routine with actives – retinol, niacinamide, AHAs, vitamin C, anything from The Ordinary or Paula’s Choice – get the CeraVe Moisturizing Cream . The ceramide load is the genuine point, the texture sinks in within seven minutes, it layers under foundation without pilling, and it does not throw off sunscreen the next morning. For the NC40-to-NC50 range with combination-oily T-zone tendencies, it is one of the strongest drugstore face creams available.

    If you need an honest body cream that holds hydration for 10+ hours, or you have eczema patches on your hands, elbows, or shins that need a real occlusive seal at night, get the Cetaphil Moisturizing Cream . The petrolatum and dimethicone film does work that lighter lotions cannot. I keep one tub on my bathroom counter for face mornings, one on my nightstand for hand and elbow patches at night.

    If your skin is genuinely reactive – rosacea, eczema in active flare, post-procedure healing, or sensitivity that flags up at even ceramides and hyaluronic acid – default to Cetaphil for both face and body. The almost-no-actives formulation is the safer choice when your barrier cannot tolerate anything new. Once the flare calms, swap face back to CeraVe.

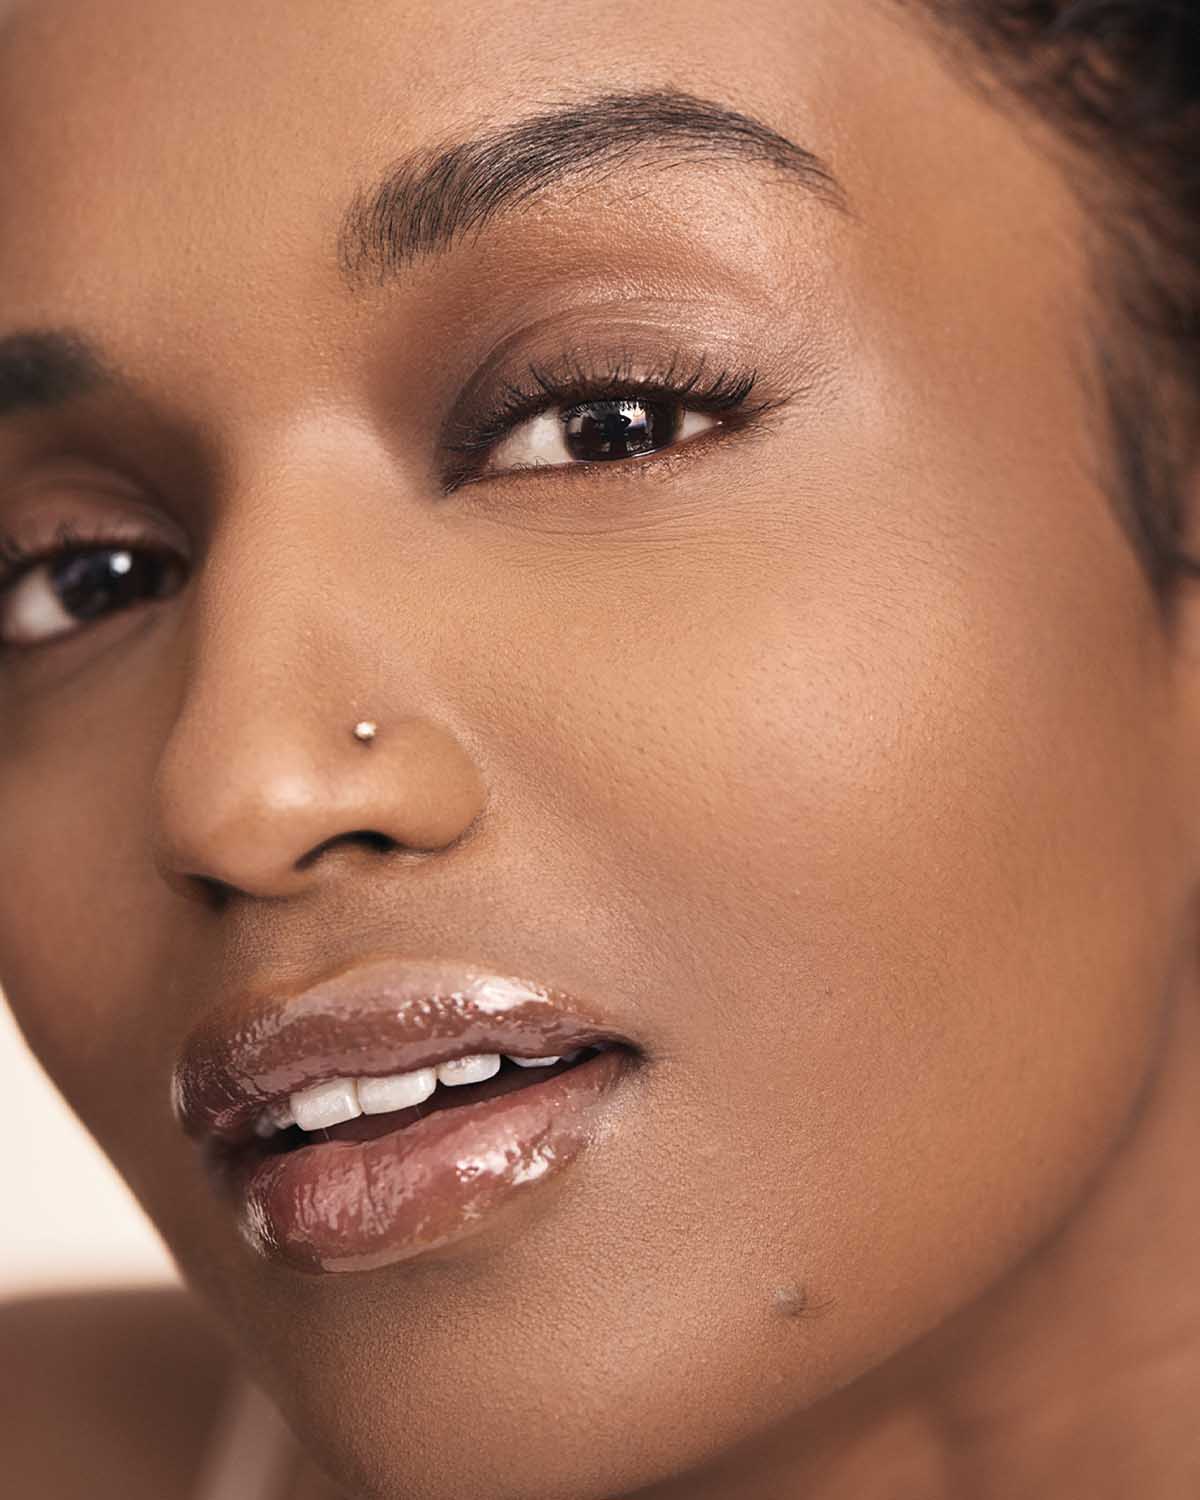
    On deep, melanin-rich skin like mine, both creams pass the white-cast test once they sink in. Cetaphil takes longer, which on darker skin can read as a slight gray sheen for the first five minutes – just give it the time. CeraVe sinks in faster and shows no cast at all.

    Frequently asked questions

    Can I use either as both a body and face cream?

    You can, but it is not optimal. CeraVe works on body but underperforms Cetaphil there. Cetaphil works fine on body but pills under foundation on face. Buy both if your budget allows – it is $35 total for nearly a year of supply. If you must pick one tub for both jobs, CeraVe is the better single-tub compromise because the face-pilling problem is a daily annoyance and the body underperformance is mild.

    Is either enough on its own, or do I need a serum?

    For hydration on dry skin, yes. Neither delivers actives, so if you have specific concerns – acne, hyperpigmentation, fine lines, texture – you will need a serum step before the cream. CeraVe is the better base for layering actives because the ceramide load supports the barrier those actives stress.

    How long should I wait before putting foundation on?

    For CeraVe, seven minutes is enough. I have tested it with a timer. For Cetaphil, do not put powder foundation on top at all – it will pill no matter how long you wait. If you must, give it 15 minutes minimum and set with a light spray of Mac Fix+ before powdering.

    Will either break me out if my skin is oily?

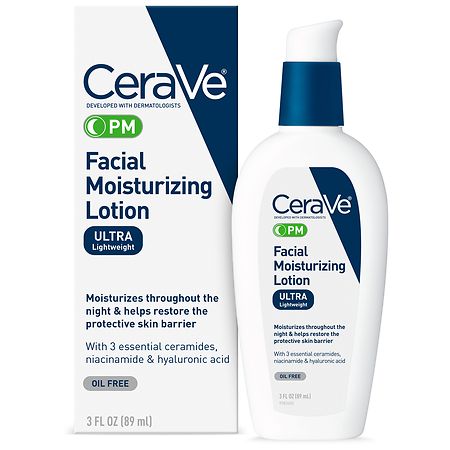
    Both are non-comedogenic and neither broke me out on my combination-oily T-zone over five months. CeraVe is the better choice for genuinely oily skin because the texture is lighter. If you are oily, also consider CeraVe PM Facial Moisturizing Lotion, which is even lighter and has niacinamide built in.

    Final pick

    For face, the winner is CeraVe Moisturizing Cream. The ceramide blend is real, it layers under makeup, and the barrier support shows up within a week of starting it. Worth the $19 every time. For body, hands, and eczema patches, the winner is Cetaphil Moisturizing Cream – the heavier occlusive seal is the right call for skin that needs sealing rather than fortifying. Buy CeraVe Moisturizing Cream at Target for face and Cetaphil Moisturizing Cream on Amazon for body. Morning layering order: gentle cleanser, hydrating toner, any active serum, CeraVe Moisturizing Cream, sunscreen, makeup. Save your money on prestige ceramide creams that charge $60 for the same three ceramides – spend it on a good chemical sunscreen and a real retinol instead.

  • Drunk Elephant A-Passioni Retinol Review: The $74 Question, Settled

    Drunk Elephant A-Passioni Retinol Review: The $74 Question, Settled

    Drunk Elephant A-Passioni Retinol Cream tube with a sample of cream swatched on deeper skin

    After three years of covering this category for readers who keep asking the same question, I can tell you Drunk Elephant A-Passioni is the retinol most often handed back to me with a quiet ‘was this worth it?’ My answer, on the record, is: sometimes, for a specific kind of buyer, at a specific point in a routine. It is not the strongest retinol you can buy at Sephora, it is not the gentlest, and it is not the cheapest. What it is – and this is the part the brand doesn’t lead with – is a fairly low-percentage retinol parked inside a heavy moisturizer base, which makes it forgiving for first-timers and underwhelming for anyone who has already worked up to a tolerance.

    For the reader who needs the context: I am NC45 with neutral-warm undertones, my skin reads as combination most months and oily in the Atlanta summer, and I have used retinoids on and off since I was twenty-three. The benchmark I hold this product against is what it is competing with on the shelf at $74, not whether it ‘works,’ because most retinols technically work given enough time. The question is whether this one earns the spend.

    Quick verdict

    Rating: 3.5 out of 5. A 1.0% encapsulated retinol in a cushioning moisturizer base, designed for retinol beginners and for anyone whose previous attempts at retinol ended in a face full of flaking. It does what it says, slowly. Best for: first-time retinol users, sensitive or dehydrated skin, and shoppers who want a one-bottle simple step. Skip if: you have built up a tolerance to 0.5% or higher and want visible texture change in under twelve weeks, or if you respond better to a serum-style retinoid you can layer your own moisturizer over. Where to buy: A-Passioni at Sephora , around $74 for 1 oz.

    What it is and where the brand context matters

    A-Passioni is Drunk Elephant’s flagship retinol, launched in 2019 as a 1.0% vegan retinol in a cream base built around what the brand calls ‘biocompatible’ ingredients. The formula combines retinol with peptides, vitamin F (essentially a blend of fatty acids), passion fruit oil, kale, winter cherry, and triglyceride-rich plant butters. The texture is closer to a moisturizer than a serum. You apply it as your last skincare step at night, and the cushioning base is supposed to buffer the irritation people typically associate with retinol.

    Drunk Elephant sits in the prestige-clean tier at Sephora, alongside Tatcha and Sunday Riley. A-Passioni, as far as I can tell from the ingredient deck on the current tube, is the same formula it was in 2020. What has changed is the competitive landscape – several brands have launched retinals and encapsulated retinols at lower prices in the last three years, which puts pressure on the $74 price tag in a way that did not exist when this product launched.

    My experience over two eight-week stretches

    I have used A-Passioni in two separate eight-week runs. The first was in 2023, when a publicist sent me a tube. The second was earlier this year, when I bought one with my own money to retest it against a CeraVe Resurfacing Retinol Serum I had been using since the summer. Both runs followed the same protocol: cleanse with a gentle gel cleanser, pat dry, apply a hydrating toner, wait two minutes, pea-sized pump of A-Passioni on the cheeks and forehead, gently pressed in. No additional moisturizer on top. Mornings, I paired with a La Roche-Posay Anthelios mineral SPF, because mineral sits better under my MAC Studio Fix Fluid in NC45 than chemical filters do.

    The first two weeks of each run, my skin did exactly what it should on a 1.0% retinol in a cushioning base: very little. No redness, no flaking, a faint tightness on the second and third nights that resolved by the fourth. Week three to four, the skin on my cheeks started looking smoother in side-lighting, which is the test I trust. My pores around the nose looked slightly tighter, and my hyperpigmentation along the jawline started to look one shade lighter.

    Where it got interesting was the comparison week. Six weeks into my 2026 run, I went back to the CeraVe Resurfacing Retinol Serum for two weeks just to test, and my skin texture continued to improve at roughly the same rate, on a product that costs $20. That is the data point I cannot get away from. If a $20 product is producing comparable results on my specific skin, the $74 product needs to be doing something dramatic for the difference. It was not.

    Caveat: my skin tolerates retinol well at this point. For someone whose skin is reactive, dehydrated, or freshly arriving at retinol, the cushioning base in A-Passioni does something the bare CeraVe does not. It buffers. It softens the introduction. That is real, and worth paying for if that is where you are starting.

    Drunk Elephant A-Passioni Retinol Cream as part of a nighttime skincare routine flat lay

    What works

    The buffering effect is real and is the single best argument for paying full price. Encapsulated retinol means the active is wrapped in a delivery vehicle that releases more gradually, which lowers the peak irritation window. Add the cushioning oil-and-butter base, and the product becomes one of the more comfortable retinol experiences at this strength. I have recommended this to two friends who had previously written off retinol after a bad week of flaking on something cheaper, and both of them stuck with A-Passioni past the four-week mark.

    The texture is one of the better ones in this category. It absorbs without the tacky film a lot of cream retinols leave behind, and it does not pill under SPF the next morning when I layer mineral filters on top. For anyone who wears foundation most days, the lack of pilling is not a small thing. Pilling forces a re-cleanse on a Tuesday morning when you do not have time for either.

    The ingredient deck is what Drunk Elephant fans pay for. No essential oils, no fragrance, no silicones, no SLS. If you are someone who has reacted to fragrance in skincare in the past, A-Passioni is a low-risk place to land. The packaging is opaque aluminum with a pump dispenser, which protects the retinol from light degradation. Retinol is famously unstable in clear glass, so opaque packaging is the bare minimum at this price tier and the brand gets it right.

    What does not work, honestly

    The price is the loudest objection and it is a fair one. $74 for 1 oz of 1.0% retinol is a premium spend in a category where credible alternatives exist between $14 and $30. The brand’s argument is that the cushioning base and the encapsulation justify the markup. That argument holds for retinol beginners. It does not hold for anyone whose skin has already adjusted to retinoids, because at that point you are paying for buffering you no longer need.

    The cushioning base, useful as it is, also limits how aggressive the product can feel. I noticed this in my second run particularly. After about six weeks, I wanted my retinol to do more than maintain – I wanted active texture change. A-Passioni at 1.0% in a cream base did not deliver that next level. To get there, I would either need to step up to a higher percentage or move to a serum-style delivery I could layer my own targeted moisturizer over. The product is, by design, a starting and maintenance retinol, not a heavy lifter.

    The shade-aware reader question: Drunk Elephant does not market this product with deeper skin tones in mind. The influencer panel they use leans fair-to-medium and the ‘before and after’ shots they circulate are not skewed toward NC40-and-deeper complexions. The product itself works on deeper skin, and I did not see any of the post-inflammatory hyperpigmentation flares retinol can cause when introduced too aggressively, but the brand’s marketing leaves a gap. If you need to see your skin tone reflected in the product imagery to feel confident about a $74 spend, A-Passioni does not give you that.

    Drunk Elephant A-Passioni compared to CeraVe Resurfacing Retinol Serum and The Ordinary Retinol in Squalane

    How it compares to the alternatives I actually use

    Three retinol comparisons I get asked about constantly, and the honest read on each.

    The Ordinary Retinol 0.5% in Squalane – around $9 for 1 oz at most retailers. A non-encapsulated retinol in a simple squalane base, sold at a strength close to A-Passioni’s. The Ordinary’s version is slightly more potent in feel because it is not encapsulated, which means more active is hitting the skin at once. That also means more irritation potential for first-timers. For an experienced retinol user, this is a credible $9 alternative to the $74 spend. For a beginner, it is too aggressive and will probably get returned in week two. Pick this if you have used retinoids before and want a no-frills option. The squalane base is nice. The price-to-result ratio is the strongest in the category. Find it at The Ordinary Retinol 0.5% in Squalane at Ulta .

    CeraVe Resurfacing Retinol Serum – around $20 for 1 oz. The closest thing to A-Passioni at a quarter of the price. It is encapsulated, uses ceramides and licorice root extract to support the barrier, and is specifically marketed for post-acne marks. I have used it for months. My honest take: for my hyperpigmentation along the jawline, it performs comparably to A-Passioni at the eight-week mark. The texture is thinner, which I prefer, but it can pill under sunscreen if you do not let it absorb fully. If your retinol goal is gentle, encapsulated, and effective on post-acne marks, this is the better value. Pick it up at CeraVe Resurfacing Retinol Serum on Amazon .

    Paula’s Choice 1% Retinol Treatment – around $58 for 1 oz. A 1.0% retinol in a slightly lighter cream base than A-Passioni’s, with added peptides and vitamin C. It sits in the same prestige-affordable tier and is arguably the closest direct competitor. I have used both back-to-back. Paula’s Choice feels slightly more clinical, less plush, and the results at eight weeks were similar. For $16 less, it does the same job with a marginally less cushioning base. If you like Drunk Elephant’s brand experience and want the pump dispenser and the heavier butter feel, A-Passioni wins. If you care about the result and the deck, Paula’s Choice is the smart pick. Shop it at Paula’s Choice 1% Retinol Treatment at Sephora .

    Who should buy it and who should not

    Buy A-Passioni if you are new to retinol and your skin has been reactive to actives in the past. The cushioning base genuinely lowers the barrier to entry. Buy it if you have sensitive or dehydrated skin and do not want to spend the first three weeks managing flaking. Buy it if you prefer a one-step product and do not want to layer a separate moisturizer on top. Buy it if the Drunk Elephant brand experience, the packaging, and the suspicious-6-free deck are part of what you are paying for, and you have decided that is worth $74 to you.

    Skip if you have already tolerated 0.5% retinol or higher and you want a product that pushes your routine forward, not one that maintains. Skip if you are price-sensitive and the CeraVe Resurfacing Retinol Serum at $20 will get you 85% of the benefit. Skip if you want to layer your own moisturizer on top of a serum-style retinol, because A-Passioni’s cushion was not designed for that workflow. Skip if you want a product with a strong track record of imagery and marketing aimed at deeper skin tones, because that is not what Drunk Elephant is currently doing.

    Where to buy and current pricing

    A-Passioni is $74 for 1 oz across major beauty retailers. It is most widely stocked at Sephora , which is the safest first-purchase retailer because of the 60-day return policy for Beauty Insider members. Ulta carries it during Drunk Elephant brand stock periods and occasionally bundles it in seasonal kits. Amazon stocks it via Drunk Elephant’s own storefront, but read seller details carefully because retinol bought from unauthorized sellers can be old, heat-exposed, or counterfeit. The brand’s site has the freshest stock if you want to verify batch.

    Frequently asked questions

    Will Drunk Elephant retinol cause hyperpigmentation on deeper skin tones?

    Not when introduced correctly. The risk of post-inflammatory hyperpigmentation on deeper complexions comes from over-using retinol too soon, not from retinol itself. A-Passioni’s encapsulated 1.0% formula is on the gentle end of the spectrum, which makes it a lower-risk starting point. Begin two nights a week, build to four, and pair with a barrier-supportive moisturizer if your skin signals stress. Always wear SPF 30 or higher in the morning.

    How long until I see results?

    Texture and pore appearance changes around week three to four with consistent use. Hyperpigmentation fading is slower – eight to twelve weeks for visible change on most skin, longer for deep-set acne marks. Anything claiming dramatic week-one results in this category is overselling.

    Can I use it with vitamin C or AHA exfoliants?

    Vitamin C in the morning, A-Passioni at night is the standard split and it works. AHA exfoliants like glycolic or lactic acid are harder to layer with retinol on the same night and can over-strip the barrier. If you use both, alternate nights – retinol Monday and Wednesday, AHA Tuesday and Thursday, with hydration on the rest.

    Is the Drunk Elephant brand worth the price tier in general?

    The brand has some standouts (Protini Polypeptide Cream is genuinely one of my favorites at the price point) and some products that are coasting on brand equity. A-Passioni falls in the middle. The formula is good. The price is high for what it delivers on already-acclimated skin. If you are buying into the brand for the first time, this is not the product I would lead with – Protini or the C-Tango eye cream are better introductions.

    Final verdict

    Worth the spend for retinol beginners and sensitive-skin shoppers who want a buffered, one-step retinol they can stick with past week four. Not worth the spend for experienced retinol users who would get more out of a serum-style delivery at a higher percentage, or for budget-conscious shoppers who can get 85% of the benefit from the CeraVe Resurfacing Retinol Serum at $20. If you fall in the first camp and the brand experience matters to you, pick up A-Passioni at Sephora and give it eight weeks on a slow ramp-up. If you fall in the second camp, save your money on A-Passioni and spend it on a real moisturizer to layer under a cheaper retinol. The retinol itself is mostly a percentage and a delivery system. The base around it is where the spend either earns out or does not.

  • Fenty Beauty Pro Filt’r Concealer Review: The Shade Range Isn’t the Story

    Fenty Beauty Pro Filt’r Concealer Review: The Shade Range Isn’t the Story

    Fenty Beauty Pro Filt'r Soft Matte Concealer in shade 410 on marble vanity

    The brand that gets credit for the most inclusive shade range in the industry is, on my face, the third-best concealer I keep on my vanity. Fenty Beauty’s Pro Filt’r Soft Matte Concealer launched in 2018 with 50 shades and changed the public conversation about how brands underserve deep complexions. The launch was a moment. The product is also a product, and after using shade 410 across two full tubes over fourteen months, I can tell you where it shines, where it doesn’t, and which two alternatives I reach for first when I’m doing a paying client. The shade range is real. The formula is a separate conversation.

    Context on the face this review is written from: I’m NC45 in MAC’s range, which translates roughly to Fenty 380 to 410 depending on where my undertone falls. I’m neutral-warm with golden undertones – not olive, not pink-based. Biracial Black and Filipina, normal-leaning-dry through the cheeks, oily through the T-zone, with hereditary blue-purple undereye circles that need both color-correcting and coverage. I trained at MAC Pro in LA at 19 and did pro makeup commercially for four years before I started writing. This concealer is good. It is not the best one I own.

    Quick verdict

    Rating: 3.5 out of 5. Genuinely impressive shade range with 50 options that account for actual undertone variation, not just lightness. Formula is buildable, soft-matte, and forgiving on textured skin. Loses points for oxidation by hour four on warmer undertones, dryness around the eye area on anyone over 30, and a price that creeps above what the formula justifies. Best for: medium-deep to deep skin tones doing a daytime full-face look under three hours. Skip if: you have mature or dry undereye skin, or if you need transfer-proof wear past six hours. Where to buy: Fenty Pro Filt’r Soft Matte Concealer at Sephora , $30 for 0.27 oz.

    What it is and the brand context

    Fenty Beauty launched in September 2017 with Pro Filt’r Soft Matte Longwear Foundation in 40 shades. The concealer followed in early 2018 with 50. Both products were formulated around the idea that shade matching for deep complexions had been treated as an afterthought for the previous thirty years of mass-market cosmetics. The concealer specifically was the first major drugstore-adjacent launch I can remember where deep shades had distinct neutral, warm, and cool variants instead of one generic “dark” bucket. The 400-range alone has nine shades. That’s more deep-tone options than most luxury brands carry across their entire complexion line.

    The formula is positioned as a medium-to-full coverage liquid concealer with a soft-matte finish, marketed as 16-hour wear and crease-resistant. The brand has reformulated quietly twice since launch, both times tightening the pigment load and adjusting the dry-down time. The version that ships in 2026 is not the version that shipped in 2018. If your last impression of this product was from the original launch, it’s worth reassessing.

    My experience across fourteen months

    I picked up my first tube in shade 410 in March 2025 after a client booking where my regular concealer ran out mid-job. I bought Fenty as the backup, used it on the client (medium-deep neutral-warm, close to my own depth), then kept using it on myself for the next eight months. Second tube went into rotation in November. So this review is anchored in two complete tubes of regular wear, not a one-week trial.

    What 410 looks like on my face: cool morning light, freshly applied, it matches almost perfectly. The pigment leans neutral with a touch of warmth, which is what my undertone needs to brighten the undereye without going gray. The dry-down takes about 90 seconds, generous compared to MAC Studio Finish (60 seconds) but workable. Once set with a translucent powder, it doesn’t move for about three hours. By hour four, I can see it shift warmer. By hour six, on my T-zone where I run oily, it has migrated into my smile lines. I’m 28, so this isn’t about deep texture – the formula just doesn’t have the staying power for a workday.

    On clients, I’ve used 380 and 410 on five different medium-deep faces, mostly for event makeup that needs to last four to six hours. It performs well on normal-to-combination skin. One client who runs very oily, it broke down at the chin by hour five. Another with hereditary darkness similar to mine, the coverage was clean at application but I had to set it heavier than usual to keep it from creasing into her inner corner by hour three. The lesson: this is a great mid-day concealer that wants to be a longwear concealer and isn’t quite there.

    The applicator is the unsung problem. The doe-foot is too wide for precise under-eye work and picks up too much product per dip. I dispense onto the back of my hand and apply with a small synthetic brush, which solves the precision issue but adds a step the packaging should have solved at the formulation stage. For a $30 concealer, the wand should be the right size.

    Fenty Pro Filt'r concealer applied under eyes on medium-deep neutral-warm skin

    What works

    The shade range remains genuinely the best in the industry for deep complexions, and the math behind it is what matters. Most brands launch with one or two “deep” shades that try to cover everyone from medium-deep to deepest. Fenty’s deep range distinguishes between warm-leaning, neutral, and cool-leaning at each depth level. For me at 410, the alternative would be Pat McGrath Skin Fetish Sublime Perfection in MD37 or MAC Studio Finish in NW45. Both work, but 410 is a tighter undertone match than either. That’s not nothing for anyone who has spent years mixing two concealers to fake a shade that should have existed.

    The coverage is genuinely buildable. One pass gives you a medium veil that evens out the undereye without looking like you’re wearing makeup. Two passes covers a brown spot or a darker discoloration. Three passes is too much for under-eye work but works for blemish coverage if you’re spot-treating. The formula doesn’t pill when layered, which is rare for a soft-matte product at this price.

    The dry-down behaves predictably on textured skin. I have a few small bumps near my hairline that other matte concealers settle into and emphasize. Fenty’s formula sets without doing that, which I credit to the slightly slower drying time. You have a window to blend it properly before it locks.

    The pigment load is honest. Some concealers swatch accurately and then sheer out to nothing on the face. This one delivers the shade you bought, which sounds like a low bar until you’ve spent $40 on a tube of something that vanished under powder.

    What doesn’t work, honestly

    Oxidation is the headline problem. On my warm undertone, 410 shifts about half a shade warmer between hour three and hour five. It’s not catastrophic – I’m not orange by the end of the day – but I notice it in photos and I notice it under bathroom lighting. For warmer-undertone medium-deep skin, this is the single biggest reason to consider a different formula. Cool-undertone wearers I’ve worked on don’t seem to see the same shift, which makes me think the oxidation is reacting with the warm pigment load specifically.

    The dryness around the eye area is the second issue, and this one gets worse the older you are. At 28, I’m fine through the lid and the inner corner, but my outer corner does dry down to a flat finish that needs hydration underneath to look comfortable. I’ve watched it look noticeably parched on two clients in their late 30s and early 40s, both of whom had no dryness issues with NARS Radiant Creamy on the same day. If you’re past 30 with any natural dryness around the eyes, this formula is going to fight you.

    The price has crept up. The concealer launched at $26 and is now $30. That’s not a huge jump on paper, but the formula hasn’t improved in a way that justifies it. Compared to drugstore alternatives that have closed the gap on shade range, the value proposition is narrower than it was in 2018. You’re paying for the brand, the shade match, and the soft-matte finish. You’re not paying for technology that drugstore brands can’t access.

    The packaging matters when you’re working professionally. The matte plastic tube scratches easily, and the labeling on the bottom (where the shade number lives) wears off after about three months of bag-rattling. By the end of the first tube, I had to remember 410 from muscle memory because the print had rubbed off. Not a deal-breaker. Annoying for $30.

    Fenty Pro Filt'r concealer compared to NARS Radiant Creamy and Maybelline Instant Age Rewind

    How it compares to alternatives

    I keep three concealers in my deep-shade rotation. Honest comparison of each against Fenty:

    NARS Radiant Creamy Concealer in Cafe or Cacao – $32 for 0.22 oz. The reason this one stays in my kit for client work is the finish. NARS reads as natural radiant skin where Fenty reads as set makeup. For mature skin, dry skin, or any look that needs to photograph soft, NARS wins. The shade range is shallower at the deepest end (30 shades vs 50) and Cacao is slightly too neutral-cool for me, so I warm it with a drop of foundation. Fenty 410 matches without mixing. But for any client over 35, I reach for NARS first.

    Maybelline Instant Age Rewind Eraser in Cocoa or Espresso – around $10 at most drugstores. The honest drugstore answer. The shade range is narrower (about 18 shades vs 50, with limited undertone variation), but the formula on medium-deep skin holds up better than the price suggests. The brightening effect is real. The depth ceiling stops around a Fenty 420 equivalent, so anyone deeper than medium-deep is out of luck. If you can use it, Instant Age Rewind delivers about 80% of what Fenty does for one-third the price. Real value gap.

    Pat McGrath Skin Fetish Sublime Perfection Concealer in MD30 or MD37 – $32 for 0.16 oz. Premium-tier alternative with the best dry-down of the three. Pigment payoff is dense without looking cakey. Fewer distinct undertone variants than Fenty in the deep range. For event makeup, photography, or any high-coverage moment, this is what I reach for. For everyday wear, the price-per-ounce ($200/oz vs Fenty’s $111/oz) is hard to justify unless you’re using it professionally.

    The pattern across my rotation: Fenty’s strength is shade matching for daytime wear on medium-deep complexions. The competitors win on specific use cases – NARS for radiance, Maybelline for value, Pat McGrath for longwear performance.

    Fenty concealer in a makeup artist's kit with synthetic brush, setting powder, and hydrating eye cream

    Who should buy it and who shouldn’t

    Buy if you’re medium-deep to deep with a warm-neutral or true-neutral undertone that has historically been hard to shade-match. Buy if your concealer needs are daytime – work, errands, brunch – and you don’t need it to last past hour five. Buy if you have normal-to-combination skin under 35 and you don’t have significant dryness around the eye area. Buy if you’re a makeup artist building a kit and you need a versatile mid-range concealer that covers the 400-shade range well.

    Skip if you’re over 35 with mature or dry undereye skin – the soft-matte finish will fight you, and NARS Radiant Creamy is the better answer for the same price. Skip if you have a strongly warm undertone that pulls orange easily – the oxidation will be noticeable by mid-afternoon. Skip if you need longwear past six hours for events or weddings – reach for Pat McGrath instead. Skip if you’re shade matching at the lighter end of the spectrum, where the formula’s strengths don’t show up as clearly and other brands have caught up on inclusivity.

    Where to buy and current pricing

    Fenty Beauty Pro Filt’r Soft Matte Concealer is $30 for the 0.27-oz tube at most major beauty retailers. Stock the full 50-shade range at Sephora (Beauty Insider members get 10-15% off during seasonal Beauty Insider sale events, plus a 60-day return policy if the shade doesn’t match), at Ulta (frequent bundle deals with Pro Filt’r foundation), and Amazon if you already know your shade and want fast shipping. Sephora is the safest first-purchase option because of the 60-day return window and the in-store shade-matching – if you’re between two shades, go to a Sephora and test on your jawline before committing.

    Frequently asked questions

    Does Fenty concealer oxidize?

    On warm undertones, yes, by about half a shade between hour three and hour five. On cool and neutral undertones, the shift is minimal or absent. If you’ve found that Fenty foundation oxidizes on you, the concealer will likely do the same, and you should size down a half-shade at purchase to account for it.

    Is Fenty concealer good for mature skin?

    Not the strongest option. The soft-matte finish accentuates fine lines and dry texture around the eye area, especially after hour four. For mature skin, NARS Radiant Creamy or a hydrating formula like Charlotte Tilbury Magic Away will perform better. Fenty works on mature skin if you prep the undereye with a heavy hydrator first, but it requires more work than a luminous formula does.

    What’s the difference between Fenty’s foundation shades and concealer shades?

    They use the same numbering system, but the concealer is meant to be applied a half-shade to full shade lighter than your foundation for brightening. If you wear Pro Filt’r foundation in 410, your concealer should be 380 for a brightened undereye effect or 410 for spot coverage that matches the rest of your face.

    Is it worth the $30 price tag?

    For the shade match on medium-deep complexions, yes. For the formula performance compared to drugstore competitors that have closed the inclusivity gap, the value is narrower. Maybelline Instant Age Rewind gets you 80% of the performance for one-third the price if your shade exists in the line. Fenty earns its premium when the shade range is the deciding factor.

    Final verdict

    Worth it for daytime wear on medium-deep complexions that have historically been hard to shade-match, with the caveat that you should save your money on Fenty if you’re over 35 with dryness, and spend it on NARS Radiant Creamy or Pat McGrath Sublime Perfection instead. The shade range is the reason to buy this concealer and the formula is the reason it doesn’t sit at the top of my kit. Buy one tube of Pro Filt’r Soft Matte Concealer at Sephora in your closest shade, give it two weeks of daytime wear, and you’ll know within the first week whether the oxidation and dry-down work for your skin. Layering order if you commit: hydrating eye cream first, color corrector under the inner corner if you need it, Fenty concealer applied with a small synthetic brush instead of the doe-foot, set with translucent powder pressed not swept. That’s the protocol that gets the most out of the formula.

  • Olaplex vs Briogeo: A Bond-Repair Comparison for Textured Hair

    Olaplex vs Briogeo: A Bond-Repair Comparison for Textured Hair

    Olaplex No. 3 and Briogeo Don't Despair Repair side by side on a beige linen background

    Bond-repair hair care became a $1 billion category on the strength of one brand’s patent and one viral hashtag, but the textured-hair conversation has been quietly arguing the case for a different formulation philosophy for years. Olaplex spent the last decade selling a single proprietary molecule (bis-aminopropyl diglycol dimaleate) as the only real fix for damaged bonds, while Briogeo built a cabinet of plant-derived masks and proteins that promise the same surface-level result with a softer ingredient list. Both brands sit on a lot of curly-haired readers’ shelves at some point. Both get recommended by the same hairstylists. And both are routinely misused on the wrong hair type, which is how you end up with low-porosity 4A coils that feel coated, gummy, or weirdly stiff a week after the treatment that was supposed to save them. The category deserves a real comparison, not another five-star praise piece, so here is the side-by-side that addresses what these two brands actually do on natural, low-porosity hair.

    Quick verdict

    For most low-porosity Type 3-4 hair, Briogeo Don’t Despair Repair is the better weekly mask – softer slip, better moisture, no protein-overload risk when used twice a month. Olaplex No. 3 is the better targeted treatment after a color appointment, a flat iron session, or a heavy protective-style takedown, used once every two to three weeks. Most readers buying one of these for general maintenance should start with Briogeo. Most readers who color, heat-style, or chemically process should keep a small bottle of Olaplex No. 3 in the cabinet alongside it. Full reasoning below.

    What they are and where they came from

    Olaplex launched in 2014 around a single patented active. The original three-step system was sold to salons first (No. 1 and No. 2 are professional-only), with No. 3 Hair Perfector as the at-home version. The brand built itself on the bond-repair claim, meaning the molecule supposedly relinks broken disulfide bonds in the cortex of the hair shaft. Since 2014 the range has expanded into shampoos, conditioners, leave-ins, and the No. 8 mask and No. 9 serum, but the core pitch is still the same molecule doing the same job. Olaplex is sold direct, at Sephora, Ulta, and Amazon, and the No. 3 sits at around $30 for 3.3 oz.

    Briogeo launched the same year, founded by Nancy Twine, with a positioning closer to clean beauty than to lab science. The line built around plant proteins, B vitamins, biotin, rosehip oil, and algae extract rather than around one signature molecule. Don’t Despair Repair is the flagship mask in the strengthening range; Scalp Revival is the second pillar of the brand and a separate product category entirely. Briogeo sits at Sephora and Sephora-adjacent retailers, with Don’t Despair Repair at around $39 for 8 oz. The brand was acquired by Wella in 2022, which has not visibly changed the formulations as of this year.

    Side-by-side comparison

    Feature Olaplex No. 3 Hair Perfector Briogeo Don’t Despair Repair
    Price Around $30 for 3.3 oz Around $39 for 8 oz
    Format Pre-shampoo cream treatment Post-shampoo deep conditioning mask
    Core active Bis-aminopropyl diglycol dimaleate (patented bond builder) Rosehip oil, algae extract, biotin, vitamin B5, almond oil
    Recommended frequency Once a week max, sit 10-90 minutes Once a week, sit 10-30 minutes
    Protein load Bond-focused, low traditional protein Light protein from plant sources
    Best use case Post-color, post-heat, post-bleach repair Weekly moisture and slip for textured hair
    Return window 60 days at Sephora, 60 days at Ulta 60 days at Sephora, 60 days at Ulta

    Olaplex No. 3 on low-porosity 4A hair

    I have used Olaplex No. 3 across three different stretches of my hair journey – once during the year I was bleaching out brassiness, once after a flat-iron season where I was straightening monthly, and once as a general weekly add to my routine when I wanted to see what it did on otherwise undamaged hair. The verdict changes a lot depending on which version of my hair was using it.

    What works: when there is actual damage to address, this product earns its reputation. After the bleach year I would apply No. 3 on dry hair, in sections, sit with it for 45 minutes under a plastic cap, then shampoo and condition normally. The next-day curl pattern was visibly bouncier and the strand felt less like a dry rope. The post-flat-iron application gave me less heat-frizz on the next wash day and a curl pattern that snapped back faster than it had been. For a deep-conditioning step after real cuticle stress, the No. 3 does what it says.

    What does not work: on undamaged low-porosity 4A hair, I felt nothing for the first three uses, and after the fourth weekly application I felt my strands going stiff and stretched-out, the classic protein-overload feeling. Low-porosity hair already resists product penetration, so a strengthening treatment on a strand that does not need strengthening tips you toward stiffness fast. The smell is also clinical, almost chemistry-set, and the consistency is a thin cream that runs if you do not stay in sections. The bottle is also small for the price – 3.3 oz disappears in two applications if you have shoulder-length thick 4A hair.

    One real critique: the marketing pitches No. 3 as universally helpful, but the application instructions and the actual chemistry suggest it is meant as a targeted repair, not a maintenance step. If your hair is not chemically processed, heat-stressed, or otherwise structurally compromised, you are not the customer for this product even though the brand sells it like you are. Buy Olaplex No. 3 at Sephora if you want the easiest return path and the bundle pricing on the rest of the system.

    Olaplex No. 3 Hair Perfector bottle held in hand in bathroom setting

    Briogeo Don’t Despair Repair on low-porosity 4A hair

    Briogeo Don’t Despair Repair has been in my weekly rotation, on and off, for about three years. It is the mask I reach for when my hair feels dry and dull but is not actively damaged – the in-between stretch most natural hair lives in for months at a time. The texture is a thick, creamy mask with real slip, the kind that lets a wide-tooth comb glide through a tangle on the first pass instead of yanking.

    What works: the moisture delivery. I apply it after shampoo on damp hair, work it through in four sections from root to tip, sit with it under a plastic cap for 20 minutes (sometimes with low heat from a steamer if I am being thorough), then rinse. The next-day curls are softer, more defined, and less thirsty-looking than they are without it. The slip is what sold me originally – detangling 4A coils with this mask in is the closest I get to a relaxing wash day. The 8 oz jar lasts me about ten weekly uses, which puts it at a better per-use cost than the No. 3 despite the higher sticker price.

    What does not work: the protein content is light but real, and if you stack this with other protein-heavy products in the same week (a hard protein treatment, a heavy gelatin or rice-water rinse), you can still overdo it on low-porosity hair. The packaging is the second issue – the jar opening collects product around the rim and gets sticky after a few uses, which is a small but real annoyance. And the smell, which Briogeo describes as a clean herbal, reads as a bit medicinal to me. Not bad, just not the comforting almond-and-honey smell of a Camille Rose Algae Renew mask, which is the closest direct competitor I would point a reader to.

    The real critique: it is a maintenance mask, not a damage repair, and the brand is honest about that in the product copy. If you have just colored, bleached, or heat-trained your hair, this mask alone is not going to undo the structural stress. Buy Briogeo Don’t Despair Repair at Sephora for the Beauty Insider points and the 60-day return window if it does not work for your texture.

    Briogeo Don't Despair Repair jar open with creamy mask texture visible

    Where they overlap and where they differ

    Both brands sell a once-a-week deep treatment with a strengthening claim, both are widely stocked at Sephora and Ulta, both run in the $30 to $40 range, both are commonly recommended by stylists for textured hair, and both will leave most users with softer, more defined curls the day after use. That is the overlap, and it is enough to confuse a first-time buyer into thinking the choice does not matter.

    The differences are bigger than they look. Olaplex No. 3 is a pre-shampoo treatment, meaning you apply it to dry hair before you wash. Briogeo Don’t Despair Repair is a post-shampoo mask, applied on damp hair after cleansing. Olaplex is built around a single patented bond-repair molecule and is most useful after structural damage. Briogeo is built around plant proteins, oils, and vitamins and is most useful for ongoing moisture and slip. Olaplex is a small bottle that disappears fast. Briogeo is a larger jar with more cost-per-use efficiency. Olaplex smells like a chemistry product. Briogeo smells like a salon product. Both have generous 60-day return windows at Sephora and Ulta, which is the same window across the two retailers, but Ulta is faster to refund on a card and Sephora is more generous on partially-used product when you have Rouge status.

    The deciding question for most readers is whether your hair needs structural repair or weekly moisture, because these two products are aimed at different problems even though the marketing makes them sound like alternatives.

    Which one for which person

    If you have low-porosity Type 3-4 hair that is not chemically colored, not regularly heat-styled, and not coming out of a long protective-style takedown, buy Briogeo Don’t Despair Repair first. It addresses the dry, dull, hard-to-detangle problem that most natural hair runs into between wash days, and it does so without the protein-overload risk that low-porosity textures hit fast. Use it once a week, sit 20 to 30 minutes under a cap, rinse.

    If you color your hair regularly (highlights, full color, bleach), heat-style with a flat iron or blow dryer weekly, or have just taken down a four-week protective style that involved tension on the cuticle, buy Olaplex No. 3 . Use it every two to three weeks as a targeted treatment, not weekly. Apply on dry hair, sit 30 to 45 minutes, then shampoo and condition. Skip the weekly application schedule the bottle recommends if your hair is otherwise healthy.

    If you have high-porosity hair (color-treated, heat-damaged, or naturally porous), the calculus shifts slightly. Olaplex penetrates faster and gives more visible results on high-porosity hair than on low-porosity, so weekly use becomes more reasonable. Briogeo still earns the maintenance slot, but Olaplex earns more of the rotation.

    If you have the budget for both, the smart move is to rotate. Briogeo three weeks of the month for moisture and slip. Olaplex once a month, the week after a color appointment or after a heavy heat session. That is the pattern most textured-hair stylists I know quietly recommend when no one is filming.

    Frequently asked questions

    Can I use Olaplex and Briogeo in the same wash day?

    You can, but for most low-porosity 4A hair I would not. Stacking a pre-shampoo bond treatment with a post-shampoo deep conditioner in the same wash loads a lot of strengthening ingredients onto the strand at once, and low-porosity hair gets stiff fast with that combination. Pick one per wash day and alternate by week.

    Is Olaplex worth it if I do not color my hair?

    Mostly no. If your hair is virgin and you do not heat style, the No. 3 is a treatment your hair does not have a use for, and you will likely feel either nothing or the protein-stiff feeling after a few uses. The Briogeo mask is the better starting point for undamaged textured hair.

    Does Briogeo replace a protein treatment?

    No. Briogeo Don’t Despair Repair has plant proteins but is not a hard protein treatment. If your strands have lost elasticity and snap when stretched wet, you need a true protein treatment like Aphogee Two-Step or an at-home gelatin rinse, not the Briogeo mask. The mask is a moisture-and-slip product with a strengthening assist, not a structural fix.

    How long does each one last on the shelf?

    Both have a 12-month period-after-opening symbol. The Briogeo jar holds up well across that window if you scoop with a clean spatula instead of dipping fingers. The Olaplex bottle, because of the smaller size and the pump-cap design, usually empties within four to six months of regular use, so shelf life is rarely the deciding factor.

    Final pick

    For the average low-porosity Type 3-4 reader buying one product, Briogeo Don’t Despair Repair is the better starting point. Softer slip, better weekly moisture, larger jar, lower protein-overload risk. For readers with color-treated or heat-stressed hair, Olaplex No. 3 earns its spot in the cabinet alongside the Briogeo, used once every two to three weeks as a targeted repair instead of weekly maintenance. Save your money on the No. 3 if your hair is not damaged, and spend it on the Don’t Despair Repair plus a good leave-in like Pattern Beauty’s. Buy Briogeo Don’t Despair Repair at Sephora first, add the Olaplex No. 3 at Ulta later if your hair needs structural repair. Layering order on a Briogeo wash day: cleanse, mask 20 minutes, rinse, leave-in, curl cream, gel, air dry or diffuse.

  • CeraVe vs La Roche-Posay: 8 Months of Side-by-Side Use on NC45 Acne-Prone Skin

    CeraVe vs La Roche-Posay: 8 Months of Side-by-Side Use on NC45 Acne-Prone Skin

    CeraVe and La Roche-Posay skincare products arranged side by side for comparison

    The cheaper brand wins the daily-routine showdown, but not the categories most people assume. After eight months running both brands on the same NC45 acne-prone face – one side of my routine CeraVe, the other La Roche-Posay – the budget option took the basics and the premium option took the specialty work, which is the inverse of how most beauty editors frame this matchup. Anyone reading “drugstore skincare” thinkpieces would expect the $20 brand to lose the head-to-head against the $30 brand. That is not what happened on my skin. The categories split cleanly, the value math is not subtle, and the verdict is specific enough that I can tell you which jar to put in your cart at Target tonight.

    I am 28, biracial Black-Filipina, neutral-warm undertones, combination skin that runs oily in the t-zone and reactive to fragrance, with hormonal cystic breakouts along the jaw. Both brands sit in the same drugstore aisle, both market themselves as dermatologist-recommended and fragrance-free for sensitive and acne-prone skin, and both are owned by L’Oréal. They are also genuinely different products at different price points, and after eight months testing across cleansers, moisturizers, sunscreens, and treatment, the right answer depends on which step of your routine you are buying for.

    Quick verdict if you only have 30 seconds

    CeraVe wins for daily basics – cleanser, moisturizer, and body care. La Roche-Posay wins for sunscreen and targeted treatment products like the Effaclar Duo and the Cicaplast Baume. If you are building a full routine on a budget, CeraVe gets you 70 percent of the way there for half the spend. If you have a specific skin problem (sensitivity flares, post-acne marks, a need for elegant sunscreen texture under makeup), La Roche-Posay’s specialty pieces are worth the extra ten dollars. Buy both. Just buy the right pieces from each.

    What they are and where they come from

    CeraVe was launched in 2005 by dermatologists, built around a patented MultiVesicular Emulsion that releases three ceramides plus hyaluronic acid over time. L’Oréal acquired it in 2017. Its pitch is barrier-repair basics at drugstore prices, fragrance-free, non-comedogenic, and dermatologist-recommended for eczema, acne, and sensitive skin.

    La Roche-Posay is a French brand that has been around since 1975 and was acquired by L’Oréal in 1989. Its hero ingredient is Thermal Spring Water from the town of La Roche-Posay in central France, marketed for its selenium content. The product range is broader and pricier than CeraVe’s, organized around four specialty lines: Effaclar for acne, Toleriane for sensitivity, Anthelios for sunscreen, Cicaplast for repair. La Roche-Posay wins at the pharmacy counter where buyers want a specific corrective product. CeraVe wins at Target where buyers want a full routine and a $15 jar they can refill every two months without thinking.

    Side-by-side comparison

    Category CeraVe La Roche-Posay
    Price range $13 to $22 $18 to $42
    Hero ingredient Three ceramides plus hyaluronic acid, MVE delivery Thermal Spring Water with selenium, plus targeted actives
    Strongest category Cleansers and moisturizers Sunscreens and treatment products
    Fragrance Fragrance-free across most of the range Fragrance-free across Toleriane and Cicaplast lines
    Best for Daily routine basics on a budget Targeted concerns and sunscreen texture
    Where to buy Target, Walmart, Ulta, Amazon, drugstores Target, Ulta, Amazon, dermatologist offices

    CeraVe: the budget workhorse that earns its hype

    I have used the CeraVe Hydrating Cleanser ($15 for a 12-ounce bottle at Target) for four years on and off, and I tested it head-to-head against the La Roche-Posay Toleriane Hydrating Gentle Cleanser ($17 for 13.5 ounces) for the full eight months. The CeraVe is a low-foam, lotion-textured cleanser I use mornings and on non-makeup nights. It does not strip my skin, does not leave a film, and has reliably kept hormonal jaw breakouts from worsening during the week before my period. The Toleriane is functionally similar and arguably slightly more elegant in feel, but I cannot find $2 worth of skin difference between the two over four months of swapping sides.

    The real CeraVe win is the Moisturizing Cream ($19 for the 19-ounce tub at Target). I have spent more than $19 on a single ounce of moisturizer before, including a Drunk Elephant Lala Retro situation I do not want to talk about, and the CeraVe tub does what those creams do without the perfume notes or the markup. The texture is thick, occlusive enough to seal in actives, and rich enough to slug with on dry winter nights. I use it as a night moisturizer in the colder months and switch to the lighter CeraVe AM Facial Moisturizing Lotion ($18) for daytime in summer.

    What I do not love: the CeraVe serum dropper bottles feel cheap, which matters less than function but matters a little. The Resurfacing Retinol Serum at $20 is meaningfully gentler than the La Roche-Posay Retinol B3 at $42, but the La Roche-Posay version delivers visibly faster results on my post-acne marks. For a beginner retinoid CeraVe wins on tolerability. For someone with three years of retinol use already under their belt, the La Roche-Posay version actually moves the needle.

    The CeraVe Moisturizing Cream is the single best dollar-for-dollar product in this comparison. I keep a tub on my bathroom counter and a smaller jar in my travel kit and I have never regretted the purchase. Pick up the 19-ounce CeraVe Moisturizing Cream tub at Target – the bigger size is significantly better value per ounce than the squeeze tube.

    CeraVe Moisturizing Cream tub open showing the thick cream texture

    La Roche-Posay: the specialty pick that earns the extra ten dollars

    The La Roche-Posay Anthelios Melt-In Milk Sunscreen SPF 60 ($36 for 5 ounces at Ulta) is the reason this brand is in my routine at all. I have tried most drugstore mineral and chemical sunscreens sold in the U.S. and most of them either pill under foundation, leave a gray cast on my NC45 skin, or feel greasy enough that I cannot wear them under a full face. The Anthelios Melt-In Milk genuinely disappears on my undertone, layers under Fenty Pro Filt’r 480 without pilling, and lasts an eight-hour workday without breaking down. I wore it nine hours under makeup at a wedding in August and my skin still looked freshly set at 11pm.

    CeraVe’s sunscreen line (Hydrating Mineral SPF 30 and the AM Facial Moisturizing Lotion with SPF 30) is fine but the mineral version leaves a cast on my undertone, and I do not trust SPF 30 on a face that gets ten hours of Atlanta sun in a typical week. The Anthelios SPF 60, applied at the recommended amount, is the sunscreen I trust under makeup.

    The other La Roche-Posay product that earns its price is the Cicaplast Baume B5 ($17 for 1.35 ounces). This thick, fragrance-free balm was formulated for post-procedure skin (after a peel or a derm appointment) and doubles as the best spot treatment I have used for newly healing acne marks. I dab it on a freshly-popped pimple at night and the next morning the surface is calmer, less inflamed, and the post-acne mark fades faster over the following two weeks than it would with just a moisturizer. CeraVe’s Healing Ointment is comparable in function but heavier – good for cracked lips, less appropriate for layering into a facial routine.

    The Effaclar Duo ($35) is the third La Roche-Posay product I will keep buying. It is a benzoyl peroxide treatment at 5.5 percent with LHA and niacinamide, and it has been my hormonal-cyst spot treatment for three years. CeraVe’s Acne Foaming Cream Cleanser with benzoyl peroxide works on surface acne but does not have the same effect on deep cystic spots. For the specific problem of a cyst on the jawline at 2am the night before a shoot, the Effaclar Duo is what I reach for. The La Roche-Posay Anthelios is at Ulta with the 60-day return window , which matters for sunscreens since you sometimes need a couple of weeks to know if one works under your makeup.

    La Roche-Posay Anthelios sunscreen, Effaclar Duo, and Cicaplast Baume B5 product trio

    Where they overlap and where they actually differ

    The overlap is real. Both brands are fragrance-free across most core lines, both are non-comedogenic, both are dermatologist-recommended for sensitive and acne-prone skin, and both are owned by L’Oréal. For a basic three-step routine (cleanser, moisturizer, sunscreen), either brand gets you a functional setup. The CeraVe Hydrating Cleanser plus Moisturizing Cream versus La Roche-Posay Toleriane Hydrating Gentle Cleanser plus Toleriane Double Repair comparison is close enough that I could not pick a winner on skin results alone. The CeraVe versions are cheaper. That is the deciding factor.

    The differences show up in three places. First, sunscreen elegance – the Anthelios line is meaningfully better under makeup than CeraVe’s sunscreen lineup, especially on deeper skin tones where chemical filters with no white cast are the goal. Second, targeted treatment – the Effaclar Duo and Cicaplast Baume B5 do specific work CeraVe does not have a one-to-one equivalent for. Third, sensory experience – La Roche-Posay’s textures are slightly more pharmacy-shelf feeling. That last one is not worth ten extra dollars on a face wash you use twice a day, but it might be worth it on a moisturizer you smooth in slowly every night.

    Which one for which person

    If you are building a full skincare routine from scratch and you are working with a budget under $60, go almost entirely CeraVe. Hydrating Cleanser, Moisturizing Cream, Resurfacing Retinol Serum for nights, and one La Roche-Posay Anthelios sunscreen for days. That is a four-product routine for around $90 total that will outperform most $300 skincare regimens on combination acne-prone skin.

    If you have a specific skin concern – persistent post-acne marks, hormonal cystic acne, sensitivity flares, sunscreen pilling under makeup – lean La Roche-Posay for the corrective pieces and keep CeraVe for the basics. Toleriane Double Repair for sensitivity, Effaclar Duo for hormonal spots, Cicaplast Baume B5 for recovery, Anthelios for daily sun protection. The corrective products are the ones where the higher price actually returns a visible difference in eight weeks.

    If you have very dry skin with actual flaking, the CeraVe Moisturizing Cream tub will outperform most La Roche-Posay options at the same price point. The ceramide-and-hyaluronic delivery system is genuinely effective at barrier repair. For oily skin types who break out under heavy moisturizers, the La Roche-Posay Toleriane Sensitive Fluide is the lighter pick and worth the upgrade over the CeraVe AM lotion.

    If you are dealing with deeper skin tones and sunscreen white cast is your biggest barrier to consistent SPF use, Anthelios Melt-In Milk is the answer. CeraVe’s mineral options leave a cast on NC40 and above. This is a formulation question, not a budget question.

    Frequently asked questions

    Are CeraVe and La Roche-Posay basically the same because they share a parent company?

    They share L’Oréal as a parent but they are genuinely different formulation philosophies and different price tiers. The CeraVe ceramide delivery system is patented and not used in the La Roche-Posay lineup. La Roche-Posay’s Thermal Spring Water is specific to their range. Same parent, different missions: CeraVe is daily-routine basics, La Roche-Posay is pharmacy specialty.

    Can I use both brands in the same routine without overdoing actives?

    Yes, and this is what I do. The hero pairing for combination acne-prone skin: CeraVe Hydrating Cleanser in the morning, CeraVe Moisturizing Cream at night, Anthelios sunscreen daily, Effaclar Duo on hormonal spots. None of these actives conflict and it costs about $90 for a four-product routine that lasts two to three months.

    Which brand is better for deeper skin tones?

    Anthelios for sunscreen, no question – the chemical filter formula leaves no white cast on NC40 and above. CeraVe’s basics are color-neutral and work for any skin tone. Sunscreen is the only category where the question matters.

    Is the CeraVe Moisturizing Cream really comparable to luxury moisturizers at five times the price?

    For barrier repair function, yes. I have used $80 Drunk Elephant moisturizers, $54 Kiehl’s jars, and the $200 La Mer a friend gave me at a wedding. None of them outperformed the CeraVe tub on dryness or overnight slugging. They smell better and the textures are more refined. They do not work better on my skin.

    Final pick

    CeraVe wins the value head-to-head and earns the bigger share of my daily routine, which is the inverse of what most beauty editors would tell you about a $20 brand versus a $30 brand. Buy CeraVe for cleanser, moisturizer, and body care. Buy La Roche-Posay for sunscreen and targeted treatment. The combined routine costs less than $100 for two to three months of product and outperforms premium skincare lines on combination acne-prone skin. My layering order on a morning my skin is behaving: CeraVe Hydrating Cleanser, La Roche-Posay Toleriane Hydrating Gentle Cleanser only if my skin feels stripped, CeraVe AM Facial Moisturizing Lotion, La Roche-Posay Anthelios Melt-In Milk on top. Save your money on $80 luxury moisturizers, spend it on the Anthelios sunscreen and a tub of CeraVe Moisturizing Cream you can refill without thinking. Grab the CeraVe Moisturizing Cream on Amazon if you have Prime, or pick both brands up at Target where the Effaclar Duo is in stock with their 90-day return policy .

  • Best Affordable Retinol Products at the Drugstore – Start Anti-Aging Without Breaking the Bank

    Best Affordable Retinol Products at the Drugstore – Start Anti-Aging Without Breaking the Bank

    Retinol is the gold standard of anti-aging skincare. Dermatologists have been recommending it for decades because it genuinely works. It speeds up cell turnover, boosts collagen production, fades dark spots, smooths fine lines, and improves overall skin texture. No other over-the-counter ingredient has this much scientific evidence backing its effectiveness.

    But here is the secret the luxury skincare industry does not want you to know: the most affordable retinol products at your local drugstore contain the same active ingredient as the hundred-dollar serums at Sephora. A retinol molecule is a retinol molecule. Your skin cannot tell the difference between a seven-dollar product and a seventy-dollar one. What matters is the concentration, the delivery system, and how you use it.

    We have tested every major drugstore retinol product available in 2026 to find the ones that deliver real results at real-world prices. Whether you are a retinol beginner or a seasoned user looking to save money, this guide has your perfect match.

    Retinol 101 – What It Is and Why It Works

    Retinol is a form of vitamin A that communicates with skin cells, essentially telling them to behave like younger, healthier cells. It works at a cellular level to accelerate the skin’s natural renewal process. In younger skin, cells turn over approximately every twenty-eight days. As we age, this process slows dramatically. Retinol speeds it back up, bringing fresh, new cells to the surface faster.

    This accelerated turnover is what produces the visible anti-aging results. Fresh surface cells look smoother, brighter, and more even-toned than old, damaged cells. Meanwhile, retinol stimulates collagen and elastin production in the deeper layers of skin, which firms and plumps from within. Over time, this combination of surface renewal and deep structural support reduces the appearance of fine lines, wrinkles, and age spots.

    The reason retinol is so effective compared to other anti-aging ingredients is that it works on multiple pathways simultaneously. Most ingredients target one aspect of aging. Retinol targets several at once, making it the most comprehensive single ingredient for anti-aging.

    Types of Retinol and What They Mean

    Types of Retinol and What They Mean

    Retinol

    Retinol

    The most common form in drugstore products. It is converted to retinoic acid by your skin through a two-step process, which means it is gentler than prescription retinoids but also takes longer to produce results. Concentrations typically range from 0.025 percent to 1 percent in over-the-counter products.

    Retinaldehyde

    Retinaldehyde

    One step closer to retinoic acid than retinol, requiring only one conversion step. This means it works faster while still being available without prescription. It is less irritating than retinoic acid but more potent than standard retinol. Less common in drugstore products but available from some brands.

    Retinyl Palmitate and Retinyl Acetate

    Retinyl Palmitate and Retinyl Acetate

    The gentlest forms of vitamin A, requiring three conversion steps to become active retinoic acid. These are found in many moisturizers and eye creams marketed for sensitive skin. They are the least irritating but also the least potent. Good for introducing your skin to retinoids but unlikely to produce dramatic results.

    Encapsulated Retinol

    Encapsulated Retinol

    Retinol wrapped in a protective capsule that releases it gradually. This slow release reduces irritation while maintaining effectiveness. CeraVe uses this technology in their retinol products, making them among the most tolerable drugstore options.

    Best Drugstore Retinol for Beginners

    Best Drugstore Retinol for Beginners

    CeraVe Retinol Serum – Approximately Seventeen Dollars

    CeraVe Retinol Serum - Approximately Seventeen Dollars

    CeraVe Retinol Serum is our top pick for retinol beginners. The encapsulated retinol releases gradually, minimizing the irritation that scares many first-time users away from retinol entirely. The formula includes niacinamide for calming, hyaluronic acid for hydration, and ceramides for barrier support. This is the retinol equivalent of training wheels, effective enough to produce results but gentle enough to keep irritation at bay.

    This product won a Shop TODAY Beauty Award as best budget anti-aging serum, and dermatologists frequently recommend it as a starting point for patients new to retinol. At seventeen dollars, it costs a fraction of premium retinol serums that use the same encapsulated technology.

    The Ordinary Retinol 0.2% in Squalane – Approximately Six Dollars

    The Ordinary Retinol 0.2% in Squalane - Approximately Six Dollars

    The Ordinary Retinol 0.2% in Squalane at just six dollars is the most affordable retinol product you can buy. The low 0.2 percent concentration is perfect for beginners, and the squalane base provides moisture that helps offset the drying effect of retinol. Start with this two to three nights per week and increase as tolerated.

    Neutrogena Rapid Wrinkle Repair Retinol Serum – Approximately Twenty Dollars

    Neutrogena Rapid Wrinkle Repair Retinol Serum - Approximately Twenty Dollars

    Neutrogena’s retinol technology has been refined over years of development. This serum uses accelerated retinol SA to deliver results while minimizing irritation. It is lightweight, absorbs quickly, and layers well under moisturizer. The brand’s long history with retinol gives confidence in the formulation.

    Best Drugstore Retinol for Intermediate Users

    Best Drugstore Retinol for Intermediate Users

    RoC Retinol Correxion Line Smoothing Serum Capsules – Approximately Sixteen Dollars

    RoC Retinol Correxion Capsules are brilliant in their design. Each capsule contains a single application of fresh retinol serum, meaning the formula stays potent until the moment you use it. Retinol degrades with air and light exposure, so traditional bottles gradually lose potency after opening. These capsules solve that problem completely.

    RoC has decades of retinol expertise and their formulations are clinically proven. The capsule delivery also eliminates the guesswork of dosing. One capsule, one application, the perfect amount every time. At sixteen dollars for a month’s supply, the value is excellent.

    The Ordinary Retinol 0.5% in Squalane – Approximately Seven Dollars

    The Ordinary Retinol 0.5% in Squalane - Approximately Seven Dollars

    Once your skin has adapted to the 0.2 percent concentration, stepping up to 0.5 percent provides increased anti-aging benefits. The squalane base remains moisturizing and the formula is stable thanks to the oil-based delivery. At seven dollars, moving up in concentration barely increases your investment.

    Best Drugstore Retinol for Advanced Users

    Best Drugstore Retinol for Advanced Users

    Neutrogena Rapid Wrinkle Repair Retinol Pro+ 0.5% Power Serum – Approximately Twenty-Five Dollars

    This is Neutrogena’s most potent retinol offering at 0.5 percent pure retinol. For experienced retinol users whose skin has built tolerance, this serum delivers visible wrinkle improvement in as little as two weeks. The formula is designed for maximum efficacy, which means it is not suitable for beginners but is exactly what advanced users need.

    The Ordinary Retinol 1% in Squalane – Approximately Eight Dollars

    The Ordinary Retinol 1% in Squalane - Approximately Eight Dollars

    The highest concentration in The Ordinary’s retinol line. At one percent, this is among the most potent over-the-counter retinol products available anywhere, at a price that makes luxury brands look absurd. Only use this if your skin has been successfully tolerating lower concentrations for several months.

    RoC Retinol Correxion Max Hydration Cream – Approximately Twenty Dollars

    RoC Retinol Correxion Max Hydration Cream - Approximately Twenty Dollars

    This combines retinol with hyaluronic acid in a rich cream format. It is ideal for experienced retinol users with dry skin who want anti-aging and hydration in one product. The cream format provides a more comfortable experience than serums for those with drier skin types.

    Best Drugstore Retinol for Sensitive Skin

    Best Drugstore Retinol for Sensitive Skin

    Sensitive skin does not mean you cannot use retinol. It means you need the right formulation and approach.

    CeraVe Retinol Serum remains the best option for sensitive skin because the encapsulated delivery minimizes irritation while the ceramides support the skin barrier. Many sensitive-skin users who could not tolerate other retinol products find CeraVe’s version manageable.

    Another approach for sensitive skin is retinol sandwiching. Apply moisturizer first, then your retinol, then another layer of moisturizer. The moisturizer layers buffer the retinol and reduce direct contact with the skin, which dramatically decreases irritation without eliminating effectiveness.

    How to Start Using Retinol Without Irritation

    How to Start Using Retinol Without Irritation

    The most common mistake with retinol is doing too much too soon. Your skin needs time to adapt. Here is the proven approach.

    Week one and two: Apply retinol one night per week. Use a pea-sized amount on dry skin after cleansing. Follow with moisturizer. This gives your skin a gentle introduction.

    Week three and four: Increase to two nights per week. Monitor for redness, peeling, or irritation. If these occur, stay at this frequency longer before increasing.

    Month two: Increase to three nights per week if your skin is tolerating well. Continue to follow with moisturizer.

    Month three and beyond: Gradually work up to every other night and eventually nightly use as tolerated. Some people never need or want to use retinol every night, and that is perfectly fine. Even two to three times per week produces real results.

    Always apply sunscreen during the day when using retinol, as retinol increases sun sensitivity. This is non-negotiable.

    Common Retinol Mistakes That Waste Your Money

    Using Too Much Product

    Using Too Much Product

    A pea-sized amount is sufficient for your entire face. Using more does not produce faster results. It only produces more irritation. Your skin can only absorb a certain amount of retinol at a time, so excess product sits on the surface and causes unnecessary irritation.

    Applying to Wet Skin

    Applying to Wet Skin

    Retinol absorbs more rapidly on damp skin, which increases irritation risk. Always apply to completely dry skin. Wait at least five minutes after washing your face before applying retinol.

    Mixing With Harsh Actives

    Mixing With Harsh Actives

    Do not use retinol on the same night as AHA or BHA exfoliants, vitamin C at high concentrations, or benzoyl peroxide. These combinations can overwhelm your skin and cause significant irritation. Use these products on alternate nights instead.

    Giving Up Too Soon

    Giving Up Too Soon

    Retinol takes time to work. Initial results like brightness and smoother texture may appear in two to four weeks. Wrinkle reduction and significant collagen building take three to six months. If you quit after three weeks because you do not see dramatic changes, you are abandoning the process before it has a chance to work.

    Storing Products Incorrectly

    Storing Products Incorrectly

    Retinol degrades with exposure to light, air, and heat. Store your retinol products in a cool, dark place. Choose products in opaque, airtight packaging rather than clear bottles with dropper applicators, which expose the formula to air and light every time you use them. This is another advantage of RoC’s capsule format.

    How to Layer Retinol With Other Products

    How to Layer Retinol With Other Products

    The correct evening layering order when using retinol is cleanser, then any water-based serums like hyaluronic acid, then retinol on dry skin, then moisturizer. This sandwich approach ensures your retinol is delivered effectively while maintaining hydration and barrier health.

    For your morning routine when using retinol at night, use a gentle cleanser, followed by a vitamin C serum for antioxidant protection, followed by moisturizer, followed by sunscreen. The vitamin C in the morning and retinol at night give you round-the-clock anti-aging coverage.

    The most important layering rule is always to finish with sunscreen in the morning. Retinol increases photosensitivity, and unprotected sun exposure after retinol use can cause more damage than if you were not using retinol at all. SPF 30 or higher, every single day, is mandatory.

    Key Takeaways

    • Retinol is the most scientifically proven over-the-counter anti-aging ingredient, and effective products are available at the drugstore starting at just six dollars.
    • CeraVe Retinol Serum at seventeen dollars is the best starting point for beginners thanks to its encapsulated delivery and skin-barrier supporting ingredients.
    • RoC’s single-dose capsules solve the potency degradation problem that affects all bottled retinol products, keeping each application fresh and effective.
    • The Ordinary’s retinol line offers the most affordable path from beginner to advanced use, with products ranging from six to eight dollars at concentrations from 0.2 to 1 percent.
    • Start slowly with once-weekly application and gradually increase frequency over two to three months to avoid irritation.
    • Daily sunscreen is mandatory when using retinol. Skipping SPF while using retinol can cause more harm than not using retinol at all.
    • Retinol results take time. Expect initial brightness in two to four weeks and significant wrinkle improvement in three to six months.

    Frequently Asked Questions

    Can I use retinol if I have acne-prone skin?

    Yes, and retinol can actually help with acne. It speeds cell turnover, which helps prevent clogged pores. You may experience a temporary purging period in the first few weeks where existing clogs come to the surface faster, but this typically resolves within four to six weeks. Start with a low concentration and be patient through the adjustment period.

    Is retinol safe during pregnancy?

    Is retinol safe during pregnancy?

    No. Retinol and all retinoids should be avoided during pregnancy and breastfeeding. High doses of vitamin A have been linked to birth defects. If you are pregnant, planning to become pregnant, or breastfeeding, switch to pregnancy-safe alternatives like bakuchiol, which provides some similar benefits without the risks.

    What is the difference between retinol and prescription tretinoin?

    What is the difference between retinol and prescription tretinoin?

    Tretinoin is the active form of retinoic acid and works directly on skin cells without conversion. It is more potent and produces faster results but also causes more irritation and requires a prescription. Retinol needs to be converted to retinoic acid by your skin, which makes it gentler but slower. For many people, drugstore retinol provides sufficient results without the prescription hassle and cost.

    Can I use retinol around my eyes?

    Yes, but carefully. The skin around the eyes is thinner and more sensitive. Use only a tiny amount and apply it to the orbital bone area rather than directly to the eyelids or directly under the lash line. If you experience irritation, reduce frequency or switch to a lower concentration specifically for the eye area.

  • Alpha Arbutin vs Hydroquinone – Which Is Safer for Fading Dark Spots on Melanin Skin

    Alpha Arbutin vs Hydroquinone – Which Is Safer for Fading Dark Spots on Melanin Skin

    When it comes to fading dark spots on melanin-rich skin, two ingredients dominate the conversation: alpha arbutin and hydroquinone. They are chemically related – alpha arbutin is actually a derivative of hydroquinone – but they behave very differently on your skin. One is available over the counter and considered safe for long-term use. The other is the most potent topical brightening agent available but carries risks that are particularly concerning for darker skin tones. Understanding the alpha arbutin vs hydroquinone debate is essential for anyone with melanin skin who wants to fade hyperpigmentation effectively and safely.

    This article breaks down everything you need to know about both ingredients: how they work, their effectiveness, their safety profiles, and – most importantly – which one is the better choice for melanin-rich skin. We will also cover how to use each ingredient correctly and explore alternatives that might work even better for your specific concerns. Because when it comes to your beautiful melanin skin, making an informed choice is not just about getting results – it is about protecting the skin you are in.

    Understanding How Both Ingredients Work

    Understanding How Both Ingredients Work

    Both alpha arbutin and hydroquinone target the same enzyme – tyrosinase – which is responsible for melanin production in your skin. By inhibiting tyrosinase, both ingredients reduce the amount of melanin your melanocytes produce, gradually fading dark spots and evening out your skin tone. However, the way each ingredient interacts with tyrosinase, the strength of that interaction, and the potential side effects differ significantly.

    The Tyrosinase Connection

    The Tyrosinase Connection

    Tyrosinase is the key enzyme in the melanin synthesis pathway. It catalyzes the conversion of the amino acid tyrosine into melanin through a series of chemical reactions. When tyrosinase is inhibited, less melanin is produced, and over time, the existing pigmented cells are naturally shed and replaced by less pigmented ones. Both alpha arbutin and hydroquinone inhibit tyrosinase, but hydroquinone also has additional mechanisms that make it more potent – and potentially more problematic.

    The Chemical Relationship

    The Chemical Relationship

    Alpha arbutin is a glucoside of hydroquinone, meaning it has a glucose molecule attached to the hydroquinone structure. This glucose attachment is what makes alpha arbutin safer – it prevents the hydroquinone from being released all at once. Instead, the glucose is slowly cleaved off by enzymes in your skin, releasing small, controlled amounts of hydroquinone right at the site of melanin production. Think of alpha arbutin as a slow-release version of hydroquinone, providing the brightening benefits with significantly less risk.

    Alpha Arbutin – The Gentle Brightener

    Alpha Arbutin - The Gentle Brightener

    How Alpha Arbutin Works

    How Alpha Arbutin Works

    Alpha arbutin inhibits tyrosinase by competing with the enzyme’s natural substrate, preventing it from producing melanin as efficiently. Because the active hydroquinone component is released gradually and in small amounts, alpha arbutin provides consistent, gentle melanin inhibition without the peaks and valleys that can cause irritation and uneven results.

    Effectiveness

    Effectiveness

    Clinical studies have demonstrated that alpha arbutin at 1 to 2 percent concentration can significantly reduce hyperpigmentation with consistent use over eight to twelve weeks. While it works more slowly than hydroquinone, the results are steady and sustainable. Alpha arbutin is particularly effective for post-inflammatory hyperpigmentation and mild to moderate sun spots.

    The The Ordinary Alpha Arbutin 2% + HA is the most popular and affordable alpha arbutin product on the market, delivering the optimal 2 percent concentration in a lightweight, hydrating serum format.

    Safety Profile

    Safety Profile

    Alpha arbutin has an excellent safety profile that makes it particularly appealing for melanin-rich skin. It does not cause the cytotoxicity (cell damage) that hydroquinone can cause at higher concentrations. It does not cause ochronosis, the paradoxical darkening that is hydroquinone’s most feared side effect. It is not photo-sensitizing, meaning it does not increase your sun sensitivity. And it can be used continuously without the need for cycling on and off.

    Advantages for Melanin Skin

    Advantages for Melanin Skin

    For people with melanin-rich skin, alpha arbutin’s gentle, controlled mechanism is a major advantage. Melanin-rich skin has more reactive melanocytes that can respond to irritation by producing even more melanin – the exact opposite of what you want from a brightening treatment. Alpha arbutin’s non-irritating nature means there is virtually no risk of triggering post-inflammatory hyperpigmentation from the treatment itself. It targets excess melanin production without affecting your skin’s normal, healthy melanin levels.

    Hydroquinone – The Powerful But Controversial Choice

    Hydroquinone - The Powerful But Controversial Choice

    How Hydroquinone Works

    How Hydroquinone Works

    Hydroquinone inhibits tyrosinase more powerfully than alpha arbutin because it interacts with the enzyme directly, without the slow-release mechanism. It also has additional mechanisms: it can damage melanocytes directly, reduce the number of melanosomes, and increase the degradation of melanin. These additional mechanisms are what make it more potent, but they are also what make it more risky.

    Effectiveness

    Effectiveness

    There is no question that hydroquinone is the most potent topical brightening agent available. At 2 percent (over-the-counter) and 4 percent (prescription), it can produce visible fading of dark spots in as little as four to six weeks. For severe or stubborn hyperpigmentation, including deep melasma, hydroquinone often produces results that other ingredients cannot match in the same timeframe.

    Safety Concerns

    Safety Concerns

    Hydroquinone’s safety profile is where the alpha arbutin vs hydroquinone comparison gets complicated. The most serious risk is ochronosis, a condition where the skin develops a blue-black discoloration that is extremely difficult to treat. Ochronosis occurs with prolonged, continuous use, typically at higher concentrations, and is more common in people with darker skin tones. This risk is why hydroquinone should only be used in cycles of eight to twelve weeks at a time, with breaks in between.

    Hydroquinone can also cause irritant contact dermatitis (redness, stinging, peeling), rebound hyperpigmentation when discontinued, and increased sun sensitivity. For melanin-rich skin, the irritation risk is particularly concerning because irritation can trigger more hyperpigmentation – creating a frustrating cycle where the treatment makes the problem worse.

    Regulatory Status

    Regulatory Status

    The safety concerns around hydroquinone have led to regulatory action in many countries. It is banned in the European Union, Japan, and Australia for use in cosmetics. In the United States, over-the-counter hydroquinone at 2 percent was recently removed from OTC shelves and now requires a prescription at any concentration following FDA regulatory changes. These regulatory decisions reflect the medical community’s growing consensus that hydroquinone requires careful medical supervision.

    Head-to-Head Comparison for Melanin Skin

    Head-to-Head Comparison for Melanin Skin

    Speed of Results

    Speed of Results

    Hydroquinone produces faster visible results, typically within four to eight weeks. Alpha arbutin works more gradually, with noticeable results usually appearing at eight to twelve weeks. However, speed is not everything – the sustainability and safety of those results matter just as much, especially for melanin skin where treatment complications can create new problems.

    Long-Term Safety

    Long-Term Safety

    Alpha arbutin wins decisively on long-term safety. It can be used indefinitely without cycling, with no risk of ochronosis or rebound hyperpigmentation. Hydroquinone requires careful cycling (eight to twelve weeks on, at least four weeks off) and carries the risk of ochronosis with prolonged use. For melanin-rich skin, where hyperpigmentation is an ongoing concern that requires long-term management, alpha arbutin’s safety for continuous use is a significant advantage.

    Risk of Worsening Hyperpigmentation

    Risk of Worsening Hyperpigmentation

    Alpha arbutin has virtually no risk of triggering new hyperpigmentation because it does not cause irritation or inflammation. Hydroquinone can cause irritant dermatitis that triggers post-inflammatory hyperpigmentation, especially on sensitive melanin-rich skin. There is also the risk of rebound hyperpigmentation when hydroquinone is stopped, where dark spots return darker than before.

    Ease of Use

    Ease of Use

    Alpha arbutin is simpler to use. Apply it morning and evening, no cycling required, no special monitoring needed. Hydroquinone requires more careful management – use for limited periods, take mandatory breaks, monitor for signs of ochronosis, and coordinate with a dermatologist.

    Cost and Accessibility

    Cost and Accessibility

    Alpha arbutin is widely available over the counter at affordable prices. The Ordinary’s 2 percent serum costs under ten dollars and lasts several months. Hydroquinone now requires a prescription in the US, adding the cost of a dermatologist visit, and prescription formulations can be significantly more expensive.

    The Verdict for Melanin Skin

    The Verdict for Melanin Skin

    For the vast majority of people with melanin-rich skin, alpha arbutin is the better choice. It provides effective, safe brightening with none of the risks that make hydroquinone problematic for darker skin tones. Hydroquinone should be reserved for severe, treatment-resistant hyperpigmentation and used only under direct dermatologist supervision, in short cycles, with careful monitoring.

    How to Use Alpha Arbutin Safely and Effectively

    How to Use Alpha Arbutin Safely and Effectively

    Concentration and Frequency

    Concentration and Frequency

    Alpha arbutin at 2 percent is the standard effective concentration. Apply it twice daily – morning and evening – after cleansing and toning but before moisturizer. There is no need to build up gradually or cycle on and off. You can start using it daily from day one.

    Best Combinations

    Best Combinations

    Alpha arbutin works even better when combined with other brightening ingredients that work through different mechanisms. Pair it with vitamin C in the morning for enhanced tyrosinase inhibition plus antioxidant protection. Pair it with niacinamide for the added benefit of melanin transfer prevention. Use it alongside retinol at night for accelerated cell turnover that helps pigmented cells shed faster.

    A powerhouse morning routine might include vitamin C serum, followed by The Ordinary Alpha Arbutin 2% + HA , followed by a CeraVe PM Moisturizing Lotion with niacinamide, and finished with sunscreen. This multi-pathway approach attacks hyperpigmentation from several angles simultaneously.

    Patience Is Key

    Patience Is Key

    Give alpha arbutin at least eight to twelve weeks of consistent daily use before judging results. Take progress photos in the same lighting every two weeks to track changes that may be too gradual to notice in the mirror. Many people see significant improvement by the three-month mark, with continued improvement over six to twelve months.

    If You Choose Hydroquinone – How to Use It Safely

    If You Choose Hydroquinone - How to Use It Safely

    Work With a Dermatologist

    Work With a Dermatologist

    If your hyperpigmentation is severe enough that you and your dermatologist decide hydroquinone is warranted, always use it under medical supervision. Your dermatologist can prescribe the appropriate concentration, monitor for side effects, and adjust your treatment plan as needed.

    Cycle Properly

    Cycle Properly

    Never use hydroquinone continuously. The standard protocol is eight to twelve weeks of use followed by at least four weeks off. During the off period, switch to other brightening ingredients like alpha arbutin, niacinamide, or azelaic acid to maintain your results without the risks of continuous hydroquinone use.

    Protect From Sun

    Protect From Sun

    Hydroquinone increases your skin’s sensitivity to UV radiation, making daily broad-spectrum sunscreen with SPF 30 or higher absolutely essential. UV exposure while using hydroquinone can worsen hyperpigmentation and increase the risk of ochronosis. Wear sunscreen religiously and reapply every two hours when outdoors.

    Watch for Warning Signs

    Watch for Warning Signs

    Discontinue hydroquinone immediately and see your dermatologist if you notice any bluish, grayish, or paradoxical darkening of the treated areas. These could be early signs of ochronosis. Also stop use if you experience severe irritation, blistering, or widespread redness. These signs indicate that the product is damaging rather than treating your skin.

    Alternative Brightening Ingredients to Consider

    Alternative Brightening Ingredients to Consider

    The alpha arbutin vs hydroquinone debate does not exist in a vacuum. Several other ingredients effectively fade dark spots on melanin skin with excellent safety profiles.

    Tranexamic Acid

    Tranexamic Acid

    Tranexamic acid is emerging as one of the most effective alternatives to hydroquinone, with studies showing comparable results for melasma without the associated risks. It works through a different mechanism than arbutin or hydroquinone, targeting the inflammatory pathways that trigger melanin production. It is gentle, safe for long-term use, and effective on all skin tones.

    Azelaic Acid

    Azelaic Acid

    Azelaic acid at 15 to 20 percent matches hydroquinone’s effectiveness for melasma in clinical studies. It selectively targets abnormal melanocytes, has anti-inflammatory and antimicrobial properties, and is pregnancy-safe. It is available over the counter at 10 percent and by prescription at higher concentrations.

    Vitamin C

    Vitamin C

    L-ascorbic acid at 10 to 20 percent provides effective tyrosinase inhibition plus potent antioxidant protection. While not as fast-acting as hydroquinone, it is safe for long-term use and provides additional anti-aging benefits. It pairs beautifully with alpha arbutin for enhanced results.

    Kojic Acid

    Kojic Acid

    Kojic acid is a natural tyrosinase inhibitor derived from fungi. At 1 to 4 percent, it provides effective brightening, though it can be sensitizing for some skin types. It is often combined with other brightening ingredients in formulations designed for hyperpigmentation treatment.

    The Multi-Ingredient Approach

    The Multi-Ingredient Approach

    The most effective strategy for fading dark spots on melanin skin without hydroquinone is combining multiple gentler ingredients that work through different mechanisms. A routine incorporating alpha arbutin, vitamin C, niacinamide, and tranexamic acid – each targeting melanin production through a different pathway – can produce results comparable to hydroquinone without any of the associated risks. Add consistent sunscreen and patience, and you have a powerful, safe, long-term hyperpigmentation management strategy.

    Key Takeaways

    • Alpha arbutin is a safer derivative of hydroquinone that provides effective brightening through slow, controlled release without the risks associated with its parent compound.
    • Hydroquinone is more potent and faster-acting but carries risks of ochronosis, rebound hyperpigmentation, and irritation that are particularly concerning for melanin-rich skin.
    • For the majority of people with dark skin, alpha arbutin is the better choice because it provides effective, safe, long-term brightening with virtually no side effects.
    • Hydroquinone should be reserved for severe cases under dermatologist supervision, used in cycles of eight to twelve weeks maximum.
    • Combining alpha arbutin with other brightening ingredients like vitamin C, niacinamide, and tranexamic acid can produce results comparable to hydroquinone without the risks.
    • Daily sunscreen is essential regardless of which brightening ingredient you choose, as UV exposure is the primary trigger for melanin production.

    Frequently Asked Questions

    Can I use alpha arbutin and hydroquinone together?

    This is generally not recommended because both ingredients target the same enzyme (tyrosinase), and combining them increases the risk of irritation without proportionally increasing effectiveness. If you are using hydroquinone under dermatologist supervision, you can switch to alpha arbutin during your hydroquinone break periods to maintain results. But using both simultaneously is unlikely to provide additional benefits and may increase side effect risk.

    Is alpha arbutin the same thing as beta arbutin?

    Is alpha arbutin the same thing as beta arbutin?

    No, they are different forms of arbutin. Alpha arbutin is significantly more effective and stable than beta arbutin. Alpha arbutin has a stronger binding affinity for tyrosinase and releases its active component more consistently. When shopping for arbutin products, make sure the label specifically says “alpha arbutin” rather than just “arbutin,” which might be the less effective beta form.

    How long should I use alpha arbutin before trying hydroquinone?

    Give alpha arbutin at least three to six months of consistent, daily use before concluding it is not working well enough. Many people give up too early because they are comparing alpha arbutin’s gradual results to hydroquinone’s faster timeline. If after six months of alpha arbutin combined with vitamin C, niacinamide, and consistent sunscreen you have not seen satisfactory improvement, then a consultation with a dermatologist about prescription options may be warranted.

    Will alpha arbutin lighten my overall skin tone?

    Will alpha arbutin lighten my overall skin tone?

    No. Like azelaic acid, alpha arbutin preferentially targets areas where melanin is being overproduced – the dark spots and patches of hyperpigmentation. It does not significantly affect your normal melanin levels or lighten your overall skin tone. It helps dark spots fade to match the surrounding skin, creating a more even complexion at your natural skin color.

    Is hydroquinone safe for short-term use on dark skin?

    Is hydroquinone safe for short-term use on dark skin?

    When used under dermatologist supervision at appropriate concentrations (2 to 4 percent) for limited periods (eight to twelve weeks), hydroquinone can be used relatively safely on dark skin. The key safeguards are: never exceeding 4 percent concentration, never using it continuously for more than twelve weeks, always wearing sunscreen, and monitoring carefully for any signs of irritation or paradoxical darkening. However, the availability of safer alternatives like alpha arbutin, tranexamic acid, and azelaic acid means hydroquinone is no longer the automatic first choice it once was.

  • Best Concealers for Dark Circles on Dark Skin – Color Correcting Tips That Work

    Best Concealers for Dark Circles on Dark Skin – Color Correcting Tips That Work

    By the Curvy Girl Journal Team |

    Why Dark Circles on Dark Skin Need a Different Approach

    Why Dark Circles on Dark Skin Need a Different Approach

    If you have ever applied a concealer marketed for dark circles only to end up looking ashy, gray, or like you have two white patches under your eyes, you are not alone. The majority of concealer advice, shade recommendations, and product formulations were developed with lighter skin tones in mind. When those same principles are applied to melanin-rich skin, the results range from ineffective to actively unflattering.

    Dark circles on dark skin are different. The hyperpigmentation tends to run deeper, with undertones that skew brown, purple, and gray rather than the blue that dominates on lighter skin. This means the color correction approach needs to be more saturated, the concealer shades need to be warmer, and the application technique needs to account for the way product sits on melanin-rich skin, which has different texture and oil production patterns.

    This guide covers everything you need to know: the color theory behind color correcting on dark skin, the specific products that actually work, the step-by-step application technique that prevents creasing and ashiness, and the common mistakes that trip up even experienced makeup users. By the end, you will have a clear, actionable system for concealing dark circles that looks natural, lasts all day, and actually enhances your beautiful melanin-rich complexion.

    Color Correcting 101 for Dark Skin

    Color Correcting 101 for Dark Skin

    Understanding Color Theory for Deeper Complexions

    Understanding Color Theory for Deeper Complexions

    Color correcting works on the principle that opposite colors on the color wheel cancel each other out. For dark circles on dark skin, the colors you are neutralizing are brown, purple, and deep gray. The correctors that cancel these tones are peach, orange, and red, with the specific shade depending on how deep your skin tone is.

    Here is the critical rule that most mainstream beauty advice gets wrong: the deeper your skin, the more saturated your color corrector needs to be. A light peach that works on medium skin will do nothing on deep skin. You need actual orange or even reddish-orange tones to effectively neutralize the depth of pigmentation. This is not a mistake; it is correct color theory applied to deeper skin tones.

    Matching Your Corrector to Your Skin Depth

    Matching Your Corrector to Your Skin Depth

    For medium-dark skin tones, a saturated peach corrector will effectively neutralize most under-eye darkness. For dark to deep skin tones, you need an orange corrector. For very deep skin tones, a red-orange or even a true warm red corrector provides the pigmentation intensity needed to cancel out the deepest hyperpigmentation. If your corrector looks too light or too pastel against your under-eye, it is not saturated enough for your depth.

    Why You Need Both a Corrector and a Concealer

    On dark skin, concealer alone cannot effectively address dark circles because the pigmentation is too deep to cover in a single layer. A color corrector neutralizes the dark tones first, creating a more even base. Then the concealer goes on top to match the area to the rest of your face. This two-step approach is what makeup artists use on dark skin tones, and it is the key to natural-looking, effective coverage.

    Best Color Correctors for Dark Skin

    Best Color Correctors for Dark Skin

    1. Live Tinted Hueguard Color Corrector ($28)

    1. Live Tinted Hueguard Color Corrector ($28)

    Live Tinted was literally created to solve color correction challenges on melanin-rich skin. Their Hueguard formula adapts to your skin tone, providing neutralizing correction without the chalky aftermath that plagues so many correctors on dark skin. The creamy, blendable formula sits beautifully under concealer without creasing or separating throughout the day.

    The shade range is specifically calibrated for deeper skin tones, avoiding the too-light, too-pastel problem that makes many correctors useless on dark skin. The formula also contains skincare ingredients that treat the under-eye area while correcting, including caffeine to reduce puffiness and vitamin C to gradually brighten the area over time.

    Shop Live Tinted Hueguard Color Corrector ($28)

    2. L.A. Girl Pro Concealer in Orange ($5)

    2. L.A. Girl Pro Concealer in Orange ($5)

    The L.A. Girl Pro Concealer in orange is one of the most recommended products in the entire dark skin beauty community, and at $5 it is also one of the most accessible. The orange shade is perfectly saturated to neutralize dark circles on medium-deep to deep skin tones. The liquid formula blends easily and provides a smooth base for concealer without being too thick or cakey.

    Professional makeup artists working on dark skin frequently carry this product in their kits because it works consistently across different depths. The applicator tip allows for precise placement in the under-eye area. For $5, this is the must-try product for anyone beginning their color correction journey on dark skin.

    Shop L.A. Girl Pro Concealer in Orange ($5)

    3. NYX Professional Makeup Color Correcting Palette ($14)

    3. NYX Professional Makeup Color Correcting Palette ($14)

    The NYX color correcting palette includes multiple shades in one compact, allowing you to customize your correction by mixing and matching. For dark skin, the orange and peach pans are the most useful, and the included green can address any redness or hyperpigmentation around the nose and chin. The cream formula blends smoothly and works well under both liquid and powder concealer.

    Having multiple correcting shades in one palette is particularly useful because your under-eye darkness can vary throughout the month due to sleep, stress, and hormonal changes. On days when the circles are deeper, use a more saturated orange. On lighter days, a peach tone suffices. The palette format gives you flexibility without buying multiple individual products.

    Shop NYX Color Correcting Palette ($14)

    Best Concealers for Dark Skin Tones

    Best Concealers for Dark Skin Tones

    4. Fenty Beauty Pro Filt’r Concealer ($30)

    4. Fenty Beauty Pro Filt'r Concealer ($30)

    With 50 shades that include multiple options for every depth and undertone, Fenty Beauty’s Pro Filt’r Concealer is the gold standard for concealer shade matching on dark skin. The creamy, soft matte formula builds from medium to full coverage while feeling light on the skin. It does not settle into fine lines, crease heavily, or oxidize throughout the day, which are common issues with concealers on deeper skin.

    The shade range specifically includes warm, cool, and neutral undertones within the deep shade range, so you are not forced to choose between a shade that is technically the right depth but has completely wrong undertones. The formula lasts up to 12 hours and resists the midday fading that can reveal corrected dark circles. This is the concealer that makeup artists reach for first on dark skin.

    Shop Fenty Beauty Pro Filt’r Concealer ($30)

    5. NARS Radiant Creamy Concealer ($32)

    5. NARS Radiant Creamy Concealer ($32)

    The NARS Radiant Creamy Concealer has been a bestseller for over a decade because it delivers consistently impressive results across all skin tones. The medium-to-full coverage formula has a natural finish that avoids both the matte flatness and the overly dewy slip that can be problematic under the eyes. The built-in skincare ingredients hydrate the delicate under-eye area.

    With 30 shades spanning the full spectrum of skin tones, the deep shade range includes warm, cool, and neutral options. The concealer has excellent staying power without setting powder, though a light dusting of translucent powder extends wear even further. The doe-foot applicator deposits the right amount of product for the under-eye area without over-application.

    Shop NARS Radiant Creamy Concealer ($32)

    6. Maybelline Instant Age Rewind Concealer ($12)

    6. Maybelline Instant Age Rewind Concealer ($12)

    If Fenty and NARS represent the prestige tier, Maybelline Instant Age Rewind is the drugstore champion. The sponge-tip applicator provides easy, precise application, and the lightweight formula delivers medium coverage that can be built up. The shade range has expanded significantly and now includes multiple deep shades with warm undertones that work on dark skin.

    The formula contains goji berry and haloxyl to address dark circles from within while providing immediate cosmetic coverage. At $12, it offers remarkable performance for the price. The only caveat is that the sponge applicator can harbor bacteria and should be cleaned regularly. Many women prefer to dab the product onto a clean brush or beauty sponge rather than applying directly from the applicator.

    Shop Maybelline Instant Age Rewind Concealer ($12)

    7. Too Faced Born This Way Super Coverage Concealer ($33)

    7. Too Faced Born This Way Super Coverage Concealer ($33)

    For the darkest circles that need maximum coverage, Too Faced Born This Way Super Coverage delivers. This full-coverage concealer provides significant pigment in a single layer, which means less layering and less risk of a heavy, cakey finish. The coconut water and alpine rose ingredients keep the formula hydrated and comfortable throughout the day.

    The shade range includes deep shades with accurate undertones, and the formula resists oxidation, which is critical for dark skin tones where a shade shift can make the concealer look orange or ashy within hours. The paddle applicator allows for controlled placement, and the formula sets to a natural satin finish without settling into creases.

    Shop Too Faced Born This Way Concealer ($33)

    Step-by-Step Application Guide

    Step-by-Step Application Guide

    Step 1: Prep the Under-Eye Area

    Step 1: Prep the Under-Eye Area

    Apply a hydrating eye cream or primer to the under-eye area and let it absorb for two to three minutes. This creates a smooth, moisturized canvas that prevents concealer from clinging to dry patches or settling into fine lines. A caffeine-based eye cream also reduces puffiness, creating a flatter surface for product application.

    Step 2: Apply Color Corrector

    Step 2: Apply Color Corrector

    Using a small brush or your ring finger, apply a thin layer of orange or peach corrector directly to the darkest areas under your eye. Typically this is the inner corner where the dark circle is deepest. Use the smallest amount possible; you are neutralizing, not covering. Blend gently with your ring finger, which applies the lightest pressure and the most warmth for smooth blending.

    Step 3: Let the Corrector Set

    Step 3: Let the Corrector Set

    Allow the corrector to set for 30 to 60 seconds before applying concealer. This prevents the two products from mixing and diluting each other. While you wait, you can work on other areas of your makeup like foundation, brows, or eyes.

    Step 4: Apply Concealer

    Step 4: Apply Concealer

    Apply concealer in an inverted triangle shape under the eye, with the base along the lower lash line and the point reaching toward the cheek. This shape brightens the entire under-eye area and creates a lifted effect. Use a damp beauty sponge to blend, pressing and patting rather than rubbing. Patting builds coverage without disturbing the corrector underneath.

    Step 5: Set with Powder (Optional)

    Step 5: Set with Powder (Optional)

    If your under-eye tends to crease, lightly set the concealer with a finely milled translucent or setting powder using a small fluffy brush. Use the lightest possible hand, as too much powder will look chalky on dark skin. Banana powder or warm-toned setting powders are better choices than pure white translucent powders, which can create an ashy cast on deeper complexions.

    Common Mistakes to Avoid

    Common Mistakes to Avoid

    Using a Concealer That Is Too Light

    Using a Concealer That Is Too Light

    The instinct to “brighten” the under-eye with a shade that is two to three levels lighter than your skin tone creates a reverse raccoon effect on dark skin. Your concealer should be no more than one shade lighter than your skin tone. On dark skin, the brightening effect comes from neutralizing the dark tones, not from using a dramatically lighter product.

    Skipping Color Correction

    Skipping Color Correction

    On dark skin with significant under-eye hyperpigmentation, concealer alone will never fully mask the darkness. Skipping the color correction step means you have to layer on more concealer to compensate, which leads to a thick, cakey finish that creases and looks unnatural. The corrector does the heavy lifting so the concealer can finish the job with a lighter touch.

    Using White Translucent Powder to Set

    Using White Translucent Powder to Set

    Pure white translucent powder creates a visible ashy cast on dark skin, especially in flash photography. Choose a setting powder with a yellow or warm undertone, or use a banana powder specifically designed for medium to deep skin tones. Ben Nye Banana Luxury Powder and Sacha Buttercup Powder are both excellent options for dark skin.

    Rubbing Instead of Patting

    Rubbing Instead of Patting

    Rubbing your concealer moves the product around and creates streaks. Patting with a damp beauty sponge presses the product into the skin for seamless, even coverage. This technique is especially important when layering corrector and concealer, as rubbing will disturb the corrector layer and reduce its effectiveness.

    Long-Term Solutions for Dark Circles

    Long-Term Solutions for Dark Circles

    Skincare Ingredients That Actually Help

    Skincare Ingredients That Actually Help

    While concealer addresses the cosmetic appearance of dark circles, certain skincare ingredients can reduce the actual pigmentation over time. Eye creams containing caffeine, niacinamide, and vitamin E have been shown in studies to decrease periocular hyperpigmentation. Vitamin C brightens the under-eye area, and retinol increases cell turnover to fade dark spots.

    Start with a caffeine-based eye cream for immediate depuffing and gradual brightening, and consider adding a retinol eye cream two to three times per week for long-term improvement. Always apply these products at night and use sunscreen during the day to prevent further darkening.

    Lifestyle Factors

    Lifestyle Factors

    Adequate sleep, proper hydration, and limiting salt intake all reduce the appearance of under-eye darkness and puffiness. Sleeping with your head slightly elevated prevents fluid pooling under the eyes. A cold compress or chilled spoons applied for five minutes in the morning can reduce morning puffiness and temporarily brighten the area.

    When to See a Dermatologist

    When to See a Dermatologist

    If your dark circles are severe, do not respond to topical treatments, or have suddenly worsened, consult a dermatologist who specializes in skin of color. They can assess whether the darkness is caused by hyperpigmentation, thin skin revealing blood vessels, allergies, or other medical factors, and recommend professional treatments like chemical peels, laser therapy, or prescription-strength brightening agents.

    Key Takeaways

    • Dark circles on dark skin require a two-step approach: color correcting first, then concealing, for natural-looking coverage.
    • The deeper your skin tone, the more saturated your color corrector needs to be. Deep skin needs orange; very deep skin needs red-orange.
    • Fenty Beauty Pro Filt’r and NARS Radiant Creamy are the top prestige concealers for dark skin. L.A. Girl Pro Concealer in Orange is the unbeatable drugstore corrector at $5.
    • Your concealer should be no more than one shade lighter than your skin tone to avoid an ashy or reverse-raccoon effect.
    • Always set with warm-toned or banana powder, never pure white translucent powder, to avoid ashiness.
    • Pat your products instead of rubbing for seamless, crease-free coverage that lasts all day.

    Frequently Asked Questions

    Do I need a color corrector or just a better concealer?

    If your dark circles are moderate to severe, you need both. Color corrector neutralizes the dark tones that concealer alone cannot mask. If your dark circles are very mild, a full-coverage concealer in the right shade might suffice, but for most women with melanin-rich skin and noticeable dark circles, the corrector step is what makes the difference between adequate and flawless coverage.

    Why does my concealer look gray or ashy after a few hours?

    This typically happens because the concealer shade has cool undertones that oxidize on your skin. Choose concealers with warm undertones, and look for formulas that specifically resist oxidation. Setting with a warm-toned powder helps maintain the correct color throughout the day. Also ensure your concealer is not too light for your skin tone, as lighter shades tend to look gray as they wear.

    Can I use my lipstick as a color corrector?

    In a pinch, a warm red or orange lipstick can work as a color corrector under the eyes. However, lipstick formulas are designed for the lips and may be too heavy, waxy, or drying for the delicate under-eye area. Dedicated color correctors have thinner, more blendable textures and often include skincare ingredients that benefit the under-eye area. Lipstick is a temporary hack, not a long-term solution.

    How do I prevent concealer from creasing under my eyes?

    Start with a hydrating eye cream as your base. Use a thin layer of corrector and a thin layer of concealer rather than thick applications of either. Set with a light dusting of finely milled powder, and bake for one to two minutes maximum before brushing away excess. Avoid over-powdering, which creates a dry, cakey texture that is more prone to cracking and creasing throughout the day.

  • How to File Almond Shaped Nails at Home – A Beginner’s Guide to the Most Flattering Shape

    How to File Almond Shaped Nails at Home – A Beginner’s Guide to the Most Flattering Shape

    Why Almond Shaped Nails Are Universally Flattering

    Why Almond Shaped Nails Are Universally Flattering

    There is a reason why nail technicians across the world consistently recommend almond shaped nails when clients ask for the most flattering option – this shape has an almost magical ability to make every hand look elegant, every finger look longer, and every nail bed look more proportional. If you have been wondering how to file almond shaped nails at home, you are about to learn the technique behind one of the most universally loved nail shapes in beauty.

    Almond shaped nails get their name from the humble almond nut. Like an almond, these nails are wider at the base, taper gradually along the sides, and come to a softly rounded peak at the tip. There are no sharp edges, no dramatic points, and no harsh angles. Everything about this shape is smooth, natural, and graceful.

    What makes almond nails so universally flattering is the way they create visual length without looking extreme. The tapered sides create a narrowing optical illusion that makes wide nail beds look slimmer, short fingers look longer, and hands look more delicate overall. But unlike stiletto or coffin shapes that can look dramatic or high-maintenance, almond nails feel approachable and elegant in a way that works for literally any occasion – from a job interview to a wedding to a lazy weekend brunch.

    The popularity of almond shaped nails for beginners has exploded in recent years, and for good reason. This shape is more forgiving than it might seem – unlike perfectly square or perfectly round nails where asymmetry is immediately obvious, the organic taper of an almond shape naturally masks minor imperfections in your filing. That makes it an ideal shape for anyone learning to file their own nails at home.

    Almond vs Other Nail Shapes – Understanding the Difference

    Almond vs Other Nail Shapes - Understanding the Difference

    Before you start filing, it helps to understand exactly how almond nails differ from other popular shapes. This clarity will help you avoid accidentally filing into a different shape.

    Almond vs Oval

    Almond vs Oval

    These two shapes are the most commonly confused, and the difference is subtle but important. Oval nails have a symmetrical, evenly rounded tip – like the shape of an egg. Almond nails taper more dramatically toward the tip, creating a slightly narrower, more pointed peak. Think of it this way: oval nails are wider at the tip than almond nails, but narrower than round nails. The almond shape is like a slightly more dramatic version of an oval.

    Almond vs Stiletto

    Stiletto nails take the almond taper to an extreme, coming to a sharp, dramatic point. Where almond nails have a softly rounded peak, stiletto nails have a true point. If you are filing almond nails and notice they are getting very pointy, you have gone too far into stiletto territory. The fix is simple – gently round off the sharp tip until it feels soft and smooth.

    Almond vs Coffin

    Almond vs Coffin

    Coffin nails start with a similar taper to almond but then have the tip filed flat, creating a squared-off edge. Almond nails never have a flat tip – the peak is always softly rounded. If you are going for almond, resist the urge to file the tip straight across.

    Almond vs Round

    Almond vs Round

    Round nails follow the natural curve of the cuticle and do not narrow at the sides at all. The sides of round nails remain parallel before rounding off at the tip. Almond nails, by contrast, begin to taper noticeably about one-third of the way up from the base, creating that distinctive narrowing silhouette. The taper is what distinguishes almond from round and gives almond its elongating effect.

    What You Need Before You Start Filing

    What You Need Before You Start Filing

    Having the right tools makes a significant difference in your results when filing almond shaped nails at home. Here is what you need and why each item matters.

    A Quality Nail File

    A Quality Nail File

    This is not the time for a metal nail file from the dollar store. For natural nails, you want a glass (crystal) file or a fine-grit emery board (180-240 grit). Glass files create the smoothest edge with the least damage to the nail plate. They also last essentially forever and can be sanitized easily. A high-quality glass nail file set is a small investment that makes a huge difference in the quality and health of your filing results.

    Avoid coarse-grit files (under 150 grit) on natural nails. These are designed for acrylics and gel extensions and will shred and weaken natural nail plates.

    A Nail Buffer

    A Nail Buffer

    After shaping, a buffer smooths out any roughness along the filed edges and gives the nail surface a gentle polish. A four-sided buffer that goes from coarse to ultra-fine is ideal. You will use it after filing to refine the shape and smooth the nail’s edge.

    Cuticle Care Tools

    Cuticle Care Tools

    Push back your cuticles gently before filing. This gives you a clear view of your nail bed and helps you file symmetrically. A rubber-tipped cuticle pusher is gentler than a metal one and reduces the risk of damaging the delicate cuticle tissue. Apply cuticle oil before pushing to soften the cuticle.

    Good Lighting

    Good Lighting

    This might sound obvious, but many people file their nails in dim lighting and then wonder why the shape looks uneven in daylight. Sit near a window or use a bright desk lamp so you can clearly see the angles and symmetry of your filing.

    A Reference Image

    A Reference Image

    Save a photo of your ideal almond shape on your phone and keep it visible while you file. Having a reference to glance at helps you maintain the right taper and prevents you from over-filing.

    Step-by-Step Guide to Filing Almond Shaped Nails

    Step-by-Step Guide to Filing Almond Shaped Nails

    Follow these steps carefully and you will have beautiful almond shaped nails that look professionally done. Take your time – rushing is the enemy of a good shape.

    Step 1 – Start With the Right Length

    Step 1 - Start With the Right Length

    Your nails need to extend past the fingertip by at least a few millimeters for almond shape to work. If your nails are currently very short, you might need to grow them out. Clip any nails that are significantly longer than the others to create a roughly even starting length across all fingers.

    Step 2 – File the Sides First

    Step 2 - File the Sides First

    This is the most important step and the one most beginners get wrong. Hold your file at a slight angle against one side of the nail, starting about one-third of the way up from the cuticle. File in one direction only – from the side of the nail toward the center tip. Do not saw back and forth, as this weakens the nail edge and creates an uneven finish.

    Repeat on the other side, matching the angle as closely as possible. Step back frequently and look at the nail straight-on to check that both sides are tapering evenly. Symmetry between the two sides is what makes almond nails look polished and professional.

    Step 3 – Shape the Tip

    Step 3 - Shape the Tip

    Once both sides taper evenly, gently round the tip. You want a soft, rounded peak – not a sharp point. File from each side toward the center of the tip with gentle, short strokes. The tip should look like the end of an actual almond – gently pointed but never sharp enough to scratch.

    Step 4 – Refine and Smooth

    Step 4 - Refine and Smooth

    Look at each nail from multiple angles – straight on, from the side, and from above. Make small adjustments to even out any asymmetry. Then use your buffer to gently smooth the filed edges. This removes any tiny rough spots that could catch on fabric or snag.

    Step 5 – Repeat on All Nails

    Step 5 - Repeat on All Nails

    File each nail individually, checking symmetry as you go. Try to match the taper angle and length across all ten nails. It is helpful to do one hand completely, then match the other hand to it rather than alternating.

    Step 6 – Hydrate

    After filing, apply cuticle oil around each nail and massage it in gently. Filing can be drying, and the oil helps seal and protect the freshly filed nail edges. A cuticle oil pen makes this quick and mess-free.

    How Long Do Your Nails Need to Be

    One of the most common questions about almond shaped nails is how long they need to be. The short answer: longer than you might think, but not as long as you might fear.

    For a true almond shape, your nails need to extend past your fingertip by at least 3-5 millimeters. This length provides enough free edge for the taper to develop gradually without making the nail look too narrow or fragile at the tip. If you try to file almond shape into very short nails, you will either lose the tapered effect entirely or end up with nails that are too narrow and prone to breaking.

    That said, there is a modified version called a “short almond” that works on nails with just 1-2 millimeters of free edge. The taper is more subtle, and the tip is rounder than a classic almond, but it still gives that flattering narrowing effect. It is a great compromise if you prefer shorter nails or if your nails are still growing out.

    If you are growing your nails for almond shape, be patient and protect them during the growing-out phase. Keep nails polished with a strengthening base coat to prevent breakage, and be gentle with your hands during daily activities. Wearing gloves for household chores, opening cans with utensils instead of your nails, and keeping nails hydrated all help maintain length while they grow.

    For those who want instant length, press-on nails and extensions in almond shape skip the growing phase entirely. We will cover those later in this article.

    Common Filing Mistakes That Ruin Almond Shape

    Common Filing Mistakes That Ruin Almond Shape

    Knowing what not to do is just as important as knowing the correct technique. Here are the most common mistakes that turn a potentially perfect almond shape into something else entirely.

    Filing Too Aggressively on the Sides

    Filing Too Aggressively on the Sides

    The number one mistake is removing too much material from the sides too quickly. You can always file more, but you cannot add nail back. Start conservatively and gradually increase the taper. Check your progress frequently. If the sides look too narrow, you have taken off too much and will need to let that nail grow out before trying again.

    Sawing Back and Forth

    Filing in both directions creates micro-tears in the nail plate that weaken the edge and can lead to peeling and breakage. Always file in one direction – from the side toward the center. Lift the file and return to the starting point for each stroke.

    Making the Tip Too Pointy

    Making the Tip Too Pointy

    It is surprisingly easy to turn almond nails into stiletto nails by over-filing the tip. The almond shape should have a soft, rounded peak – not a sharp point. If you go too pointy, gently round the tip by filing small strokes across it from each side. Think “soft mountain” rather than “sharp peak.”

    Asymmetric Sides

    Asymmetric Sides

    If one side of the nail tapers more than the other, the nail will look crooked and unbalanced. To avoid this, count your file strokes on each side and try to match them. After every few strokes, look at the nail straight-on to compare both sides.

    Not Matching Across All Nails

    Not Matching Across All Nails

    A common issue is having each nail in a slightly different version of almond. Take the time to compare your nails against each other as you work. Hold your hands together and look at corresponding nails side by side. Matching the shape across all ten nails is what makes the manicure look professional.

    Maintaining Your Almond Shape Between Manicures

    Maintaining Your Almond Shape Between Manicures

    Once you have filed your perfect almond shape, you want to keep it looking good for as long as possible.

    File Lightly Every Few Days

    File Lightly Every Few Days

    As your nails grow, they grow straight out – which means the almond taper gradually becomes less defined. A few gentle strokes with your file every three to four days keeps the taper looking fresh without requiring a full reshaping session.

    Keep Nails Hydrated

    Keep Nails Hydrated

    Dry, brittle nails are more prone to breaking and chipping, which can ruin your carefully filed shape in an instant. Apply cuticle oil at least once daily – before bed is ideal because the oil has all night to absorb and condition. A CND Solar Oil is a professional favorite that strengthens and hydrates both the nail plate and surrounding skin.

    Protect Your Tips

    Protect Your Tips

    Almond nails have a narrower tip than square or round nails, which means the tip is the most vulnerable point. Be mindful of how you use your hands – avoid using your nails as tools to open packages, peel stickers, or scratch at things. These habits put direct pressure on the tip and are the leading cause of breakage in almond-shaped nails.

    Keep a File Handy

    Keep a File Handy

    If you catch a small snag or chip early, you can often file it out before it becomes a full break. Keep a nail file in your purse, your desk, and your bathroom so you can address minor issues immediately.

    Best Colors and Designs for Almond Nails

    Best Colors and Designs for Almond Nails

    The almond shape is incredibly versatile when it comes to color and design choices. Its elegant silhouette flatters virtually every style, but some combinations are particularly stunning.

    Nude and Neutral Tones

    Nude and Neutral Tones

    The almond shape was practically designed for nude and neutral polish. The natural-looking shape combined with a “your nails but better” color creates the ultimate elegant, effortless look. Choose a nude shade that matches your skin tone or is one shade lighter for the most flattering effect.

    Deep Reds and Burgundies

    Deep Reds and Burgundies

    Classic red on almond nails is one of the most timeless, glamorous combinations in beauty. The tapered shape adds sophistication that a square or round shape does not quite achieve. Deep burgundy, wine, and oxblood shades look especially luxurious during fall and winter.

    French Tips

    French Tips

    The French manicure on almond shaped nails is an elevated classic. The almond shape makes the white tip look more graceful than it does on square nails. For a modern twist, try colored French tips in soft pink, lavender, or sage green.

    Nail Art

    Nail Art

    The elongated surface area of almond nails provides an excellent canvas for nail art. The shape particularly suits designs that follow the taper – vine-like florals, ombre fades, or a single accent gemstone at the tip. A floral nail art sticker set can give you salon-quality designs without freehand painting skills.

    Strengthening Tips for Natural Almond Nails

    Strengthening Tips for Natural Almond Nails

    Because almond nails taper to a narrower tip, they can be slightly more fragile than wider shapes. Here is how to keep your natural almond nails strong and break-resistant.

    Use a Strengthening Base Coat

    Use a Strengthening Base Coat

    Before applying any color, always apply a strengthening base coat. Formulas containing keratin, biotin, or calcium help reinforce the nail plate and provide extra protection against breakage. This is especially important at the tapered tips where the nail is thinnest.

    Consider Biotin Supplements

    Consider Biotin Supplements

    Biotin (vitamin B7) is one of the most well-researched supplements for nail strength. Studies show that 2.5-5mg daily can improve nail thickness and reduce breakage. Results typically become visible after three to six months. Always check with your healthcare provider before starting any supplement.

    Stay Hydrated Inside and Out

    Stay Hydrated Inside and Out

    Nails that are dehydrated are brittle nails. Drink plenty of water throughout the day to support nail health from the inside. On the outside, apply cuticle oil regularly and consider wearing gloves when using cleaning products.

    Avoid Harsh Chemicals

    Avoid Harsh Chemicals

    Acetone-based nail polish remover is effective but harsh. Switch to an acetone-free remover for routine polish changes and save pure acetone only for removing gel or acrylics. The gentler formula preserves more of the nail’s natural moisture.

    Give Your Nails Breaks

    Give Your Nails Breaks

    If you wear polish constantly, give your nails a week off every month or so. During this break, apply a nail strengthening treatment and generous amounts of cuticle oil. This allows your nails to rehydrate and recover from any stress caused by polish and remover.

    Almond Nails With Extensions and Press-Ons

    Almond Nails With Extensions and Press-Ons

    If your natural nails are too short for almond shape or if you struggle with breakage, extensions and press-on nails offer fantastic alternatives.

    Press-On Nails

    Press-On Nails

    Press-on nails have come a long way from the chunky, obviously fake versions of the past. Modern press-ons come in almond shape pre-made, and many look remarkably realistic. They are incredibly easy to apply – most take under 15 minutes for a full set. Look for press-ons that come in multiple sizes for the best fit. A good almond-shaped press-on nail set can last 1-2 weeks with proper application and gives you a salon-worthy look at a fraction of the price.

    Gel Extensions

    Gel Extensions

    Gel extensions, also called soft gel tips, are a popular salon option for adding length while maintaining a natural look. Your nail technician will apply pre-shaped gel tips in almond shape and then blend them seamlessly with your natural nail. Gel extensions are lighter and more flexible than acrylics, which many people find more comfortable.

    Acrylic Extensions

    Acrylic Extensions

    Acrylic remains the gold standard for durability and longevity. A skilled nail technician can sculpt perfect almond shapes from acrylic that last 2-3 weeks before needing a fill. Acrylics are slightly heavier than gel but offer unmatched strength, making them ideal if you are hard on your hands.

    Whatever method you choose, almond shape consistently ranks as one of the most requested shapes at salons worldwide. Its timeless elegance, universal flattery, and moderate length make it the perfect balance between practical and glamorous. Whether you achieve it through natural nail filing, press-ons, or professional extensions, almond nails are always a good idea.

    Key Takeaways

    • Almond shaped nails are universally flattering because they create a tapered silhouette that elongates fingers and slims the nail bed
    • Always file in one direction from the side toward the center to prevent nail damage and achieve the smoothest edge
    • Nails need at least 3-5mm of free edge past the fingertip for a true almond shape, but a modified short almond works on shorter nails
    • The most common mistake is over-filing the sides or making the tip too pointy – check symmetry frequently and remember soft mountain not sharp peak
    • Maintenance is simple – a few light filing strokes every few days plus daily cuticle oil keeps almond nails looking freshly shaped
    • Press-on nails and salon extensions are excellent alternatives if your natural nails are too short or fragile

    Frequently Asked Questions

    Are almond shaped nails hard to maintain?

    Are almond shaped nails hard to maintain?

    Not at all. Almond nails actually require less precise maintenance than square or coffin shapes because the organic taper is more forgiving. A few gentle filing strokes every few days keeps the shape looking fresh. The tapered tip is slightly more fragile than wider shapes, so being mindful about not using your nails as tools helps prevent breakage.

    Can almond nails work on wide nail beds?

    Can almond nails work on wide nail beds?

    Absolutely – and in fact, almond shape is often recommended specifically for wider nail beds. The tapering sides create a narrowing optical illusion that makes the nail bed appear slimmer and more proportional. Many people with wider nail beds find that almond shape transforms the look of their hands more dramatically than any other shape.

    Is almond shape stronger or weaker than other shapes?

    Is almond shape stronger or weaker than other shapes?

    Almond falls in the middle of the strength spectrum. It is stronger than stiletto, coffin, and lipstick shapes because it has no sharp points or flat edges that concentrate stress. However, it is slightly less strong than round or squoval shapes because the tapered tip is narrower. For most people, almond nails hold up just fine. A strengthening base coat adds extra protection if needed.

    How do I file almond nails on my dominant hand?

    This is a universal struggle. Some tips: rest both hands on a flat surface to stabilize them, file more slowly with your non-dominant hand, and check your progress more frequently. You can also try holding the file still and moving your nail against it. Some people choose to do accent art only on their non-dominant hand and keep the other in a solid color.

    Can I change my current nail shape to almond without cutting shorter?

    It depends on your current shape and length. If you currently have square nails, you can usually transition to almond by filing the corners and sides into a taper without losing much length. The transition is easiest from oval to almond since the shapes are closely related. File gradually over two to three sessions rather than trying to completely change the shape in one sitting.

  • Affordable Anti-Aging Products That Actually Work – Build a Routine for Under 50 Dollars

    Affordable Anti-Aging Products That Actually Work – Build a Routine for Under 50 Dollars

    The anti-aging skincare industry wants you to believe that you need to spend hundreds of dollars a month on serums, creams, and treatments to keep your skin looking youthful. That is a lie. A very profitable lie, but a lie nonetheless. The truth, backed by dermatologists and decades of research, is that effective anti-aging skincare comes down to a handful of proven ingredients that are available in affordable drugstore products.

    You do not need a fifty-dollar serum when a twelve-dollar one contains the same active ingredient at the same concentration. You do not need a luxury moisturizer when a drugstore version uses the same ceramides and peptides. The expensive products are paying for packaging, marketing, and brand prestige. The affordable products are paying for the ingredients that actually change your skin.

    This guide will help you build a complete, dermatologist-backed anti-aging routine for under fifty dollars total. Every product recommended here has proven ingredients at effective concentrations and hundreds or thousands of positive reviews from real users.

    The Truth About Anti-Aging on a Budget

    Dermatologists consistently say the same thing when asked about affordable skincare: the ingredients matter, not the price tag. A retinol molecule does not know whether it came from a thirty-dollar product or a three-hundred-dollar product. It works the same way regardless. What matters is the concentration of the active ingredient, the stability of the formula, and the delivery system.

    Drugstore brands have access to the same ingredient suppliers as luxury brands. CeraVe, Neutrogena, and L’Oreal invest heavily in research and development. Their formulations are backed by clinical studies. Some of their products are literally developed with dermatologist input and testing. The idea that you need to spend more to get effective ingredients is simply not supported by the science.

    What you are paying for with luxury anti-aging products is typically the sensory experience, the beautiful packaging, the pleasant fragrance, and the prestige of the brand name. These things are nice, but they do not make your skin younger. If your budget allows for luxury and you enjoy the experience, there is nothing wrong with that. But if you are choosing between paying rent and buying La Mer, please know that CeraVe will serve your skin just as well.

    The Only Anti-Aging Ingredients That Actually Work

    The Only Anti-Aging Ingredients That Actually Work

    Retinol and Retinoids

    Retinol and Retinoids

    Retinol is the single most proven anti-aging ingredient available without a prescription. It accelerates cell turnover, stimulates collagen production, reduces fine lines and wrinkles, evens out skin tone, and improves texture. If you could only use one anti-aging product, it should contain retinol. Start with a low concentration of 0.25 to 0.5 percent and work up gradually to avoid irritation.

    Vitamin C

    Vitamin C

    Vitamin C is a powerful antioxidant that protects against free radical damage from UV exposure and pollution. It brightens skin tone, reduces dark spots, and supports collagen production. For maximum effectiveness, look for L-ascorbic acid at a concentration of 10 to 20 percent combined with vitamin E and ferulic acid, which enhance its stability and potency.

    Sunscreen

    Sunscreen

    Sunscreen is arguably the most important anti-aging product you can use. UV damage is responsible for up to 90 percent of visible skin aging, including wrinkles, dark spots, and loss of firmness. A broad-spectrum SPF 30 or higher used daily will do more for your skin’s youth than any serum or cream.

    Hyaluronic Acid

    Hyaluronic Acid

    Hyaluronic acid is a humectant that draws moisture into the skin, plumping fine lines and creating a smoother, more hydrated appearance. It does not directly reverse aging but creates an environment that supports skin health and makes other anti-aging ingredients work more effectively.

    Niacinamide

    Niacinamide

    Niacinamide, also known as vitamin B3, strengthens the skin barrier, reduces inflammation, minimizes pore appearance, and helps with uneven skin tone. It plays well with virtually every other active ingredient and is gentle enough for even sensitive skin.

    Your Morning Anti-Aging Routine Under 25 Dollars

    Your Morning Anti-Aging Routine Under 25 Dollars

    Step 1: Gentle Cleanser – CeraVe Hydrating Facial Cleanser

    Step 1: Gentle Cleanser - CeraVe Hydrating Facial Cleanser

    CeraVe Hydrating Facial Cleanser – approximately ten dollars for 12 ounces. This ceramide-rich cleanser removes overnight oils without stripping your skin. It is gentle enough for daily use and does not disrupt the skin barrier, which is essential for anti-aging because a healthy barrier keeps skin resilient. At this size, the bottle will last about three months.

    Step 2: Vitamin C Serum – CeraVe Skin Renewing Vitamin C Serum

    CeraVe Skin Renewing Vitamin C Serum – approximately twenty dollars. Features 10 percent L-ascorbic acid combined with ceramides and hyaluronic acid for dual anti-aging and hydration benefits. Apply a few drops to clean skin before moisturizer. This is your antioxidant protection for the day, defending against UV and pollution damage.

    Step 3: Moisturizer with SPF – CeraVe AM Facial Moisturizing Lotion SPF 30

    CeraVe AM Facial Moisturizing Lotion SPF 30 – approximately fourteen dollars. This two-in-one product provides daily moisture and broad-spectrum sun protection. The ceramide and hyaluronic acid formula supports the skin barrier while SPF 30 protects against UV aging. Using a combined moisturizer-sunscreen saves money and simplifies your routine.

    Total morning routine cost: approximately forty-four dollars, but each product lasts two to three months, bringing the actual monthly cost to about fifteen to twenty dollars.

    Your Evening Anti-Aging Routine Under 25 Dollars

    Your Evening Anti-Aging Routine Under 25 Dollars

    Step 1: Same Cleanser as Morning

    Step 1: Same Cleanser as Morning

    Use the same CeraVe Hydrating Cleanser from your morning routine. One bottle serves both routines.

    Step 2: Retinol – CeraVe Retinol Serum

    Step 2: Retinol - CeraVe Retinol Serum

    CeraVe Retinol Serum – approximately seventeen dollars. This Shop TODAY Beauty Award winner contains encapsulated retinol for gradual release that minimizes irritation. The formula includes niacinamide, hyaluronic acid, and ceramides for hydration and barrier support. Start by using it two to three nights per week and gradually increase to nightly use as your skin builds tolerance.

    Step 3: Night Moisturizer – CeraVe Moisturizing Cream

    Step 3: Night Moisturizer - CeraVe Moisturizing Cream

    CeraVe Moisturizing Cream – approximately sixteen dollars for 16 ounces. This rich, ceramide-packed moisturizer seals in the retinol and provides overnight hydration. The generous size makes it an incredible value. At this price-to-volume ratio, your nightly moisturizer costs pennies per use.

    Total evening routine cost: approximately thirty-three dollars, with products lasting two to four months each.

    Best Affordable Retinol Products

    Best Affordable Retinol Products

    If you want options beyond CeraVe, here are the best affordable retinol products available in 2026.

    RoC Retinol Correxion Line Smoothing Night Serum Capsules at approximately sixteen dollars offer single-dose retinol capsules that keep the formula fresh and potent until use. Each capsule contains the perfect amount for one application, eliminating guesswork. RoC has decades of retinol expertise and their formulations are clinically proven.

    Neutrogena Rapid Wrinkle Repair Retinol Pro+ 0.5% Power Serum is a more potent option for experienced retinol users. At Neutrogena’s highest retinol concentration, it delivers visible improvement in wrinkles within two weeks. The price point is around twenty-five to thirty dollars, making it the most concentrated affordable retinol available.

    The Ordinary Retinol 0.5% in Squalane at approximately seven dollars is the most affordable retinol on the market. The squalane base is moisturizing and non-irritating. At this price, there is virtually no barrier to trying retinol for the first time.

    Best Affordable Vitamin C Products

    Best Affordable Vitamin C Products

    L’Oreal Paris Revitalift 10% Pure Vitamin C Serum with ferulic acid is an excellent choice at approximately twenty-eight dollars. The ferulic acid boosts the antioxidant effects of the vitamin C. Ninety-three percent of users reported brighter skin within four weeks of consistent use.

    The Ordinary Ascorbic Acid 8% in Squalane at approximately seven dollars is a budget-friendly entry point. The oil-based formula is more stable than water-based vitamin C serums, meaning it stays effective longer after opening. This is ideal for anyone who uses vitamin C infrequently and worries about their serum oxidizing before they finish the bottle.

    Naturium Vitamin C Complex Serum at approximately twenty dollars features 10 percent L-ascorbic acid combined with sodium ascorbyl phosphate, ascorbyl glucoside, niacinamide, and hyaluronic acid. Multiple forms of vitamin C ensure continuous delivery and effectiveness.

    Sunscreen – The Most Important Anti-Aging Product

    Sunscreen - The Most Important Anti-Aging Product

    We cannot overstate this: daily sunscreen is the most effective anti-aging product you can use. UV damage causes wrinkles, dark spots, loss of firmness, and texture changes. A well-formulated SPF 30 or higher applied daily prevents this damage from occurring in the first place, which is far more effective than trying to reverse damage after the fact.

    Affordable sunscreen options that work well under makeup include CeraVe AM Moisturizing Lotion SPF 30, Neutrogena Ultra Sheer Dry-Touch Sunscreen SPF 55, and La Roche-Posay Anthelios Melt-in Milk SPF 60. All are under twenty dollars and provide excellent broad-spectrum protection.

    Apply sunscreen as the last step of your morning skincare routine, every single day, rain or shine, summer or winter. UV rays penetrate clouds and windows. Consistent daily application is what produces the anti-aging results.

    Budget-Friendly Extras That Make a Difference

    Budget-Friendly Extras That Make a Difference

    Chemical Exfoliant

    Chemical Exfoliant

    The Ordinary Glycolic Acid 7% Toning Solution at approximately nine dollars provides gentle chemical exfoliation that smooths texture and brightens tone. Use two to three times per week in the evening on nights you skip retinol. This single product can make a visible difference in skin radiance within two weeks.

    Eye Cream Alternative

    Eye Cream Alternative

    Most dermatologists agree that you do not need a separate eye cream. Your regular moisturizer and retinol serum can be applied to the under-eye area. The skin around the eyes is thinner and more sensitive, so use a small amount and avoid tugging. This saves you the fifteen to twenty dollars most people spend on dedicated eye cream.

    Peptide Serum

    Peptide Serum

    The Ordinary Buffet peptide serum at approximately fifteen dollars targets multiple signs of aging with a cocktail of peptides, amino acids, and hyaluronic acid. Use it after cleansing and before moisturizer on mornings when you are not using vitamin C.

    The Complete Under 50 Dollar Routine

    The Complete Under 50 Dollar Routine

    Here is the full budget breakdown for a complete, effective anti-aging routine.

    CeraVe Hydrating Cleanser: ten dollars. CeraVe Retinol Serum: seventeen dollars. CeraVe AM Moisturizing Lotion SPF 30: fourteen dollars. CeraVe Moisturizing Cream: sixteen dollars. Total: approximately fifty-seven dollars, but each product lasts two to four months, bringing the effective monthly cost to approximately fifteen to twenty-five dollars.

    For the most budget-conscious routine, swap in The Ordinary products. The Ordinary Retinol 0.5% in Squalane at seven dollars plus The Ordinary Natural Moisturizing Factors at eight dollars plus any affordable SPF brings the total well under fifty dollars with products to spare.

    Key Takeaways

    • Effective anti-aging skincare depends on proven ingredients at effective concentrations, not luxury price tags. Drugstore products contain the same active ingredients as prestige brands.
    • The four essential anti-aging ingredients are retinol, vitamin C, sunscreen, and hyaluronic acid. Everything else is supplementary.
    • A complete, dermatologist-backed anti-aging routine can be built for approximately fifteen to twenty-five dollars per month using drugstore products.
    • Sunscreen is the single most important anti-aging product. Daily SPF 30 or higher prevents the UV damage responsible for up to 90 percent of visible skin aging.
    • Start retinol slowly at two to three nights per week and increase gradually to avoid irritation. CeraVe, RoC, and The Ordinary all offer effective affordable options.
    • You do not need a separate eye cream. Your regular moisturizer and retinol can be gently applied to the under-eye area.

    Frequently Asked Questions

    At what age should I start using anti-aging products?

    At what age should I start using anti-aging products?

    Dermatologists recommend starting a basic anti-aging routine in your mid-twenties, primarily with sunscreen and antioxidants like vitamin C. Retinol can be introduced in your late twenties or early thirties. However, it is never too late to start. Beginning an anti-aging routine at any age will improve your skin’s appearance and slow future aging.

    Can I use retinol and vitamin C together?

    Yes, but not at the same time. Use vitamin C in the morning for antioxidant protection and retinol in the evening for cell turnover. This schedule maximizes the benefits of both ingredients without the irritation risk of layering them directly. If your skin is very sensitive, you can alternate nights instead.

    How long does it take to see results from affordable anti-aging products?

    Most users see initial improvements in skin brightness and hydration within two to four weeks. Fine lines and texture improvements typically become visible after six to twelve weeks of consistent use. Significant wrinkle reduction and collagen rebuilding take three to six months. Patience and consistency are more important than spending more money.

    Are expensive anti-aging serums worth the splurge?

    Are expensive anti-aging serums worth the splurge?

    For the vast majority of people, no. The active ingredients that produce anti-aging results are available at effective concentrations in drugstore products. What you pay for with luxury products is primarily the sensory experience, packaging, and brand prestige. If these things bring you joy and are within your budget, enjoy them. But they are not necessary for effective anti-aging skincare.