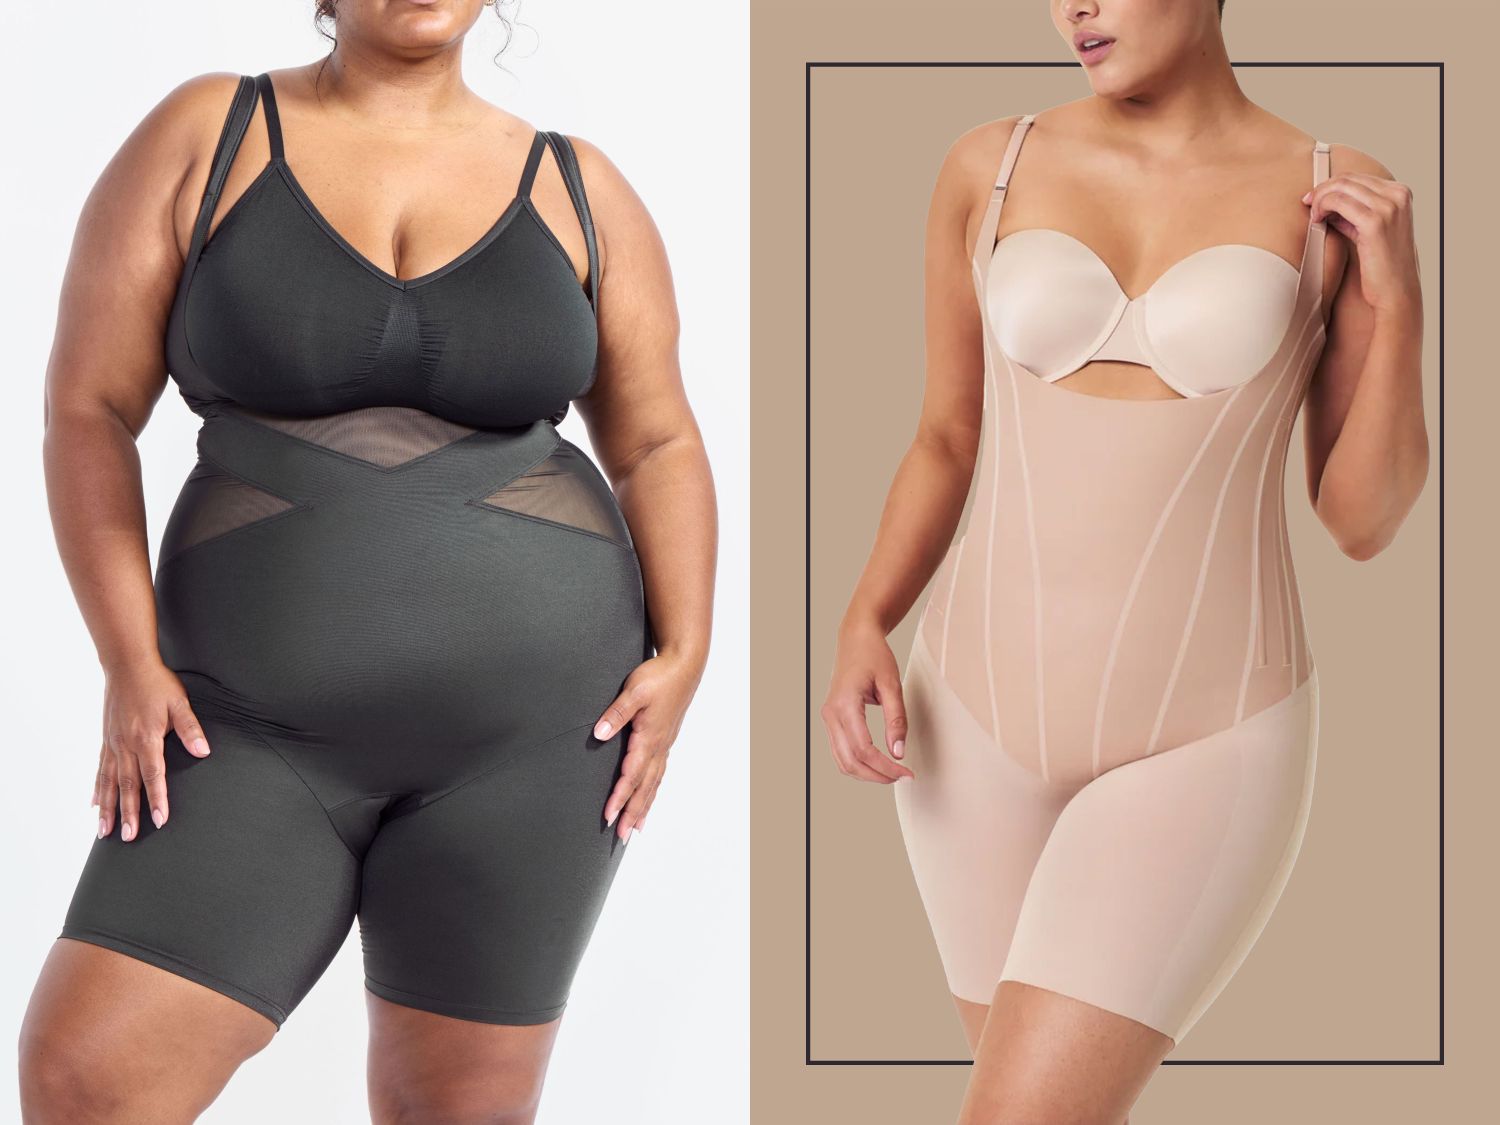
Every curvy woman has a version of the same fitting-room story. You find jeans that finally slide over your thighs and hips, you do a happy little shimmy, and then you turn around and there is a three-inch canyon gaping at the back of your waistband. Or the reverse: the waist fits like it was made for you, but the denim simply refuses to travel past your thighs. You leave with nothing, again, half-convinced your body is the problem. It is not. Straight-size jeans are cut for a body shape that most of us do not have, and once you understand what actually causes the gap and the squeeze, you can shop for the features that fix them instead of hoping.
I have bought and returned more jeans than I care to admit, and the turning point was realizing that fit is engineering, not luck. A handful of construction details separate jeans that hug your curves from jeans that fight them. Here is what to look for, written for real plus-size and curvy bodies rather than the narrow mannequin most denim is designed around.
Why the back waist gaps in the first place
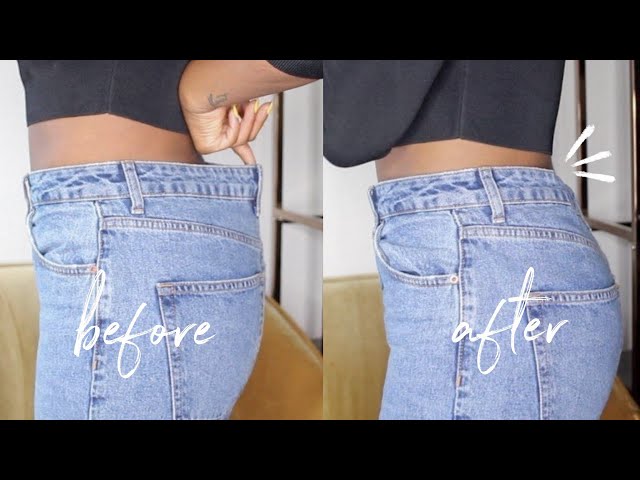
The gap is not a flaw in you, it is a mismatch between your proportions and the pattern. If you have a defined waist that sits well in from your hips, which describes a huge share of curvy and hourglass bodies, then jeans cut on a straighter line will fit your hips and leave slack at the smaller waist. The denim has more fabric across the top than your middle needs, so it stands away from your back and gaps. Pear and hourglass shapes get this constantly, because the hip-to-waist difference is exactly what standard grading ignores.
Apple shapes hit the opposite wall. If you carry weight around your middle, a low or mid-rise pair digs in under the belly, rolls down, and creates that unflattering muffin over the top. In both cases the fix is not a smaller size, which just makes everything tighter and more uncomfortable, but a different cut designed for the way your waist and hips actually relate. Naming the cause matters, because it points you straight at the two features that solve it.
The waistband is everything
If there is one detail that decides whether a pair of jeans works on a curvy body, it is the waistband. Look for a contoured or curved waistband, sometimes sold as a no-gap or Waist-Match band, which is cut to follow the inward curve of your waist instead of running in a straight line. Better still is a hidden inner elastic band, which quietly cinches the top to your actual shape so it stays flush against your back no matter how much smaller your waist is than your hips.
A contoured or hidden-elastic waistband follows the curve of your waist, so it stays flat instead of gaping
This single feature fixes the number one complaint curvy women have about jeans, and once you have worn a properly contoured band you will never happily go back to a straight one. Brands like NYDJ and Democracy build hidden inner panels and curved bands into their signature fits, and it is the reason their jeans sit smooth across the back when generic pairs stand away. When you shop, read the product description for the words contoured, curved, no-gap, or hidden elastic, and treat a plain straight waistband on a curvy-marketed jean with healthy suspicion.
Rise: why high-waisted holds everything in place
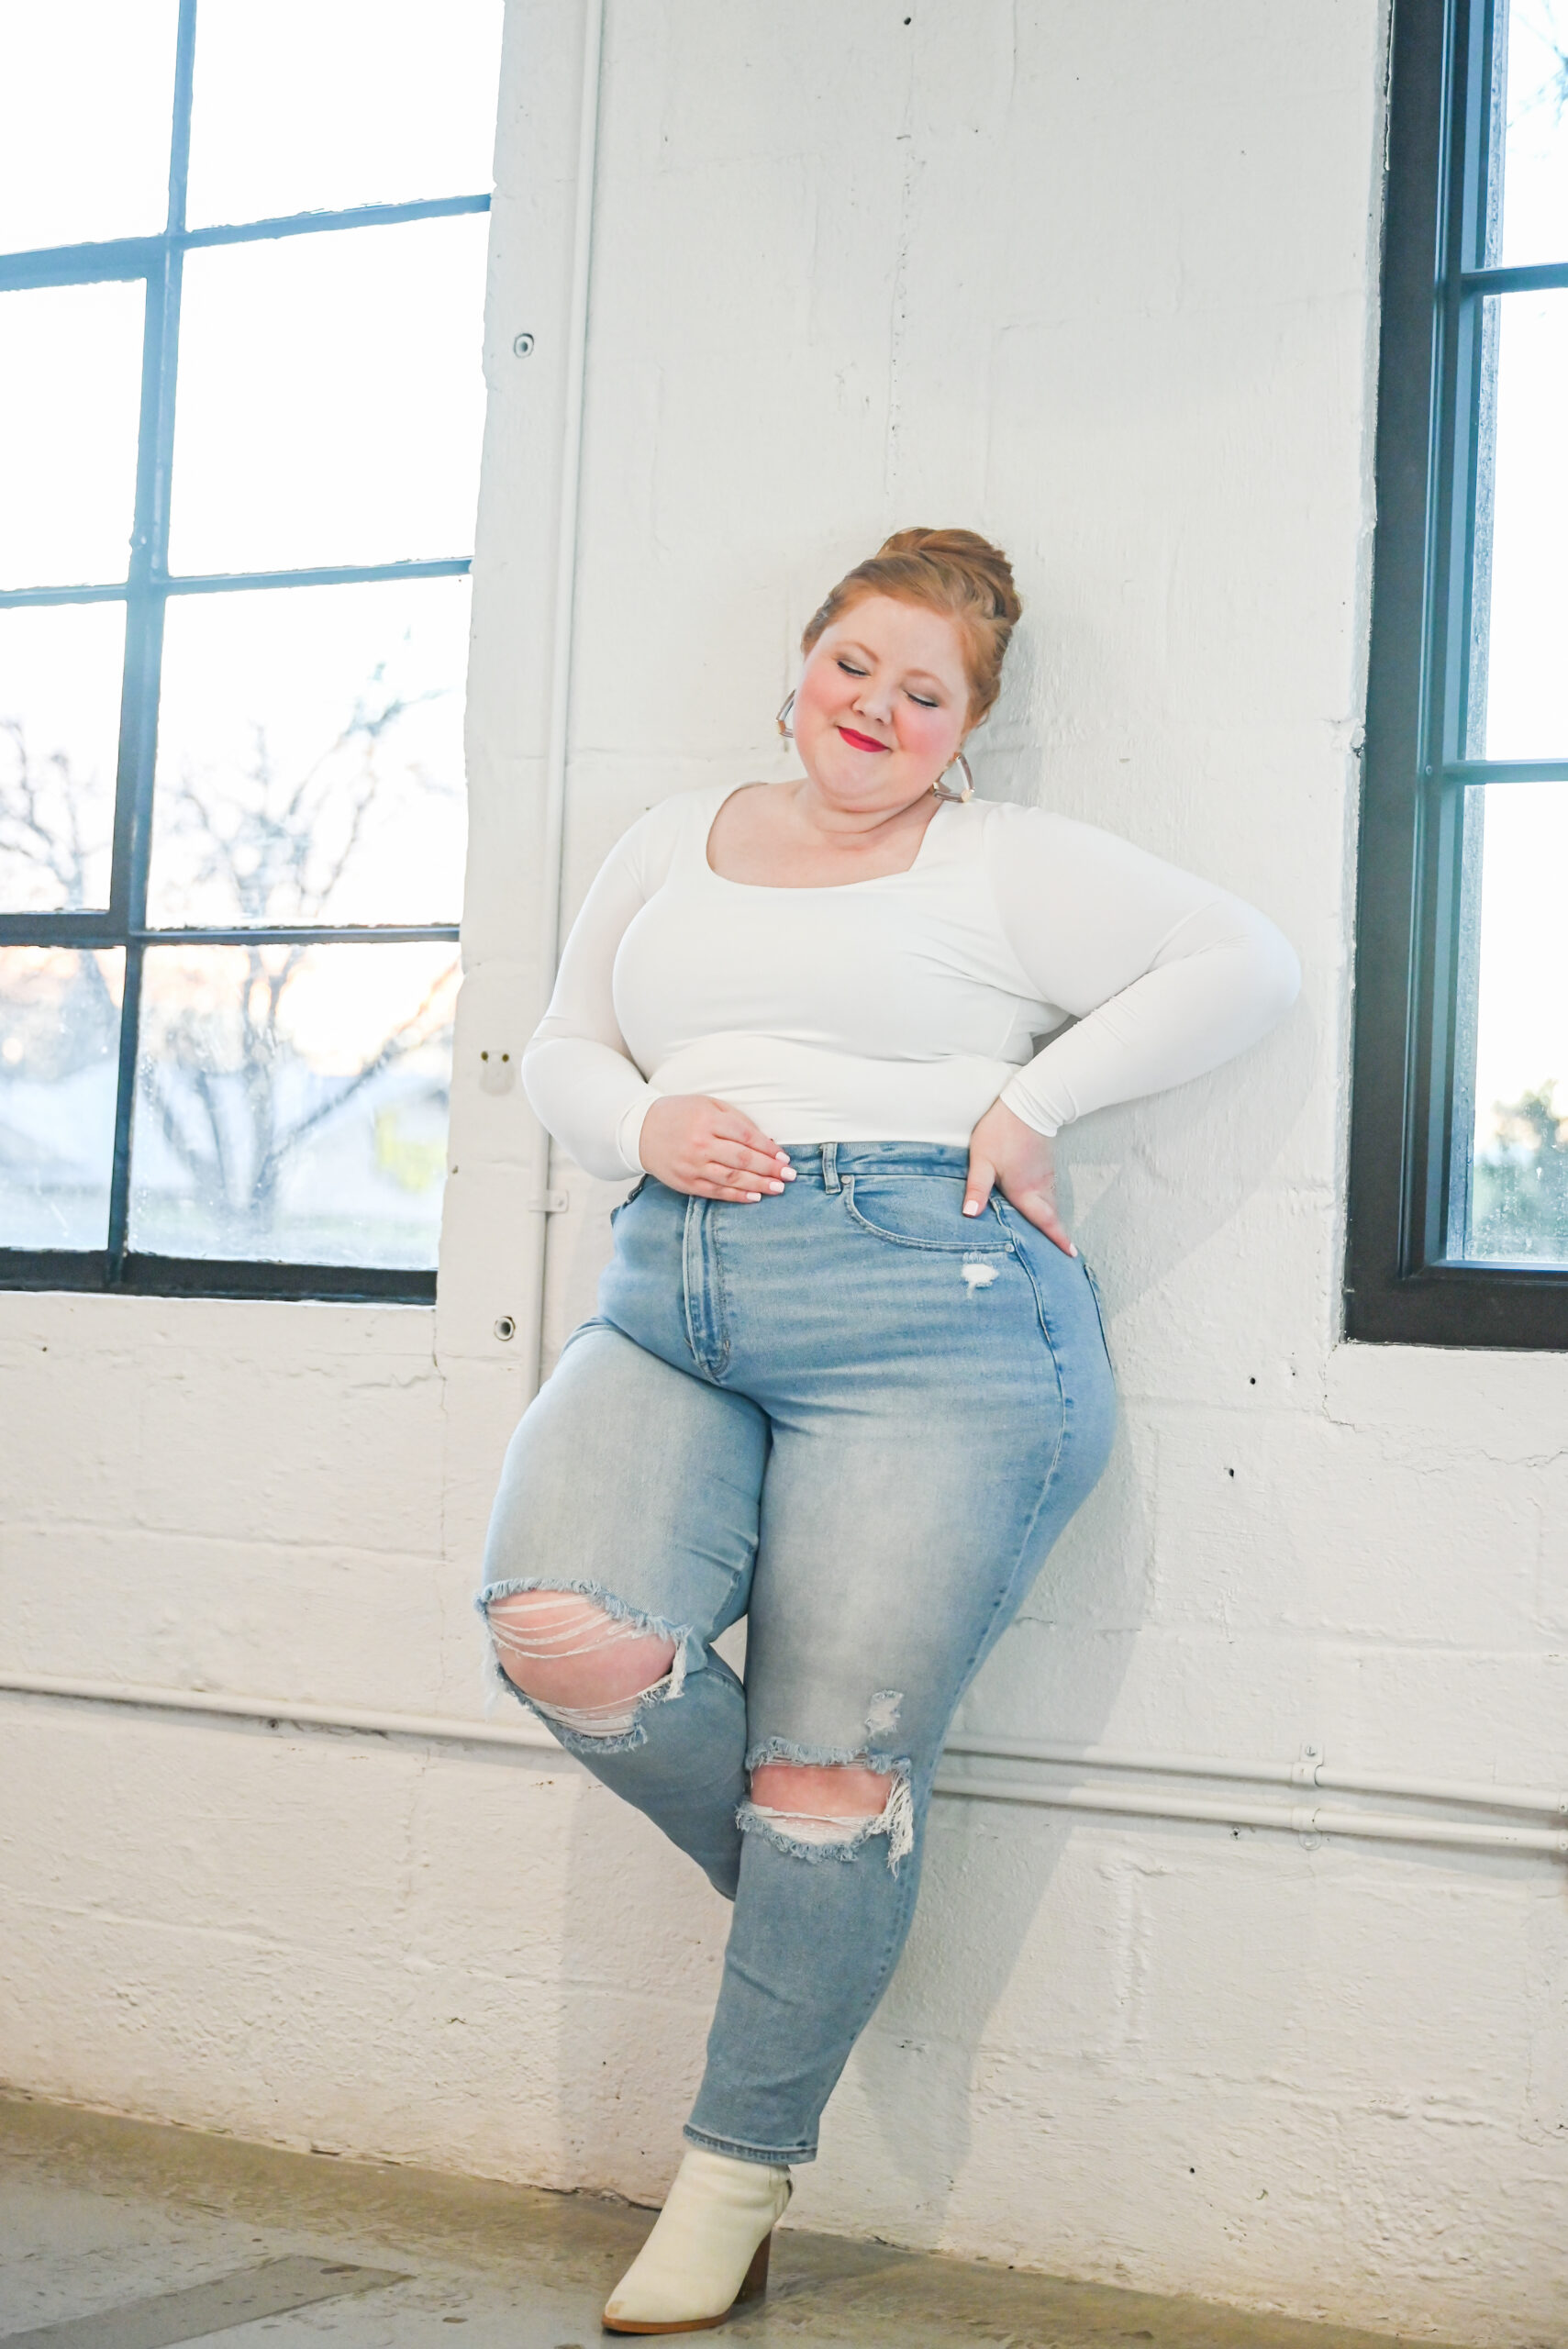
Rise is the height from the crotch seam to the top of the waistband, and for most curvy and plus-size bodies, high-rise is the answer to more problems than any other single choice. A high rise sits above your hips and comes up over the softest part of your stomach, so it holds your midsection gently, stops the waistband sliding down as you move, and closes the gap at the back by sitting at the narrower part of your torso. It also gives you real coverage, so you are not tugging your jeans up every time you stand.
High-rise jeans sit above the hips and over the softest part of the stomach, which is what stops the slide and the gap
Low-rise works against a curvy midsection almost every time. It perches on the widest part of your hips and belly with nothing to anchor it, so it rolls, digs, and makes the middle look larger rather than smoother. If you are an apple shape especially, high-rise is not a trend to consider, it is the structural fix for the exact discomfort you have been fighting. Short-waisted bodies sometimes find a super-high rise hits the ribs, so look for a rise around ten to eleven inches rather than the very tallest, and you get the hold without the fold.
What tummy panels do, and what they do not
A lot of curve-focused jeans now include some kind of tummy-control panel, and it helps to know what you are actually buying. A good panel is a slightly firmer internal layer across the front that smooths the midsection and stops the waistband from folding over when you sit. It gives a cleaner line under a fitted top and takes the edge off the dig. What it does not do is transform your shape or act like shapewear, and a panel that is too aggressive just creates its own roll at the top, so you want smoothing, not squeezing.
Pair a modest tummy panel with the right rise and you get a genuinely comfortable, smooth fit. Treat the panel as a nice-to-have that supports the two features that really matter, the contoured waistband and the high rise, rather than as the headline fix on its own. If a jean leans hard on aggressive compression to compensate for a straight waistband, it will still gap and still dig, just with more effort.
Fabric: enough stretch to move, enough recovery to hold
Denim with some stretch is your friend on a curvy body, but stretch alone is only half the equation. The word that matters more is recovery, which is the fabric’s ability to snap back to shape instead of bagging out. A jean with good stretch but poor recovery feels great for an hour, then sags at the knees and seat and grows a whole size by mid-afternoon, so you spend the day hiking them up. Look for a cotton blend with elastane plus a recovery-focused fiber, and check reviews specifically for whether they bag out.
Look for stretch paired with good recovery, so the denim moves with you but snaps back instead of bagging out
The trade-off runs the other way too. A rigid, non-stretch jean holds its shape beautifully but can be brutal to get over full thighs and unforgiving when you sit. For most of us the sweet spot is a mid-weight stretch denim with strong recovery, which moves with your body through a full day and still looks sharp at dinner. If you live in your jeans, spending a little more on fabric quality pays off every single wear.
Cuts that flatter, and the thigh-wear problem
Once the waistband and rise are right, cut is where you get to have fun. Wide-leg, bootcut, and slim-straight styles all balance fuller hips and thighs beautifully, and a slight flare below the knee lengthens the whole line. Skinny jeans can absolutely work on a curvy body, they just demand the best waistband and recovery you can find, because they have the least room to hide a poor fit. The honest issue many of us know well is thigh wear, where the denim rubs through between the legs long before the rest of the jean is worn out.
Thigh wear comes from friction and thin fabric, so a slightly heavier denim with good recovery lasts far longer, and choosing a cut with a touch more room through the thigh reduces the rub. Brands that design for curves tend to reinforce these stress points. ELOQUII and Universal Standard both cut genuinely curve-first jeans, and a well-made curve-fit high-rise jean fits the waist and the thigh at once instead of forcing you to choose. For everyday value, Torrid and Lane Bryant cut their denim for plus-size proportions rather than grading up, so a high-rise jean with a contoured waist from either sits smooth at the back. And if you want a hidden-panel classic, a pair of tummy-control bootcut jeans covers the waistband, rise, and cut in one go.
Quick answers to the questions everyone asks
How do I stop my jeans gaping at the back waist? Choose a contoured or curved waistband, ideally with hidden inner elastic, which follows the inward curve of your waist instead of running straight. Pair it with a high rise that sits at the narrower part of your torso. The gap is a proportion mismatch, not your size, so a smaller pair will not fix it.
What jeans are best for a big belly or apple shape? High-rise jeans with a smoothing tummy panel and a contoured waistband. The high rise sits above the belly and holds it gently instead of digging in and rolling down the way a low or mid rise does. Avoid stiff, low-rise cuts, which are the exact combination that digs and creates a muffin.
What should I look for in high-waisted tummy-control jeans? A rise around ten to eleven inches, a contoured or hidden-elastic waistband, a smoothing rather than aggressively compressive front panel, and denim with good recovery. Those together give a smooth, held midsection that stays put all day without folding over or bagging out at the knees.
Why do my jeans wear out between the thighs? Friction plus thin fabric. When your thighs touch, the denim rubs with every step and eventually thins and splits, usually long before the rest of the jean is worn. A heavier-weight denim with good recovery and a cut with a little more thigh room lasts much longer against that rub.
Which plus-size jeans hold their shape? The ones with strong recovery in the fabric, not just stretch. Stretch lets them move, recovery makes them snap back instead of bagging at the knee and seat. Check reviews for whether a pair sags or grows through the day, and lean toward mid-weight stretch denim from curve-focused brands.
What rise is best if I’m short-waisted and plus-size? Aim for a high rise around ten to eleven inches rather than the very tallest available, which can hit your ribs and fold. You still get the hold and gap-closing benefit of a high waist without the top edge digging into your midsection when you sit down.
Your simple shopping checklist
Next time you are staring down a wall of denim, run through five quick questions. Does it have a contoured or hidden-elastic waistband? Is it a high rise that comes over the softest part of your stomach? Does the fabric list good recovery, not just stretch? Is the cut, wide-leg, bootcut, or slim-straight, one that balances your hips? And does the thigh have enough room to move without rubbing thin? Get most of those yeses and you have found jeans that fit your body instead of fighting it, no back-waist canyon required.
The first time the castle comes into view, framed by a wide cobblestone esplanade and the smell of warm sugar drifting from a churro cart, something in your shoulders drops. You came here to feel wonder, not to spend the day scanning lap bars and bench widths, doing quiet math about whether the next ride will fit. That second worry is real, and pretending it is not helps no one. The good news is that almost all of it can be planned away before you ever board the train to Marne-la-Vallee, the town about 20 miles east of central Paris where the resort lives. A little homework up front buys you a lot of ease once you are there, and ease is the whole point.
This guide walks through the practical, body-aware parts of a Disneyland Paris trip: when to go, what to wear, which rides tend to be generous and which tend to be tight, how to eat well, where to save, and how to keep your head in a good place. Treat every specific number here as a starting estimate and confirm it with the official park accessibility pages or a cast member on the day, because details shift between seasons and refurbishments.
Getting the Lay of the Land Before You Book
Disneyland Paris is two parks sitting side by side, sharing one entrance plaza. The first, Disneyland Park, opened in 1992 and is the classic one: Sleeping Beauty Castle at the heart, five themed lands radiating outward, parades and fireworks and the rides most people picture when they imagine Disney. The second park spent years as Walt Disney Studios Park and was reimagined and renamed Disney Adventure World in spring 2026, gaining a Frozen-themed area built around Arendelle along with a new promenade of attractions. Most visitors split their time across both, and a multi-day ticket that lets you hop between them is the relaxed way to do it.
Booking tickets online in advance is almost always cheaper than buying at the gate, and on busy days the park can sell out entirely, so a pre-booked ticket also guarantees you get in. The resort uses dynamic pricing now, which works in your favor as a planning signal: lower ticket prices usually line up with quieter days, while the steepest prices flag the most crowded dates. If your goal is calm over chaos, follow the cheaper dates.
On timing, the quieter stretches tend to be the low-season window roughly from early November through March, setting aside the Halloween tail and the Christmas holidays, which draw big crowds despite the cold. Mid-January, early February, and midweek days in September are reliably gentle. Tuesdays and Thursdays generally run lighter than weekends. Quieter days mean shorter queues, which matters more than you might think when you are plus-size: less time standing on hard pavement, fewer narrow turnstiles to negotiate in a hurry, and more breathing room to ask a cast member a question without a line building behind you.
Packing and Dressing for a Long, Comfortable Day
A Disneyland Paris day is a walking day. People routinely clock the equivalent of a long hike across the two parks without noticing until their feet stage a protest at dinner. The single best thing you can do for your body here is sort out your shoes weeks ahead. Choose genuinely broken-in, supportive walking shoes or trainers, the pair you already trust on long days, not a fresh box of cute sandals bought for the trip. Pack a spare pair of socks in your day bag so you can swap to dry feet after an afternoon rain shower or a splashy boat ride.
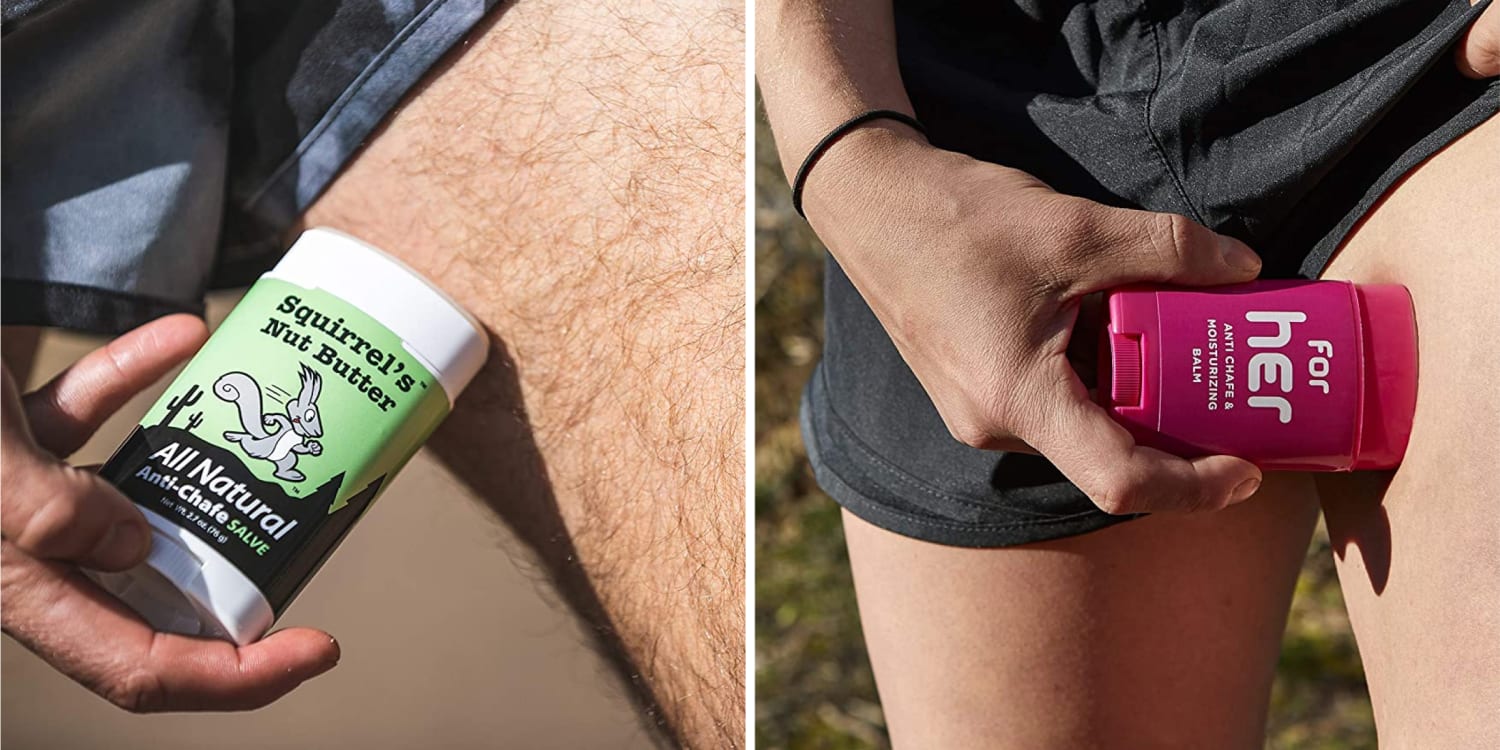
Chafing is the other quiet saboteur of a good day, and the fix is simple. Anti-chafing shorts worn under dresses and skirts, or a glide balm on the inner thigh and underarm, will keep a hot, humid afternoon from turning into a sore evening. Pack them even if you are not sure you need them, because the parks are warm in summer and you will be moving constantly.
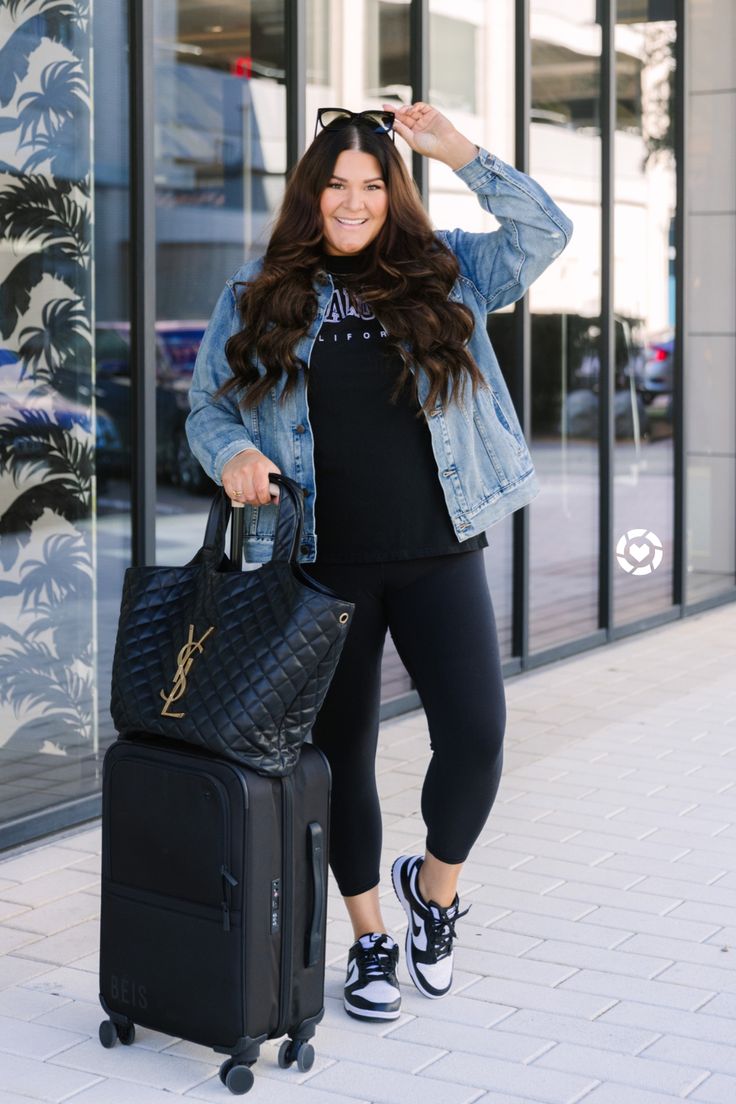
Dress in layers you can shed and stash. Paris weather swings, mornings can be cool and afternoons warm, and indoor queues can get stuffy. A packable layer or light jacket that crushes into your bag covers all of that without committing you to carrying a coat all day. Build your outfit around forgiving, breathable fabrics with a bit of stretch, the kind that move when you sit, climb into a ride vehicle, and bend over a stroller. A small crossbody or backpack keeps your hands free for the turnstiles and ride bars, and many attractions ask you to secure loose items anyway. Round it out with a refillable water bottle, sunscreen, any medication you need on a schedule, and a portable charger for the app you will lean on all day.
Rides, Restraints, and Honest Seating Talk
Here is the part that gets whispered about and rarely written plainly, so let us be plain. Disneyland Paris does not publish official weight limits on its rides. What varies is the seat width, the leg room, and crucially the restraint design, and those vary a lot from attraction to attraction. None of this is a verdict on your body. It is engineering, and engineering can be scouted in advance.
In general terms, gentler dark rides and boat-style attractions tend to be the most accommodating, with bench seats, generous leg room, and simple lap belts or no individual restraint at all. Anything described as a boat ride, a slow indoor tour, or a wide-bench experience is usually a comfortable bet. Rides built around individual bucket seats with a single seatbelt also tend to work well across a range of body types, because a belt has more give than a rigid bar.
The tighter fits, by widespread first-hand accounts, are the faster coasters with low lap bars or restraints that come down across the stomach and lock to a fixed position. Restraints that sit low across the midsection are the ones most likely to be snug, because there is no adjustment once they reach their stop. A few of the resort’s signature thrill coasters fall into this category. This does not automatically mean they will not fit you, only that they are worth scouting before you commit to a 40-minute queue.
Scouting is the whole strategy, and it is easy. Before you join any line you are unsure about, find a cast member at the entrance and ask plainly whether you can see a sample restraint or test seat. Many attractions keep a test vehicle or a sample lap bar right at the front for exactly this purpose, and using it is completely routine. Cast members are trained to handle this discreetly and kindly, and they would far rather help you check at the entrance than have you reach the front and turn back. If a ride does not work out, ask whether there is an alternate boarding option or accommodation. The exact mechanics of restraints, the location of test seats, and any accessibility arrangements change with refurbishments, so treat all of the above as a guide and confirm the current setup with the park’s accessibility information and the cast member in front of you.
One more practical note: the queue turnstiles themselves are narrow at several attractions, narrower than the ride seats in some cases. There is almost always an accessible gate beside them, and a cast member will open it for you without fuss. You do not need to justify it. Just ask.
Eating Well Without the Stress or the Splurge
Food at a destination resort is priced like a destination resort, and that is the honest truth. Counter-service meals, table-service restaurants, and the snack carts all carry a premium over what you would pay in the city. Budget for it as part of the trip rather than being surprised by it, and treat the exact prices as estimates that move with the season and the venue.
A few habits keep both your wallet and your comfort in good shape. If you are staying in or near Paris and commuting in, eating a proper breakfast before you arrive and saving the bigger, nicer meal for the city in the evening can meaningfully cut your in-park spend. Inside the parks, table-service restaurants are worth at least one booking on your trip, not only for the food but for the chair. Sit-down dining gives you a real seat, a break from the pavement, and a half-hour of air conditioning or shade, which is restorative in the middle of a long day. If you want a specific restaurant, reserve it in advance, because the popular ones fill up.
Carry a few snacks and that refillable water bottle. Hydration and a steady blood-sugar level do more for your mood and stamina than any single attraction, and they keep you from making a tired, expensive decision at the nearest cart at the exact moment you are most worn down. Look for seating with a bit of space and standard chairs rather than fixed booths when you can, and do not hesitate to ask a host to seat you somewhere that suits you. That is a normal request.
Spending Smart on Tickets and Line-Skipping
Beyond booking tickets early and chasing the cheaper dynamic-pricing dates, the biggest spend question is the resort’s paid line-skip service, Premier Access. It lets you reserve a shorter-queue slot at popular attractions through the app, and it comes in two broad shapes: buying access to a single ride at a time, and buying a daily bundle that covers the headline attractions. As an estimate, single-ride access tends to land somewhere in the single-digit to high-teens euros per person per ride, while the all-in daily bundle runs much higher, into the triple digits per person on busy days. Confirm current pricing in the app on the day, because it moves with demand.
Whether it is worth it depends entirely on your day. On a quiet off-season Tuesday, you may never need it. On a packed summer or holiday date, or if you only have a single day to see everything, paying to skip the longest queues can be the difference between a frantic day and a pleasant one. For most people the smart play is to skip the pricey daily bundle and instead buy single-ride access only for the two or three attractions you most want to do when their standby lines get ugly. Buying as you go, rather than committing up front, keeps you flexible.
There is a comfort angle here too. Standing in a long, slow-moving outdoor queue is the least pleasant part of any park day for a curvy traveler, hard on the feet, the back, and the patience. Spending a little to shorten the worst lines is partly a money decision and partly a kindness to your body. Weigh it that way.
Carrying Your Confidence Through the Gates
The logistics matter, but the mindset matters just as much, so do not skip this part. You belong in these parks exactly as you are, and the overwhelming majority of cast members are genuinely warm and quick to help when you ask. The handful of moments that might sting, a snug restraint, a turnstile that needs the side gate, a chair that is not quite right, are problems with the furniture and the engineering, not with you. Plan for them, solve them matter-of-factly, and let them go.
Build your day so your body is set up to win. Arrive early before the crowds and the heat, around 45 minutes before the official opening if you can manage it, and do the must-do rides first while the lines are short and your energy is high. Plan deliberate sit-down breaks across the day, a table-service lunch, a shaded bench during a parade, a quiet indoor show, so you are pacing a marathon rather than sprinting until you crash. Wear the comfortable shoes, pack the anti-chafing shorts, carry the water, and keep that packable layer in the bag. Take the photos in front of the castle without ducking out of frame, because you came a long way to be here.
Disneyland Paris rewards the traveler who scouts ahead and asks for what they need. Do that quiet preparation, and what is left is the part you actually came for: the castle catching the late light, the first drop of a ride you were brave enough to check and board, and a churro that tastes better than it has any right to.
Boarding a plane should feel like the start of something good – a beach, a reunion, a city you have been dreaming about. For a lot of curvy women, though, the airport carries a low hum of dread that has nothing to do with turbulence and everything to do with armrests, seatbelts, and the fear of a side-eye from a stranger in 14B. That dread is not yours to carry. The seats are too narrow, the policies are inconsistent, and the industry has been slow to catch up to the bodies it actually serves. None of that is a personal failing. With the right information and a little planning, you can walk through that jet bridge knowing exactly what to expect, what your rights are, and how to make the whole experience genuinely comfortable.
What follows is the practical, dignity-first playbook: real airline policies, verified as of mid-2026, with the caveat that these rules shift often, so always confirm before you book.
The seatbelt extender question (and the FAA rule)
Let’s clear up the single most misunderstood part of plus-size flying first, because it trips up even seasoned travelers. You cannot bring your own seatbelt extender onto a U.S. commercial flight. People buy them online all the time, see the “FAA approved” label, and assume they are set. They are not. The Federal Aviation Administration treats a seatbelt extender as part of the aircraft seat itself, which means it has to be inspected and maintained under the airline’s FAA-accepted Continuous Airworthiness Maintenance Program. A personal extender, no matter what its packaging claims, has never been inspected under that program, so crew are instructed not to allow it.
Here is the good news that the worry usually drowns out: airlines are required to provide extenders free of charge, and they keep them stocked. You do not pay for one, you do not pre-order one in most cases, and you do not owe anyone an explanation. When you board, quietly tell the flight attendant at the door, “I’d like a seatbelt extender, please.” That is the entire transaction. They hand it to you, often folded discreetly, and you buckle in like everyone else. Cabin crew handle this request constantly and think nothing of it.
A couple of practical notes. Different aircraft use slightly different extenders, so the one you used on your outbound flight may not be the one offered on the way home, and an extender you kept from a previous trip will not be accepted. Ask fresh each time. If you would rather not flag down a busy attendant in the aisle, mention it as you step through the cabin door, when crew are stationed right there and the moment is private. Owning the request, calmly and early, takes all the heat out of it.
Choosing your seat strategically
Where you sit shapes the entire flight, and a few smart choices make a real difference. The window seat is the quiet favorite for many curvy travelers. You get a wall to lean into instead of an aisle full of passing carts and elbows, you control the shade, and you are not the one being climbed over. The trade-off is asking to get up for the restroom, so weigh that against your own comfort. The aisle seat suits anyone who wants to stand, stretch, or move freely without disturbing a seatmate, and it gives one hip a few extra inches of breathing room into the aisle, though watch for the beverage cart.
The middle seat is the one to avoid when you can, and most of the time you can. Bulkhead rows (the front row of a cabin section) sometimes offer a touch more room and no seat reclining into your knees, but the armrests there are often fixed because the tray tables fold into them, which can mean less width, so read seat maps carefully. Exit rows promise extra legroom, but crew may relocate anyone who cannot fasten the standard belt without an extender, since exit-row passengers must meet specific safety requirements. Legroom is not the same as seat width, so do not let the legroom hype override the fit question.
A tool worth bookmarking is SeatGuru, which maps the actual seat dimensions and quirks of specific aircraft. Seat width varies more than people realize, often between 17 and 18.5 inches in economy, and a single inch is the difference between a tense flight and an easy one. Book your seat assignment as early as you can, ideally the moment you purchase the ticket. If two of you are traveling together, booking the window and aisle of a three-seat row is a known trick: middle seats fill last, so you may end up with an empty buffer between you, and even if someone takes it, you are flanking them rather than being flanked.
The airline ‘customer of size’ policies, compared (verified)
This is where careful research pays off, because no two airlines handle plus-size passengers the same way, and several changed their rules within the past year. Confirm directly with the carrier before you book, since these policies move quickly.
Southwest remains the most generous of the major U.S. carriers, and that matters because the airline briefly tightened its rules in early 2026 before reversing course. As of late May 2026, a customer who needs extra space is not required to buy a second seat in advance. You can request a complimentary additional seat at the gate when space allows, or buy one ahead and apply for a refund afterward. That refund still stands under specific conditions: the flight cannot be sold out, the seats must be in the same fare class, and you must request the refund within 90 days of travel. One catch worth knowing – if any leg of your trip is flown by a partner airline rather than Southwest itself, the extra seat is non-refundable. If no additional seat is available on your flight, Southwest works to move you to a later one with room.
Alaska Airlines has a clear, fair policy. If you cannot comfortably lower both armrests around you, you purchase a second seat at the same fare as your first. The reassuring part is the refund: if every leg of your journey departs with at least one empty seat on board, you get the cost of that second seat back. You contact the airline shortly after you fly to request it. The refund is reserved for passengers who genuinely need the space, not for anyone simply wanting an empty seat next to them.
American Airlines asks passengers who need a seatbelt extension plus extra space beyond a single seat to buy an additional seat. You book it by calling Reservations rather than online, and the agent secures two adjacent seats at the same fare. If they can only seat you in a higher class of service, you may owe the fare difference. American does not advertise the same automatic post-trip refund that Southwest and Alaska offer, so treat the second seat as a planned cost and confirm any reimbursement options with the airline directly when you call.
Delta takes a notably relaxed stance. Delta does not require you to buy an extra seat for needing a seatbelt extender, provided two things are true: the airline’s extender lets you buckle in safely, and you can keep both armrests down for the flight. The airline’s stated concern is safety and not significantly encroaching on a neighbor’s space. If a genuine space conflict arises onboard, crew may move you to a roomier spot or, in some cases, ask you to take a later flight with more open seats. Delta has no formal customer-of-size refund program because it generally does not require the second purchase in the first place.
United Airlines requires an extra seat for any economy passenger who cannot fit in a single seat with the armrests down, or who needs more than one seatbelt extender. You can buy the second seat in advance, and if you do not, you may be asked to purchase it on the day of departure at that day’s fare, which is often higher. United also offers an alternative many travelers overlook: instead of a second economy seat, you can book or upgrade to a premium cabin, where the seats are wider. For some itineraries the math on a single wider seat works out better than two narrow ones.
The honest summary: Delta is the most forgiving if an extender and both armrests work for you, Southwest and Alaska are the friendliest on refunds, and American and United expect more advance planning. Verify on the carrier’s own site before paying.
What to wear to fly comfortable
Clothing is your first comfort tool, and the cabin gives you two competing problems to dress for: long stretches of sitting and a temperature that swings from stuffy at the gate to chilly at altitude. Layering solves both. A soft, breathable base layer under a cardigan, zip hoodie, or wrap means you can adjust without packing a suitcase of options. Natural fibers and good stretch blends move with you and breathe better than stiff synthetics that trap heat.
Reach for fabrics with give. A ponte knit dress, wide-leg trousers with an elastic or drawstring waist, or your most trusted leggings paired with a longer tunic all let you settle in without a waistband digging in after hour two. Avoid anything with hardware that presses against you when you sit, like thick belts, stiff zippers along the hip, or rigid seams across the belly. Slip-on shoes or sneakers you can loosen are kinder than anything you have to wrestle with at security, and feet swell at altitude, so a half-size of breathing room helps. Bring a pair of grippy socks for padding around the cabin if you like to slip your shoes off. A large, soft scarf doubles as a blanket, a pillow, or a privacy layer, and weighs almost nothing. Dressing for the body you have on the day you fly, in pieces that already feel good, is the whole strategy.
What to pack
Pack for comfort first and you will thank yourself somewhere over the ocean. Hydration is the quiet hero of any flight, since cabin air is famously dry, so bring an empty refillable bottle through security and fill it at a fountain past the checkpoint. Snacks you actually enjoy and that travel well, like nuts, protein bars, or fruit, spare you from depending on a cart that may never reach the back rows or stock anything you want.
Compression socks are worth considering for any flight over a couple of hours, since sitting still raises the risk of swelling and circulation issues for everyone, not just plus-size flyers. They are optional and a personal call, not a requirement, so choose what feels right for your body. A small comfort kit earns its space in your carry-on: lip balm and hand lotion for the dry air, any medications in their original packaging, a phone charger and a battery pack, noise-cancelling headphones or earplugs, an eye mask, and a neck pillow if you sleep upright. Keep a light wrap or shawl on top for the inevitable cabin chill. Stash a refresh pouch with wipes, deodorant, and a toothbrush for long-haul mornings. If you use any personal comfort items for sitting, a seat cushion or a small lumbar support, those are entirely allowed and nobody’s business but yours. Packing with intention turns a cramped few hours into a manageable, even pleasant, stretch of your trip.
Navigating the airport with confidence
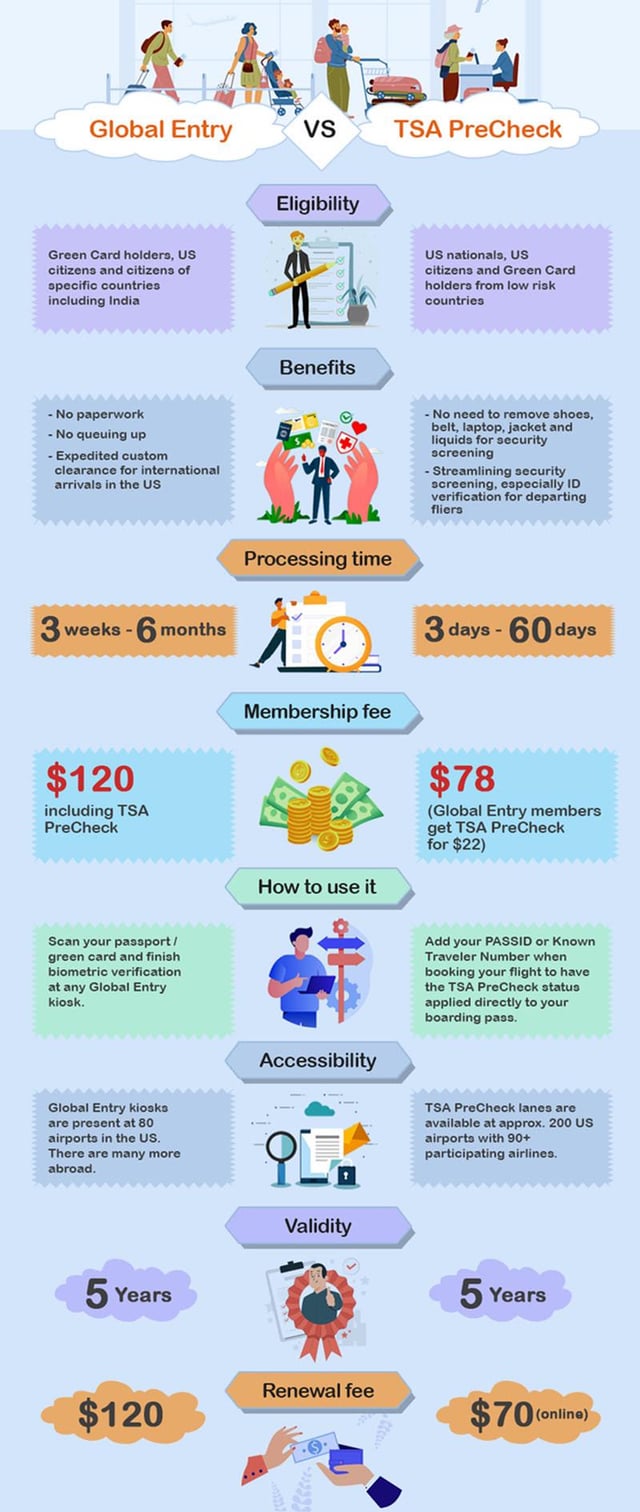
The terminal can feel like an obstacle course, so give yourself the gift of time. Arriving early erases the frantic, sweaty dash that makes everything harder, and it means you can move at your own pace through check-in, security, and the long walk to the gate. Wear or pack those slip-on shoes for the security line, where you will move faster and with less fuss. Consider TSA PreCheck if you fly even a few times a year, since it lets you keep your shoes on and skip the most cramped part of the screening process.
Airports are large, and gates can be a serious walk apart. There is zero shame in using the moving walkways, requesting wheelchair or cart assistance if a long concourse is hard on your body, or pausing on a bench to catch your breath. Assistance is a service the airport provides on purpose, and using it is smart, not weak. Once through security, find a comfortable spot to settle rather than hovering in the crush. When boarding opens, you are entitled to ask the gate agent about your seat or confirm an empty adjacent seat. Approach the desk with a calm, matter-of-fact tone, because you belong there as much as anyone holding a boarding pass.
If anxiety creeps in, name it for what it is – a response to an environment built without your comfort in mind, not a verdict on you. Slow your breath, ground yourself with a familiar playlist queued up before you board, and remember that most fellow passengers are absorbed in their own travel and not watching you at all. Should you ever encounter rudeness, you owe no one a performance of apology for the space your body occupies. A neutral “excuse me” and a steady posture handle nearly every awkward moment, and a quiet word with a flight attendant resolves most discomforts faster than you would expect.
Booking your next trip with your shoulders down
Comfort in the air comes down to a handful of moves you now have in hand: ask for the free extender at the door, book your window or aisle seat the moment you buy the ticket, check the seat width on SeatGuru before you commit, and read the customer-of-size policy of whichever airline you are flying. Pack the water bottle, the snacks, the soft layers, and arrive with time to spare. Pick the carrier whose rules fit your needs – Delta if an extender and armrests work for you, Southwest or Alaska if you want a second seat with a real shot at a refund. Save this list to your phone and pull it up the next time you book. The window seat is yours, the snacks are packed, and the destination is waiting.
The Frankfurt gate desk that taught me the six-month rule
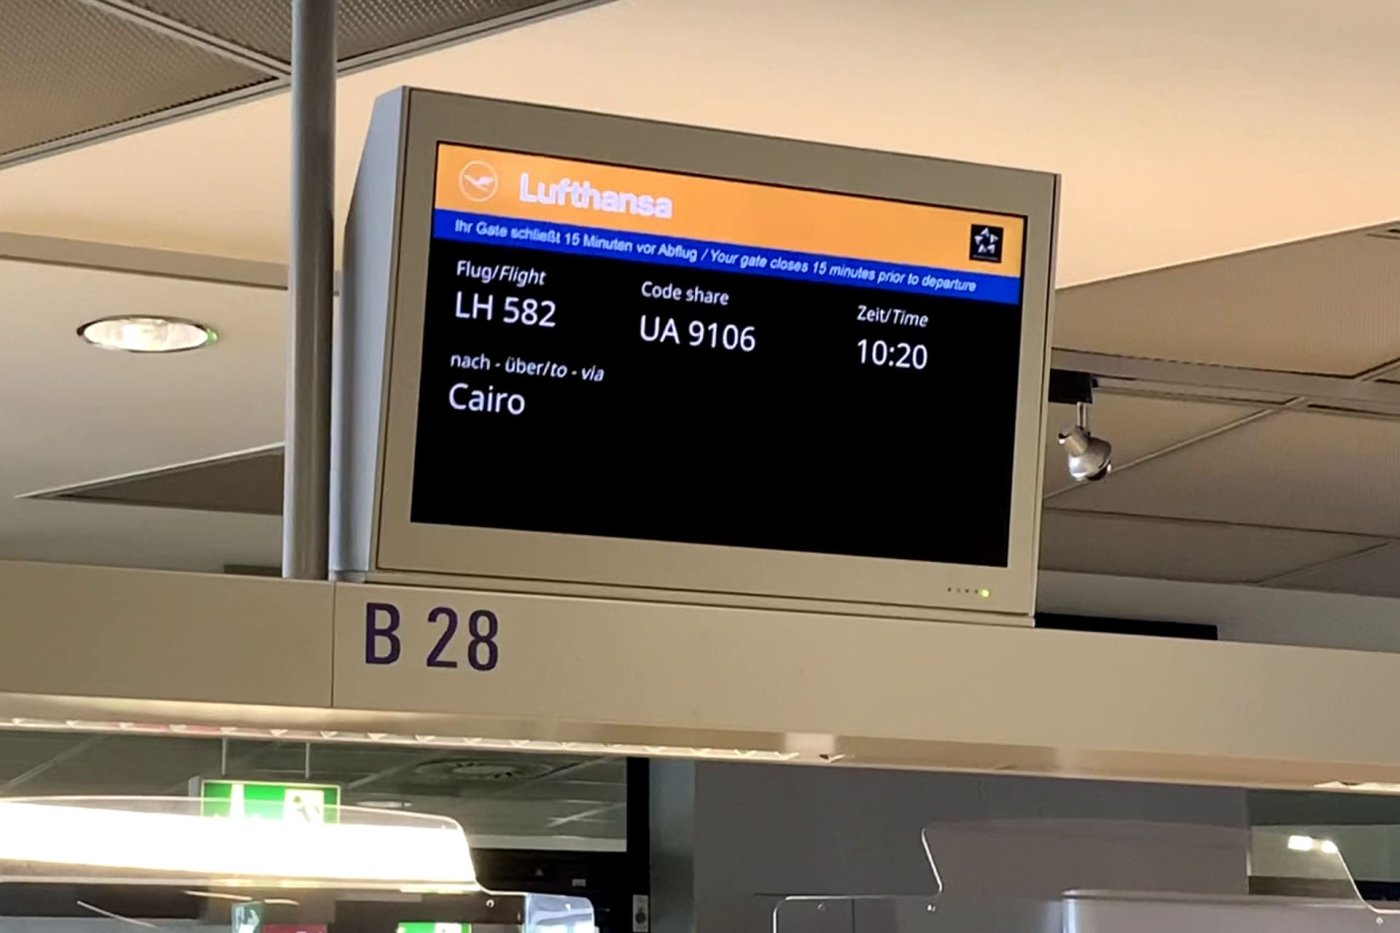
The gate agent at Frankfurt slid my passport back across the counter and said, in the politest possible voice, that I would not be flying to Cairo that afternoon. My passport expired in four months and twenty-one days. Egypt requires six months of validity from the date of entry. I had four months and twenty-one days, which would have been plenty had I been going home, but I was not going home. I was going to Cairo for ten nights with a friend who was already in the air from JFK. I was standing in Terminal 1 with a boarding pass that no longer worked and a refund clock that did not care.
I have been to forty-one countries and had never had a passport problem until that morning. The fix was a regional US embassy appointment, a $185 emergency replacement fee, and a redirected flight that cost me another $410. The trip got salvaged. The lesson got expensive. This is the article I wish I had read the week I booked Cairo, because travel documentation in 2026 is not just the sticker prices on the State Department site. It is the timing, the renewal rhythm, the panic-tax on expedited service, and the specific places where a $95 credit card pays you back $200. I pulled three years of receipts and cross-referenced State Department, CBP, and AAA pricing as of this writing.
The US passport: book, card, first-time, renewal
The number to anchor against is the first-time US passport book. In 2026, the all-in price is $165: $130 in fees to the State Department plus $35 in execution fees paid to whoever takes your application (post office, clerk of court, participating library). Photos are extra, $14 to $17 at most CVS or Walgreens. AAA members get them free at most branch offices. Total walk-out on a first-time book is $179 to $182 without AAA, $165 with it.
Renewals are cheaper. If your existing passport was issued within the last fifteen years, after you turned sixteen, and is in your current name, you can renew by mail or online for $130 flat. No execution fee. No appointment. The online portal opened nationally in 2024 and processes in four to six weeks at standard speed.
The passport card is a separate document, valid only for land and sea entry to Canada, Mexico, Bermuda, and the Caribbean. It costs $30 added to a book application, $65 standalone. I have one and have used it twice. If you live in a border state or cruise out of Florida regularly, it pays for itself. If you fly internationally, it does not.
Expedited and same-day: the panic-tax pricing
The cheapest passport is the one you renewed last year while you were not planning a trip. Every dollar above the $130 base is a panic tax, and the curve gets steep fast.
Standard processing in 2026 runs four to six weeks. Expedited service costs an extra $60 on top of base fees and brings the timeline to two to three weeks. Add $20.32 for two-way priority mail. The mid-tier expedite is the right call if your trip is six to eight weeks out. Total: $215 to $235 for a first-time book, $190 for a renewal.
Inside the two-week window, you can book in person at one of the 26 regional passport agencies (NYC, Atlanta, Miami, Houston, Chicago, LA, San Francisco, and others). Appointments are technically free but only available with proof of international travel within fourteen days. You walk out same day. All-in cost lands around $185 to $215. Slots release at 8 a.m. local time, three weeks ahead, and get taken by 8:02. Set a calendar reminder.
Inside the seven-day window, you are in private-courier territory. RushMyPassport, ItsEasy, and Travel Visa Pro run your application through a regional agency for you. The 2026 pricing is brutal: $499 for five-business-day service, $699 for 48 hours, and $1,200 for a true same-day rush. That is on top of the standard $130 base fee. Total walk-out for a same-day rush is $1,330 to $1,400. I have paid this once, the Frankfurt-Cairo aftermath, and what made the bill bearable was the alternative of eating a $4,200 non-refundable trip. Build the buffer before you need it.
Global Entry and TSA PreCheck
If you fly more than three round trips a year, Global Entry is the single best paperwork investment you can make. The 2026 fee is $120, paid once, valid for five years. That works out to $24 a year for a service that pulls you out of every customs and immigration line at every major US airport, and bundles TSA PreCheck for domestic flights at no extra cost. PreCheck on its own is $78 for five years. Most travelers should buy Global Entry instead. The math is not close.
The catch is the interview. Conditional approval after the online application takes four to eight weeks. The in-person interview used to be the bottleneck, but the program now offers Enrollment on Arrival, where you complete the interview at the customs desk when you re-enter the US from any international trip. It adds about ten minutes and saves you the trip to JFK at 6 a.m. on a Tuesday.
The other programs are niche. NEXUS is $50 every five years, only worth it if you cross into Canada regularly. SENTRI is $122.25, for southern border crossings. CLEAR is a private biometric line at major airports for $189 a year, and the math only works if you fly out of a CLEAR hub more than twice a month. For most travelers, Global Entry alone is the right buy.
Real ID and the international driving permit
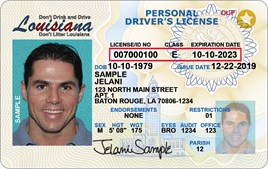
Real ID enforcement at domestic TSA checkpoints took full effect on May 7, 2025. As of mid-2026, you cannot board a domestic flight with a non-Real ID driver’s license. If your license has a gold or black star in the upper corner, you are set. If it does not, you need to upgrade at your state DMV, and the cost is wildly state-dependent.
Fees in 2026 land between $30 and $60 in most states. Texas charges $33, California $45, Florida $48, New York $30, Illinois $30, Georgia $35. The variance comes from whether the state charges a Real ID surcharge or bundles it in. This is a one-time line item at your next renewal. If your passport book is current you can technically skip Real ID, but a license fits in a wallet and a passport book in a jacket pocket gets forgotten the one morning you need it.
The international driving permit is the most overlooked $20 in travel paperwork. AAA is one of two federally authorized issuers. The IDP costs $20, takes ten minutes with two passport photos and your current US license, and is valid for one year. You need it if you plan to drive in Italy, Greece, Croatia, Costa Rica, Japan, South Korea, Spain, or most of Eastern Europe. The traffic stop is where the absence matters. I have been pulled over twice in Italy in seven years and the IDP turned a potentially expensive afternoon into a thirty-second exchange both times.
Visa fees by region, the wild variance
Visas are the line item that will surprise you most. Prices vary from twenty dollars to two hundred depending on country, visa type, and whether you applied online or on arrival. Some countries cost US passport holders nothing. Some charge more for Americans as a reciprocity measure. Here is the 2026 lay of the land for the regions I get asked about most.
Europe
: Schengen-area visas for US passport holders are free for tourism under ninety days. ETIAS authorization is scheduled to begin in late 2026 (Q4 launch, with a transition period before it becomes mandatory in 2027) at roughly 20 euros per traveler, valid for three years. UK ETA is around $13 (10 pounds). Both are online forms, processed in days, not weeks. Confirm the current launch date on the official EU travel-europe.europa.eu site before you book.
West Africa
: Senegal is visa-free for Americans for ninety days. Ghana requires a single-entry e-visa at $60 to $150 depending on processing speed. Nigeria is $160 for the visa-on-arrival e-pass, with another $30 in airport processing.
East and Southern Africa
: Kenya is now e-visa only at $30, processed online in three to seven days. Tanzania is $100 multi-entry. South Africa is visa-free for ninety days for US passport holders. Morocco is visa-free for ninety days.
Asia
: Vietnam e-visa is $25 for thirty days, $50 for ninety. Cambodia visa on arrival is $30. Thailand is visa-free for sixty days. India e-visa is $40 for thirty days, $80 for one year, $100 for five years. Japan is visa-free for ninety days. South Korea requires K-ETA at $7, valid three years.
South America
: Brazil reinstated e-visas for US passport holders at $80.90 for ten-year multi-entry. Argentina, Chile, Peru, and Colombia are all visa-free. Bolivia is the regional standout at $160 visa on arrival, in crisp US bills, which the embassy site does not mention loudly enough.
Middle East
: UAE is visa-free for thirty days. Jordan is $56 on arrival, free if you book through the Jordan Pass at $70 which bundles entry to Petra. Egypt is $25 on arrival, payable in cash at the airport bank window before you reach immigration.
The pattern: most online e-visa applications run $20 to $80, most visa-on-arrival programs run $25 to $100, and a handful of reciprocity countries (Bolivia, Nigeria, Chad, Eritrea) push past $150. Build a $100 visa line into any trip outside Europe and you will be right more often than wrong.
Travel insurance: when to buy, what to pay
Travel insurance is the line item travelers under-budget most. A single-trip policy runs $50 to $150 for a one-to-two-week international trip, scaling with age, trip cost, and coverage limits. For a $3,000 trip to Portugal, the right policy through World Nomads, Allianz, or Travel Guard runs $90 to $120 and covers cancellation, medical evacuation, and lost luggage.
The honest test: would losing the cost of this trip ruin your year? If yes, buy. If the trip is $400 in points and a free hotel, skip. For longer or multi-country itineraries, an annual multi-trip policy runs $300 to $500 and pays for itself at three or more trips a year. I have an annual policy through Allianz at $380 a year that has paid out twice (a delayed flight, a stolen camera). Net positive.
Your credit card matters here. The Chase Sapphire Preferred and Reserve both include trip cancellation, delay, lost luggage, and rental car coverage when you book on the card. The Reserve adds emergency medical evacuation. For most trips, the card coverage is enough. Where it is not: medical evacuation in remote regions, adventure activities (all policies exclude scuba past thirty feet, motorcycling, and rope sports), and trips over $10,000 non-refundable.
The yearly total for an active traveler
Here is the math for someone taking three to four international trips a year. Passport renewal at $130 every ten years amortizes to $13 a year. Global Entry at $120 every five years is $24. Real ID one-time at $40 amortizes to $5. The IDP at $20 for travelers who drive abroad. Visas average $150 a year for two or three e-visa countries. Travel insurance at $50 to $150 per trip, or $380 a year for an annual policy. Realistic yearly documentation spend lands at $200 to $400, with $250 to $300 the median case.
That is less than most travelers spend on baggage fees in a year, and less than the price of one nice dinner per international trip. The whole infrastructure of being able to leave the country runs you about a dollar a day.
The honest cost-saving moves that actually work
Three moves materially shift the math. The first and largest is the travel credit card statement credit. The
[LINK:#affiliate]
Chase Sapphire Preferred
[/LINK]
at $95 a year reimburses your Global Entry, TSA PreCheck, or NEXUS fee once every four years as a credit of up to $120 after the June 2026 refresh. The
[LINK:#affiliate]
Chase Sapphire Reserve
[/LINK]
at $795 a year does the same plus $300 a year in travel credit and a stack of other lifestyle credits. The
[LINK:#affiliate]
American Express Platinum
[/LINK]
at $895 a year includes the same reimbursement plus airline incidental credits. Apply for the card in the same quarter you renew Global Entry and the $120 fee posts to the card, the statement credit posts within a billing cycle, and you have effectively paid zero. I have done this twice in a decade. Both times the credit posted within forty-five days.
The second move is AAA membership. At $69 to $89 a year, AAA pays for itself the first time you use it for free passport photos ($14 to $17 saved), the IDP ($20), and one roadside tow. I joined at twenty-three for a tow and it has paid for itself every year since on documentation alone.
The third move is the public library. Some county and city libraries are designated passport acceptance agents and process applications during regular hours, no appointment needed. The execution fee is the same $35 the post office charges, but the line is shorter and a handful of branch libraries waive the execution fee entirely as a public service. Search “passport acceptance facility” on the State Department site for your zip code. I have processed two renewals this way and the second branch waived the fee.
The single smartest move I made last year
The smartest documentation move I made in the last twelve months was applying for the Chase Sapphire Preferred in February, three weeks before my Global Entry came up for renewal. I paid the $120 fee on the new card. The statement credit (up to $120 after the June 2026 refresh) hit my account on the next billing cycle. The sign-up bonus, earned after I put normal rent and groceries on the card for three months, landed in May. I used those points in October to book a $740 round-trip flight to Lisbon for $0 out of pocket.
One card, one application, one fee paid in the right month: the Global Entry renewal became free, the flight to Lisbon became free, and the $95 annual fee on the card was a rounding error against the value. Total cost of that year’s travel paperwork after the credit landed was meaningfully negative. The system was doing the work while I was packing the carry-on.
On a Tuesday morning in November 2024, I dragged a suitcase out from under my bed in my Manhattan apartment and opened it on the rug. Seventeen garments came out. Ten countries. Four continents. Six years of buying clothes on the road at size 24, sometimes 26, depending on the country and the cut. I had not laid them out together before. When I did, the pile told a story I had been living inside of without seeing it. Some countries had cut for my body. Some had not. The pile knew which was which, even when I had spent years pretending otherwise.
This is the story of those seventeen pieces. Where each came from. What each cost. What each taught me about the gap between American plus-size and the rest of the world. I am writing it because I am tired of the polite version, and because four of those seventeen pieces are still in my weekly rotation, and the reason all four survived is the same reason.
The pile
Here is what came out of the suitcase, in the order I pulled them. A custom iro-and-buba in indigo aso-oke from Lagos, 2018, around $340 with the commission. A green-and-gold kaftan from a souk tailor in Marrakech, 2019, roughly $85 after the haggle. A Yakampot cotton midi from a small atelier in Roma Norte, Mexico City, 2020, about $220. A custom blouse for my cousin’s wedding sewn in a Mumbai tailor’s shop in 2022, $48 including the cotton-silk. A Punyus oversize dress from the Marui Plus floor in Tokyo, 2023, near $130. A Maxhosa Africa knit poncho bought near the V&A Waterfront in Cape Town, 2023, around $310. A Marina Rinaldi linen blazer from the Selfridges reduction in London, 2024, $390 after the markdown. A vintage silk shirt from a Marais resale in Paris, 2024, $60. A Castaluna swing dress shipped to my Paris hotel, $95. A commissioned leather jacket from a Galata workshop in Istanbul, 2024, $260. A Carnival costume from Aura mas band in Trinidad, 2024, $1,900 with the bra recut.
I am skipping a few, but those are the ones I want to talk about. The rest were filler. The ones I named are the lessons.
Lagos, 2018
The first piece I commissioned abroad was the indigo iro-and-buba. I was in Lagos for a wedding and my aunt walked me into a workshop in Ikoyi run by a woman who measured me with a soft tape and a expression that said she had done this a thousand times. The commission took six weeks. I flew home without it and it arrived in a DHL pouch a month and a half later. The fit was the first time in my adult life a garment held my back and my shoulders the way I had read about in magazines that did not feature women my size.
What Lagos taught me was the commission cycle. Six weeks is normal. You go for the first measurement. You come back for a fitting if you can. If you cannot, you trust the seamstress and the courier. The garment is built to your body, not adapted to it. That distinction matters. Hawi Couture in Lagos and designers like Lisa Folawiyo work in this model, and so do thousands of unnamed workshops in every neighborhood. The Nige
rian fashion industry is set up to commission. The American industry is set up to push you into the next-closest size off a rack. Those are different industries doing different jobs.
Marrakech, 2019
A year later I sat on a low stool in a souk tailor’s shop near Bab Doukkala while a man in his sixties measured me with chalk on the fabric itself. The kaftan was green-and-gold, lined, with a deep V neckline I would not have picked in the US because I would not have been offered it. He told me to come back in four hours. I went and got a tagine and a mint tea and walked back at the time he said. The kaftan was finished. It fit. I paid the equivalent of $85 after a respectful haggle. I have worn that kaftan at
least sixty times since.
Marrakech taught me that the speed of commissioning is a local variable. Lagos is six weeks. Marrakech can be four hours. Mumbai can be next-day. London is six weeks again, but the workflow is the same. The slow thing is not commissioning itself. The slow thing is finding an industry that knows how to do it for your body without flinching.
Mexico City, 2020
I was supposed to be on a Carnival cruise in March 2020. The world ended instead. The rebooking eventually deposited me in Mexico City for a long winter where I learned the difference between Latin American talla extra and US plus. Yakampot is a small Mexican atelier with a shop in Roma Norte, and they cut a cotton midi for me with a hand-embroidered yoke that I still wear to dinners. The price was $220, which felt right for the level of work.
Talla extra in Mexico runs smaller than US plus, sometimes by two full sizes. A Mexica
n XXL is closer to a US 14. This is not a critique of Mexican sizing. It is a statement of fact that affects what you can walk in and buy off a rack. Yakampot was willing to cut up. Most Roma Norte boutiques were not. The lesson was that brand intent matters more than country. A brand that wants to dress me will. A brand that doesn’t, won’t, regardless of the flag on the storefront.
Mumbai, 2022
Mumbai was a cousin’s wedding and a tailor named Bhavin near Bandra West. I needed a blouse for a lehenga. He measured me at 11 in the morning. The blouse was ready by 9 the next night. It cost $48. I cried in the changing room, which embarrassed both of us. The lehenga itself was a problem because the shop I had ordered it from in advance had sized me using a chart that bore no resemblance to my body and the skirt would not zip. The blouse worked. The skirt did not. The lesson was Indian sizing math.
The math is this. Indian ready-to-wear is built off a base that assumes a small frame. The numerical sizes you see online are not a translation of US sizing. They are a separate scale that runs short in the torso and tight in the chest. The Indian solution is to commission, which is also the South Asian American solution. Saree Sea and similar US-Indian shops will work with you. The big direct-to-consumer Indian sites mostly will not. If you are going to India and you are above a US 18, plan to be measured on arrival and commission everything that is not a sari.
Tokyo, 2023
Tokyo was the surprise. I had been told Japan was hostile to my body. I went anyway. Punyus, the plus-size label founded by comedian Naomi Watanabe, has a flagship inside Shibuya 109 and a second location at Lumine Est in Shinjuku, with sizes that go up to 6L. I bought an oversize dress with a graphic print for around $130. The dress fits me better than most American mid-tier brands at the same price.
What Tokyo cost me was time. The Punyus floor at Shibuya 109 is not advertised in English. I went on a Tuesday afternoon with a translation app and a screenshot from a Japanese plus-size blog. The fitting room conversation was slow and warm. The salesperson was patient with my measurements and apologetic about the sizing scale, which still topped out below a US 26 in many cuts. The dress I wear now was at the upper edge of what they carried. The next size up did not exist. Japan made me, kind of. Japan also told me where the wall was.
Cape Town, 2023
Cape Town gave me the Maxhosa Africa knit poncho and a humbling at the same time. I went up to a small fabric house in Bo-Kaap to ask about a custom piece, and an elder seamstress who was at the cutting table looked at me, asked where I was from, then said something in Xhosa to a younger woman beside her. The younger woman laughed politely and translated. The elder had said I was asking for a “regular cut” when I clearly wanted an asoebi-quality cut, and that I should know the difference before I came back. I deserved the gentle scolding. I had been treating commissioning like ordering coffee.
The Maxhosa Africa piece I bought ready-made near the V&A Waterfront was around $310. Laduma Ngxokolo’s brand cuts up to what most US shoppers would call a 22, which in their sizing was labeled differently. The fit was generous because the silhouette is meant to be. That is a design choice, not an accommodation, and I learned the difference there. South African designers like Maxhosa do not center plus-size customers, but they do not engineer us out of the cut either. The shape welcomes the body. That is its own kind of mercy.
London, 2024
London was the European luxury reality. Marina Rinaldi is the Max Mara plus-size line, and Selfridges runs a reduction on it twice a year. I bought a linen blazer for $390, marked down from over $700. The fit was the first ready-to-wear piece in years that did not need alterations through the shoulder, which is the place American plus brands tend to fail me. I also took the blazer to Atelier Notting Hill for a minor sleeve adjustment, because European luxury at this price point expects you to alter, and the alteration shop did not blink at my measurements.
The European luxury reality is this. There are maybe four or five lines globally that cut to a US 24 with the same fabric and construction as their straight-size mainline. Marina Rinaldi is the household name. Elena Mirò is another. The prices reflect the construction. The reduction calendar matters more than the brand directory. If you are buying European plus luxury full price, you are buying it wrong.
Paris, 2024
Paris was a quieter chapter. I found a vintage silk shirt in a Marais resale for $60, which fit because vintage Paris sizing for older silk pieces runs generous through the body. I also ordered a Castaluna swing dress to my hotel. Castaluna is the La Redoute plus-size line, and the order arrived in two days for $95. Paris itself was not where I shopped well. Paris was where I learned that a hotel concierge will sign for plus-size online orders without commentary, which removed the most stressful step of the trip.
Istanbul, 2024
Galata had a leather workshop I had read about on a Turkish plus-size forum, and I walked in on a Thursday and walked out two days later with a black moto jacket built to my measurements for $260. The fabric house was off Galatasaray. The pattern maker drafted on butcher paper while I drank tea. The jacket has held up through two winters of subway commuting in Brooklyn. It is the single best price-to-fit garment I own.
Istanbul taught me that the leather and fabric houses around Galata and Beyoğlu are the closest thing in Europe to the Lagos commission model. The infrastructure exists. The workshops are still operating. The wait times are short. The prices reflect a labor cost that has not yet been swallowed by tourism markup. If I had to choose one city to send a plus-size friend for a wardrobe overhaul, I would send her to Istanbul before I sent her anywhere else.
Trinidad, 2024
Trinidad was Carnival, and Carnival was its own discipline. I played mas with Aura, one of the bands that builds custom costumes for larger bodies without pretending it is a favor. The base costume was around $1,400. The bra recut took 18 hours of work over two visits and added another $500. The body math of a feathered backpack is real. The harness sits across your shoulders. The bra has to hold a chest plus the weight of a wire frame plus eight pounds of feathers. The fitter who recut my bra was the same age as my mother and worked silently while music played in the next room.
Aura was the only band where I did not have to explain my body twice. The fitter knew what a 24 looked like on a Carnival stage because she had built for that body before. That is the asoebi-quality cut the Bo-Kaap seamstress had named. A cut for someone like you, made by someone who has done it for someone like you.
What the pile told me
Here is the structural argument the suitcase made on my rug that morning. The American plus-size industry is set up for off-the-rack at modest quality. The rest of the world, in places where commissioning culture is alive, is set up to build to a body at whatever quality level you can pay for. Those are two different operating systems, and an American plus-size woman traveling abroad is mostly running into the second one without knowing what to do with it.
The choice every plus-size US woman has, once she travels enough to see both systems, is which one she is going to organize her wardrobe around. You can keep accepting the off-the-rack mediocrity of mid-tier American brands and pretend the fit issue is your problem. Or you can learn the international commissioning model and treat your wardrobe like a build, not a shop. The commissioning model takes more time. It costs more in some cities and dramatically less in others. It produces clothes that fit. The shopping model produces clothes that you make peace with.
I am not telling anyone to fly to Lagos to get a blouse. I am saying that once you have done it once, the off-the-rack experience back home stops feeling normal, and you start asking harder questions about why the brand you have been loyal to for ten years still cannot put a sleeve on you that does not strangle your upper arm.
The four garments that stayed in the rotation
Of the seventeen pieces on the rug that November morning, four are still in my weekly rotation eighteen months later. The Marrakech kaftan. The Lagos iro-and-buba. The Cape Town Maxhosa poncho. The Mumbai blouse. Three were commissioned outright. The fourth, the Maxhosa, was ready-made from a brand whose silhouette is generous by design. The Marina Rinaldi blazer is in the closet but only comes out for work travel. The Tokyo Punyus dress is folded on a shelf because the fit is good but the print is loud and I do not wear it often. The Trinidad costume is in a storage bin because Carnival costumes only have one job.
Four out of seventeen. Three commissioned, one cut with intent. The American off-the-rack pieces I bought between trips, the ones I did not bother to lay out that morning because I knew where they would land, are mostly gone. Goodwill or the donation bin at the synagogue down the block. They wore out faster, fit worse, and never felt like mine the way the commissioned pieces do.
I zipped the suitcase back up that afternoon with the survivors inside, and the donations went into a separate bag. The pile had said what it came to say. The countries that cut for my body had names: Nigeria, Morocco, South Africa, India, Turkey, Trinidad on a good week. The countries that politely could not had names too, and I will not list them, because the seamstresses in those countries are not the problem. The industries are. And the only thing the pile asked of me was to stop pretending I did not know the difference.
It is 7:43 AM on a Tuesday in October 2024, and I am sitting in one of the navy leather club chairs in the Delta Sky Club at LAX Terminal 5, watching the sun come up over the tarmac through a window that does not open. I have a four and a half hour layover. My flight to Detroit was rerouted because of weather, and the gate agent gave me a Sky Club pass as an apology, which I accepted with the kind of gratitude reserved for people who know that lounge access is something you usually have to engineer rather than receive. The chair arm is pressing into my left hip the way it does in a body that was not part of the spec sheet when somebody at Delta’s design firm decided that 19 inches of seat width was sufficient.
My Quince cashmere wrap, the one that actually fits a size 4X, is draped behind me on the back of the chair, partly because I want it accessible and partly because it covers the seam where my hip meets the armrest. The buffet has croissants in a glass case with no labeled allergens, scrambled eggs in a chafing dish with a serving spoon that requires me to lean across the table to reach, and a yogurt parfait station with a sneeze guard about the height of my collarbone. The bathroom door, when I went in twenty minutes ago, was visibly narrower than the gate-area bathroom door I used right before walking in. I measured it later. Eight inches narrower.
This is the chapter the airline glossy never publishes. Lounges are sold as a premium experience, an upgrade, a sanctuary, and for a lot of travelers they are exactly that. For a plus-size traveler, a lounge is also a series of design decisions that you have to navigate, and the only way to navigate them well is to know which lounges have been built or renovated with bodies like ours in mind, which have not, and how to get into the ones worth getting into without spending your annual travel budget on day passes.
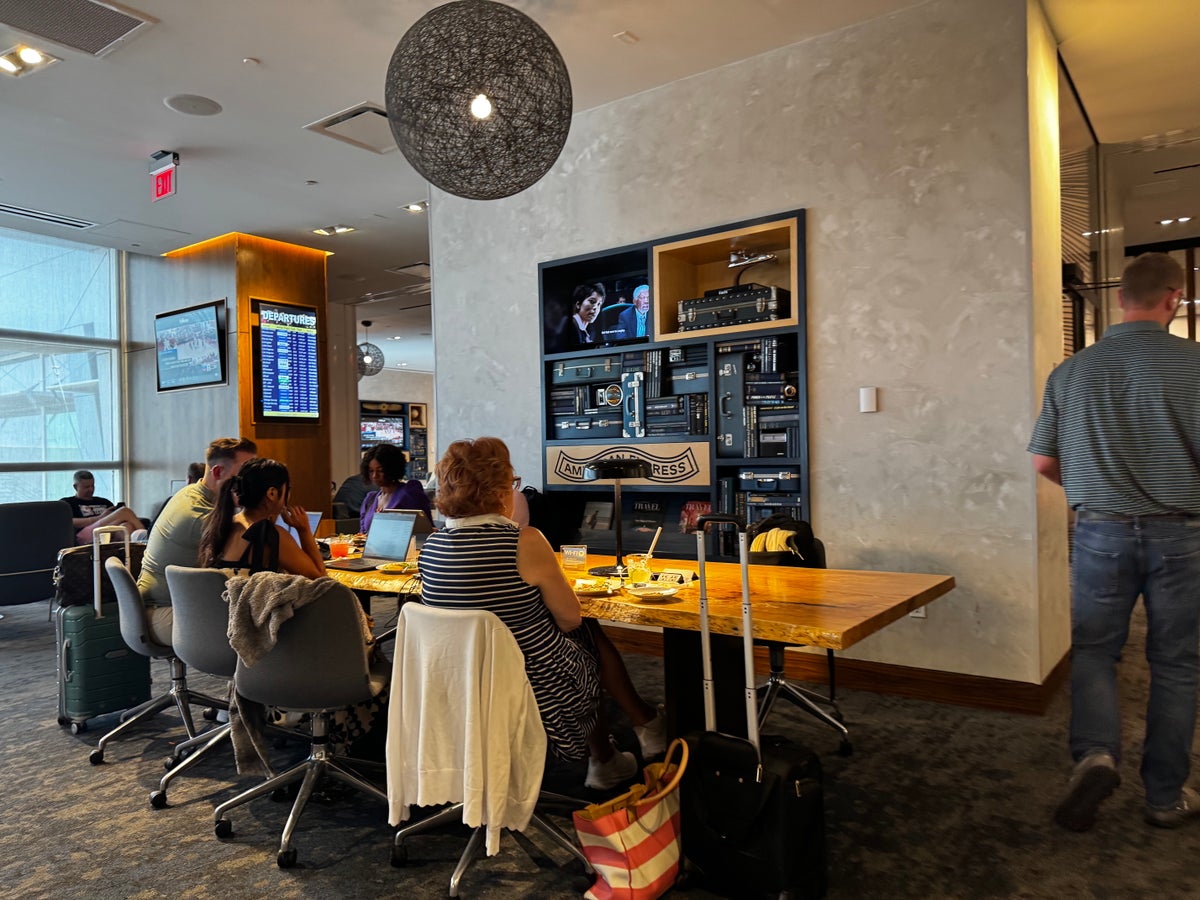
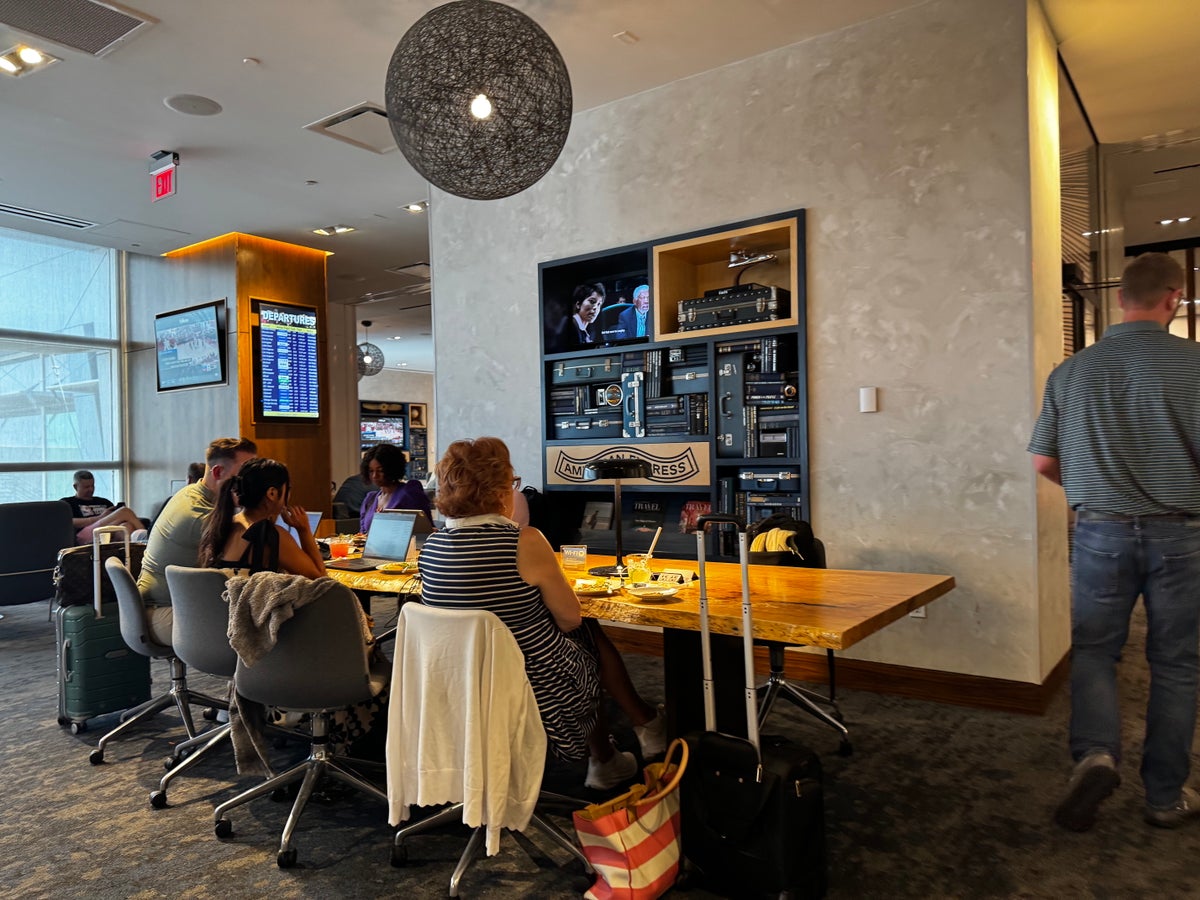
Plus size traveler sitting in airport lounge chair morning light
How to Actually Get Lounge Access
Let me save you the marketing fog and walk you through the four real paths into a lounge in 2026, because the answer to “should I get lounge access” is almost always yes if you fly more than four times a year, and the answer to “how” depends on your spending pattern more than your fare class.
Priority Pass is the entry point most travelers consider first. The standalone membership runs $99 a year for the Standard tier, $329 for Standard Plus, and $469 for Prestige, which gets you unlimited visits with no per-visit fee. According to Priority Pass’s own 2024 published figures, the average walk-in day pass at a participating lounge runs about $35 USD, which means the Prestige membership pays for itself at roughly 14 visits a year. If you are flying once a month and using a lounge each time, Prestige is cheaper than paying at the door, and you get access to over 1,500 lounges globally. The catch is that Priority Pass lounges in the US have been quietly disappearing. American Express pulled most of its US Centurion Lounges out of the network years ago, and a number of Delta Sky Clubs no longer accept Priority Pass at peak hours. The network in Europe, Asia, and South America is still strong.
The credit-card route is what most frequent travelers actually use, and the math here matters. The American Express Platinum carries an $895 annual fee in 2026 (up from $695 after Amex’s January 2026 refresh) and gives you access to the Centurion Lounge network, Delta Sky Clubs when flying Delta same-day, Priority Pass Select (lounges only, no restaurants), Plaza Premium, Escape, and a handful of Lufthansa lounges in some configurations. Capital One Venture X runs $395 a year and gets you into Capital One Lounges plus Priority Pass with unlimited guests, which is the part that matters if you travel with a partner. Chase Sapphire Reserve, now at $795 a year after its mid-2025 overhaul, also includes Priority Pass Select and the growing Chase Sapphire Lounge by The Club network.
The stack a lot of travel writers still recommend is Amex Platinum plus Capital One Venture X. The two cards together cost about $1,290 a year after the 2026 Platinum fee hike, and they get you into virtually every premium lounge worth visiting in the US plus unlimited Priority Pass access globally, with the Venture X covering your guest. If you fly with a partner, the Venture X’s unlimited guest policy alone justifies its fee. Whether the combined $1,290 still pencils out at the new Platinum price depends on how much you actually use the Centurion network and Amex’s stack of category credits.
The day-pass purchase math is worth running too. Most US lounges sell day passes at the door for $50 to $79. The Delta Sky Club walk-up rate is $50 if you have a same-day Delta boarding pass. The Amex Centurion Lounges do not sell day passes at all, which is a deliberate choice to control crowding. If you fly twice a year and only want occasional access, paying at the door is fine. If you fly six or more times a year, a card is cheaper within one year.
Status-based access is the final route, and it is the hardest to engineer if you do not already fly enough to earn it. Delta Diamond Medallion, United Premier 1K, and American Executive Platinum all include some lounge access, but generally only on international itineraries or specific routes. Star Alliance Gold gives you access to most Star Alliance member lounges globally. Oneworld Emerald is the equivalent. If you are not already in one of these programs, this is not the path for you, and that is fine.
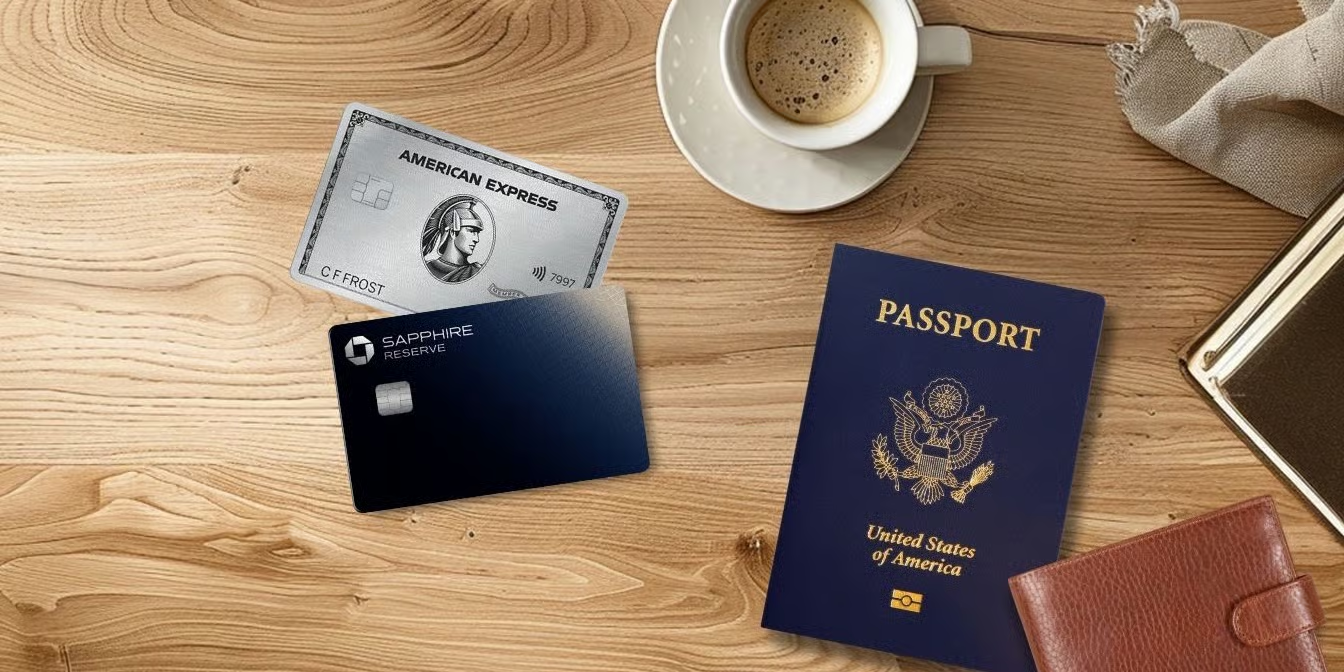
Credit cards fanned out on travel desk with passport
What to Test for as a Plus-Size Traveler
The first thing I check when I walk into any new lounge is the chair situation. Specifically, I look for chairs without arms, or with arms wide enough that the seat itself is at least 21 inches wide. The standard “club chair” in most US lounges has a seat width of 18 to 20 inches between the arms, which is workable if you are around a size 18 or smaller and brutal above that. The good news is that most lounges have a mix of furniture, and the chairs along the windows or in the dining area are often armless benches or banquette-style seating. Walk the lounge once before you settle in. If the only available chair is the navy leather club chair, ask the host if there is a quiet zone with different seating. The Centurion network usually does, the Capital One lounges definitely do, and the Sky Clubs are hit or miss.
The bathroom door width is the test that nobody publishes and that matters more than the food. American lounges, post-2018 renovation, are generally ADA compliant, which means at least 32 inches of clear door width. European lounges, especially the older Lufthansa and British Airways spaces, are often not, and the doors can be as narrow as 26 inches. If you are turning sideways to get into a bathroom stall, you already know what I am talking about. The workaround is to use the accessible stall, which is almost always wider, and to do this without apology even if there is a line. Tigress Osborn, executive director of the National Association to Advance Fat Acceptance, has been a public voice for fat travelers’ right to use accessible facilities when the standard ones do not actually fit. The accessible stall is not just for wheelchair users.
The buffet table reach is the next thing I assess. Most lounge buffets are set up so that you reach across a serving counter that is 30 to 36 inches deep. If you are in a larger body, that reach across is the difference between a clean grab and getting yogurt on your shirt. Look for the lounges that have buffet attendants who will plate for you. The Centurion Lounges do this. The Polaris Lounges do this. The standard Sky Club generally does not. If you are at a self-serve buffet and the reach is awkward, ask for a tray and load it one plate at a time.
For premium lounges, the shower stall dimensions become relevant. The Polaris Lounge at Newark has shower suites that are roughly 5 feet by 5 feet, which is genuinely spacious. The Centurion Lounge showers are smaller, around 3 feet by 4 feet, functional but tight. Plus-size travel writer Stephanie Yeboah, who has documented airline and accommodation accessibility for outlets including Refinery29, has been clear that shower stall dimensions are one of the most underreported pieces of accessibility data in the travel space. She is right.
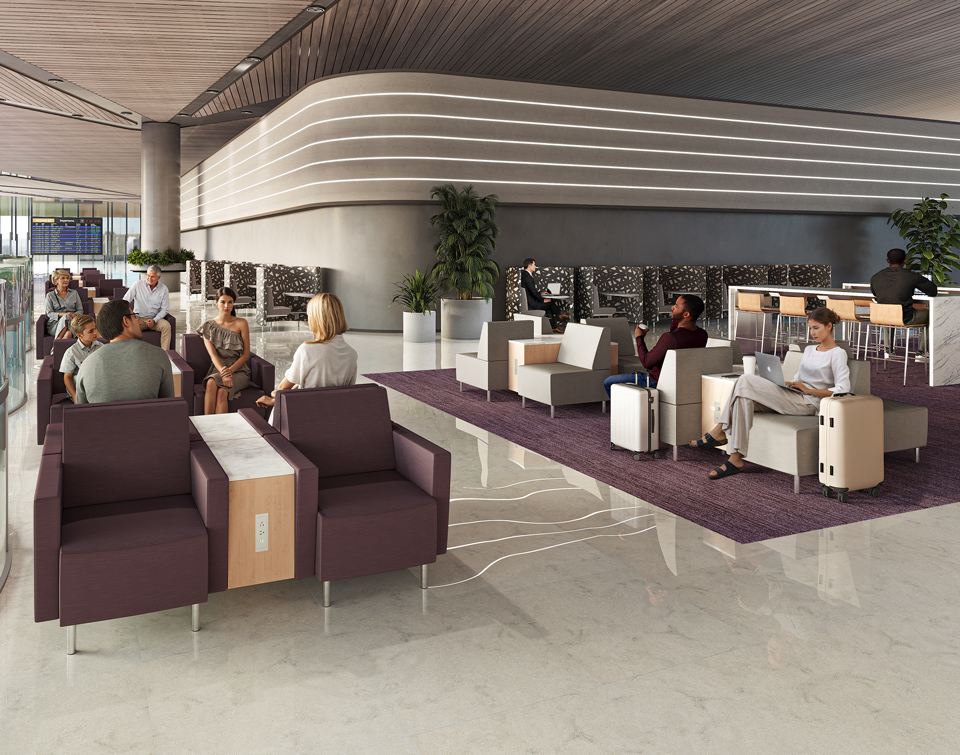
Modern airport lounge interior with armless seating area
Six Specific Lounges Audited
The Centurion Lounge at Las Vegas Harry Reid is, in my experience, the best US lounge for a plus-size traveler. The space is large, the seating includes a long banquette along the window with no arms, the dining area uses chairs with 22-inch seat widths, and the buffet is staffed so you do not have to reach across. The bathroom doors are wide. The shower suites are tight but usable. The crowd management is generally good. I have spent three layovers there and never felt squeezed.
The Capital One Lounge at Washington Dulles is the other lounge I recommend without reservation. It opened in 2022 with a clear focus on accessibility and comfort. The seating is varied, the work pods have generous interior dimensions, the wellness room has a meditation chair that comfortably fits a larger body, and the food hall concept means no buffet line. You order at a station and food comes to you. It is what a lounge built in this decade should look like.
The Delta Sky Club at LAX Terminal 5, where I am sitting as I write this, is fine. It is not designed for me. The club chairs are standard 19-inch seat width with leather arms that do not give. The buffet is self-serve with a counter you have to reach across. The bathroom door is, as noted, eight inches narrower than the gate-area bathroom. The view is excellent. The coffee is good. If you have access, use it. Just do not expect comfort.
The United Polaris Lounge at Newark Liberty is one of the most spacious lounges in the US system, but it is gated behind a Polaris international business class ticket, which is not a casual purchase. If you are flying Polaris, the lounge is genuinely worth the time. The dining room serves restaurant-style table service, which solves the buffet problem entirely. The shower suites are 5 feet by 5 feet. The day suites have a lie-flat bed. The seating mix is good.
The Plaza Premium at Toronto Pearson Terminal 1 is the Priority Pass lounge I recommend for international transits. The chairs are mostly armless or generously armed, the buffet is staffed during peak hours, and the shower facilities are bookable. Brett Snyder at Cranky Flier has reviewed the Plaza Premium network multiple times and called the Toronto lounges some of the most consistent in the system, which matches my experience.
Singapore Airlines flies out of JFK Terminal 4 but does not run a dedicated SilverKris lounge there. Eligible passengers are routed to partner spaces including the Air India Maharaja Lounge, the Virgin Atlantic Clubhouse for Suites and Solitaire PPS members, and the Capital One Lounge. If you are flying Singapore in a premium cabin out of JFK, ask at check-in which partner lounge your fare class accesses, because the experience varies sharply between them.
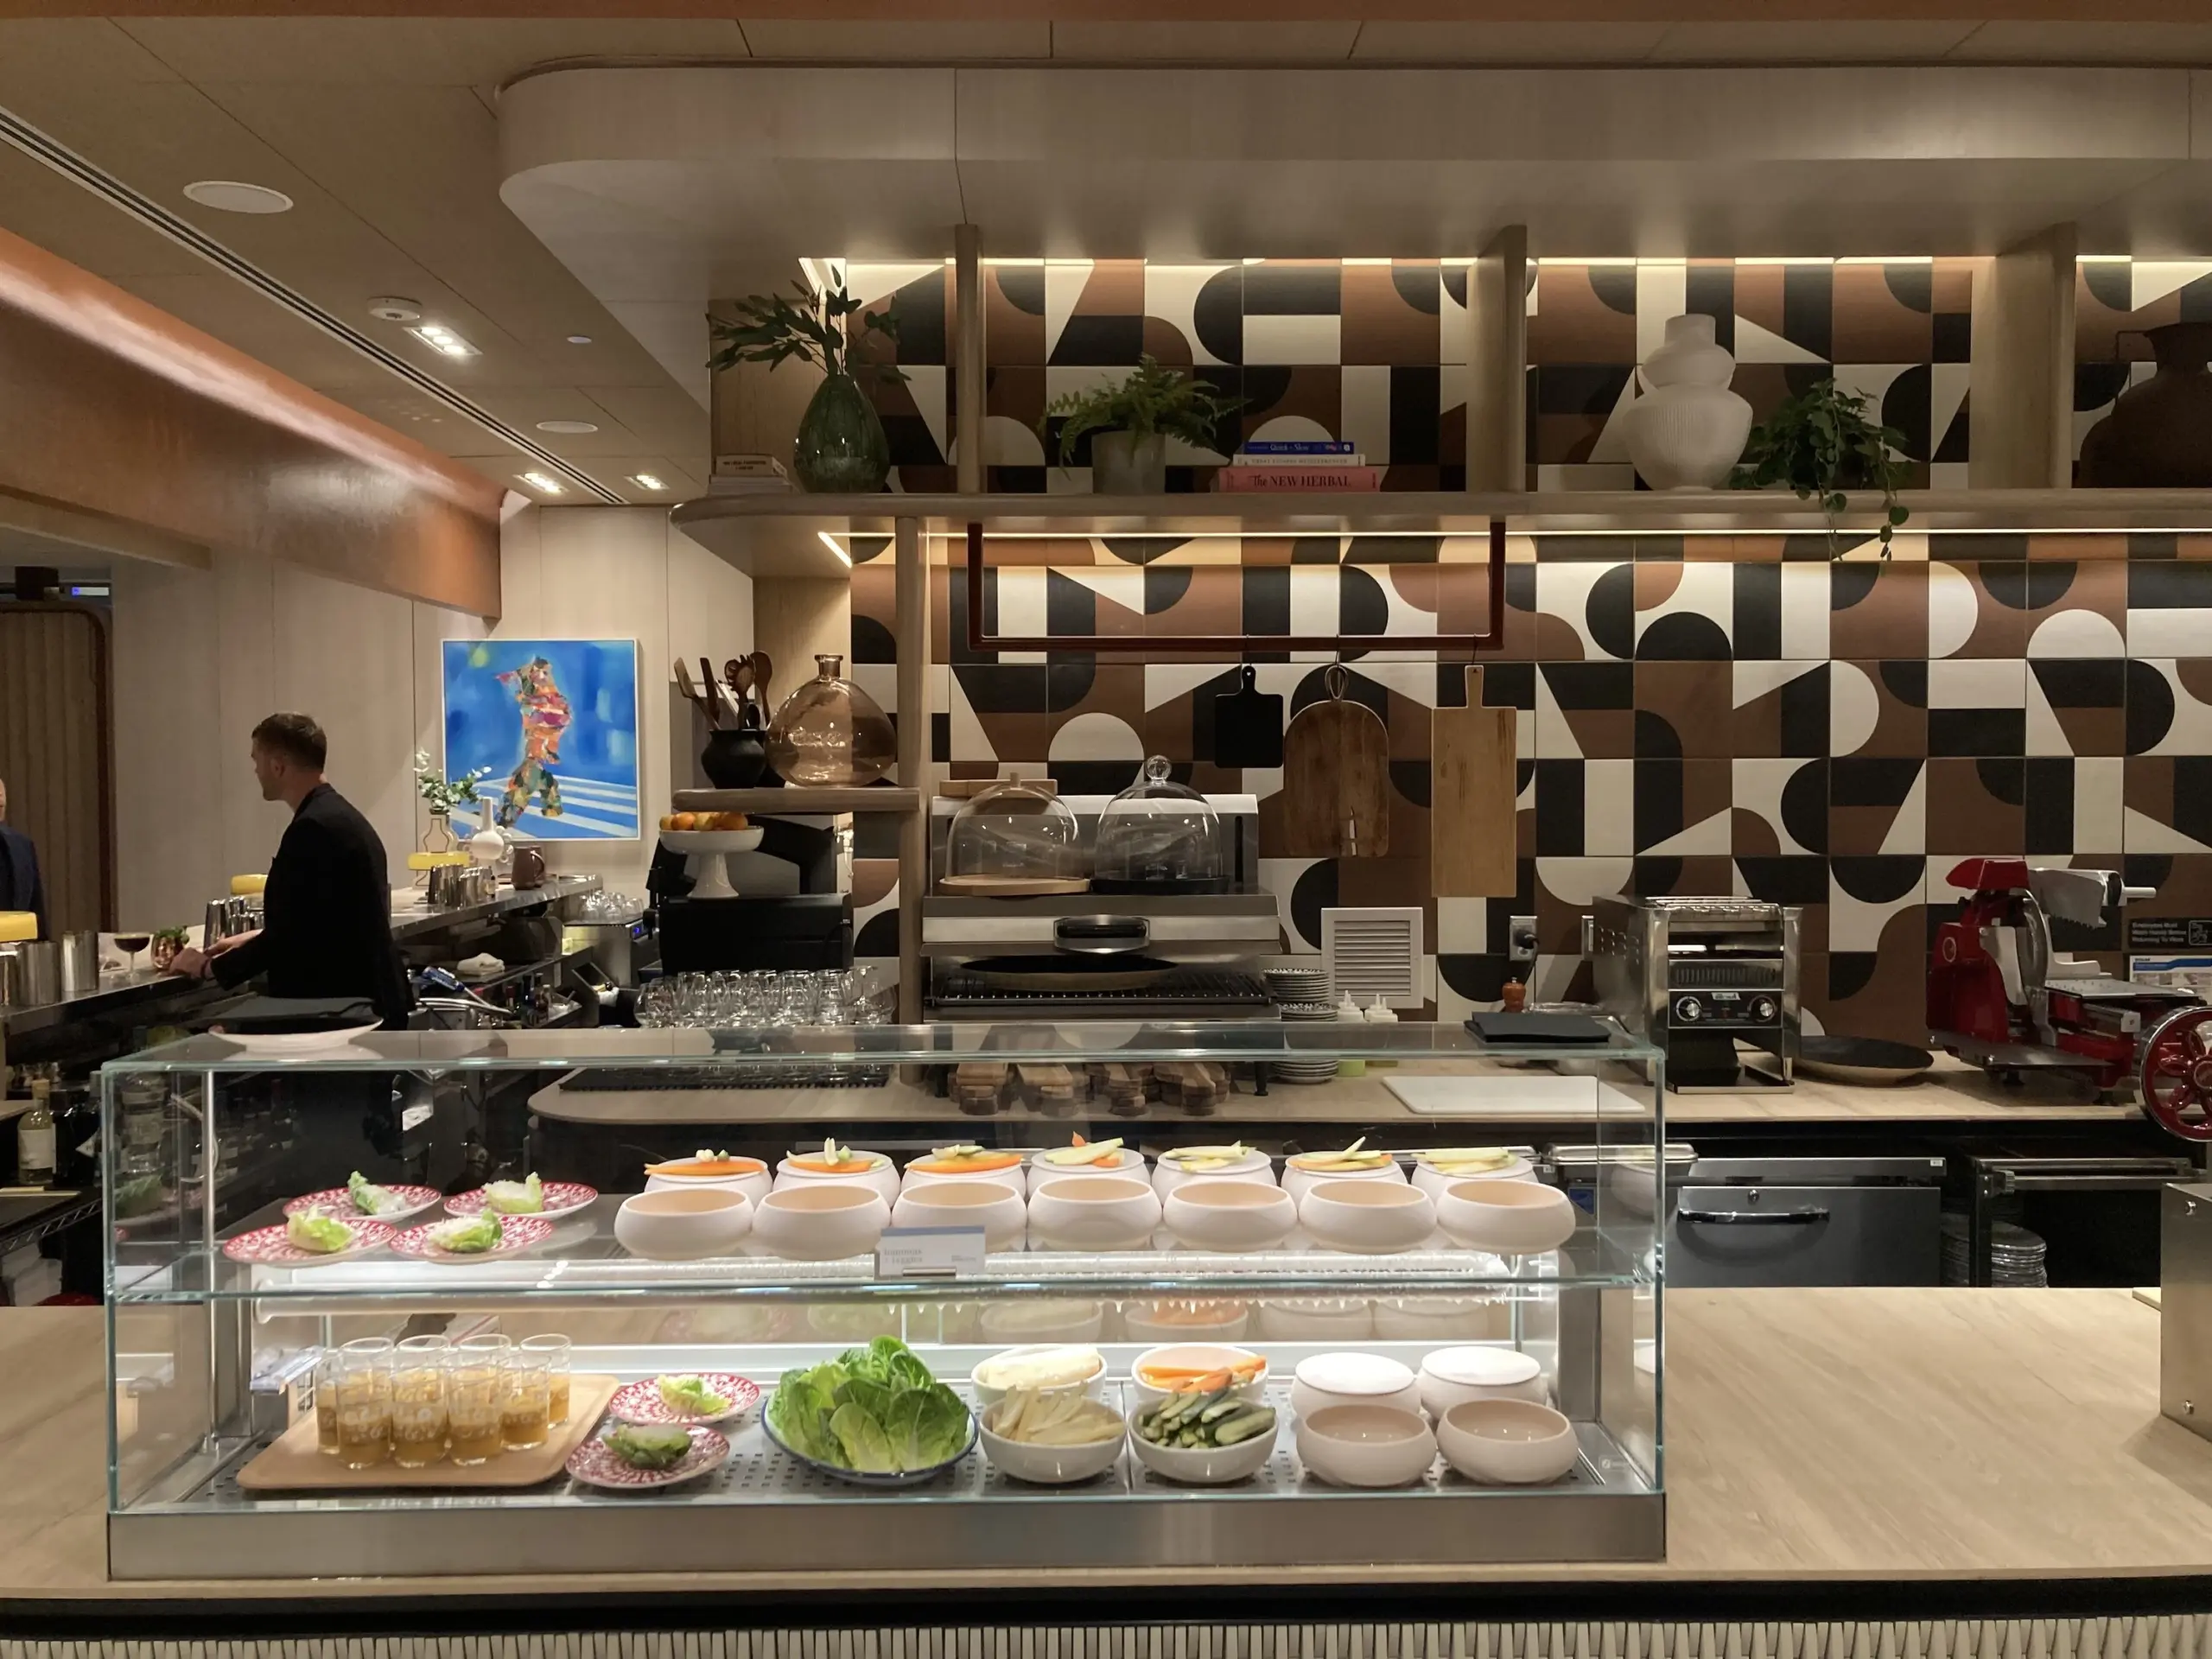
Airport lounge buffet station with staff plating food
The Bathroom Problem at Every European Lounge
I want to be specific about this because nobody else seems willing to be. The European lounges I have used, including Lufthansa Senator at Frankfurt, British Airways Galleries at Heathrow Terminal 5, Air France at Paris Charles de Gaulle, and KLM Crown at Amsterdam Schiphol, all have bathroom doors and stalls that are noticeably narrower than US lounges. The Heathrow T5 lounge bathroom stalls measured at 24 inches of interior width when I traveled through last year, which is several inches less than the US standard. The shower facilities in European lounges are often partitioned into very narrow stalls with little room to turn around.
The workaround for plus-size travelers transiting Europe is to use the gate-area family restrooms or the airport’s main bathrooms before entering the lounge, and to time your needs accordingly. This is not a perfect solution. It is the solution that exists right now. The longer-term fix is for European carriers to renovate, and there is no indication that they intend to.
What to Pack for a Long Lounge Layover
A compression refresh kit lives in my carry-on for any layover longer than three hours. This is a clean pair of compression leggings or shorts, depending on what I am wearing, and a small bottle of body powder. If you are larger and you have been sitting on a plane for five hours, changing your compression layer in the lounge bathroom before your next flight is the difference between getting off the second plane feeling human and getting off feeling broken.
A change of underwear, always. Long-haul travel is sweaty work, and lounges are one of the few places where you can change in privacy.
The snack situation is worth planning for. Lounge buffets, especially the smaller Priority Pass lounges, often run out of food or have limited options if you have any food restrictions. I pack a few protein bars and a bag of mixed nuts as backup. The Bureau of Transportation Statistics reported that around 20 percent of US domestic flights experienced a departure delay in 2024, and if you are stuck in a lounge for longer than expected, having your own food matters.
Charging cables that work with European outlets are essential if you transit Europe regularly. Most premium lounges in dual-voltage configurations now have USB-C ports built into the seating, but I still pack a Type C to Type G adapter and a Type C to Type F adapter, plus my regular USB-C cable. The lounges in Schengen-zone airports tend to have Type F outlets. The UK uses Type G. Knowing this in advance saves you from having to ask the lounge agent for an adapter, which they may or may not have.
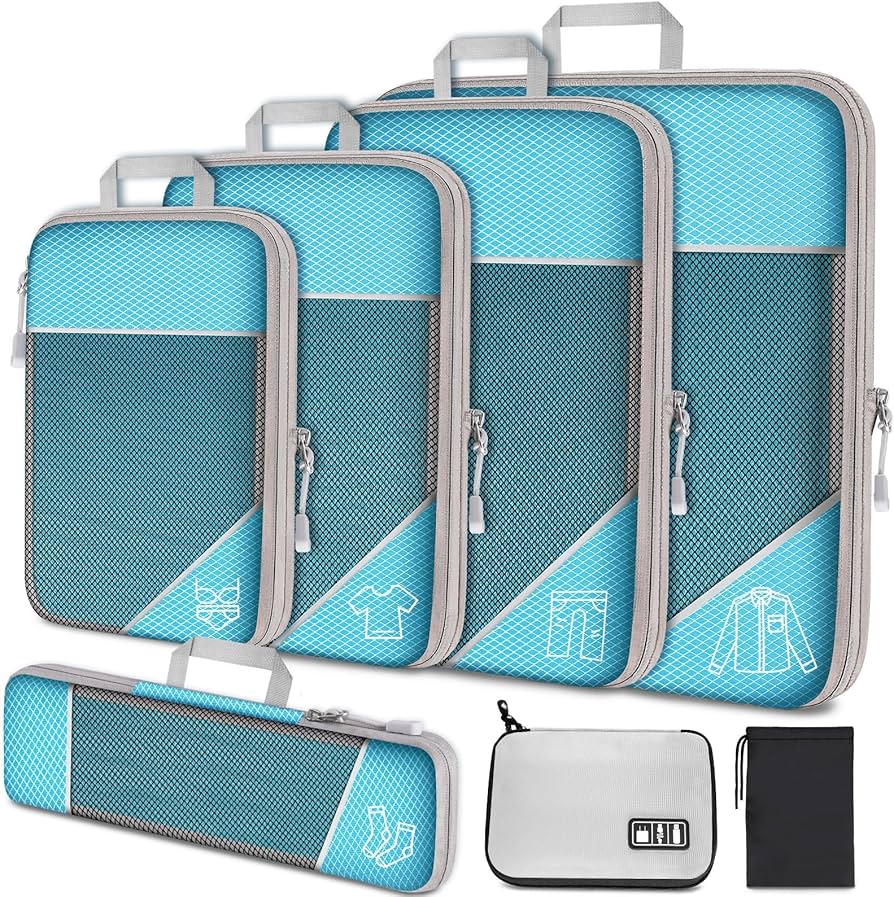
Organized carry on bag with compression wear and chargers
The Etiquette of Being a Visibly Fat Traveler in a Quiet Lounge
I am going to say this with the kindness it requires. There is no etiquette obligation specific to fat travelers in lounges. We are allowed to take up space. We are allowed to use the chairs that fit, even if that means asking to move from the first chair the host points us to. We are allowed to use the accessible stall when the standard stalls do not work for our bodies. We are allowed to ask for a tray at the buffet. We are allowed to be there.
What I have learned over the years is that asking quietly and confidently for what I need almost always gets me what I need. The hosts at premium lounges are trained in hospitality. They will move you to a different seat. They will plate your food. They will tell you which bathroom is more accessible. If you ask without apology, they will respond without judgment. The exceptions exist. They are rare.
The harder part is the other travelers, the ones who look at you the way some people look at any visibly fat body in a premium space. I have learned to make eye contact, smile, sit down, and proceed with my day. The lounge is a paid or earned amenity. You are there because you have access. That is the only credential that matters.
What an Actually Plus-Size-Friendly Lounge Looks Like
The argument I want to leave you with is this. Airport lounges were built for the body of a business traveler that the airlines assumed in 1985, and the lounge experience for a size 24 traveler in 2026 is a series of accommodations the airlines have not made. The 19-inch club chair, the narrow bathroom door, the buffet reach, the cramped shower stall, these are not accidents. They are the residue of design decisions that did not consider us. The work of being a fat traveler in a premium space is, in part, the work of compensating for that residue.
An actually plus-size-friendly lounge would have a published seating mix with at least 30 percent armless or wide-arm seating, bathroom doors and stalls at 36 inches of clear width, attended buffets or food-hall service models, shower stalls with at least 5 feet of interior dimension, and dining tables with chair clearance generous enough that you can pull your seat in without scraping your hip on the table edge. It would have a host trained to ask, not assume, what kind of seating each guest prefers. It would have a wellness room with a chair that fits a larger body. It would have published specifications, the way some hotels have started to publish accessibility specs for their rooms.
The two American lounges that come closest to this are the Centurion Lounge at Las Vegas Harry Reid and the Capital One Lounge at Washington Dulles. They are not perfect. The Centurion bathroom doors are 32 inches, not 36. The Capital One showers are smaller than the Polaris suites. But the seating mix in both lounges, the staffed food service, and the overall design awareness make them the two spaces in the US where I have walked in and not had to plan around my body. That is what a good lounge feels like. I want more of them.
Somewhere over Greenland, on a Delta 767 from JFK to Rome, I was sitting in seat 27B in a navy wool-blend dress that had seemed so smart in the Uber at 4 a.m. By the time we hit cruising altitude over the North Atlantic, the dress was soaked through under both arms, my ankles had swollen up tight against the leather strap of my Birkenstock Madrids, and the cabin temperature had dropped what felt like 18 degrees off the ground temperature at JFK. I had the airline blanket folded in my lap because I had not packed a sweater, and I had four more hours to go before we started our descent into Fiumicino.
That was the flight I decided long-haul outfits were not a question of what to wear. They were a system. A set of rules. Once I figured out the rules, I could stop reinventing the wheel every time I booked a long flight, stop landing in a new city looking and feeling like I had been wrung out and hung to dry. Below is the system – the chafe layer, the swelling layer, the temperature layer, plus three specific formulas I have actually worn on actual flights in three different bodies.
The chafe problem (and why your favorite fabric is making it worse)
Thigh chafe on a plane is not a moral failing. It is friction plus moisture plus eight hours of not being able to get up and walk it off. The skin gets warm, the fabric grips, and somewhere between hour three and hour five you realize the inside of your thigh is on fire. Same goes for under-bust chafe, underarm chafe, and the line where a waistband sits if you have any belly softness at all.
The fabrics that make it worse, in my experience after roughly forty long-haul flights: anything 100% cotton (it holds sweat against your skin and never dries in a pressurized cabin), denim of any kind (seams plus rigidity equals raw skin by hour two), wool blends that brush the inner thigh, and most synthetic activewear that has any kind of grippy interior, like a brushed liner. Lululemon’s Align fabric is wonderful for yoga but it will not save you on a 12-hour flight if your thighs touch, because the nylon-elastane mix gets sticky once it gets damp.
What helps: smooth, fluid fabrics that move with you instead of clinging. Viscose, modal, Tencel lyocell, light merino, and the soft viscose-linen blends Eloquii has been doing for the last few years. They breathe, they release moisture instead of trapping it, and they do not develop that velcro feeling when they get damp.
What also helps, and what I now will not fly without: a real anti-chafe product applied before I leave the house. The original BodyGlide stick (about $8 at any drugstore) is the gold standard. It is a solid balm in a deodorant-style tube, glides on dry, does not stain fabric, and lasts roughly six hours on me. Megababe Thigh Rescue (~$14, the green tube) is a creamier version with coconut oil and aloe in it, and it smells faintly of lavender, which is nice when you are crammed into 27B. For longer flights I also pack a small jar of Lush Silky Underwear in the talc-free version, which is essentially a cornstarch-based powder you tap on at the gate bathroom for a hard reset around hour six. None of these will fix a chafe situation that has already gone raw, so the rule is apply before, not after.
The swelling problem (and the compression numbers that actually matter)
Cabin pressure plus eight hours of not moving plus gravity equals ankles that look like someone else’s ankles. This is not a plus-size problem specifically, but it does interact with plus-size bodies in a particular way, because we tend to already retain water around the calves and ankles, and a long flight will compound it. The first time I landed in Bangkok after a 14-hour flight and could not get my shoes back on, I knew something had to change.
The fix is graduated compression socks, and the numbers matter. Most cute “travel socks” sold at airport newsstands are around 8-15 mmHg, which is essentially a snug sock. For flights under four hours, that is fine. For anything over six hours, you want a minimum of 15-20 mmHg. For anything over ten hours, or if you have any history of swelling, varicose veins, or a body weight that puts more pressure on the venous system, I personally wear 20-30 mmHg, which is medical-grade and what most flight attendants I have talked to wear on long-hauls.
The plus-size sock question is real. Most compression brands top out at a calf circumference that does not work past a US 14, and a sock that cuts into your calf is actually worse than no sock at all because it constricts blood flow above the compression zone. The three brands I have found that genuinely work on bigger calves:
Comrad
has the most generous plus-size sizing of any compression brand I have tried. Their Large Wide Calf option fits roomy calves comfortably (their size chart kicks in past about 17 inches at the widest point) and they come in 15-20 and 20-30 mmHg. The CloudCotton blend is what I fly in.
Sockwell
makes a merino-bamboo blend in 15-20 mmHg that is softer than Comrad but tops out at about an 18-inch calf. Good for shorter flights or smaller calves.
Vim & Vigr
has the prettiest patterns and a moisture-wicking nylon version that is great if your feet sweat. Plus-size sizing goes up to about a 19-inch calf.
Put them on before you leave the house, not on the plane. The reason is gravity: once your legs have been hanging down for two hours in an Uber and a TSA line, the swelling has already started, and trying to wrestle a 20-30 mmHg sock onto an already-swollen leg in an airplane lavatory is its own form of suffering.
The cabin temperature problem (a 22-degree variance, in one outfit)
The jet bridge at JFK in August is 90 degrees. The cabin at 35,000 feet is somewhere between 65 and 72. Add or subtract for which airline (Delta runs warm, United runs cold, most European carriers run cold-to-frozen), where you are sitting (over the wing tends to be warmer, by a galley or exit row is colder), and how many bodies are around you (a full cabin is warmer than a half-empty one).
You are dressing for a 22-degree variance, sometimes more, in the same outfit. The way to do that is layers that you can put on and take off without doing the whole get-up-and-go-to-the-bathroom routine, because in a packed economy cabin you cannot count on getting to the bathroom whenever you want. So the layering has to happen in your seat.
My layer order, from skin out: smooth seamless underwear, then a soft tee in modal or viscose, then a pull-on stretch pant with no rigid waistband, then a cardigan or wrap I can drape across my chest like a blanket, then a packable jacket I can use as a pillow or pull on for the descent. The two pieces that change everything are the wrap and the jacket. They need to be lightweight enough to stuff in the personal item, warm enough to handle a cold cabin, and easy to take on and off while seated.
Formula 1: Short-haul casual (under 4 hours)
This is your JFK to Miami, your Lagos to Accra, your Heathrow to Barcelona. The flight is short enough that the swelling and chafe risk is lower, but you still want to land looking like you have your life together.
Pant:
Old Navy PowerSoft jogger (their high-waisted version in a dark heather) or Universal Standard’s Smart Signature ponte pant. Both have a smooth interior waistband, no zipper, and enough give that you can eat the entire snack box without unbuttoning anything.
Top:
Quince modal-cotton tee in a darker color. The modal blend is breathable, does not show sweat at the underarms the way pure cotton does, and runs true to size up through 3X.
Sweater:
Madewell Transport tote sweater, which is a coatigan-style cardigan that doubles as a blanket. Cotton-wool blend, so it breathes but holds heat.
Shoes:
Clean white sneakers, ideally Veja Esplar in the extended sizing that goes up to a US 12 women’s. They are leather, so they wipe clean in an airport bathroom if you spill, and they look intentional with whatever you change into at your destination.
Compression:
15-20 mmHg Comrad ankle-high if you swell, or nothing if you do not.
Formula 2: Long-haul economy (8-15 hours)
This is the one that took me years to figure out. JFK to Rome, LAX to Tokyo, Lagos to Atlanta. You are going to be in this outfit for fifteen-plus hours door to door, you are going to sleep in it (badly), and you are going to land and need to function. Every piece has to do double duty.
Pant:
Eloquii pull-on wide-leg pant in their viscose-linen blend. No waistband to dig in, the fabric breathes, and the wide leg means nothing is touching your thighs when you cross your legs in a tight seat. They wrinkle, but in a way that looks intentional, not like you slept in them. Which you did.
Top:
A soft modal-spandex boatneck tee (the Spanx AirEssentials boatneck or the Lou & Grey signature soft tee both work) tucked loosely. The fabric holds shape through twelve hours of sitting without bagging at the elbows.
Wrap:
Quince Mongolian cashmere wrap, the big one (the 100% cashmere travel wrap is about $90 and worth every cent because it doubles as a blanket, a pillow, and a cardigan). It packs down to the size of a paperback in your personal item.
Shoes:
Allbirds Tree Runners in a half-size up from your normal. The eucalyptus fiber breathes, they slip on and off without bending over (which you cannot do in 27B anyway), and the cushioning holds up to a sprint through the Frankfurt connection.
Compression:
Comrad 20-30 mmHg wide-calf, in merino, worn under a thin cotton crew sock so the compression sock does not show when I take my shoes off at the gate. This is non-negotiable on anything over eight hours.
Anti-chafe:
BodyGlide on the inner thigh, under-bust line, and the back of the heel, applied before I leave the house. Megababe in the personal item for a top-up at the layover.
Formula 3: Premium cabin (any duration)
If you are flying business or first, or if you are flying coach but on the way to something where the airport lounge or the arrivals photo matters, you want the formula that reads “put-together” without sacrificing any of the comfort. Honestly this is also what I wear when I am picking up a rental car at a small European airport and need to look like I belong there.
Pant:
A ponte slim-straight with a wide soft waistband that does not bite (Universal Standard’s Smart Signature Ponte in the slim cut is the go-to) or Anthropologie Pilcro slim straight in stretch sateen. The Pilcro goes up to a 24W in some washes.
Top:
Lou & Grey signature soft tee, long-sleeve crew, in a neutral. The fabric has enough drape that it reads dressier than a regular t-shirt, but it is still essentially pajamas.
Layer:
Loft drapey blazer in a knit fabric. Not a real structured blazer, which will wrinkle, but a softer knit version that you can roll up and stuff in the seat-back pocket.
Overshirt:
The Sleeper pajama-style overshirt (the linen one) doubles as a long cardigan in the cabin and a beach overshirt when you land. It is not cheap (around $290) but it has earned its keep for me on roughly twenty long-hauls.
Shoes:
Vionic Joey loafer. The arch support is genuinely orthopedic, they read as actual shoes (not slippers), and they slip on and off at security without bending. Vionic goes up to a US 12.
Compression:
Same Comrad 20-30 mmHg, in a black merino so they read as regular trouser socks.
The underwear question (and why I changed my answer)
For years I flew in an underwire bra because I felt unsupported without one, and I would land in Rome with two perfect red welts under my breasts that took 48 hours to fade. I now will not fly in an underwire on anything over four hours. The cabin pressure plus the seated position pushes the wire into the under-bust crease in a way that creates pressure sores. Real pressure sores. Ask any flight attendant.
What works for me now: a supportive wireless or soft-wire bra, not a thin lace bralette. The CUUP Plunge in the modal version (which scales up to an H cup in the larger band sizes), the Knix Catalyst wireless bra (supportive enough for a G cup, comes in plus sizing), or the Soma Embraceable wireless. All three give me enough shape that I do not feel naked under a tee, and none of them leave marks.
Going without a bra entirely is also a real option, particularly under a wrap or blazer, and I have done it on red-eyes more times than I will admit. The point is not the specific answer, it is that an underwire is not a hill worth dying on for a fifteen-hour flight.
For the bottom half: seamless boyshorts in a smooth microfiber, not lace. Anything with elastic at the leg opening will dig in once you sit for a few hours. The Knix leakproof boyshort is my flying default because it also handles a surprise period start, which has happened to me twice over the Atlantic and both times I was grateful.
What goes in the personal item
The personal item is not for stuff you might want. It is for stuff you will need within six minutes of feeling uncomfortable. Mine, every flight:
The Quince cashmere wrap (already out, on my lap before takeoff)
A second pair of socks, thick cotton, for when my feet get cold inside the compression socks
BodyGlide travel size and a small tin of Megababe
A change of underwear (one pair, sealed in a small ziplock)
A toothbrush, toothpaste, deodorant, face moisturizer (the Cerave travel size), and a lip balm
A reusable water bottle, filled after security
One snack you actually want to eat (almonds, a Larabar, dried mango), not whatever the airline is giving you
Phone charger plus a battery pack, because the seat outlet is broken on roughly half the flights I have been on
Glasses if you wear contacts (the cabin air will dry them out by hour three)
The transit-ready rule
Here is the test I run on every long-flight outfit before I leave the house. If the plane landed early and I had to walk straight from baggage claim to a meeting, or to a train, or to a hotel check-in with people behind a desk, could I do it without changing? Not look magazine-photo perfect. Just walk in, hand over an ID, and not feel like I had to apologize for my body or my clothes.
That is the rule. Transit-ready. It rules out anything I would be embarrassed to be photographed in, anything that wrinkles into a topographic map, anything I cannot walk a mile in (because Heathrow and Atlanta and Frankfurt are functionally a mile each from gate to exit), and anything I am going to have to sneak into a bathroom to swap out before I face another human.
The opposite of transit-ready is what I had on that Delta flight to Rome, in the wool-blend dress and the leather-strap sandals, when I landed at Fiumicino at 7 a.m. and had to ride a train into the city and could not bring myself to walk into the hotel until I had stopped at a cafe and splashed cold water on my face in the bathroom. I lost an hour of my first morning in Rome to recovering from my outfit. I will not lose another one.
The goal of a long-flight outfit is not to look chic in the security-line selfie. It is to land in Rome, Lagos, Bangkok, or LAX and walk straight off the plane and into the city without first locking yourself in an arrivals-hall bathroom to change. What makes that possible is not luck and not genetics. It is the right fabric against your skin, real compression on your legs, a wrap you can put on without standing up, anti-chafe applied before you ever set foot on the jet bridge, and shoes you can run through a connection in. Build the system once. Then every long flight after that is just packing.
It was June 2024, mile 187 on I-26 East, somewhere between the Georgia state line and the Charleston exit signs that promise marsh views in another hour. My sister was driving the Toyota Camry we had rented in Atlanta. I was in the passenger seat. And the seat belt was cutting into my ribs at the diagonal so sharply that I had been shifting position every four minutes for the last forty miles, trying to get the strap to sit anywhere other than across the top of my left breast and under my right armpit.
That was the moment. Not a dramatic one. No tears, no pulling over. Just the quiet, specific realization that the seat belt geometry in a 2023 Toyota Camry, like the seat belt geometry in basically every car sold in America, is engineered for a male body that is 5’10, 175 pounds, with a flat chest and a narrow torso. My body is none of those things. I am 5’4, size 18, with a high bust and the soft-tissue distribution that comes with being a Black woman who looks like every woman in my family for three generations back. The belt was not designed for me. It was designed around me, the way the entire road-trip industry has been designed around me for the last hundred years, and I was just supposed to suck it up.
I am not going to suck it up. Neither should you. Road trip discomfort for plus-size women is not a personal failing. It is a solvable engineering problem. About eighty dollars of pre-trip gear and a four-stop hydration protocol fixes most of it. The rest is knowing which snacks actually carry you through hour five without a sugar crash, which compression socks prevent the deep vein thrombosis risk that is genuinely higher for our bodies on drives over four hours, and which outfit lets you slide out of a car at a rest stop without feeling like you have been folded into origami. This is the engineering solution. I have driven Atlanta to Charleston, NYC to DC, LA to San Francisco, and Portland to Seattle in the last eighteen months. Everything in this guide is something I have actually tested on my actual body.
The Seatbelt Geometry Problem and the Twenty-Dollar Fix
Here is the thing nobody tells you. The diagonal strap of a standard three-point seat belt is anchored at a point above and behind your left shoulder, and it runs across your torso to a buckle on your right hip. That diagonal angle is calibrated for a torso that is taller than it is wide, with the chest mass low and flat. If you have a high bust, a fuller midsection, or anything resembling soft tissue at the size-18-and-up range, the strap does not sit across the sternum the way it was designed to. It rides up onto your throat, slices across one breast, or buries itself into the soft tissue under your arm. None of those positions are safe in a crash, and all of them are miserable for six hours.
The Insurance Institute for Highway Safety has analyzed this gap repeatedly. In police-reported tow-away crashes, women are roughly twenty to twenty-eight percent more likely to be killed on a per-crash basis than men, and a 2019 University of Virginia study put the female-occupant frontal-crash injury odds at about seventy-three percent higher than a comparable male occupant. The safety equipment was developed and tested on male-bodied dummies for decades. The plus-size female body is even further outside the design envelope. So this is not in your head. The car was not built for you.
The fix is a seatbelt shoulder adjuster, the small clip that attaches to the diagonal strap and reroutes the angle so it hits your shoulder correctly instead of your neck or your chest. Generic versions run roughly $10 to $20 on Amazon. I keep one in the glove compartment of every rental car I drive. It takes about ten seconds to install, it does not interfere with the buckle releasing in an emergency, and it is the single highest-return purchase I have ever made for road comfort. Look for one that explicitly says it does not interfere with retraction and is rated for adult use. If you take nothing else from this article, take this.
The Lumbar Problem and the Thirty-Five-Dollar Fix
Car seats are also engineered for a body that is not yours. The lumbar curve on a standard sedan seat is shallow, the cushion depth is too short for thicker thighs, and the seat back angle assumes you have very little soft tissue between your spine and the upholstery. After two hours, your lower back is screaming. After four hours, you cannot feel your tailbone.
The Everlasting Comfort Memory Foam Lumbar Cushion is thirty-five dollars and it is the highest-rated lumbar support for plus-size bodies on every forum I have read in the last two years. It has a strap that loops around the seat back, so it stays in place when you shift. The contour is deep enough to actually fill the gap behind your lower spine, which is the whole point. I bought one in October 2023 and I have not done a long drive without it since.
If you have hip issues on top of back issues, add a Tempur-Pedic gel seat cushion under your sit bones. It is closer to sixty dollars and it is worth every penny on drives longer than three hours. The combination of lumbar support behind and gel cushion below changes the angle of your pelvis just enough that your lower back stops bearing the full load of the drive. I noticed the difference on the Portland to Seattle run last summer. Three hours, no back pain, which had never happened to me before.
The Bladder Problem Nobody Wants to Talk About
Plus-size women have a complicated relationship with road-trip hydration. Drink too little water and you arrive dehydrated, with a headache and stiff muscles. Drink enough water and you need a bathroom every fifty miles, which on rural stretches of I-95 or I-5 means white-knuckling it to the next gas station. There is also pelvic floor pressure to consider, which gets worse with the vibration of a long drive.
My protocol now is electrolyte timing. I drink eight ounces of water with a scoop of Skoop electrolyte powder when I get in the car, and then I sip slowly for the next ninety minutes. Electrolytes mean my body actually absorbs the water instead of running it straight through. I do not drink coffee in the first two hours. I save caffeine for the energy dip around mile 200, paired with a real meal stop. This protocol means I need a bathroom every two hours, not every forty minutes, and I arrive hydrated.
Compression bladder support garments are also worth considering for the long-driver. I am not going to pretend everyone wants to talk about this, but the vibration of a six-hour drive is hard on pelvic floor tissue, and a light compression brief from Knix or Thinx adds support without being uncomfortable. Sister told me about Knix last year. She was right.
##
The Ninety-Minute Rule Is About Your Heart, Not Just Your Legs
This is the section I want every plus-size woman to read twice. The CDC, the American Heart Association, and the World Health Organization have all flagged elevated deep vein thrombosis risk in long-distance travelers, with body mass index above a certain threshold listed as a contributing risk factor on trips over four hours. DVT is a blood clot that forms in the deep veins of the leg, usually after long periods of immobility. It can be fatal if it travels to the lungs. The risk is real, it is statistical, and it is preventable.
The prevention protocol the major cardiology organizations agree on is not complicated. Stand up and walk for five minutes every ninety minutes. Flex your calves while seated. Stay hydrated. Wear graduated compression socks on any drive longer than four hours. That is the whole protocol. The hardest part is convincing yourself to actually pull over when you are seventy miles from your hotel and the sun is about to set.
I now set a ninety-minute timer on my phone at the start of every drive. When it goes off, we find an exit within five miles, we get out, and we walk around the rest stop or gas station parking lot for five full minutes. I do calf raises. I do the standing forward fold I learned from my yoga teacher in Atlanta. I drink more electrolyte water. We get back in the car and reset the timer. The drive takes about twenty minutes longer than it would otherwise. I am alive and have functioning circulation when I arrive. The trade is obvious.
The Snack Stack That Actually Carries You
Gas station snacks are an enemy of the long drive. Refined sugar gives you forty minutes of energy followed by a crash that makes you want to nap behind the wheel. Salty processed corn gives you instant bloat. The candy aisle is not your friend on hour five.
My pack-from-home stack is Sahale snack mixes for the slow-release protein-fat combination, Premier Protein shakes for breakfast or the mid-afternoon energy dip (thirty grams of protein, one hundred sixty calories, you actually feel full for two hours), and Skoop electrolyte packets for the water bottle. I also bring a bag of Trader Joe’s roasted unsalted almonds, two apples, and a sleeve of those Fage three-percent yogurt cups in the cooler if we are starting before nine in the morning. That stack costs about twenty-five dollars and it lasts a two-day round trip. The math is much better than ninety dollars of gas-station impulse buys that leave you feeling worse.
One specific Premier Protein math. A thirty-gram protein shake plus a handful of almonds plus an apple is roughly four hundred calories and forty grams of protein. That stack carries me from mile zero to mile two hundred without a real meal stop. When I do stop for a meal, I am not ravenous, so I order something reasonable instead of the entire menu of a Cracker Barrel.
The Outfit, Built for Twelve Hours in a Seat
The outfit math for a plus-size road trip is different from the outfit math for a flight or a day out. You need fabric that does not pinch when you sit for hours. You need shoes that you can slip on and off. You need layers because the car will be cold when your sister is driving and warm when you are driving, and the climate control vote will go to whoever is awake.
My standard kit is a Spanx pull-on travel skirt for any drive in summer, a Quince modal tee, an Allbirds Tree Runner, and a pair of Comrad knee-high graduated compression socks for any drive over four hours. A good pull-on travel skirt with a wide elastic waistband is the only kind that does not ride up when you sit, and it has enough stretch that you can sleep in it in a hotel and look fine in it at a roadside diner. The Quince modal tee breathes and does not show sweat. The Tree Runners are wool so they do not stink on day two. The Comrad compression socks are the fifteen-to-twenty millimeter mercury graduated rating that actually does the work on your circulation.
For winter or cold-climate drives, swap in a pair of Universal Standard ponte leggings, a long Quince cashmere cardigan, and the same compression socks layered under wool socks. The principle is the same. Stretch, breathability, layers, and shoes you can take off at hour three when your feet swell.
Night Driving Versus Day Driving
I prefer day driving for trips under six hours and a split schedule for anything longer. Day driving means you can see the actual landscape, you can stop at the random fruit stand or the historical marker, and you arrive in time to settle into wherever you are staying before dark. Night driving has its uses, mostly when you are trying to avoid traffic on a holiday weekend or when you are crossing a stretch of country that is not particularly scenic. The trade-off is that night driving is harder on your eyes, your stamina, and your judgment about when to stop.
My rule now is no driving after eleven at night unless we have a clear, specific destination within ninety minutes and both of us have slept well. The temptation to push through the last hundred miles at one in the morning has put me in some sketchy gas stations and one memorable wrong exit on I-95 outside Richmond. Sleep is cheaper than a wrong turn.
The Audio Stack for Sister-Trip Energy
The right audio carries a long drive. My current rotation is NPR’s Code Switch for the meaty conversation, Brittany Luse’s “It’s Been a Minute” for the pop-culture take, and a long-form audiobook for the stretch where conversation has run out and we both want to be in our own heads. I rotate music in for thirty minutes after every podcast hour, mostly Brandy, mostly Anita Baker, mostly Solange when the road gets pretty.
The trick with audiobooks on a sister trip is to pick something you both actually want to hear. Last summer we did “Caste” by Isabel Wilkerson on the LA to San Francisco run and I cried somewhere around Paso Robles. That was the right call. The road trip the year before I had picked something neither of us was into, and we ended up listening to the same Aretha album three times because nobody wanted to commit to anything else.
The First-Aid Bag
The must-pack first-aid kit for plus-size road trips is small and specific. BodyGlide for thigh chafe in summer, because anything humid plus a six-hour drive equals friction issues. Melatonin gummies for hotel sleep, especially if you are crossing time zones or sleeping at altitude. Tylenol for the inevitable tension headache. A small tube of arnica gel for any unexpected bruising or muscle soreness. Eye drops because car air conditioning is brutal. Backup phone charger.
I also pack a small ice pack in the cooler for the lower back. On the NYC to DC drive last winter, my sister threw it under her sweatshirt for the last hour and arrived at the hotel without the back spasm she usually gets after long drives. Small thing, big return.
The Four Trips, One Lesson Each
Atlanta to Charleston, June 2024. Five hours forty minutes. The lesson was the seatbelt adjuster. I had not bought one yet and I spent the entire drive shifting position. By Charleston I had a bruise across my collarbone. I ordered a shoulder strap repositioner that night from the hotel.
NYC to DC, December 2024. Four hours twenty minutes if traffic cooperates, six if it does not. The lesson was the compression socks. We hit Jersey Turnpike construction and the drive ballooned to almost six hours. My ankles were swollen when we arrived. I had not worn compression. The next drive I did, I wore them. No swelling.
LA to San Francisco, August 2024. Six hours up the 5, or eight hours up the 101 if you want the coast. The lesson was the lumbar cushion. I did the 101 version, which is gorgeous and worth every minute, but it is a winding mountain drive that fatigues your lower back in a way the straight interstate does not. The Everlasting Comfort cushion was the difference between arriving in Big Sur ready for dinner and arriving ready for a heating pad.
Portland to Seattle, March 2025. Three hours fifteen minutes on the I-5. The lesson was the electrolyte protocol. Short drive, easy weather, but I had a meeting the next morning and I wanted to arrive sharp, not tired. The Skoop hydration plan plus the ninety-minute stretch rule meant I walked into dinner that night feeling like I had not been in a car at all.
What the Industry Needs to Fix in the Next Decade
I am not going to spend the next decade buying seatbelt adjusters and lumbar cushions because the auto industry refused to redesign for bodies that have always existed. The fix is not on the consumer. The fix is on the engineers. Seatbelt anchor points need to be adjustable across a wider range, not just up and down by an inch. Crash test dummies need to model the full distribution of female bodies, including high-bust and plus-size variants, with the same rigor applied to male body types. Car seats need lumbar curves that accommodate the range of human spines that actually buy cars.
Until that happens, we engineer the workaround. We buy the twenty-dollar clip and the thirty-five-dollar cushion and the medical-grade compression socks. We set the ninety-minute timer. We pack the protein and the electrolytes. We arrive whole, not bruised, not swollen, not in pain. That is the engineering solution for now. The structural solution is a longer fight.
The Challenge
Here is what I am asking. Most road-trip discomfort for plus-size women is solvable with about eighty dollars of pre-trip gear and a four-stop hydration protocol. The lumbar wedge, the seatbelt strap repositioner, the compression socks, the electrolyte powder. That is the kit. On your next drive of four hours or longer, try it. Set the ninety-minute timer. Pack the Sahale and the Premier Protein. Wear the Comrad socks. Use the Tysonix clip. Stop every ninety minutes and walk for five.
Then tell us. Tell us if you arrived without back pain for the first time. Tell us if your ankles were not swollen. Tell us if the seatbelt did not leave a mark across your chest. Tell us what you would add to the kit, because I am still building mine, and the next plus-size woman who reads this article will benefit from what you learned. The car was not built for us. We can still build the trip for us. Start with the next four-hour drive and let me know how it goes.
In November 2024 I was in Sayulita, Mexico, for a four-day surf trip with two friends. The rental shop on the cobblestone street that runs down to the main beach was the one our hotel recommended. I had been on a board exactly twice before. The young instructor walked me to the wall of wetsuits, pulled the biggest one off the rack, and held it up. It was a women’s 12. I am a size 18. The zipper closed maybe two thirds of the way up my back. There was a five-inch gap of bare skin from my lower back to my shoulder blades, and the neoprene was so tight across my chest I could feel my own heartbeat through it. He looked at me, smiled with what I think was genuine sympathy, and said, “we’ll make it work.” He zipped it as far as it would go. Three minutes into paddling out, I felt the seam tear along my left shoulder blade with a sound I heard underwater. By the time I made it back to the beach, the tear was the length of my hand. The shop charged me $40 for the damage. The instructor apologized. I sat on the sand and cried in a way that was not really about the wetsuit.
That afternoon in Sayulita is where this article starts, because it is where the lesson started for me. The water sports industry, for almost the entire fifteen years I have been traveling with intention, has built its gear, its imagery, and its rental inventory for an active woman who is a size 8 with visible abs. The rest of us have been told, kindly or unkindly, to make it work. In 2026, that is finally beginning to change. Real brands are now cutting wetsuits in real sizes. Plus-size-specific surf schools exist. Rash guard ranges that go to 4X are no longer one-off marketing experiments. This guide is the audit I wish someone had handed me before I paid for that ripped seam.
Why standard wetsuits fail plus-size bodies
A wetsuit is not loose fabric you slip into. It is a layer of neoprene foam, between 3mm and 5mm thick, that is supposed to compress against your skin and trap a thin sheet of water that your body heats and then keeps warm. The compression is the entire point. Too loose, and cold water flushes through with every movement and you freeze in twenty minutes. Too tight, and it cuts off your range of motion, restricts your breathing, and tears at the seams.
The math on a 5mm wetsuit is unforgiving. Every cubic centimeter of body it covers is being squeezed by foam that was engineered to flex around a body shape the company designed the suit for. When a women’s straight-size suit tops out at a 12 or 14, the company’s design team almost never tested the suit on a 16, 18, 20, or 22 body. They graded the pattern up, which means they scaled the numbers and hoped. Wetsuit grading does not scale gracefully. Chests get wider, but armholes and shoulders do not get proportionally taller. Hips get fuller, but inseams stay short. The result is a suit that pinches at the armpit, gaps at the lower back, and binds at the upper thigh, all at the same time.
The three failure points to watch for are the back zip, the leg cuffs, and the chest panel. The back zip is the most visible because it is where my Sayulita suit failed – on a body the suit was not graded for, the zipper either will not close at all or it closes under so much tension that the seam either side of the zip tears the first time you twist your torso. The leg cuffs are next. On a plus-size body, the upper thigh circumference often exceeds what the cuff was designed to slide over, so you either cannot get the suit on past your knees, or the cuff cinches so tight on your calf that it cuts off circulation. The chest panel is the quietest failure. It will not tear, but it will compress your rib cage enough that taking a deep breath underwater feels like work. That is the suit that ruins your dive without ever announcing why.
What to actually look for on the spec sheet
The spec sheet is where the work is. Almost no brand will tell you “this fits a size 18” on the product page. You have to read the construction details and reverse-engineer it.
Start with thickness. A 4/3mm wetsuit means 4mm panels on the torso and 3mm on the arms and legs. A 5/4/3mm means 5mm on the core, 4mm on the upper legs, 3mm on the lower arms and legs. For most plus-size beginners surfing in water above 60 degrees Fahrenheit, a 4/3 is the right starting point. Five-millimeter suits are warmer but compress harder, and the harder the compression, the less forgiving the fit. If you are diving in cooler water and you need the 5mm, prioritize a front-zip design and seek out brands that explicitly cut for fuller figures.
Next, seams. There are three main constructions. Flatlock seams are stitched flat against the skin, are the cheapest, and let cold water leak through. They are fine for warm water and beginner suits. Glued and blind-stitched seams use glue first, then a needle that does not pierce all the way through the neoprene, which keeps almost all water out. Sealed or taped seams add a strip of tape over the inside of the seam for maximum waterproofing and durability. For plus-size bodies, sealed seams are worth paying for because the seams are the failure point under stretch. A taped seam can survive what a flatlock cannot.
Finally, the zipper. Back-zip suits are easier to put on alone, which matters when you are getting ready by yourself on a rental beach. They are also where most plus-size fit failures happen because the zip has to clear your entire torso under tension. Front-zip and chest-zip suits are harder to get into, but the closure sits on the upper chest where the body is more uniform in width and the tension load is lower. If you have the choice, choose chest-zip. If the brand only offers back-zip in your size, ask if they offer a “back-zip extender” – some do.
The brand audit, label by label
Six brands are doing the work in 2026. I have either worn each of these or dressed friends in them on real trips, and I am ranking them by how honestly they cut for plus bodies, not by marketing.
XCEL Drylock.
XCEL’s Drylock line extends through 3X in women’s, which in their grading runs roughly to a US 22-24. The 4/3 Drylock has glued and blind-stitched seams, a chest-zip closure, and a generous chest panel that does not compress the rib cage the way most straight-size suits do. This is the suit I now own. It is not cheap (the women’s 4/3 runs around $400) but it is the closest thing to a real plus-size surf wetsuit on the US market, and it has lasted eighteen months of regular use without a seam giving way.
Need Essentials.
Australian brand, direct-to-consumer, no middleman markup. Their women’s range now goes to a size 18 in the 3/2 and 4/3, and the cut is more generous than the size label suggests because the Australian grading runs about one size larger than US. Their seams are glued and blind-stitched at a price point ($230-270 USD) that undercuts XCEL meaningfully. The catch is shipping from Australia. Order four to six weeks before your trip. Their customer service is the most responsive of any brand on this list – they will measure-fit you over email.
O’Neill Bahia 4/3 women’s.
O’Neill’s Bahia line extends through women’s size 18 in the 4/3, which is the highest mass-market size on a major brand’s straight wetsuit range. The seams are glued, not taped, and the back-zip design has its known issues for plus bodies, but at $220 it is the most affordable way into a real branded wetsuit that will actually close. If you are between sizes, size up. The Bahia runs small even by O’Neill’s standards.
Rip Curl Dawn Patrol.
Rip Curl’s Dawn Patrol women’s range goes up to XL in the 4/3, which in their grading is roughly a US 14-16. It is the lightest commitment of the major brands – their plus extension is real but modest. I am including it because the rental shops in Costa Rica, Portugal, and Australia stock Dawn Patrol heavily, and if you are a 14 or 16 you have a real shot at finding one that fits on the rack. Below that size range, the Dawn Patrol works. Above it, look elsewhere.
Cressi diving wetsuits.
Cressi is an Italian dive brand and their plus-size range is the most honest on the diving side. Their Lui & Lei 5mm two-piece (the women’s “Lei” cut) goes through a 3X and the two-piece construction is itself a plus-size win – a separate jacket and pants means each piece is sized independently, which solves the “my chest fits but my hips do not” problem in one design move. For warm-water snorkel and shallow dive trips in the Caribbean, this is the suit I recommend.
ScubaPro Definition.
ScubaPro’s Definition Steamer extends through 4X in women’s in the 5mm and 6.5mm, which is the largest size range available on any major dive wetsuit in 2026. The cut is engineered specifically for fuller chests and wider hips with stretch panels at the lower back and inner thighs. The price is steep ($550-700) but for serious divers, this is the suit. It is also the only mass-market dive suit I know of that comes in a “tall” cut as a separate option, which matters if you are over 5’8″.
Rash guards, water leggings, and the layer that prevents the worst part
A rash guard is the layer that decides whether you finish the day with skin or without it. Salt water plus board wax plus repeated friction on the inner thighs, the underbust, and the lower back is a recipe for raw skin within about ninety minutes. For plus-size bodies, the rash guard problem is the same as the wetsuit problem: most are graded to a size 12 and stop. The brands that have extended their ranges are the ones to know.
Carve Designs has been the quiet leader here for the better part of a decade. Their women’s rash guards go to 3X, the long-sleeve fit is generous through the bust and the arms, and the fabric is a UPF 50+ four-way stretch that holds its shape through repeated salt water exposure. Their water leggings, which are the lower-body equivalent of a rash guard, go to a 3X waist and a length that actually reaches the ankle on women over 5’6″. A Carve rash guard and a pair of their water leggings is what I wear under a thinner wetsuit in warm water, and over my swimsuit when I am snorkeling in the Caribbean and want sun coverage. The fabric does not pill, does not fade after a season, and dries in about twenty minutes on a beach towel.
prAna Mahala is the second name to know. Their Mahala swim collection includes a rash guard that goes to 3X and a pair of swim shorts that reach mid-thigh, both in a recycled nylon that holds up. The cut is slightly more relaxed than Carve, which I prefer for a snorkel day where I am not paddling hard. The Mahala line also comes in patterns and colors that look like beachwear, not athletic wear, which matters more than it should when you are getting on and off a boat in front of people.
Athleta Kata Bralette and the Athleta water swim leggings line are the third pillar. Athleta’s plus-size extension goes through a 3X, and the Kata bralette is the only built-in-bra rash guard alternative I have found that actually supports a DDD-and-up chest in the water. For surf days where I am taking the rash guard on and off, the Kata layered under a regular long-sleeve rash top is the combination I trust. The water leggings are cut shorter than Carve’s, which works better in warmer water but is less protective from sun on a long day.
Board shorts again, briefly
Board shorts are the underrated piece of the kit. For surf days where the water is warm enough to skip the wetsuit, board shorts plus a rash guard plus a swimsuit is the standard layering. The plus-size board short market in 2026 is still thin compared to rash guards, but two brands have done real work. Maaji’s plus-size swim collection includes board shorts that go to 3X, sit at the natural waist (which matters – low-rise board shorts on a plus body roll down the second you paddle), and have a real drawstring that holds. Swimsuits For All has a board short under their Curve label that goes through a 22/24 and runs about $40, which makes it the most affordable plus board short on the market. The fabric is heavier than Maaji and dries slower, but it survives chlorine and salt water both.
If you are between sizes on board shorts, size up and trust the drawstring. The wrong move is to squeeze into a smaller pair “because I will lose weight before the trip.” You will not. You will sit in the parking lot of the surf shop trying to button them and then either cry or skip the lesson. I have done both.
Snorkel masks, fin sizing, and the gear nobody talks about
The pieces of water sports gear that are not the wetsuit get less attention but cause as many problems. Snorkel masks are sized to face width, not body size, but fuller faces and rounder cheekbones genuinely do not seal well to a standard mask. Cressi’s F1 Frameless and the ScubaPro Synergy 2 both come in a wider face cut that fits cheekbones the regular mask leaks around. If you have spent a snorkel trip with water trickling into your mask every thirty seconds, the mask is the problem, not your face. Ask the dive shop for a wide-face option specifically.
Fins are the other quiet issue. Fin sizing scales to foot length, which is fine, but the foot pocket on a closed-heel fin is also cut for a particular foot width and ankle circumference. Plus-size bodies often have slightly wider feet and proportionally fuller calves, and a fin that fits the length will sometimes cut into the top of the foot or the lower calf. Open-heel fins with adjustable straps and a separate dive bootie are the workaround. The bootie pads the foot, the strap adjusts to your actual ankle, and the fin does its job without leaving bruises. ScubaPro Seawing Nova and Cressi Reaction Pro both come with open-heel construction in sizes that match a women’s foot up to about size 12 US.
The kayak and SUP gap that still has not closed
Kayak and stand-up paddleboard gear is where the size range still falls off a cliff. Personal flotation devices, which are required by law in most jurisdictions for paddle sports, are graded to chest circumference. Standard women’s PFDs top out around a 40-inch chest. A plus-size woman with a 44-inch or 48-inch chest will often have to default to a men’s PFD, which sits higher on the torso, rides up under the chin, and chafes the underbust within an hour. NRS makes a Shenook women’s PFD that extends to a 48-inch chest and is cut to sit lower at the bust line, and Stohlquist’s BetSea goes to a 46. Beyond that, the market disappears. If you are looking at a kayak rental trip in 2026 and you are above a 48-inch chest, call the rental shop two weeks ahead and ask specifically what PFD sizes they stock. Bring your own if you can. The “we’ll have something for you” answer usually means a men’s universal.
SUP shorts and SUP leggings follow the same pattern as surf gear, which is to say Carve and Athleta cover the lower end of plus sizing and very few brands extend past a 3X. The board itself is not a fit issue – SUP boards are sized by rider weight and a heavier rider just needs a longer, wider board, which any honest rental shop will have. Ask for a board rated to your weight plus 30 pounds for stability margin. A 240-pound rider should be on a board rated for at least 270 pounds. The shop that hands you a smaller board “because it will be fine” is not the shop you want to learn from.
What to expect from rental shops in 2026
Rental shop stocking is the bottleneck. Even the best plus-size wetsuits in 2026 mostly live in customers’ garages, not on rental walls. The shops that have caught up are the ones that have a plus-size customer base loud enough to demand it, and those are concentrated in a handful of places.
Hayley Gordon, the Australian surfer who founded Salt Gypsy, has been one of the few industry voices openly arguing that the surf rental supply chain needs to stock through XL and XXL as standard inventory. Salt Gypsy itself focuses on rash guards and surf leggings, but Gordon’s writing and her interviews have done the cultural work of naming the problem. When you see a rental shop in Australia or California that stocks larger wetsuits, you are seeing the downstream effect of that pressure. The shops in Pacific Beach, San Diego, in Encinitas, and in Byron Bay are noticeably better stocked than shops in places where the conversation has not yet happened.
Curves Surf School in Costa Rica is the second name to know. They run plus-size-only surf retreats out of Playa Guiones, which means every wetsuit on the wall is graded for a fuller body, every board is rated for a heavier rider, and every instructor has trained to teach people who have been told their whole lives that they cannot do this. A week with Curves is the closest thing to a guaranteed-fit surf trip I know of. The cost is higher than a generic surf camp, but you do not pay a torn-suit fee on day one.
Outside of those concentrated pockets, the rule for 2026 is: call the shop, ask the size question by name, and bring your own gear if you are above a US 16. Email is better than calling because it gives them time to actually check the rack instead of guessing, and it gives you a written answer you can hold them to.
Learning to advocate for your own size before you book
The advocacy work is the part nobody teaches. When you book a surf trip, a dive trip, or a paddle trip in 2026, the question “do you have gear in my size” needs to be asked before the deposit, not after. The script that has worked for me, every time, is this: “I am a US women’s size 18 and I am looking to book a [lesson / rental / charter]. Can you confirm you have a women’s wetsuit / PFD / rash guard that fits a chest measurement of X and a hip measurement of Y? If not, I am happy to bring my own, but I want to confirm before I book.” Send that in email. Save the reply. If the shop hedges or sends a marketing brochure instead of an answer, that is the answer.
Patagonia’s 2024 inclusivity report named the rental-shop inventory gap directly and committed to expanding their own wetsuit grading through 2026. Patagonia is not yet at the top of this list because their plus-size cuts are still arriving in waves, but the report itself is one of the few public documents from a major outdoor brand that acknowledges the gear gap honestly. Quoting it back to a rental shop when you are pushing them to stock larger sizes is genuinely useful.
Frequently asked questions
What size wetsuit should I order if I am between two sizes?
Size up. The compression of neoprene against a body that is already at the limit of the suit’s grading is what causes seam tears. A slightly looser suit that closes flat is always a better surf or dive than a tight suit that you have to wrestle on.
Are men’s wetsuits a workaround for plus-size women?
Sometimes, with caveats. Men’s wetsuits are cut straighter through the torso, shorter in the inseam relative to height, and have no built-in chest accommodation. For a woman with a smaller chest and a fuller waist, a men’s 4/3 in XL or XXL can fit better than a women’s plus straight suit. For most plus-size women, the lack of a chest panel makes the fit worse, not better. Try one in a store before committing to one online.
How much should I expect to spend on a plus-size wetsuit that actually fits?
Plan for $220 to $450 on a 4/3 surf suit, and $400 to $700 on a 5mm or thicker dive suit. The cheap end of the market does not extend through plus sizes yet. The gear that fits is the gear that is being made for a smaller customer base, and the price reflects that.
Can I learn to surf or dive if I cannot find rental gear in my size?
Yes. The answer is to buy your own gear before the trip, or to book through one of the plus-size-specific schools like Curves. Do not let a rental shop’s shortage become your reason for skipping a sport you want to learn. The gear gap is the industry’s problem, not yours.
What about wetsuit alterations?
Most surf shops in coastal cities know a wetsuit tailor. The most useful alteration is adding a back-zip extender panel, which can give a borderline-fit suit another inch or two of closure. Cost is usually $40 to $80. For a suit that is closing but cutting at the upper thigh, a cuff trim is also a real option.
The argument I want to leave you with
For fifteen years, the water sports industry has done a very specific thing. It has put “active women” on its brochures, its catalogs, its rental shop walls, and its marketing campaigns, and the woman in the picture has been, almost without exception, a size 8 with visible abs, a tan, and her hair already wet. The implicit message of every one of those images, repeated across magazines and Instagram and trade shows and travel agency posters, is that this is what an active woman looks like, and if you do not look like this, you do not get to do this. The Sayulita instructor who said “we’ll make it work” was not the villain of that story. He was downstream of fifteen years of an industry deciding that bodies like mine did not need to be designed for.
The brands that are getting it right in 2024, 2025, and now 2026 are the ones I named in this article. XCEL Drylock through 3X. Need Essentials cutting honest sizes from Australia. O’Neill extending the Bahia to a real women’s 18. Rip Curl moving the Dawn Patrol up. Cressi making a two-piece dive suit that finally solves the chest-versus-hip problem. ScubaPro Definition cutting through 4X for serious divers. Carve Designs and prAna and Athleta and Salt Gypsy putting rash guards on bodies the rest of the market pretended did not exist. NRS and Stohlquist making PFDs that close around a real woman’s chest. Curves Surf School in Costa Rica building a whole school out of the assumption that plus-size women would learn to surf if anyone bothered to make space for them.
The women who held off from learning to surf, from getting certified to dive, from kayaking the coast they grew up on, from trying SUP on a calm lake at sunrise – the women who held off because the gear was not made for them – those women are about to be the most paying customers in those sports. Every brand that has extended its size range in the last two years is going to find that out by 2027. Every brand that has not is going to wonder where its growth went. The argument is no longer that plus-size inclusion is a moral question. It is a business one. And the brands doing the work are the ones I am putting my money behind.
The Sintra-Cascais coastal walk outside Lisbon does not look hard on the map. You leave the Cabo da Roca lighthouse early enough to catch the Atlantic still gray and unwarmed, you point your shoes south along the dirt track that hugs the cliff edge, and you tell yourself the eighteen kilometers between you and the Praia do Guincho beach bar will dissolve into a long October afternoon of wildflowers and gull noise. That was the plan in 2025. The reality, by hour three, was that I’d stopped twice already to peel a pair of straight-size hiking shorts away from the inner-thigh seam that was sawing a quarter-sized raw patch into the left side of my body with every step, and I was doing the math on whether a Portuguese pharmacy would carry Body Glide or whether I was about to finish this walk smearing a granola bar wrapper between my legs as a barrier. The shorts had been an experiment. I’d bought them in the largest size the brand carried and had a Brooklyn alterations woman let out the waist by an inch and a half, because I’m a size 22 in pants and a 20-22 on top, and that was as close to a true plus hiking short as the brand offered. The alteration had been clean. The inseam hadn’t been altered. The inseam was the problem.
That is the shape of plus-size hiking in 2026. My hiking wardrobe is a Frankenstein of straight-size gear with the waists let out, a small rotation of true plus pieces from the three or four brands that actually carry above an 18, and a handful of items I bought in the men’s department because the cut handles my frame more honestly than the women’s “extended” run. I have walked or hiked trails in eight of the thirty-eight countries I have visited as a travel correspondent for this publication, and the through-line in every single one of those experiences is that the gear is not designed for me. It is designed for a 5’7″ woman in a size 8 and then graded up with the assumption that a body four sizes larger does not also have a longer inseam, a wider sit-bone spacing, more inner-thigh contact, and a chest that lives in a different geometric relationship to the shoulder seam than a fit model’s does. The grading does not handle any of that. The chafing math does. What follows is the field guide I wish someone had handed me before that Sintra walk, written for the woman who is size 18 and up, who walks or hikes for pleasure or fitness or both, and who would like to stop bleeding through her shorts on hour three of a perfectly normal Portuguese afternoon.
Plus-size hiking gear gap (where the industry stops)
The outdoor industry has a well-documented size cutoff problem. Most major brands stop their women’s run at XL or 16, a smaller subset extends to XXL or 18, and a much smaller subset, fewer than ten brands operating at any meaningful retail scale in 2026, carries through 3X or size 26. Outside Magazine has covered the gap across multiple pieces in recent years. The reporting documents that even brands marketing themselves as inclusive often cap their technical hiking gear, the pants, the rain shells, the base layers, at sizes well below where their casual or yoga-adjacent lines extend. The pattern is blunt. The outdoor industry has decided, repeatedly, that plus bodies are welcome in studios and welcome in promotional photography and not welcome on the actual trail.
The women doing the work to push against this gap are not industry insiders. They are athletes and they are visible. Mirna Valerio, the ultrarunner and trail athlete whose 2017 memoir “A Beautiful Work in Progress” remains the most-circulated single text in the plus-trail conversation, has been logging long-distance trail miles at size 22 and above for over a decade. Her sponsorship history with Merrell and her ongoing speaking work have done more to legitimize the plus body on a trail than any brand campaign. Latoya Shauntay Snell, the ultramarathoner and founder of Running Fat Chef, has run over two hundred races including multiple ultramarathons at a body size that the running industry has spent decades pretending does not exist. Snell has written and spoken publicly about the gear hunt as a separate athletic event from the running itself. When two women at the very top of the plus endurance world have to spend hours per gear cycle hacking together functional kits from a market that does not want to sell to them, the gap is not a niche complaint. It is the industry’s default state.
The brands that actually serve plus hikers in 2026 are a short list. REI Co-op extends its in-house brand through 3X across most of the technical line, and the extension has held through multiple seasonal drops, which is the durability test that separates a real commitment from a press-release commitment. Columbia carries through 3X across most of its hiking line, including the pants, which is the category most brands cut first. Patagonia carries through XS-3X on most hiking-relevant pieces, with the Torrentshell rain shell topping at XXL. prAna sizes through 3X across most of its hiking pants and tops with a brand-level commitment to the extended run that predates the 2020 inclusivity wave. Athleta carries through 3X across most of its outdoor-adjacent line, with the caveat that the brand’s hiking-specific technical pieces are thinner on the ground than its yoga or running offerings. That’s essentially the bench. A handful of brands. The rest of the market either stops at XL or pretends to extend without actually grading the technical pieces.
Base layers (top and bottom) for cold/hot
The base layer is the most-skipped piece in a plus hiker’s kit and the piece that pays back the fastest. The function of a base layer is moisture management. It pulls sweat off the skin, moves it into the next layer, and dries fast enough that the wet fabric does not chill you when you stop moving. In a plus body, this matters more than in a straight-size body, because the body produces more heat under load, sweats more across more surface area, and has more skin-on-skin contact where wet fabric becomes a chafing event rather than just a temperature event. A cotton t-shirt under a hiking shirt is the single most common gear error I see on plus beginners on a trail, and it is the one that ruins more walks than any other.
The fabric to know is merino wool. Merino is naturally moisture-wicking, antimicrobial enough that it doesn’t smell after a multi-day hike the way synthetic fabrics do, and warm-when-wet in a way that no other fiber matches. The weight is the variable. Merino base layers are sold by gram weight per square meter, and the meaningful range for hiking is roughly 150 grams per square meter for warm-weather and shoulder-season use, 200 grams per square meter for cold-weather use, and 250 grams per square meter for genuinely cold conditions. Smartwool’s Classic Thermal Merino crew runs at 250 grams and sizes through 3X at around $130 as of 2026. Their Classic All-Season Merino crew runs at 150 grams and sizes through 3X at around $110. I own both. The 250-weight has earned its place on every shoulder-season trail day I’ve done since 2023. The 150-weight is the one I pack for summer alpine starts, where the dawn temperature is in the forties and the afternoon temperature is in the seventies and the layer has to handle both ends.
The base layer bottom is the piece almost no plus hiker owns and the piece that closes the kit. A merino bottom under a hiking pant in cold weather extends the temperature range of the pant by roughly fifteen degrees Fahrenheit and adds essentially no weight in your pack. Smartwool’s Classic Thermal Merino bottom in 250 weight sizes through 3X at around $115 and is the piece I’d buy first if I were rebuilding the kit. The fit is high-rise, the inseam is generous in the plus grading, and the gusset construction doesn’t pull at the inner thigh the way many bottoms do. The lower-priced alternative is REI Co-op’s Merino base layer bottom (the 185-gram weight in current production) through 3X. The fabric is lighter than the Smartwool 250, the construction is slightly less refined at the waistband, but the piece is competent and durable and is the entry-point version of this category.
The synthetic alternative to merino is polyester or polypropylene, both of which dry faster than wool, weigh less, and cost roughly half as much. The trade is smell. Synthetic base layers retain odor after one day of use in a way that merino doesn’t, which matters on a multi-day hike where you can’t wash. For day hiking, a synthetic base layer is perfectly functional. The Patagonia Capilene Cool Daily Long-Sleeve Shirt at around $49 through XXL is the workhorse synthetic top in the category. Patagonia carries this piece in plus, which most synthetic-base-layer brands don’t, and the fabric has held up through three years of weekly wear in my rotation.
Hiking pants vs. shorts vs. skort at size 22 (chafing math)
This is the section that the Sintra failure prompted. The choice between pants, shorts, and skort on a plus body is not an aesthetic question. It is a physics question about how much inner-thigh contact your specific body has, how much moisture sits between those surfaces under load, and how the fabric of each option handles the friction generated by that contact across the duration of a walk. The chafing math is unforgiving and personal. A pair of shorts that work for one plus hiker will saw a raw patch into the next plus hiker’s thigh, because the geometry of where the inseam sits and the surface area of skin contact varies meaningfully even between two women at the same dress size.
Hiking pants are the safest default for plus bodies and the option I reach for first on any walk longer than ten kilometers. The function is straightforward. The fabric covers the skin-on-skin contact zone entirely, removes the chafing variable, and lets the pant material rather than your skin handle the friction. The category leader for plus hikers in 2026 is the prAna Halle Straight Pant in the plus grading through 3X at around $99. The fabric is a nylon-spandex stretch-woven with a water-repellent finish and a roll-up tab at the calf for warm conditions. The construction includes a gusseted inseam, the single most important feature in a plus hiking pant. The gusset is a diamond-shaped panel of fabric inset at the crotch that distributes the strain across multiple seams rather than concentrating it on one. Without a gusset, a plus hiking pant tears at the inseam within a season of regular use. With one, the pant lasts years. The Halle has it. Most plus pants don’t.
The REI Co-op Sahara Convertible Pant at around $80 through 3X is the lower-priced alternative and the pant I’ve logged the most miles in. The fabric is a nylon ripstop with a UPF 50 finish, and the convertible feature zips off the lower leg at the knee to convert the pant into a short. The piece isn’t as polished as the prAna in fit, the waistband is a flat elastic rather than a structured band, and the cargo pockets are oversized in a way that catches branches on overgrown trails. None of that has stopped the pant from being durable through roughly two hundred miles of trail use. The conversion zipper is real and functional, and on a long day where the morning is cold and the afternoon is hot, the ability to drop the legs at lunch is the feature that pays for the pant.
Hiking shorts are the option I now wear only on flat trails of under ten kilometers and only with a chafing prevention layer underneath. The prAna Halle Short at $69 through 3X is the short I trust, with the same gusseted construction as the pant, a five-inch inseam in the plus grading (which is roughly an inch longer than the straight-size version, a correct grading choice), and the same nylon-spandex fabric. The short alone is not the failure mode. The short with no anti-chafing layer underneath is. The fix is a pair of bike shorts or a chafing-prevention short worn beneath the hiking short. The Undersummers Shortlette in their plus sizes through 5X at $26 is the slip short most plus hikers I know wear under everything from dresses to hiking shorts. The fabric is a 92 percent nylon, 8 percent spandex blend with a wide flat band at the leg opening that does not roll up under friction. The combination of a hiking short and an Undersummers slip is the kit that lets a plus body wear shorts on a hike. The hiking short alone is not.
The hiking skort is the option I came around to slowly. The function is a built-in short under a skirt panel, which removes the chafing concern entirely while keeping the fabric coverage of a pant on the underside. The Title Nine Clamber Skort goes to 18 and does not work for me as drafted. The Athleta Trekkie North Skort at $89 through 3X does work. The fabric is a 92 percent nylon, 8 percent spandex stretch-woven, the inner short has a six-inch inseam in plus, and the skirt panel sits at the knee without bunching at the back. The skort has become my default summer hiking piece in hot and humid conditions, where the additional ventilation between the skirt and short layer is meaningful, and where the shape of the piece reads as deliberate rather than apologetic on the trail.
Tops: cooling tech-tee reality
The hiking tee category is the place where plus options have improved the most over the last three years and where the marketing language is still the most inflated. Every major brand sells a “cooling” tech tee. Most of them are simply a polyester knit with a moisture-wicking finish that wears off after roughly thirty wash cycles. The pieces that actually deliver the cooling claim are the ones with either a meaningfully higher percentage of mechanical-cooling yarn, the ones with a structural mesh ventilation panel under the arm or across the back, or the ones using a phase-change material that responds to body heat. Most of the market does none of these things and charges a premium for the marketing copy.
The Columbia Silver Ridge Tech Tee at $40 through 3X is the workhorse in the category. The fabric is a 100 percent polyester with the brand’s Omni-Wick and Omni-Shade finishes, UPF 50 rated, and the construction includes a back yoke vent panel that is a real ventilation feature rather than a styling line. I own this tee in four colors. I wear them on rotation through the summer season. The fabric handles two hundred miles of use without pilling at the underarm, which is the failure point on cheaper tech tees, and the UPF rating is the feature I would not give up. On a fully exposed ridge walk at altitude, a UPF 50 fabric on the back and shoulders is the difference between a sunburn and a finished hike.
An Athleta-style tech tee at around $44 through 3X is the third workhorse in this category, with a nylon-elastane blend that dries faster than the Columbia polyester and feels less plasticky against the skin. Athleta cycles their core tech tee names every season; whatever the current SKU is, the construction stays roughly consistent.
The upgrade once you’ve logged enough miles to justify it is the Patagonia Capilene Cool Trail Shirt at around $59 through XXL. The fabric is a recycled polyester knit with a structured shoulder seam, dropped to sit off the actual shoulder rather than on top of it, which means the strap of a pack doesn’t run a friction line directly on the seam. This is a construction detail most tee designers don’t think about and one that matters enormously when you’re carrying any kind of pack on a multi-hour walk. The Patagonia version costs more than the Columbia. The shoulder seam alone pays back the difference.
Lightweight jacket: rain vs. wind layer
The lightweight jacket category is two separate categories that brands often blur. The rain shell is a fully waterproof piece, typically with a Gore-Tex or proprietary equivalent membrane laminated to the face fabric, that handles sustained precipitation. The wind layer is a lighter, often non-waterproof piece designed to cut wind and shed light moisture without the bulk or breathability cost of a full rain shell. A complete plus hiking kit needs both. Most plus shoppers own only one, usually the rain shell, and end up wearing it as a wind layer because the brand sold the rain shell as a “do-everything” piece. It is not. The breathability cost of a waterproof membrane is real, and wearing a rain shell as a windbreaker on a moderate-effort hike will leave you wet from the inside out within an hour.
The rain shell in the plus category that actually delivers in 2026 is the REI Co-op Rainier Rain Jacket at around $130 through 3X. The fabric is a 2.5-layer proprietary waterproof-breathable membrane, seam-sealed at every construction line, with pit zips that open under the arm to dump heat when the rain is light but you’re working hard. The pit zips are the feature. A rain shell without pit zips is functionally a sauna on a moderate climb. The Rainier has them. The Patagonia Torrentshell 3L at around $179 through XXL is the higher-end alternative, with a true 3-layer membrane that breathes meaningfully better than 2.5-layer constructions at the cost of bulk and weight. Columbia’s OutDry Extreme line is the technical alternative, with a Columbia-proprietary membrane that performs at a similar level at a slightly lower weight.
The wind layer is the piece most plus hikers skip. The function is a sub-six-ounce shell that packs into its own pocket, lives in the bottom of a daypack, and comes out the moment a ridge wind starts cutting heat off your core. The Patagonia Houdini Air Jacket at $129 through XXL is the canonical piece in this category. The fabric is a 0.7-ounce per square yard recycled nylon ripstop with a durable water repellent finish, not waterproof but water-resistant to a meaningful degree, and the piece weighs roughly three ounces in a 1X. The Houdini Air is one of two or three pieces in my entire kit that has earned its weight every single trip. It is the piece I forget I am carrying until the moment I need it, and then it is the piece that saves a hike from becoming a death-march of cold misery.
The pattern most experienced trail writers flag is that hikers buy the visible piece, the rain shell, because the rain is the visible threat. The wind is the invisible one, and the one that takes more hikers off the trail. The wind layer is a base purchase, not an optional one – I’ve internalized this after enough cold ridge experiences to know it’s correct.
Socks: the merino case (Smartwool, Darn Tough)
The sock is the smallest and most-overlooked piece of the kit and the piece that controls more of your hiking comfort than any other item except the shoe. A cotton athletic sock on a hike will produce a blister within ten kilometers in most conditions, because cotton absorbs sweat, holds it against the skin, and softens the foot tissue until friction tears it. A merino sock at the correct weight does the opposite. It moves sweat away from the foot, dries fast, regulates temperature across a range of conditions, and resists odor across multi-day use.
The two brands that matter in this category are Smartwool and Darn Tough. Both make merino socks at the weights and constructions that hiking actually requires. The crucial detail for plus hikers is the sizing. Plus women often have larger feet, in the range of US 10 to 13, and many sock brands stop their sizing at a women’s 10 or 11. Smartwool sizes its women’s socks through size 11.5 in most styles, with men’s options that go meaningfully larger and that fit a wider foot honestly. Darn Tough sizes its women’s socks through 11.5 and offers a wide-calf option in select styles that fits plus calves without rolling at the cuff, which is a fit issue most sock brands ignore entirely.
Smartwool’s Hike Classic Edition Full Cushion Crew Sock at around $26 through size 11.5 is my baseline hiking sock. The fabric is a merino wool, recycled nylon, and elastane blend, with cushioning across the heel and ball and a flat seam at the toe. The sock has lasted me roughly four hundred miles of use without a hole, which is the wear-life that justifies the price. The Darn Tough Hiker Boot Sock Full Cushion at around $25 through size 11.5 is the alternative I rotate with. The Darn Tough construction is heavier, the cushioning more pronounced, and the brand offers a lifetime warranty they actually honor (mail in a worn sock, receive a replacement, no proof of purchase required).
The sock detail that most beginners miss is to buy two pairs and rotate them across a multi-day hike, washing one in a stream or sink while wearing the other. A merino sock dries overnight in most conditions. The rotation extends the wear-life of both pairs and keeps a clean dry sock on the foot every morning, which is the single largest blister-prevention move you can make.
Hiking shoes for wide feet (Hoka, Altra, Oboz)
The shoe is the most expensive single piece in the kit, the most personal, and the piece where the plus-body fit conversation overlaps with the wide-foot fit conversation in a way the industry has been slow to acknowledge. Plus women often have wider feet, both because heavier bodies spread the metatarsal arch over time and because the population of plus women includes a meaningful number of women whose feet were always wider than the standard women’s last accommodates. The default women’s hiking shoe is built on a B-width last, which is narrower than the D-width that fits most plus feet honestly. The fix is to buy in wide widths, and the brands that offer wide widths in their hiking shoes are the brands that earn the plus market.
The Hoka Speedgoat 6 in the wide width at around $155 is the shoe I’ve logged the most plus-trail miles in over the last two years. The Speedgoat is a trail running shoe rather than a hiking boot, with the maximalist cushioning that has defined Hoka since the brand launched in 2009. The wide width accommodates a foot up to a D-width comfortably. The cushioning matters in a plus body. The impact load on every step in a heavier body is higher, and the maximalist stack height on the Speedgoat absorbs more of that load than a traditional low-stack hiking boot does. The shoe is the most-recommended trail shoe in plus running and hiking communities for a reason. The fit is generous, the cushioning is genuine, and the wide width is meaningfully wider than the regular width rather than a token half-step.
The Altra Lone Peak 9 in the wide width at $150 is the alternative for hikers who prefer a zero-drop construction. Altra’s design philosophy is foot-shaped (a wider toe box than the industry standard) and zero-drop (no heel-to-toe height difference), which suits hikers with wide feet and a forefoot-strike gait. The Lone Peak is not for everyone. The zero-drop construction takes weeks to adapt to if you are coming from a traditional heel-elevated shoe, and the lower stack height transmits more trail feel through the foot in a way that some hikers find tiring on longer days. For the hikers it does suit, it is the shoe that earns long-term loyalty.
The Oboz Bridger Mid Waterproof in wide widths at $190 is the boot rather than the trail-runner in this category. Oboz has been making honest wide-width hiking boots since the brand’s founding and is one of the few outdoor brands to offer wide as a genuine fit option rather than a marketing label. The Bridger Mid is a full-grain leather upper, a Vibram outsole, and a B-Dry waterproof membrane, with a structured ankle support that the trail-runners do not provide. The boot weighs more than a trail-runner (roughly thirty-three ounces per pair in a women’s 10 wide), and the trade is honest. You get ankle support, you get waterproofing that holds up across years, and you get a sole stiffness that handles loose scree and uneven terrain better than a trail-runner does. For multi-day backpacking with a heavier pack, the boot is the correct call. For day hiking on established trails, the trail-runner is. I own both. They serve different days.
The education resources at REI Co-op, including the brand’s long-running expert classes and online gear guides, have been the most reliable single source I have found for matching a plus body and a wide foot to the correct shoe. REI’s free expert advice service is staffed by people who actually walk the gear they recommend, and the advice I have received across multiple in-store fittings has been markedly more useful than what most online quizzes produce.
The 50-mile gear durability check
The gear-durability problem in plus hiking is meaningfully different from the gear-durability problem in straight-size hiking. The same physical wear factors that cause early failure in plus clothing (more friction at the inseam, more stress at the seat seam, heavier load on the shoulder strap of a pack) apply to hiking gear, and the brands that grade their plus pieces honestly versus the brands that just resize them shows up around mile fifty of regular use. Mile fifty is the rule of thumb I have arrived at after roughly five years of buying and burning through plus hiking gear. If a piece is going to fail in the inseam, the seat, the underarm, or the cuff, it fails by mile fifty. If it makes it past fifty miles of regular use, it usually lasts the season.
The test is simple. Buy the piece. Wear it on roughly five to ten hikes ranging from five to ten kilometers each. At the fifty-mile mark, inspect the high-stress zones. Look at the inseam stitching for any pulling, any thinning, any visible thread separation. Look at the seat seam for the same. Look at the underarm for pilling on a synthetic top or felting on a merino base layer. Look at the cuff and hem for any rolling, fraying, or stretching out of shape. The pieces that pass the fifty-mile check are the pieces worth investing in. The pieces that fail it are the pieces to return inside the brand’s return window if possible and to flag in your own notes as a one-season piece rather than a long-term investment.
The pieces that have passed the fifty-mile check in my own rotation include the prAna Halle Pant (currently at roughly four hundred miles with no failure), the REI Co-op Sahara Convertible Pant (roughly two hundred miles, one minor pulling at the conversion zipper that has not progressed), the Smartwool Hike Classic Full Cushion Crew Sock (multiple pairs at four-hundred-plus miles each), the Patagonia Houdini Air Jacket (three years of use, no failure), and the Hoka Speedgoat 6 (replaced at roughly five hundred miles, which is the expected wear-life of a maximalist running shoe). The pieces that have failed inside fifty miles in my own testing include three different pairs of straight-size hiking shorts that were altered to fit (all failed at the inseam where the alteration did not extend to), a Title Nine hiking dress that pilled across the chest and back by mile thirty, and a budget-tier rain shell I will not name that delaminated at the underarm seam at roughly mile forty-five.
What to skip from straight-size hiking advice
The bulk of available hiking advice on the internet is written for straight-size bodies by writers who have never had to think about plus-specific gear failure. Most of it is still useful. Some of it is actively wrong for a plus hiker and worth flagging.
Skip the advice to size up in everything. The default plus-shopper move when buying hiking gear, after years of being underserved by sizing, is to add a size to anything that comes close to a fit. This is wrong in hiking specifically. A pant that is too large at the waist will sag under the weight of a hip belt and will chafe at the inner thigh because the fabric drapes into the contact zone rather than sitting clean above it. A top that is too large at the shoulder will catch under a pack strap and will work itself into a friction point across a long day. Buy your true size in technical hiking gear, even if the number on the tag is uncomfortable to look at. The piece is engineered to fit in the size it is labeled, and sizing up degrades the engineering.
Skip the advice to wear cotton in hot weather. This is a piece of advice that circulates in casual walking communities and is wrong for any hike longer than two kilometers in a plus body. Cotton holds sweat, softens skin, and accelerates chafing. The right move in hot weather is a lighter-weight synthetic or merino layer, not a cotton one. The “cotton breathes” claim is true in still air and a flat sit-down setting. It is not true under load with any kind of friction, and a plus hiker has more friction than a straight-size hiker by default.
Skip the advice to break in hiking boots over weeks before a trip. Modern hiking shoes, particularly trail-runners like the Hoka Speedgoat or the Altra Lone Peak, do not require break-in in the way leather boots from two decades ago did. The right move with modern trail shoes is to walk a few short distances in them to confirm fit and then take them on the trail. Excessive break-in walking in shoes that do not need it accelerates the wear on the cushioning and shortens the in-trail wear-life. Boots like the Oboz Bridger Mid do still benefit from a few weeks of break-in, because the full-grain leather upper genuinely softens with wear. The distinction matters and the blanket “always break in your boots” advice does not preserve it.
Skip the advice to invest in expensive trekking poles before you’ve logged enough miles to know you need them. Trekking poles are a meaningful upgrade for some hikers in some terrain. The honest answer is that poles help on steep descents (where they take impact load off the knees) and on long sustained climbs (where they distribute effort to the upper body). They don’t help meaningfully on flat or rolling terrain and add weight and pack-management complexity. Buy a pair only after you’ve done enough hiking to identify your own terrain preferences. Then buy them once. Black Diamond Trail Ergo Cork at around $130 is the pole most experienced hikers I trust recommend.
Skip the advice that you need to lose weight before you can hike. This is the most damaging piece of advice in the entire conversation and the one Mirna Valerio and Latoya Shauntay Snell have spent careers refuting. The hike is the practice. The body that arrives at the trailhead is the body that does the hike. The gear conversation in this article exists precisely because the trail is for the body you have, not for the body the industry wishes you had.
The 7-piece starter kit with named brands
Here is the kit. If you are buying from zero in 2026 and you want a complete plus-size walking and hiking starter setup that will handle three-season conditions in most temperate environments, this is what to buy. Seven pieces. Seven brands. The specific items I would put on a friend’s list if she texted me from her phone in the REI parking lot asking what to walk in with.
Base layer top.
Smartwool Classic All-Season Merino Base Layer Long-Sleeve Crew at $110 in your true size through 3X. The 150-gram weight handles cold mornings and warm afternoons across a shoulder-season range. This is the piece that lives in your pack on warm days and comes out at the trailhead on cold ones.
Base layer bottom.
Smartwool Classic Thermal Merino Bottom in 250 weight at $115 through 3X. The 250 weight is the warmer option and the one I would buy first if you are choosing only one bottom. The high-rise cut and the generous inseam in the plus grading are the construction details that earn the price.
Hiking pants.
prAna Halle Straight Pant at $99 through 3X. The gusseted inseam is the construction feature you cannot skip. The roll-up tab handles warm afternoons. The water-repellent finish handles light rain without requiring the rain shell to come out. This is the workhorse pant of the kit.
Fast-dry tee.
Columbia Silver Ridge Tech Tee at $40 through 3X. The UPF 50 finish and the structural back yoke vent are the features that justify the price over a generic athletic tee. Buy two or three in colors you will actually wear.
Lightweight jacket.
Patagonia Houdini Air Jacket at $129 through XXL. The wind layer is the piece most plus hikers skip and the piece that most often saves a hike from becoming a cold-misery event. The three-ounce weight and the pocket-stuffable construction mean the jacket lives in your pack without consequence until you need it.
Sock pair.
Darn Tough Hiker Boot Sock Full Cushion at $25 in your true size through 11.5. Buy two pairs from the start. The lifetime warranty matters and the rotation across multi-day use matters more.
Shoe.
Hoka Speedgoat 6 in the wide width at $155. The cushioning handles plus-body impact load honestly. The wide width fits a wider foot without crowding the toe box. The trail-runner construction handles most non-technical terrain that most day hikers actually walk.
That kit, bought at full retail, lands at roughly $683 before tax. Roughly half of that ($284) is the shoe and the rain jacket equivalent (we left out the rain shell because the wind layer is the piece I would buy first and the rain shell is the piece I would add second once you have hiked enough to know which climate range you most often walk in). The kit will handle most three-season day hiking in most temperate climates. It will not handle alpine winter conditions, multi-day backpacking with a heavy pack, or extreme heat above one hundred degrees Fahrenheit. Those are different kits and different conversations.
The challenge I want to leave you with is this. Pick one piece off this list. Not all seven. One. Buy it this week. Wear it on the next walk you take, whether that is a five-kilometer loop in your neighborhood park or an eighteen-kilometer coastal walk outside Lisbon. The kit is not the goal. The walk is the goal. The kit is what makes the walk something you finish without bleeding through your shorts at hour three. If the piece you pick is the prAna Halle Pant, you will know on the second walk that the gusseted inseam is real and the alteration-tax is gone. If it is the Smartwool sock, you will know on the first walk that the blister you got the last time was not your fault, it was the sock. If it is the Hoka Speedgoat, you will know on the first descent that the cushioning is the difference between a sore knee at the end of the day and a finished hike. Pick the piece. Walk in it. The next piece becomes obvious from there. The trail is waiting and it has been waiting and the body that arrives at it is the right body. Start with one piece. Start this week.